Visiting the park is one of the things I really enjoy these days, but since it's getting a lot cooler now, those days are long gone for a while until the warmer months are back. So, I was so happy to create this spontaneous DIY to admire and to reminisce upon during the colder seasons.

One of my favorite things to do at the park is to pick up little treasures, so when my oldest son found a butterfly that had gone to butterfly heaven, you know I wasn't going to pass it up. Having not preserved a butterfly before, I took to google and discovered that there's really not much to it than what I had thought.

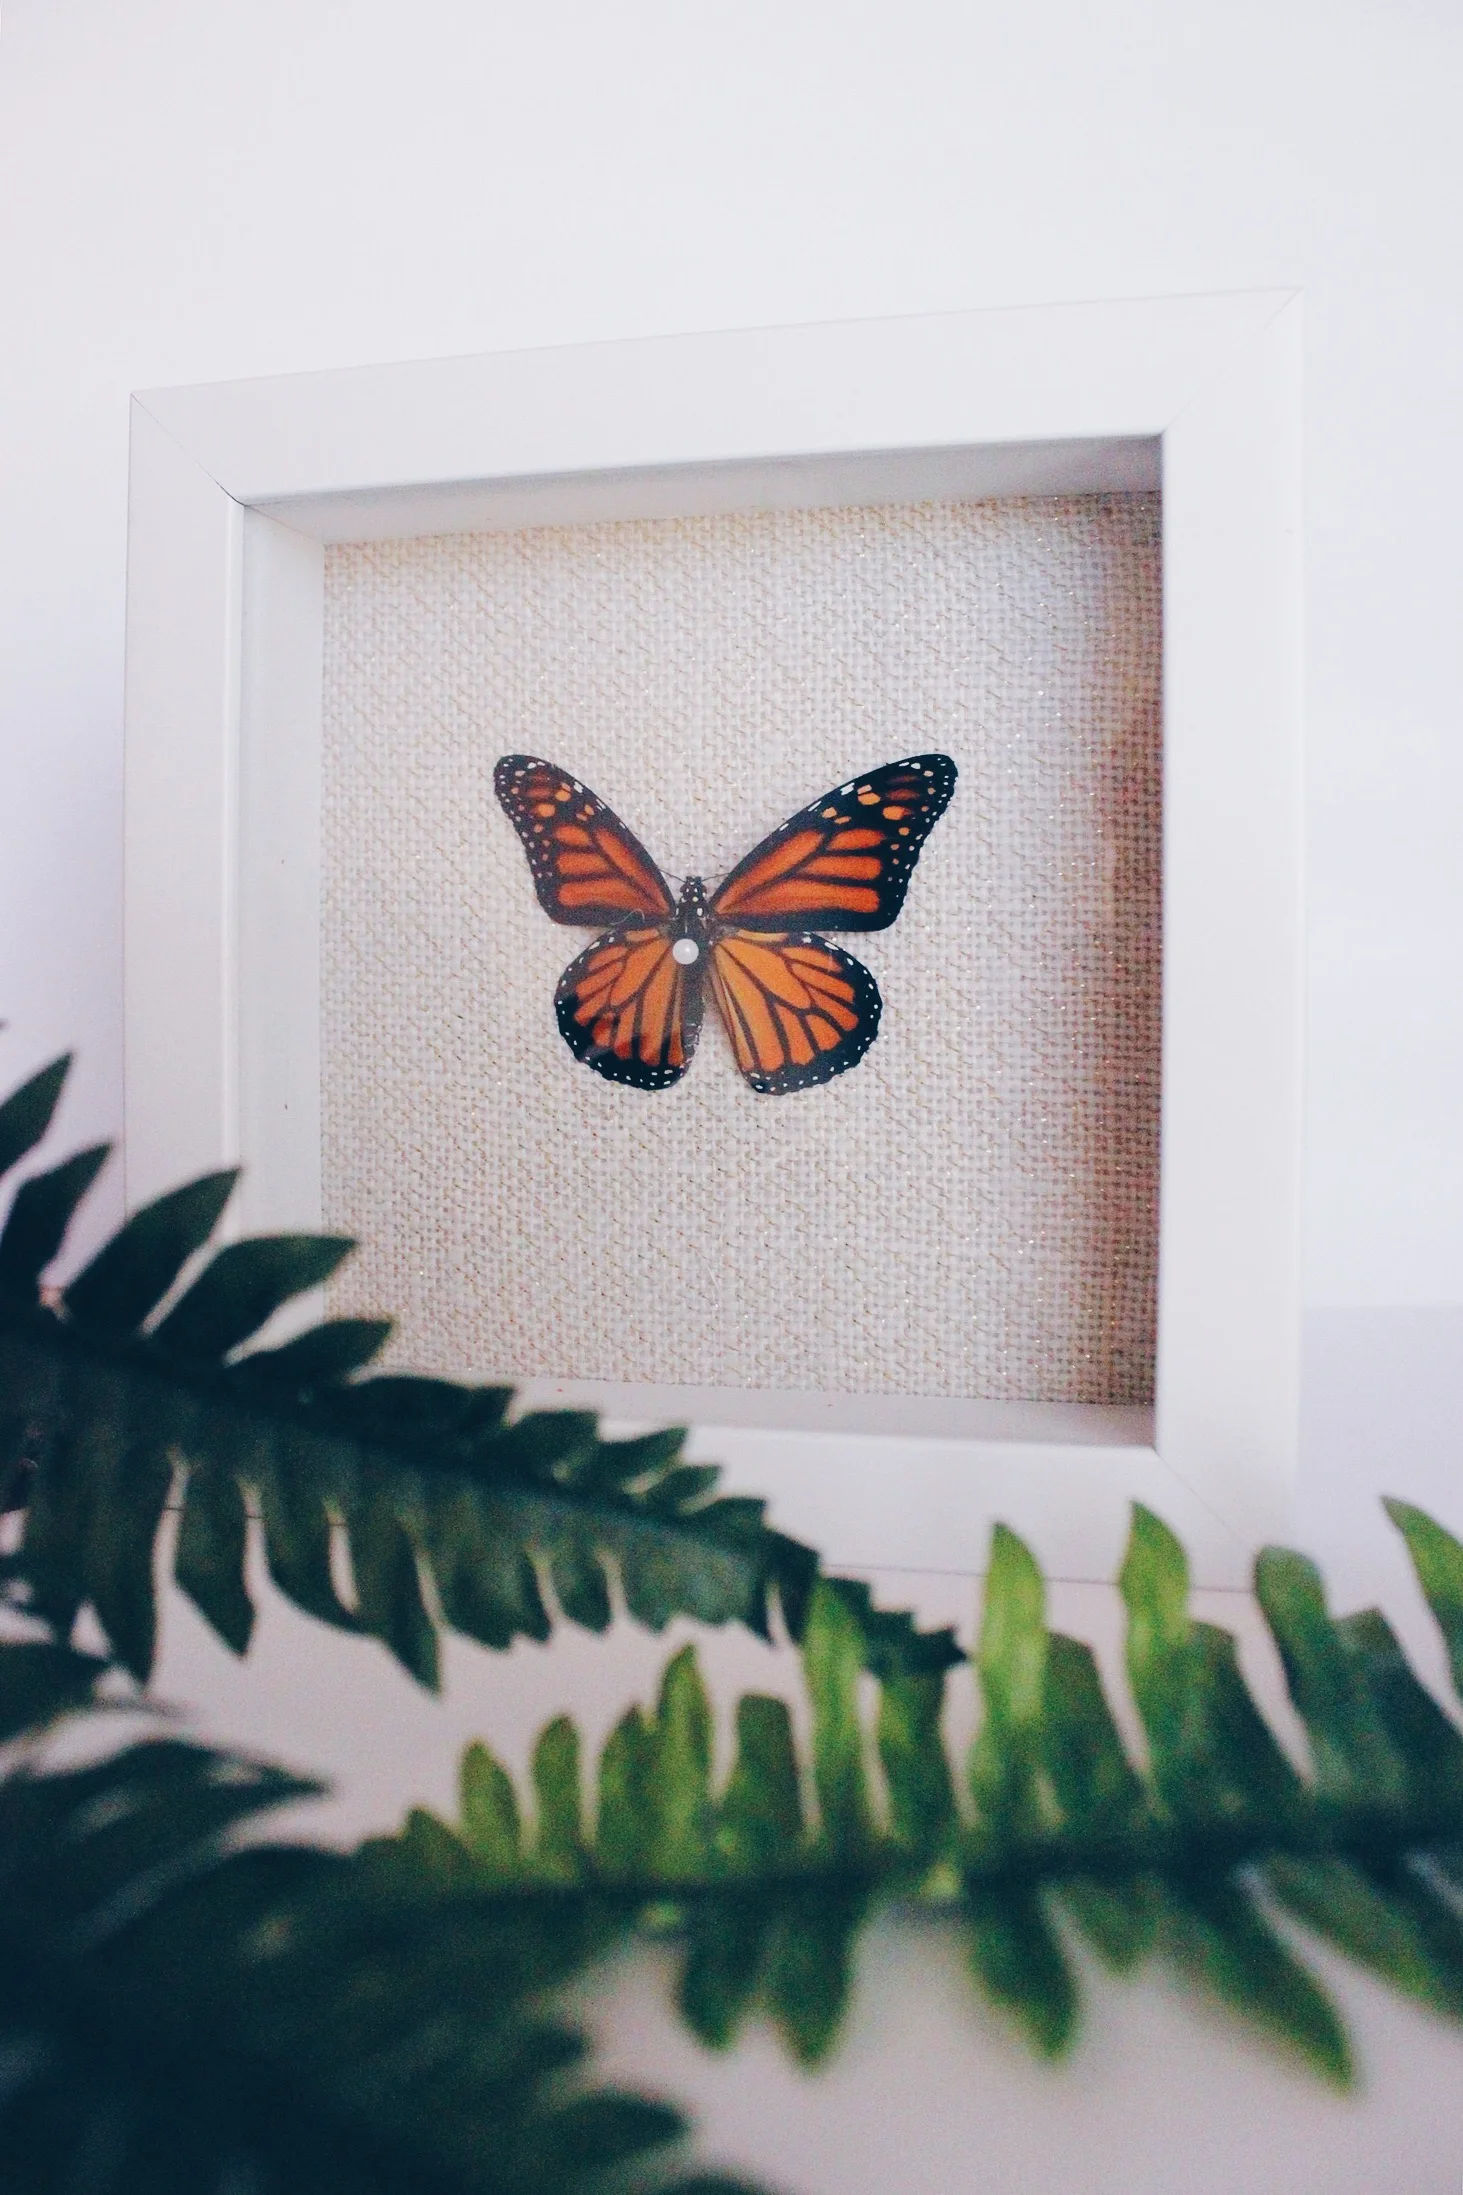
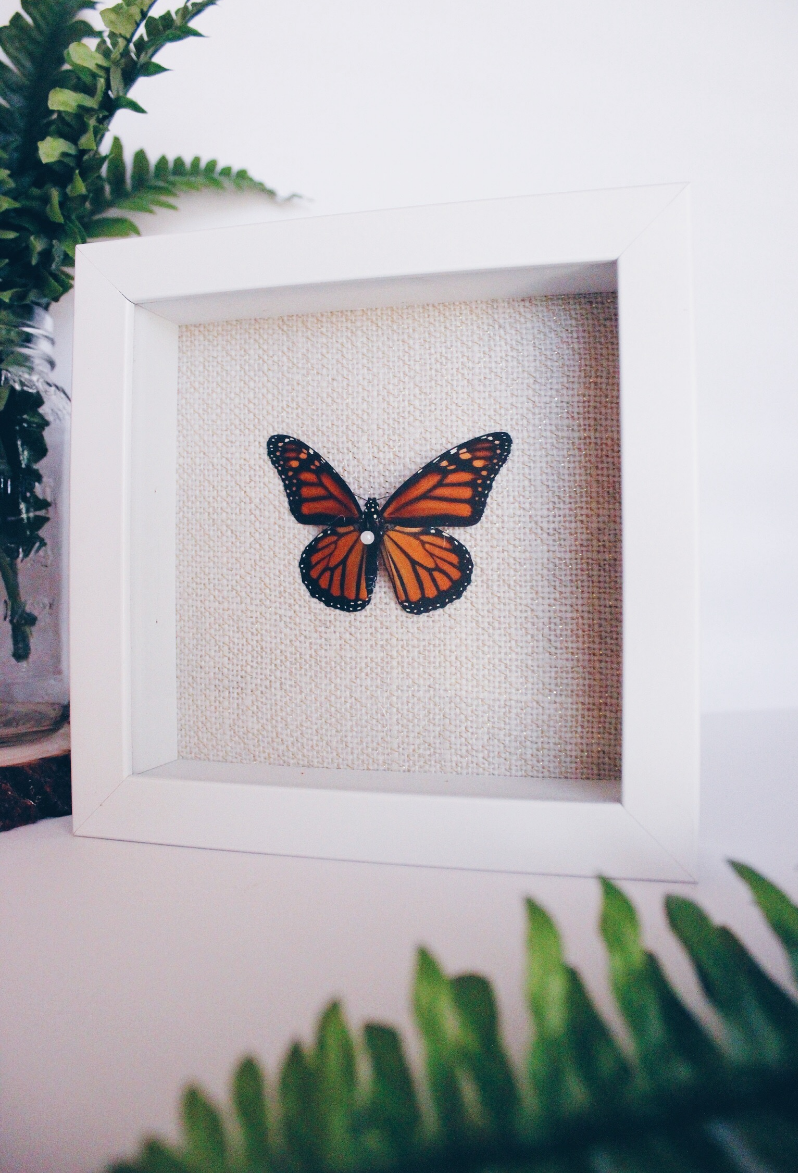
I am definitely not the butterfly-killing type, so this was one of those DIYs that was very spontaneous and out of the blue for me. How often do you stumble upon a butterfly that is completely intact and not already stiff and dry (or missing a wing, a leg...) ? Rarely, right! This is a monarch butterfly, and they are so so beautiful and plentiful here. I was so excited to see one up close, but also sad that the butterfly had died somehow.

So, here's how I did this really quick project. I didn't take step-by-step photos because I was rushing to put it together at the time, but it's really easy and straightforward.
What you'll need
- Butterfly
- Shadow Box - Size: 7"w x 7" h (5 1/2" w x 5 1/2" h mounting area)
- Burlap with gold accents or any fabric - Size: 6 1/2 - 7" w x 6 1/2 - 7" h
- Tape
- Pin
Instructions
You'll need a butterfly that is still fresh and that has not gone stiff yet. If your butterfly has gone stiff already, put it in a container with a wet napkin and let it sit until the butterfly is hydrated. If you don't plan to mount the butterfly immediately, just put it in a container and freeze it. Once ready to use, remove from the freezer and place a wet napkin in the container to get it hydrated again. Note: Since I didn't need to freeze or rehydrate my butterfly, I am not 100% sure if these steps are effective. I found this advice online.
Remove the frame backing and take your fabric and wrap it around tightly. Secure the fabric with tape to the back of the frame. Measure the center of your frame and mark it so you know where to place your butterfly. Take your butterfly and spread out the wings gently. Holding the thorax, insert the pin as pictured. The butterfly should be pushed up against the pin head so it appears to be floating when mounted. Push the pin into the frame where you marked the center. Reposition the butterfly's antennae and wings for its final resting position. Reassemble your frame and hang.
I think that was one of the easiest DIYs in DIY history, and it literally only took a few minutes. Total cost: $5. I only had to purchase the shadow box, which was even on discount, so YAY for that. I love how it turned out, especially for a spontaneous project that will be enjoyed for years to come.
Even if you're designing on a budget, you can still achieve something beautiful and authentic. I hope this project inspires you! Happy Fall!
Let me know what you think about this DIY in the comments!


Embarking on a gastronomic adventure can be as exhilarating as exploring new cultures and traditions. From the fiery spices of Indian cuisine to the delicate flavors of Japanese sushi, the world is a treasure trove of diverse gastronomic experiences waiting to be savored. In this article, we’ll give you a tantalizing glimpse into some must-try cuisines that will take your taste buds on a journey around the globe.