
Today, I’ll be showing you how to make these oh-so-cute hanging wood shelves. The idea came to me after coming across wooden cutting boards at Daiso. If you’re not familiar with Daiso, it’s a popular discount store that sells Japanese products for $1.50 and up, so you can find many things for the home there for very cheap. Daiso is everywhere here in California, so I am living for it!
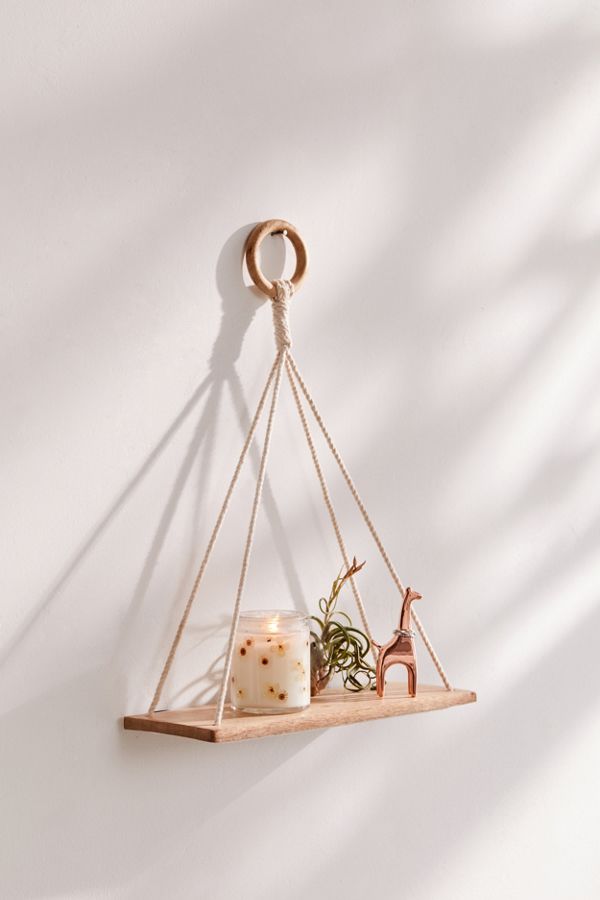
I purchased the wood cutting boards not knowing for sure what I was going to make with them until I remembered this Urban Outfitters hanging shelf that I had bookmarked a while back. I realized that the wood pieces from Daiso would be perfect for creating a product dupe for much less. In all actuality, these DIY hanging wood shelves probably cost less than $5 each to make, and being that I already had everything I needed to make these except for the wood, it only cost me $3 for two - what a steal!

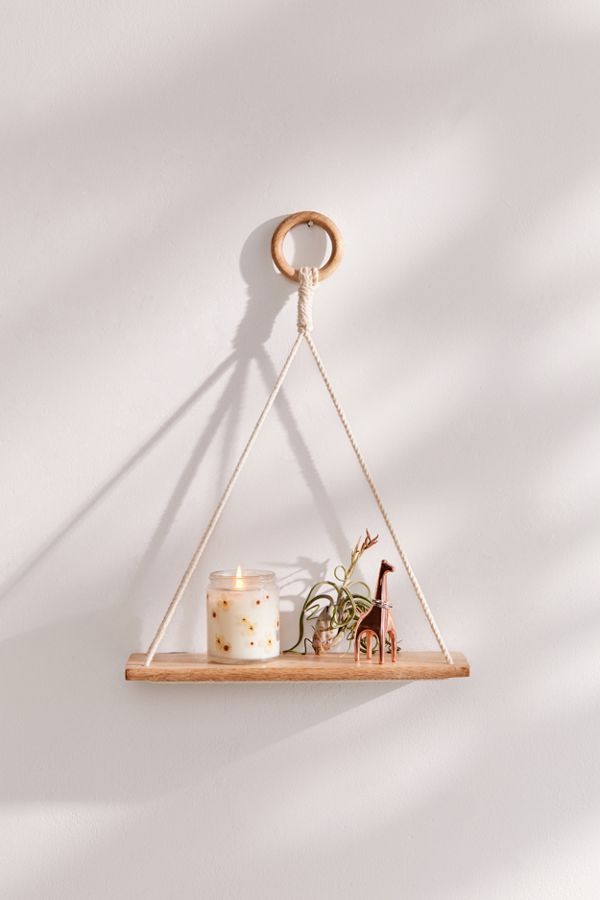
I love how they turned out (I made two of them), so I hope you try making them too. This is one of the easiest wood shelving ideas, especially if you live in one of these apartments for rent in McKinney and you want floating wood shelves, but you are looking for more of a quick and easy way to do it. I absolutely love the raw and natural wood look of these too, so these came out perfect and fit my aesthetic and decor so well. They also have that minimalist + bohemian + Tumblr vibe going on, and we are all about that life over here!
Watch the video below to learn how to make it, and if you are needing a to refer back to the instructions, I have written them out below. I have also listed all of the supplies needed for this project. Enjoy!
Supplies
• Daiso wood cutting board 30 x 19 x 0.9 cm (11.81 x7.48 x 0.35")
• IKEA Drill
• Scissors
• Pen
instructions
STEP 1
mark holes + drill
At each corner, mark 1” in from each side, then drill a total of 4 holes.
STEP 2
cut yarn + string through holes
Cut 2 - 4’ pieces of yarn and then string each piece along the landscape orientation of the wood. Evenly distribute yarn so that when it is held upright, you have even lengths of yarn at both sides.
STEP 3
loop strings through wood ring + adjust placement
Gather strings through the wood ring and then place the shelf up against a wall to test out the placement of the strings. To ensure that the wood piece hangs level to the wall, adjust the string’s tension by allowing the wood piece to even out so that it is laying flat. Your strings will be angled slightly, so just hold them tightly against the wood ring because a knot will be placed around them at this length.
STEP 4
cut a 12” piece of yarn + make a gathering knot
Watch my YouTube video above for how to do this part because this is the tricky part!
STEP 5
hang + enjoy
Hang your shelf anywhere on your walls with a picture hanger hook which provides a bit of an angle for the wood ring to rest in. These are the exact ones I used to hang mine.

Wasn’t that so simple?! I thought it was a very easy project to do. Two shelves could very well be done in less than 15 minutes, so it is also a very quick project. If you decide to make these, let me know how yours turn out. I’d also love to see how you style these.
what home decor items have you been eyeing lately?
This post contains affiliate links. Please see my privacy policy for a complete disclosure.
