Posts in home
How To Elevate Your Home With Professional Remodeling Services

A home is more than just a place to live—it’s a reflection of your personal style, comfort, and functionality. Whether you're looking to modernize outdated spaces, enhance energy efficiency, or increase property value, professional remodeling services can help you achieve your vision. With expert craftsmanship and strategic planning, you can transform your home into a space that truly meets your needs.


In this guide, we’ll explore the key benefits of home remodeling, the most impactful renovations, and how to choose the right remodeling professionals for your project.

If you're ready to transform your home into a space that reflects your unique style and functionality with high-quality professional remodeling services, we invite you to explore Expert Remodeling Services by Panda Contractors, where skilled craftsmanship will help bring your vision to life with precision, expertise, and a commitment to excellence.

No. 1

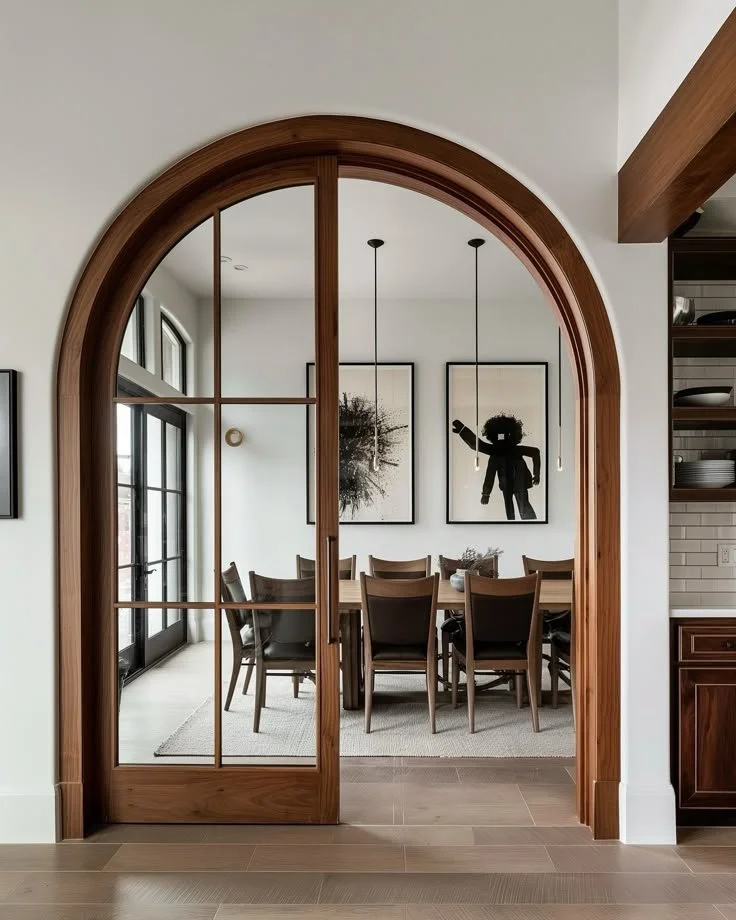
Why Invest in Professional Home Remodeling?

Home remodeling is a significant investment, but when done correctly, it offers long-term benefits that make it worthwhile.

Here’s why hiring professional remodeling services is the best decision for homeowners:

Increases Property Value

A well-executed renovation can boost your home’s market value, making it more appealing to potential buyers. Upgrades such as kitchen remodels, bathroom renovations, and energy-efficient improvements often yield the highest return on investment (ROI).

Enhances Functionality and Comfort

Remodeling allows you to reconfigure spaces to better suit your lifestyle. Whether it’s expanding a kitchen, adding a home office or granny flat, or upgrading a bathroom, renovations improve the overall livability and convenience of your home.

Improves Energy Efficiency

Modern renovations often incorporate energy-efficient appliances, insulation, and windows, reducing utility costs and promoting sustainable living. This not only benefits your wallet but also contributes to a greener environment.

Updates Outdated Designs

If your home feels outdated or lacks modern appeal, a remodel can bring it up to date with contemporary aesthetics, smart technology, and stylish finishes. This enhances both visual appeal and functionality.

Addresses Structural Issues

Over time, homes develop wear and tear, including plumbing issues, outdated wiring, and foundation concerns. Professional remodeling services ensure that these problems are addressed, improving safety and durability.

No. 2

Top Home Remodeling Projects to Consider

Not all renovations offer the same level of impact.

Here are some of the most effective remodeling projects that can transform your home:
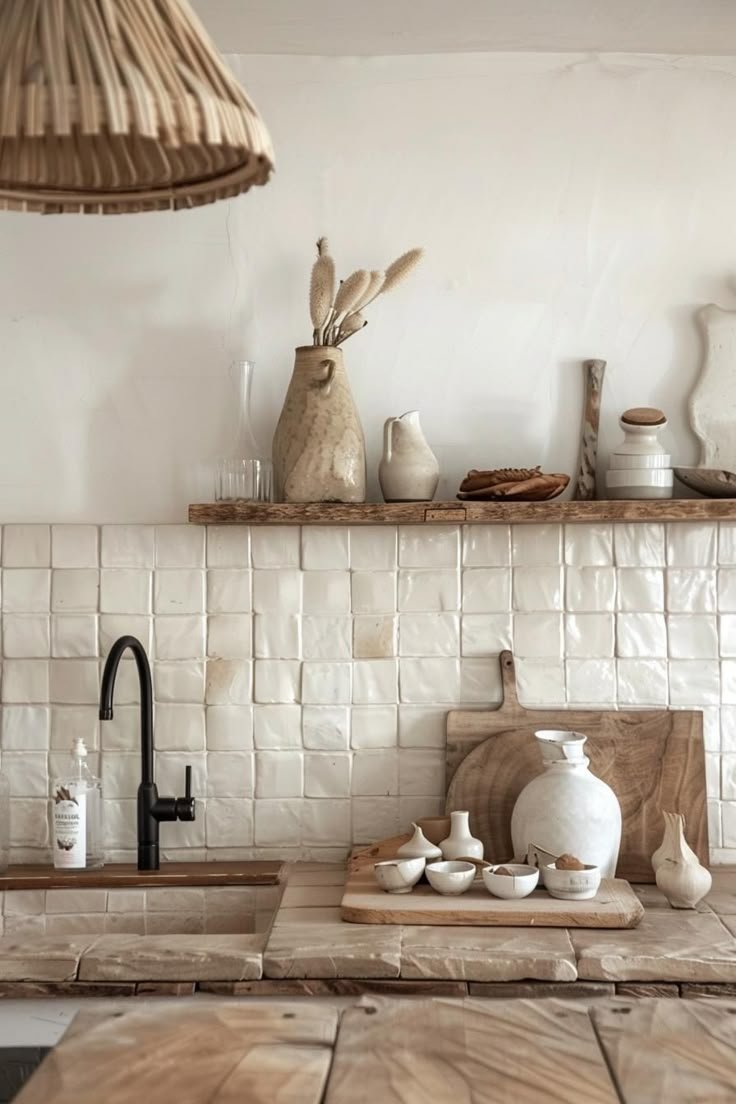
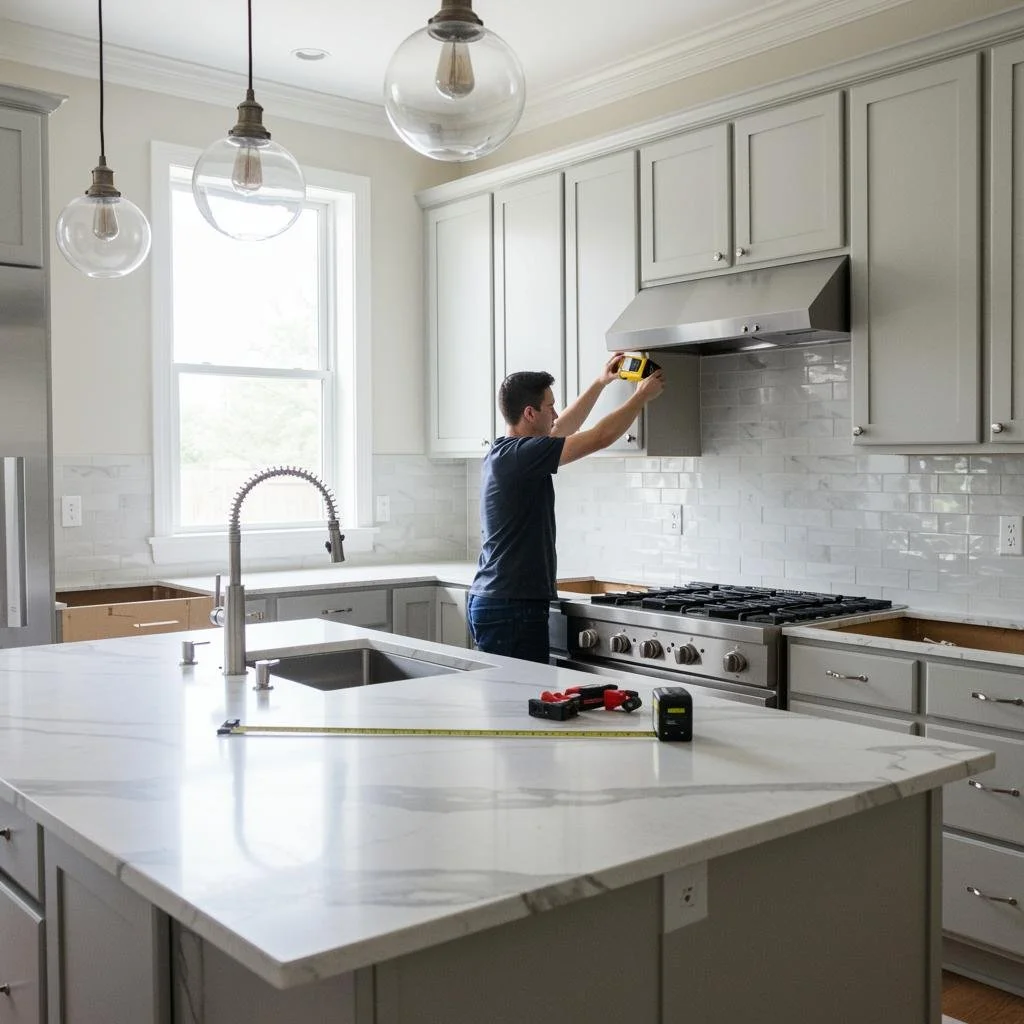
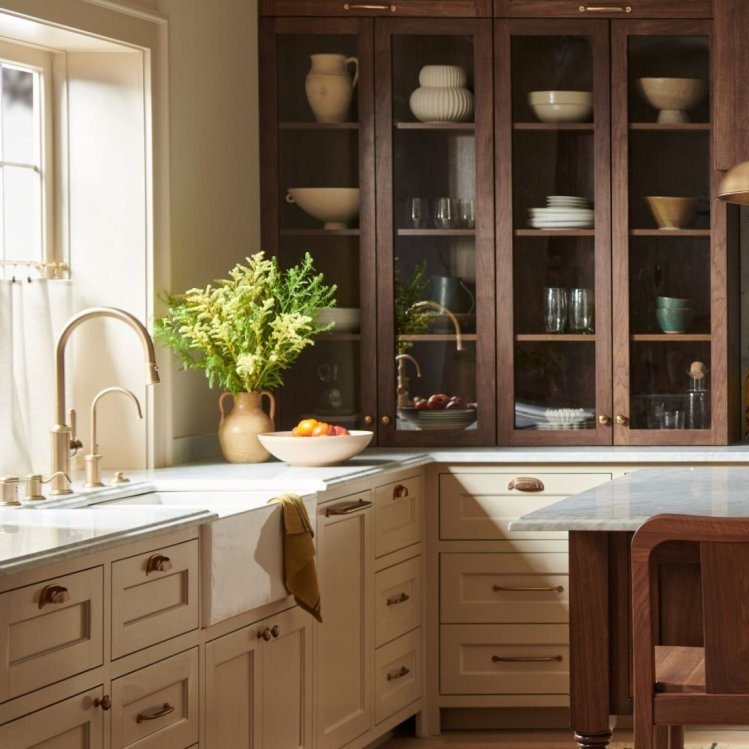
Kitchen Remodeling

The kitchen is often the heart of the home, making it one of the most valuable areas to renovate.

Consider:

  • Upgrading countertops with quartz or granite.

  • Installing modern cabinetry for better storage.

  • Adding energy-efficient appliances to reduce electricity costs.

  • Enhancing lighting with under-cabinet LEDs and pendant fixtures.

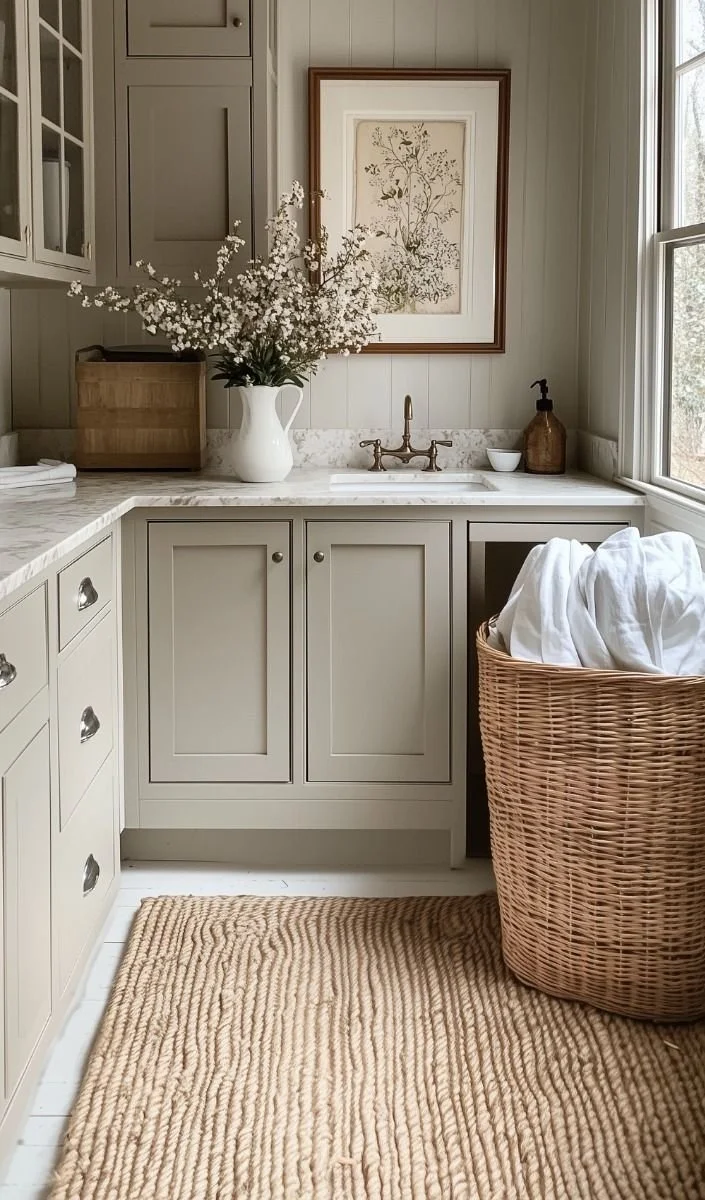
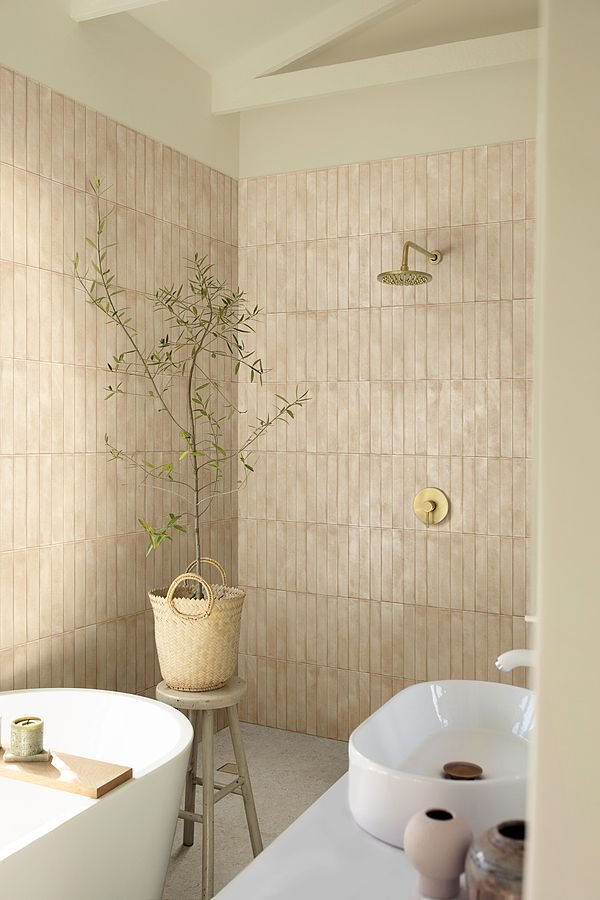
Bathroom Renovations

A luxurious, well-designed bathroom enhances comfort and adds value to your home.

Key bathroom upgrades include:

  • Walk-in showers with glass enclosures for a sleek look.

  • Freestanding bathtubs for a spa-like experience.

  • Smart mirrors and lighting for added convenience.

  • Water-saving fixtures to improve efficiency.

Basement and Attic Conversions

Unused spaces like basements and attics can be transformed into functional living areas, such as:

  • Home offices for remote work.

  • Guest suites for visitors.

  • Entertainment rooms with home theaters.

  • Fitness areas for at-home workouts.

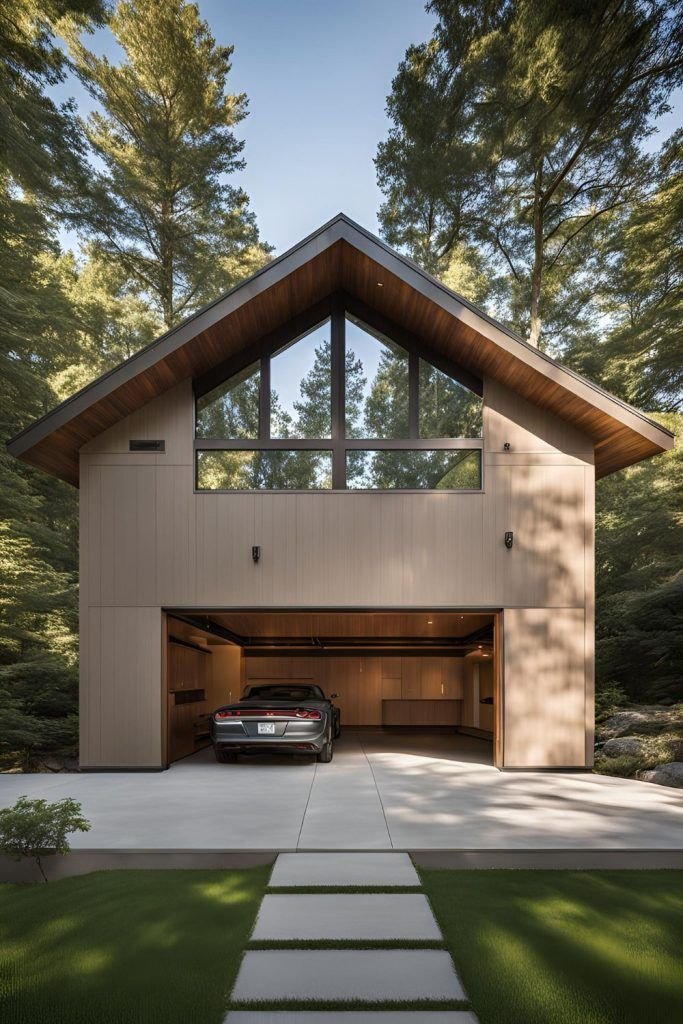
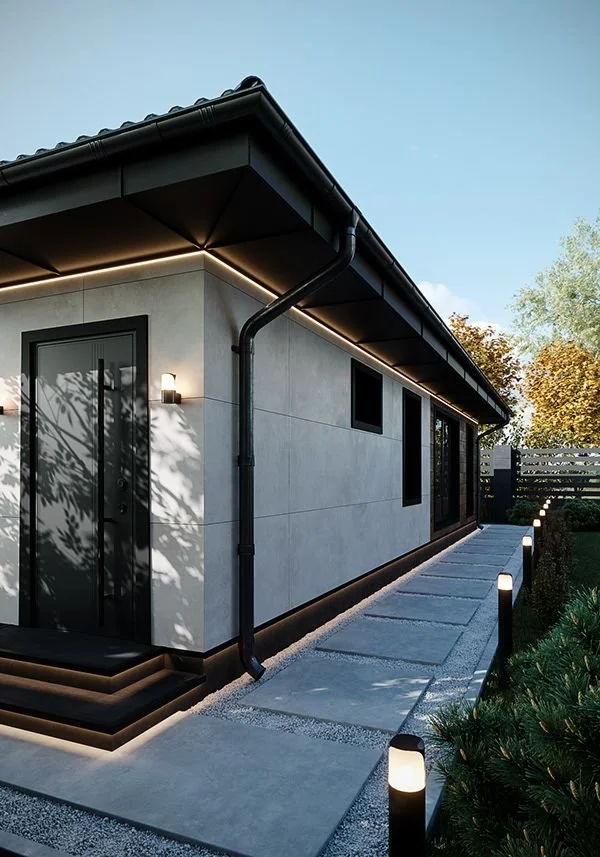
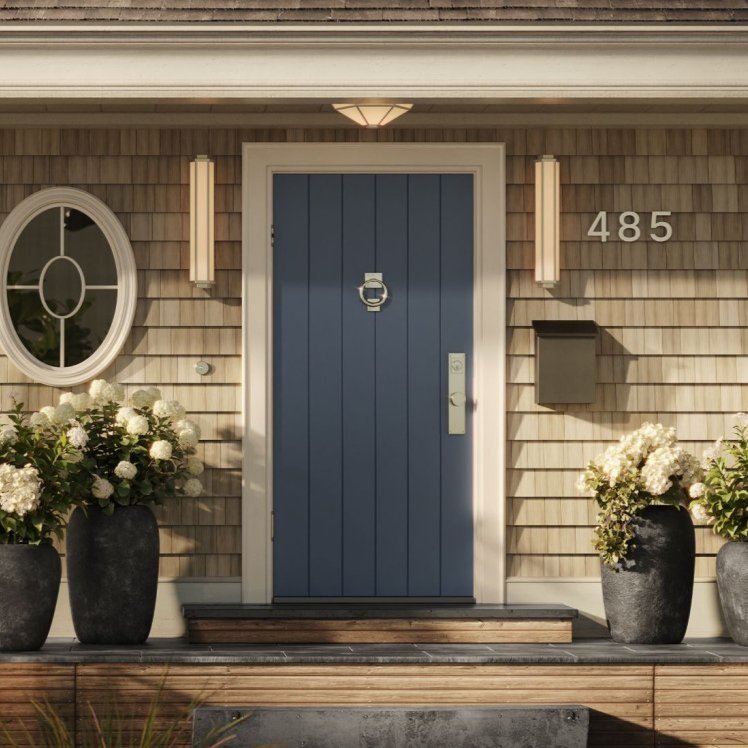
Outdoor Living Enhancements

Expanding your living space outdoors can create a perfect area for relaxation and entertainment.

Consider:

  • Deck or patio installations for outdoor gatherings.

  • Landscaping improvements to enhance curb appeal.

  • Outdoor kitchens and fire pits for year-round enjoyment.

  • Pergolas and covered seating areas for shade and comfort.

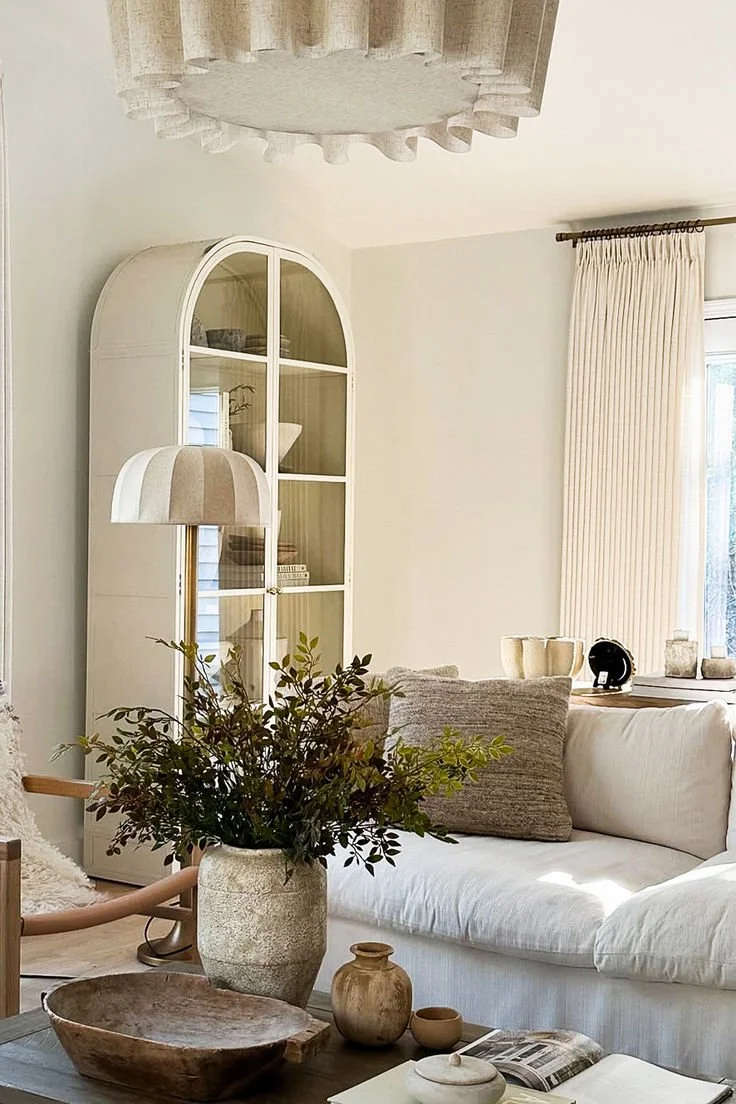
Whole-Home Renovations

For homeowners looking for a complete transformation, a whole-home remodel can modernize every aspect of the property.

This may include:

  • Open-concept floor plans for a spacious feel.

  • New flooring and paint to refresh interiors.

  • Smart home technology for automation and security.

  • Energy-efficient windows and doors to reduce heating and cooling costs.


hellolovelyliving houzz home remodeling project ideas

Houzz

Make your home project a reality. Find inspiration, products, and the pros to make it happen - all in one place.


No. 1

How to Choose the Right Remodeling Professionals

Selecting the right remodeling contractor is crucial for a successful renovation.

Here’s how to ensure you hire the best professionals for the job:

1. Check Credentials and Licensing

Ensure the contractor is licensed, insured, and certified to perform remodeling work in your area. This protects you from potential liabilities.

2. Review Past Projects and References

Look at their portfolio of completed projects and read customer reviews to assess their quality of work and reliability.

3. Get Detailed Estimates

Request written estimates that outline labor costs, materials, and timelines to avoid unexpected expenses.

4. Discuss Project Timelines

A clear timeline ensures that your renovation stays on schedule and minimizes disruptions to your daily life.

5. Ensure Clear Communication

A good contractor should provide regular updates, answer questions, and address concerns throughout the remodeling process.

FAQ

How much does a home remodeling project cost?

The cost varies depending on the scope of the project, materials used, and labor costs. A small renovation may cost a few thousand dollars, while a full-home remodel can range from $50,000 to $150,000 or more.

How long does a typical home renovation take?

Project timelines depend on the complexity of the renovation. A kitchen or bathroom remodel may take 4-8 weeks, while a whole-home renovation can take several months.

Do I need permits for home remodeling?

Yes, certain renovations require building permits, especially for structural changes, electrical work, and plumbing upgrades. A professional contractor will handle the permit process for you.

What are the best renovations for increasing home value?

The most valuable renovations include kitchen remodels, bathroom upgrades, energy-efficient improvements, and curb appeal enhancements.

Can I live in my home during a remodel?

For minor renovations, you can typically stay in your home. However, for major remodels, such as kitchen overhauls or full-home renovations, temporary relocation may be necessary.

Takeaways

Investing in professional home remodeling services is one of the best ways to enhance your living space, increase property value, and improve functionality. Whether you’re upgrading a single room or undertaking a full-scale renovation, expert craftsmanship ensures a seamless transformation.

By following these expert tips and working with professional remodeling services, you can create a home that is beautiful, functional, and tailored to your lifestyle. Ready to get started? Contact a trusted remodeling contractor today!

Looking For Home Resources?

Looking to enhance your living space and create a sanctuary that supports your well-being? Explore our home partners who offer a wide range of resources to elevate your home environment.


homeHLL x Editor


Best Home Staging Tips For 2025

Thinking about selling your home or putting a listing on the market? It can feel like a lot to handle, but there are simple ways to make any home more appealing to buyers and increase its value.


One of the best ways to do this is through home staging. A lot of people think staging is just about decorating, but it’s actually about helping buyers picture themselves living in the space. And it works—homes that are staged sell faster and often for a higher price.

In fact, according to the International Association of Home Staging Professionals, staged homes sell 3 to 30 times faster than unstaged ones and can bring in up to 20% more value. This makes it worth investing in the home staging costs

In 2025, buyers will be drawn to clean, simple designs, eco-friendly touches, and smart home features. If you want to attract serious offers, these trends can make a big difference. In this article, we explore some of the best home staging tips for 2025.

Top Home Staging Tips for 2025

Getting a home ready for buyers is all about making it look welcoming, spacious, and well-maintained.

Here are some simple ways to stage your home so it stands out:

No. 1

Declutter the Space

Start by going through each room and removing anything that is no longer needed. This not only makes the space look bigger but also helps with packing if you are planning to move.

In smaller homes or apartments, a few simple tricks can make a big difference. Lighter shades on walls, furniture, and decor help reflect light, making the space feel open and airy.

Mirrors are another great way to create the illusion of depth. A large mirror placed on one wall can instantly make a room feel larger.

The way furniture is arranged also matters. Keep walkways clear and avoid placing bulky pieces in the middle of the room to create a better sense of flow.

No. 2

Deep Clean Every Corner

Once the clutter is gone, it’s time for a deep clean. Wash the windows, mop the floors, and shampoo the carpets to refresh the space.

Dust every surface, polish furniture, and vacuum thoroughly. Ceiling fans and air vents should also be cleaned to remove any built-up dust.

Bathrooms need special attention. Fresh towels and a new bar of soap can make a big difference in making the space feel clean and welcoming.

In the bedroom, fresh bedding and neatly made beds create an inviting atmosphere.

No. 3

Make the Most of Lighting

Good lighting can completely change how a space feels. Installing dimmers on overhead lights allows for better control over brightness throughout the day, making the home feel warm and inviting.

Table lamps are another great addition. Choosing lamps with unique designs and placing them at different heights around the room can add character while improving the overall lighting.


hellolovelyliving terrain potted plants planters for garden and home

Terrain

Discover the beauty of nature with Terrain’s curated selection of planters and plants. From lush greenery to blooming florals, find the perfect touch for your home or garden!


No. 4

Improve the First Impression

The outside of a home is the first thing buyers will see, and if it looks neglected, they might not even want to step inside.

A clean and well-maintained exterior sets the right tone. This means washing the windows, power-washing the walls, and refreshing the front door with a new coat of paint or updated hardware.

The driveway and sidewalks should be cleaned and repaired if needed. Outdoor areas like patios, decks, and pools should be decluttered and in good shape.

Adding a few decorative touches can also help. Potted plants, fresh mulch, and proper outdoor lighting can make a home feel warm and inviting. Simple details like a new mailbox or neatly trimmed hedges can go a long way in making the property more attractive.

No. 5

Use Neutral Colors

A fresh coat of paint or new curtains in a neutral shade can instantly make a home feel brighter and more spacious.

Light colors like off-white, beige, or soft gray work well because they make it easier for buyers to picture themselves living in the space. Bold or personalized colors might appeal to some, but they can also turn away potential buyers who prefer a blank slate.

Neutral walls also give more flexibility when rearranging furniture or adding decor. It creates a balanced background that works with any style, making staging easier and the home more inviting.

No. 6

Refresh the Kitchen and Bathroom

The kitchen and bathroom play a big role in a buyer’s decision, so these spaces should be as clean and updated as possible. Clutter should be kept to a minimum—only a few decorative touches are needed.

Fresh white towels in the bathroom, a small plant or orchid in the kitchen, and some well-placed lighting can create a polished, welcoming look. Adding simple upgrades like modern cabinet handles, a stylish mirror, or fresh caulk around sinks and tubs can make a home feel well-maintained.

A little effort in these areas can make a big difference in how buyers perceive the overall condition of the home.


No. 7

Consider Virtual Staging

Staging a home with physical furniture and decor can be expensive and time-consuming, but virtual staging offers a practical alternative. This process involves digitally placing furniture and decor in listing photos to help buyers see the full potential of a space. It allows sellers to showcase a home’s best features without the cost of traditional staging.

Virtual staging is especially useful for empty homes or spaces that need a fresh look. It helps create an inviting atmosphere in photos, making it easier to attract buyers online. Since most home searches start with listing photos, visually appealing images can make a big difference in getting more interest and offers.

No. 8

Add More Storage

Buyers always appreciate a home with enough storage space. If your home lacks built-in storage like closets or cabinets, consider adding furniture that doubles as storage.

A sideboard, for example, can be a great addition to store extra dishes, napkins, or flatware while also enhancing the decor. Simple additions like this make a space look more organized and functional, which can be a big plus for buyers.

No. 9

Pay Attention to Your Backyard

Backyards and outdoor areas have become more important to buyers in recent years. Many people now look for homes with patios, porches, or outdoor seating areas. In fact, studies from the National Association of Realtors show that 82% of buyers want a patio, and many also prefer front and rear porches. 

Before listing your home, make sure your outdoor space looks inviting. Mow the lawn, pull out any weeds, and set up some outdoor furniture to show how the space can be used. Even if you don’t have a built-in patio, a clean and well-arranged outdoor area can still attract buyers.

No. 10

Rearrange the Furniture

A home should feel open and easy to move through. Too much furniture can make rooms look smaller and cluttered, making it harder for buyers to picture themselves in the space.

Store away any oversized or mismatched furniture, and arrange what’s left to create a spacious and welcoming feel. The more walkable and open the space, the easier it is for buyers to imagine their own furniture in the home.

Takeaways

Staging a home doesn’t have to be complicated or expensive. Simple changes like decluttering, fresh paint, and good lighting can make a big difference in how buyers see the space.

A well-presented home attracts more interest and can lead to better offers. With the right touches, selling a home in 2025 can be a smoother and more rewarding experience.

Looking For Home Resources?

Looking to enhance your living space and create a sanctuary that supports your well-being? Explore our home partners who offer a wide range of resources to elevate your home environment.


homeHLL x Editor


Top Tips And Trends For Your Dream Kitchen Plumbing

You want a kitchen that not only looks stunning but also functions seamlessly. Modern plumbing solutions can transform your kitchen space, prevent common water disasters, and enhance efficiency.


Concerns about hidden leaks, rising water bills, or outdated fixtures are common, but today’s advanced faucet designs, water-saving technology, and professional installation methods provide reliable solutions. In this article, we explore the top tips and emerging trends to help you create the kitchen of your dreams, with a special focus on innovative plumbing solutions.

Ready to explore the latest faucets, sinks, and piping methods to elevate your cooking space? fergusonsplumbingkitcheninspiration.com offers expert advice, tips, and inspiration. Together, we'll address every concern and bring your kitchen plumbing dreams to life.

No. 1

Plan Your Appliances Early

Booking your kitchen appliances well ahead of time frees you from last-minute decisions. It also lets you coordinate plumbing connections, cabinetry spaces, and functional additions.

1. Map Out Your Workflow

Visualize how you move between the sink, stove, and refrigerator. This triangle forms the heart of your kitchen, shaping every aspect of your plumbing layout.

2. Think About Spaciousness

Large pots require generous clearance under faucets, and dish-drying racks benefit from deep basins. Factor these dimensions in before selecting each fixture and sink type.

3. Coordinate With Cabinetry

Appliance placement impacts how your cabinets open and close. Plan around door swings, drawer extensions, and plumbing lines to ensure unobstructed access to stored items.

4. Factor in Plumbing Lines

Your sink's location depends on drain routes, while pot fillers may require a specialized supply path. Anticipate these needs to avoid renovations down the road.

5. Check for Compatibility

Not all appliance brands match well with every faucet or sink style. Look for fittings designed to work seamlessly together to streamline each installation phase.

No. 2

Choose the Right Fitter

Finding an experienced professional goes beyond comparing prices. You want someone who understands your preferred fixtures, local codes, and the intricacies of modern kitchen plumbing.

  • Ask about Licensing - Confirm they meet the required standards and carry appropriate liability coverage.

  • Discuss Projects - Gauge their experience with sink installations, pot-filler faucets, and dishwasher drain lines.

  • Request a Visit - Have them inspect plumbing and confirm feasibility of your desired layout.

  • Ask about Warranties - This guarantees coverage for leaks or any other installation issues later on.

  • Compare References - This ensures the fitter has been tested in real situations.

  • Insist on Written Estimates - Ensure it details labor, parts, and costs that might arise if unforeseen issues occur.

  • Verify Timelines - This ensures your fitter can coordinate with countertops, cabinets, and other trades involved.

  • Ask about Tools for Plumbing - This includes pipe cutting and sink mounting, to expedite the timeline.

  • Consider Communication - A fitter who explains clearly helps you make decisions throughout every stage.

  • Evaluate Pricing - This ensures fees align with norms, and match the services you require for your kitchen upgrade.

Following these tips helps you find a professional who aligns with your vision. Your fitter's expertise can make or break your dream kitchen's plumbing success.

No. 3

Install a Pot-Filler Faucet

Pot-filler faucets are major time-savers in busy kitchens. Installing them requires careful measurement, the right placement, and reliable connections to ensure a leak-free cooking experience.

1. Check the Water Supply Position

Your existing hot or cold water line determines how easily you can connect the pot filler. Confirm the route and accessibility before finalizing your faucet's location to avoid costly adjustments later.

2. Locate Your Studs

A secure mount prevents damage when the pot filler is extended over heavy cookware. Use a stud finder to locate sturdy support and mark the positions accurately for proper installation.

3. Mount the Faucet Body

  • Drill pilot holes as recommended by the manufacturer.

  • Align the faucet precisely to ensure a level installation.

  • Fasten bolts securely and seal any gaps to prevent moisture intrusion.

4. Test for Leaks

  • Turn on the water supply and inspect all joints carefully.

  • If you notice dripping, tighten connections or replace worn-out washers.

  • Check for consistent water pressure and smooth flow to ensure optimal performance.


hellolovelyliving rejuvenation kitchen plumbing hardware

Rejuvenation

Elevate your kitchen design with Rejuvenation's exquisite hardware and decor collection - where style meets functionality


No. 4

Don't Forget the Dishwasher

You might overlook how critical the dishwasher's drain line is until it malfunctions. Proper planning ensures efficient drainage and prevents unpleasant odors or messy leaks.

  • Review Manufacturer Guidelines - Examine guides specific to your dishwasher model for drain hose height and air gap requirements to ensure proper installation.

  • Locate the Knockout Port - If connecting the dishwasher’s drain hose to a garbage disposal, locate and remove the knockout plug to allow unrestricted water flow.

  • Install a High-Loop or Air Gap- Use a high-loop setup or an air gap device to prevent dirty water from reentering the dishwasher and contaminating clean dishes.

  • Check for Kinks or Obstructions - Inspect the drain hose for bends, twists, or blockages that could cause slow drainage or backups.

  • Secure Clamps Properly - Tighten clamps at both the dishwasher and disposal connection points to minimize leaks, especially during high-pressure wash cycles.

  • Inspect Gaskets for Wear - Check the hose fittings for worn or cracked gaskets. Replace any damaged components immediately to prevent leaks.

  • Avoid Over-Tightening Plastic Fittings - Excessive force can crack plastic connections, leading to unexpected leaks. Tighten fittings firmly but carefully.

  • Separate Drain and Water Supply Lines - Keep hot water lines away from drain hoses to prevent heat damage to plastic tubing and avoid premature wear.

  • Run a Test Cycle Before Sealing Cabinets - Before finalizing the installation, run a test wash cycle to verify proper drainage and leak-free operation.

  • Consult a Plumber for Persistent Issues - If drainage problems persist, seek professional assistance to identify underlying issues such as improper slope or clogged pipes.

Addressing every dishwasher detail up front helps you avoid service calls. Keeping your drain line unobstructed delivers cleaner dishes and a smoother overall kitchen routine.

No. 5

Measure Everything Twice

Exact measurements prevent overly large sinks or misaligned faucets. Double-checking every dimension saves time, money, and unneeded stress during your kitchen remodeling or renovation process.

1. Gather the Right Tools

Use a reliable tape measure, level, and a ruler for depth checks. Keep a notepad handy to record each reading precisely and remain consistent throughout.

2. Assess Cabinet Space

Measure the cabinet's interior width and depth to avoid buying a sink that won't fit. Subtract clearances for plumbing lines and faucet assembly very thoroughly.

3. Check Sink Dimensions

Some sinks stretch to 36 inches or more, while compact versions are around 25 inches wide. Know your countertop cutout size before finalizing any purchase.

4. Double-Confirm Before Cutting

Always measure twice and mark your cut lines. Incorrect cuts can lead to irreparable counters, wasted materials, or an awkwardly fitting sink alignment and frustration.

5. Review the Fit

For comprehensive instructions, see this guide. Place your sink temporarily, confirm it aligns with faucets, and ensure there's enough space for accessories and adjustments.

No. 6

Start With the Sink

A reliable sink forms the backbone of your kitchen. Planning its style, size, and finish early sets the tone for all other decisions to come.

  • Decide on Style – Choose between drop-in, undermount, or farmhouse sinks, as each affects countertop fit and installation ease.

  • Assess Faucet Placement – Ensure the faucet aligns properly with the sink basin and surrounding workspace for convenience.

  • Pick a Material – Consider stainless steel, cast iron, or composite, balancing durability, maintenance, and personal preference.

  • Evaluate Bowl Configuration – Decide between single, double, or triple basins, depending on your dishwashing habits and available space.

  • Consider Depth – Opt for a deeper sink to fit large cookware, but be mindful of potential back strain from excessive depth.

  • Look for Self-Rimming Sinks – These offer easier installation and allow for simpler replacements without disturbing countertops.

  • Select Undermount for a Seamless Look – This option provides easier cleaning but requires sturdy countertop support.

  • Weigh Farmhouse Designs – A deep, exposed front sink accommodates large loads effectively, adding a rustic aesthetic.

  • Plan Accessory Holes – Factor in soap dispensers, sprayers, or additional fixtures for both functionality and aesthetics.

  • Research Reputation – Check reviews and warranties to ensure your sink meets durability standards and resists wear.

Making the sink priority sets the stage for a coordinated kitchen. Dimension and detail revolves around ensuring it fits perfectly and functions at its best.

No. 7

Select the Perfect Sink Size

Picking the perfect sink width, length, and depth requires balancing form and function. Consider how you use the space before ultimately making a final statement.

1. Consider Kitchen Layout

If your counters are undersized, fitting a massive sink could cramp walkways. Think about everyday traffic flow and kitchen zones to ensure comfortable overall movement.

2. Balance Aesthetics With Function

An oversized sink offers room but might look bulky in a streamlined setting. Find a balance that complements cabinets, countertops, and your kitchen's overall theme.

3. Water Usage Habits

If you typically use a dishwasher, a huge sink may sit unused. Conversely, frequent hand washers benefit from added basin depth or multiple compartments and capacity.

4. Faucet Compatibility

Not all sinks fit every faucet's arch or reach. Double-check spout clearance and handle operation, especially if you choose deeper basins or a farmhouse design.

5. Coordinate With Existing Decor

Whether your motif is modern, rustic, or transitional, confirm your sink size blends visually. It should enhance, not overwhelm, the look and feel you desire.

Takeaways

Transform your dream kitchen into a reality with careful planning, expert guidance, and meticulous attention to detail. By making informed and thoughtful choices, you'll curate a stylish and highly functional space that not only meets but also exceeds your expectations. For even more expert insights and valuable tips, explore our other articles and take the essential final step toward perfecting your culinary oasis today!

Looking For Home Resources?

Looking to enhance your living space and create a sanctuary that supports your well-being? Explore our home partners who offer a wide range of resources to elevate your home environment.


homeHLL x Editor


The Importance Of Properly Installed Gutters For Roof Protection

A well-maintained roof is essential for the longevity and safety of any home. While many homeowners focus on roofing materials and insulation, one critical yet often overlooked component is the gutter system. Properly installed gutters play a crucial role in protecting the roof, foundation, and overall structural integrity of a home.


Without professional gutter systems, rainwater can accumulate on the roof, leading to water damage, leaks, and costly repairs. In this article, we explore the importance of properly installed gutters, their benefits, and how they contribute to roof protection and home longevity.

No. 1

How Gutters Protect Your Roof

Preventing Water Damage

One of the primary functions of gutters is to channel rainwater away from the roof and foundation. Without gutters, water can pool on the roof, leading to shingle deterioration, leaks, and structural damage. Over time, trapped moisture can cause rotting in wooden structures, weakening the roof’s integrity.

By ensuring proper water drainage, gutters help maintain the durability of roofing materials, preventing expensive repairs and replacements.

Reducing Ice Dams in Winter

In colder climates, ice dams can form when melted snow refreezes at the roof’s edge. This can lead to water backing up under the shingles, causing leaks and interior damage.

Properly installed gutters, combined with effective insulation and ventilation, help direct melted snow away from the roof, reducing the risk of ice dam formation.

Protecting Fascia and Soffits

The fascia and soffits are crucial components of a roofing system, providing support and ventilation. When gutters are missing or improperly installed, water can overflow and seep into these areas, leading to wood rot, mold growth, and structural weakening.

By directing water away from these vulnerable areas, gutters help maintain the structural integrity of the roof.

No. 2

The Impact of Poor Gutter Installation

Roof Leaks and Interior Damage

Improperly installed or clogged gutters can cause water to overflow, leading to roof leaks and interior water damage. This can result in stained ceilings, peeling paint, and even mold growth, which can pose health risks.

Foundation Erosion

Gutters don’t just protect the roof—they also safeguard the foundation. When rainwater is not properly directed away from the house, it can erode the soil around the foundation, leading to cracks, basement flooding, and structural instability.

Landscape Destruction

Without functional gutters, water runoff can damage landscaping, washing away soil, plants, and mulch. Over time, this can lead to uneven ground and drainage issues, affecting the home’s curb appeal and stability.

No. 3

Key Features of a Properly Installed Gutter System

To ensure maximum roof protection, gutters must be installed correctly and maintained regularly.

Here are some essential features of a high-quality gutter system:

Correct Slope and Positioning

  • Gutters should have a slight downward slope to direct water toward the downspouts.

  • Incorrect slope can cause water pooling and overflow, leading to roof damage.

Durable Materials

  • Aluminum, copper, and stainless steel are popular gutter materials due to their durability and rust resistance.

  • Choosing high-quality materials ensures a long-lasting system.

Properly Placed Downspouts

  • Downspouts should be positioned to direct water away from the foundation.

  • Extensions or splash blocks can further prevent water accumulation near the home.

Gutter Guards for Debris Prevention

  • Installing gutter guards helps prevent leaves, twigs, and debris from clogging the system.

  • This reduces the need for frequent cleaning and maintenance.


hellolovelyliving rejuvenation outdoor project guide

Rejuvenation

Rejuvenation believes in the power of thoughtful design - explore their extensive range of outdoor hardware, including stylish accessories that add character and charm to your home's exterior.


No. 4

Maintenance Tips for Long-Lasting Gutters

Even the best-installed gutters require regular maintenance and attention to detail to function effectively and prevent potential issues. Regular cleaning and inspections are essential to ensure that they can properly channel water away from your home and safeguard your property.

Here are some essential gutter maintenance tips:

Regular Cleaning

  • Remove leaves, dirt, and debris at least twice a year (spring and fall).

  • Clogged gutters can lead to overflow and roof damage.

Inspect for Leaks and Damage

  • Check for cracks, rust, or loose fasteners that could cause leaks.

  • Repair or replace damaged sections promptly.

Ensure Proper Water Flow

  • Test gutters by running water through them to ensure smooth drainage.

  • Adjust the slope if water is pooling.

Trim Overhanging Branches

  • Trees near the roof can drop leaves and branches, leading to clogged gutters.

  • Trim branches to minimize debris buildup.

No. 5

Choosing the Right Gutter System for Your Home

When selecting a gutter system, homeowners should consider factors such as climate, roof size, and material durability.

Here are some common gutter types and their benefits:

K-Style Gutters

  • Most popular choice for residential homes.

  • High water capacity and aesthetically pleasing design.

Half-Round Gutters

  • Ideal for historic or traditional homes.

  • Smooth shape reduces debris buildup.

Seamless Gutters

  • Custom-made to fit the home, reducing leak risks.

  • Fewer joints mean less maintenance and longer lifespan.

Box Gutters

  • Common in commercial buildings.

  • Can handle large volumes of water.

Takeaways

A well-installed gutter system is essential for roof protection, foundation stability, and home longevity. By ensuring proper water drainage, gutters prevent roof leaks, structural damage, and costly repairs.

Investing in high-quality materials, professional installation, and regular maintenance can extend the lifespan of both your roof and home. Whether you’re installing new gutters or upgrading an existing system, prioritizing proper installation and upkeep will safeguard your home against water damage and costly repairs.

For homeowners looking to enhance roof protection, properly installed gutters are a smart investment that ensures long-term durability and peace of mind.

Looking For Home Resources?

Looking to enhance your living space and create a sanctuary that supports your well-being? Explore our home partners who offer a wide range of resources to elevate your home environment.


homeHLL x Editor


Rustic Aesthetic On A Budget: How To Use Scaffold Boards In Your Kitchen

Creating a warm, rustic vibe in your kitchen doesn’t have to break the bank. Scaffold boards offer an affordable, durable, and versatile solution for homeowners looking to add character to their space. These reclaimed wooden planks can be transformed into shelves, countertops, islands, or decorative accents, bringing a cozy farmhouse feel to your kitchen.


Beyond their aesthetic appeal, scaffold boards are a practical choice for budget-conscious renovators. They provide ample workspace, sturdy construction, and a sustainable alternative to expensive hardwoods. With just a few tools and a bit of creativity, you can revamp your kitchen effortlessly while maintaining a timeless charm.

If you’re looking for affordable, high-quality materials, consider checking out scaffold boards for sale. In this guide, we will walk you through the benefits, preparation steps, treatments, and design ideas to help you make the most of these rustic planks.

No. 1

Why Choose Scaffold Boards for Your Kitchen?

Scaffold boards are an excellent choice for kitchen upgrades due to their strength, versatility, and affordability. Whether you're looking to create floating shelves, countertops, or a rustic dining nook, these boards offer a cost-effective alternative to traditional wood materials.

Key Benefits of Scaffold Boards

  • Exceptional Durability – Designed for heavy loads, scaffold boards can withstand daily kitchen use.

  • Timeless Aesthetic – Their natural grain and weathered look add rustic charm to any space.

  • Eco-Friendly Choice – Reclaimed boards reduce waste and promote sustainable home improvement.

  • Budget-Friendly – Compared to hardwood, scaffold boards offer a more affordable option.

  • Easy to Work With – Minimal construction experience is needed for DIY projects.

  • Versatile Applications – Suitable for countertops, shelving, islands, and decorative accents.

By incorporating scaffold boards, you can achieve a high-end rustic look without overspending. Their natural imperfections and rich textures make them a perfect fit for farmhouse-style kitchens.

No. 2

Essential Preparation Steps

Before installing scaffold boards in your kitchen, proper preparation is crucial to ensure safety, durability, and a polished finish.

Step 1: Inspect the Boards

Check each plank for splits, warping, or structural weaknesses. High-quality boards will provide a sturdy foundation for kitchen surfaces.

Step 2: Gather Necessary Tools

Having the right tools on hand will streamline the process.

Essential supplies include:

  • Measuring tape – Ensures precise cuts and proper fit.

  • Level – Helps maintain even surfaces.

  • Screws and brackets – Secure boards in place.

  • Sandpaper – Smooths rough surfaces for a refined finish.

  • Sealant or wood oil – Protects against moisture and stains.

Step 3: Cut Boards to Size

Measure and mark your boards before cutting to ensure a perfect fit for countertops, shelves, or islands. Accurate cuts prevent material wastage and enhance the final look.

Step 4: Sand the Surface

Start with coarse-grit sandpaper, then switch to finer grit for a smooth, splinter-free finish. Sanding enhances the wood’s natural grain and prepares it for sealing.

Taking the time to properly prepare your boards will ensure a long-lasting, professional-quality installation.

No. 3

Choosing the Right Finish: Indoor vs. Outdoor Treatments

Scaffold boards can endure different environments, but applying the right finish will maximize their lifespan.

Indoor Finishing Options

  • Wax or quick-drying oil – Ideal for controlled indoor environments.

  • Food-safe sealants – Protect kitchen surfaces from spills and stains.

  • Breathable finishes – Maintain air quality while preserving wood texture.

Outdoor Finishing Options

  • Water-resistant sealers – Protect against rain and humidity.

  • UV-protective coatings – Prevent fading from sun exposure.

  • Regular reapplication – Helps maintain integrity in fluctuating weather.

Selecting the appropriate treatment ensures your scaffold boards remain functional and visually appealing for years to come.


hellolovelyliving non toxic kitchenware

Caraway

Cook with confidence and care! Caraway's non-toxic kitchenware combines sleek design with health-conscious materials for a safer, smarter kitchen experience.


No. 4

Applying Oil-Based Sealers for a Rich Finish

Oil-based sealers penetrate deep into the wood, enhancing durability and moisture resistance. They also bring out the natural beauty of the grain, making them a great choice for rustic kitchens.

Steps to Apply Oil-Based Sealers

  1. Choose a High-Quality Product – Opt for Danish oil, tung oil, or linseed oil for a rich, protective finish.

  2. Apply Evenly – Use a brush or cloth to distribute the oil across the surface, ensuring full coverage.

  3. Allow Proper Drying Time – Let each coat cure completely before applying the next layer.

  4. Build Multiple Layers – Adding extra coats strengthens the wood’s resistance to moisture and wear.

Oil-based sealers enhance the wood’s natural character while providing long-lasting protection.

No. 5

Using Water-Based Sealers for a Quick, Eco-Friendly Finish

Water-based sealers dry faster, emit fewer fumes, and provide a clear protective layer. They are a great option for busy kitchens where quick application and drying times are essential.

Steps to Apply Water-Based Sealers

  • Check for Food-Safe Labels – Ensure the product is safe for kitchen surfaces.

  • Stir Thoroughly Before Use – Prevents inconsistencies in color and texture.

  • Apply Thin Coats – Use a brush or roller for an even finish.

  • Sand Lightly Between Coats – Improves adhesion and durability.

  • Reapply Periodically – Maintains protection in high-traffic areas.

Water-based sealers offer a simple, eco-friendly solution for preserving scaffold boards in a kitchen setting.

No. 6

Creative DIY Design Ideas for Your Kitchen

Scaffold boards provide endless design possibilities, allowing you to create custom, rustic-inspired kitchen elements on a budget.

1. Floating Shelves

  • Install L-brackets to mount scaffold boards as open shelving.

  • Display cookbooks, potted herbs, or vintage kitchenware for a farmhouse look.

2. Rustic Breakfast Bar

  • Use scaffold boards and metal supports to create a cozy breakfast nook.

  • Pair with industrial stools for a stylish, functional space.

3. Kitchen Island Countertop

  • Replace an existing island top with scaffold boards for a rustic upgrade.

  • Apply food-safe oil to protect the surface while maintaining its natural charm.

4. Sliding Barn Doors

  • Use scaffold boards to create barn-style pantry doors.

  • Install metal tracks for a modern farmhouse aesthetic.

Scaffold boards allow you to customize your kitchen affordably, blending functionality with rustic elegance.

Takeaways

Incorporating scaffold boards into your kitchen is a budget-friendly way to achieve a rustic, farmhouse-inspired aesthetic. Their durability, affordability, and versatility make them an excellent choice for homeowners looking to revamp their space without overspending.

Here are the key takeaways:

  • Scaffold boards offer a durable, cost-effective alternative to traditional wood.

  • Proper preparation and finishing ensure longevity and protection.

  • Oil-based and water-based sealers provide different benefits for indoor and outdoor use.

  • DIY projects like shelving, countertops, and barn doors enhance kitchen functionality.

  • A rustic kitchen upgrade doesn’t have to be expensive—scaffold boards make it achievable.

By following these steps, you can transform your kitchen into a cozy, rustic retreat while staying within budget. Whether you’re adding functional shelving or a statement countertop, scaffold boards provide an affordable, stylish solution that will stand the test of time.

Looking For Home Resources?

Looking to enhance your living space and create a sanctuary that supports your well-being? Explore our home partners who offer a wide range of resources to elevate your home environment.


homeHLL x Editor


Simple Ways To Choose A Plumbing Expert For Your Home

You want your home's plumbing to run smoothly, but finding the right professional can be challenging. By focusing on expertise, reviews, and communication, you’ll be able to choose a plumber who can handle clogged drains, leaks, and other common issues. Taking the time to research and compare options ensures that you receive high-quality service and long-term solutions.


hellolovelyliving woman looking up reviews online for a plumbing expert


Proper credentials matter when selecting a plumber. Always look for licensed and insured specialists who stay updated on industry trends. Visiting an About.me profile or professional website can help you explore a plumber’s track record and gain confidence in your choice.

Once you pinpoint the perfect fit, request written estimates and verify warranties to avoid unexpected costs. By following these simple steps, you’ll secure a reliable plumber who can handle emergencies, installations, and routine maintenance with ease.

In this article, we explore effective ways to select a plumbing expert for your home, ensuring that the specialist you choose truly qualifies for the job and can meet your specific needs.

No. 1

Research Plumbing Options Carefully

Before planning major plumbing upgrades, consider both style and functionality when selecting fixtures. Doing thorough research can save you money and ensure the best results.

Key Factors to Consider

  • Functionality – Determine your household’s needs, including water heater capacity and faucet styles that complement your kitchen or bathroom layout.

  • Durability – Look for corrosion-resistant finishes, sturdy brass fittings, or stainless steel designs that can withstand long-term use.

  • Aesthetic Appeal – Choose fixtures that match your décor, ensuring a seamless blend with tiles, countertops, and overall interior design.

If you're unsure about fixture compatibility, consult a professional plumber for expert insights. Their guidance can help you make informed decisions that enhance both performance and style.

No. 2

Check Licensing and Insurance

Verifying a plumber’s credentials ensures that your project meets local regulations and safety standards. This diligence protects you from liabilities and guarantees high-quality service.

Steps to Verify Credentials

  • Confirm Licenses – Request up-to-date state licensing details to ensure the plumber is legally authorized to perform repairs, installations, or remodeling.

  • Ask About Insurance – Inquire about general liability coverage and worker’s compensation to prevent unexpected costs in case of accidents.

  • Choose Legitimate Contractors – Avoid unlicensed handymen who may offer lower rates but lack the necessary credentials for complex plumbing tasks.

Additionally, use official resources to verify a plumber’s standing. Taking this step minimizes risks and ensures you hire a qualified professional.

No. 3

Compare Cost Estimates Fairly

Evaluating multiple quotes helps you balance affordability and quality. Comparing estimates clarifies costs and prevents unwelcome surprises.

How to Assess Estimates

  • Request Detailed Breakdowns – Ask for itemized quotes that outline labor, materials, and additional fees. Transparency prevents misunderstandings and disputes.

  • Consider Standard Rates – Familiarize yourself with average plumbing costs to spot suspiciously high or unrealistically low prices.

  • Look for Hidden Costs – Ask about potential travel surcharges, emergency call fees, or weekend rates to avoid unexpected expenses.

Always compare at least three quotes to ensure fair pricing. If you notice significant price gaps, request an explanation to determine whether higher costs reflect better materials or advanced workmanship.


hellolovelyliving rejuvenation kitchen fixtures and plumbing

Rejuvenation

Elevate your kitchen design with Rejuvenation's exquisite hardware and decor collection - where style meets functionality


No. 4

Match Skills to Your Needs

Choosing the right specialist is crucial for your plumbing project’s success. Not all plumbers offer the same expertise, so it’s important to find one that aligns with your needs.

What to Look For

  • Specialized Expertise – Some plumbers focus on new installations, while others excel in repairs or remodeling.

  • Training and Certifications – Look for professionals with advanced skills, especially for complex systems requiring modern techniques.

  • Proper Equipment – Ensure the plumber has the necessary tools to complete your project efficiently.

Selecting a plumber with the right skills eliminates guesswork and ensures a smooth, hassle-free experience.

No. 5

Read Customer Reviews Online

Exploring feedback from previous clients provides insight into a plumber’s reliability and responsiveness. Online reviews reveal real experiences, helping you make an informed decision.

Where to Look

  • Reputable Platforms – Use websites like Trustpilot or the Better Business Bureau for verified ratings.

  • Review Timestamps – Check recent reviews to assess the plumber’s current performance and service quality.

  • Look for Patterns – Identify recurring themes in feedback, such as punctuality, professionalism, and reliability.

While negative reviews aren’t always deal-breakers, a pattern of similar complaints may indicate deeper issues. A plumber who actively resolves concerns demonstrates accountability and professionalism.

No. 6

Ask Homeowners for Recommendations

Speaking with trusted friends or family can lead you to reliable plumbing professionals. Personal experiences often provide valuable insights that online reviews may overlook.

Ways to Find Trusted Plumbers

  • Join Local Community Groups – Neighborhood forums and social media pages often feature contractor referrals and honest reviews.

  • Attend Home Improvement Events – Trade shows and expos showcase reputable plumbers and allow you to assess their expertise in person.

  • Ask for Before-and-After Photos – Seeing completed work helps verify a plumber’s skill and attention to detail.

Maintaining open communication with those who recommend a plumber ensures you receive accurate, firsthand insights before making a decision.

No. 7

Clarify Warranties and Repairs

Understanding warranty terms protects your investment in plumbing services. Clear coverage details ensure that repairs or replacements are handled efficiently if issues arise.

Key Warranty Considerations

  • Coverage Length – Ask how long the warranty lasts and what specific parts it includes.

  • Labor Guarantees – Some warranties cover parts but not labor. Clarify whether follow-up visits are free if issues occur.

  • Exclusions – Understand any limitations, such as damage caused by improper maintenance or external factors.

Store warranty documents and invoices in a safe place for easy access. Quick retrieval ensures you can resolve disputes or request repairs without unnecessary delays.

Takeaways

Finding a reliable plumber requires careful research, but the effort pays off in long-term satisfaction and peace of mind. By prioritizing credentials, customer feedback, and clear communication, you can confidently hire a professional who delivers quality service.

Take the time to compare estimates, verify warranties, and seek recommendations from trusted sources. These steps will help you make an informed decision, ensuring your home’s plumbing remains in excellent condition for years to come.

Count on Dan’s Plumbing FAQ for helpful insights as you finalize your trusted home solutions.

Looking For Home Resources?

Looking to enhance your living space and create a sanctuary that supports your well-being? Explore our home partners who offer a wide range of resources to elevate your home environment.


homeHLL x Editor


10 Ways To Transform Your Kitchen With Expert Remodeling

The kitchen is the heart of every home—a space where meals are prepared, memories are made, and families gather. If your kitchen feels outdated, cramped, or lacks functionality, a kitchen remodel can breathe new life into your space. With expert remodeling strategies, you can enhance aesthetics, improve efficiency, and increase your home’s value.


hellolovelyliving kitchen remodel modern clean aesthetic


Whether you’re planning a complete overhaul or a minor update, in this article, we share some effective ways to transform your kitchen with expert remodeling.

If you are looking for experienced professionals to assist you with your kitchen renovation, consider exploring versatile 321 Construction kitchen remodeling services. Their skilled team is dedicated to transforming your culinary space into a beautiful and functional area that meets your unique needs and style preferences.

No. 1

Upgrade to Modern Cabinetry

Cabinets play a crucial role in both storage and design. If your current cabinets look worn out or don’t offer enough space, upgrading to modern, custom cabinetry can completely change the look and feel of your kitchen.

Consider options like:

  • Shaker-style cabinets for a timeless appeal.

  • Glass-front cabinets to showcase elegant dishware.

  • Soft-close drawers and doors for a touch of luxury.

  • Pull-out shelves and organizers to maximize storage efficiency.

Opting for high-quality materials such as solid wood, plywood, or MDF ensures durability and longevity.

No. 2

Install High-End Countertops

Countertops are one of the most used surfaces in the kitchen, so choosing the right material is essential. Upgrading to premium countertops can enhance both functionality and aesthetics.

Popular choices include:

  • Quartz – Durable, low-maintenance, and available in various colors.

  • Granite – Natural beauty with unique patterns and high resistance to heat.

  • Marble – Luxurious and elegant, though it requires regular maintenance.

  • Butcher block – Warm, rustic appeal with excellent durability for food prep.

Selecting the right countertop material ensures a stunning and practical kitchen workspace.

No. 3

Enhance Lighting for Ambiance and Functionality

Lighting plays a vital role in setting the mood and improving visibility in your kitchen. A well-lit kitchen enhances both safety and ambiance.

Consider incorporating:

  • Recessed ceiling lights for even illumination.

  • Pendant lights over the island for a stylish focal point.

  • Under-cabinet lighting to brighten workspaces.

  • Dimmable LED lights for adjustable brightness.

A layered lighting approach ensures your kitchen is both functional and inviting.


hellolovelyliving rejuvenation kitchen hardware and decor

Rejuvenation

Elevate your kitchen design with Rejuvenation's exquisite hardware and decor collection - where style meets functionality


No. 4

Upgrade to Smart Appliances

Modern kitchens benefit greatly from smart appliances that offer convenience, energy efficiency, and advanced features.

Some must-have smart appliances include:

  • Smart refrigerators with touch screens and Wi-Fi connectivity.

  • Induction cooktops for faster, safer cooking.

  • Voice-controlled ovens for hands-free operation.

  • Dishwashers with energy-saving modes for efficiency.

Investing in energy-efficient, high-tech appliances can make your kitchen more modern and user-friendly.

No. 5

Create a Functional Kitchen Layout

A well-designed kitchen layout improves workflow and efficiency. If your kitchen feels cramped or disorganized, consider reconfiguring the space for better functionality.

Popular kitchen layouts include:

  • Open-concept kitchens that connect seamlessly with the dining or living area.

  • L-shaped or U-shaped layouts for optimal counter space.

  • Galley kitchens for compact yet efficient designs.

  • Kitchen islands for additional prep space and seating.

A thoughtfully designed layout ensures your kitchen is both practical and visually appealing.

No. 6

Incorporate Stylish Backsplashes

A backsplash is more than just a protective surface—it’s an opportunity to add personality and style to your kitchen.

Trendy backsplash options include:

  • Subway tiles for a classic, clean look.

  • Mosaic tiles for a pop of color and texture.

  • Marble or quartz slabs for a seamless, luxurious appearance.

  • Metallic or mirrored finishes for a modern touch.

Choosing the right backsplash can tie together your kitchen’s design elements beautifully.

No. 7

Add a Kitchen Island for Extra Space

A kitchen island is a game-changer for both functionality and aesthetics. It provides additional counter space, storage, and seating options.

Consider features like:

  • Built-in sinks or cooktops for added convenience.

  • Extended countertops for casual dining.

  • Hidden storage compartments for better organization.

  • Multi-level designs to separate prep and dining areas.

A well-designed kitchen island enhances both efficiency and style.

No. 8

Upgrade Flooring for Durability and Style

Kitchen flooring should be durable, easy to clean, and visually appealing. If your current flooring is outdated or worn, upgrading to a high-quality material can make a significant difference.

Popular kitchen flooring options include:

  • Hardwood for warmth and timeless elegance.

  • Luxury vinyl plank (LVP) for water resistance and durability.

  • Porcelain or ceramic tiles for a sleek, easy-to-maintain surface.

  • Natural stone for a high-end, sophisticated look.

Choosing the right flooring ensures a long-lasting and stylish kitchen.

No. 9

Maximize Storage with Smart Solutions

An organized kitchen is a functional kitchen. If clutter is a problem, incorporating smart storage solutions can help keep everything in place.

Effective storage ideas include:

  • Pull-out pantry shelves for easy access.

  • Hanging pot racks to free up cabinet space.

  • Drawer dividers for better utensil organization.

  • Corner carousel cabinets to utilize hard-to-reach spaces.

Maximizing storage ensures your kitchen stays tidy and efficient.

No. 10

Personalize with Unique Design Elements

Adding personal touches to your kitchen remodel makes the space feel truly yours.

Consider incorporating:

Personalized details bring warmth and charm to your kitchen, making it a space you love spending time in.

Takeaways

A kitchen remodel is one of the most rewarding home improvement projects, offering both aesthetic and functional benefits. By upgrading cabinetry, countertops, lighting, appliances, and storage solutions, you can create a kitchen that is stylish, efficient, and inviting.

Whether you opt for small updates or a full renovation, expert remodeling ensures your kitchen becomes a modern, functional, and beautiful space that enhances your home’s value and your daily life.

With the right planning and design choices, your dream kitchen is within reach!

Looking For Home Resources?

Looking to enhance your living space and create a sanctuary that supports your well-being? Explore our home partners who offer a wide range of resources to elevate your home environment.


homeHLL x Editor


Essential Pool Safety Tips You Should Follow To Avoid Accidents

Having a pool at home is enjoyable but also a responsibility. Numerous serious accidents occur each year in pools.


In this article, we discuss some safety rules to keep your family and guests safe. Whether you have a pool or simply visit one, learning how to stay safe can prevent unfortunate events.

In case an accident happens, legal help might be required. The best swimming pool accident attorneys can assist if someone is hurt due to negligence.

However, preventing accidents before they occur is always the best course of action. That is why you should diligently follow these essential pool safety tips to ensure a secure and enjoyable swimming experience at all times.

No. 1

Always Supervise Children

Children are at a greater risk for pool accidents. When you have kids at home or they're visiting, never allow them to be alone near the pool. Even if they know how to swim, they might have an accident. Watch them carefully and be close enough to assist if necessary.

No. 2

Install a Fence Around the Pool 

A pool fence may keep younger kids or pets from falling into the water. The fence has to be more than four feet tall with a self-closing, latching gate. This prevents accidental drownings and keeps your pool area safe.

No. 3

Use Pool Alarms

Pool alarms are a good addition. These alarms can sense if someone enters the pool unauthorized. Pool alarms may be gate alarms, underwater motion detectors, or wearable alarms for kids.


hellolovelyliving swimply rent out your pool and earn money when people book

Swimply

An online marketplace for hourly rentals of pools, courts, entire homes, and many other amenities.

Host or rent a pool in your area. Get $25 off when you book a private pool, or join as a host and list your pool to earn thousands of dollars a month.

Sign up below for a free gift!


No. 4

Teach Kids to Swim

Teaching children to swim early can help avoid accidents. Swimming lessons show kids how to stay safe in the water. Even if they know how to swim, they should be supervised at all times.

No. 5

Do Not Run Near the Pool

Slippery pool decks lead to serious falls and injuries. Remind children and guests to walk and not run around the pool area. Non-slip mats or textured surfaces around the pool could also help prevent slipping.

No. 6

Keep Safety Equipment Nearby

Have safety equipment, including a life ring, a reaching pole, and a first aid kit, near your pool. In case of an emergency, these tools will enable you to rescue and take care of someone immediately.

No. 7

Never Swim Alone

Even if you are a great swimmer, it's safer to swim with another person. Accidents like sudden health problems or cramps can happen to anyone. Having another person around will help in emergencies.

No. 8

Avoid Alcohol Near the Pool

Consuming alcohol while swimming or supervising swimmers is unsafe. Alcohol slows response time and impairs judgment, leading to drowning or injuries. Stay alert and avoid drinking around the pool.

No. 9

Cover the Pool When Not in Use

A pool cover is another essential safety feature. It helps prevent accidental falls, particularly for kids and pets. Be sure that the cover can hold weight and remains in place when the pool is not in use.

Takeaways

A swimming pool should be a place for relaxation and fun, not a potential risk. By following these basic safety tips, you can protect your family and avoid accidents. Be alert, take precautions, and take pool safety seriously.

In case an accident does happen due to negligence, you might need the very best swimming pool accident lawyers on your side. However, prevention is better than having to live with the consequences of an accident. Be safe and enjoy your pool responsibly!


Looking For Home Resources?

Looking to enhance your living space and create a sanctuary that supports your well-being? Explore our home partners who offer a wide range of resources to elevate your home environment.


homeHLL x Editor


Common Household Water Leaks And How To Fix Them

Water leaks in the home can be a significant inconvenience, not to mention a potential source of costly repairs if left unaddressed. Whether you’ve noticed a small drip or a more serious flood, it’s crucial to understand the various types of water leaks that could arise and how to handle them promptly.


An essential first step is to pinpoint the origin of the leak, which could be due to a damaged pipe, malfunctioning appliance, or even a leaking fridge. In this article, we explore common household water leaks and provide practical advice on when to handle them yourself and when it’s time to call a local plumber for assistance.

No. 1

Leaking Faucets and Pipes

One of the most common types of water leaks is a leaking faucet. Although a dripping faucet might appear harmless, it can lead to considerable water waste over time, resulting in increased utility costs. Often, the leak is caused by a deteriorated washer or a problem with the faucet’s valve.

This is an easy fix for most homeowners, as it often just requires replacing the washer or tightening the valve. Similarly, leaking pipes under sinks or in other areas of your home can lead to water damage if not addressed.

If you spot a leak around the pipe joints or notice water pooling near a pipe, it’s essential to act quickly. Begin by shutting off the water supply to avoid additional damage, then examine the pipes for any issues.

You may be able to patch up small leaks with a temporary fix like pipe tape, but for more extensive damage, it’s advisable to seek professional help from a local plumber.

No. 2

Water Heater Leaks

Water heaters are another appliance prone to leaks. These leaks can occur at the tank’s base or around the connections to the pipes. The primary cause of water heater leaks is often corrosion or damage from sediment build-up inside the tank.

If you notice a pool of water around your water heater, it could be a sign that the tank is deteriorating, and you may need to replace it. If the leak originates from the connections, a local plumber can assist in replacing damaged connections or valves.

A malfunctioning water heater can also lead to inconsistent water temperature and reduced efficiency, meaning you might end up spending more on energy bills. Consistent maintenance of your water heater, such as flushing sediment buildup and inspecting the connections, can help prevent leaks from developing.

No. 3

Fridge Leaking Water

A common issue many homeowners face is a fridge leaking water, especially from the freezer or refrigerator compartment. Water pooling around the fridge can be due to a blocked defrost drain or a faulty door seal.

In some cases, the water may even be due to a blocked condensation line or an issue with the refrigerator's water filter. It’s essential to first unplug the fridge and inspect the drainage system and the door seal for any visible damage.

If the problem persists, there could be a more complex issue, such as a frozen defrost drain or broken water line. If you’re unable to solve the issue on your own, contacting a local plumber who is familiar with appliance-related leaks is a good option.

It’s critical not to ignore a fridge leaking water, as over time, it could lead to water damage in the surrounding areas or even mould growth in hidden spaces.


hellolovelyliving smell away odor neutralizing machine home

Smell Away

Say goodbye to stubborn odors with the Smell Away® Odor Neutralizing Machine! Perfect for homes, it eliminates pet smells, cooking odors, dampness, and more—leaving your space fresh and inviting.

Shop now for cleaner, healthier air!


No. 4

Leaking Washing Machines

Washing machines are another common appliance prone to leaks. Water can pool around the machine due to a variety of causes, including damaged hoses, worn-out seals, or overloading the machine.

If you spot water leaking from the washing machine, begin by checking the hoses for any signs of cracks or damage. Tightening or replacing the hoses may solve the issue.

Additionally, check the door seal to ensure it isn’t worn out or damaged, as this could cause leaks during the wash cycle. In some cases, the problem could be more complex, such as issues with the washing machine’s internal plumbing.

If tightening the hoses doesn’t solve the problem, or if you notice leaks from the machine's internal components, it’s best to call a professional plumber for assistance.

No. 5

Roof and Ceiling Leaks

While not often thought of as part of the plumbing system, roof and ceiling leaks can also cause significant water damage to your home. These leaks usually occur due to damaged roofing materials or clogged gutters, which prevent water from properly draining off the roof.

Water can infiltrate the roof and seep into the ceiling beneath. Regular upkeep is essential to prevent roof leaks. Be sure to clear gutters of debris and check the roof for any missing or damaged shingles.

If you observe any signs of a roof leak, such as water stains on the ceiling, it’s crucial to consult a professional roofer or plumber to evaluate the damage and carry out necessary repairs. If left untreated, roof leaks can lead to structural problems and mold development.

When to Contact a Local Plumber

While some small leaks can be fixed with basic DIY methods, it’s best to reach out to a local plumber when dealing with more significant issues. If you are unable to identify the source of the leak, if the leak is persistent despite your attempts at fixing it, or if it’s causing damage to your home, it’s time to call in a professional.

A qualified plumber possesses the knowledge and skills to resolve the issue promptly, preventing any additional damage.

Takeaways

Water leaks in the home are not merely a nuisance—they can lead to serious damage if not addressed in time. Whether it’s a leaking faucet, water heater, fridge, or washing machine, understanding the common causes and solutions for these leaks can help you protect your home and prevent costly repairs.

If you find yourself unable to fix the issue on your own, don’t hesitate to reach out to a local plumber to get your home back in top shape and avoid further water damage.

Looking For Home Resources?

Looking to enhance your living space and create a sanctuary that supports your well-being? Explore our home partners who offer a wide range of resources to elevate your home environment.


homeHLL x Editor


What Is The Best Hot Water System Type For The Gold Coast?

Choosing the right hot water system for your Gold Coast home is essential for comfort, energy efficiency, and cost savings. With various options available, it's important to consider the climate, energy sources, household size, and budget to determine the most suitable system.


In this article, we uncover the best hot water system type specifically designed for the unique climate and conditions of the Gold Coast region. We aim to provide you with informed insights that will help you make the right choice for your home heating needs.

For residents seeking prompt and professional service, Same Day Hot Water Service Gold Coast offers expert advice and installations tailored to your needs.

Types of Hot Water Systems

Understanding the different types of hot water systems can help you make an informed decision:

No. 1

Electric Hot Water Systems

These hot water systems utilize electric heating elements to effectively raise the temperature of water that is stored within a specialized tank.

Pros:

  • Lower Initial Cost: Generally more affordable to purchase and install.

  • Ease of Installation: Straightforward setup, especially if replacing an existing electric unit.

Cons:

  • Higher Operating Costs: This can be more expensive to run, particularly on continuous tariffs.

  • Environmental Impact: Dependent on electricity, which may come from non-renewable sources.

Suitability for Gold Coast:

While easy to install, the higher running costs may be a consideration for budget-conscious households.

No. 2

Gas Hot Water Systems

These hot water systems utilize natural gas or LPG as a reliable energy source to efficiently heat water, which is available in various options including storage tank models or instantaneous (tankless) units that provide hot water on demand.

Pros:

  • Energy Efficiency: Generally more efficient than electric systems.

  • Lower Operating Costs: Gas is often cheaper than electricity, leading to savings over time.

  • Continuous Hot Water: Tankless models provide hot water on demand.

Cons:

  • Higher Initial Cost: Especially for tankless models.

  • Gas Availability: Requires a gas connection, which may not be available in all areas.

Suitability for Gold Coast:

A viable option if gas is readily available, offering efficiency and potential cost savings.

No. 3

Solar Hot Water Systems

These hot water systems harness the power of solar energy to efficiently heat water, often enhanced by supplementary electric or gas boosters. This eco-friendly approach not only reduces energy costs but also promotes sustainable living practices.

Pros:

  • Eco-Friendly: Utilizes renewable energy, reducing carbon footprint.

  • Lower Operating Costs: Sunlight is free, leading to significant savings.

Cons:

  • High Initial Investment: Installation can be costly.

  • Weather Dependent: Efficiency can be affected by cloudy days, though boosters mitigate this issue.

Suitability for Gold Coast:

With abundant sunshine, solar systems are an excellent choice for environmentally conscious residents.


Bed Threads

Elevate your sleep sanctuary with Bed Threads—luxurious, 100% French flax linen bedding for ultimate comfort and style.

Shop now for the perfect night's sleep!


No. 4

Heat Pump Hot Water Systems

This innovative type of hot water system extracts valuable heat from the surrounding air in order to warm the water, functioning efficiently and effectively even in cooler temperatures. This design ensures optimal performance throughout the entire year, providing consistent access to hot water regardless of seasonal changes in climate.

Pros:

  • Energy Efficient: Uses less electricity compared to traditional electric systems.

  • Eco-Friendly: Lower greenhouse gas emissions.

Cons:

  • Higher Upfront Cost: More expensive to purchase and install.

  • Noise: Some units can be noisy during operation.

Suitability for Gold Coast:

An efficient option suitable for the mild Gold Coast climate.

Factors to Consider

When selecting the best hot water system for your Gold Coast home, consider the following:

  • Household Size: Larger families may require systems with higher capacities or continuous flow options.

  • Energy Efficiency: Opt for systems that offer long-term savings on energy bills.

  • Installation Space: Ensure adequate space is available for the system, especially for solar panels or large tanks.

  • Budget: Balance initial costs with ongoing operating expenses.

Takeaways

Determining what is the best hot water system type for the Gold Coast depends on your specific needs and circumstances.

Solar and heat pump systems are ideal for those prioritizing energy efficiency and environmental impact, while gas systems offer a balance between efficiency and cost. Electric systems, though less efficient, may be suitable for those with budget constraints.

Consulting with professionals, such as Same Day Hot Water Service Gold Coast, can provide personalized recommendations to ensure you choose the optimal system for your home.

Looking For Home Resources?

Looking to enhance your living space and create a sanctuary that supports your well-being? Explore our home partners who offer a wide range of resources to elevate your home environment.


homeHLL x Editor


How Much Does A Shower Cartridge Replacement Cost?

If you're experiencing a persistent leak or poor water flow, a faulty shower cartridge could be the cause. Understanding replacement costs and potential hidden expenses will help you manage your budget effectively. This guide outlines the key pricing factors and helps you decide between repairing or replacing your shower cartridge.


For detailed cost breakdowns and expert repair insights, visit Dan’s Plumbing for professional advice and step-by-step guidance on maintaining your shower system.

No. 1

Cost Range Overview

This section provides a breakdown of labor and material costs, helping you plan your budget accordingly.

  • Total Replacement Cost: $100 – $350 (includes parts, labor, and installation fees).

  • Cartridge Price: $10 – $80 (depends on material, brand, and valve type).

  • DIY Savings: If you replace it yourself, costs range from $40 – $120, reducing labor expenses.

Tip: Review these figures to determine if a DIY approach or professional service suits your situation.

No. 2

Labor Expense Details

Labor costs can vary significantly based on several factors, including the level of expertise and experience of the plumber, the specific location in which the work is being done, and the complexity of the installation process itself. Each of these elements plays a crucial role in determining the final cost of plumbing services.

Hourly Rates:

  • Plumber Fees: $75 – $160 per hour (rates depend on expertise and region).

  • Comparison Tip: Always get multiple quotes to find the best deal.

Average Work Duration:

  • Typical Time Frame: 30 minutes to 1 hour.

  • Estimated Labor Cost: $90 – $270, depending on job complexity.

DIY Savings:

  • Avoid labor fees by handling the replacement yourself.

  • Potential savings: $75 – $160 per hour.

No. 3

Key Cost Factors

Several factors influence shower cartridge replacement costs, including materials, labor, and accessibility.

  • Type & Material: Brass and ceramic cartridges last longer but cost more than plastic options.

  • Labor Charges: Service fees typically range from $90 – $270, depending on local rates.

  • Accessibility Issues: If the cartridge area is difficult to access, expect higher labor costs.

  • Warranty Coverage: Check if your cartridge has a lifetime warranty to offset replacement expenses.

  • Regional Variations: Prices differ by location (e.g., New York costs may be higher than Miami).

Understanding these factors helps you decide whether professional service or DIY is the right choice.


hellolovelyliving rejuvenation bathroom fixtures and hardware

Rejuvenation

Elevate your space with Rejuvenation's timeless bathroom plumbing fixtures – where style meets functionality.


No. 4

Cartridge Component Types

Different cartridges serve specific functions in shower systems:

  • Flow Cartridges: Control water speed and act as an on/off regulator.

  • Diverter Cartridges: Direct water between multiple shower outlets.

  • Thermostatic Cartridges: Maintain a steady water temperature, counteracting sudden pressure changes.

Tip: Regular maintenance and proper lubrication extend the lifespan of these components. For detailed installation tips, visit This Old House.

No. 5

Warranty Coverage Options

A solid warranty can save money on future repairs.

Here’s what to check:

  • Warranty Period: Many manufacturers offer lifetime warranties for residential use.

  • Ownership Terms: Most warranties are non-transferable and apply only to the original homeowner.

  • Coverage Scope: Typically covers leak-free and defect-free parts, but not labor costs.

  • Exclusions: Improper installation or abrasive cleaning may void the warranty.

  • Claim Process: Keep proof of purchase and ownership documentation for claims.

Tip: Always read warranty terms carefully to avoid unexpected costs.

No. 6

Hiring a Professional

Hiring a qualified expert not only ensures proper installation but also significantly reduces the risk of costly mistakes that can arise from inadequate knowledge or experience. Their expertise will help you navigate the complexities of the installation process with confidence.

Cost Considerations:

  • Average Replacement Cost: $275 (range: $100 – $400).

  • Plumber Hourly Rate: $75 – $160 per hour.

  • Survey Fees: Some professionals charge an assessment fee for complex jobs.

Preparation & Inspection:

  • Request at least three estimates before making a decision.

  • Ensure the plumber inspects the shower system before starting work.

  • Check HomeGuide for additional hiring tips.

Tip: Hiring a professional can prevent errors that might lead to future plumbing issues.

No. 7

Essential Steps Ahead

Before Replacing Your Shower Cartridge

  1. Evaluate costs (labor vs. DIY).

  2. Check warranty coverage to minimize expenses.

  3. Compare professional estimates to secure fair pricing.

  4. Act quickly if you notice signs of failure.

FAQ

Why does a shower cartridge fail?

  • Water pressure imbalances and mineral buildup cause deterioration.

  • Over time, O-rings and internal components may wear out or corrode.

What are the key signs of failure?

  • Constant Water Flow: A worn cartridge may let water drip continuously.

  • Stuck Faucet Handles: Corrosion or damage can cause stiff or immovable handles.

  • Temperature Fluctuations: Sudden hot and cold shifts suggest cartridge failure.

  • Reduced Water Pressure: Clogs or wear may impede water flow.

  • Leakage & Structural Damage: Unnoticed leaks can cause wall or ceiling stains.

How do you replace a faulty cartridge?

  1. Turn off the water supply.

  2. Remove the shower handle.

  3. Use proper tools to extract and replace the cartridge.

TAkeaways

By understanding cost factors, labor fees, and cartridge types, you can make an informed decision about repairing or replacing your shower cartridge. Whether you choose a DIY approach or hire a professional, maintaining your shower system prevents costly future repairs and ensures optimal water flow.

Visit this professional site to review expert advice. Act quickly to fix signs of failure, thereby safeguarding your investment and enhancing safety.

Looking For Home Resources?

Looking to enhance your living space and create a sanctuary that supports your well-being? Explore our home partners who offer a wide range of resources to elevate your home environment.


homeHLL x Editor


Big Moves, Small Spaces: Where Do Your Things Go?

Moving is exciting—until you realize your belongings don’t fit. Downsizing can feel like a puzzle, especially when shifting from a larger home to a smaller one. What stays, what goes, and where do you put the rest?


In Amarillo, TX, where families and professionals are moving into cozy homes and apartments, space is a common challenge. With rising housing costs and changing lifestyles, smart storage solutions matter more than ever.

Figuring out what to do with your things doesn’t have to be stressful. In this article, we share practical tips on organizing small spaces, making smart choices, and finding solutions for the things you’re not ready to part with.

No. 1

Why Are Homes Shrinking While Belongings Multiply?

If it feels like homes are getting smaller, that’s because they are. The average new home in the U.S. is nearly 10% smaller than it was a decade ago. Meanwhile, rent is rising, especially in cities.

In places like New York or San Francisco, people are paying premium prices for spaces barely larger than a parking spot. Even in more affordable areas like Amarillo, TX, families are moving into smaller homes, whether by choice or necessity.

But while homes shrink, the amount of stuff we own keeps growing. Online shopping has made it easier than ever to accumulate things we don’t need. Subscription services send new clothes, gadgets, and household items straight to our doors.

And let’s not forget the "just in case" mindset—keeping things because we might need them one day.

The result? People are living in tighter spaces, struggling to find room for their belongings. That’s why storage solutions are more important than ever.

If you’re facing a space crunch, just look up storage Amarillo TX to find reliable options that can help keep your home functional without forcing you to part with everything.

The goal isn’t just to store things but to store them smartly. The way you manage your space can make a huge difference in how comfortable your home feels.

No. 2

Smart Strategies for Fitting More in Less

When space is tight, every inch counts. Instead of piling things in corners or stuffing closets until they barely close, try these strategies to make the most of your space.

Think Vertical

Most people focus on floor space, but walls are underused real estate. Tall shelves, wall-mounted organizers, and even ceiling storage can help free up room. Hooks and pegboards are lifesavers in kitchens and entryways. Using vertical space keeps everyday items within reach while freeing up valuable floor area for essential furniture.

Invest in Multi-Use Furniture

A bed with built-in drawers. A coffee table that doubles as storage. A fold-out desk that disappears when not in use. These items are game-changers in small spaces. The more functions one piece can serve, the fewer things you need.

Multipurpose furniture allows you to stay organized without sacrificing style or comfort.  If you’re downsizing, consider incorporating cozy mid-century modern furniture—it’s known for clean lines, compact form, and practicality, making it ideal for smaller spaces.

Rotate Seasonal Items

If it’s summer, why keep winter coats and holiday decorations in your main closet? Pack them away and swap them out when needed. Under-the-bed storage bins work great for this, as do vacuum-sealed bags that reduce bulk.

Declutter with Purpose

Downsizing isn’t about getting rid of everything. It’s about making smart choices. Do you really need three sets of measuring cups? Five throw blankets? If something hasn’t been used in over a year, reconsider its place in your home.

Use Hidden Storage

Benches with compartments. Ottomans that open up. Stairs with built-in drawers. If your furniture isn’t working double duty, you’re missing a chance to maximize your space.

Managing a small home isn’t about limiting what you own—it’s about being strategic with how you store and use it.

No. 3

What to Keep, What to Let Go, and What to Store

When moving into a smaller space, every item should earn its place. The trick is knowing what stays, what goes, and what can wait.

What Stays

Keep the things you use daily. Kitchen essentials, work supplies, clothes that fit and get worn regularly—these deserve a spot in your home. Sentimental items are okay, but limit them to a reasonable amount. You don’t need to keep every childhood keepsake or every souvenir from past vacations.

What Goes

Let go of duplicates, broken items, and things that no longer serve a purpose. If you haven't used something in a year, chances are you won’t miss it. Donate, sell, or recycle what you can. Keeping clutter just because you might need it later usually leads to a crowded home.

What Waits

Some things are important but not for daily use. This includes seasonal decorations, extra furniture, and sentimental belongings you’re not ready to part with. If you don’t have space for these, storing them safely offsite is a smart option.

The key is balance — keeping what adds value while freeing yourself from unnecessary clutter.


Retold Recycling

Downsizing or decluttering? Simplify your life and recycle responsibly with Retold Recycling.

Ship in your unwanted textiles and make space sustainably.


No. 4

Why Managing Space Matters

A cluttered home doesn’t just make life inconvenient—it affects your mood, focus, and overall well-being. Studies show that messy spaces can increase stress and make it harder to concentrate. When your environment is chaotic, your mind feels the same way.

On the flip side, a well-organized space brings clarity and peace. It’s easier to relax, find what you need, and feel comfortable in your own home. That’s why space management isn’t just a practical skill — it’s a lifestyle choice.

As the housing market continues to shift, and more people embrace smaller living spaces, efficient organization will become even more important. Whether it’s through creative storage, downsizing with purpose, or using outside storage solutions wisely, finding ways to live well in limited space is key to making the most of any home.

The bottom line? Moving into a smaller home doesn’t mean you have to sacrifice comfort or style. With smart organization, creative storage, and a willingness to let go of what no longer serves you, even the smallest space can feel functional and inviting.

The challenge isn’t just about fitting things—it’s about rethinking what truly matters. Less space can mean fewer distractions, less clutter, and a more intentional way of living. So, whether you’re downsizing by choice or necessity, remember: the size of your home doesn’t define its value—how you use it does.

Takeaways

Downsizing doesn’t have to be overwhelming—it’s an opportunity to create a more functional and clutter-free space. With homes shrinking and belongings multiplying, smart storage solutions like vertical shelving and multi-functional furniture can help maximize every inch.

Decluttering with purpose ensures that only essential and meaningful items remain, while storage units provide a practical way to manage overflow. A well-organized home not only enhances efficiency but also improves mental clarity and relaxation.

Ultimately, downsizing is about intentional living—focusing on what truly matters and transforming any space into a comfortable, stylish, and stress-free home.

Looking For Home Resources?

Looking to enhance your living space and create a sanctuary that supports your well-being? Explore our home partners who offer a wide range of resources to elevate your home environment.


homeHLL x Editor


How To Make Unpacking Easier After A Move

Moving into a new home is exciting, but the process doesn’t end once the moving truck is unloaded. Unpacking can be just as time-consuming and overwhelming as packing, especially without a clear plan.


Without a strategy, boxes can pile up, making it take weeks or even months to fully settle in. Many homeowners focus all their energy on packing and organizing the move itself, only to feel drained when it comes time to unpack.

Instead of dealing with clutter and confusion, it’s helpful to have a structured approach. Breaking the process into smaller tasks, prioritizing essential rooms, and organizing as you unpack can make the transition much smoother.

For those moving into smaller homes or needing time to decide where everything should go, extra storage space can be a great solution. In places like Lexington, where people frequently relocate for work, school, or lifestyle changes, finding a flexible storage option can make unpacking much more manageable.

In this article, we explore several helpful ways to make the process of unpacking easier and more manageable after a move. By sharing insightful strategies, we aim to simplify what can often feel like an overwhelming task.

No. 1

Use Storage to Manage Unpacking at Your Own Pace

One of the biggest challenges of unpacking is dealing with too many boxes in a limited space. When every room is filled with packed items, it becomes difficult to move around and set up furniture properly.

Instead of trying to unpack everything at once, placing non-essential items in storage can help create a more organized process. Self-storage Lexington facilities provide a convenient way to store extra furniture, seasonal decorations, and items that aren’t immediately needed.

This allows you to focus on unpacking the essentials first while keeping non-urgent belongings in a secure space. Using a storage unit is particularly helpful for those who are downsizing or transitioning between homes.

If certain furniture pieces don’t fit but may be useful later, a storage unit can prevent homeowners from making rushed decisions about selling or donating them. Additionally, it provides a temporary solution for those wanting to renovate or redesign their space.

No. 2

Start with the Essentials and Prioritize Rooms

Unpacking everything at once can feel overwhelming, so it’s important to focus on essential items first. Before moving, pack a separate box with necessities such as toiletries, medications, chargers, basic kitchen supplies, and a few changes of clothes.

This ensures that daily routines can continue smoothly while the rest of the unpacking process takes place. Once essentials are easily accessible, unpacking by room can make the process more manageable.

No. 3

Prioritize High-Use Rooms First

  • The Kitchen – Setting up kitchen essentials allows for easy meal preparation, reducing the need to eat out.

  • The Bedrooms – Making beds and organizing basic clothing provides a comfortable place to rest after a long day of unpacking.

  • The Bathroom – Having toiletries, towels, and cleaning supplies in place helps maintain daily hygiene routines.

By focusing on these rooms first, you can gradually move on to less urgent spaces, such as the living room, garage, or guest rooms.

No. 4

Label and Organize Boxes for a Smooth Process

One of the most time-saving steps during unpacking is having a clear labeling system. Boxes that are properly labeled with their contents and designated rooms make it much easier to find specific items without having to open everything at once.

A good approach is to label each box clearly on multiple sides and use color-coded labels or stickers to identify different rooms. Keeping an inventory list can also help track important items.

For those who prefer a digital approach, using moving apps or spreadsheets can help organize box contents and ensure that nothing gets misplaced. Additionally, unpacking by category rather than randomly opening boxes can speed up the process.

For example, unpacking all kitchen items at once instead of mixing them with living room decor makes setting up each space more efficient. This method reduces clutter and helps maintain order throughout the process.


Public Storage

Discover secure, reliable, and easily accessible storage solutions tailored to your needs.

Whether you're moving, decluttering, or in need of extra space, Public Storage offers a wide range of unit sizes, climate-controlled options, and 24/7 security to keep your belongings safe and accessible when you need them.


No. 5

Declutter and Arrange as You Unpack

Unpacking is the perfect opportunity to get rid of unnecessary items. Even after decluttering before the move, there may still be things that no longer fit the new home or aren’t needed.

Instead of holding onto items that take up space, donating or selling them can help create a cleaner, more organized living area. As boxes are unpacked, it’s important to find designated spaces for each item rather than leaving them scattered around.

Setting up furniture, organizing storage solutions, and arranging decorations early on can prevent clutter from building up. For those moving into smaller homes, maximizing space is key.

Ways to Maximize Space

  • Use vertical storage options like shelves and wall-mounted organizers.

  • Invest in multi-functional furniture such as storage ottomans and foldable tables.

  • Keep frequently used items accessible while storing less-used belongings in closets or storage bins.

Taking the time to organize properly from the beginning prevents the need for re-organizing later and makes settling in much easier.

No. 6

Staying Motivated and Avoiding Burnout

Unpacking can take time, so it’s important not to rush the process. Setting realistic goals, such as unpacking one or two rooms per day, can help avoid burnout.

Taking short breaks, staying hydrated, and playing music while unpacking can make the experience more enjoyable. Getting help from family or friends can also speed up the process and make it feel less overwhelming.

Assigning tasks and working together as a team can turn unpacking into a more efficient and even fun activity. For those with busy schedules, unpacking over several days or weeks can be a practical approach.

Prioritizing essentials first and gradually organizing the rest ensures that the process is manageable without unnecessary stress. Unpacking after a move doesn’t have to be stressful or overwhelming.

Takeaways

With the right approach, you can make the process smooth and efficient. Using a storage unit can help manage extra items while settling into the new home.

Prioritizing essentials, labeling boxes clearly, and organizing as you go can make unpacking faster and easier. Decluttering during the process prevents unnecessary items from taking up space, and staying motivated helps maintain momentum.

By following these strategies, you can transition into your storagenew home with less stress and more ease. With a little planning and organization, you can enjoy your new space sooner and feel truly at home.

Looking For Home Resources?

Looking to enhance your living space and create a sanctuary that supports your well-being? Explore our home partners who offer a wide range of resources to elevate your home environment.


homeHLL x Editor


The Joy Of Year-Round Celebrations: Making Every Day Special With Fresh Blooms

Embracing the thoughtful charm of a flower subscription has become the secret weapon of those who love to celebrate life’s moments with grace and ease. A dedicated floral delivery service ensures that every special occasion receives the blooming touch it deserves, transforming ordinary days into unforgettable experiences.


From enhancing home décor to strengthening personal connections, a recurring flower subscription brings beauty, organization, and heartfelt gestures into everyday life. In this article, we share the joy of year-round celebrations, where the beauty of fresh blooms significantly enhances the entire experience, creating an atmosphere filled with vibrancy and love.

No. 1

Creating Year-Round Beauty with Fresh Blooms

The allure of a monthly bloom delivery lies in its ability to keep a home feeling fresh, vibrant, and inviting. Each arrangement introduces new colors, textures, and fragrances, reflecting the changing seasons while maintaining an elegant and harmonious aesthetic.

Why a Flower Subscription Elevates Home Décor

  • Consistent Freshness – A steady stream of seasonal flowers ensures that living spaces always feel lively and well-curated.

  • Seasonal Transitions – Spring tulips give way to summer sunflowers, followed by autumn dahlias and winter amaryllis, creating a natural flow of beauty throughout the year.

  • Effortless Elegance – Whether placed on a dining table, entryway, or home office, each bouquet enhances the ambiance of any room.

A flower subscription transforms a home into a living, breathing work of art, where each delivery tells a new seasonal story.

No. 2

The Art of Never Missing a Special Moment

A seasonal flower subscription serves as a built-in reminder system for important dates, ensuring that birthdays, anniversaries, and milestones are always celebrated with stunning floral arrangements.

How a Floral Subscription Enhances Celebrations

  • Automated Gifting – Never worry about forgetting an important occasion—flowers arrive right on time.

  • Personalized Touch – Choose custom arrangements that reflect the recipient’s favorite blooms and colors.

  • Surprise and Delight – Unexpected floral deliveries bring joy and appreciation to loved ones throughout the year.

By integrating a flower subscription into a celebration calendar, every special moment is marked with beauty and thoughtfulness.

No. 3

Personal Touch in Modern Living: Elevating Home Styling

A curated flower delivery service brings the expertise of floral design into the home, allowing for creative styling and ever-changing focal points.

Ways to Incorporate Fresh Flowers into Home Décor

  • Dining Table Centerpieces – A rotating selection of seasonal blooms creates a stunning focal point for meals and gatherings.

  • Entryway Elegance – A fresh bouquet in the foyer offers a warm welcome to guests.

  • Bedroom Serenity – Soft, delicate flowers like lavender or peonies add a calming touch to personal spaces.

With each new delivery, homeowners can reimagine their space, keeping interiors fresh, stylish, and inspiring.


hellolovelyliving boqs wildflower floral subscription

Bouqs

Bouqs has farm-fresh flowers for every type of moment including monthly subscriptions.


No. 4

Building Lasting Connections Through Thoughtful Gestures

A continuous flower service fosters meaningful connections by ensuring that loved ones always feel cherished and appreciated.

How a Flower Subscription Strengthens Relationships

  • Surprise Deliveries – Sending flowers to a friend’s workplace or a family member’s home creates unexpected moments of joy.

  • Tradition of Thoughtfulness – A recurring floral gift becomes a cherished ritual, reinforcing love and appreciation.

  • Memory-Making Moments – Fresh blooms serve as beautiful backdrops for family dinners, morning coffee rituals, and intimate celebrations.

Flowers have a unique ability to convey emotions, making them a timeless and heartfelt way to stay connected.

No. 5

Practical Elegance: Organization Meets Beauty

A home flower subscription seamlessly integrates beauty with organization, ensuring that celebrations and décor updates happen effortlessly.

How a Floral Subscription Simplifies Life

  • Digital Calendar Integration – Syncing deliveries with a digital planner ensures that every celebration is perfectly timed.

  • Consistent Home Aesthetic – A tailored floral program maintains a home’s style and seasonal harmony.

  • No Last-Minute Scrambling – With flowers arriving automatically, there’s no need for last-minute gift shopping.

By combining practicality with elegance, a flower subscription becomes an effortless way to enhance daily life.

No. 6

Living in Full Bloom: The Everyday Joy of Fresh Flowers

Beyond special occasions, regular flower deliveries provide daily inspiration, encouraging creativity and enhancing well-being.

The Unexpected Benefits of a Flower Subscription:

  • Creative Inspiration – Fresh blooms can be used for photography, floral pressing, or DIY décor projects.

  • Mood Enhancement – Studies show that flowers reduce stress, boost happiness, and promote relaxation.

  • A Connection to Nature – Bringing botanical beauty indoors fosters a sense of peace and tranquility.

With each new bouquet, a home is infused with fresh energy, creativity, and serenity.

Takeaways

A flower subscription service does more than just keep your home beautiful – it creates a framework for celebrating life's moments both big and small. By maintaining this consistent connection to fresh blooms, you ensure that every special occasion is marked with beauty while transforming everyday moments into celebrations worth remembering.

Why a Flower Subscription is a Must-Have

  • Ensures every special occasion is celebrated with elegance.

  • Brings seasonal beauty into the home year-round.

  • Strengthens personal connections through thoughtful gestures.

  • Simplifies organization while enhancing home aesthetics.

  • Provides daily inspiration and promotes well-being.

By maintaining a consistent connection to fresh blooms, homeowners can transform everyday moments into celebrations worth remembering—one bouquet at a time.

Looking For Home Resources?

Looking to enhance your living space and create a sanctuary that supports your well-being? Explore our home partners who offer a wide range of resources to elevate your home environment.


homeHLL x Editor


Embracing Cozy Living: Creating Your Perfect Garden Retreat

The growing trend of garden suite construction has redefined how homeowners view their outdoor spaces, turning backyards into functional, stylish, and serene retreats. Modern garden suite construction and design seamlessly blend indoor comfort with outdoor beauty, offering a perfect balance of aesthetic appeal and practicality.


With thoughtful design, customized features, and innovative solutions, these tiny backyard paradises are becoming a sought-after addition to homes, providing versatile living spaces that enhance everyday life.

In this article, we share how talented designers thoughtfully create a cozy yet functional garden suite that beautifully fosters relaxation and rejuvenation for all who seek a serene escape from the hustle and bustle of daily life.

No. 1

Crafting a Tiny Paradise: Designing with Purpose

When backyard living suite specialists embark on a project, their goal is to create a space that feels both intimate and expansive. By incorporating large windows, French doors, and open layouts, these compact sanctuaries invite natural light while offering picturesque views of surrounding gardens.

Key Design Elements for a Spacious Feel

  • Floor-to-ceiling windows to enhance brightness and create a seamless indoor-outdoor connection.

  • French doors that open to lush greenery, extending the living space into nature.

  • Neutral color palettes that make interiors feel airy and open.

These design choices ensure that every square foot of a garden suite feels light, inviting, and effortlessly stylish.

No. 2

Thoughtful Details: The Magic Lies in the Design

Custom garden suite creators understand that the inherent charm of these beautifully designed spaces comes from the thoughtfully and carefully curated details that not only enhance functionality but also elevate aesthetics in meaningful ways. Each element is intentionally selected to create a harmonious blend that resonates with the overall vision of tranquil living.

Essential Features That Elevate the Space

  • Built-in window seats adorned with plush cushions, offering cozy reading nooks.

  • Cleverly concealed storage solutions that maintain a clutter-free environment.

  • Vintage-inspired fixtures that add a timeless, elegant touch.

  • Soft, natural textures that create a warm and inviting ambiance.

By integrating these elements, garden suites become not just functional spaces but enchanting retreats that exude comfort and charm.

No. 3

Bringing the Outdoors In: A Celebration of Nature

One of the defining characteristics of modern garden suites is their remarkable ability to seamlessly integrate nature into the overall design aesthetic. This harmonious blend not only enhances the beauty of the living space but also fosters a deeper connection between the inhabitants and the natural environment surrounding them.

Ways to Blend Indoor Comfort with Outdoor Beauty:

  • Herb gardens near kitchen windows, allowing fresh ingredients to be within arm’s reach.

  • Breakfast nooks overlooking blooming flowers, creating a serene morning routine.

  • Indoor planters and greenery, bringing a touch of nature inside.

  • Natural wood and stone finishes, reinforcing a connection to the outdoors.

By prioritizing nature-inspired design, these spaces enhance well-being and relaxation, making them the perfect retreat for homeowners.


hellolovelyliving houzz home design architecture

HOuzz

Make your home project a reality. Find inspiration, products, and the pros to make it happen - all in one place.


No. 4

Creating Cozy Corners: Multifunctional Spaces with Character

Modern tiny garden home builders have mastered the intricate art of designing multifunctional nooks that effortlessly serve as both practical and charming spaces for various activities and relaxation. These thoughtfully crafted areas seamlessly blend aesthetics with functionality, providing homeowners with delightful spots to unwind, work, or connect with nature.

Examples of Cozy, Functional Spaces:

  • A reading corner with a vintage armchair, draped in a soft throw, positioned to catch the morning light.

  • A compact workspace with a foldable desk and built-in shelving, perfect for remote work.

  • A daybed with hidden storage, offering both seating and additional organization.

  • A comfy sectional couch that hugs the wall, providing ample seating without overwhelming the space—ideal for a mix of lounging and entertaining.

These thoughtful design choices transform simple spaces into storybook settings, making garden suites feel both magical and highly functional.

No. 5

Seasonal Adaptability: A Space for Every Time of Year

Boutique garden suite designers meticulously consider how these unique outdoor spaces will seamlessly transition through the various seasons of the year, ensuring comfort and enjoyment throughout every month.

Design Features for Seasonal Versatility:

  • Retractable glass walls for a breezy summer feel.

  • Cozy fireplaces or heated flooring for warmth during winter.

  • Insulated walls and energy-efficient windows to maintain a comfortable indoor climate.

  • Outdoor patios with pergolas, offering shade in summer and shelter in cooler months.

By incorporating seasonal adaptability, these spaces remain inviting and functional no matter the time of year.

No. 6

Innovative Storage Solutions: Maximizing Space Without Compromise

Since garden suites are compact in design, implementing clever storage solutions is essential to maintaining a spacious, orderly, and organized environment that feels open and inviting. By maximizing storage efficiency, you can ensure that every inch of your garden suite contributes to both functionality and aesthetic appeal.

Smart Storage Ideas for Small Spaces

  • Hidden drawers beneath window seats, keeping essentials tucked away.

  • Vintage-style cabinets that add character while providing ample storage.

  • Multifunctional furniture, such as ottomans with built-in compartments.

  • Floating shelves and vertical storage, optimizing wall space.

These creative storage solutions ensure that organization becomes part of the design, rather than an afterthought.

No. 7

Personalized Touches: Making the Space Uniquely Yours

A garden retreat should beautifully reflect the unique personality and vibrant lifestyle of its owner. Thoughtful customization allows homeowners to infuse their cherished space with personal charm, creating an inviting atmosphere that speaks to their individuality and preferences.

Ways to Personalize a Garden Suite

  • Incorporate family heirlooms or antique furniture for a sentimental touch.

  • Create a gallery wall with your favorite artwork or travel photos.

  • Design a cozy tea or coffee station, perfect for quiet mornings.

  • Add soft lighting with fairy lights or lanterns, enhancing the ambiance.

These personalized elements make a garden suite feel like a true extension of the home, filled with warmth and character.

Takeaways

The evolution of garden suite design has transformed these spaces into more than just functional additions—they are magical retreats that enhance daily life. With thoughtful layouts, innovative storage, and seamless indoor-outdoor integration, these charming havens prove that small spaces can hold big dreams.

Why Garden Suites Are the Future of Backyard Living

  • They offer a perfect blend of comfort, style, and practicality.

  • They create a serene retreat for relaxation, work, or entertaining.

  • They maximize space while maintaining a cozy, inviting atmosphere.

  • They celebrate nature, bringing the beauty of the outdoors inside.

As more homeowners embrace the garden suite lifestyle, these enchanting spaces continue to redefine backyard living, proving that every square foot can be filled with charm, functionality, and endless possibilities.

Looking For Home Resources?

Looking to enhance your living space and create a sanctuary that supports your well-being? Explore our home partners who offer a wide range of resources to elevate your home environment.


homeHLL x Editor


Making Your Home A Happier, More Joyful Place

Your home should be your favorite place on the planet. After all, you’ll have spent a lot of money getting your hands on the keys — it’s reasonable that you should expect that you wouldn’t trade it for anywhere else.


Alas, things don’t always work that way. There’s no shortage of things that can impact the joy you feel while at home. Maybe your home is becoming overly dark and cluttered, or what you do while you’re there is impacting your happiness.

Whatever it is — if your home is not lifting your heart and spirit, then it’s time to take action. In this article, we’ll run through a few handy strategies for revitalizing your property with a healthy dose of joy.

No. 1

Add Greenery

Looking for a quick and easy way to make your house a happier place to be? Then look at adding some plants and fresh flowers. Studies have shown that plants can do wonders for improving your overall well-being, including boosting your happiness levels and purifying your home’s air.

Plus, they’ll simply help to make your house look better. That’s a large number of benefits for something that is quick to add to your home and only requires a little bit of maintenance.

No. 2

Increase Natural Light

You’ll be full of joy if you can wake up to a house filled with sunshine on those beautiful spring and summer mornings. But of course, you can only have that experience if natural light is able to pass into your home. Everything from outdated windows to the color of the paint on your walls can impact the brightness of your home, but these are things that you can easily change.

If your windows don’t let in more sunshine even after thorough cleaning, then take a look at Window Nation custom windows — that’ll ensure as much light as possible enters your property. You can also paint your walls a light, neutral color, and also hang a few mirrors in the areas where sunshine comes in; they’ll help reverberate the light around your home. 


Terrain

Discover the beauty of nature with Terrain’s curated selection of plants. From lush greenery to blooming florals, find the perfect touch for your home or garden!


No. 3

Get to Know Your Neighbors

There’s a lot of joy that can come from feeling like you live in a community. Alas, modern society doesn’t push us towards community; if anything, we’re pushed in the opposite direction.

You’ll enjoy your home much more if you get to know your neighbors, so why not look at hosting a BBQ for your street? You might just discover that your future best friend has been living next door to you the entire time.

No. 4

Joyful Activities

Finally, take a look at what you’re doing while you’re at home. If you’re simply scrolling through Facebook or Instagram, then you can’t be all that surprised if you’re not overly happy while at home.

Replace the time you spend looking at your screen with positive activities such as yoga, meditation, journaling, or streaming the best shows, and you’ll find that your home quickly becomes a place that nourishes your heart and spirit. Remember — happiness is an activity, not a state of being.

Takeaways

Adding joy to your home is about cultivating an environment that reflects your authentic self and nurtures your spirit. By incorporating elements that resonate with your personal preferences—be it vibrant colors, meaningful art, or cherished items—you create a space that uplifts and inspires.

Emphasizing mindful practices, such as decluttering, incorporating plants, or dedicating corners for relaxation, can enhance the overall atmosphere. Ultimately, a joyful home serves as a sanctuary that supports your journey of self-discovery and transformation, fostering a deeper sense of peace and well-being in your everyday life.

Looking For Home Resources?

Looking to enhance your living space and create a sanctuary that supports your well-being? Explore our home partners who offer a wide range of resources to elevate your home environment.


homeHLL x Editor


Essential Plumbing Installations For A Cozy Home

A reliable plumbing system is essential for maintaining a comfortable and efficient home. Unexpected leaks, inefficient fixtures, and outdated installations can disrupt your daily routine and lead to costly repairs.


By upgrading key plumbing components and implementing proactive maintenance, you can enhance your home’s water efficiency, durability, and overall functionality. In this guide, we provide expert insights into essential plumbing upgrades, from installing modern fixtures to integrating smart water monitoring systems.

In addition, when you encounter persistent plumbing issues in your home, you can always get a plumber to help promptly to effectively resolve these complications. Their specialized knowledge and skills ensure that the problem is addressed thoroughly, giving you peace of mind.

No. 1

Enhance Your Shower Experience with a New Showerhead

Upgrading your showerhead can significantly improve your daily routine, providing better water pressure, efficiency, and comfort.

Follow these steps to ensure a smooth installation and maximize your shower’s performance:

Steps for Installing a New Showerhead

  1. Choose the Right Model – Select between fixed, handheld, or dual showerheads, considering water efficiency and customizable spray settings.

  2. Gather Necessary Tools – Have an adjustable wrench, Teflon tape, a clean cloth, and a strap wrench ready for a seamless installation.

  3. Prepare the Shower Arm – Remove old tape and debris from the shower arm threads to ensure a secure, leak-free connection.

  4. Attach the New Showerhead – Hand-screw the new head, then tighten it gently with a wrench. Test for leaks by running water through the fixture.

  5. Maintain Regularly – Soak the showerhead in vinegar periodically to remove mineral deposits and maintain an effective spray pattern.

By following these steps, you can enjoy a refreshing, high-performance shower while improving your bathroom’s water efficiency.

No. 2

Install a Water Softener for Better Water Quality

A water softener plays a crucial role in helping to protect your plumbing system by significantly reducing mineral buildup over time. This reduction not only helps to extend the lifespan of your appliances but also improves overall water efficiency, ensuring that your home’s water system operates at its best.

Installation Guidelines

  • Shut Off the Main Water Supply – Ensure pipes meet size specifications before installing a modern water softener.

  • Choose the Right Location – Install the unit in a dry, level area near the water meter, ensuring proper ventilation and accessibility.

  • Follow Manufacturer Instructions – Carefully connect the inlet and outlet ports, restore water flow gradually, and check for leaks.

A properly installed water softener enhances water quality, prevents pipe corrosion, and improves the performance of household appliances.

No. 3

Integrate Smart Water Monitoring Systems

Smart water monitoring systems are designed to provide real-time insights into your home’s water usage, effectively helping you detect leaks early and prevent potentially costly damage. By keeping track of your water consumption patterns, these systems offer valuable information that can help you make informed decisions about your water management and conservation efforts.

Key Steps for Smart Water Monitoring

  • Establish Supply Lines – Use outdoor-rated pipes with a slight slope to maintain optimal drainage and prevent freezing.

  • Secure Plumbing Connections – Route supply lines through walls, using thread adapters and plumber’s tape for a leak-proof seal.

  • Create Effective Drainage – Install drain pipes with proper adapters and slope to channel water safely into a dry well or designated drainage area.

  • Follow Best Practices – Insulate pipes in unheated areas, secure fittings firmly, and test for leaks before finalizing the installation.

  • Plan for Maintenance – Regularly inspect and maintain smart monitoring devices to ensure accuracy and prompt detection of potential water issues.

By implementing smart water monitoring, you can prevent water waste, reduce utility costs, and protect your home from unexpected plumbing failures.


hellolovelyliving rejuvenation bathroom plumbing fixtures

Rejuvenation

Elevate your space with Rejuvenation's timeless bathroom plumbing fixtures – where style meets functionality.


No. 4

Install an Outdoor Sink for Convenience

An outdoor sink significantly enhances your garden area or backyard kitchen, providing seamless and convenient access to water for a variety of activities such as cleaning, cooking, and gardening tasks. This addition not only elevates the functionality of your space but also encourages a more enjoyable and efficient outdoor experience.

Installation Essentials

  • Ensure Proper Slope and Drainage – Position the sink with a slight slope to prevent water pooling and ensure efficient drainage.

  • Select an Optimal Location – Choose a spot near existing water sources, sheltered from extreme weather conditions.

  • Use Durable Materials – Install PVC pipes for outdoor durability and attach shutoff valves at key points to maintain consistent water pressure.

A well-installed outdoor sink adds convenience and functionality to your outdoor space while ensuring long-term durability.

No. 5

Upgrade Your Toilet for Efficiency and Comfort

Modern toilet upgrades significantly enhance water efficiency, improve hygiene standards, and offer added convenience, ultimately making your bathroom space more functional, user-friendly, and eco-friendly. Investing in these modern solutions not only benefits your home but also contributes positively to the environment.

Advanced Toilet Features

  • Water-Efficient Designs – High-efficiency toilets use less water per flush, reducing consumption and lowering utility bills.

  • Dual-Flush Options – Provides partial and full flush settings, helping conserve water based on usage.

  • Smart Features – Upgrade to touchless flushing, heated seats, and built-in bidets for enhanced hygiene and comfort.

  • Durable Materials – Choose high-quality ceramic or porcelain for long-lasting performance.

  • Regular Maintenance – Inspect seals, valves, and internal components to ensure optimal functionality.

By integrating modern toilet technology, you improve bathroom efficiency while reducing water waste.

No. 6

Select the Right Piping Material for Your Home

Choosing the best piping material is crucial as it ensures long-term durability, enhanced efficiency, and notable cost-effectiveness for your home’s plumbing system over time. Selecting the right materials not only contributes to optimal functionality but also helps to prevent unexpected repairs, thereby providing peace of mind.

Comparison of Piping Materials

  • Copper Pipes – Highly durable and resistant to corrosion, but more expensive.

  • PVC Pipes – Affordable, lightweight, and resistant to chemical corrosion.

  • PEX Pipes – Flexible, easy to install, and resistant to freezing, making them ideal for modern plumbing systems.

  • Galvanized, Cast Iron, and Brass – Suitable for specific applications based on durability and water pressure needs.

Selecting the right piping material enhances water flow, reduces maintenance costs, and ensures long-lasting performance.

No. 7

Considerations for Installing a Water Heater

A new water heater significantly enhances energy efficiency and ensures a reliable, consistent hot water supply for your home, making daily tasks such as bathing, cooking, and cleaning much more convenient and enjoyable.

Key Installation Factors

  • Pre-Installation Checks – Measure space and verify system compatibility before installation.

  • Safety and Code Compliance – Follow modern plumbing codes, ensure proper venting, and maintain adequate clearance.

  • Energy Efficiency – Choose tankless water heaters for on-demand heating and lower energy consumption.

  • Routine Maintenance – Inspect valves, vent systems, and heating elements to maintain efficiency.

A well-installed water heater enhances home comfort while reducing energy costs.

No. 8

Takeaways: Elevate Your Home’s Plumbing System

Upgrading your plumbing system enhances your home’s efficiency, safety, and comfort. By implementing modern fixtures, smart monitoring, and high-quality materials, you can prevent costly repairs and improve water conservation.

Here are the key takeaways:

  • Upgrade showerheads, toilets, and water heaters for better efficiency.

  • Install smart water monitoring systems to detect leaks early.

  • Choose durable piping materials for long-lasting performance.

  • Maintain proactive plumbing care to prevent unexpected issues.

By making informed plumbing upgrades, you create a more reliable, stress-free home environment. Explore expert solutions and take the next step toward enhancing your home’s plumbing system today.

Looking For Home Resources?

Looking to enhance your living space and create a sanctuary that supports your well-being? Explore our home partners who offer a wide range of resources to elevate your home environment.


homeHLL x Editor


What To Look For In Expert Residential Roofing Services For Homes

Your home’s roof is one of its most critical components, providing protection, insulation, and aesthetic appeal. Whether you need a new roof installation, repairs, or maintenance, choosing the right residential roofing services for your home is essential to ensure quality, durability, and long-term performance.


With so many roofing companies available, it can be challenging to determine which one is the best fit for your needs. In this guide, we’ll explore the key factors to consider when selecting an expert residential roofing service, ensuring your home remains safe, secure, and visually appealing.

No. 1

Experience and Expertise in Residential Roofing

When hiring a roofing contractor, experience matters. A well-established company with years of expertise is more likely to provide high-quality workmanship and reliable service.

What to Look For

  • Years in Business – A company with at least five to ten years of experience demonstrates stability and expertise.

  • Specialization in Residential Roofing – Ensure the contractor specializes in home roofing, as residential and commercial roofing have different requirements.

  • Portfolio of Past Work – A reputable company should provide examples of completed projects and customer testimonials.

No. 2

Proper Licensing, Insurance, and Certifications

A trustworthy roofing company should possess all the necessary licenses, insurance coverage, and certifications required to operate legally within the industry, ensuring both compliance with regulations and protection for homeowners against potential liability. This level of professionalism not only reflects their qualifications but also instills confidence in their ability to handle various roofing projects safely and effectively.

Essential Credentials

  • State License – Verify that the contractor is licensed to perform roofing work in your area.

  • Insurance Coverage – Ensure they carry liability insurance and workers' compensation insurance to protect you from accidents or damages.

  • Manufacturer Certifications – Many top roofing manufacturers, such as GAF, Owens Corning, and CertainTeed, certify contractors who meet their high standards.

Ask for proof of licensing and insurance before signing any contract.

No. 3

Quality Roofing Materials and Options

The durability and longevity of your roof depend on the materials used. A professional roofing service should offer high-quality materials that suit your home’s style, climate, and budget.

Popular Roofing Materials

  • Asphalt Shingles – Affordable, durable, and available in various colors and styles.

  • Metal Roofing – Long-lasting, energy-efficient, and resistant to extreme weather.

  • Tile Roofing – Elegant, fire-resistant, and perfect for Mediterranean or Spanish-style homes.

  • Slate Roofing – Highly durable and luxurious but requires a higher investment.

A reputable contractor will explain the pros and cons of each material and help you choose the best option for your home.


hellolovelyliving rejuvenation outdoor hardware exterior home doorway entrance

Rejuvenation

Rejuvenation believes in the power of thoughtful design - explore their extensive range of outdoor hardware, including stylish accessories that add character and charm to your home's exterior.


No. 4

Transparent Pricing and Detailed Estimates

A reputable and professional roofing company should always provide clear, transparent, and upfront pricing structures that are easy to understand, ensuring that there are absolutely no hidden fees or unexpected costs lurking in the fine print.

What to Expect in a Roofing Estimate

  • Material Costs – Breakdown of the materials required for the project.

  • Labor Costs – The cost of skilled labor for installation or repairs.

  • Timeline – Estimated start and completion dates.

  • Warranty Information – Details on material and workmanship warranties.

Get at least three quotes from different roofing companies to compare pricing, services, and warranties.

No. 5

Strong Warranties and Guarantees

A reliable roofing company will confidently stand behind its work by offering comprehensive warranties that cover both the materials used and the labor provided. This commitment not only demonstrates their dedication to quality but also gives homeowners peace of mind, knowing that they are protected against potential issues that may arise after the installation is complete.

Types of Roofing Warranties

  • Manufacturer Warranty – Covers defects in roofing materials, typically lasting between twenty and fifty years.

  • Workmanship Warranty – Covers installation errors, usually lasting between five and ten years.

Read the warranty terms carefully and ensure you understand what is covered.

No. 6

Customer Reviews and Reputation

A company’s reputation speaks volumes about its reliability, trustworthiness, and overall quality of service provided to its customers. The way an organization is perceived in the marketplace can significantly influence not only its success but also customer loyalty and satisfaction.

Where to Check Reviews

  • Google Reviews – Look for companies with high ratings and positive feedback.

  • Better Business Bureau (BBB) – Check for accreditation and complaint resolution history.

  • Yelp and Angi – Read customer experiences and testimonials.

Ask for references from past clients and contact them to inquire about their experience.

No. 7

Safety Standards and Compliance

Roofing is an inherently dangerous job, and maintaining safety should be a top priority for any contractor working in this demanding field. Proper precautions and safety measures are essential to ensure the well-being of workers and to minimize the risks associated with the various hazards they may encounter on the job.

Safety Measures to Look For

  • OSHA Compliance – Ensure the company follows Occupational Safety and Health Administration guidelines.

  • Proper Equipment – Contractors should use harnesses, helmets, and fall protection gear.

  • Trained Crew – Workers should be certified and experienced in safe roofing practices.

No. 8

Local Knowledge and Understanding of Climate

A roofing contractor who is well-versed and experienced with the specific climate conditions in your local area can provide valuable recommendations regarding the most suitable materials and appropriate installation techniques. These suggestions are essential for ensuring that your roof can effectively withstand the various weather conditions that are typically encountered in your region.

Why Local Expertise Matters

  • Knowledge of Local Building Codes – Ensures compliance with regulations.

  • Understanding of Weather Challenges – Helps select materials that resist rain, snow, wind, and heat.

  • Faster Response Time – Local contractors can provide quick service and emergency repairs.

No. 9

Emergency Roofing Services and Repairs

Unexpected roofing issues, such as leaks, storm damage, or fallen debris, require immediate attention. A reliable roofing company should offer emergency repair services to prevent further damage to your home.

Signs You Need Emergency Roof Repairs

  • Leaks or Water Damage – Stains on ceilings or walls.

  • Missing or Damaged Shingles – Exposed underlayment or roof decking.

  • Sagging Roof – Indicates structural issues or trapped moisture.

Choose a roofing company that provides emergency services for urgent repairs.

No. 10

Professionalism and Communication

A roofing contractor should consistently demonstrate professionalism, be highly responsive, and maintain open lines of communication that make it easy for clients to connect with them throughout every stage of the project.

Signs of a Professional Roofing Company

  • Prompt Responses – Answers calls and emails quickly.

  • Clear Communication – Explains the process and addresses concerns.

  • Respect for Property – Keeps the worksite clean and minimizes disruption.

If a contractor is unresponsive or vague, consider it a red flag.

Takeaways

Selecting the right residential roofing service is crucial for ensuring the safety, durability, and aesthetic appeal of your home. By considering experience, licensing, materials, pricing, warranties, reputation, and safety standards, you can make an informed decision and invest in a roof that lasts for decades.

Here are the key takeaways:

  • Hire an experienced and licensed roofing contractor.

  • Choose high-quality materials suited to your climate.

  • Get detailed estimates and compare multiple quotes.

  • Check customer reviews and warranties before committing.

  • Ensure the company follows safety and local building codes.

A well-installed and maintained roof enhances your home’s value, energy efficiency, and protection. Take the time to research and hire a trusted roofing expert to ensure your investment is worthwhile and long-lasting.

Need expert residential roofing services? Contact a trusted roofing contractor today for a free consultation.

Looking For Home Resources?

Looking to enhance your living space and create a sanctuary that supports your well-being? Explore our home partners who offer a wide range of resources to elevate your home environment.


homeHLL x Editor


Comprehensive Home Exterior Services: Everything You Need to Know

Your home's exterior plays a crucial role in its overall appearance, functionality, and value. From curb appeal to structural integrity, maintaining and upgrading the exterior of your home can make a significant difference.


Comprehensive home exterior services provide homeowners with a one-stop solution for all their outdoor needs, ensuring that every aspect of your property is in top condition.

In this article, we’ll explore what comprehensive home exterior services entail and why they’re essential for every homeowner.

No. 1

What Are Comprehensive Home Exterior Services?

Comprehensive home exterior services encompass a wide range of tasks and projects aimed at maintaining, repairing, or enhancing the exterior of your home. These services address everything from the roof to the landscaping and everything in between.

Key areas covered include:

1. Roofing

  • Roof installation, repair, and replacement

  • Gutter cleaning and maintenance

  • Storm damage repair

2. Siding

  • Siding installation and replacement

  • Repairs for cracks, dents, or warping

  • Cleaning and maintenance to prevent mold or staining

3. Windows and Doors

  • Window and door installation or replacement

  • Weatherproofing and insulation

  • Repairs to address drafts, cracks, or damage

4. Painting and Finishing

  • Exterior painting for walls, trim, and shutters

  • Staining and sealing decks or fences

  • Pressure washing for a fresh, clean look

5. Landscaping and Hardscaping

  • Lawn maintenance and tree care

  • Patio, walkway, and driveway installation

  • Retaining walls and outdoor lighting

6. Decks and Fences

  • Deck design, construction, and repair

  • Fence installation, repair, and staining

  • Maintenance to prevent wear and tear

7. Energy Efficiency Upgrades

No. 2

Benefits of Comprehensive Home Exterior Services

Enhanced Curb Appeal

A well-maintained exterior not only improves the overall visual appeal of your home but also makes it significantly more inviting to both guests and potential buyers alike. Additionally, this attention to detail can lead to an increase in its market value, ensuring that your investment is not only aesthetically pleasing but also financially rewarding.

Increased Property Value

Quality exterior services can significantly boost the overall value of your home, enhancing its appeal and making it a worthwhile investment, especially if you plan to sell in the near future. With the right improvements, you can attract potential buyers and ensure that your property stands out in a competitive market.

Improved Energy Efficiency

Upgrades such as installing energy-efficient windows alongside implementing proper insulation can significantly reduce energy costs while also making your home much more sustainable and environmentally friendly in the long run.

Protection Against the Elements

Regular maintenance and timely repairs are essential to ensure that your home remains fully protected from the harsh and unpredictable weather conditions that can occur throughout the year. By addressing any minor issues proactively, you can prevent costly damage from escalating into more significant problems in the future.

Convenience

Hiring a comprehensive service provider significantly simplifies the process by eliminating the need to coordinate multiple contractors, which ultimately saves you valuable time and considerable effort. This streamlined approach allows you to focus on what truly matters to you while ensuring that all aspects of the project are handled efficiently and cohesively.

No. 3

When Should You Consider Home Exterior Services?

  • Seasonal Maintenance: Before or after harsh weather seasons to ensure everything is in good condition.

  • Damage Repair: After storms or accidents that may have caused exterior damage.

  • Upgrades: When planning to sell your home or improve its functionality.

  • Aesthetic Improvements: To give your home a fresh, updated look.


hellolovelyliving rejuvenation outdoor deck light pathway

Rejuvenation

Rejuvenation believes in the power of thoughtful design - explore their extensive range of outdoor hardware, including stylish accessories that add character and charm to your home's exterior.


No. 4

Choosing the Right Home Exterior Services Provider

When selecting a service provider, consider the following:

  • Experience and Expertise: Choosing expert exterior services by Imperial Roofing and other companies who have a proven track record in the industry can make all the difference.

  • Comprehensive Offerings: Ensure they cover all aspects of exterior work to avoid hiring multiple contractors.

  • Customer Reviews: Read reviews and testimonials to gauge customer satisfaction.

  • Licensing and Insurance: Verify that they are licensed and insured for your peace of mind.

  • Transparent Pricing: Look for clear, upfront pricing with no hidden fees.

Takeaways

Comprehensive home exterior services are an essential investment for homeowners looking to maintain or enhance their property. From protecting your home against the elements to boosting its curb appeal, these services ensure that your house remains in excellent condition for years to come.

Whether you’re tackling seasonal maintenance, repairing damage, or upgrading for energy efficiency, partnering with a reliable service provider will make the process seamless and stress-free. Take the first step today and give your home the care it deserves!

Looking For Home Resources?

Looking to enhance your living space and create a sanctuary that supports your well-being? Explore our home partners who offer a wide range of resources to elevate your home environment.


homeHLL x Editor


Mom’s Guide To Refreshing Your Living Room With Peel And Stick Wallpaper

As a busy mom, keeping your living space fresh and stylish can feel like a challenge. Between managing daily tasks and taking care of the family, major home renovations often seem impossible.


However, there’s an easy and affordable way to give your living room a brand-new look—peel-and-stick wallpaper. This hassle-free option allows you to update your space without the mess of paint or the commitment of traditional wallpaper.

In this guide, we share how you can effortlessly refresh your living space with the innovative and stylish option of peel-and-stick wallpaper.


No. 1

Choosing the Perfect Wallpaper Style

The right wallpaper design can completely transform the feel of your living room. If you love warm, earthy tones and an eclectic mix of patterns, bohemian wallpaper is a fantastic choice.

This style features rich textures, intricate designs, and vibrant colors that add character and personality to your space. Whether you opt for floral prints, Moroccan-inspired patterns, or geometric shapes, bohemian wallpaper creates a cozy and inviting atmosphere for your family and guests.

For those who prefer a more delicate and refined look, small print wallpaper is an excellent option. Unlike bold, oversized patterns, small prints offer subtle elegance and sophistication.

Whether it’s tiny florals, fine lines, or delicate geometric shapes, this style works well in both small and large spaces, adding depth without overwhelming the room. Small print designs are perfect for moms who want a timeless and calming aesthetic in their living area.


No. 2

Prepping Your Walls for a Smooth Application

Before applying peel-and-stick wallpaper, it’s important to prepare your walls properly. Start by cleaning the surface with a damp cloth to remove dust and dirt.

If your walls have any cracks or holes, fill them with spackling paste and sand them down for a smooth finish. This will help the wallpaper adhere better and prevent bubbling.

Next, measure your wall space carefully and cut the wallpaper into manageable strips. If your wallpaper has a repeating pattern, ensure the pieces align correctly before applying them. Marking light pencil guidelines can help you maintain straight placement.


No. 3

Applying Peel and Stick Wallpaper Like a Pro

One of the best things about peel-and-stick wallpaper is its easy application process. Start by peeling a small section of the backing and positioning the wallpaper at the top of the wall.

Slowly smooth it down while peeling off more of the backing, pressing out any air bubbles with a squeegee or soft cloth. If you make a mistake, don’t worry—this wallpaper is repositionable, so you can adjust it as needed.

If covering an entire wall, work in sections from top to bottom, ensuring each strip aligns perfectly for a seamless finish. Use a utility knife to trim any excess wallpaper along the edges for a polished look.


hellolovelyliving etsy peel and stick wallpaper

Etsy

Transform your space effortlessly with Etsy’s extensive collection of stylish peel-and-stick wallpaper—easy to apply, remove, and fall in love with!


No. 4

Creative Ways to Use Peel and Stick Wallpaper in Your Living Room

Peel-and-stick wallpaper isn’t just for walls—you can use it in several creative ways to enhance your living space. Here are a few ideas:

  • Create an Accent Wall: Choose a single wall behind your sofa or TV unit for a striking focal point.

  • Upgrade Furniture: Apply wallpaper to bookshelves, coffee tables, or cabinet doors for a stylish refresh.

  • Frame It as Art: Instead of covering an entire wall, place wallpaper in large frames to create unique wall décor.

  • Add Texture to Ceilings: A patterned ceiling can add an unexpected design element to your living room.

No. 5

Why Moms Love Peel and Stick Wallpaper

Peel-and-stick wallpaper is a game-changer for busy moms. Unlike traditional wallpaper, it’s easy to install, remove, and reposition, making it perfect for renters or those who love to change their décor frequently.

If your kids leave smudges or artwork on the walls, many peel-and-stick wallpapers are wipeable, making cleanup a breeze.

Additionally, this budget-friendly option allows you to transform your living room without hiring professionals or spending a fortune. With so many styles and patterns available, you can find the perfect wallpaper to match your home’s personality.

Takeaways

Refreshing your living room doesn’t have to be complicated or expensive. With peel-and-stick wallpaper, you can easily update your space in just a few hours. Whether you choose bohemian wallpaper for a vibrant, artistic touch or small print wallpaper for a soft, elegant look, this simple DIY project can make a huge difference.

By following these easy steps, you can create a stylish, cozy, and functional living room that reflects your personality—all while keeping up with your busy mom life!

Looking For Home Resources?

Looking to enhance your living space and create a sanctuary that supports your well-being? Explore our home partners who offer a wide range of resources to elevate your home environment.


homeHLL x Editor