The Easiest Way to Create a Gallery Wall from Scratch
When we moved into our new place last year, I had high aspirations for our living room walls. With 10 foot ceilings, the sky's the limit, literally - and who wants bare walls when you have all of that space to play with? Not me! Those aspirations included an accent wall featuring an art gallery and curtains on our lone ranger window. We did paint our accent wall (yay!), but the gallery wall (sadly) never made it (along with the curtains). Fast forward to the present, and I was finally able to bring my vision to life thanks to Minted, an online art marketplace featuring art from so many talented independent artists and designers from around the world! It helps that I had some of the elements already in place for the perfect backdrop for my gallery wall, but without Minted, it wouldn't have been the same. What I was able to create was a perfect little office space that I could finally call mine, with all of the pretty touches that I can feel inspired by every time I look at it.
Disclosure: Wall art was provided courtesy of Minted. I always share my honest thoughts and opinions and stand behind products I truly believe in and would purchase myself. I include affiliate links.
Discover how I was able to easily and quickly create a gallery wall from scratch and how you can duplicate my process to create your own, too. Yes, gallery walls can look intimidating, but after going through the process, I realized just how fun and easy it actually was. With the right planning and preparation, you will think so too. Let's begin!

Find inspiration.
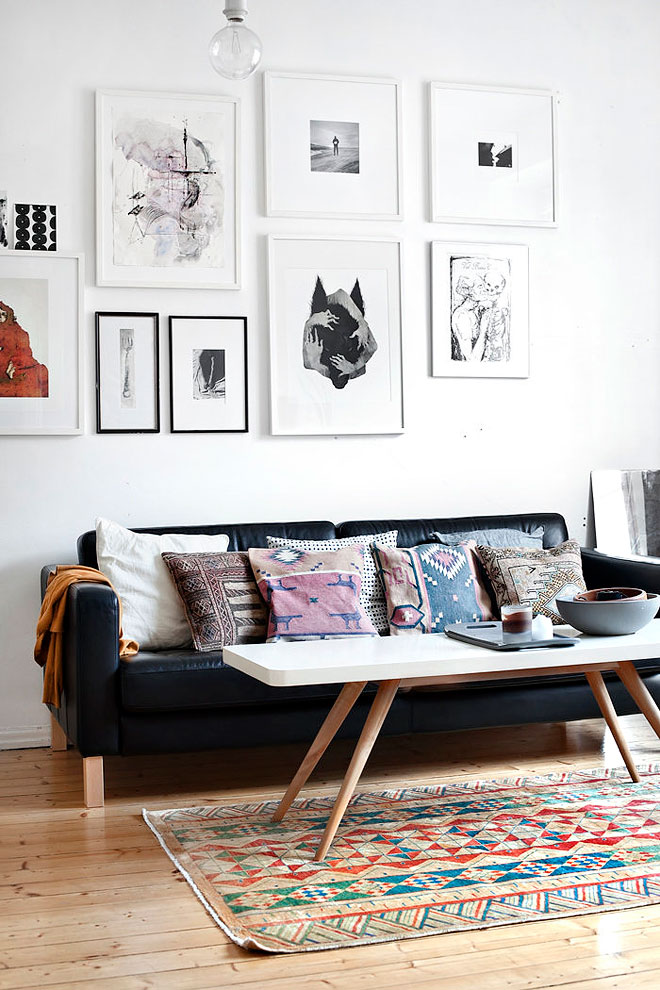
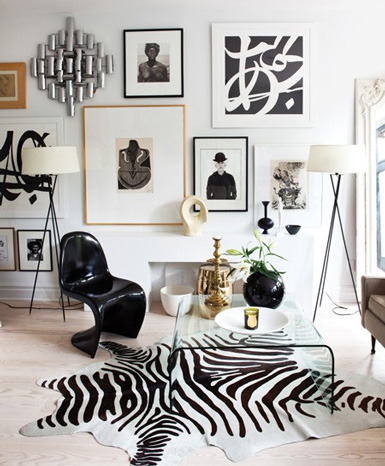
(via Miss Moss, Belle Maison)
Pinterest is a great place to seek inspiration and get tons of ideas for gallery wall layouts, styles, and types of framed art and objects. Here's my Pinterest board that I put together, which helped me visualize different layouts and styles. You can use it to get some ideas, too. Decide on a general idea of what look you're trying to achieve.

Measure your wall.
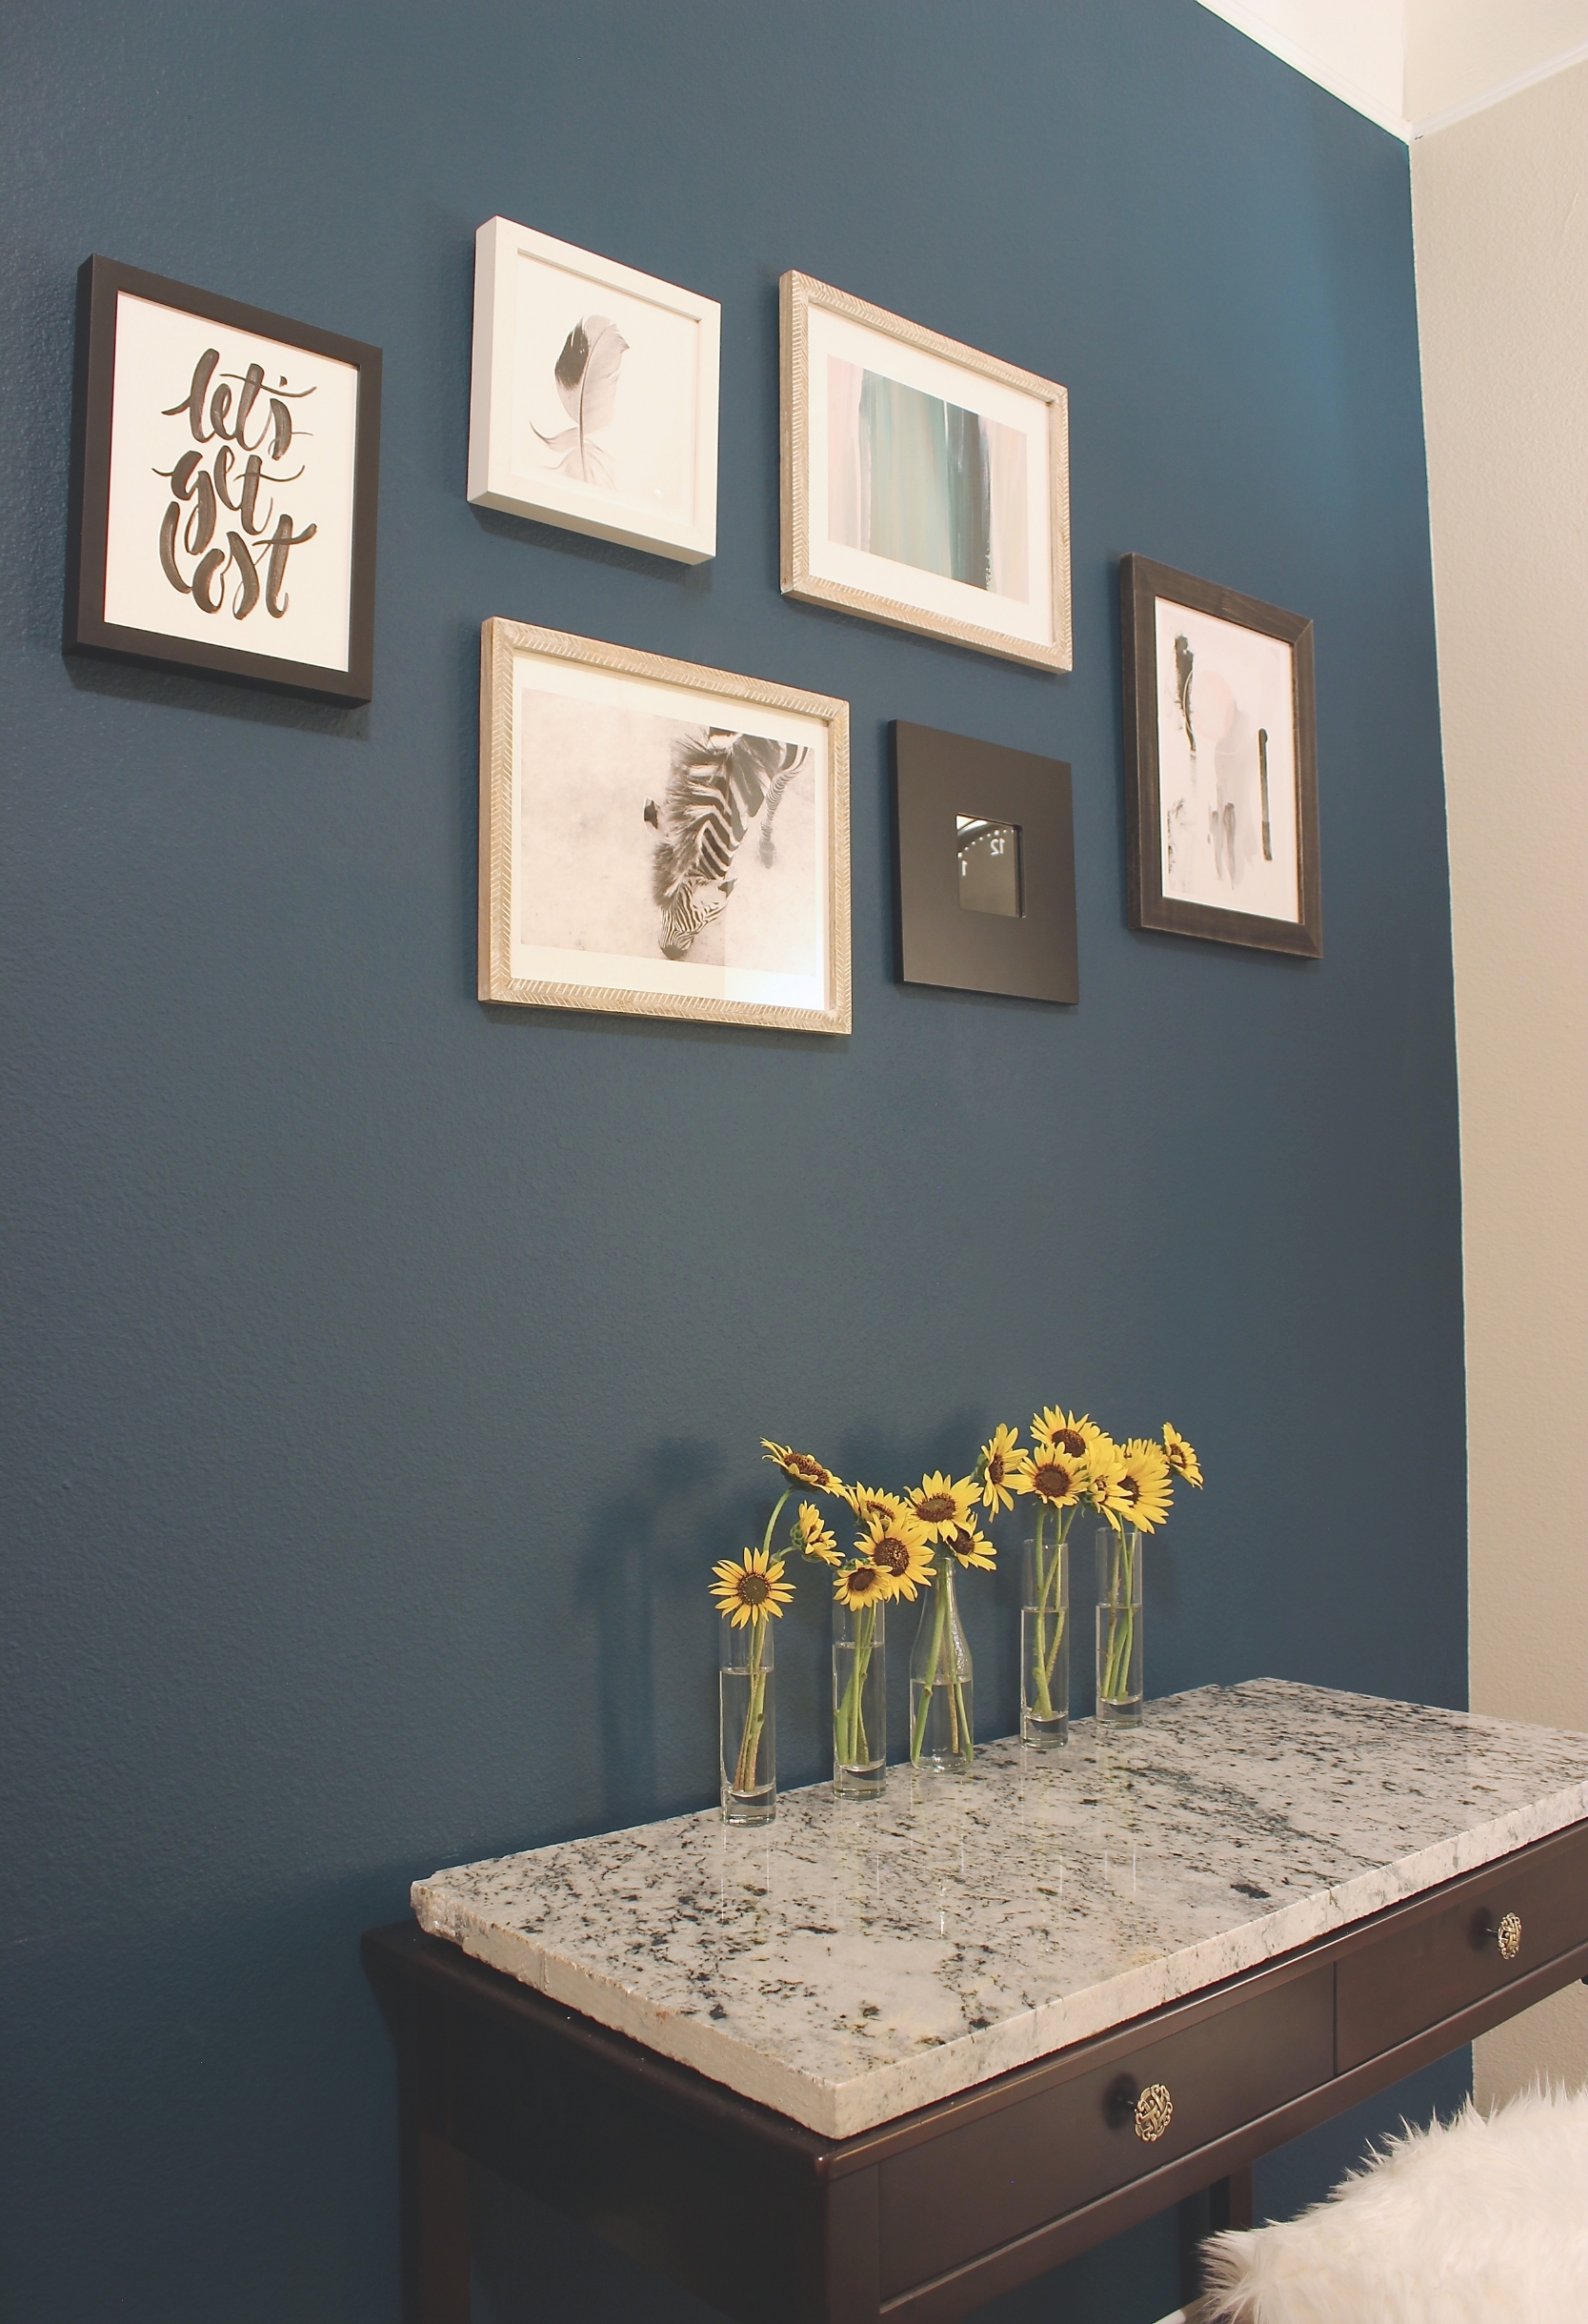
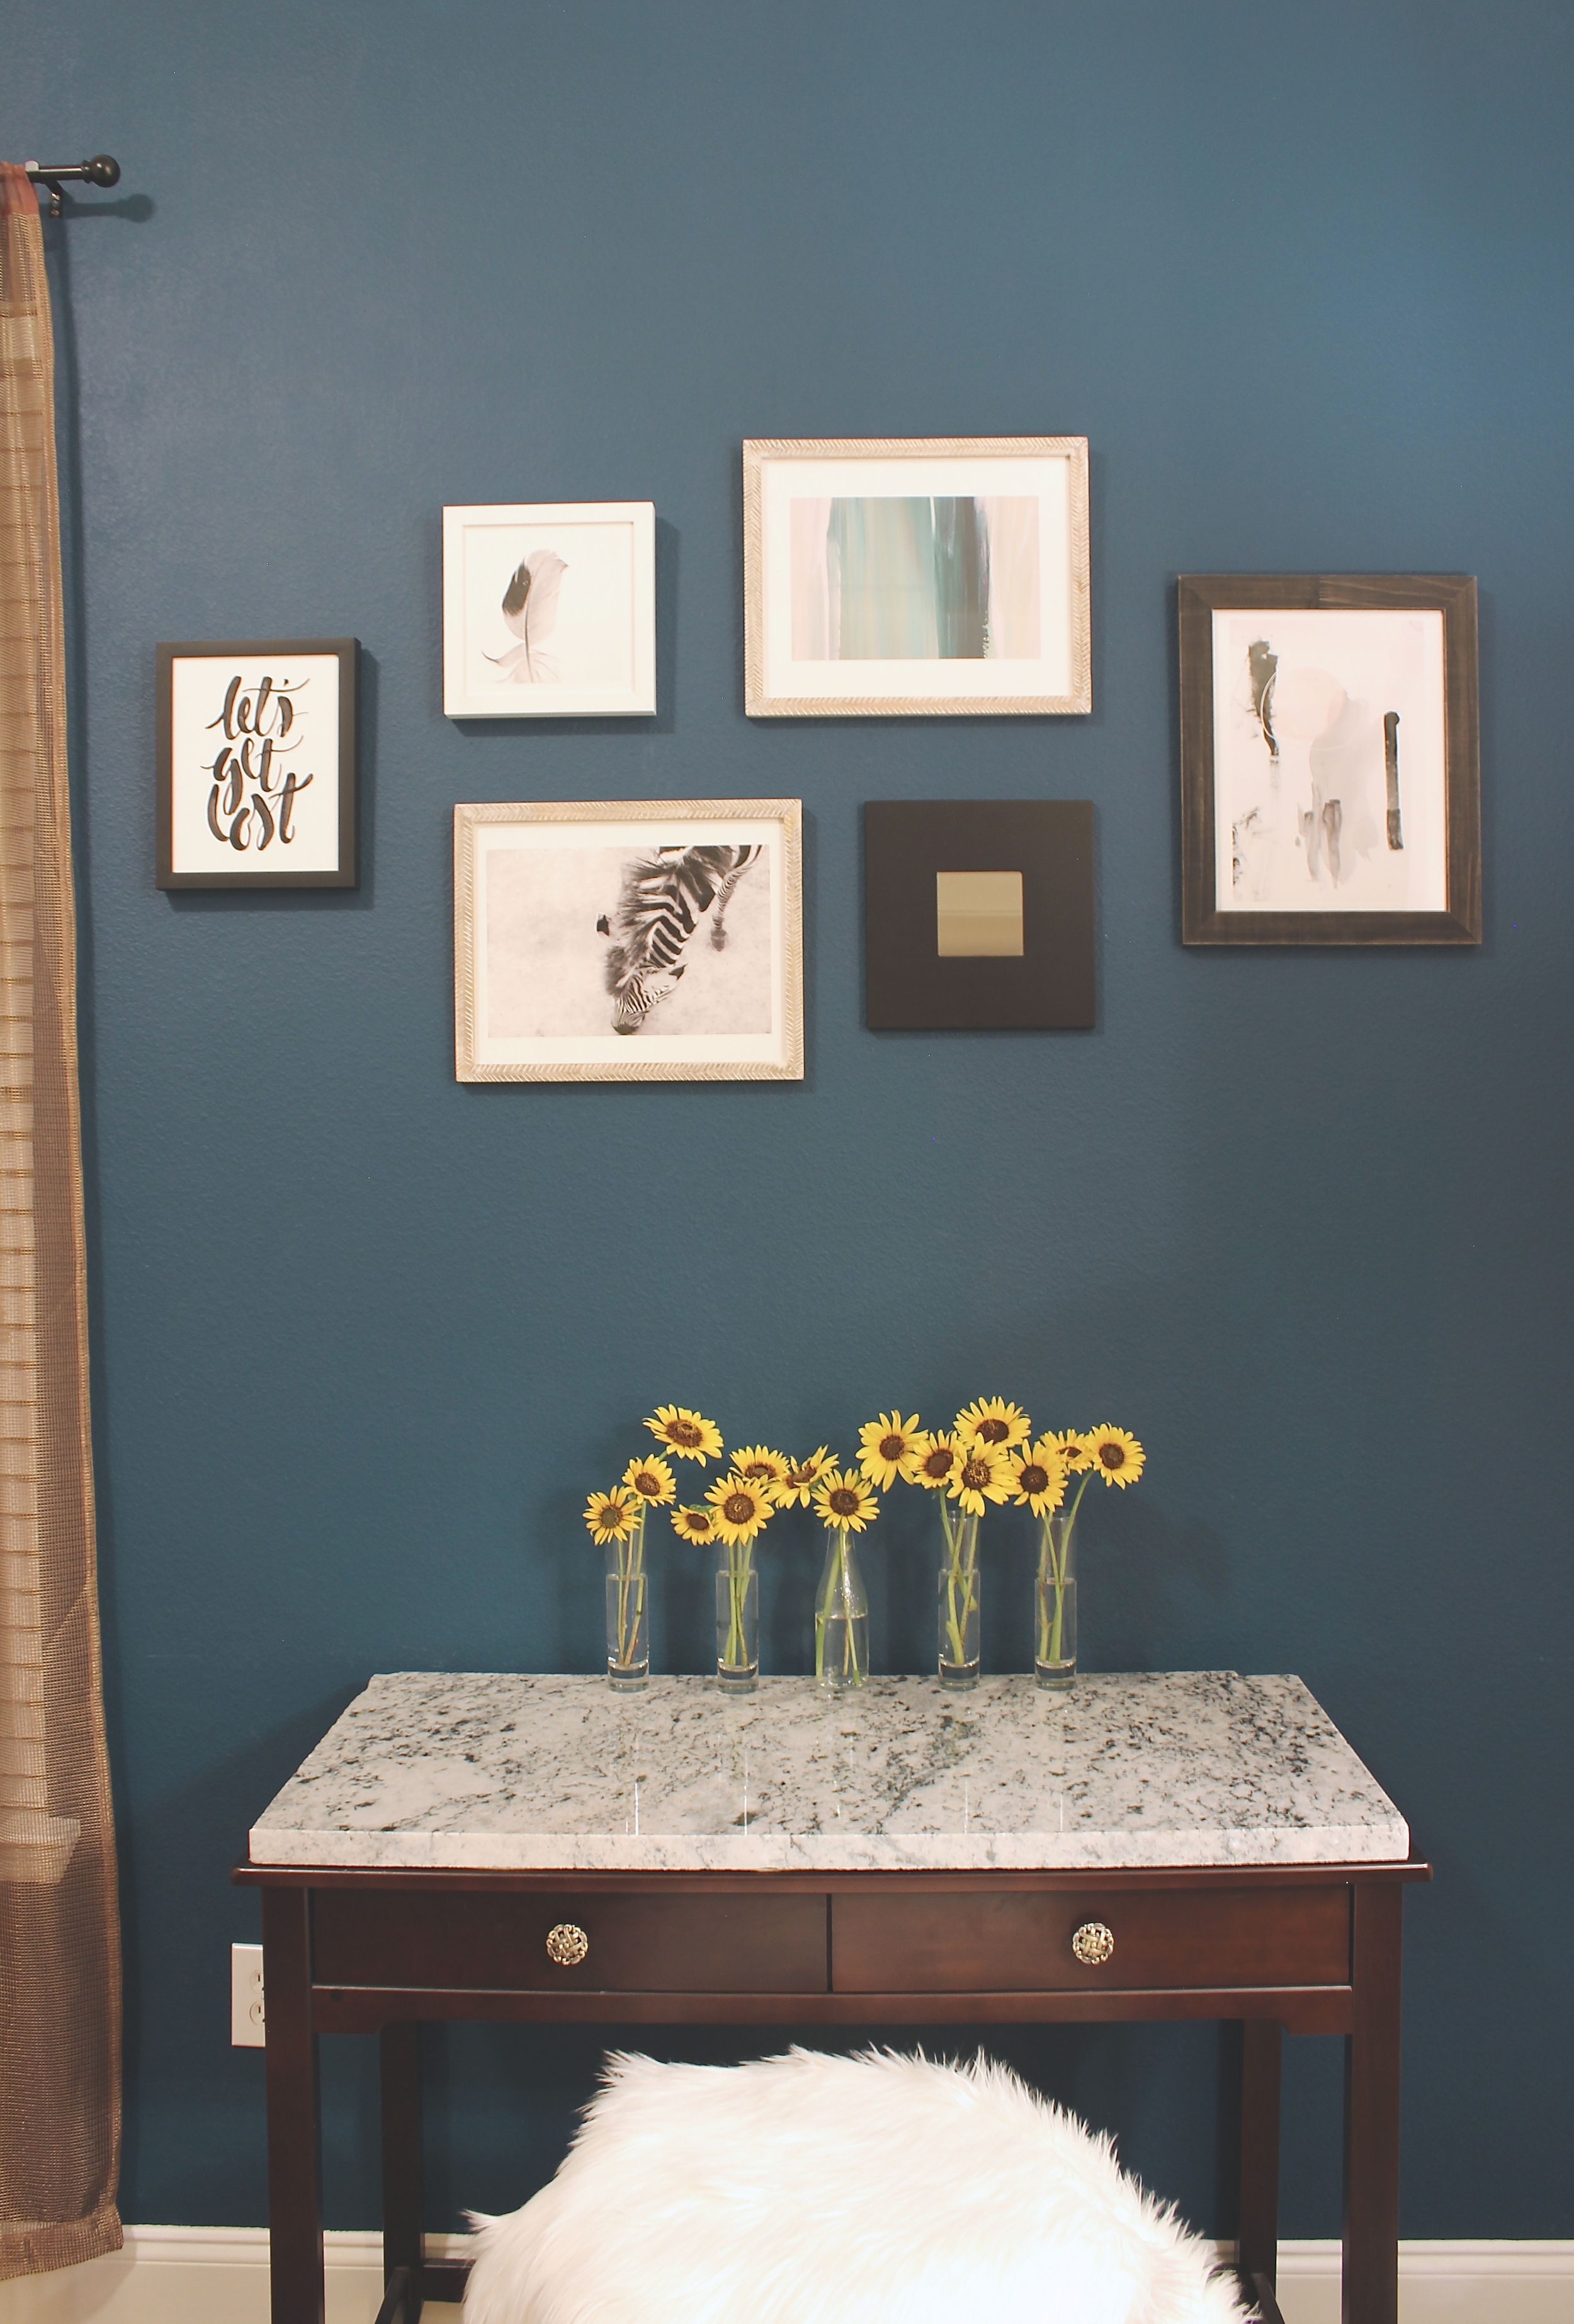
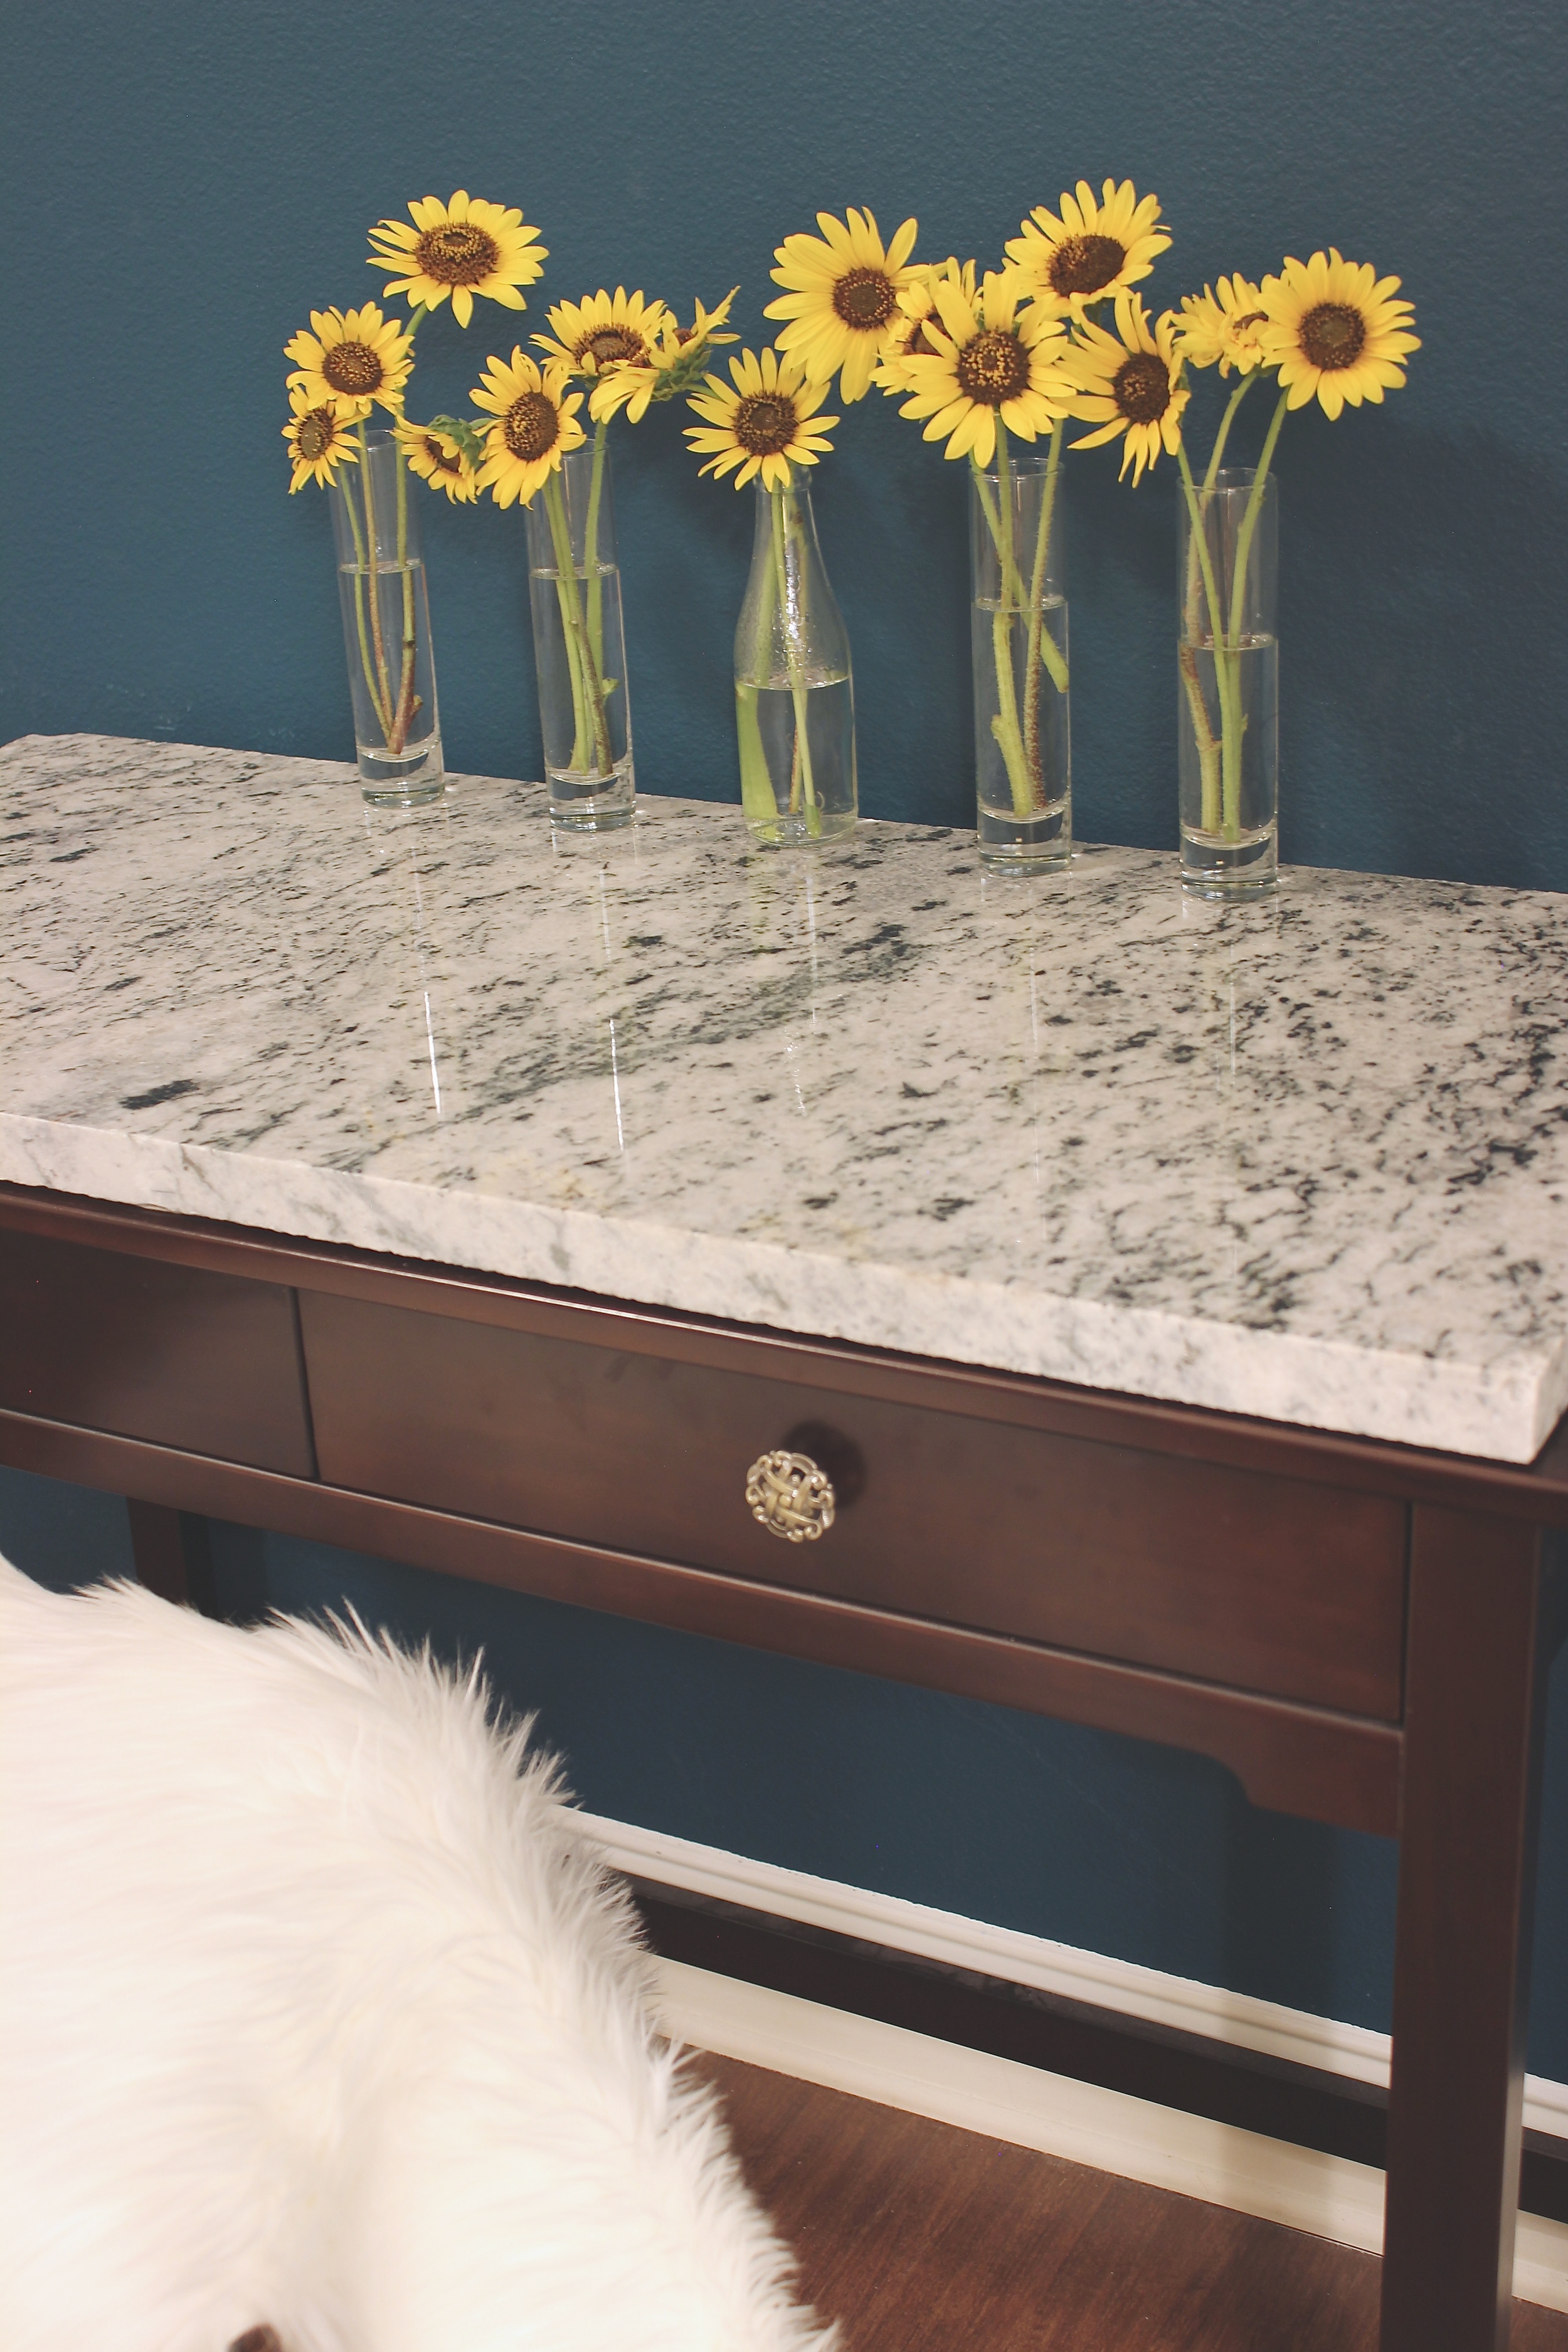
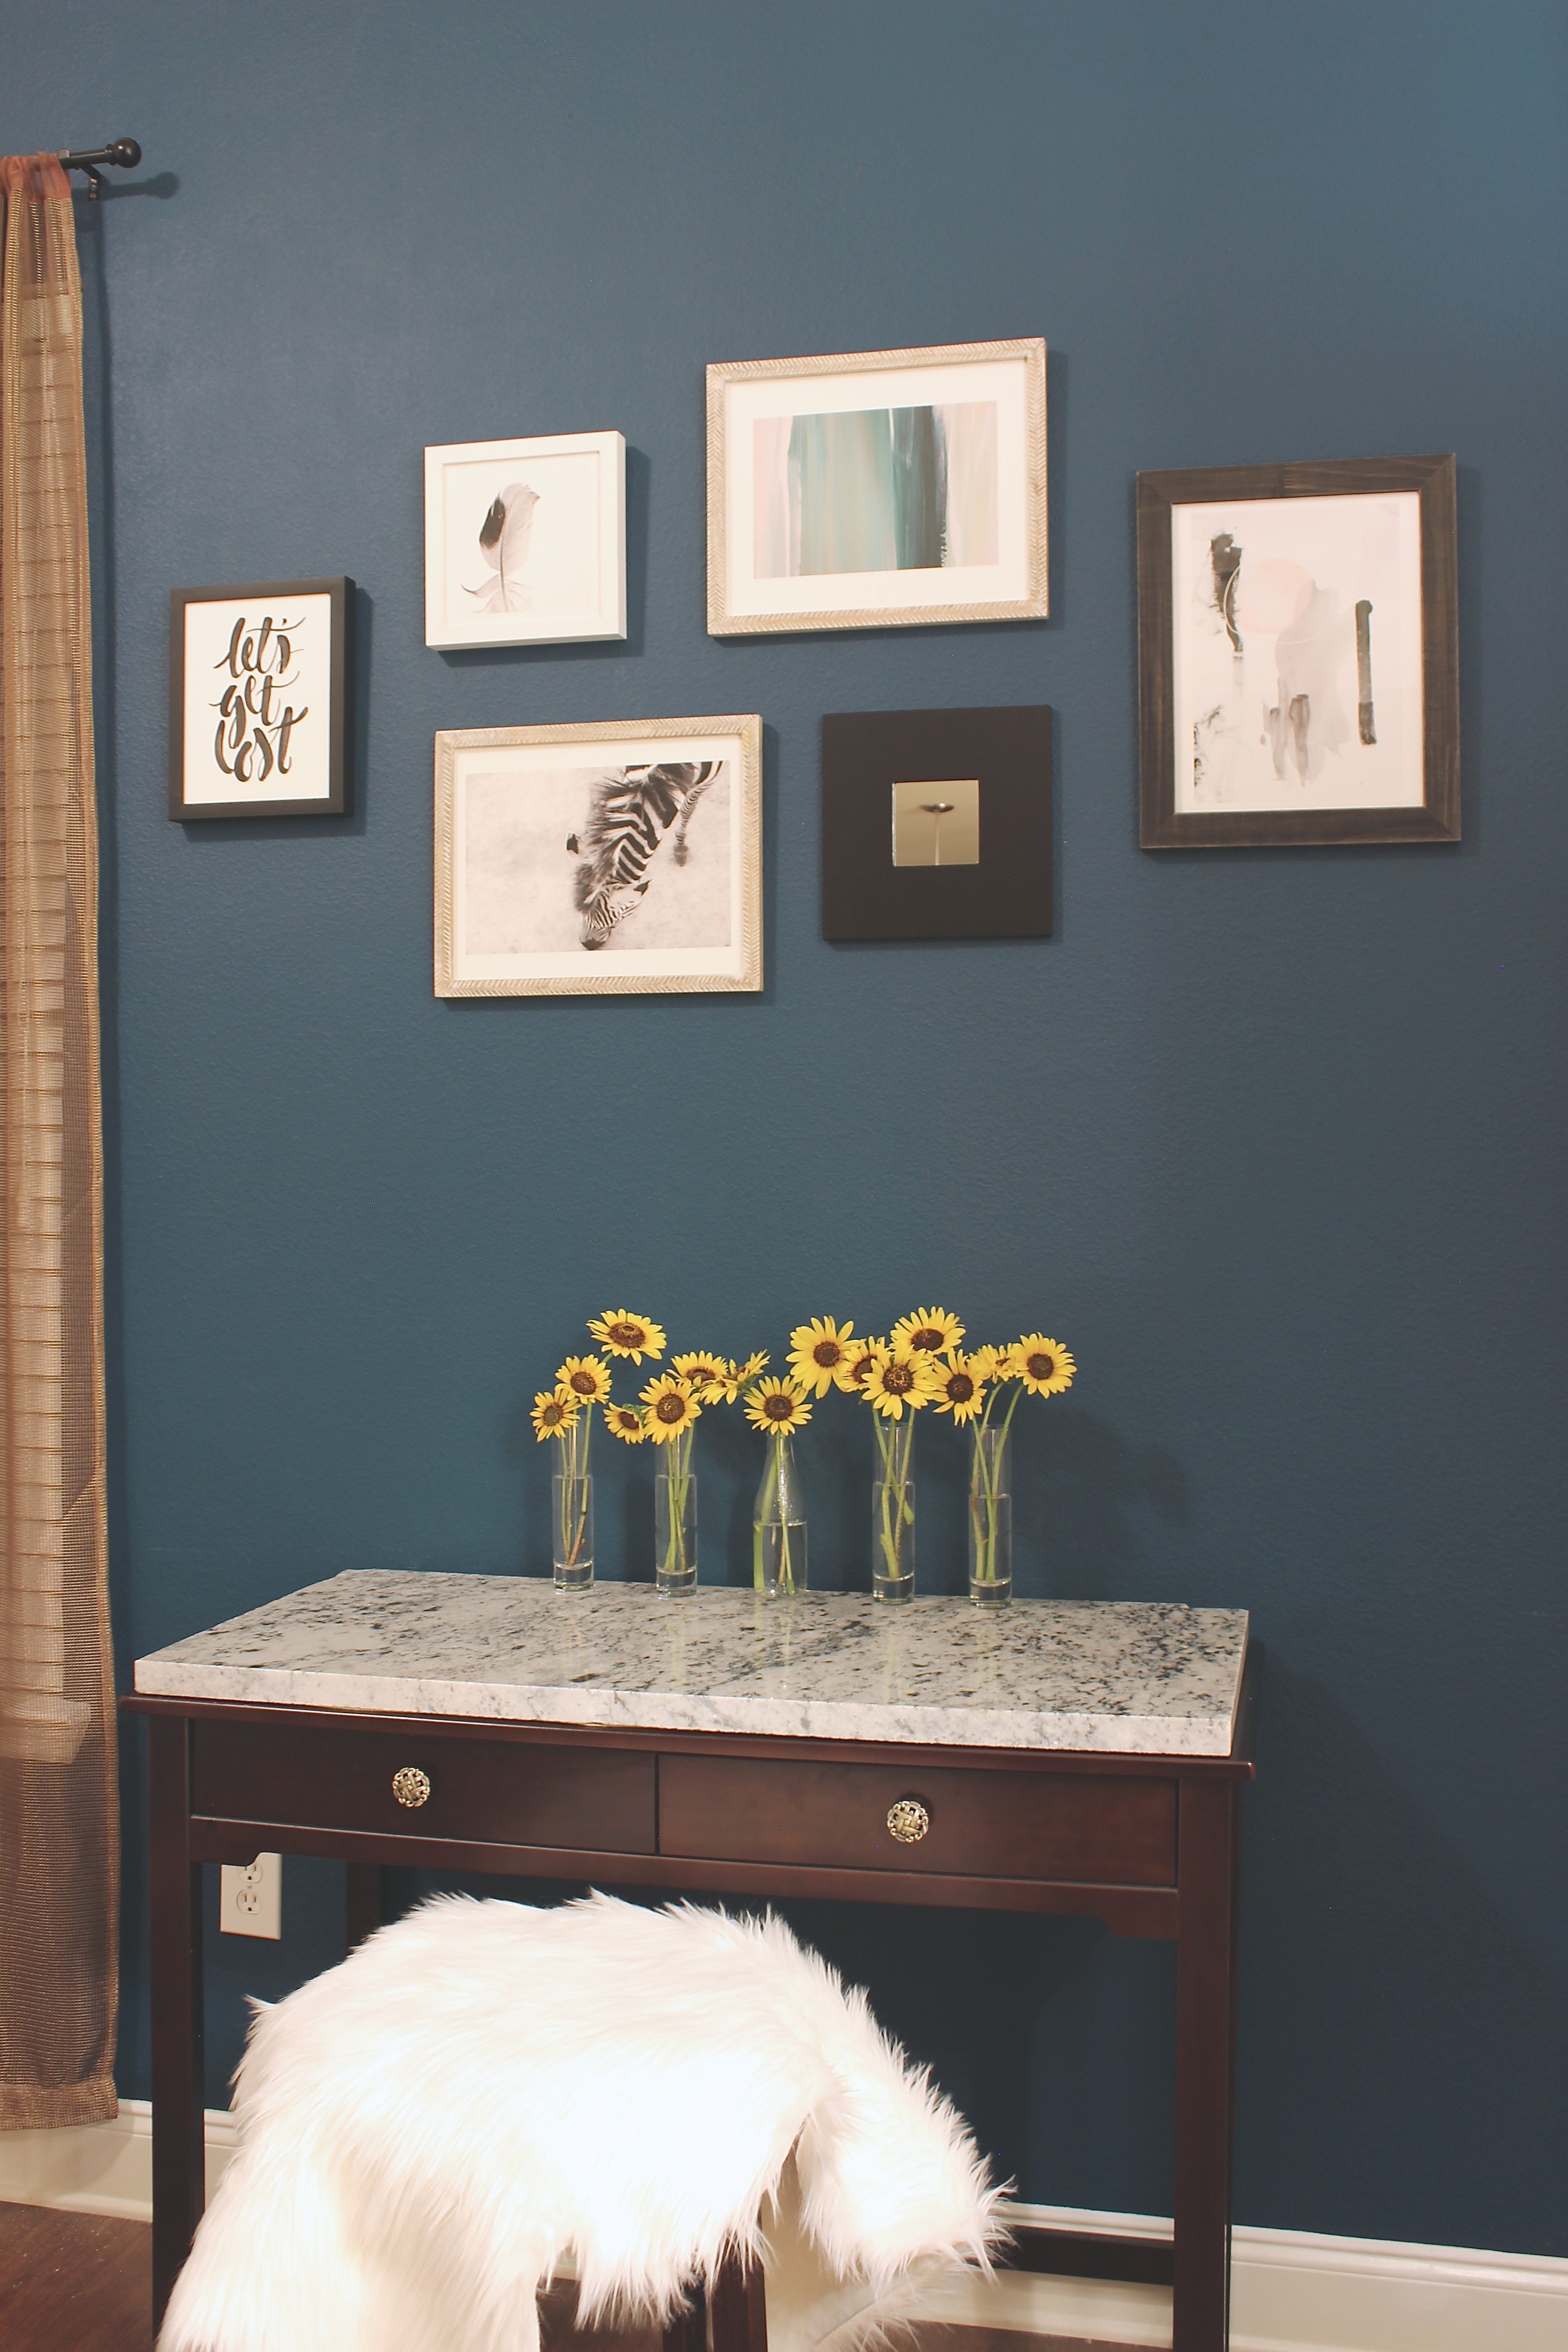
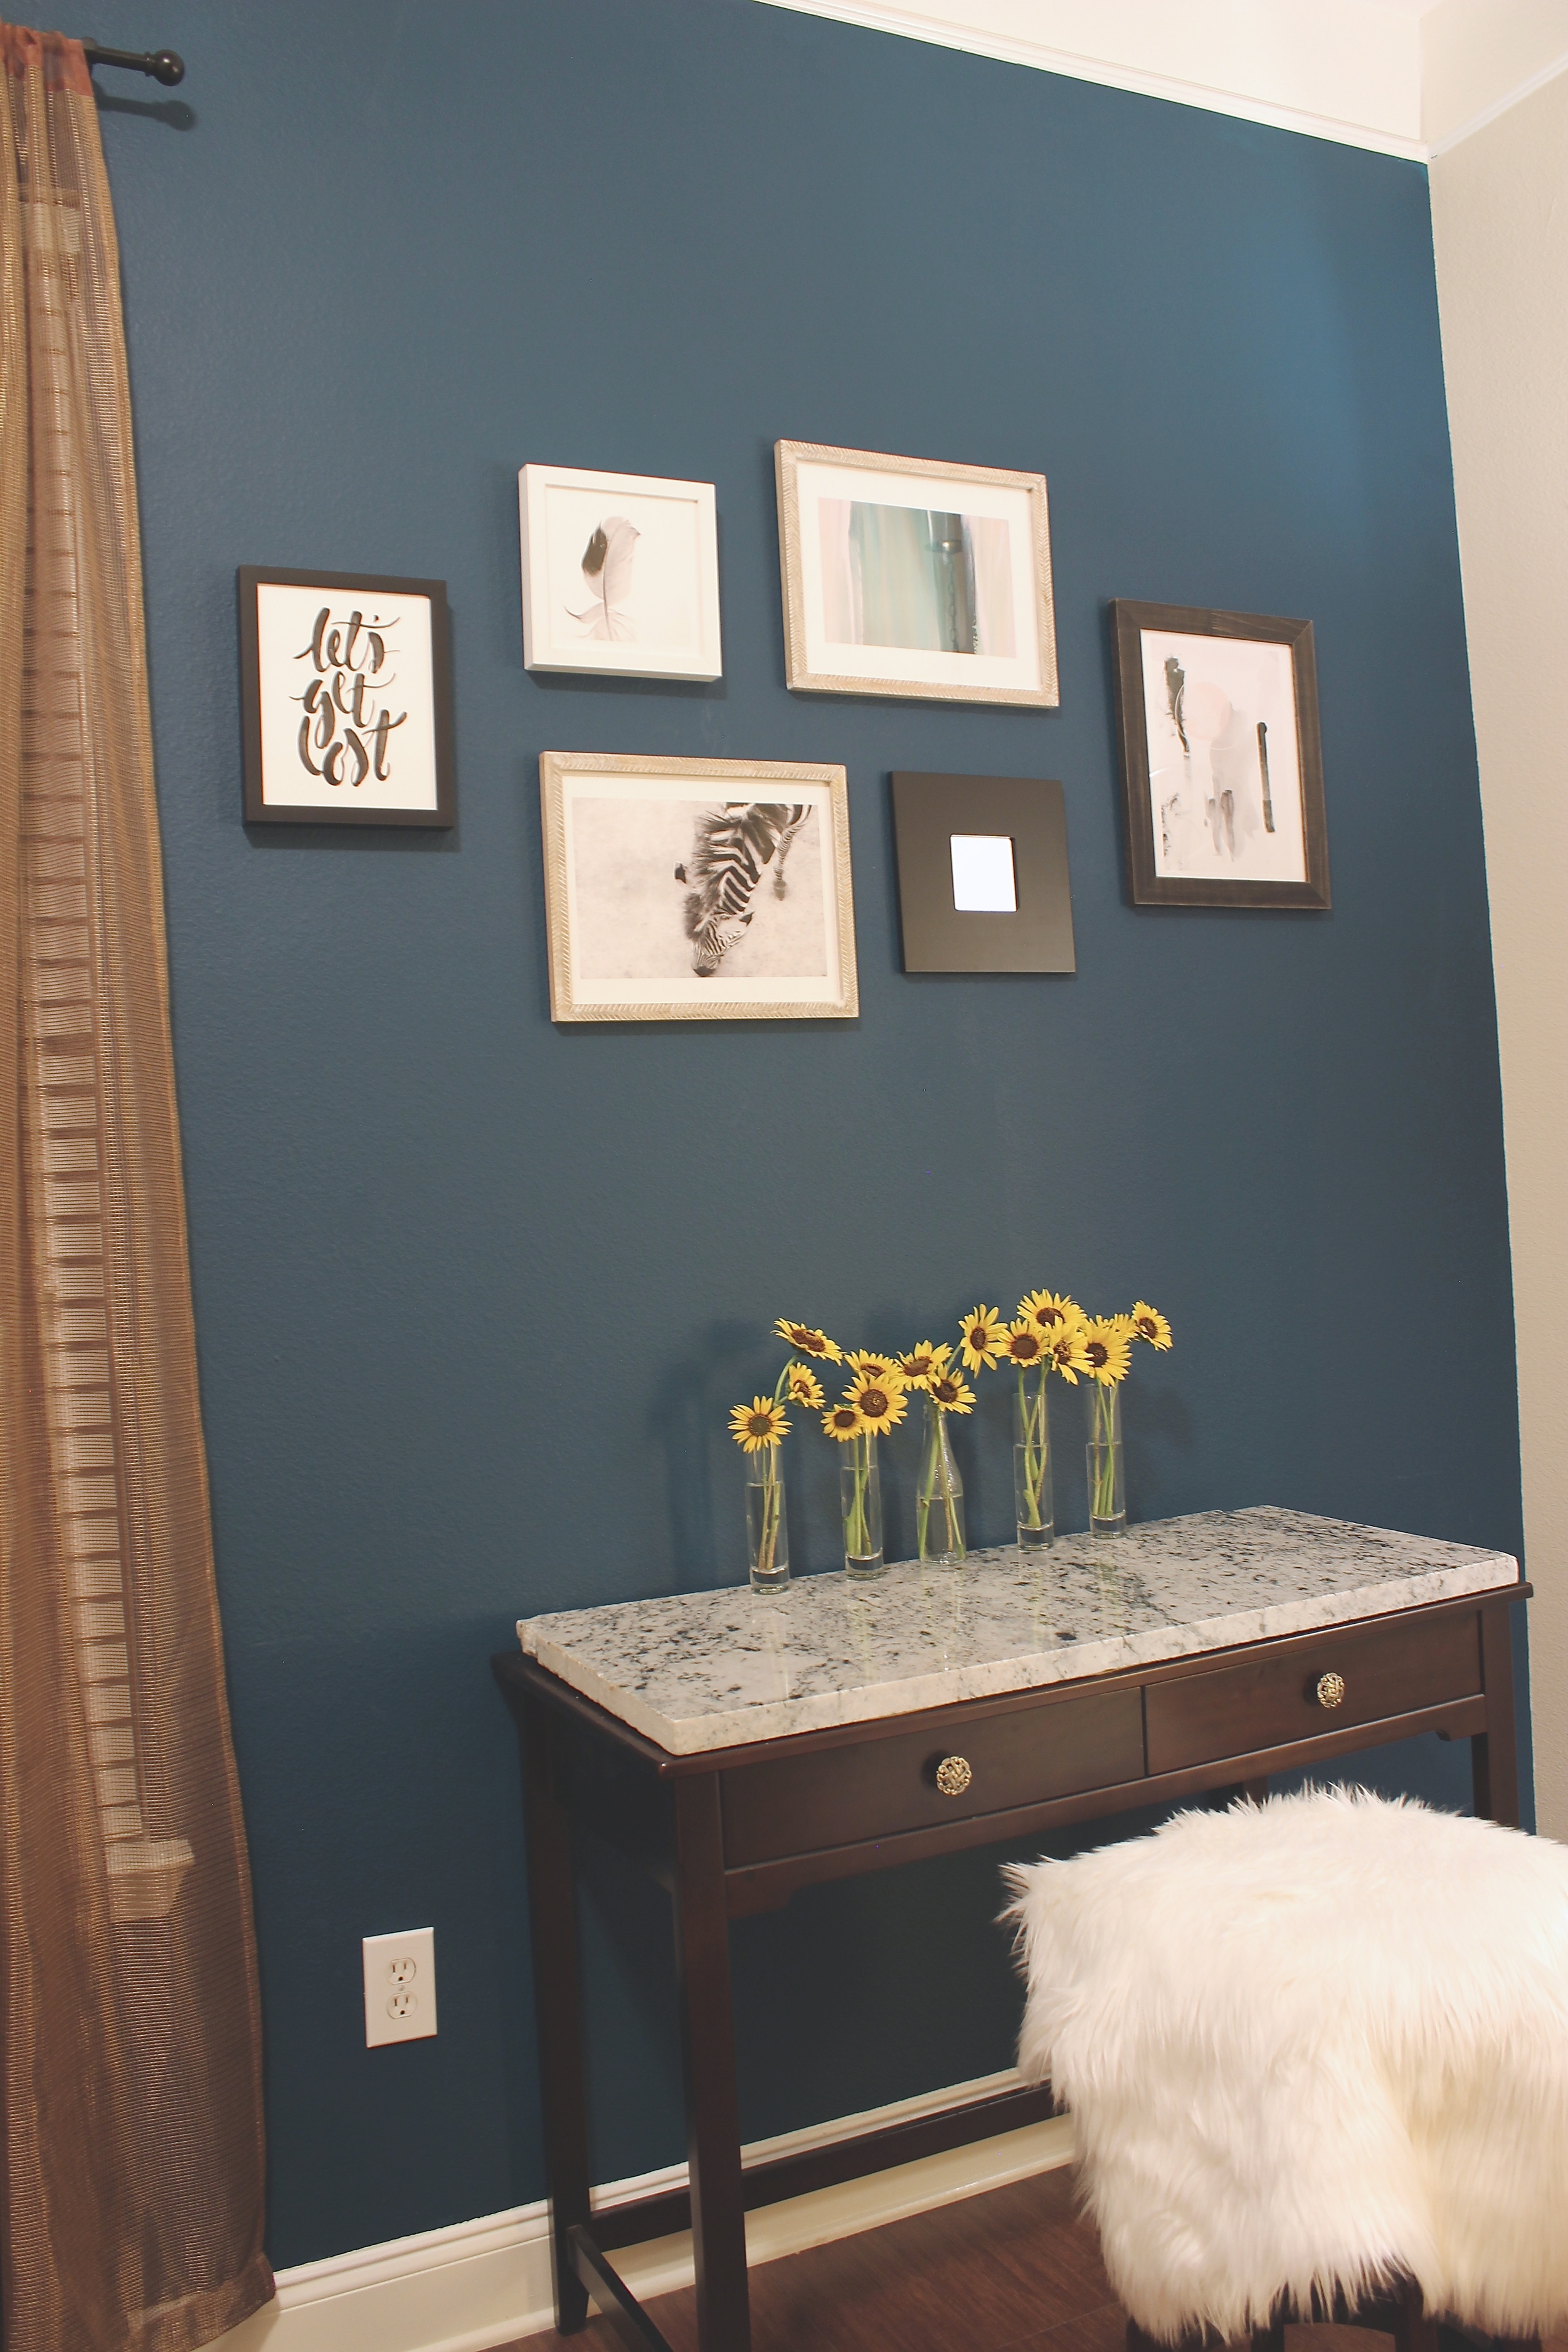
Choose a focal wall where you want to place your gallery. I chose an accent wall in my living room that was already painted a lovely color called Ocean Abyss by Behr Marquee. Make sure you measure the area and visualize how high you want to place it. I chose to go with eye-level. It will also depend on furniture that you plan to place in front of or around your gallery wall, so decide on that firsthand before you install it so that you can be sure that it will work with your setup. I decided to place a desk in front of my gallery wall. This is also a good time to decide how many prints you want to use. There really isn't any magic number, but balance is key and it must work within the area that you plan to place them. I went with 5 prints, with the option of adding onto that if I found other frames around the house that I wanted to incorporate.

Look for art.
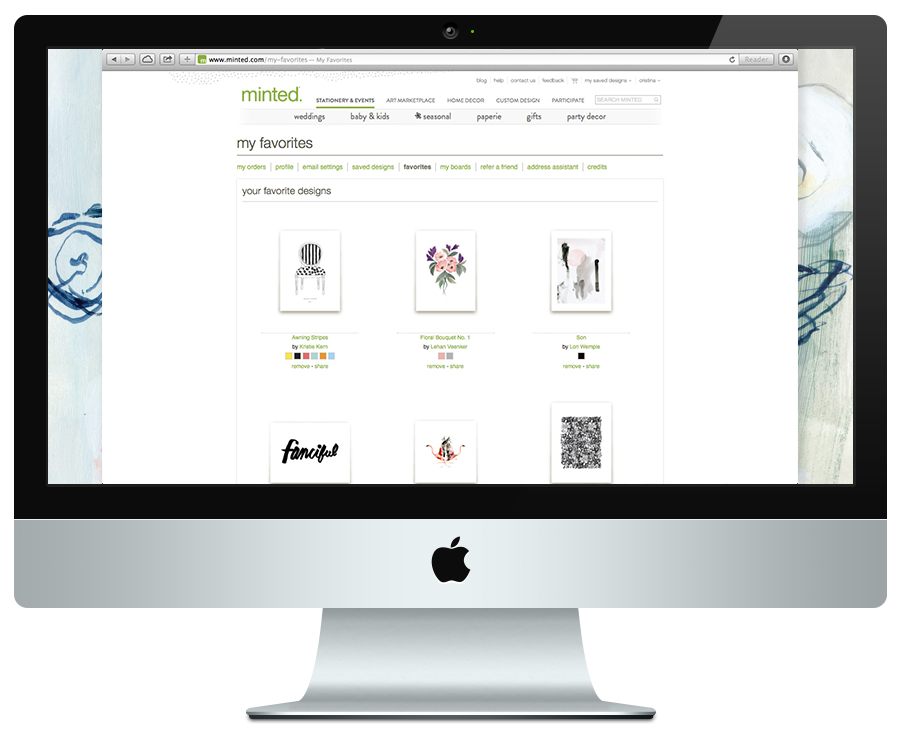
Favorites: I logged onto Minted's Art Marketplace and favorited the art pieces that I liked. Favorite as many as you can, because you will need a lot of options when you finally narrow it down. Try to visualize a theme. For my gallery wall, I wanted to feel a certain way when I looked at it - to feel as if I was traveling within the prints. Ask yourself what feeling you want your gallery wall to elicit. This will inspire you and help you organize art prints within a certain theme. Also try to select a mix of prints. For example, select a variety of art that are a mix of typographic, graphic, abstract, and drawing styles. Combining a variety of prints will create an interesting gallery. Also decide on a color scheme. I chose black, white, and a print that pulled in colors that matched my accent wall.
You can also look around your house for some wall objects and framed art that you would like to include as well. If you will be shopping around at various places for your pieces, visualize your gallery wall as you go, but stay within your theme.

Create a design mockup.
Creating a mockup will help you visualize your gallery wall and make it so much easier to decide on which prints you want to purchase. First, I saved my favorites from Minted as a pdf file. To do that, from my Macbook, all I did was select file > print > save as adobe pdf.
If you have already purchased the art pieces and frames that you will be using, opted for homemade prints printed on photo printing paper; or plan on shopping at several retailers, skip to Step 6.

I created my mockup using Adobe Illustrator (editing software).
My step-by-step process:
Layout all prints: I opened the pdf file page-by-page and was able to move each print around as a separate thumbnail.
Select prints and arrange: I selected the prints that I thought would look good together, then tried different layouts and arrangements until I had my final picks.
Choose sizes and frames: I went back onto Minted and decided on the sizes I wanted to go with, then scaled the mockup prints to 25% of actual size so it would give me a true idea of how they looked in relation to each other. I also chose several frames that I liked, then copied and pasted a photo of each into Illustrator and arranged them until I could find a good mix of frames that I liked.
Layout final picks: Once I had decided on which frames I wanted, I created several layouts, then picked a tentative layout to go with.
If you are planning on incorporating additional prints or objects that you will be purchasing separately or already have on hand, your imagination will help here. Visualize! Don't be worried if your layout changes, you will have another round of laying them all out.
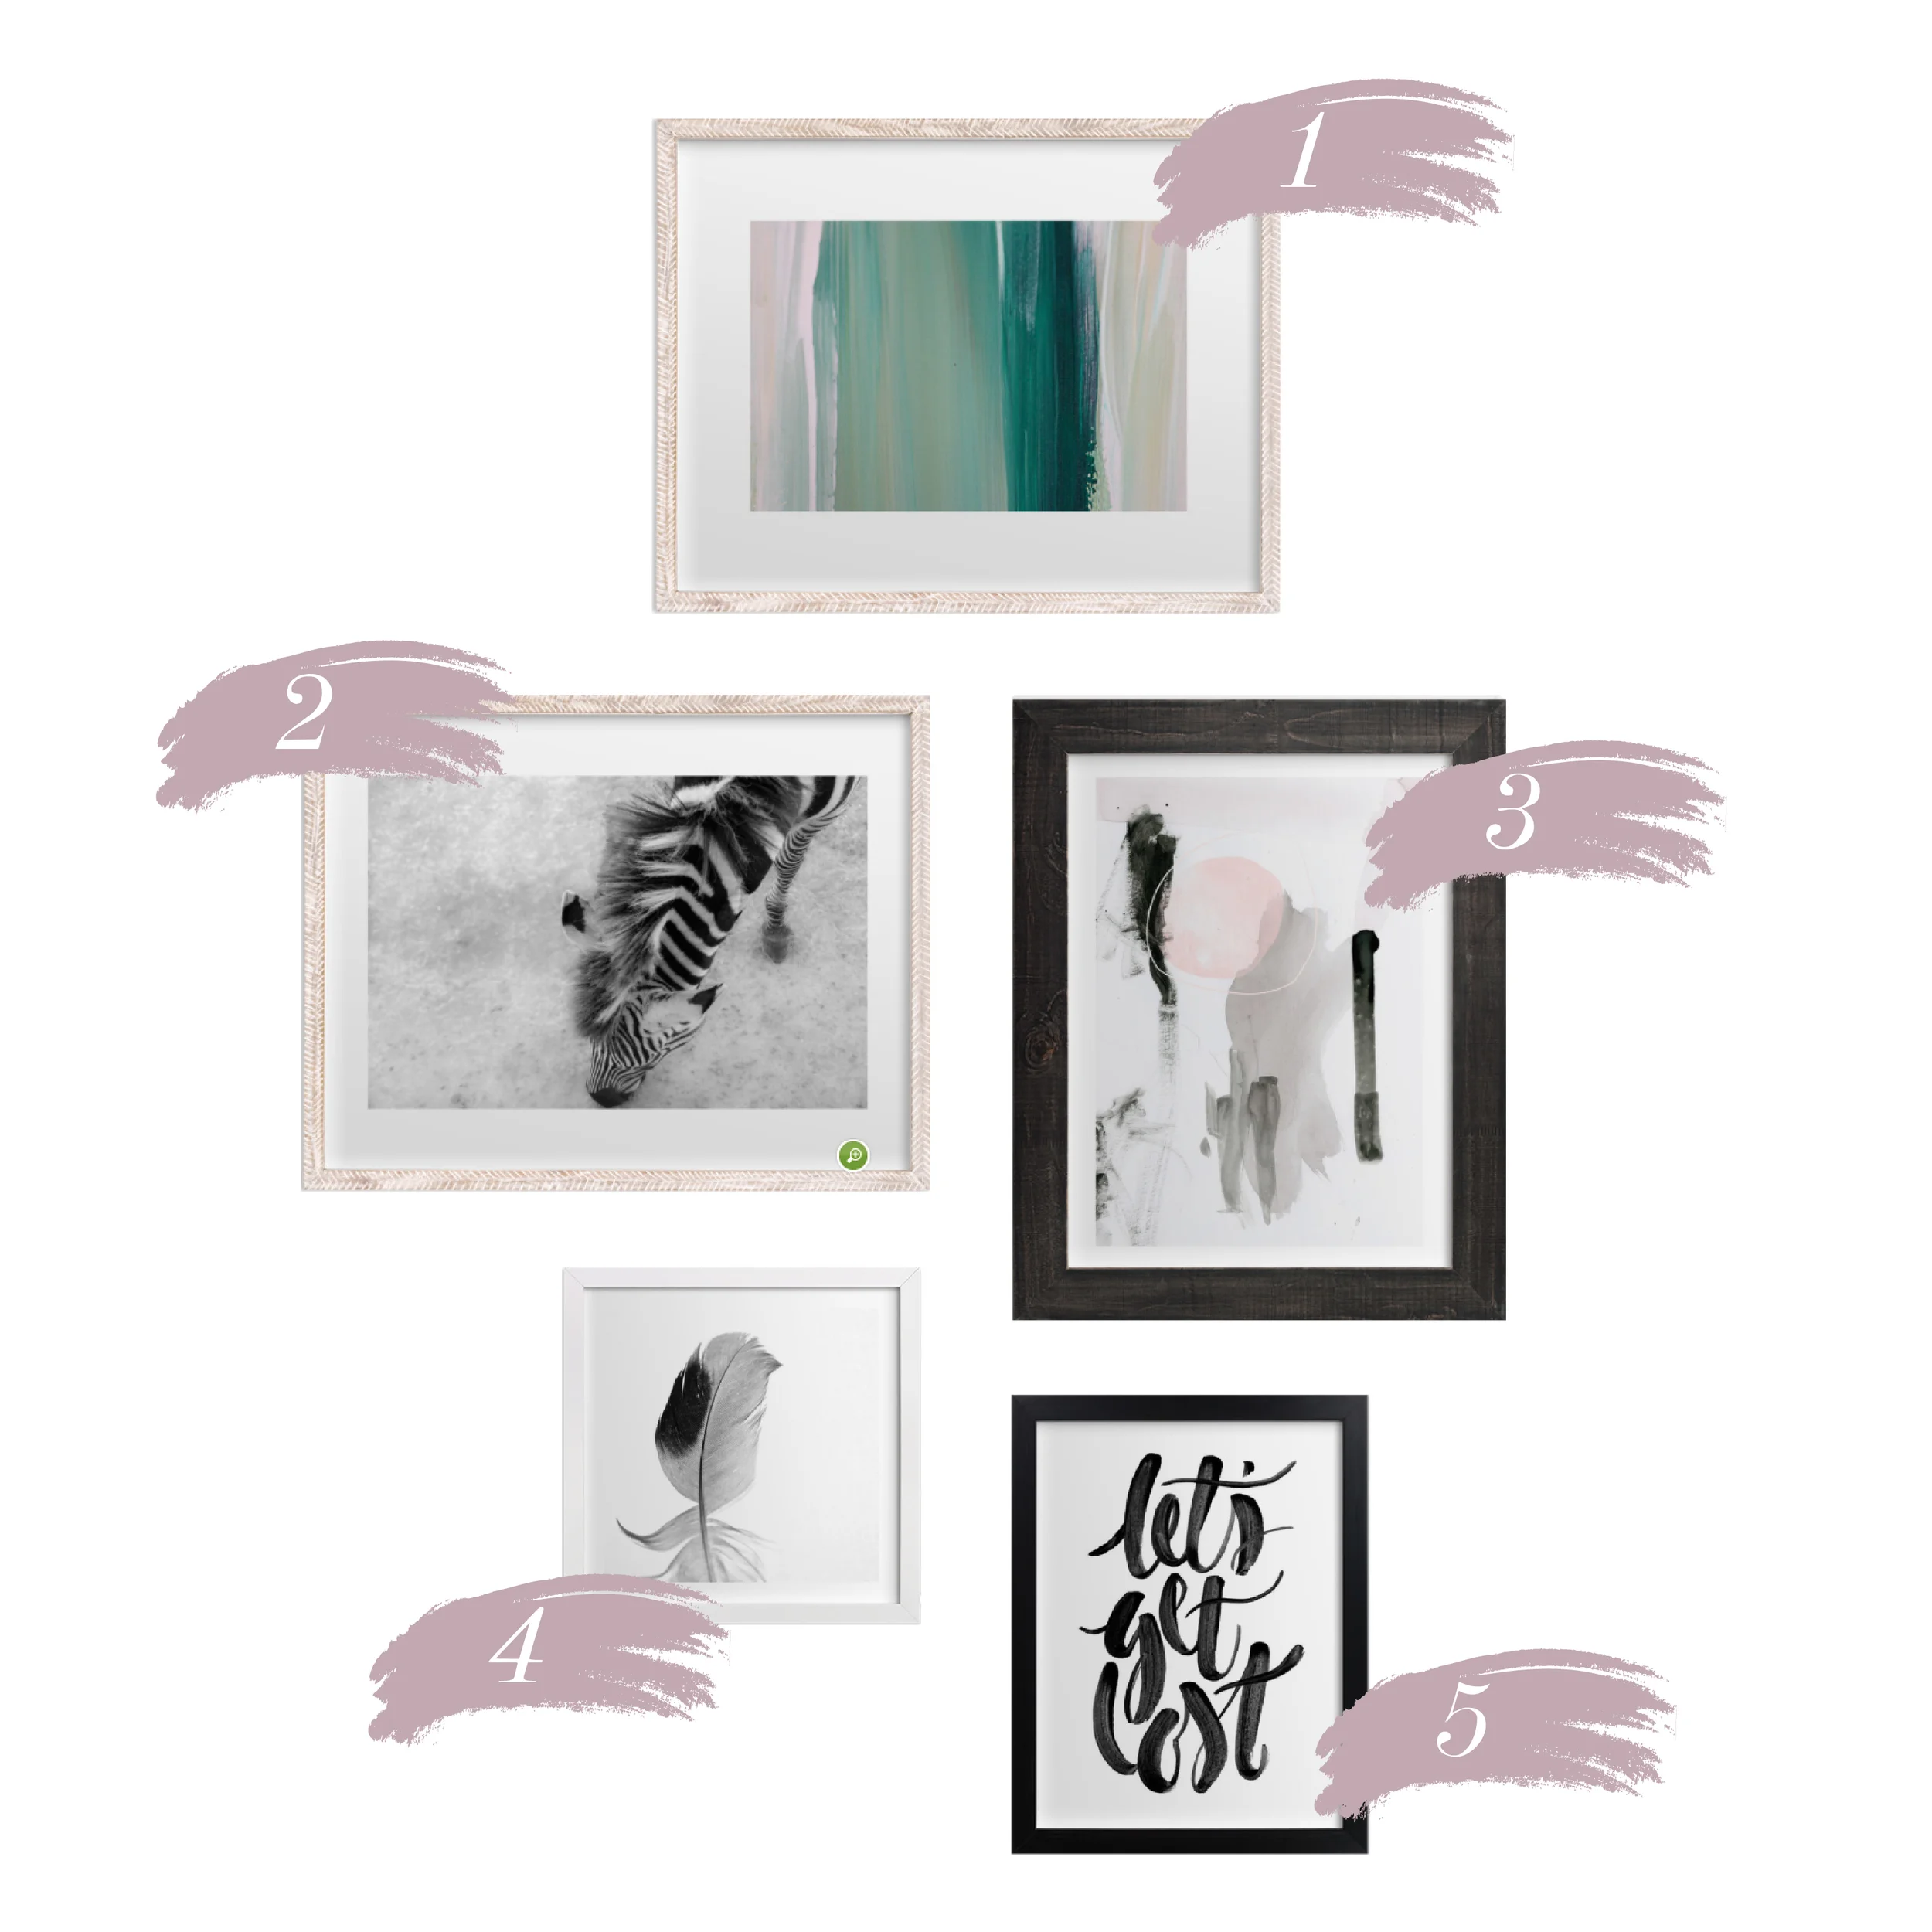
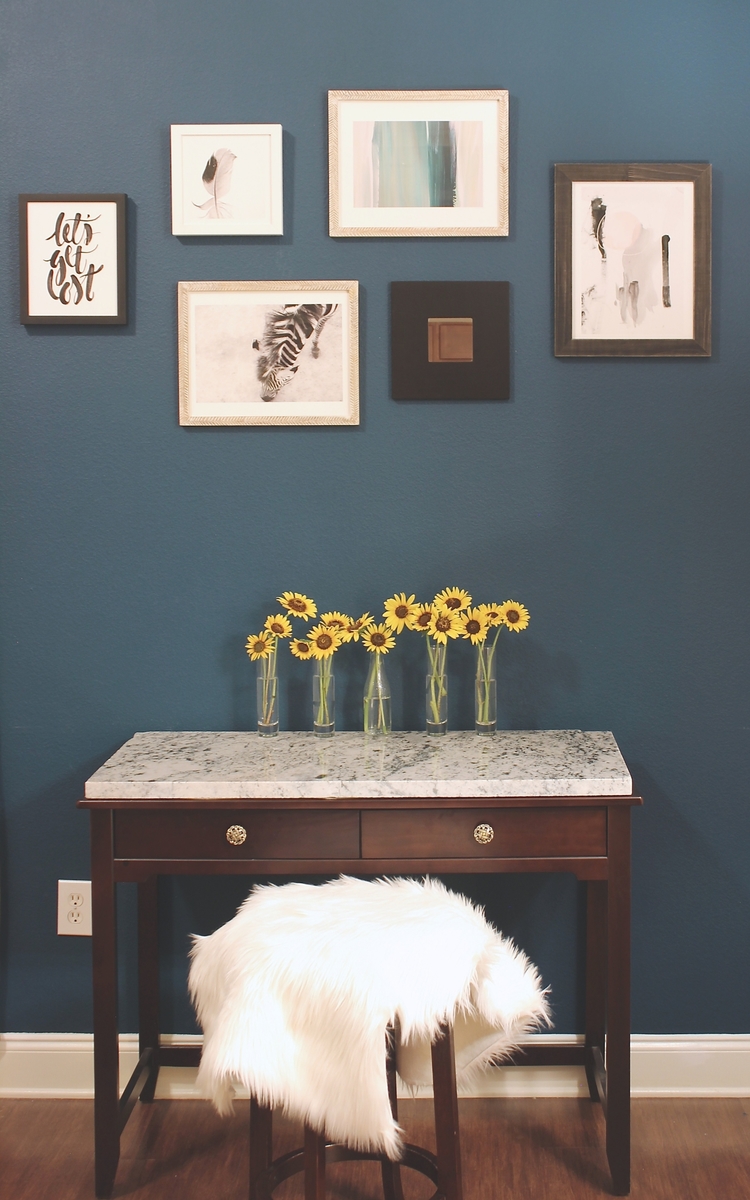
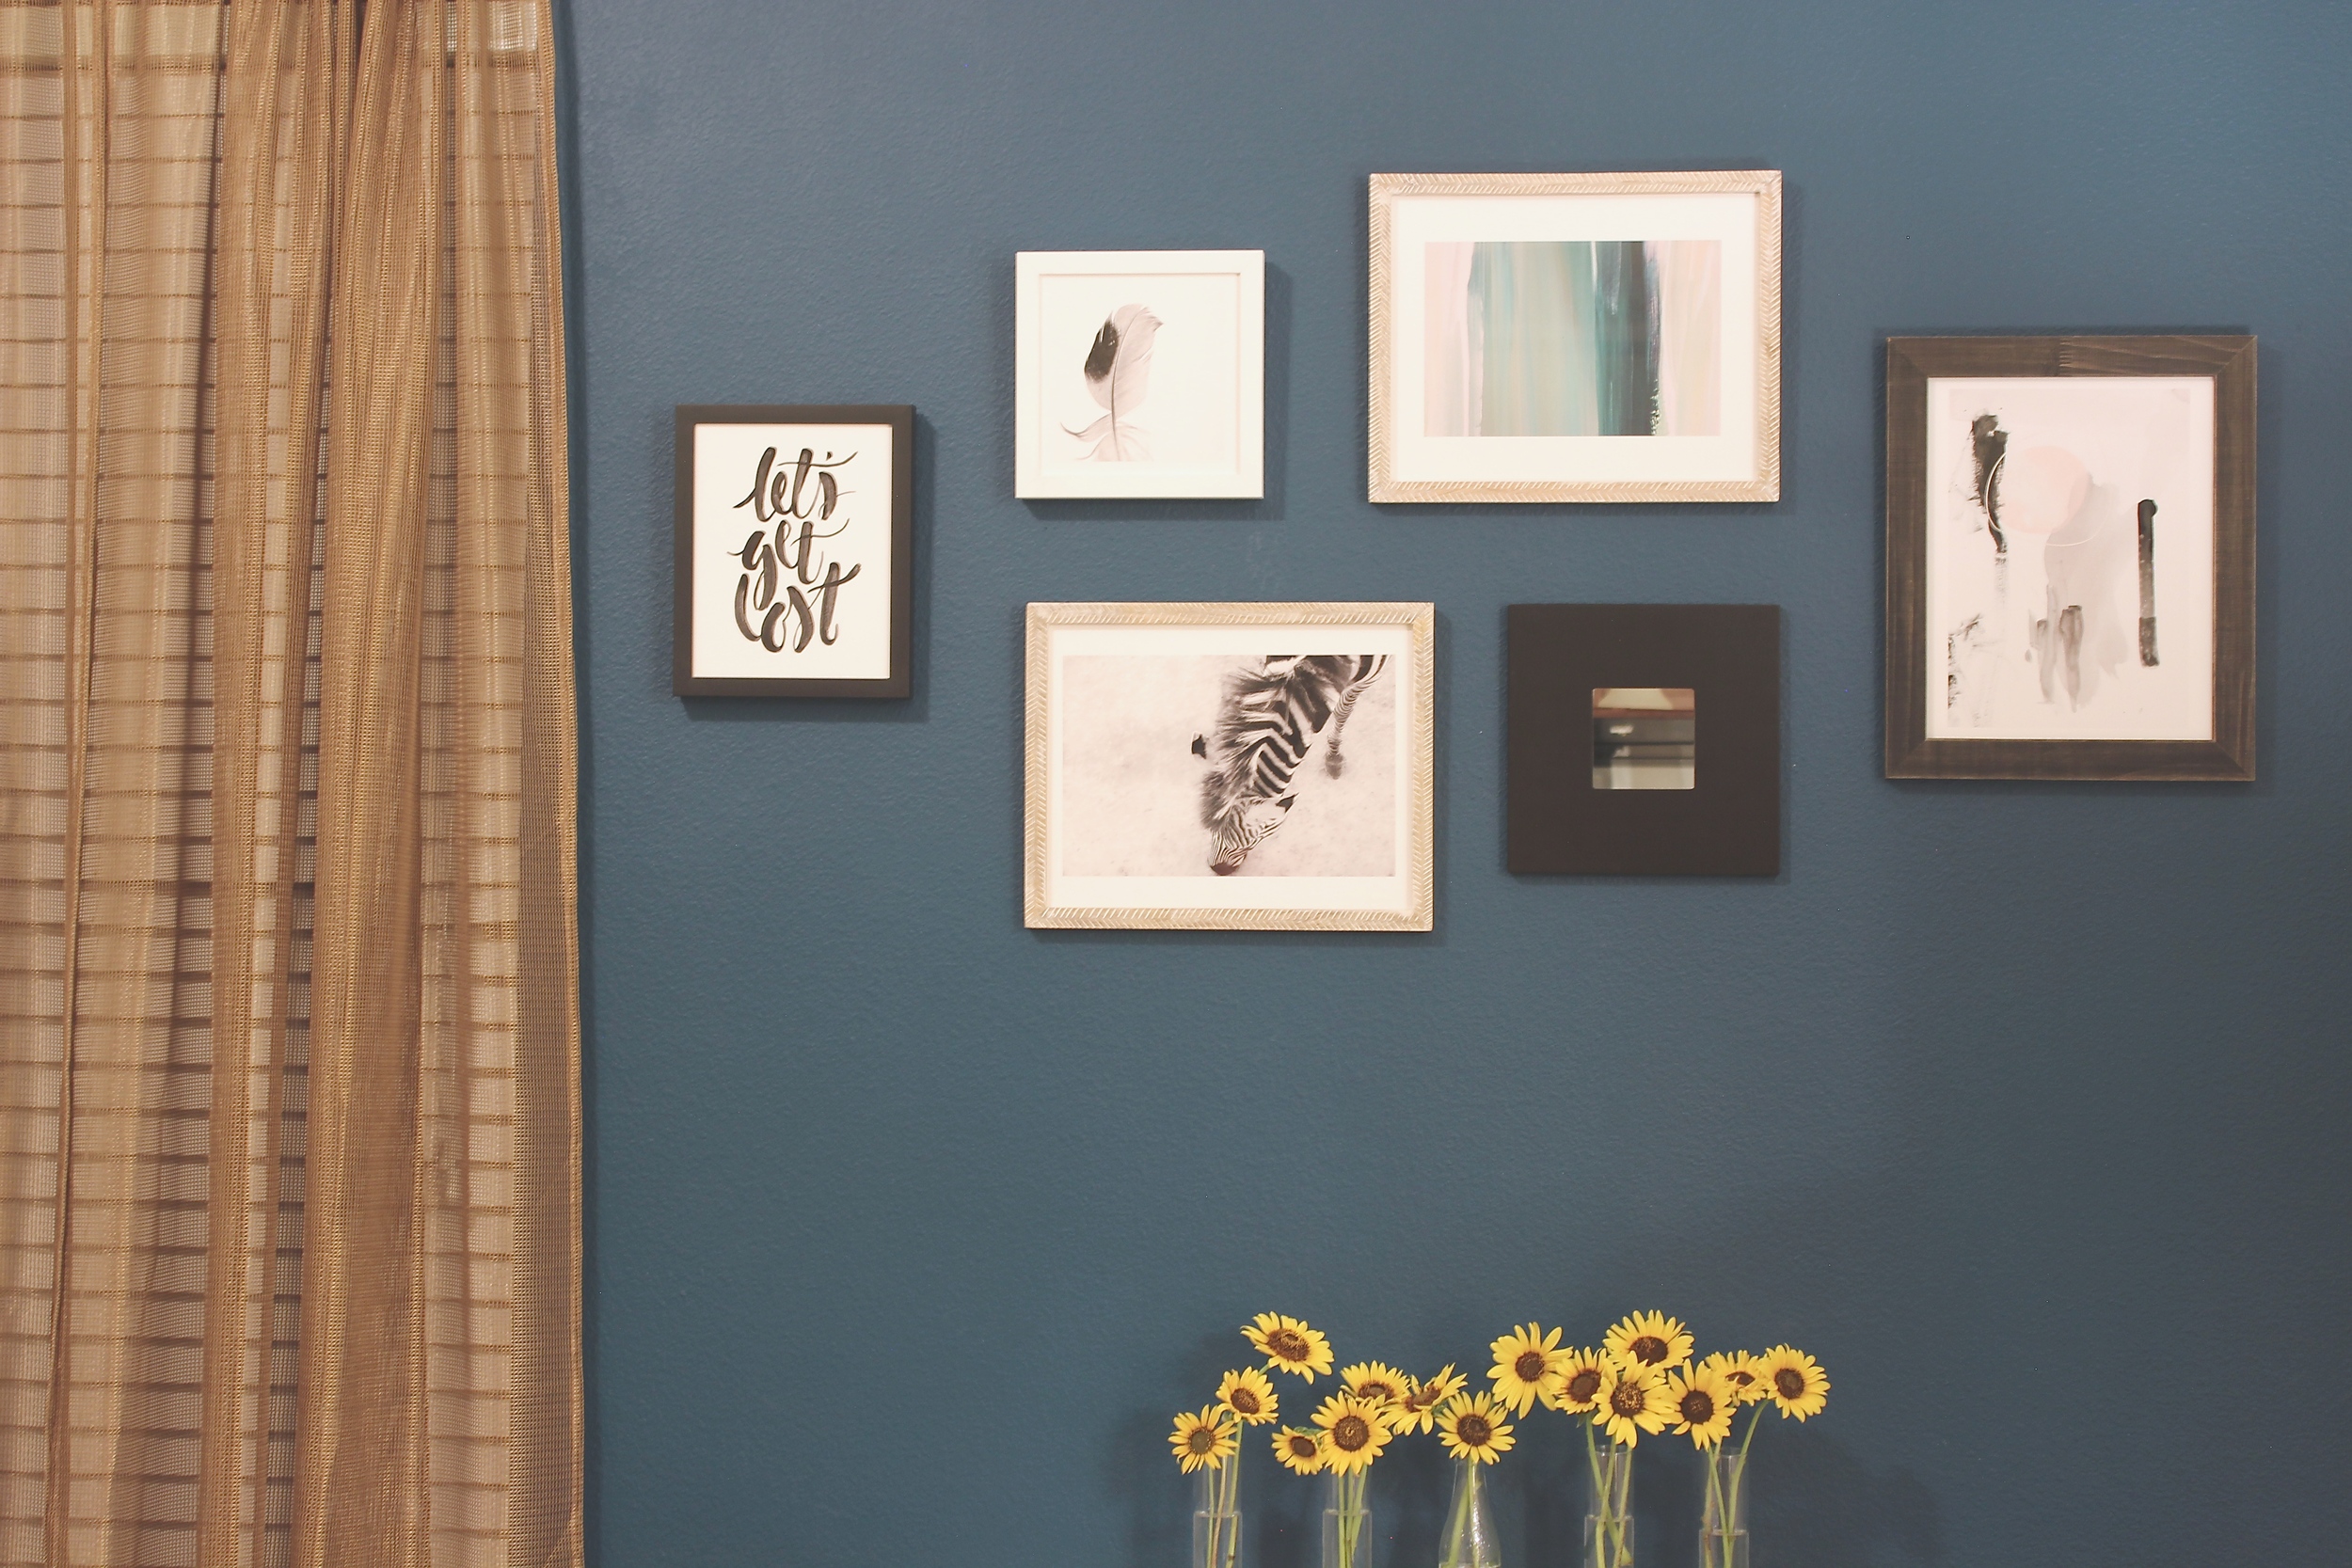
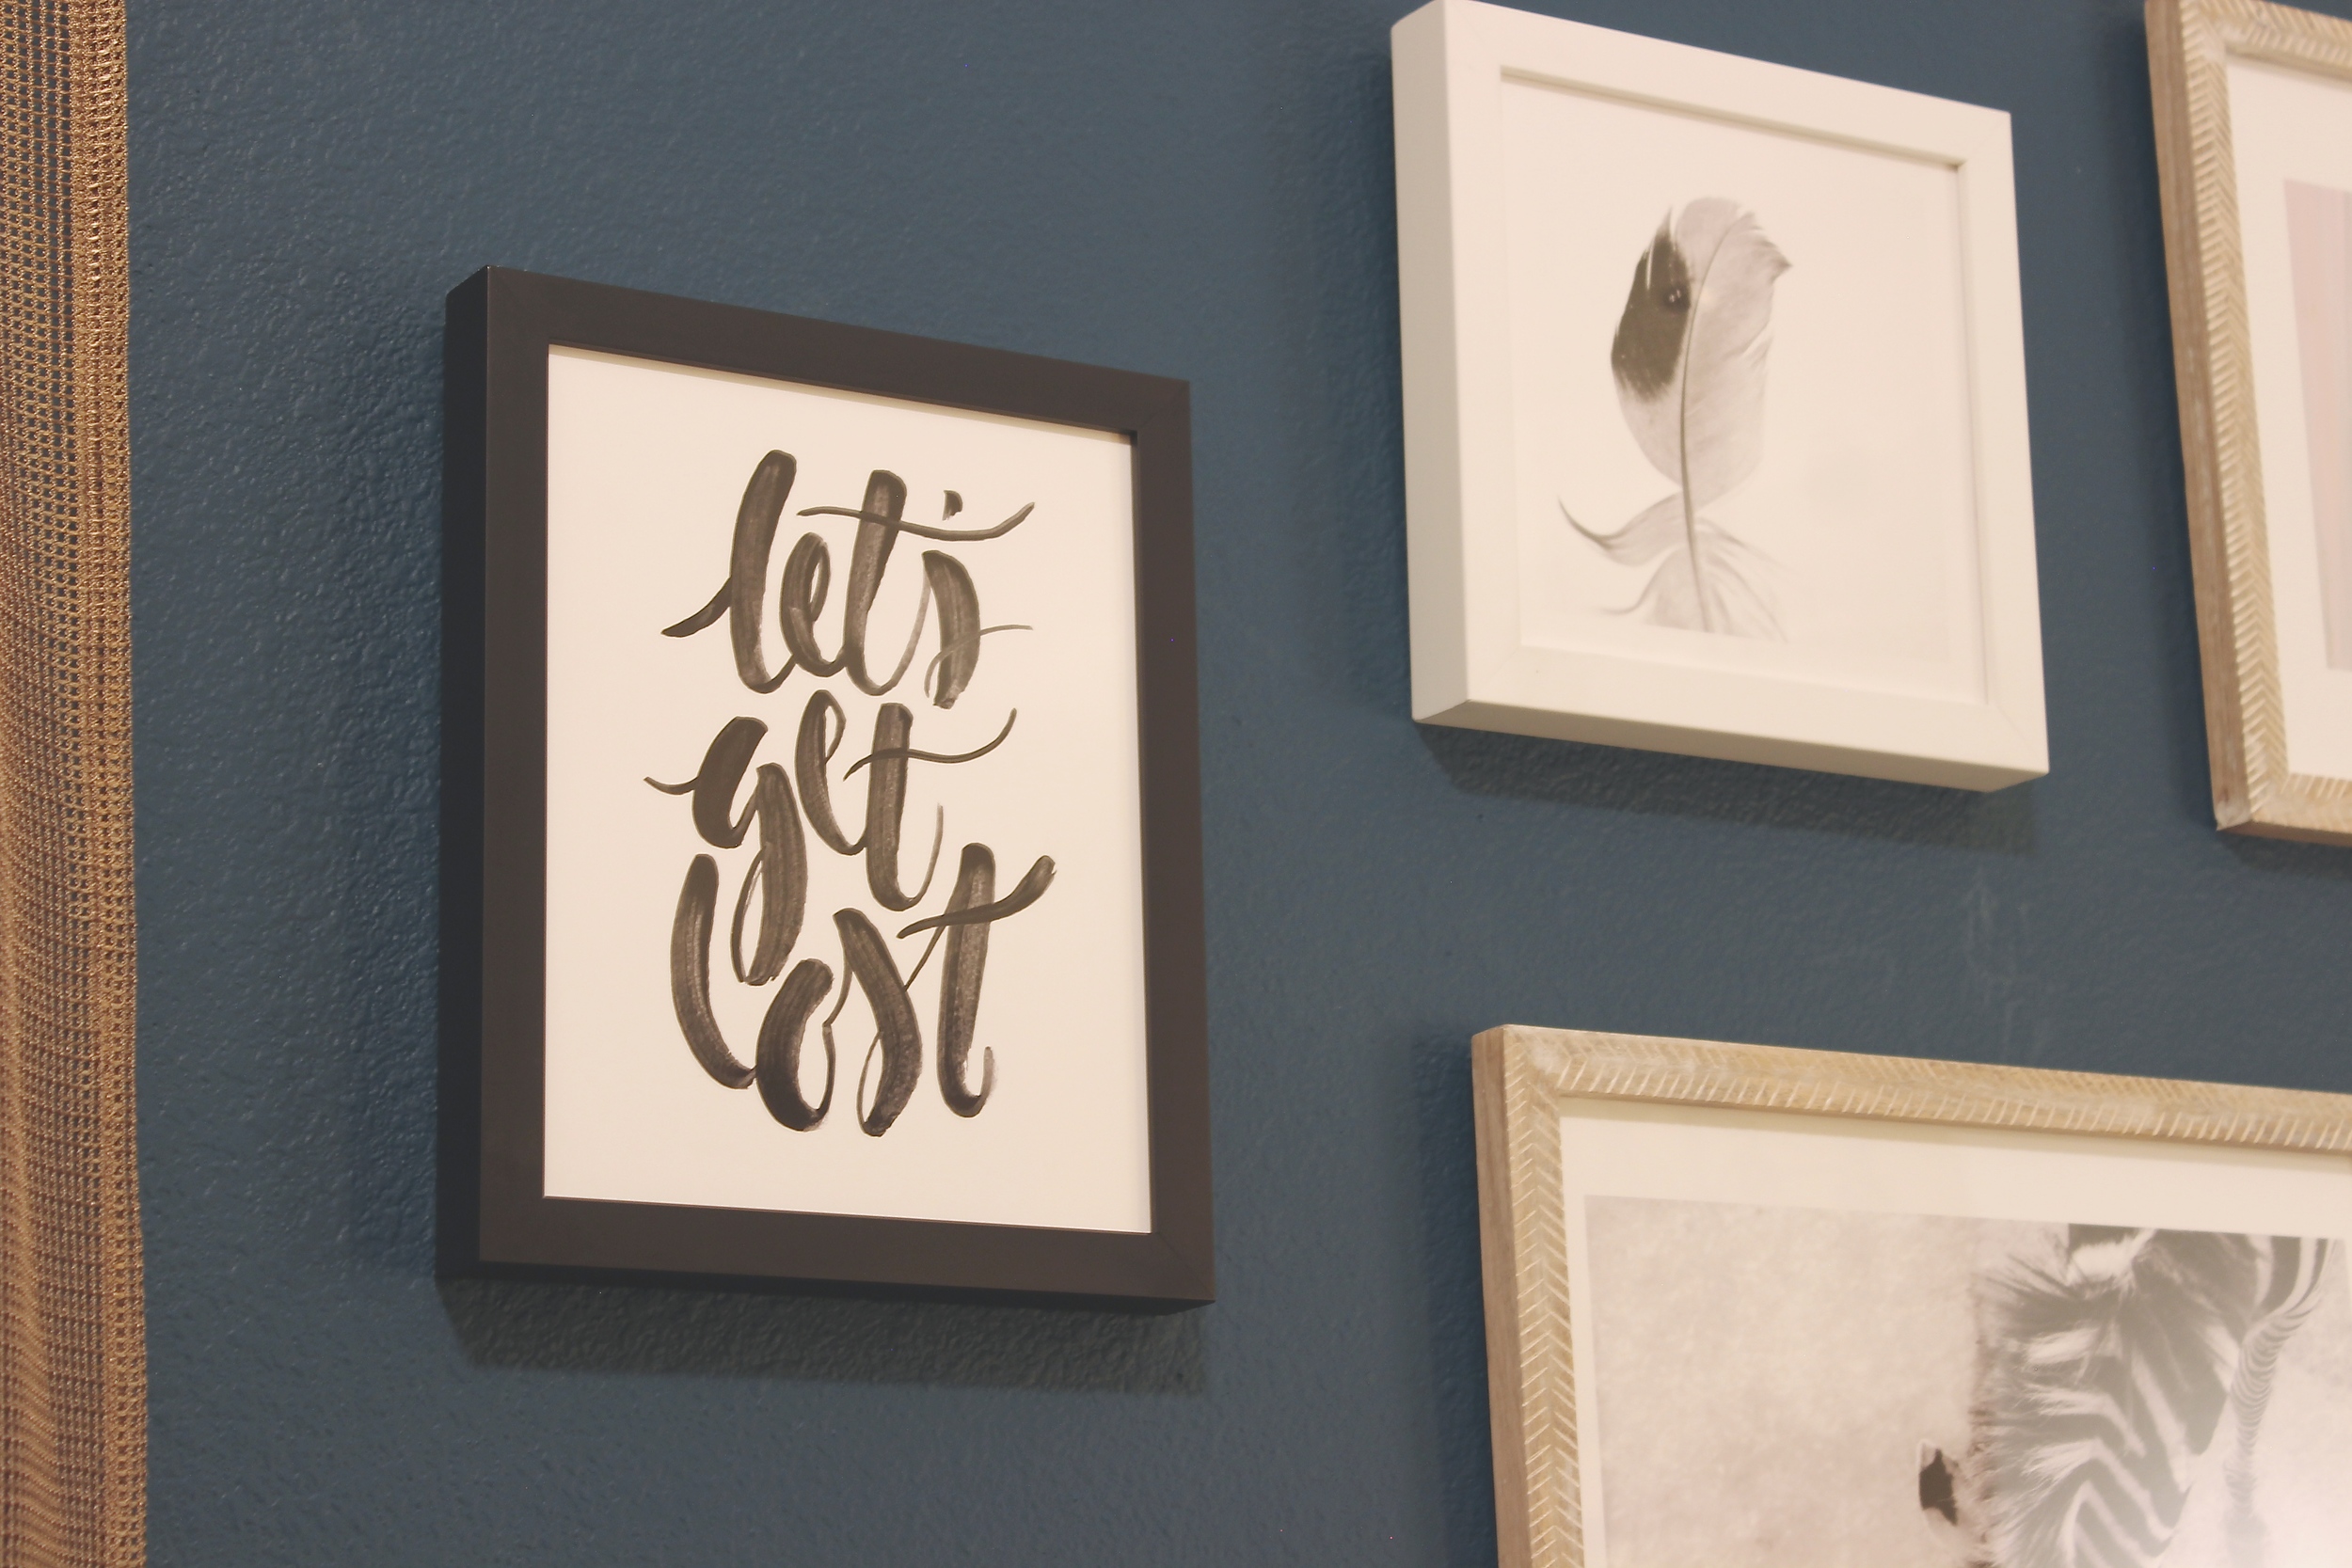
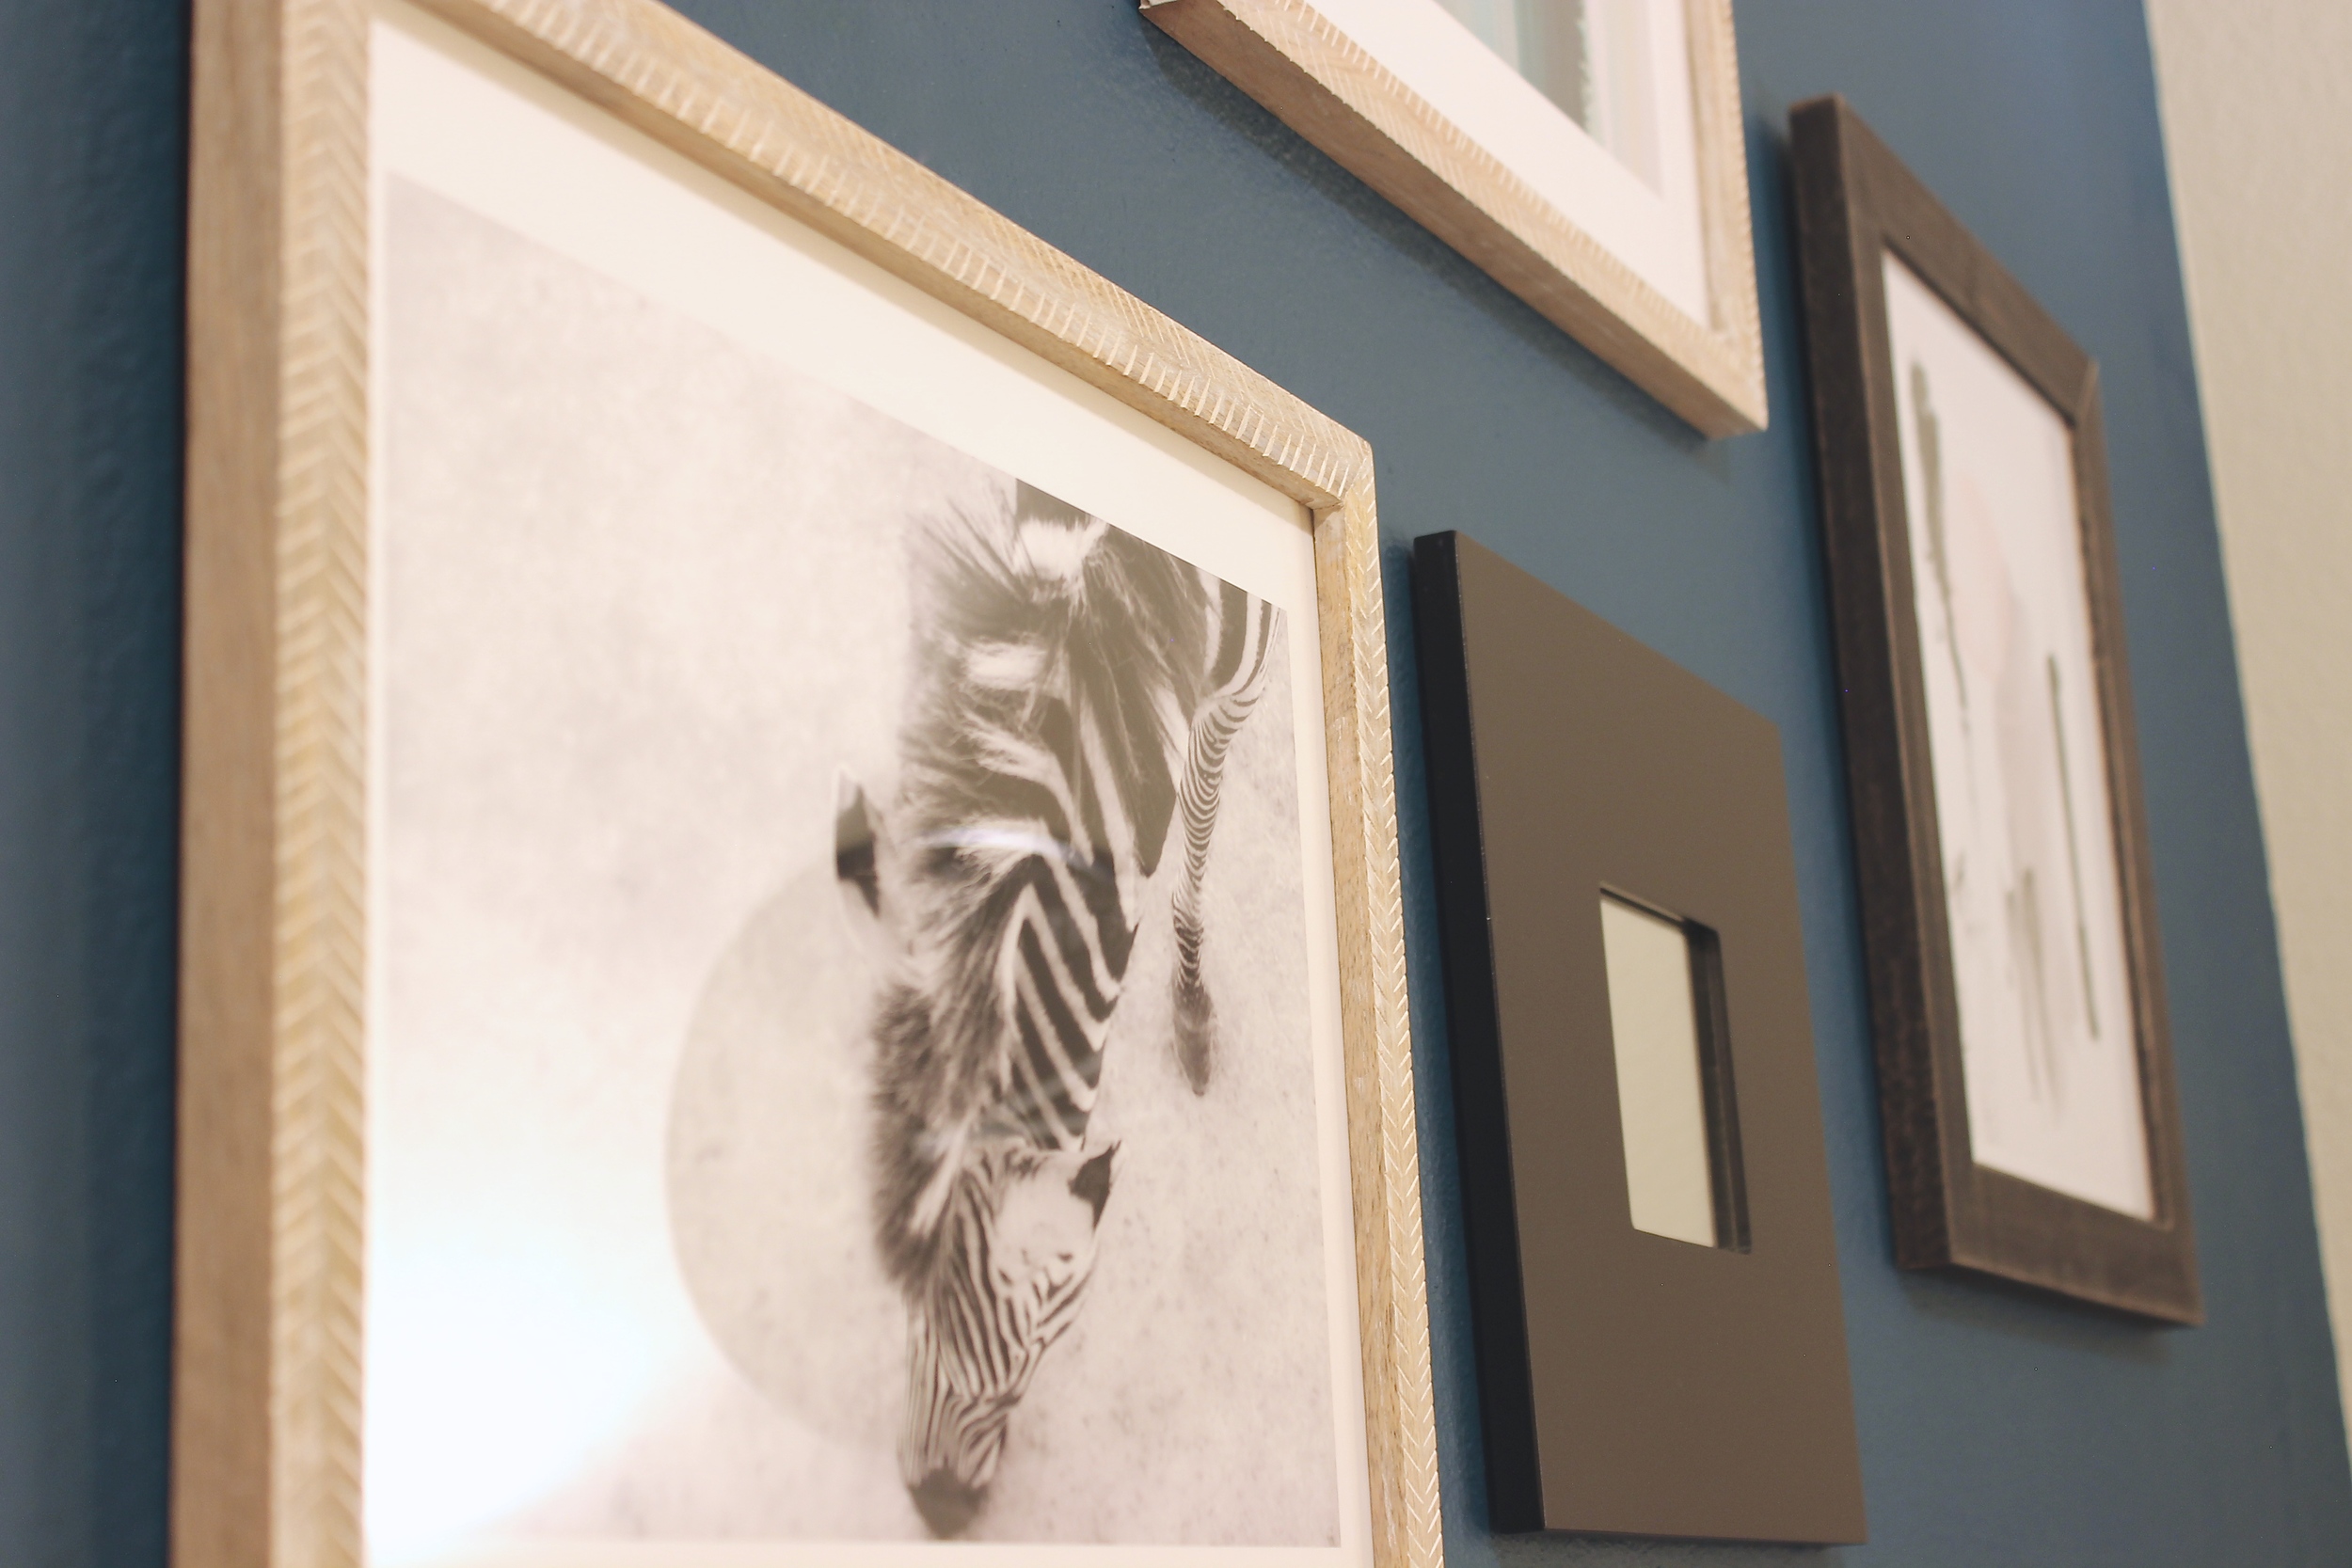
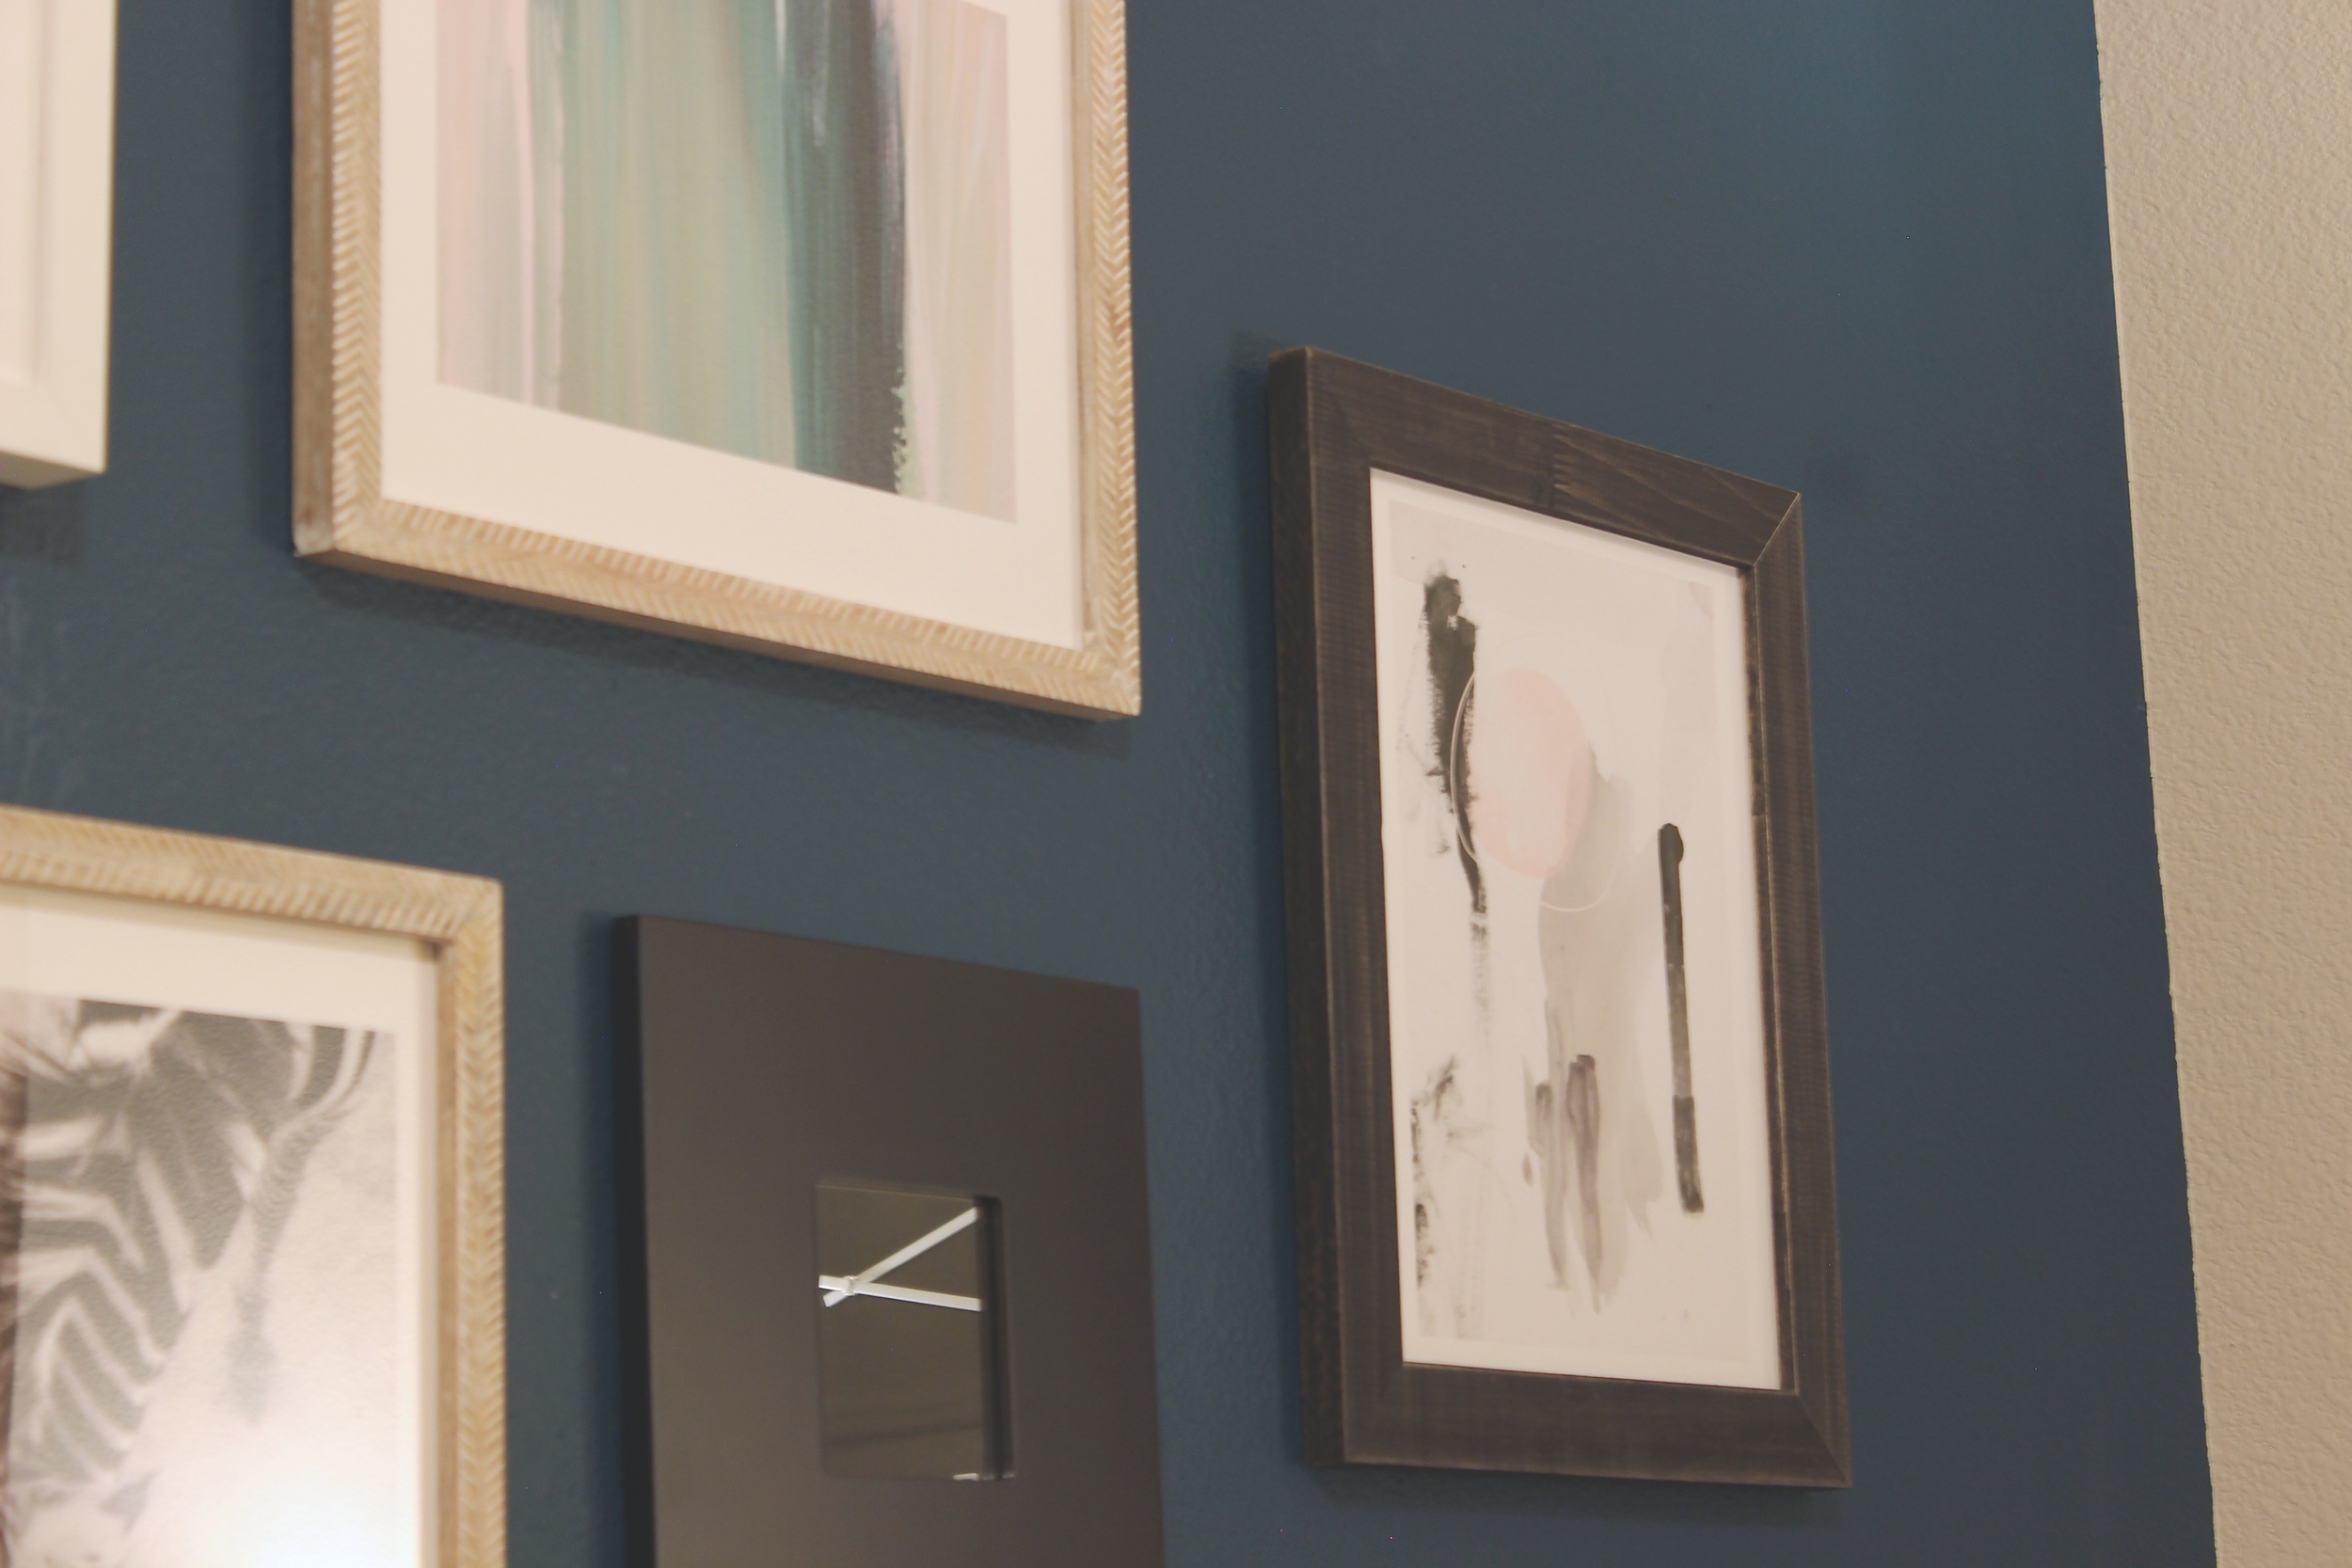
1. Emerald Blades limited edition print by Artsy Canvas Girl Designs 14" x 11" whitewashed herringbone // 2. Zebra from Above limited edition print by Mary Ann G. Tusa 14" x 11" whitewashed herringbone // 3. Son limited edition print by Lori Wemple 11" x 14" distressed charcoal stain // 4. Ruffled Feather limited edition print by Sarah Luna 8" x 8" white premium wood // 5. Let's Get Lost by Sam Dubeau 8" x 10" black premium wood
These are the prints that I chose and the tentative layout I went with, which ended up changing later. I chose a mix of frames - there are so many pretty ones available on Minted that it took me several days to decide on these. I wanted my gallery wall to look less structured and more like I had collected a bunch of different prints over time.
I know my process is a little complex (thanks to being a graphic designer *eek*), so don't freak out if you don't have any fancy programs, there is an easy way! Minted has a tool on their site that lets you create boards. Here are a couple of mockups that I created for fun using their tool:

Let's Get Lost board by Cristina. See more art prints on Minted

My Art Wall board by Cristina. See more Minted wall art

Purchase your art.

Now that you are all set with your mockup, you can now commit to the prints and make your purchase. In the meantime, start gathering the supplies you will need to hang your frames.
Supplies you will need: Screws, drywall anchors, drill and drill bits, tape, paper, scissors, measuring tape or ruler, and a pencil.
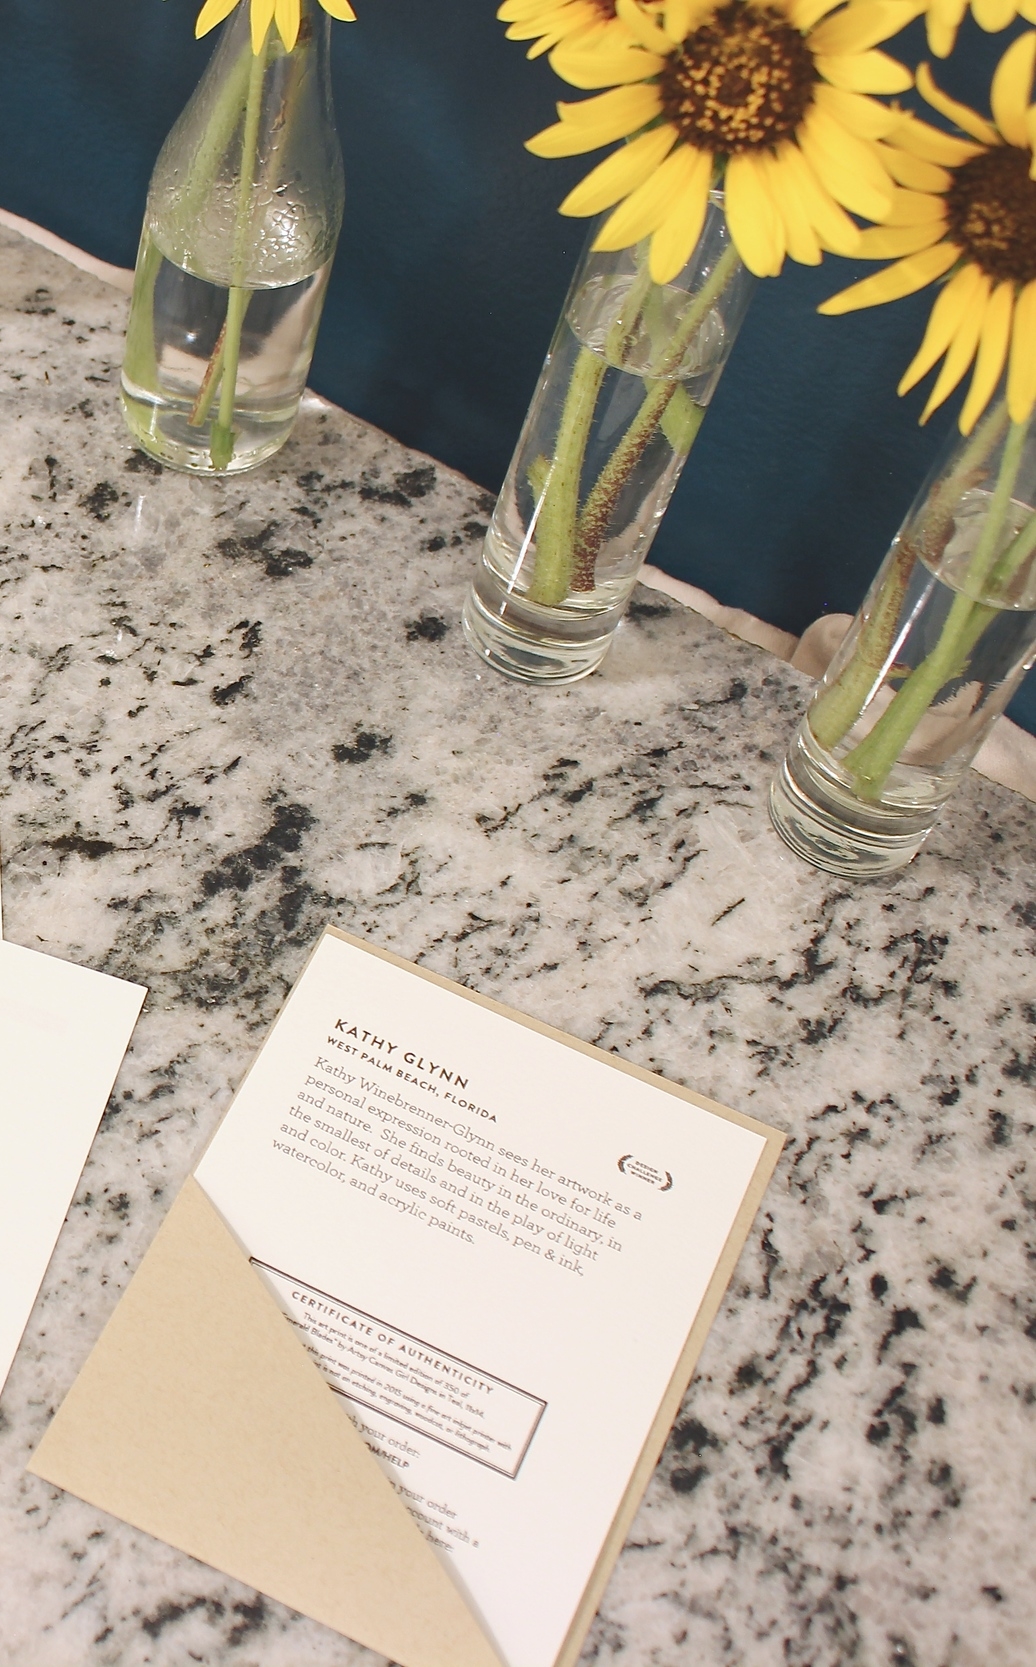
Let me tell you, I was so pleased with the way my Minted pieces arrived. They arrived straight to my door so quickly, in just 4 days! Each frame was individually packed and secured with cardboard packaging. The print itself was even wrapped in plastic and each came with individual cards with details about the artist and print. I could tell immediately that they cared about the details, which I am always fond of when it comes to products. Each print were true to color just as I had viewed them on the site, so I was really excited about that.
Before you get all excited to unwrap all of your pieces, hold your horses! I found that it was so much easier to keep my frames clean by leaving them in the plastic that it came with. Your frames will be squeaky clean once you finally hang them.

Lay out your art.

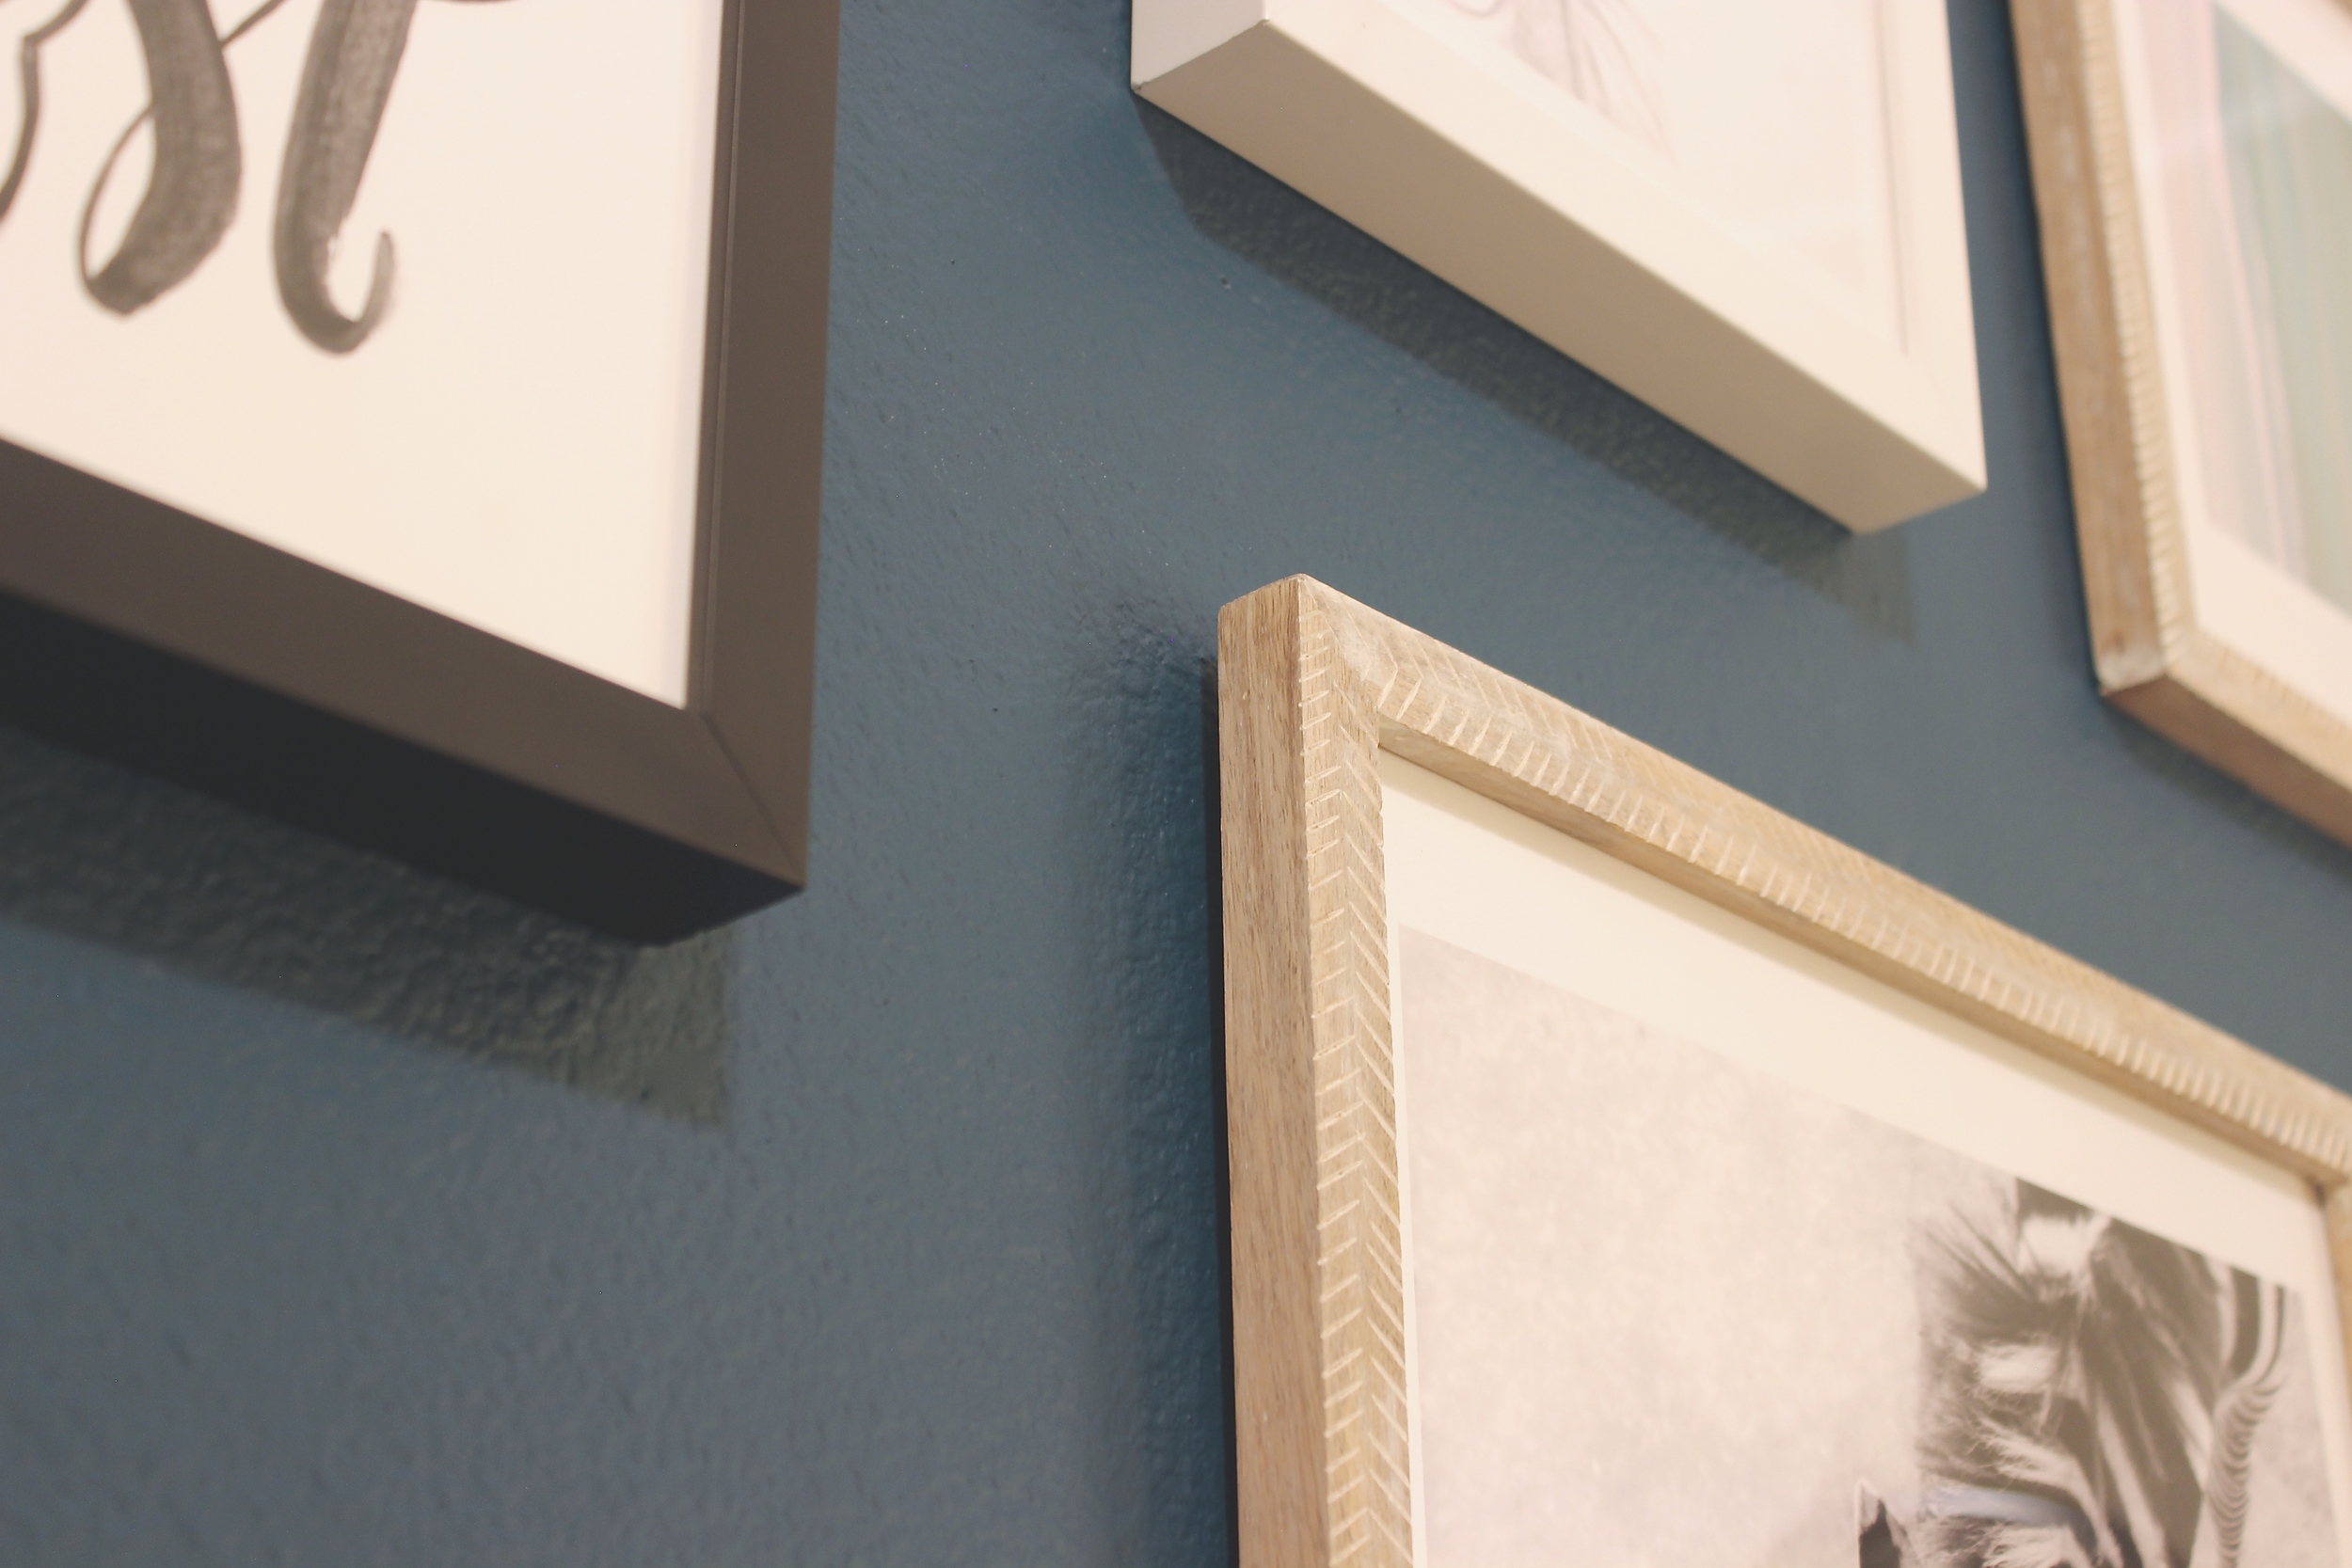
Gather all of your pieces and lay them out. If you created a mockup, refer to it, but adjust and change it as you like because everything always looks different in person. Try different layouts and see what looks best. You could even take photos of each layout so you can compare them. Decide on the amount of spacing you want between each piece and measure it out to see how it actually looks. Once you're happy with it, leave them laid out until you're ready to hang them. This is my rough layout - I adjusted the spacing of these later so that it was even. I decided that the vertical layout that I had done for my mockup was too narrow for the space. I also added a black mirror that I already had from IKEA.
Create a wall mockup.
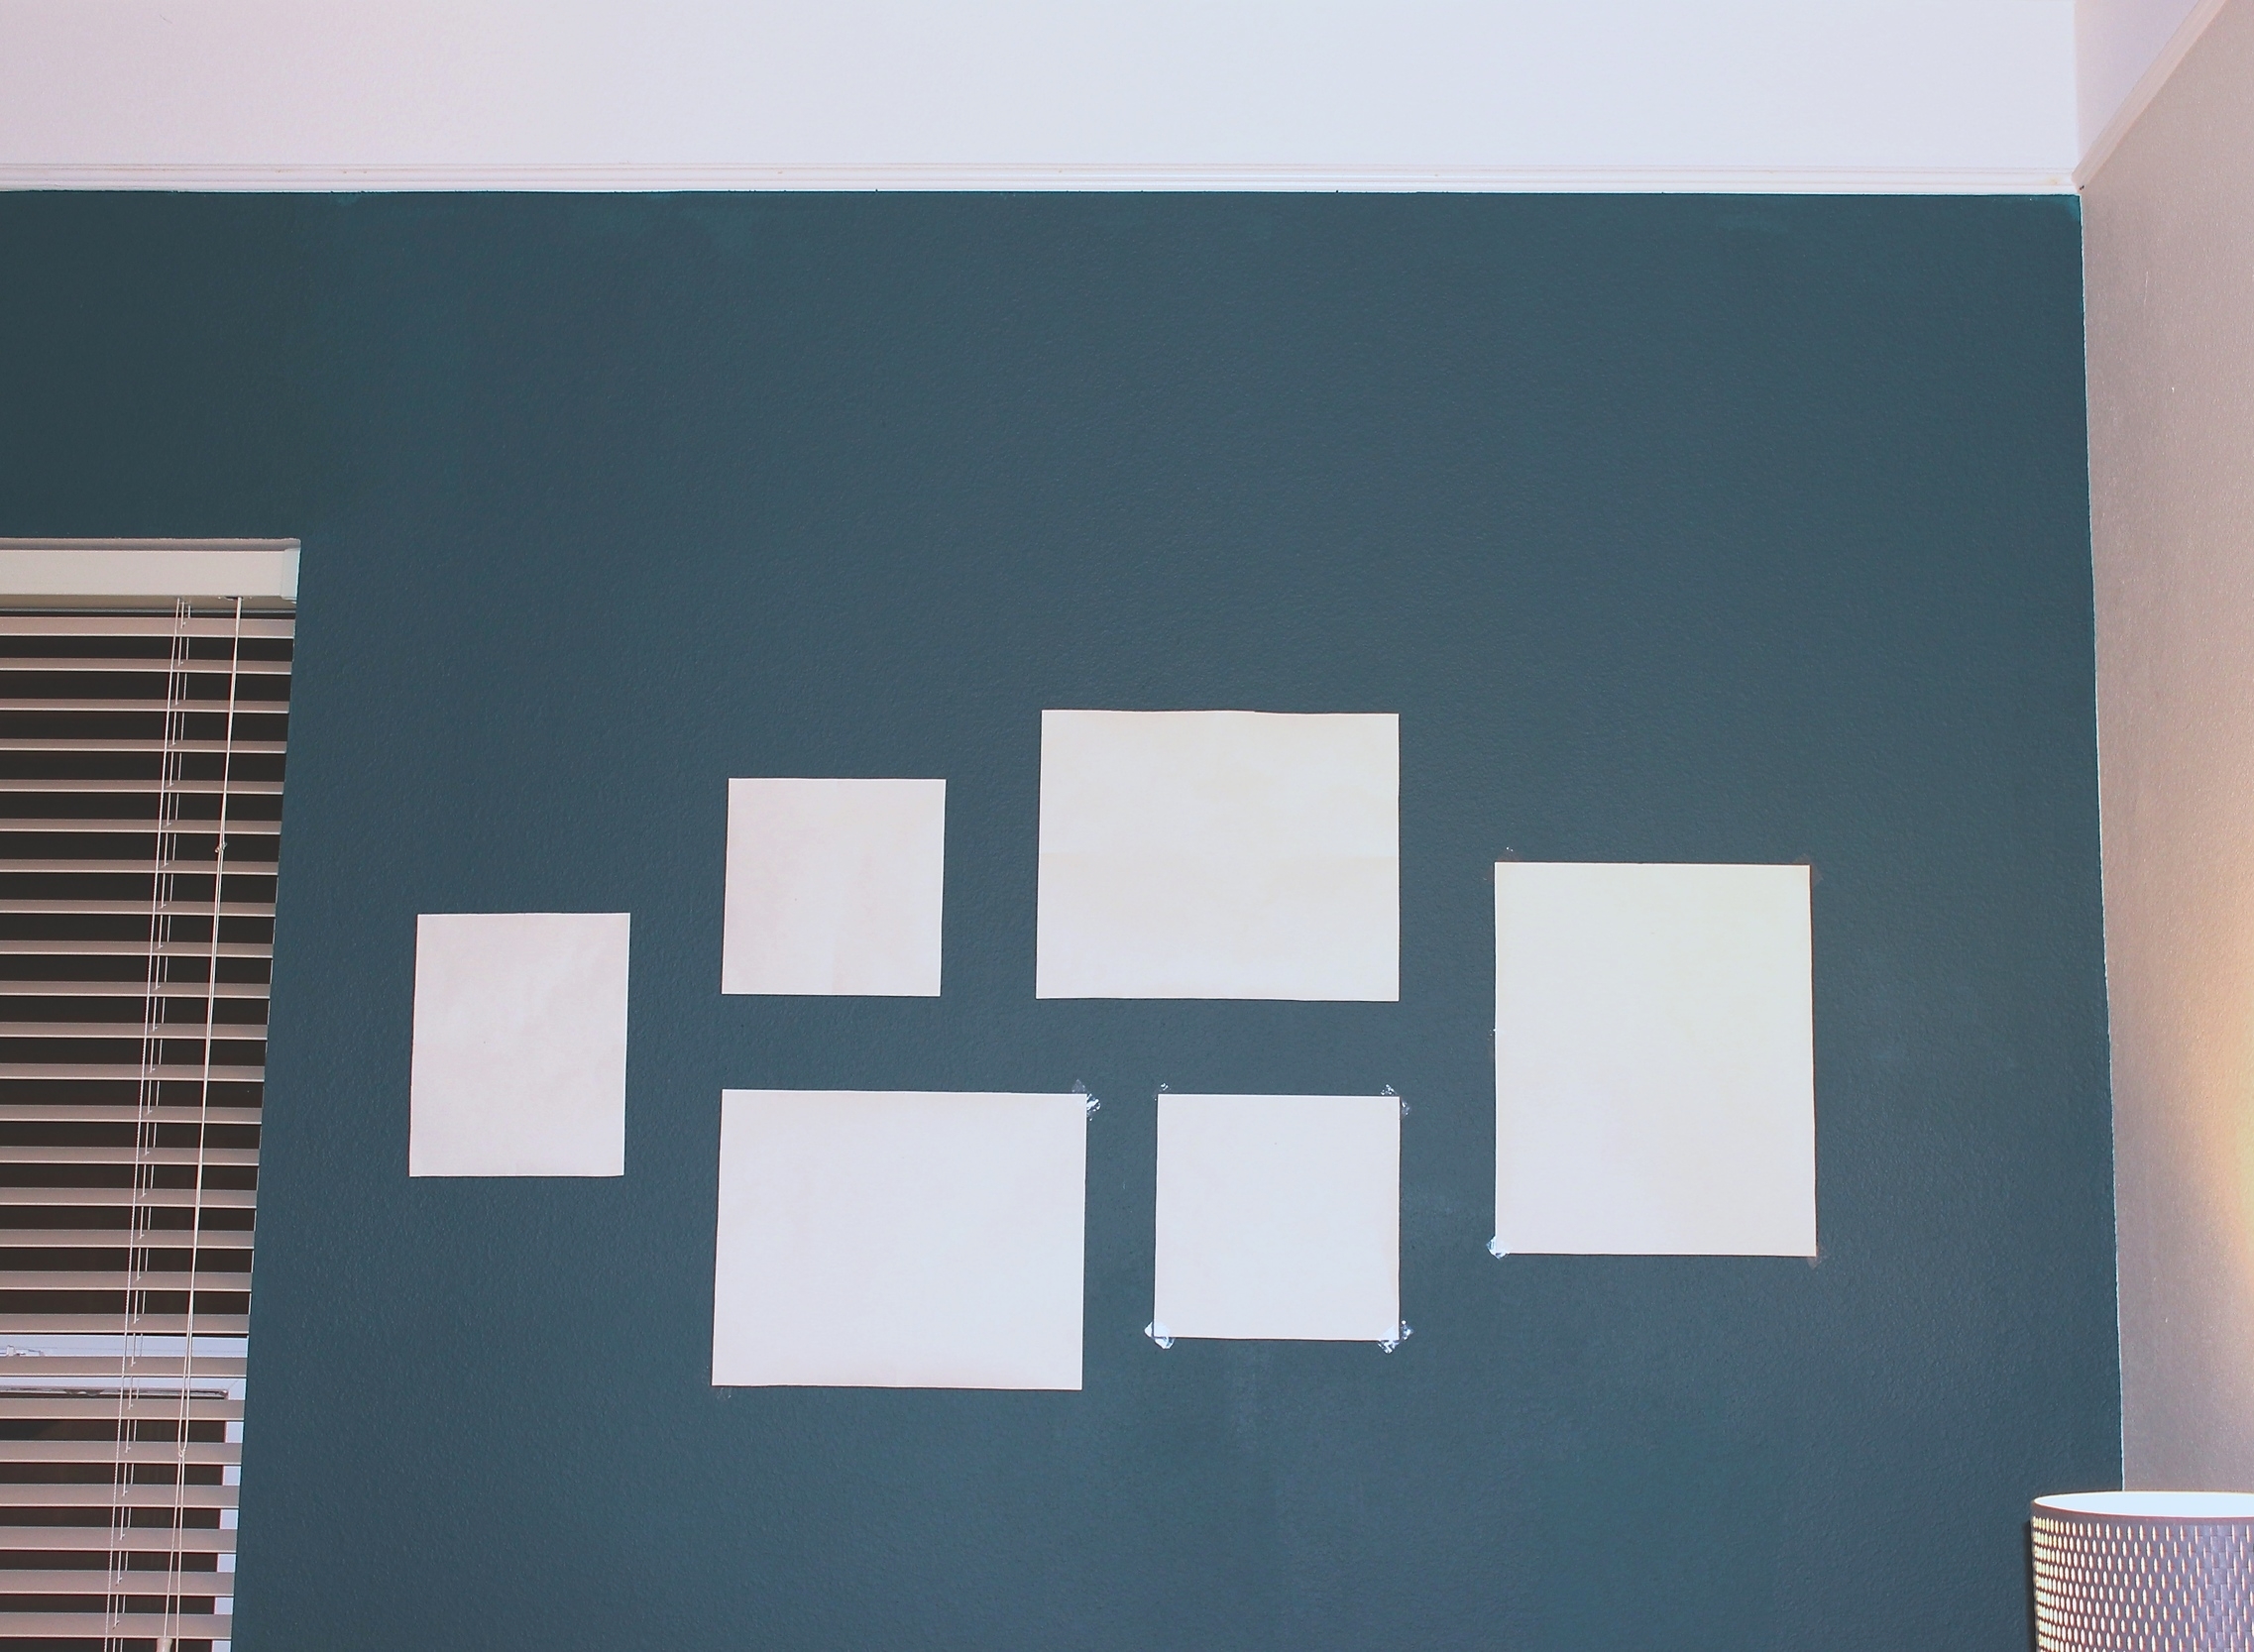
Use your frames to create outlines on paper and then cut them out. Do this for all pieces. Place the cutouts on the wall relative to how you laid them out in step 6. For each cutout, I marked a center guide 3" from the top of each frame and 2" for the mirror. Make sure to check how low your wire sits to compensate for where your holes will need to be. What I did was measure the spacing between each piece at 4" and aligned the two smaller pieces with the edge of the bigger pieces on each side. Since I already had a stud on my wall, I had to use that as the starting point for the center frame, so that is why there is more space on the right side of the wall. I then laid out the other pieces, making sure to align them to create order and centering the frames at each end horizontally. For my wall mounts, I used drywall anchors, so it was very easy to install. Wherever you marked your center guides is where you will drill your holes.

Hang your art and enjoy.
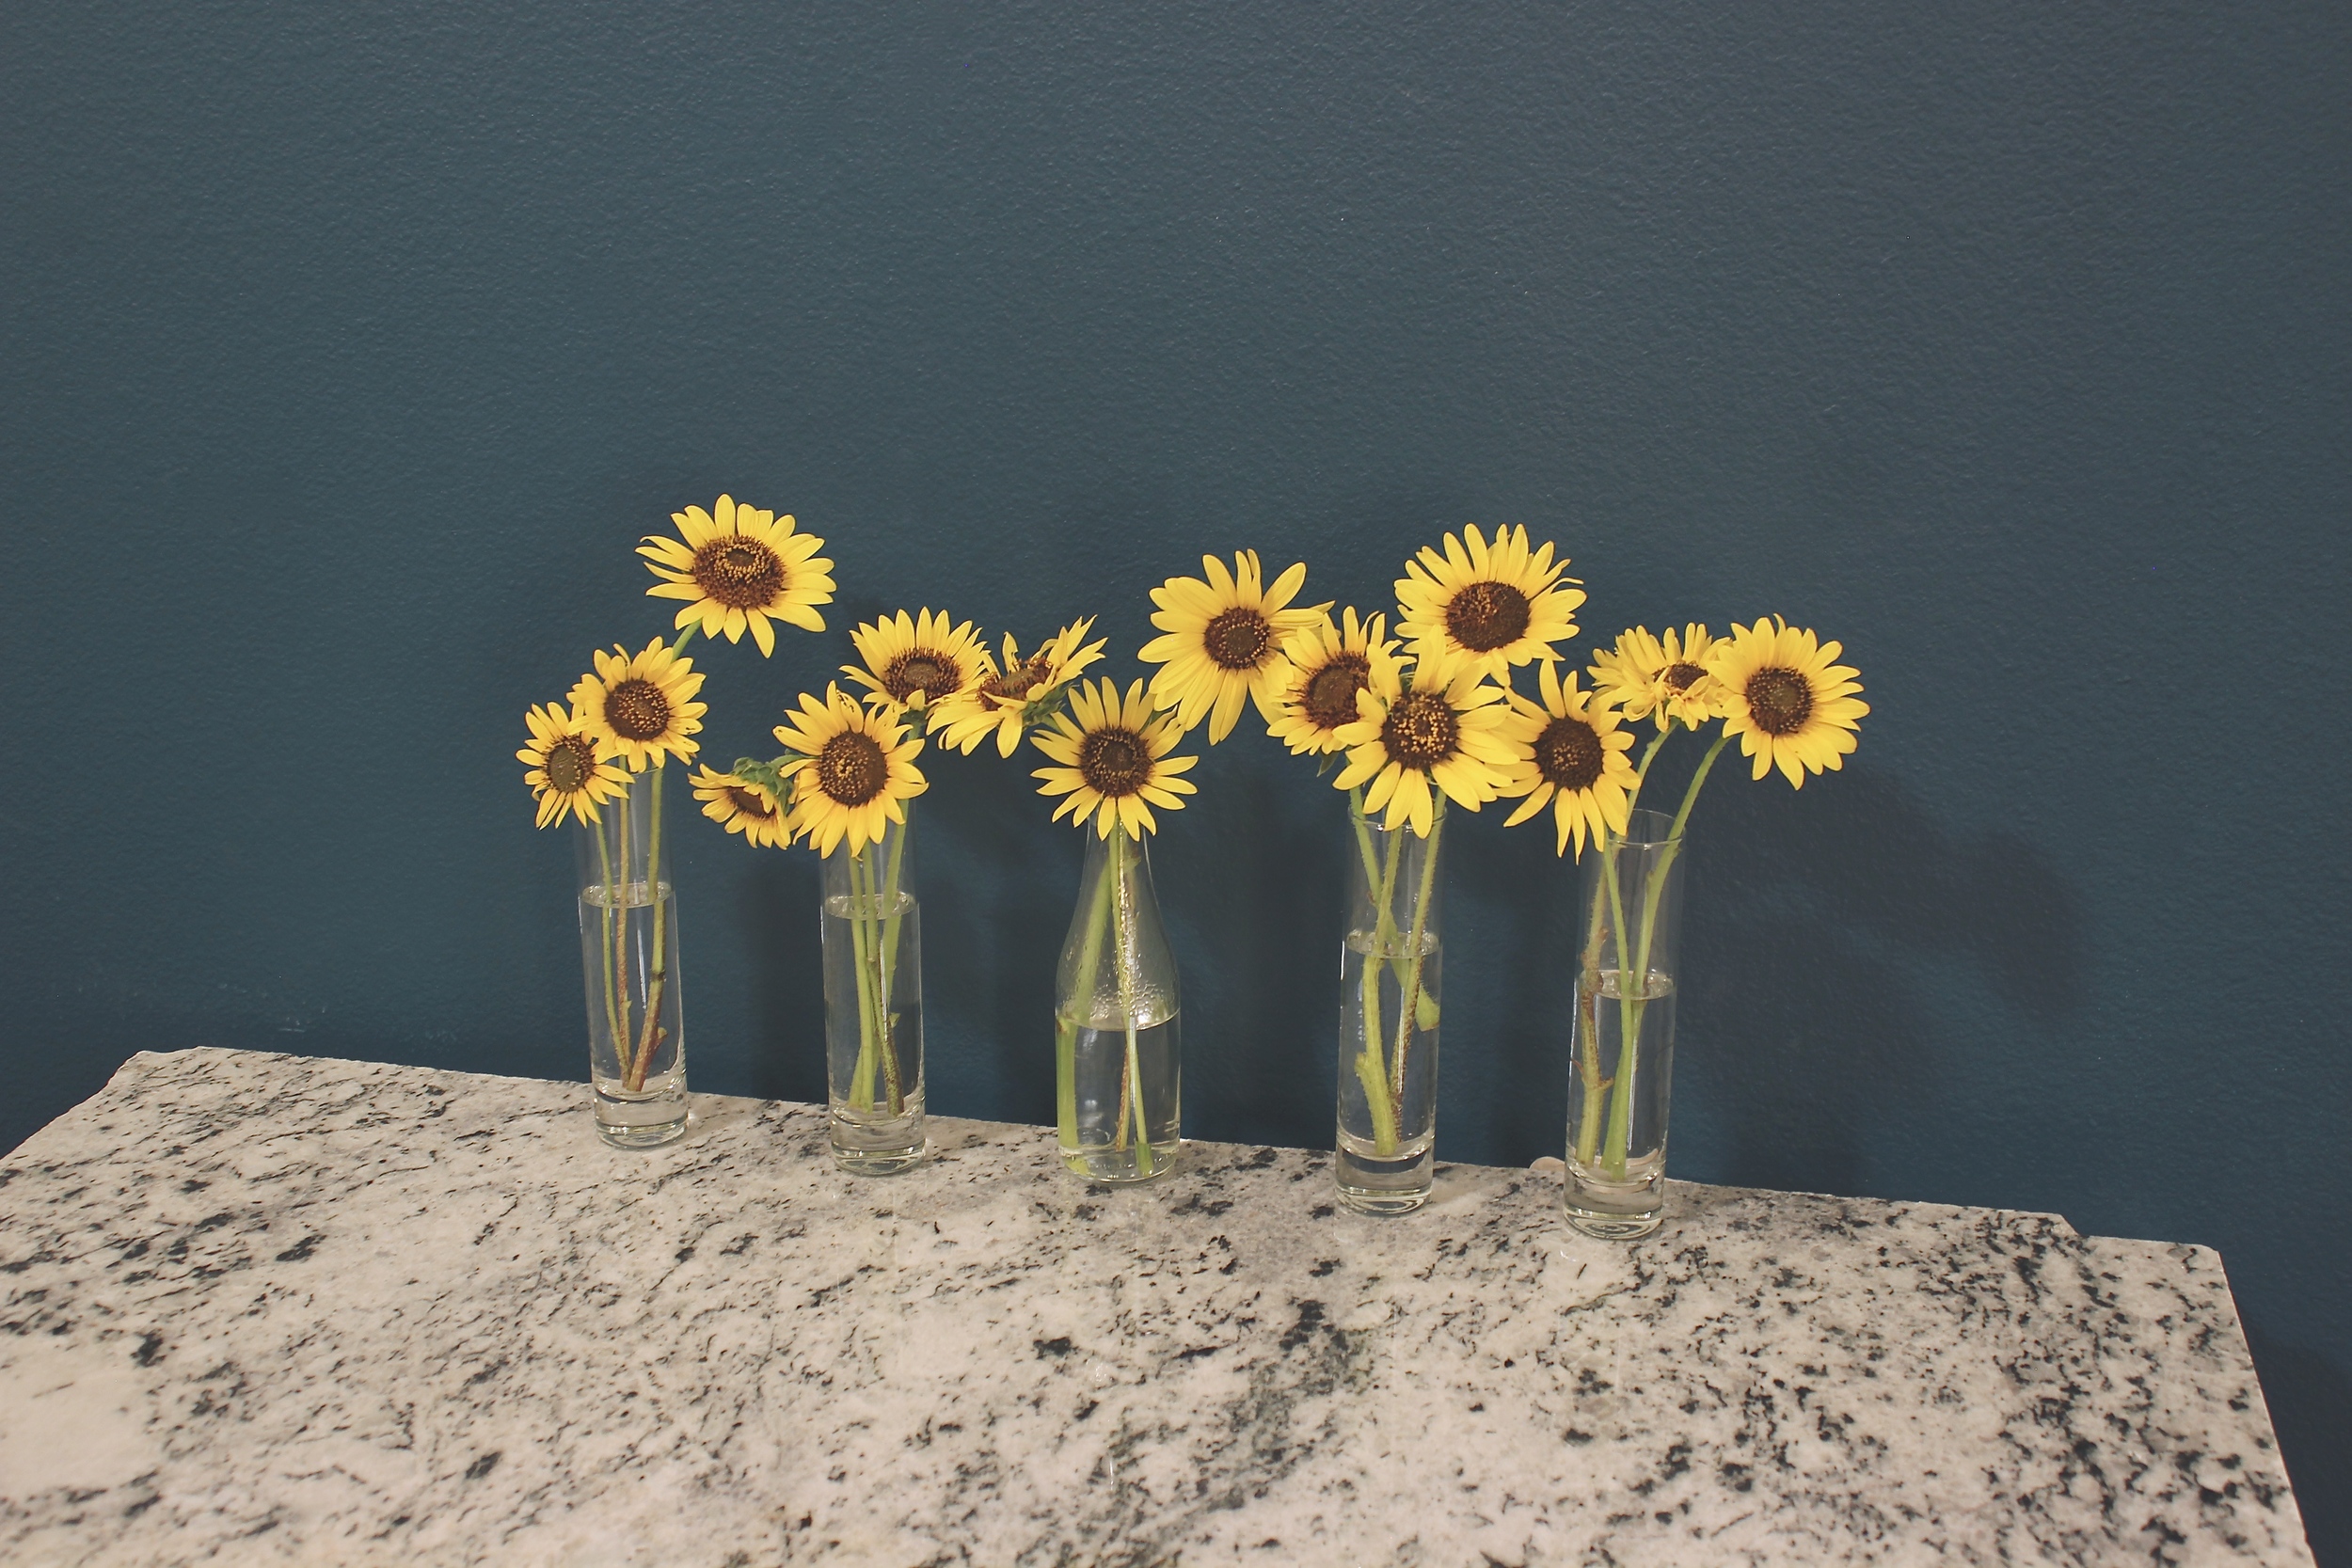
Once all of your screws are in, hang your frames and measure the spacing to make sure it is equal on all sides. Voila! There you have your beautiful gallery wall! Add your furniture back in place and don't forget some lighting to set the mood. It really does change the whole feeling of a room. I was just amazed with how great this gallery turned out, and I couldn't have been more pleased with the results.


I hope you had an amazing time with me. I know this was a long post, so thanks for staying 'til the end and putting up with my endless rambling (haha). I am so excited to get to do this and can't wait to share more exciting projects like these. Let me know if you'd like to see my entire living room. It's not exactly complete, but I'd love to share what I have.
Thank you so much to Minted for giving me this opportunity to design my space with these incredible works of art. I am hooked on what the company is all about - quality, detail, and giving back to the community. I love it when companies have depth and purpose.
If you are ever looking for wall art, stationary, home decor, children's decor, or fabrics, I highly encourage you to visit Minted's website. I was honestly blown away with all of their products.
That is all lovelies, until next time! If you have any questions or if I missed anything, please comment below and I'll get back to you.
Will you be creating a gallery wall? Share with me in the comments! <3