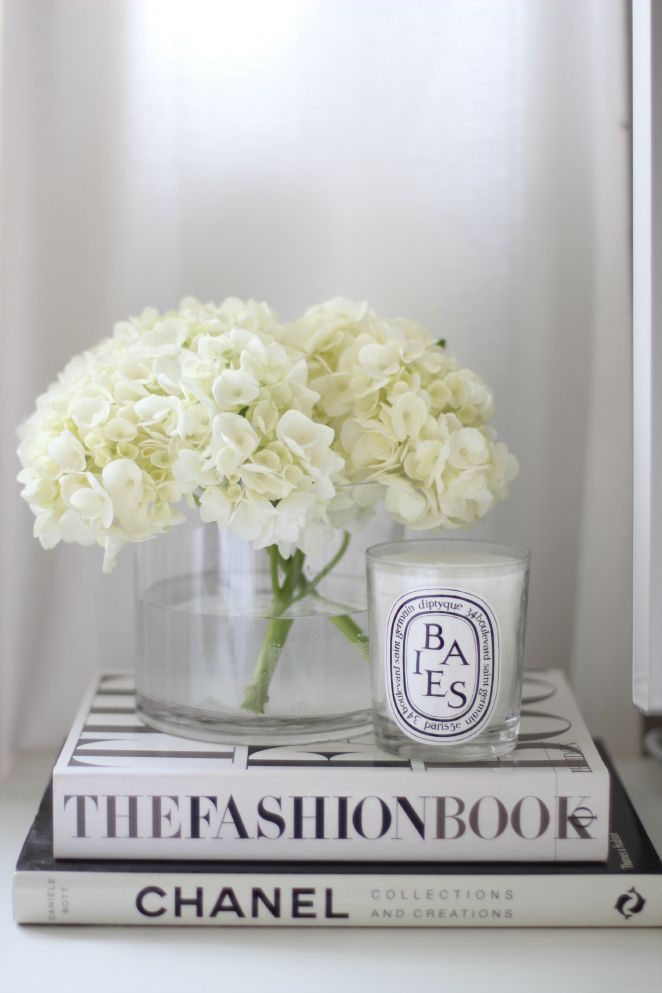
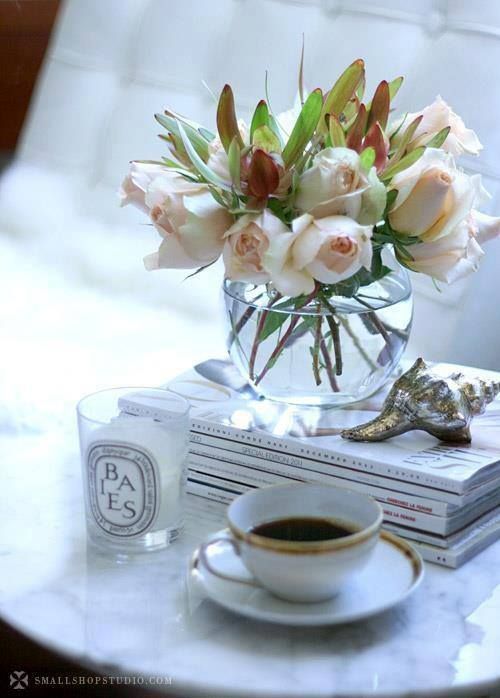
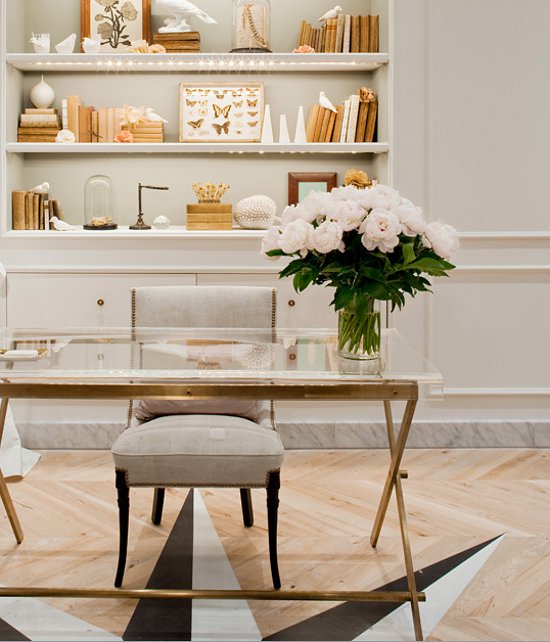
Posts in lifestyle
Hello Fall! + Blogger Fall Home Tours

via Bliss At Home

With Fall upon us, I can't help but get excited for the holidays to come and the cool sweater weather ahead. Although I come from an island, I can say that I will never get used to the heat, especially when it reaches a blistering 100 degrees and above here in Oklahoma. Being in the Midwest has exposed me to some very harsh weather conditions, so I've learned to really appreciate nice weather and being outdoors on those perfect-weather days. It's not always possible because it's normally either too hot or too cold most months of the year. 

Fall is such a fun time to get into the holiday spirit and decorate your home with bright colors, bring natural elements indoors, and create a cozy atmosphere. In the coming weeks, I'll be sharing a bunch of Fall design roundups that will get you inspired to bust out your inner Martha. I remember watching her show when I was little and wanting to be just like her. I think that's where my love for all things home started. I was OBSESSED! Remember when she would say "It's a good thing." I loved it!

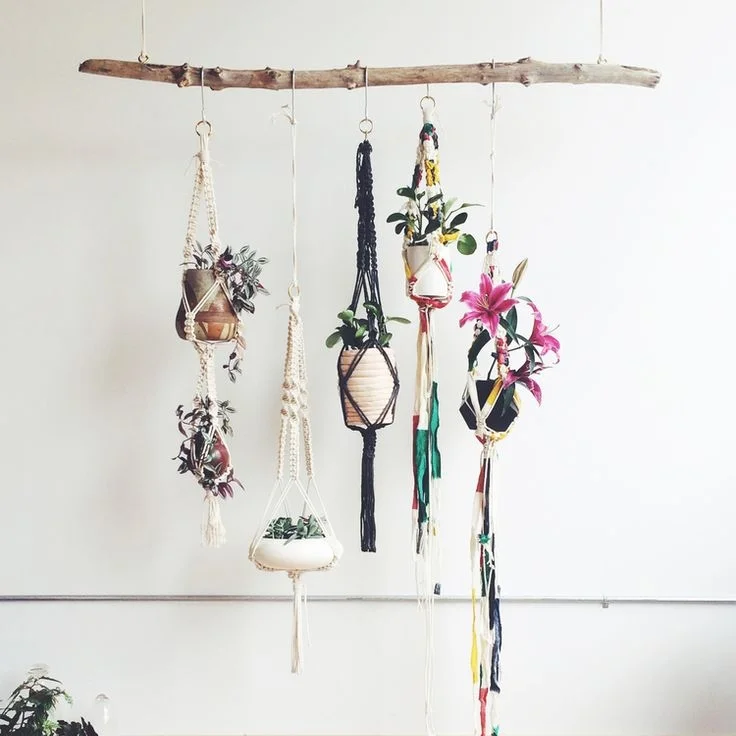
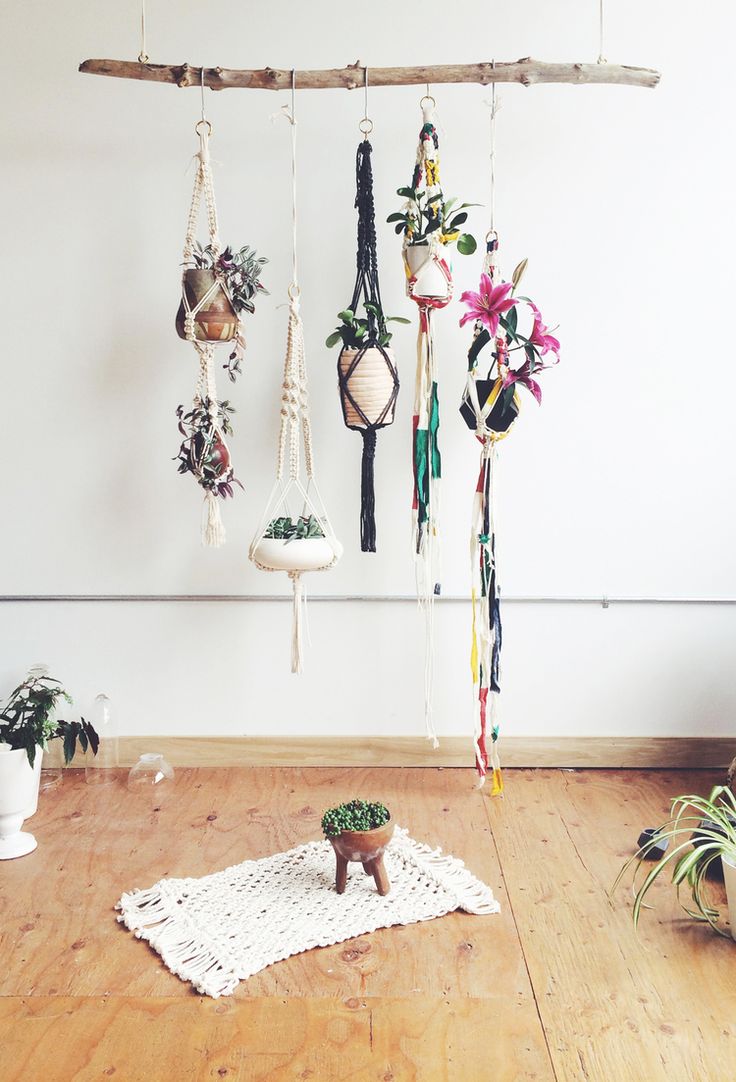
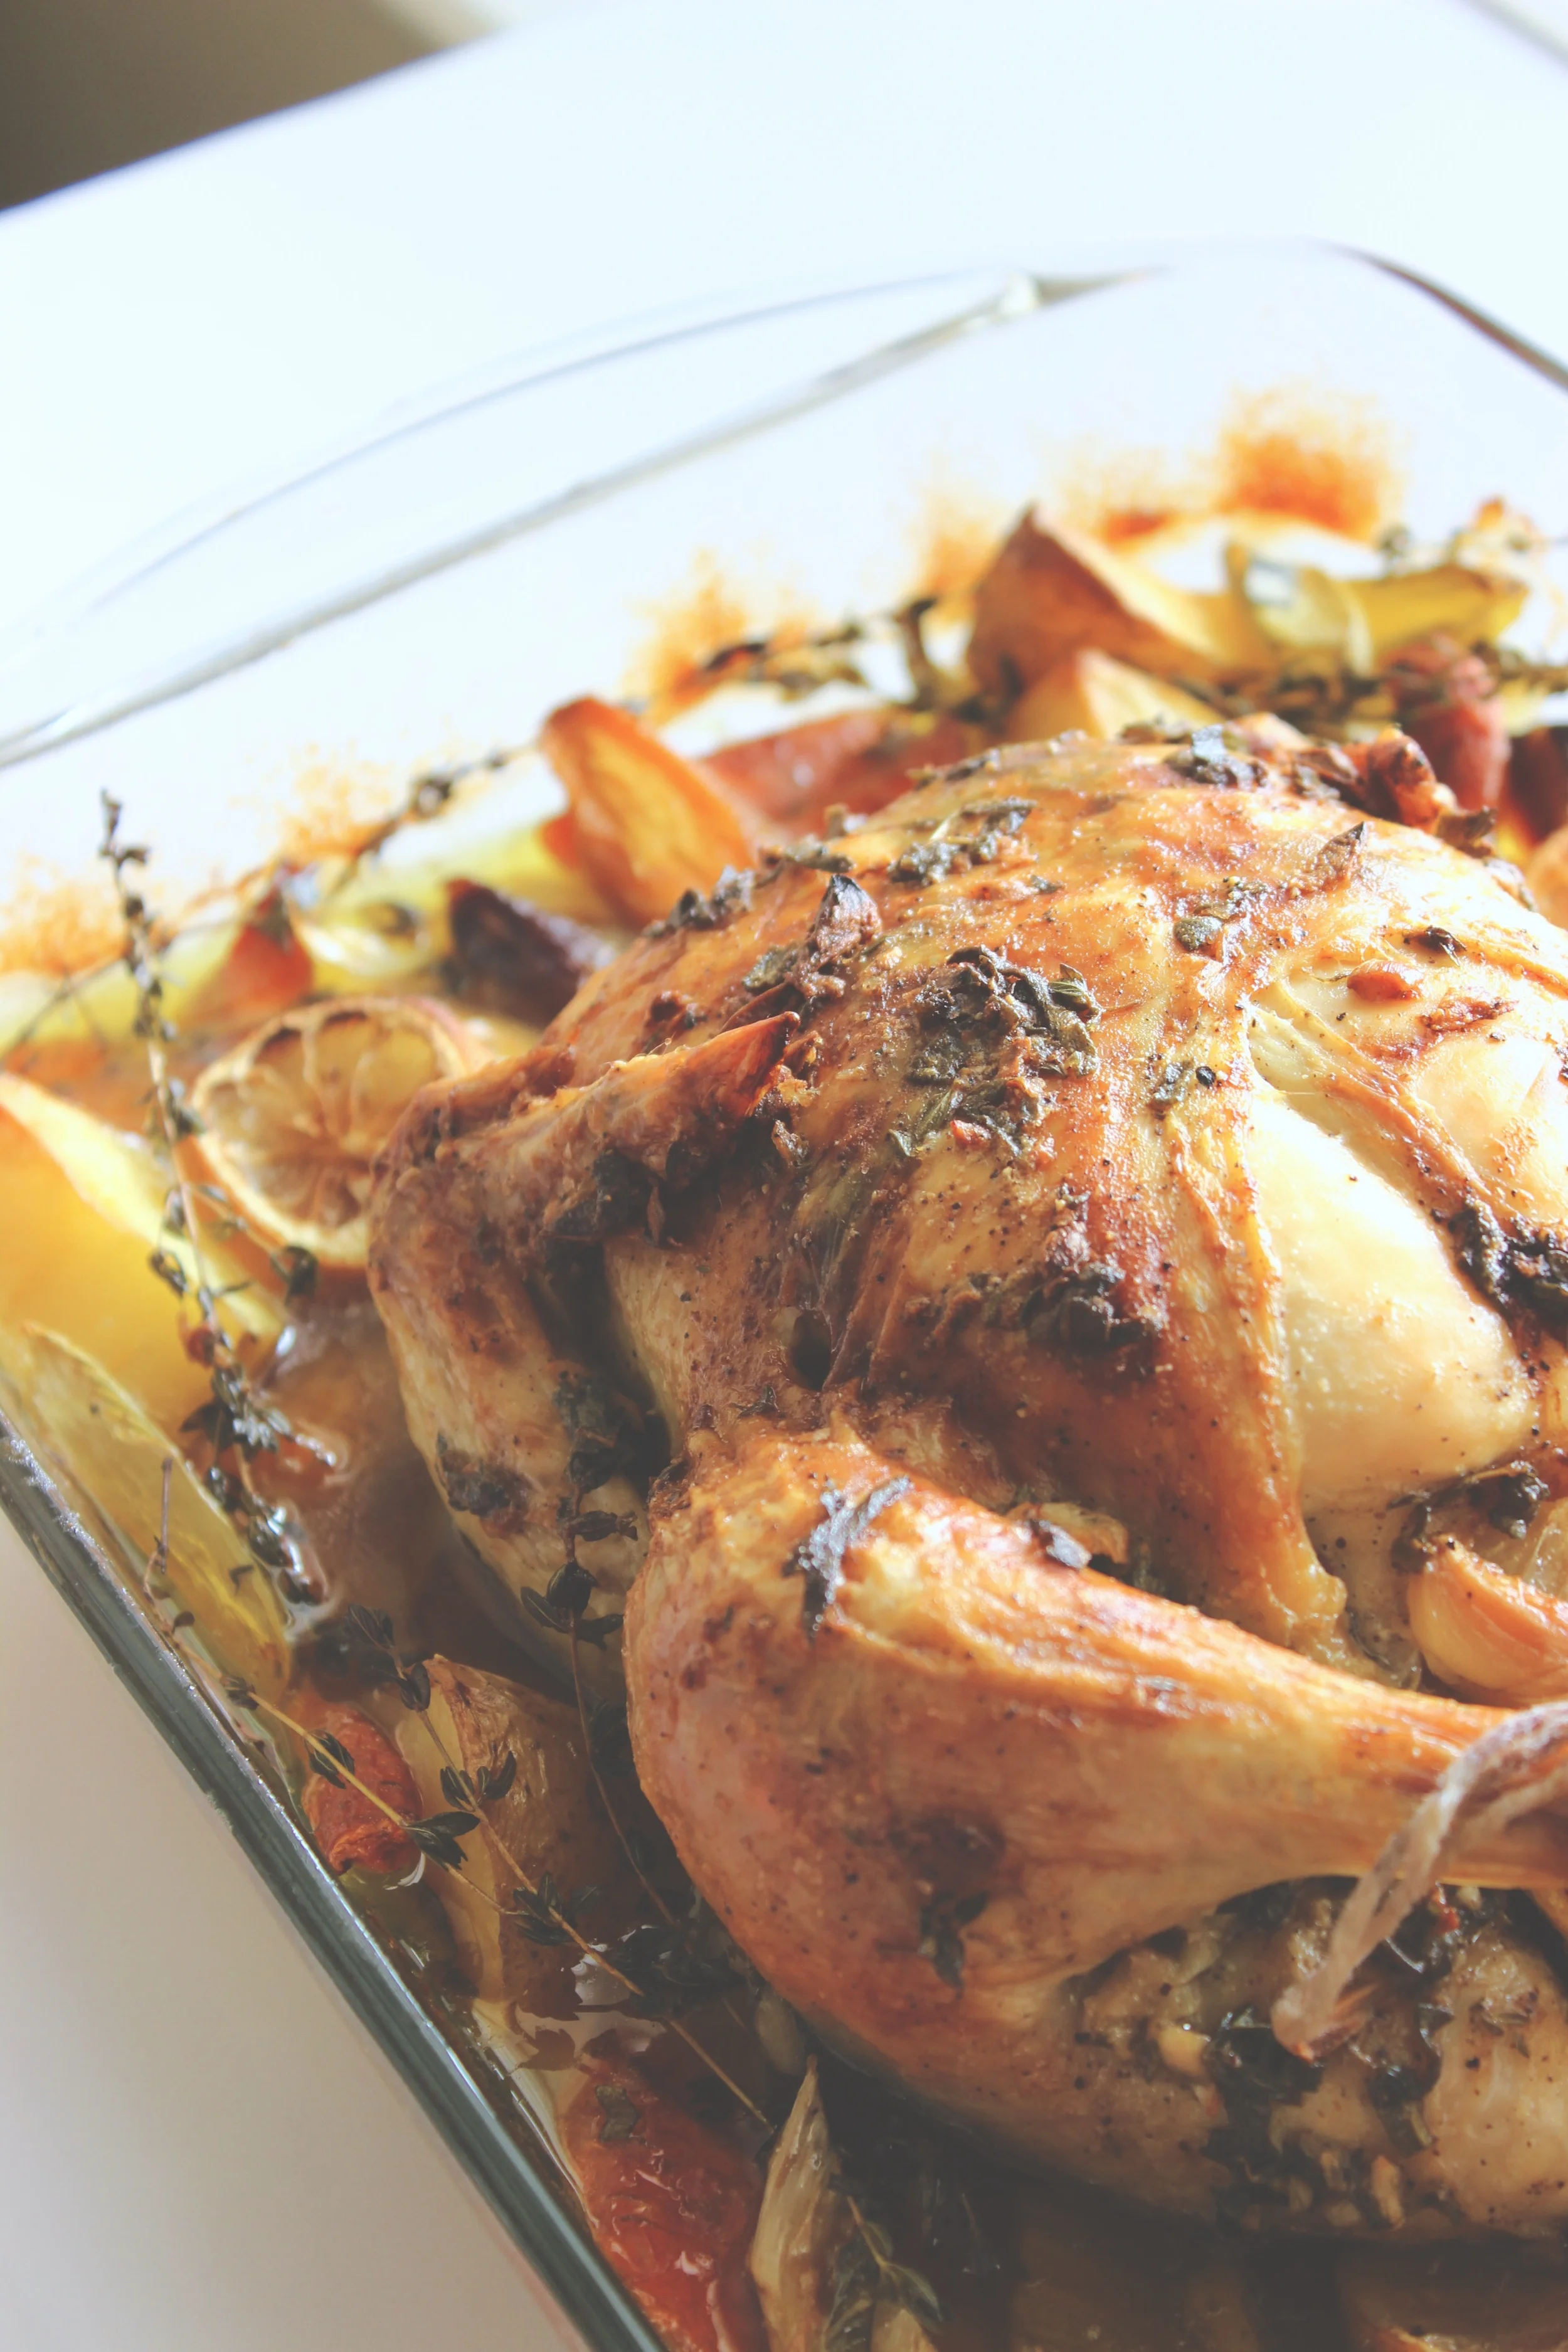
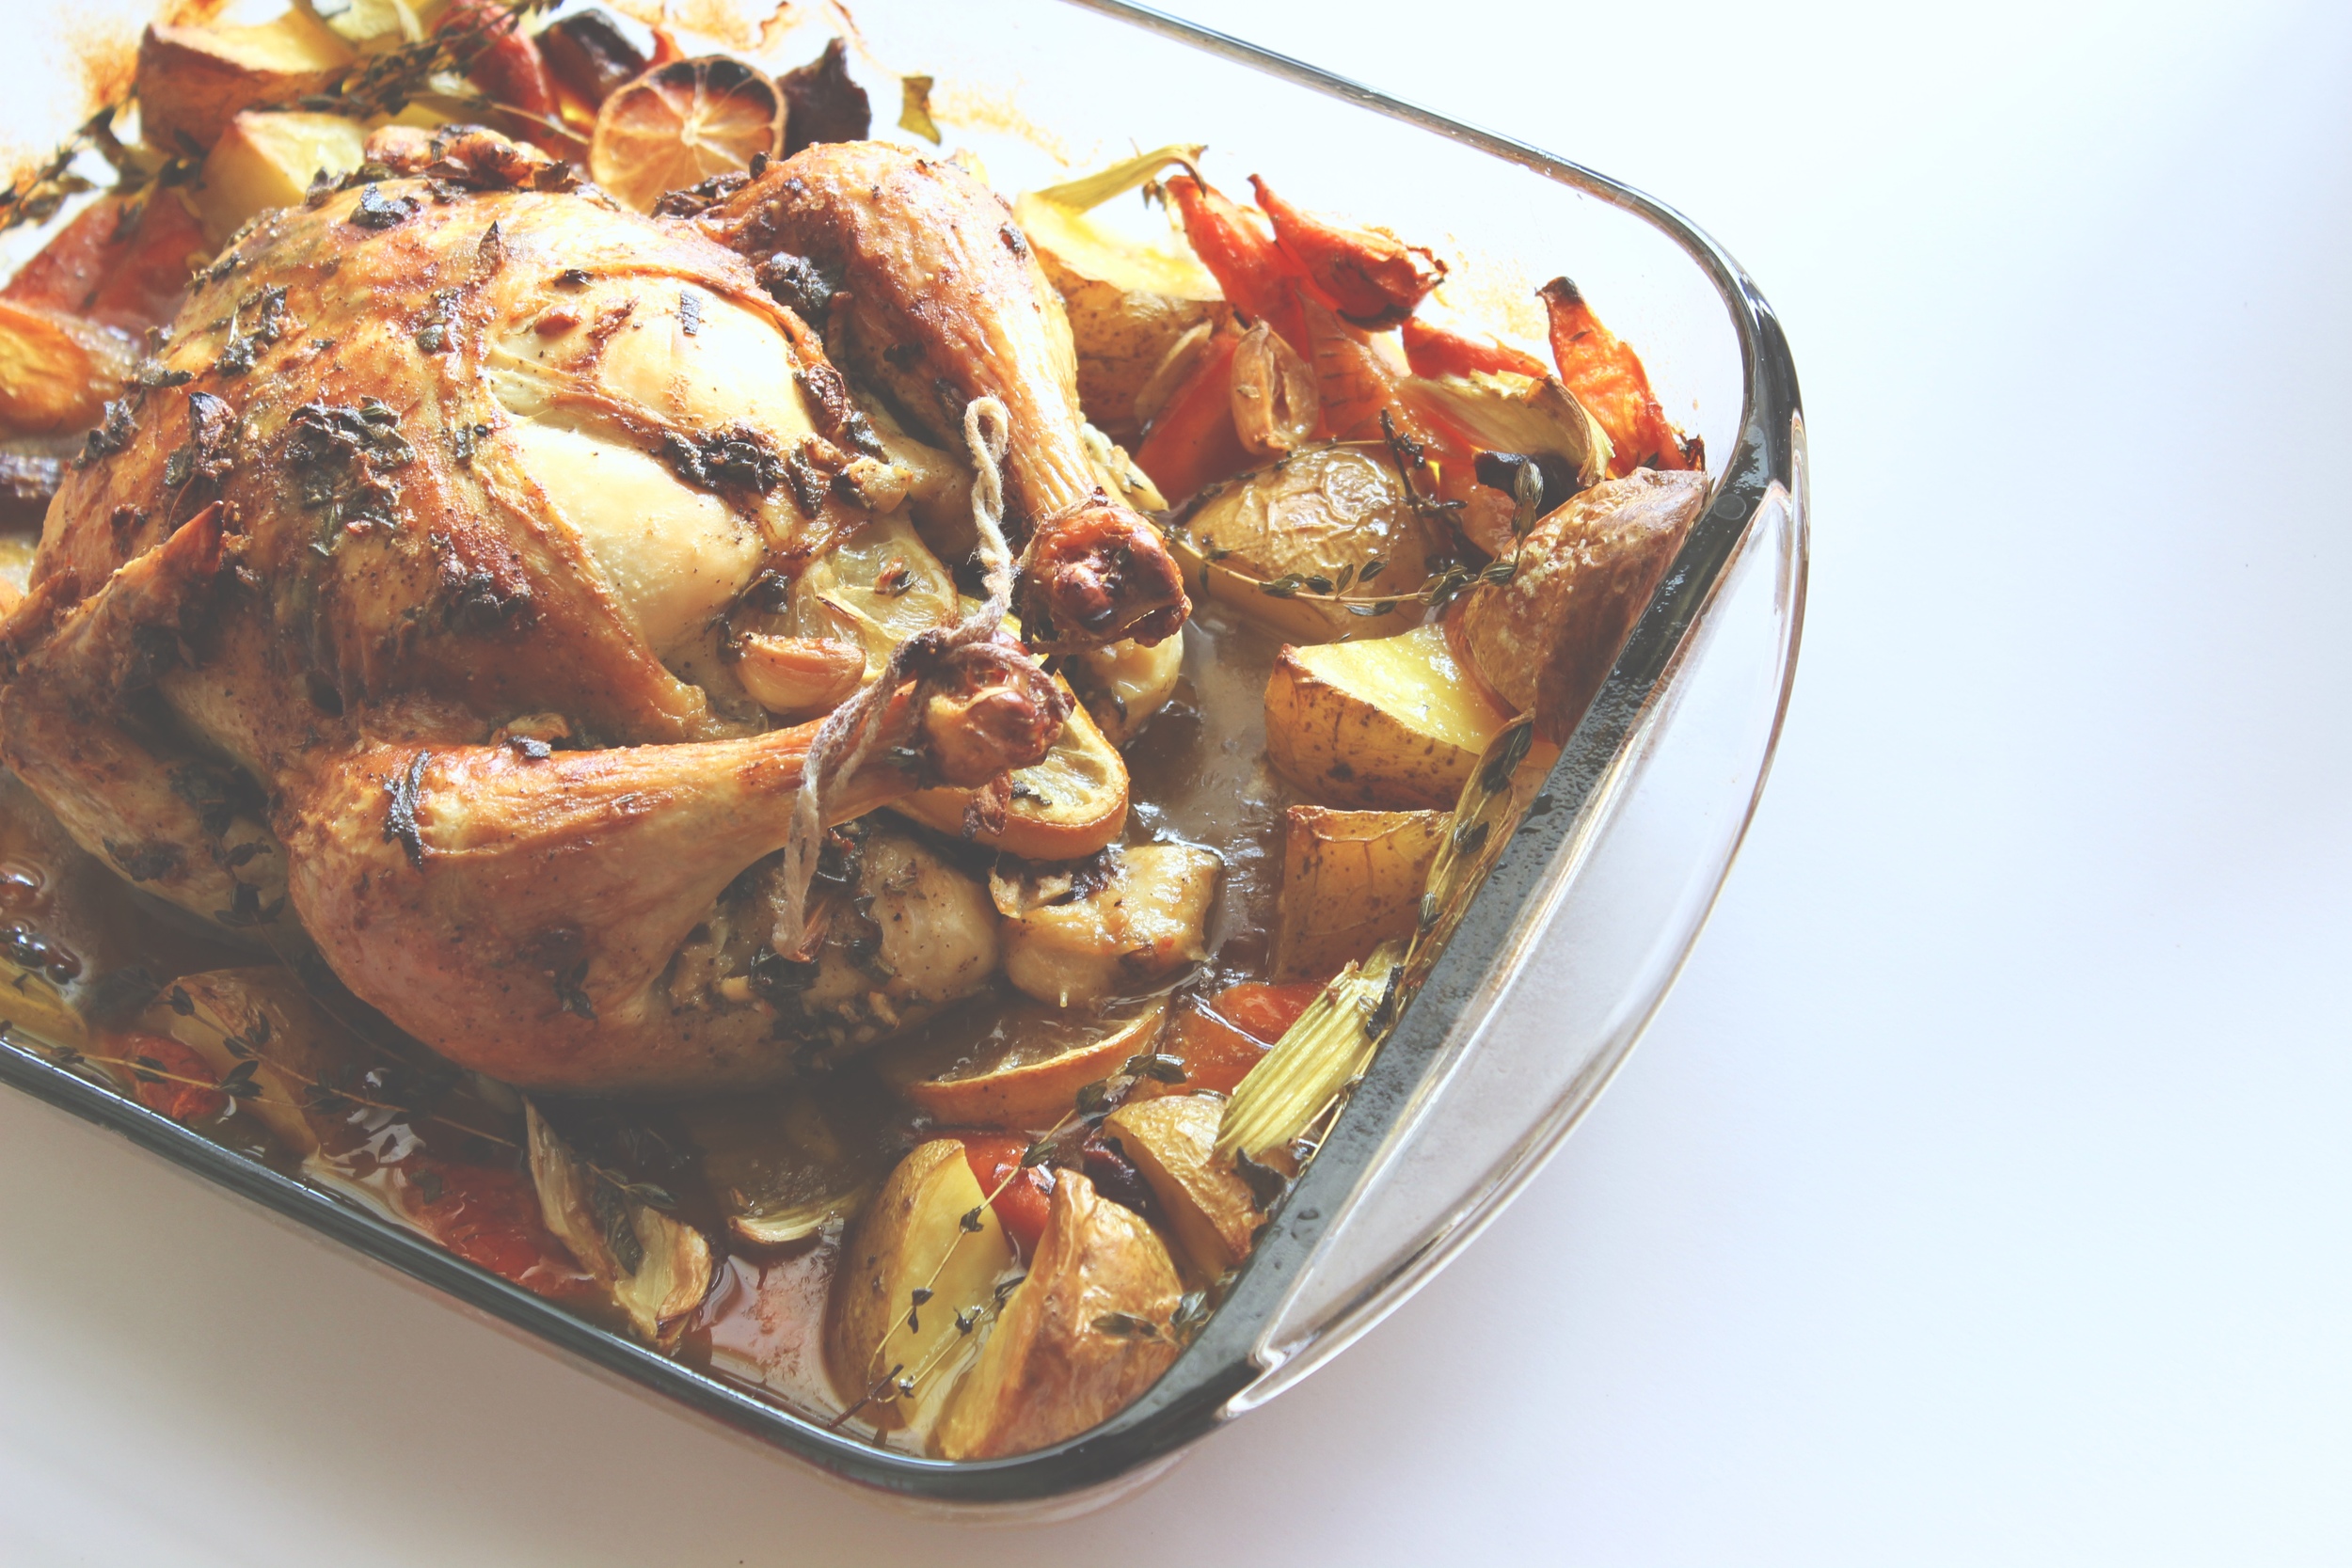
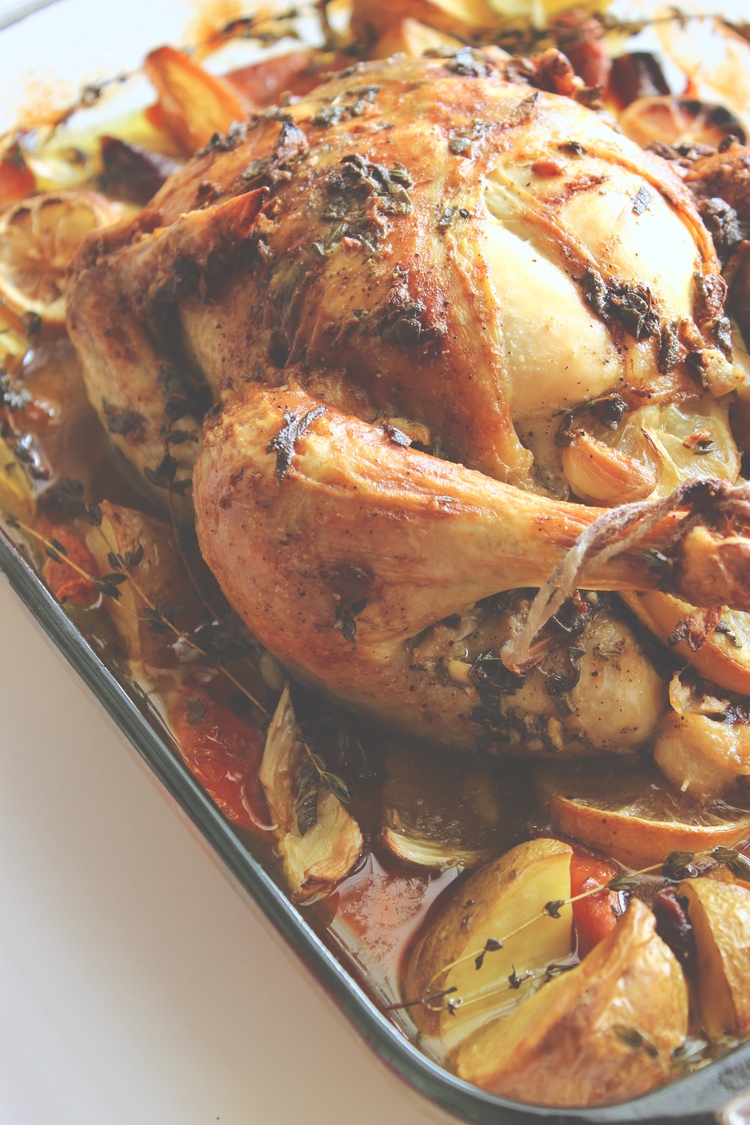
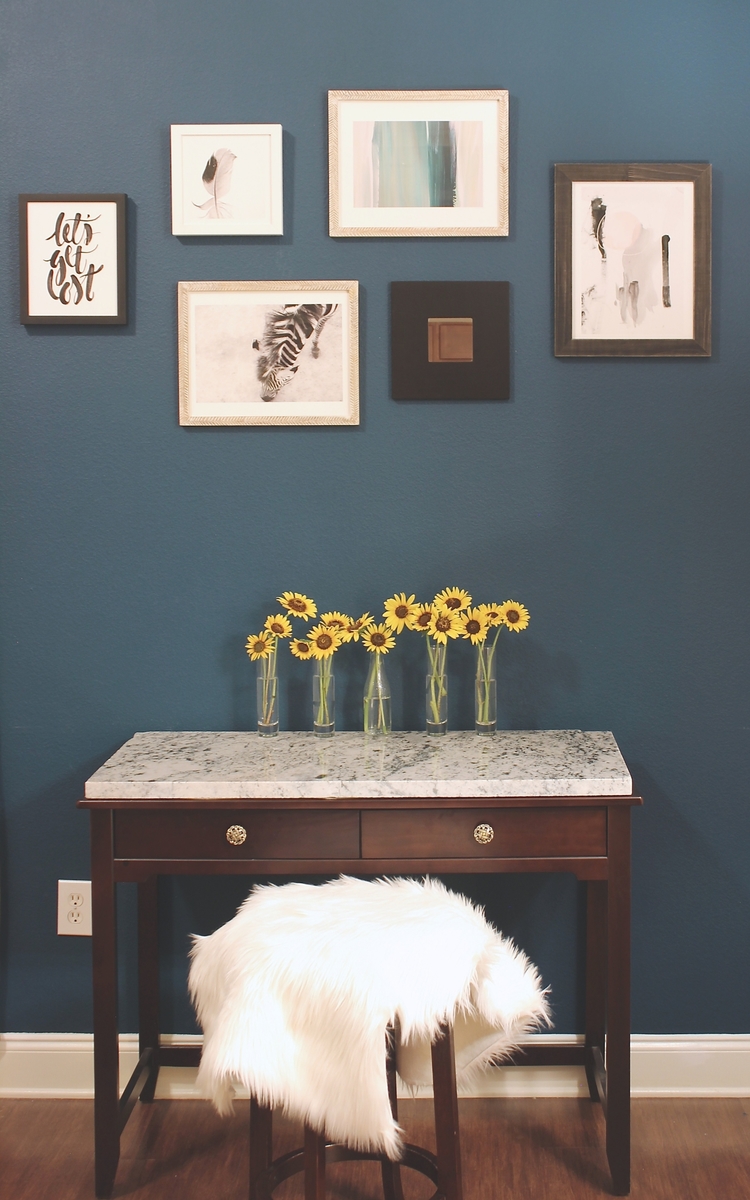
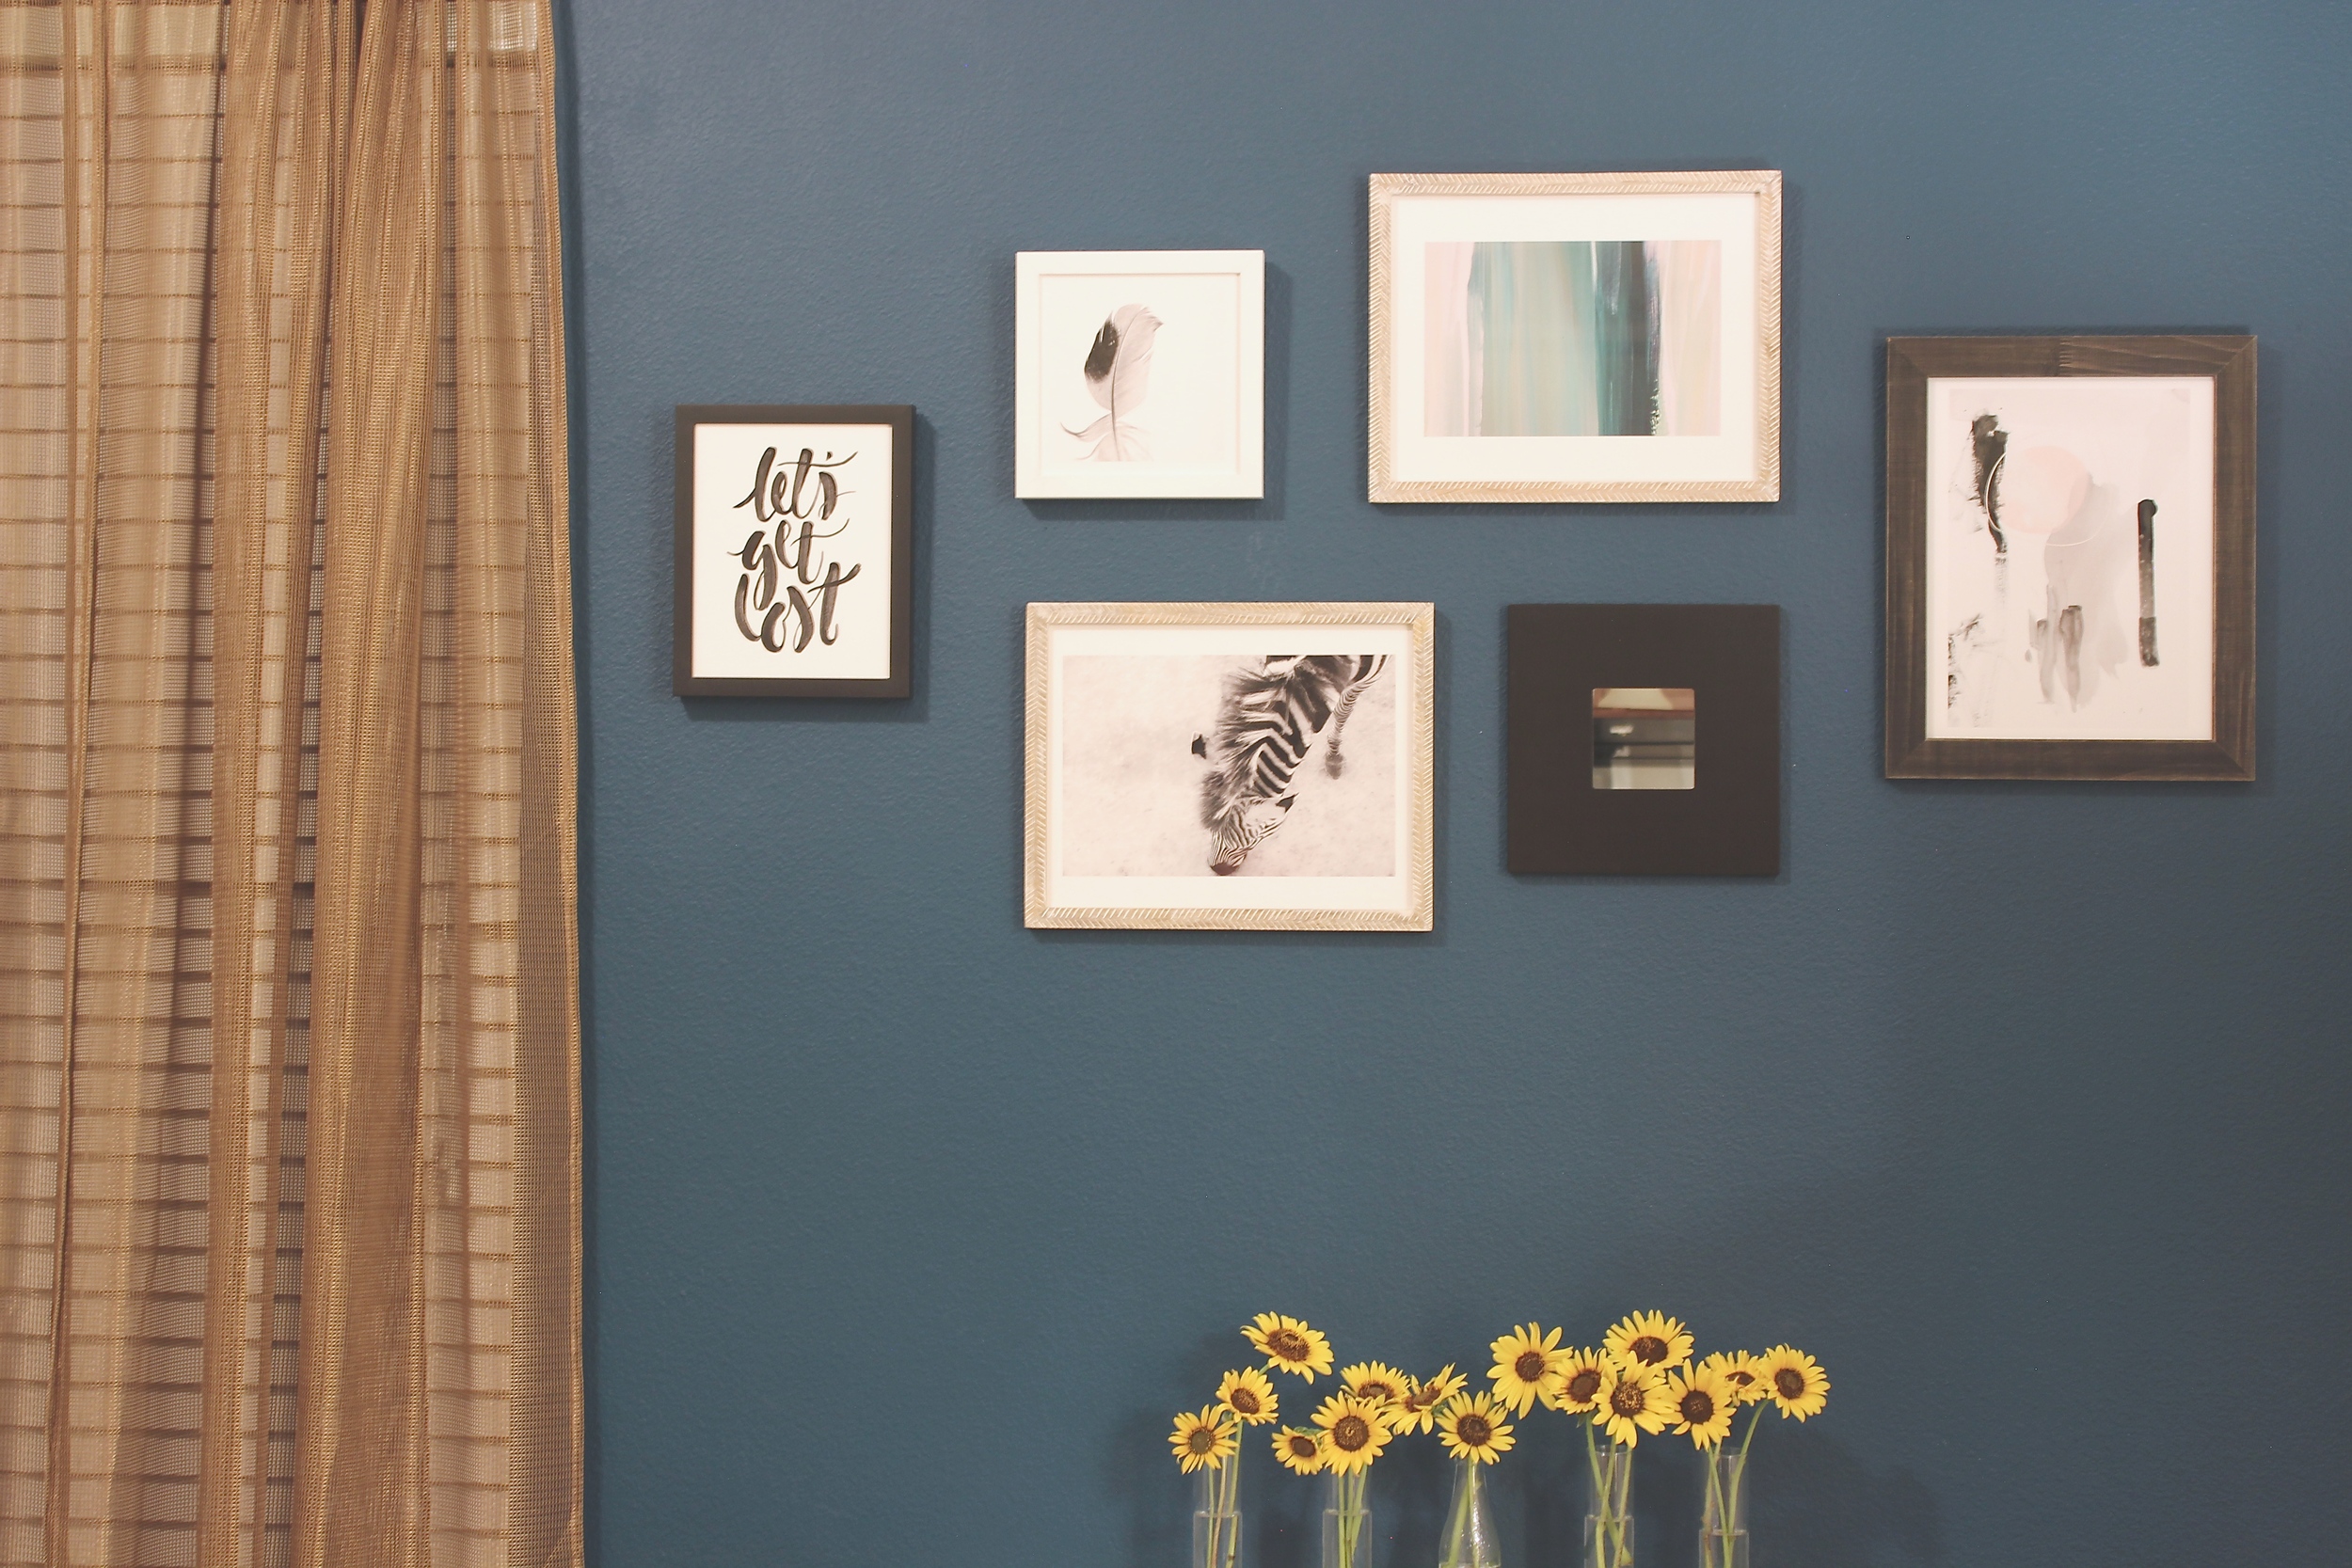
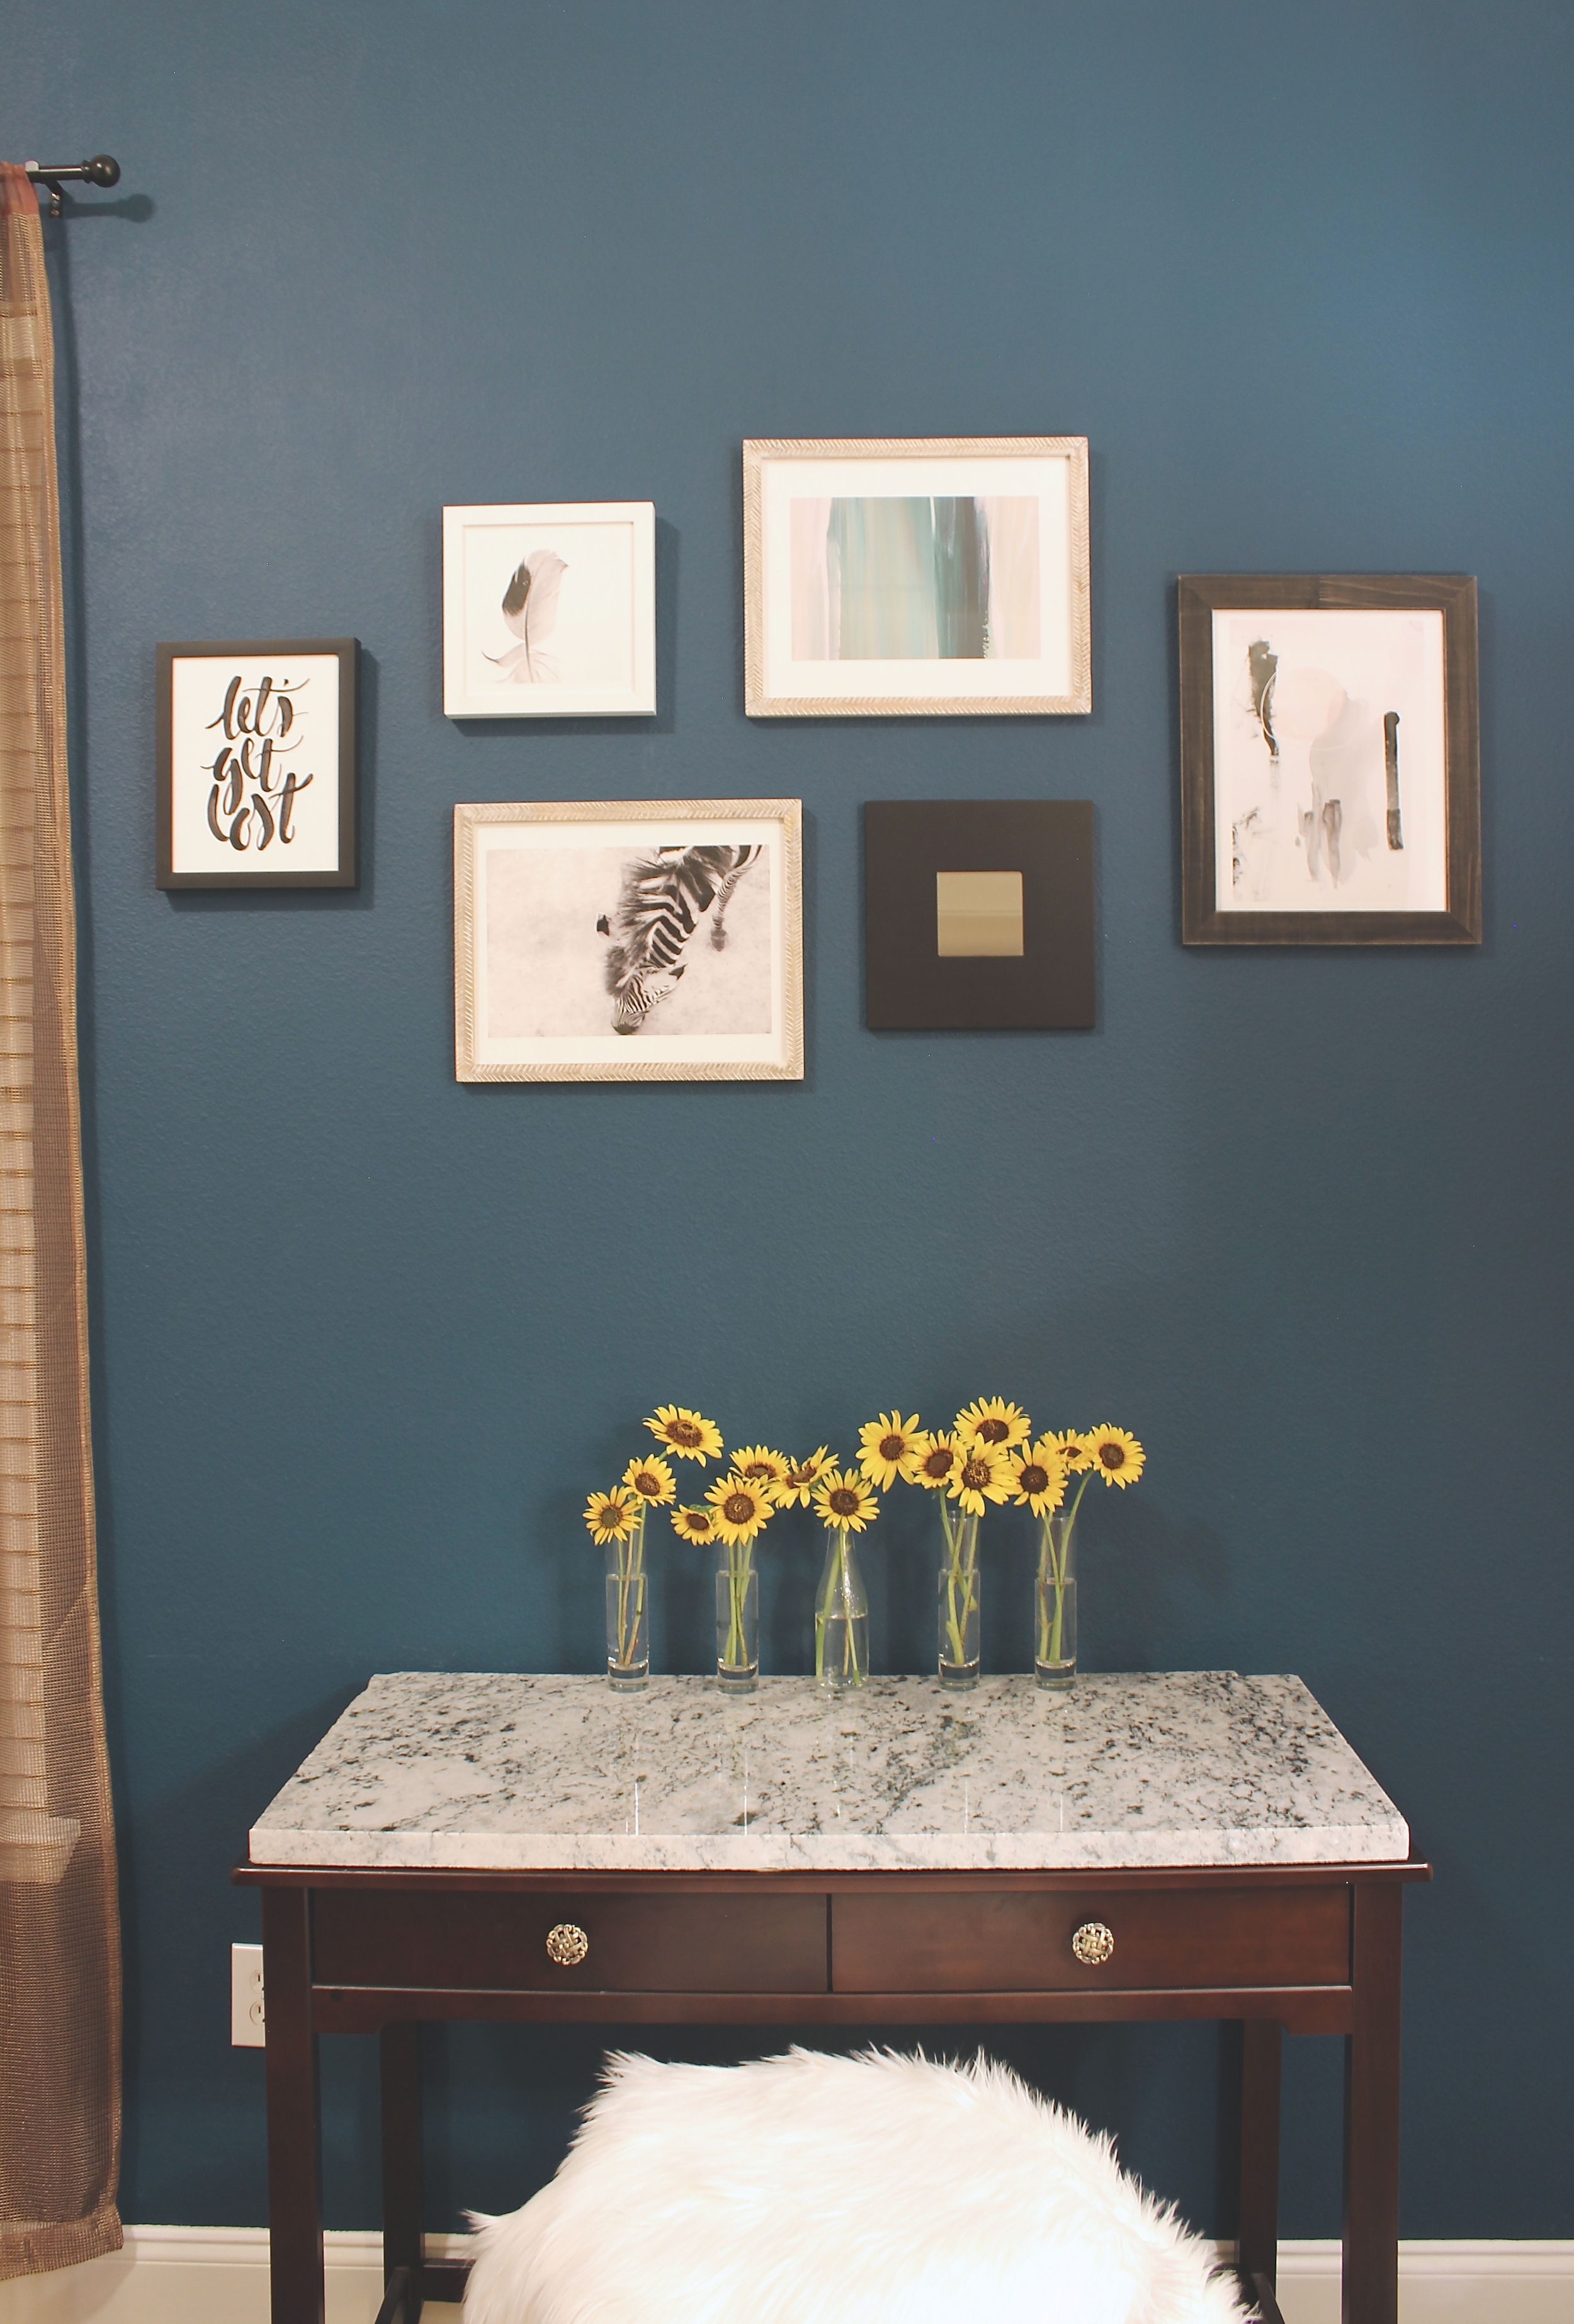
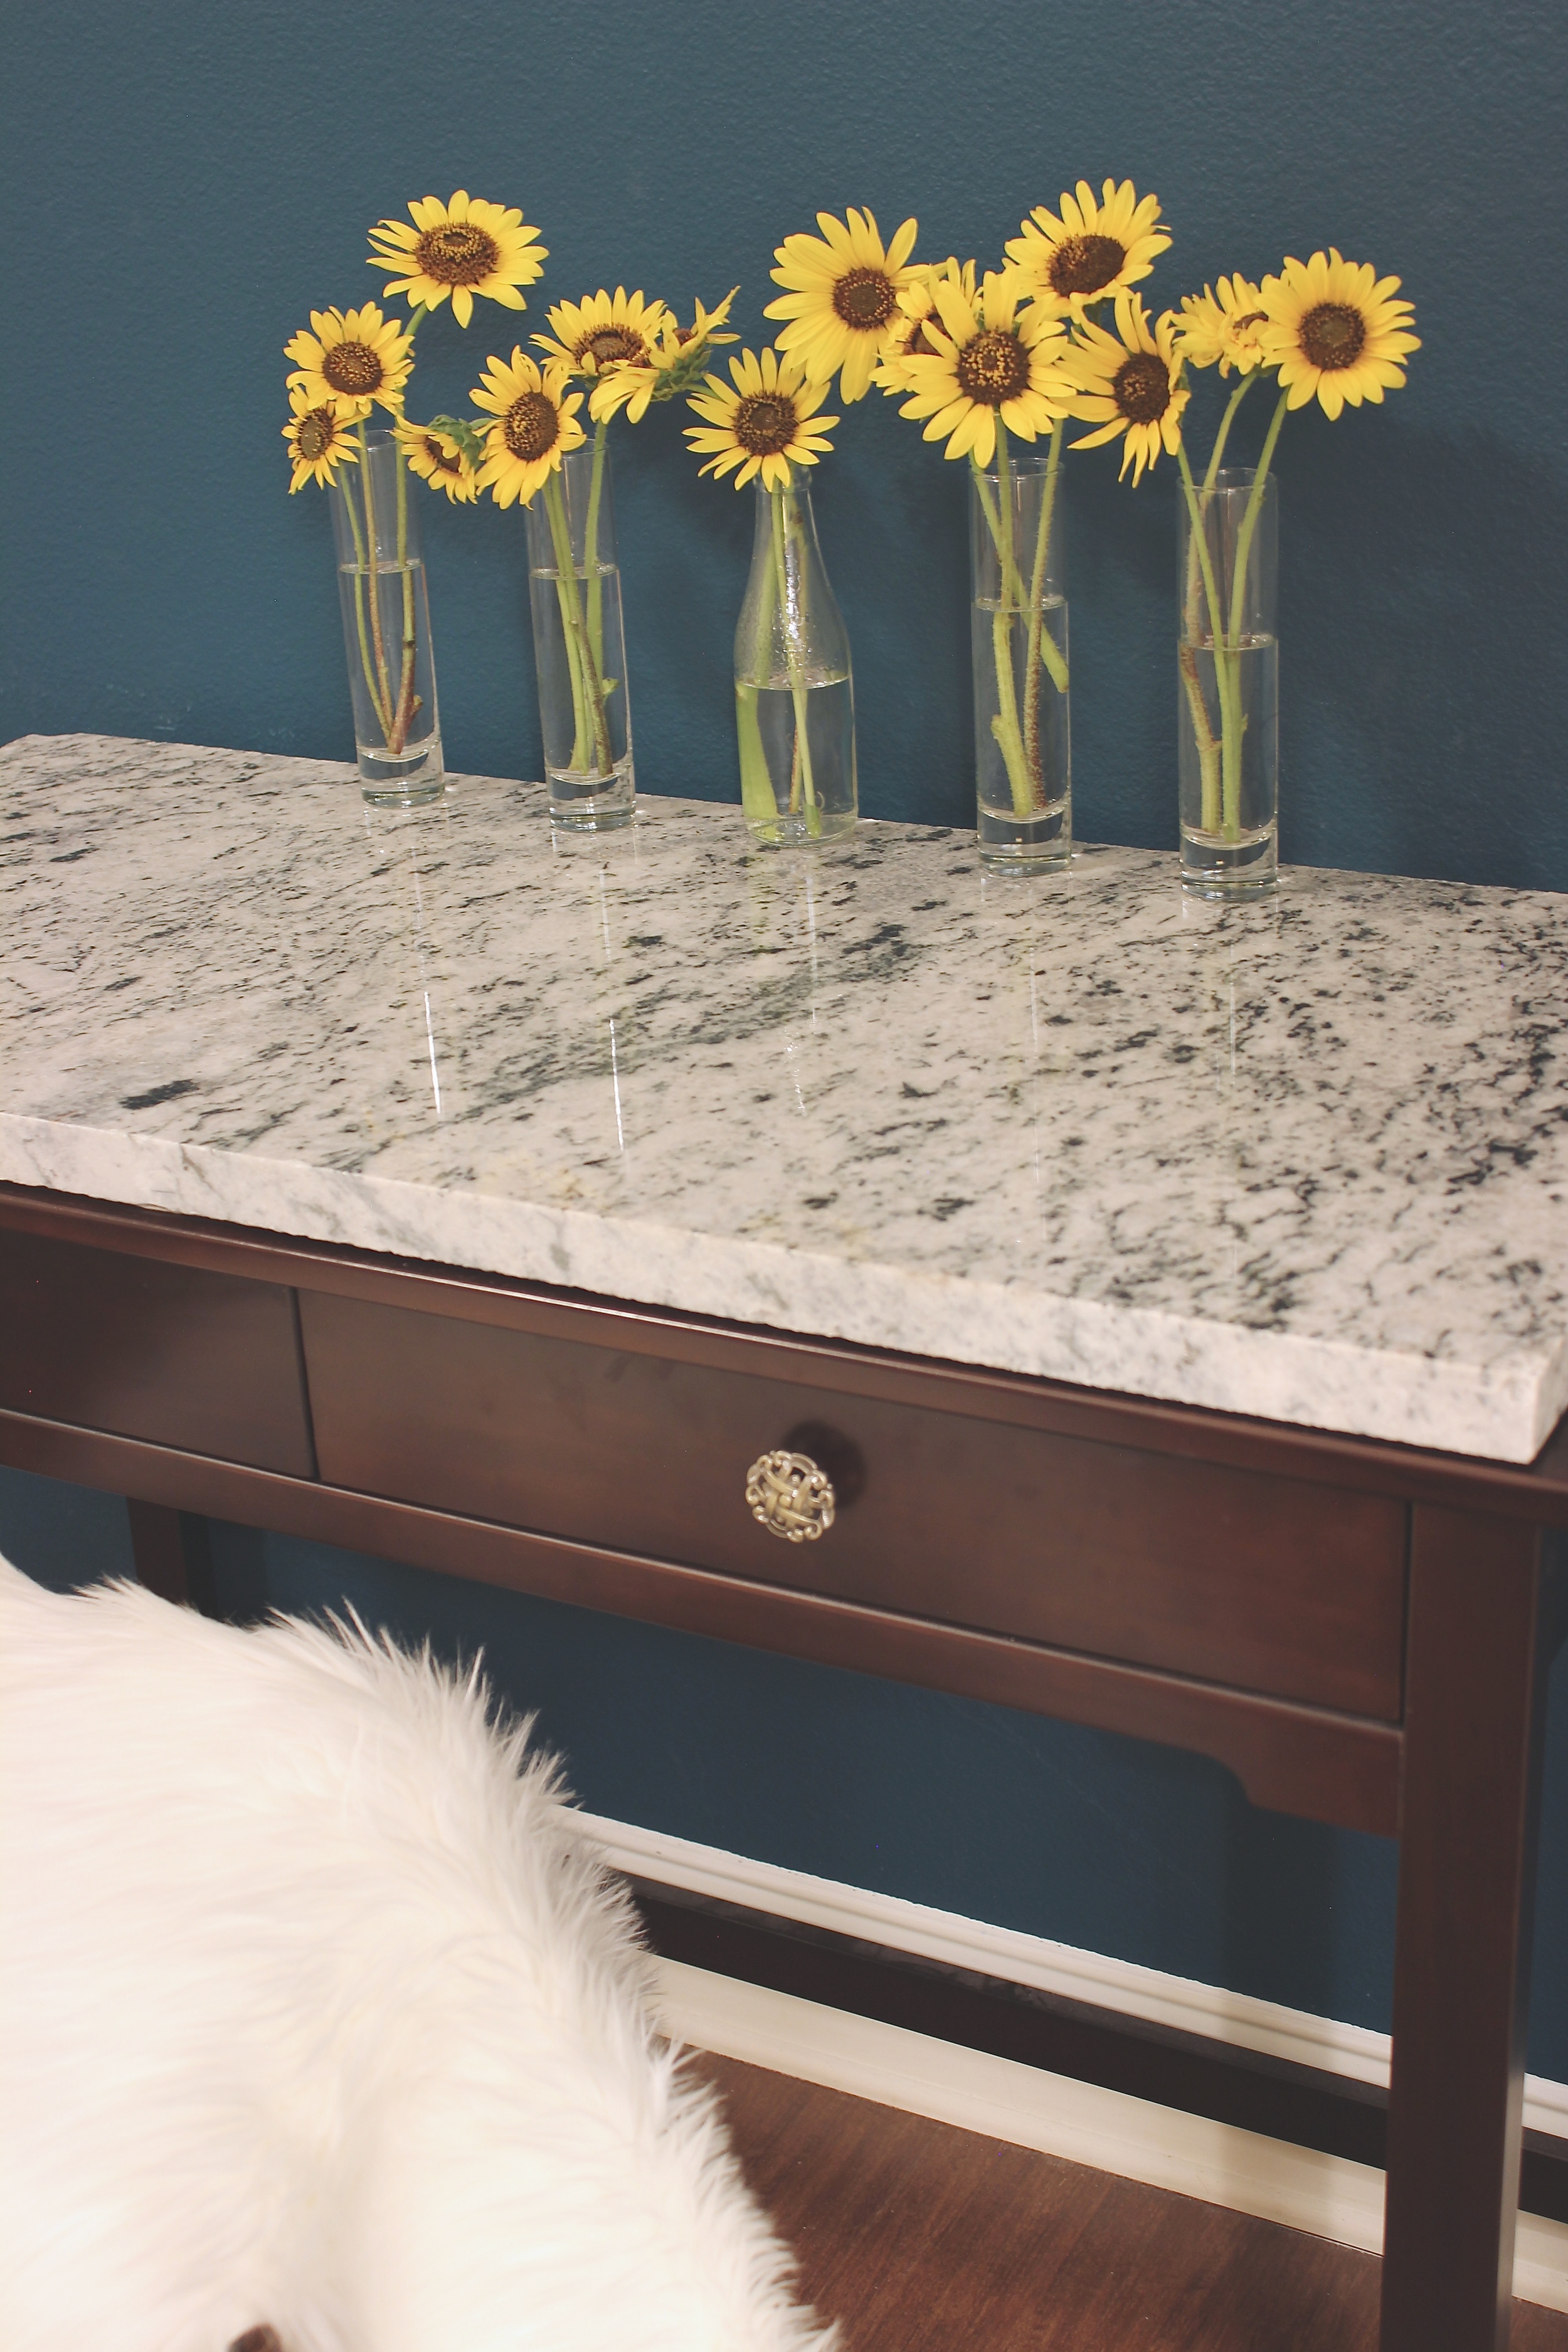
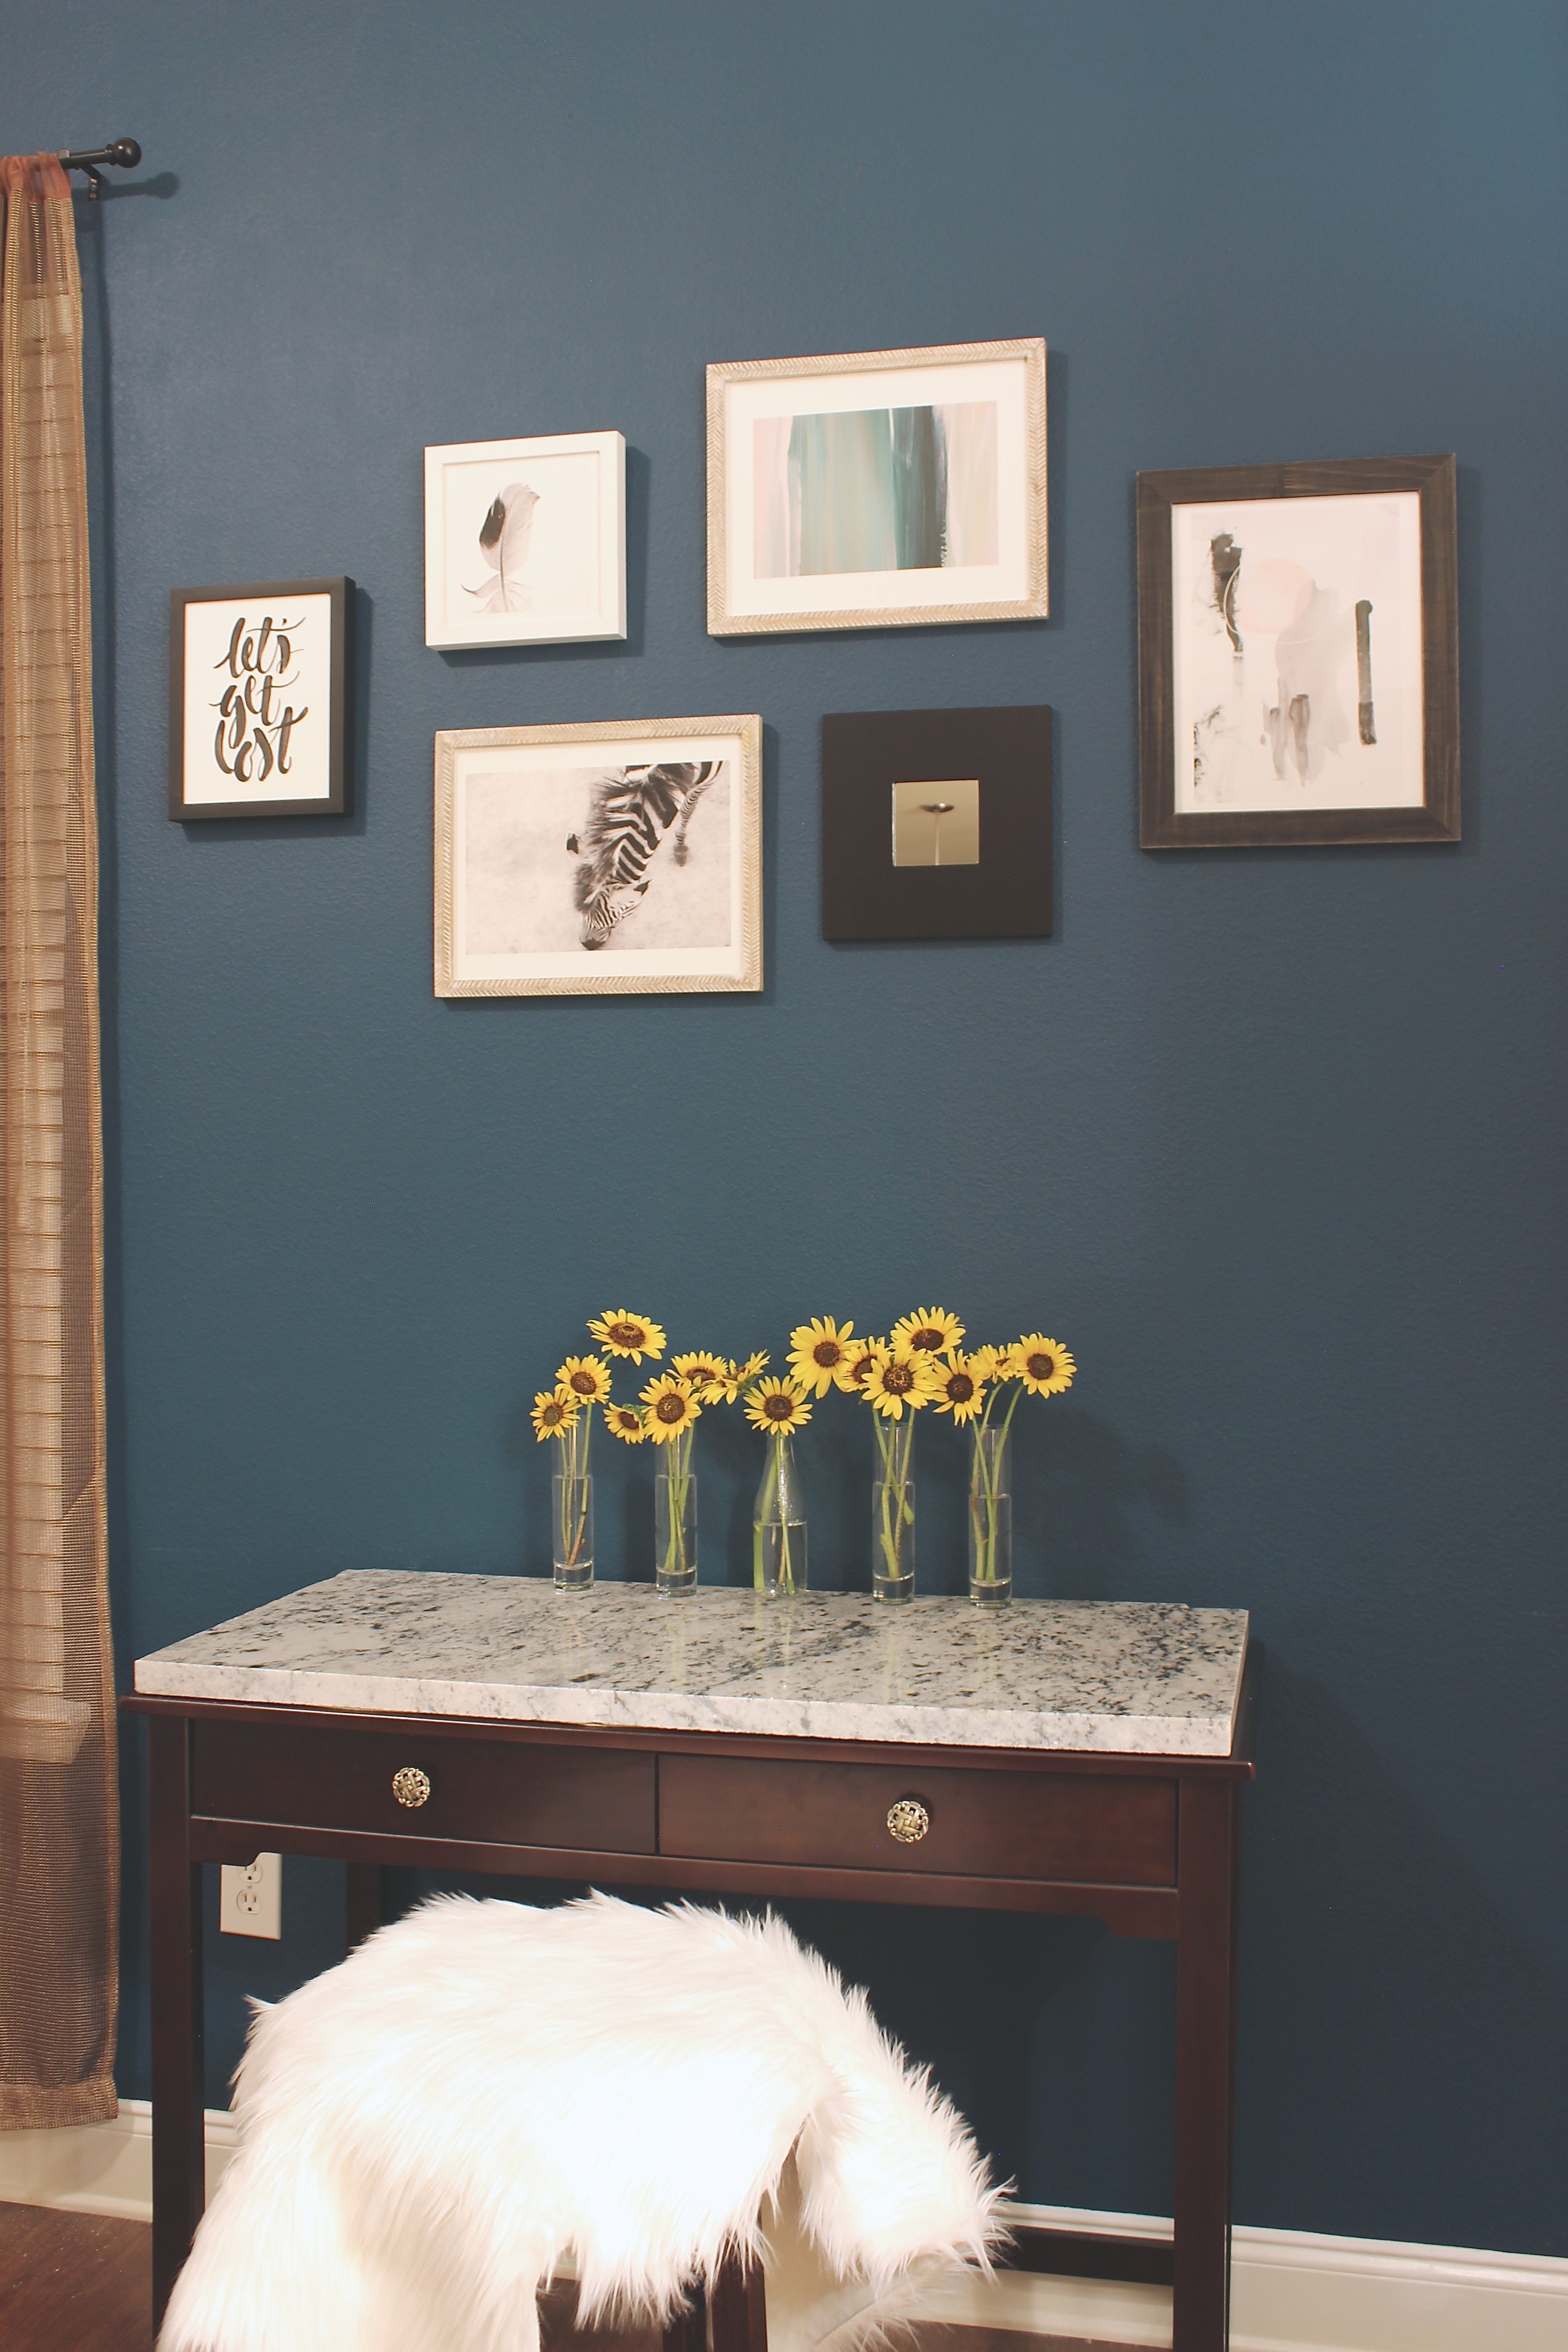
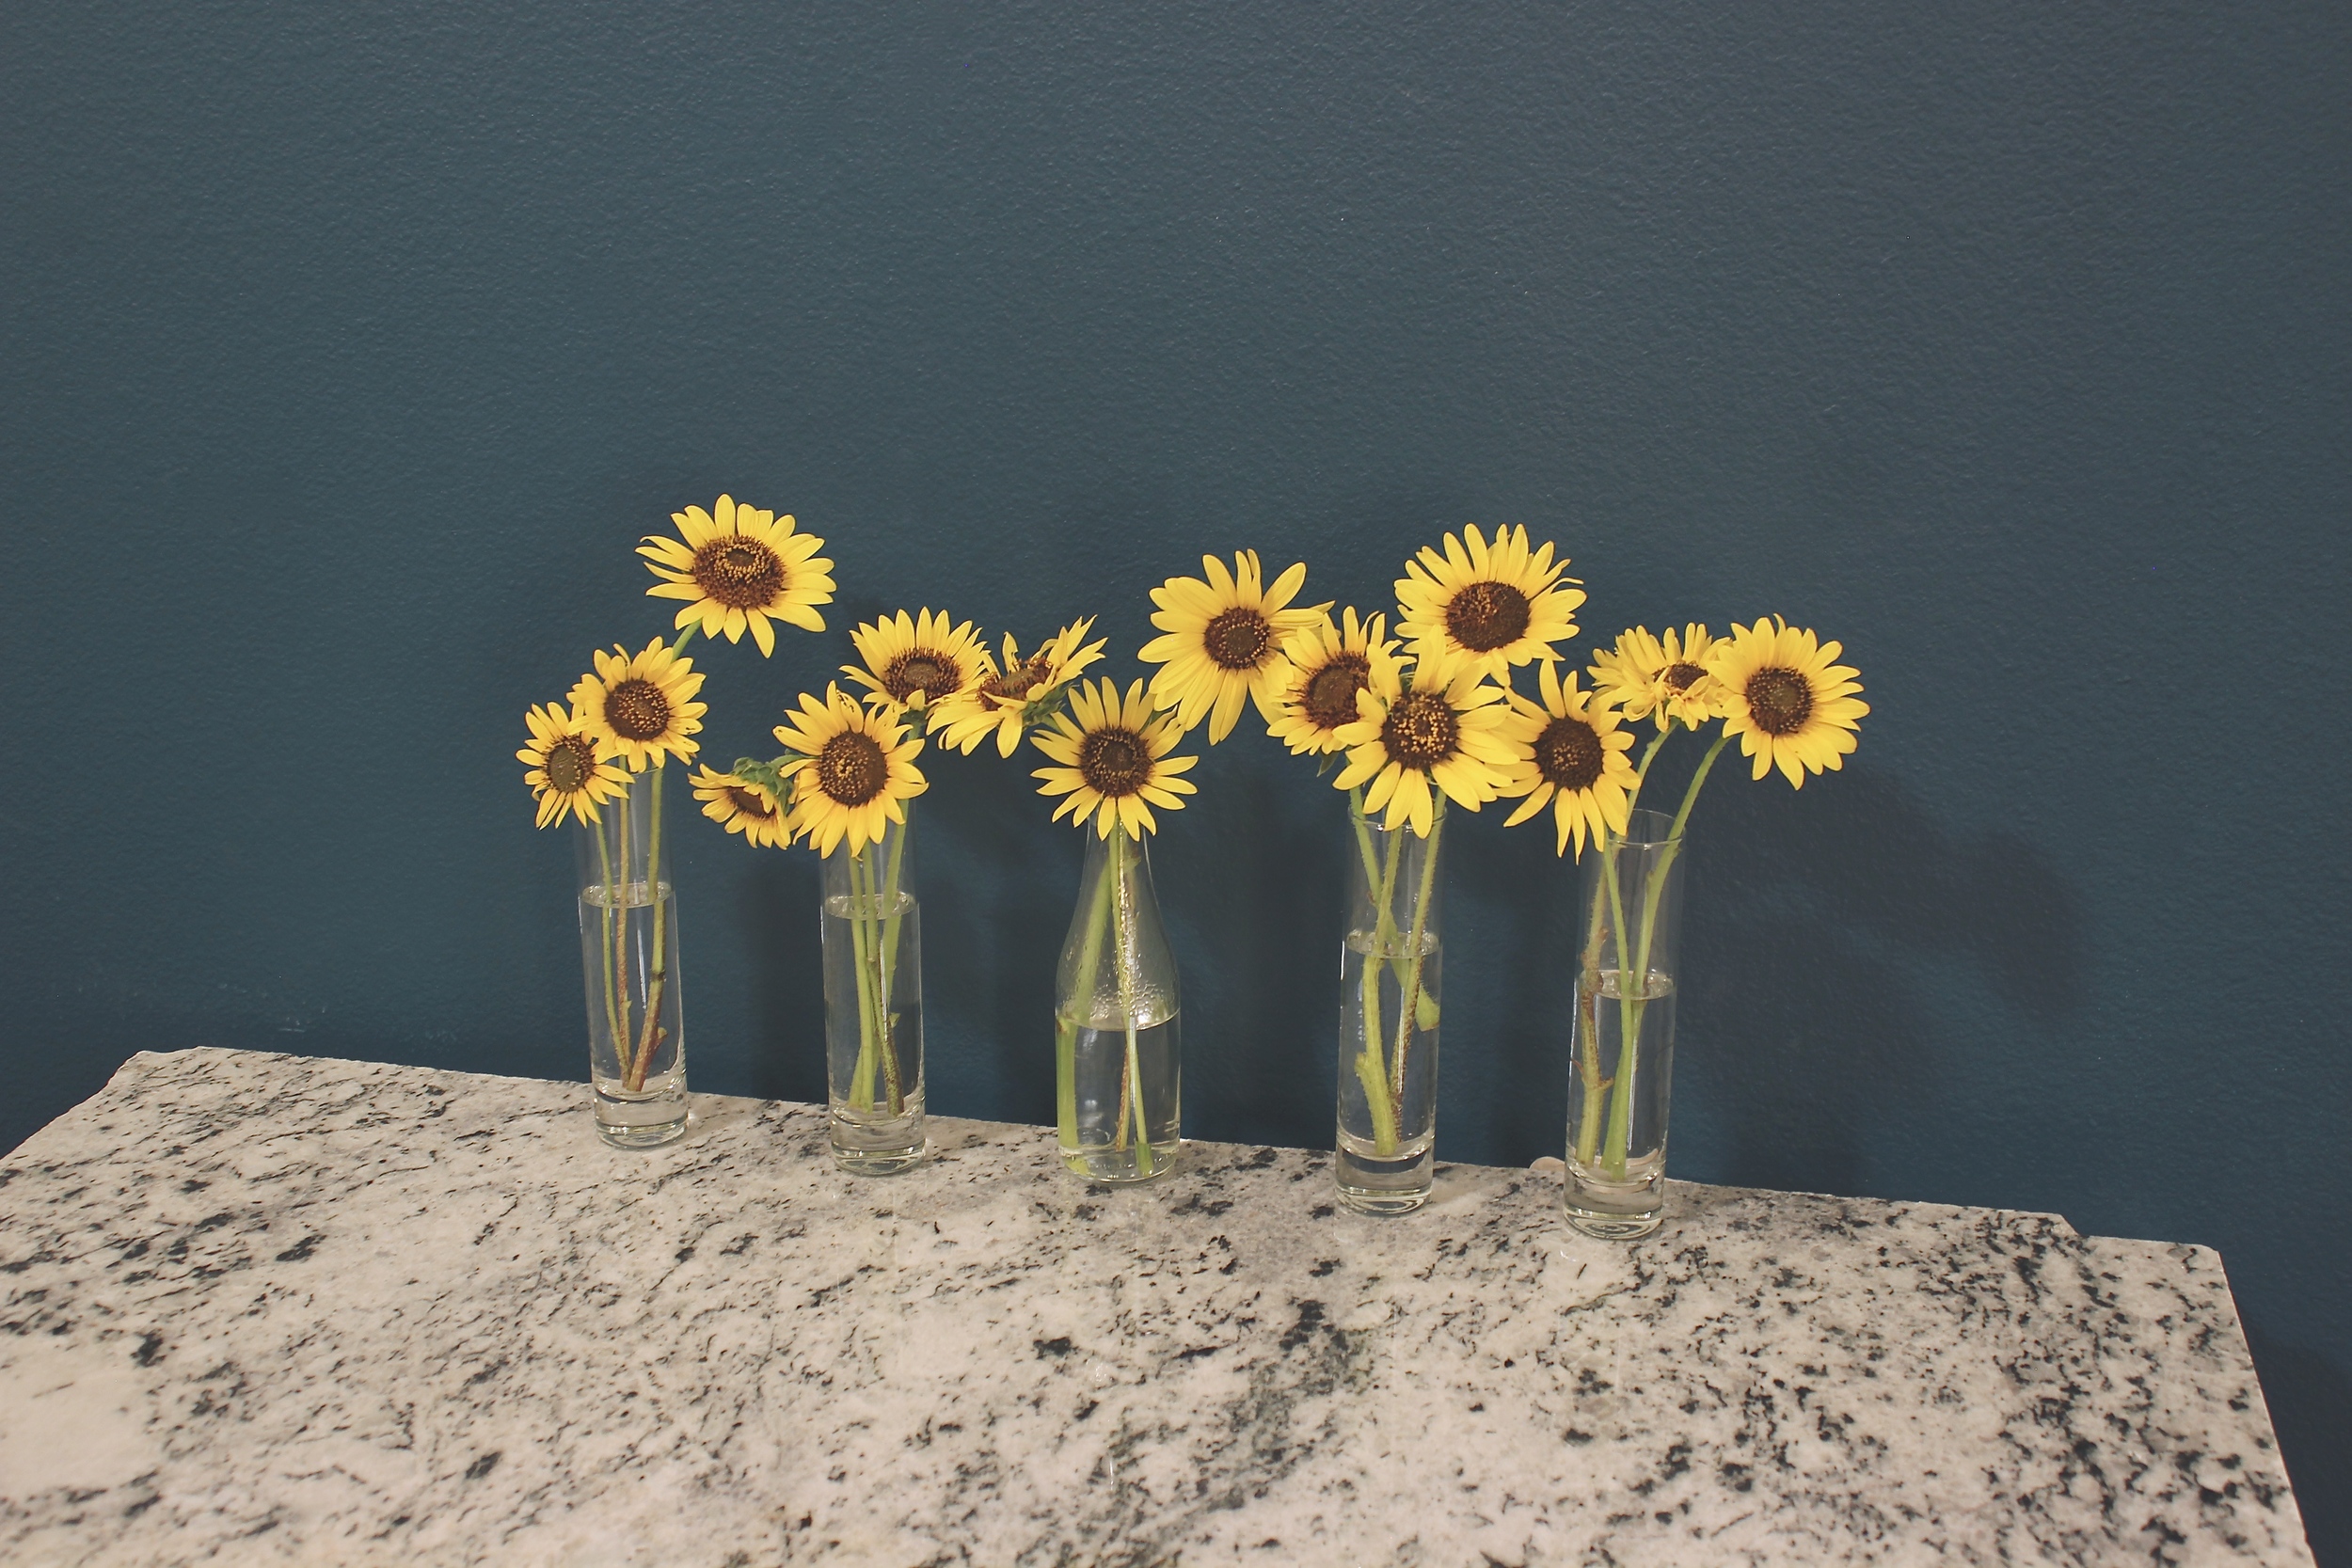
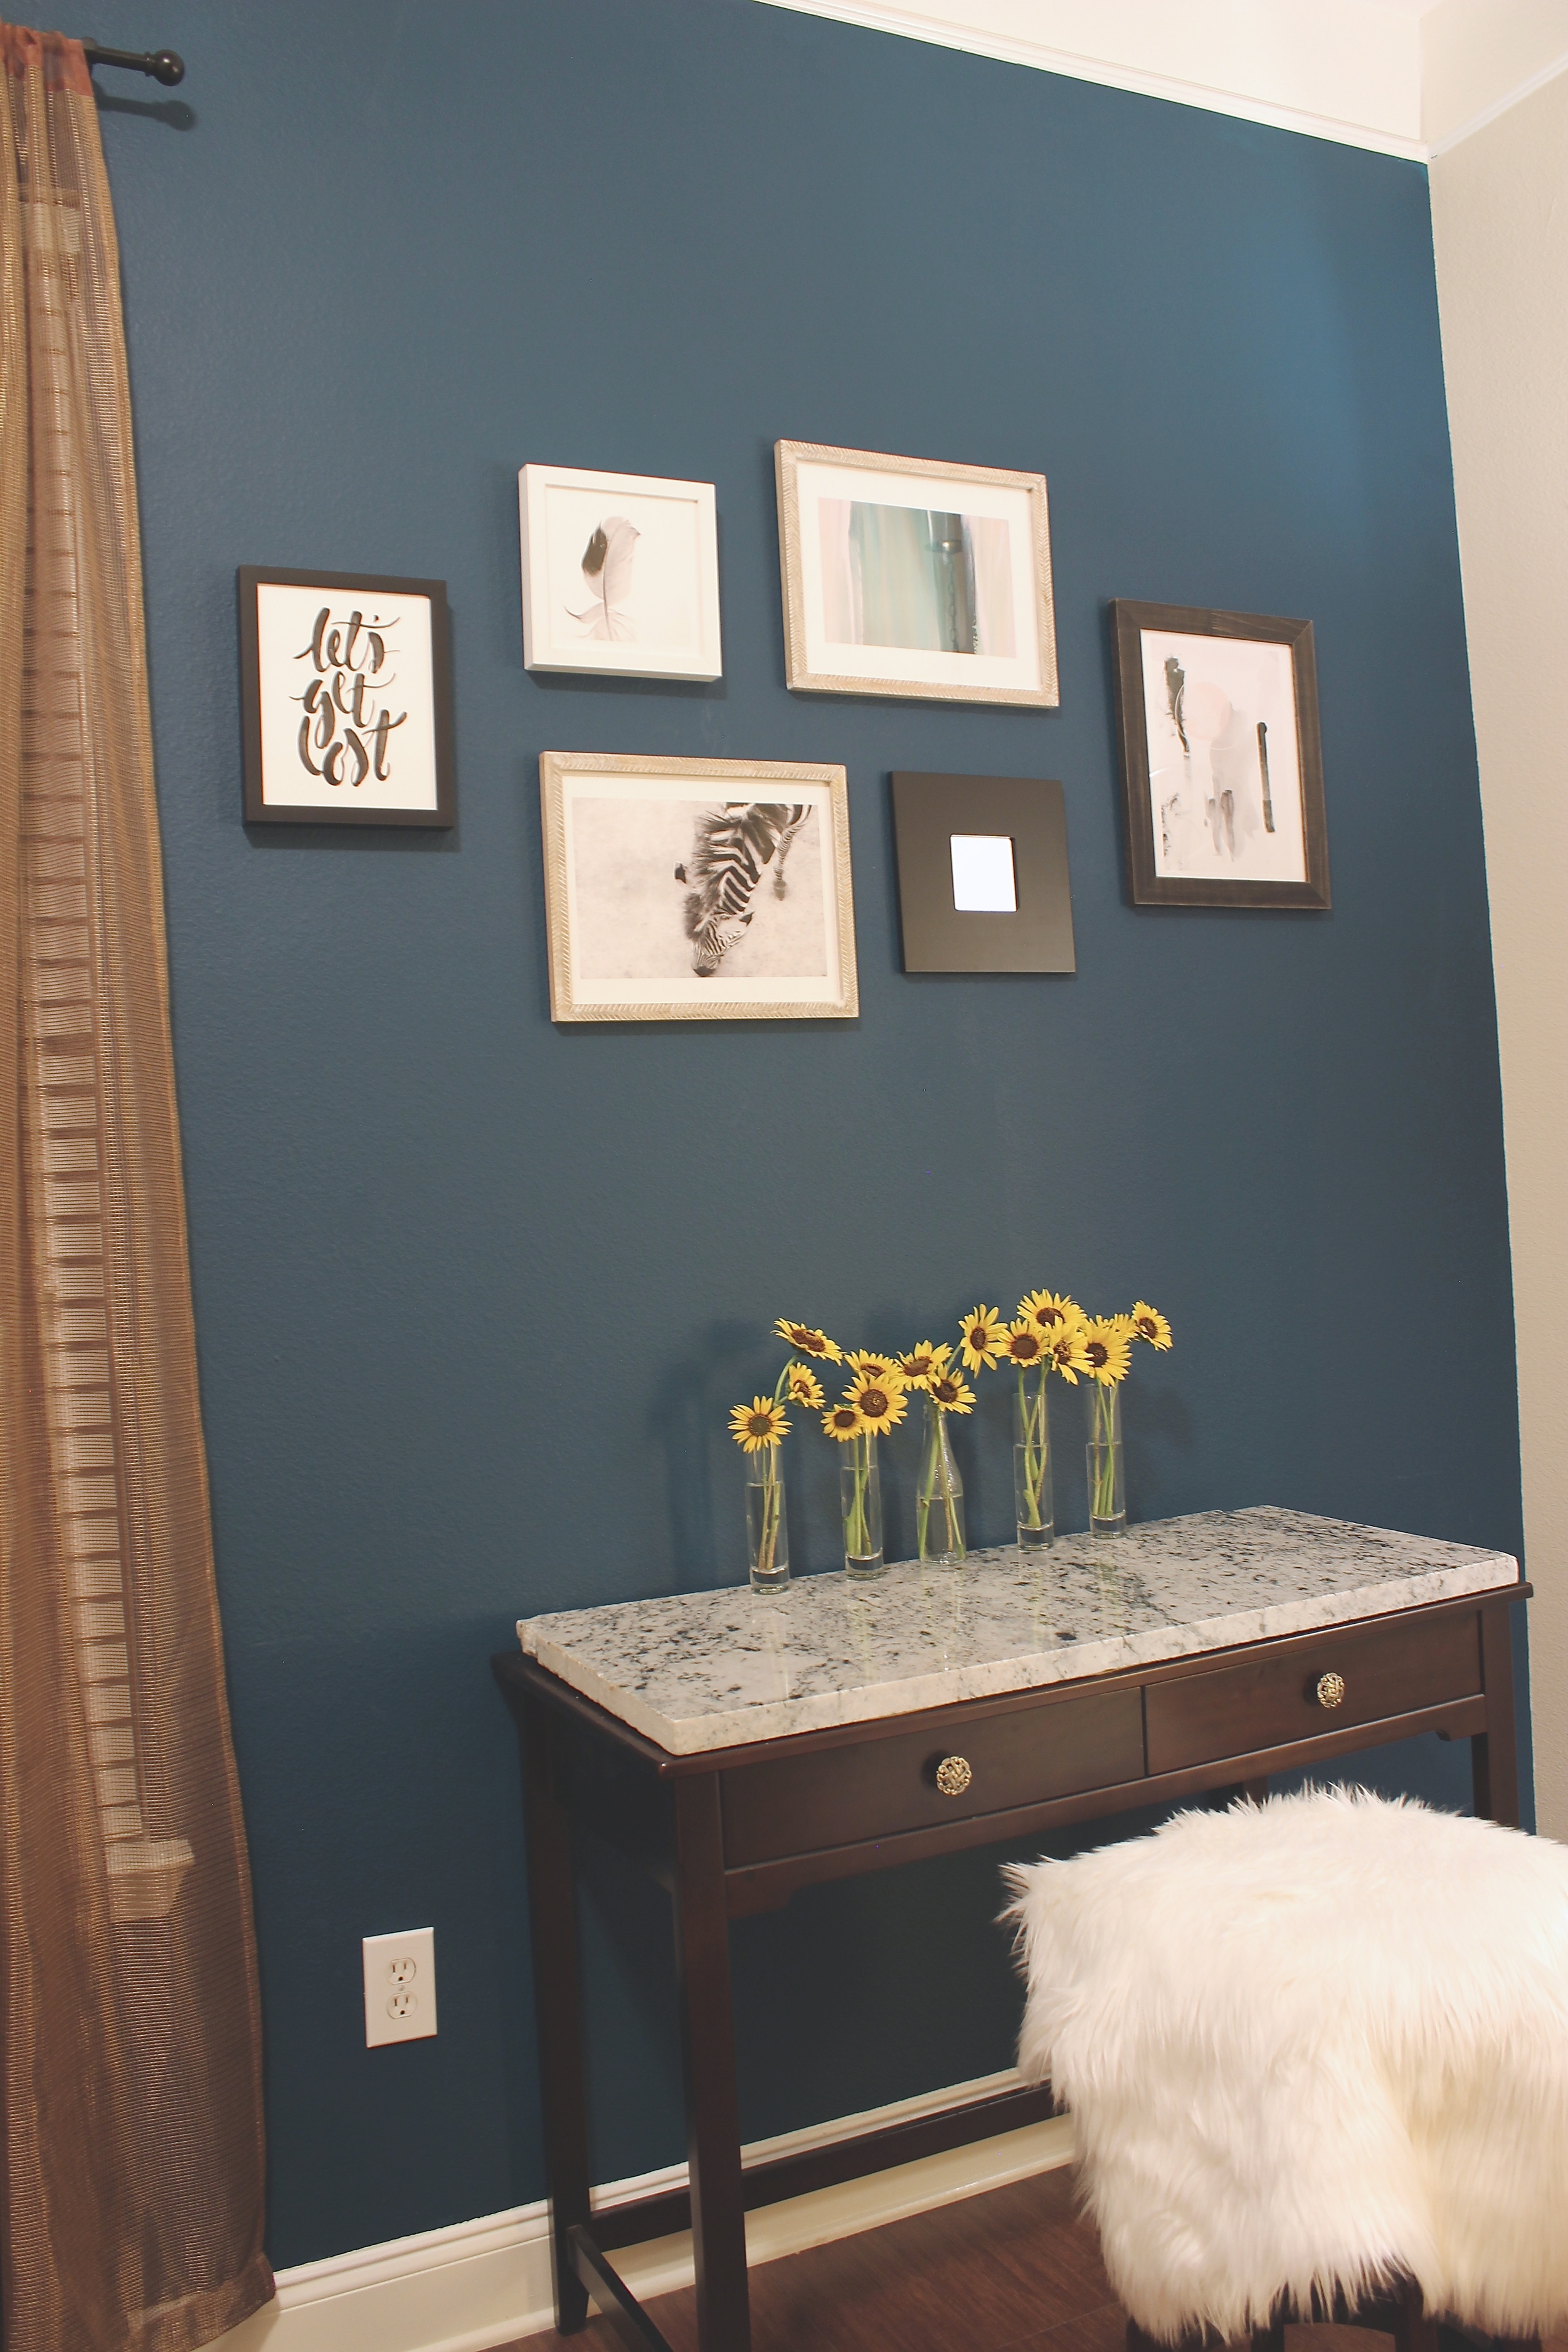
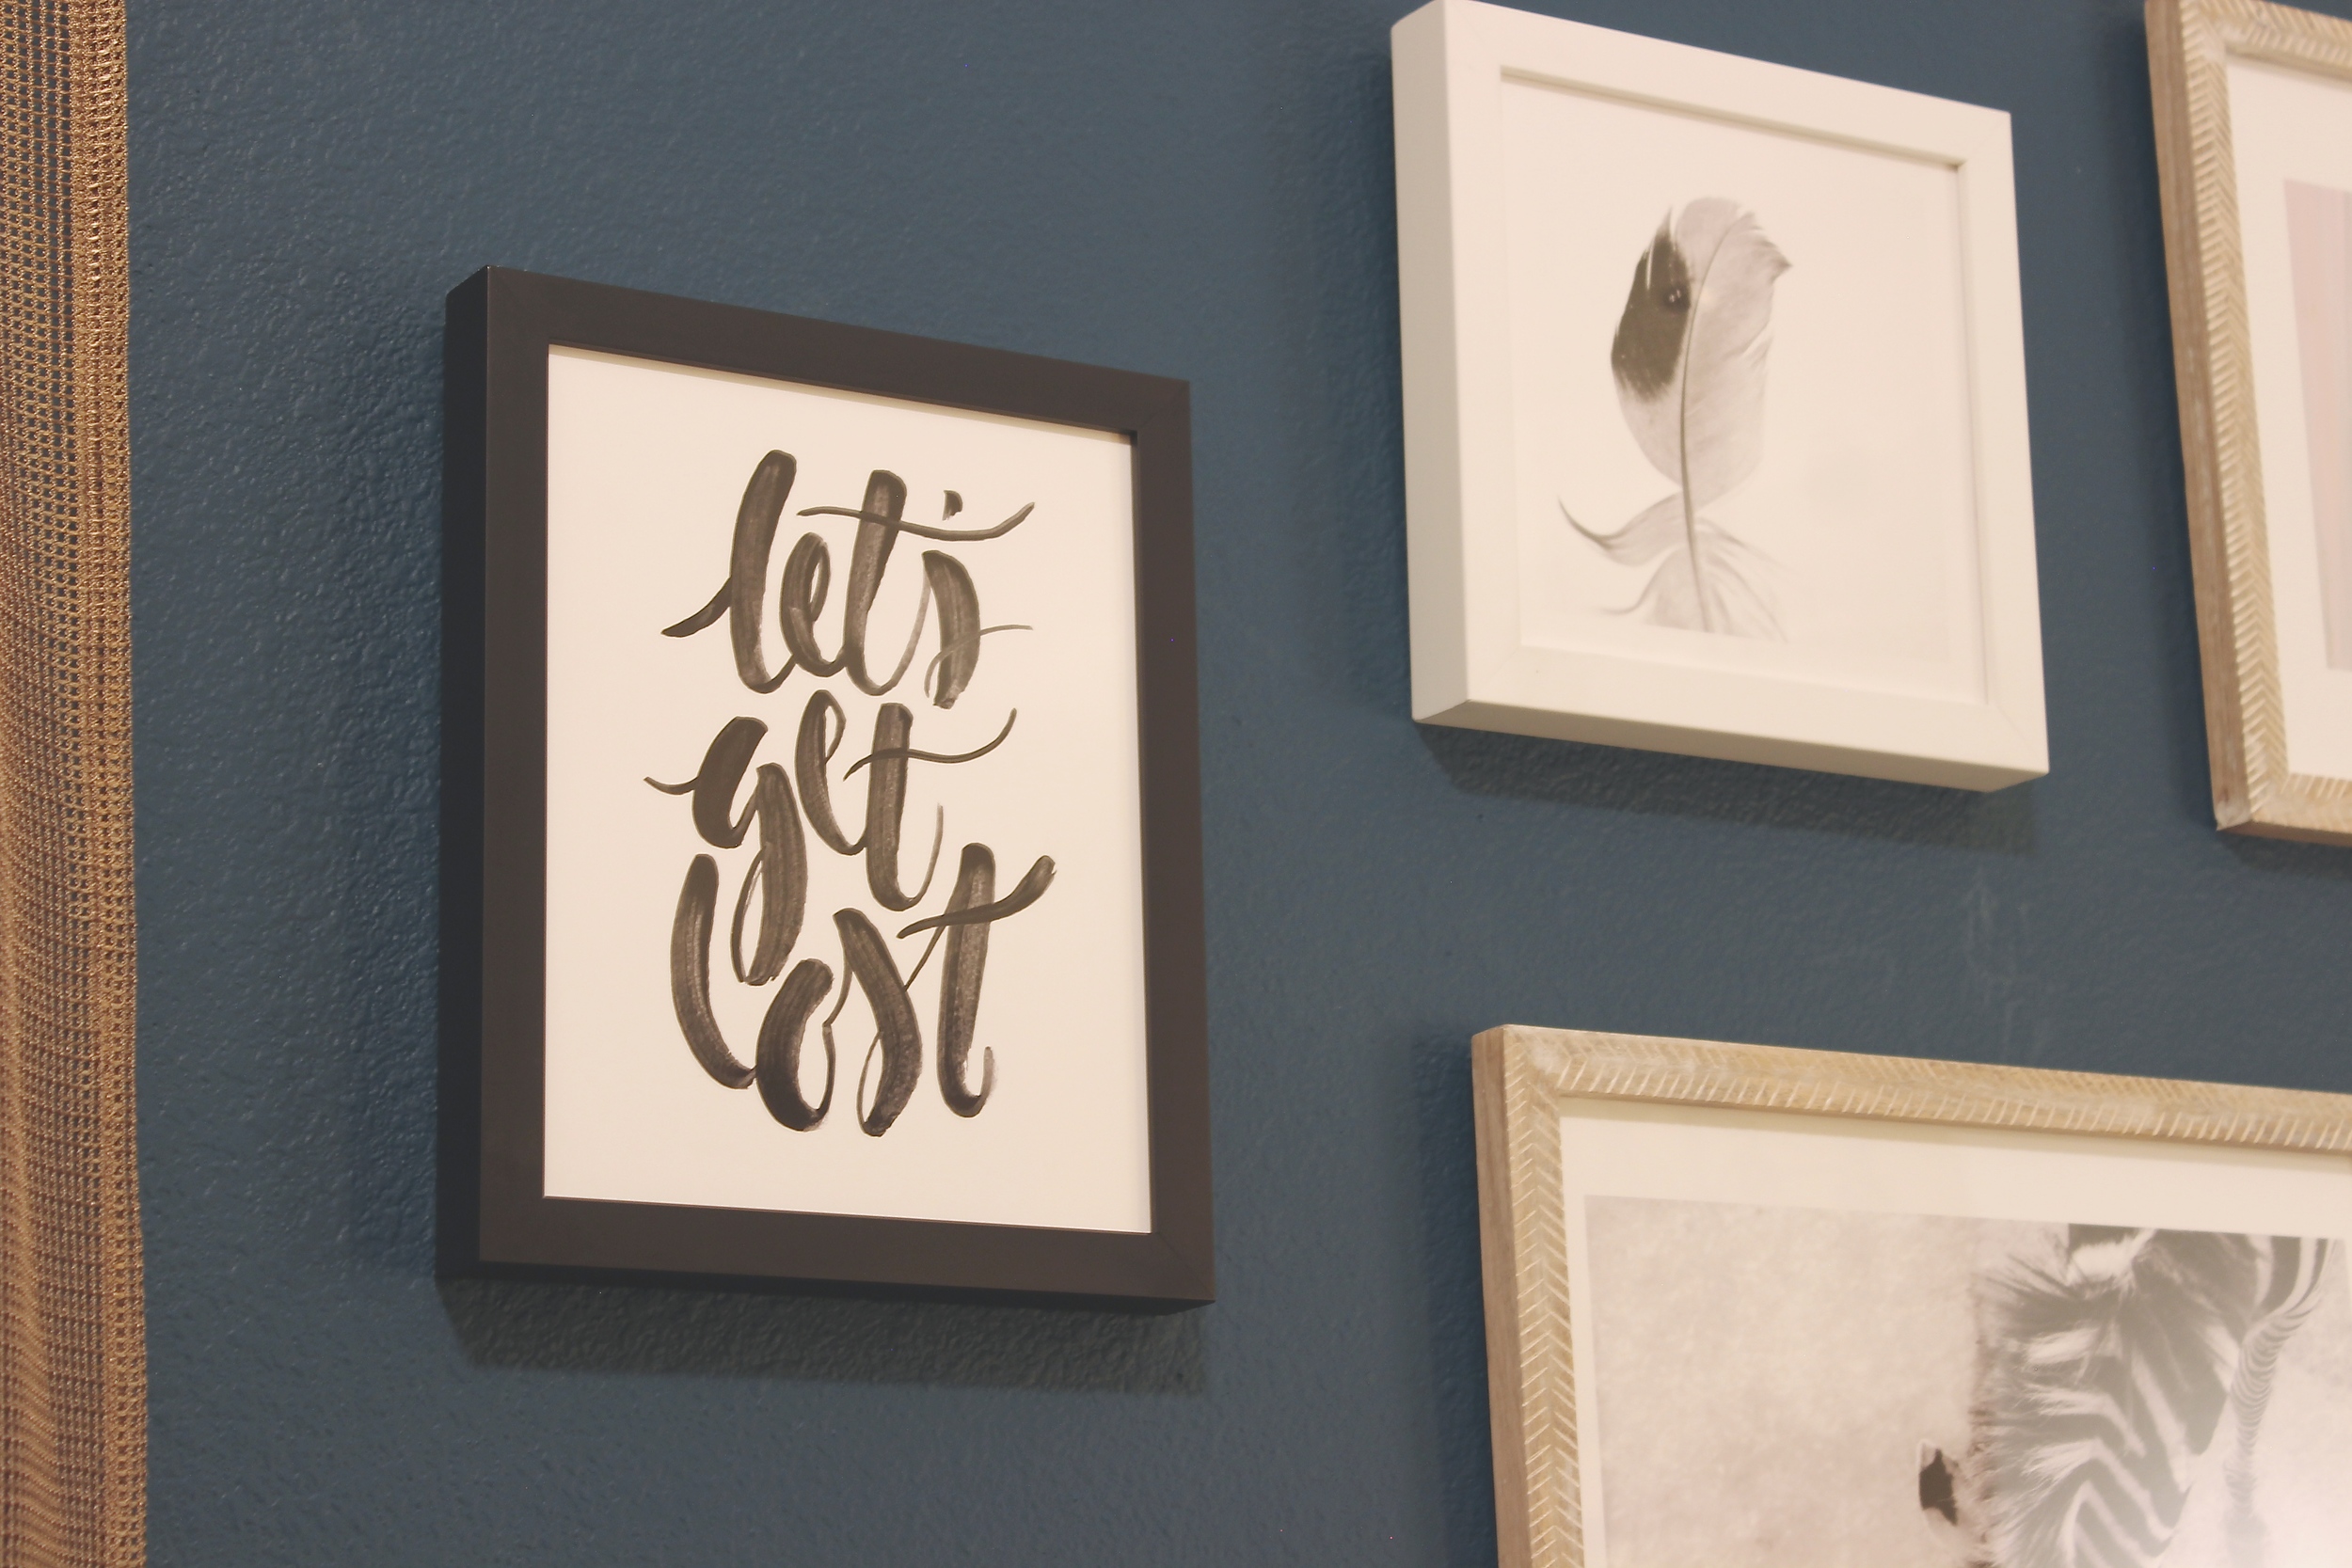
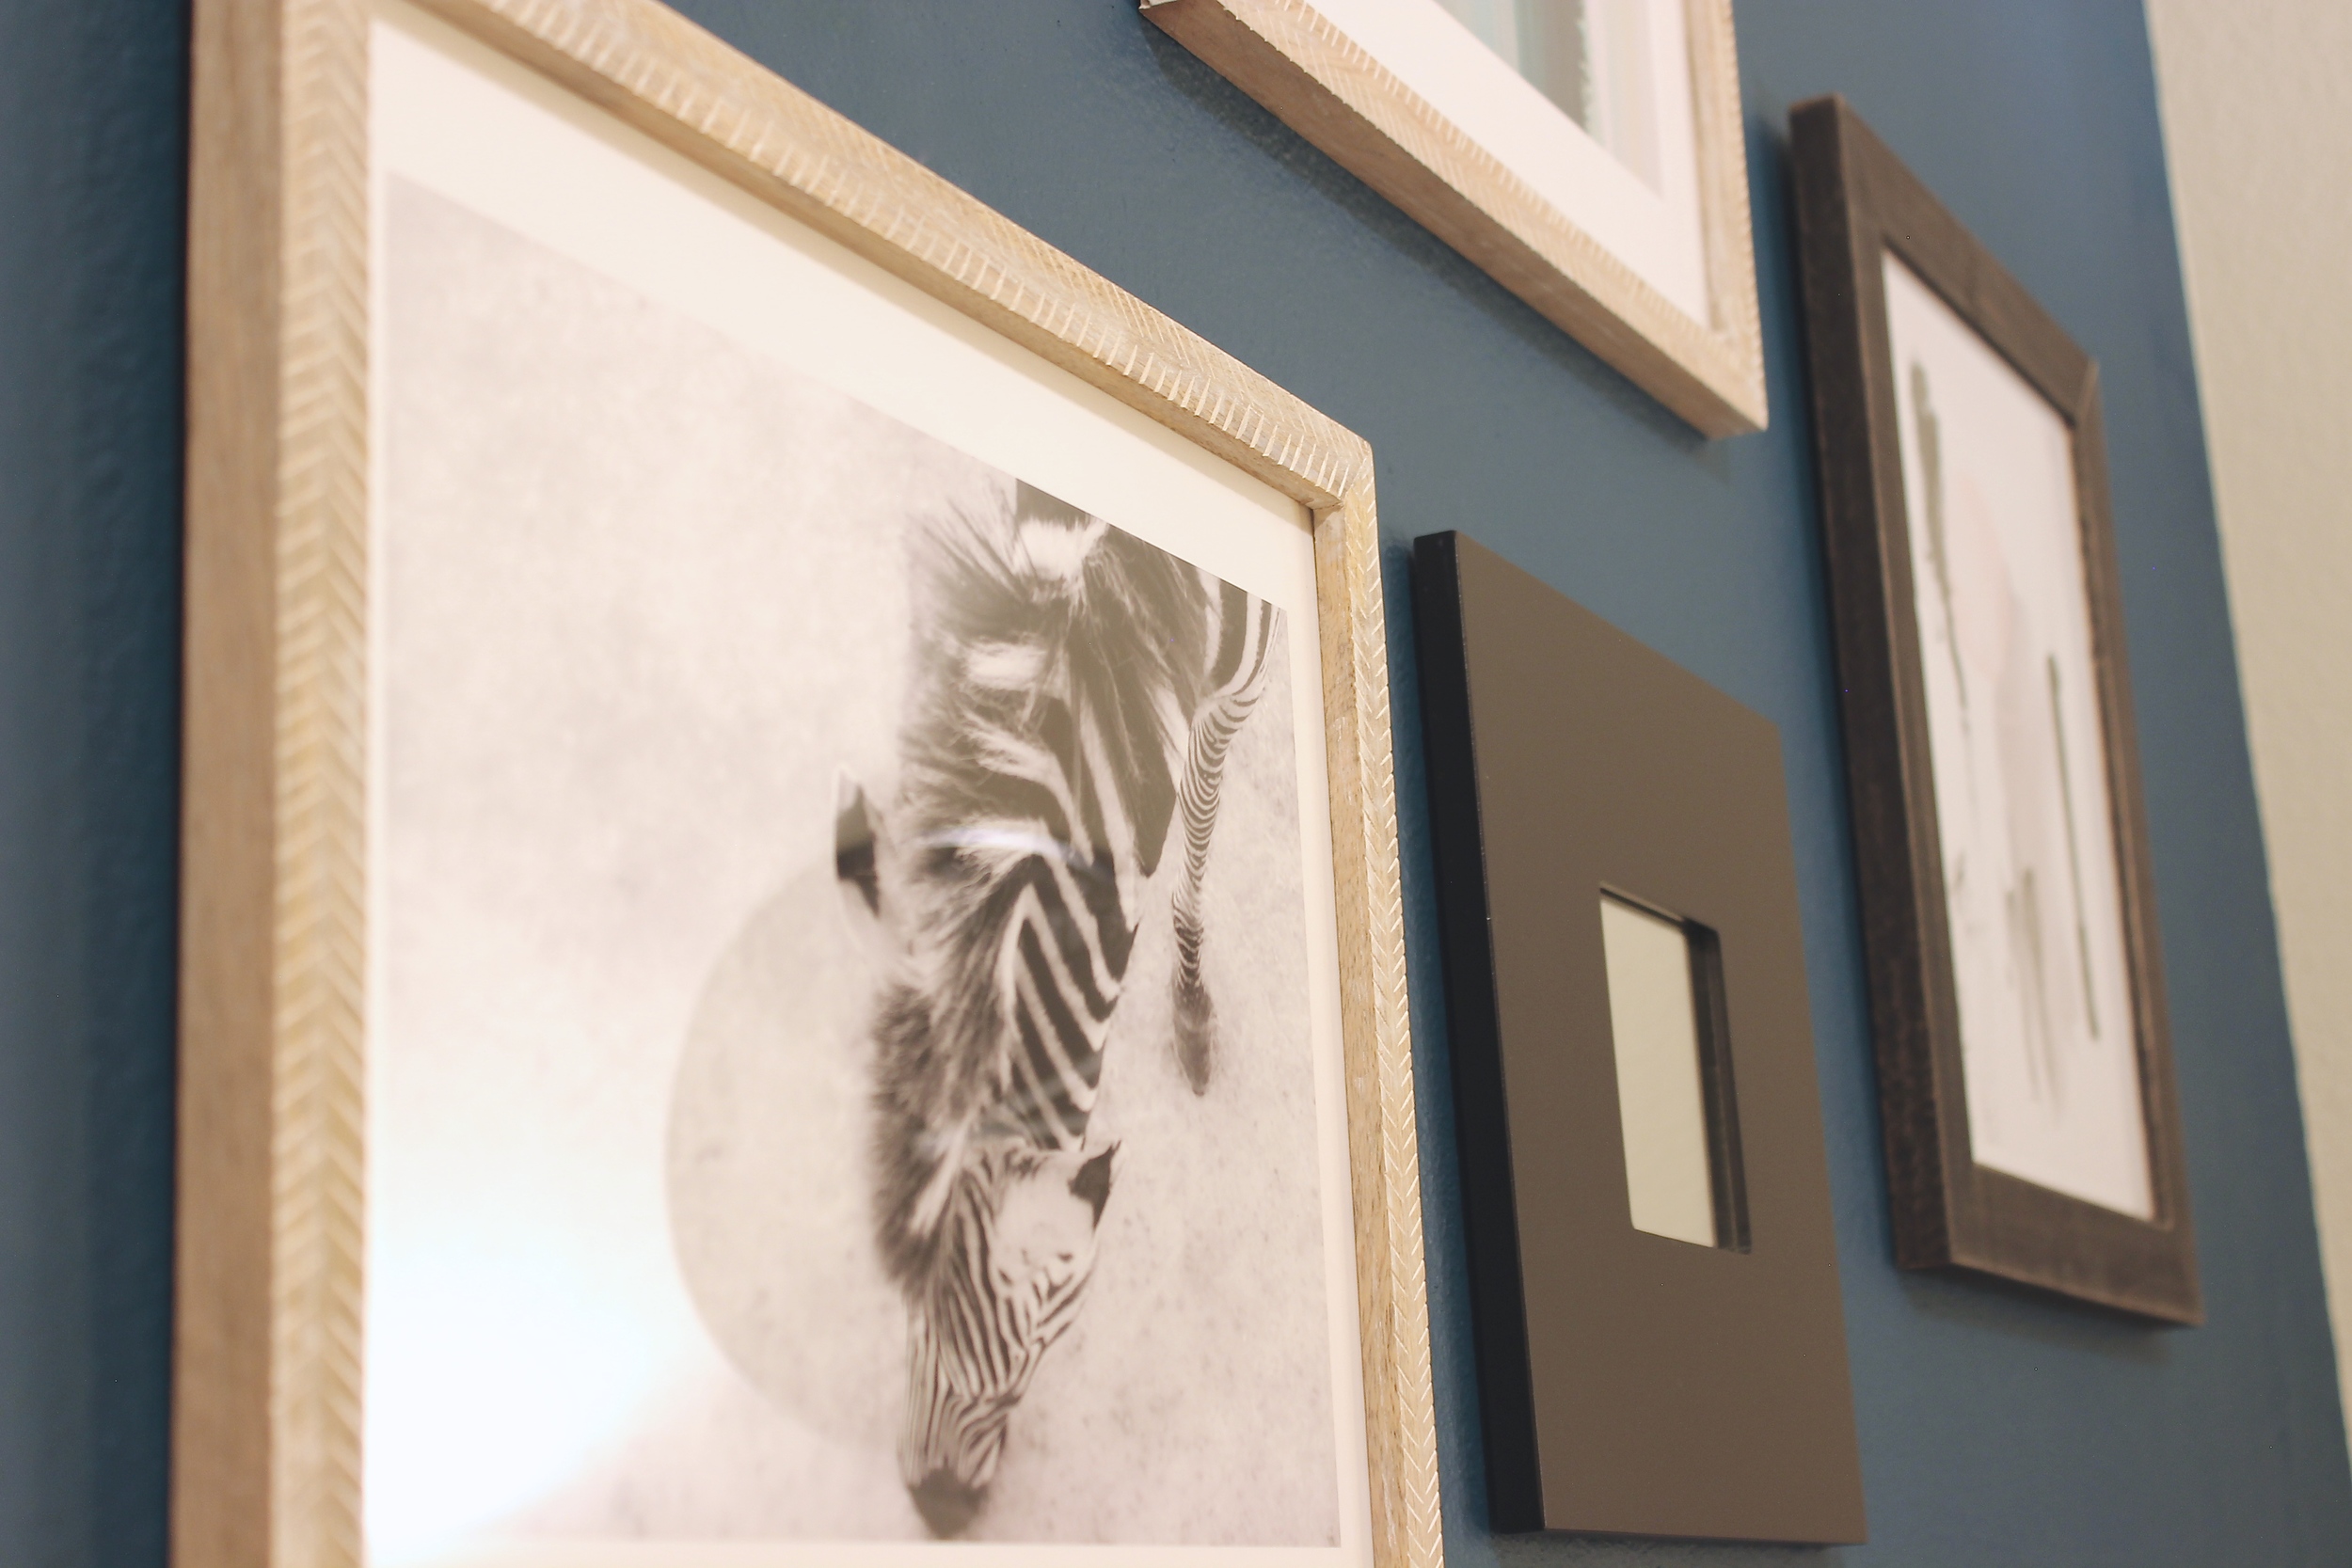
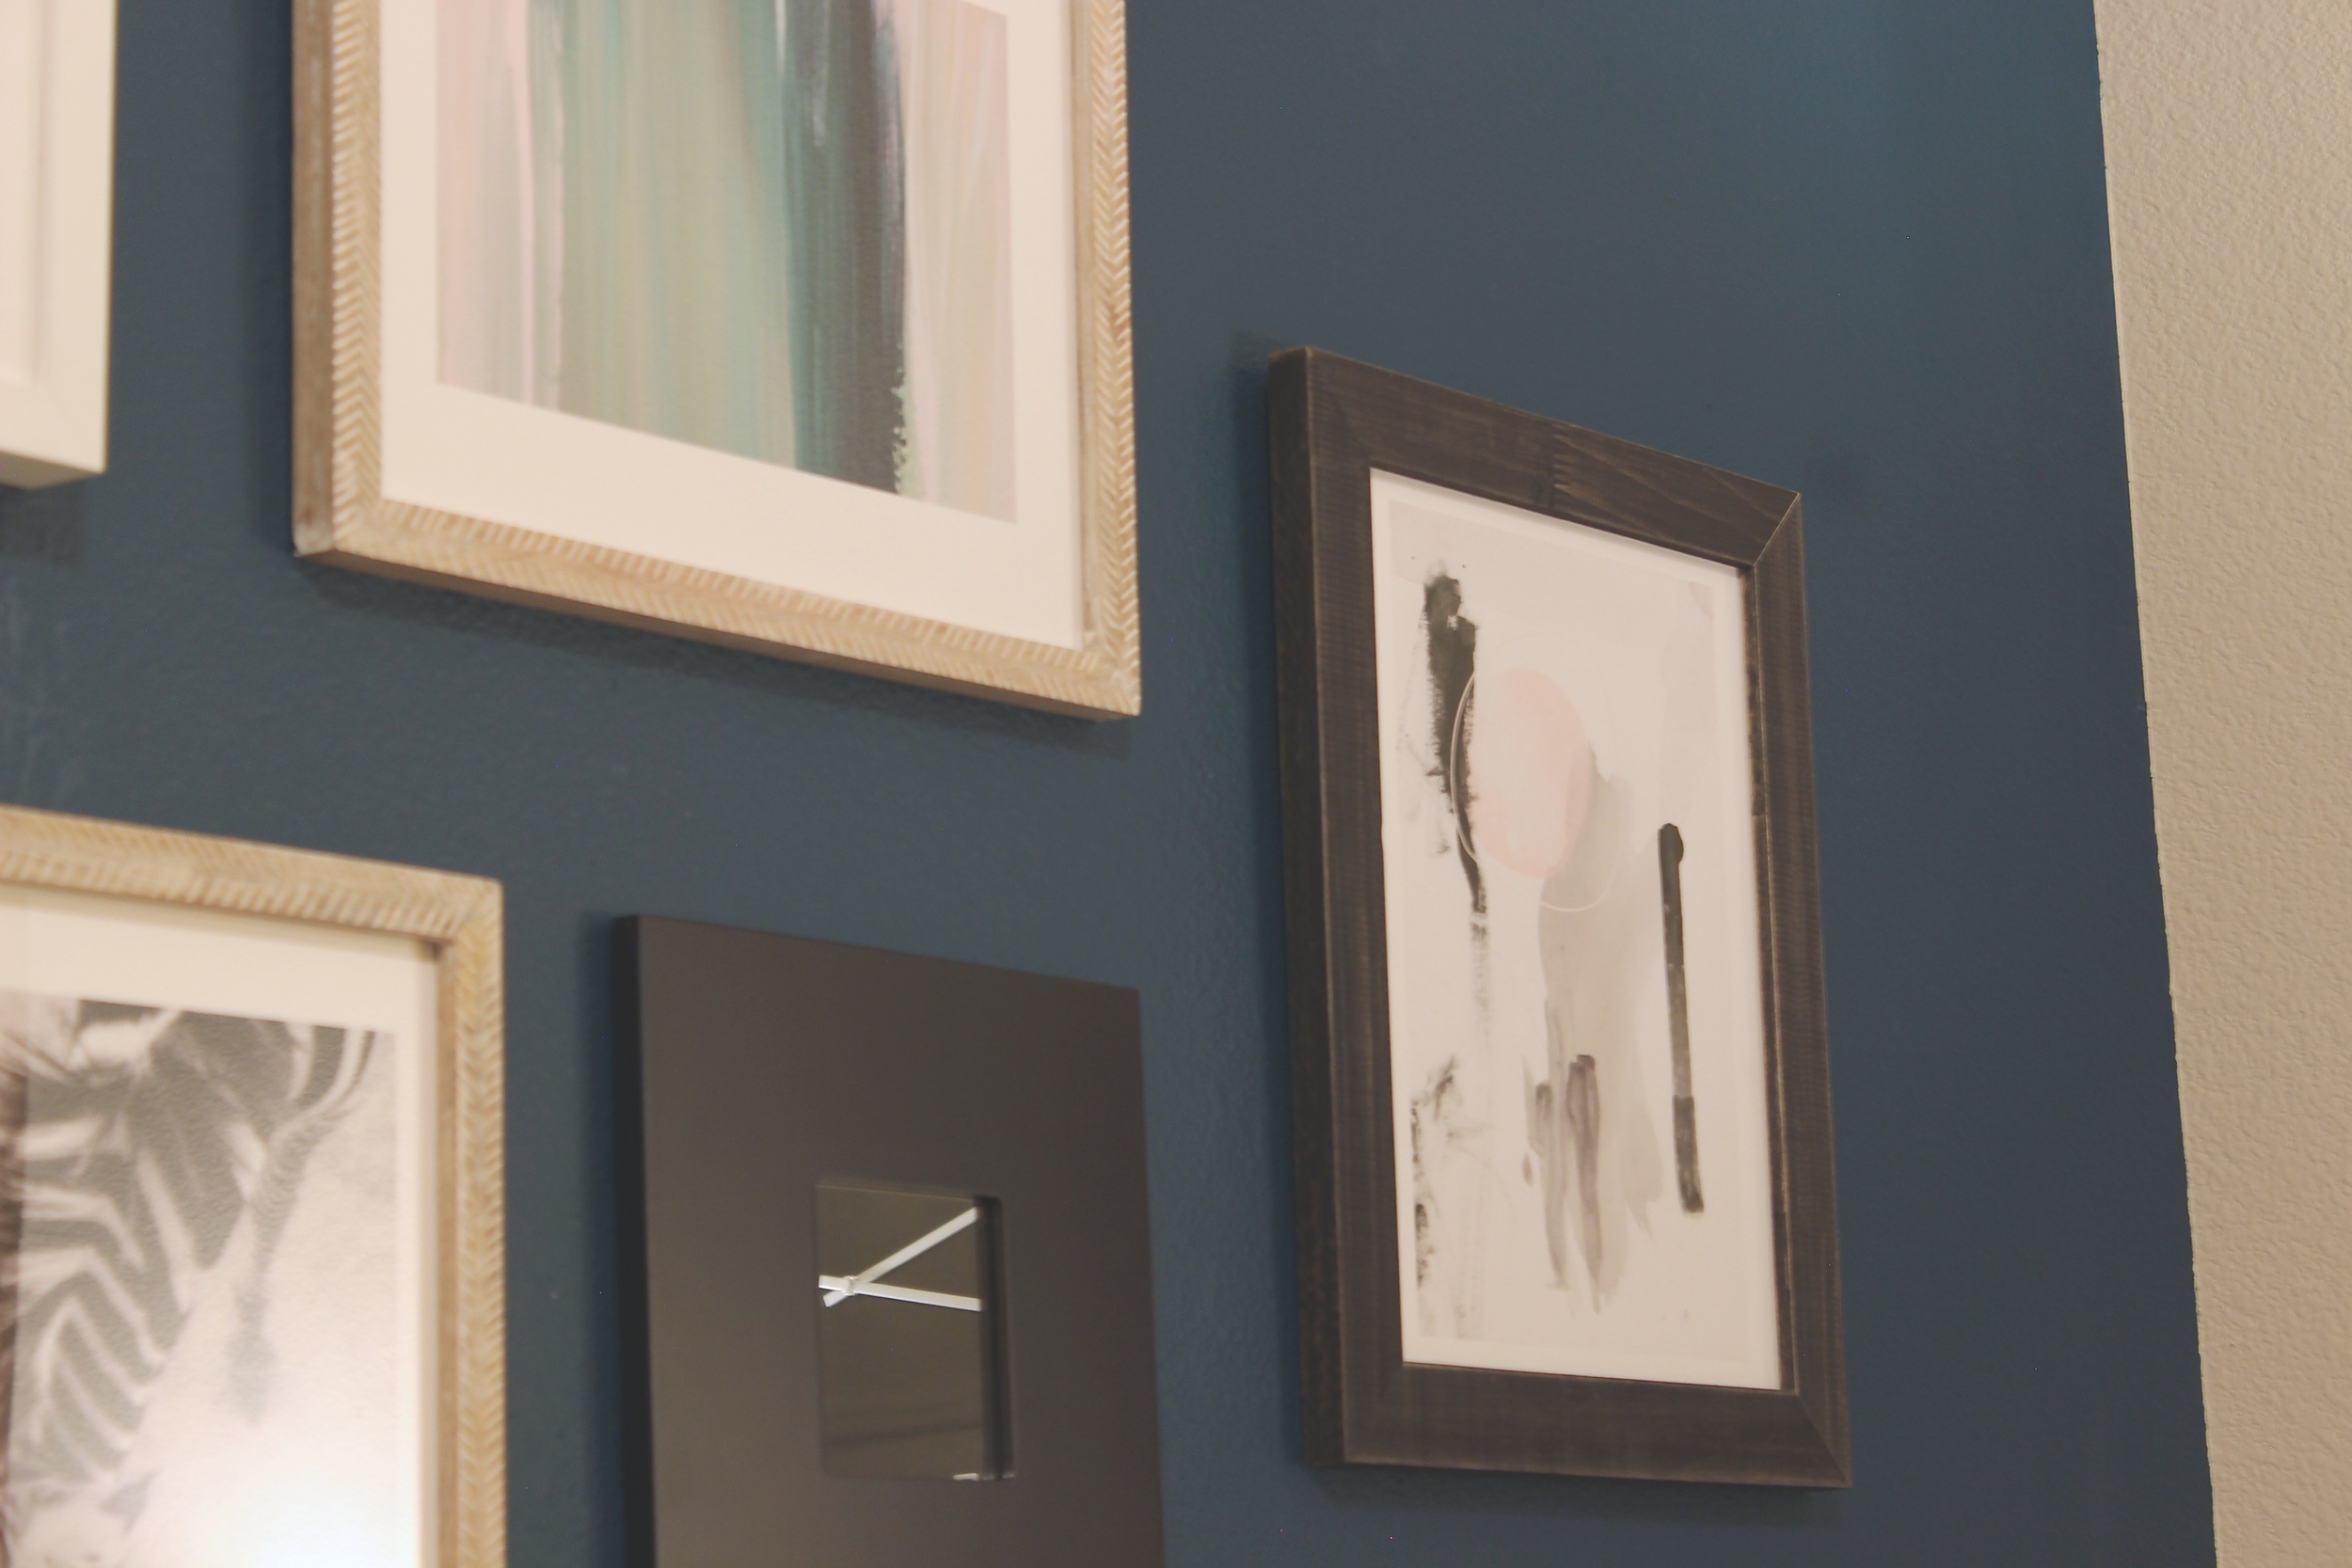
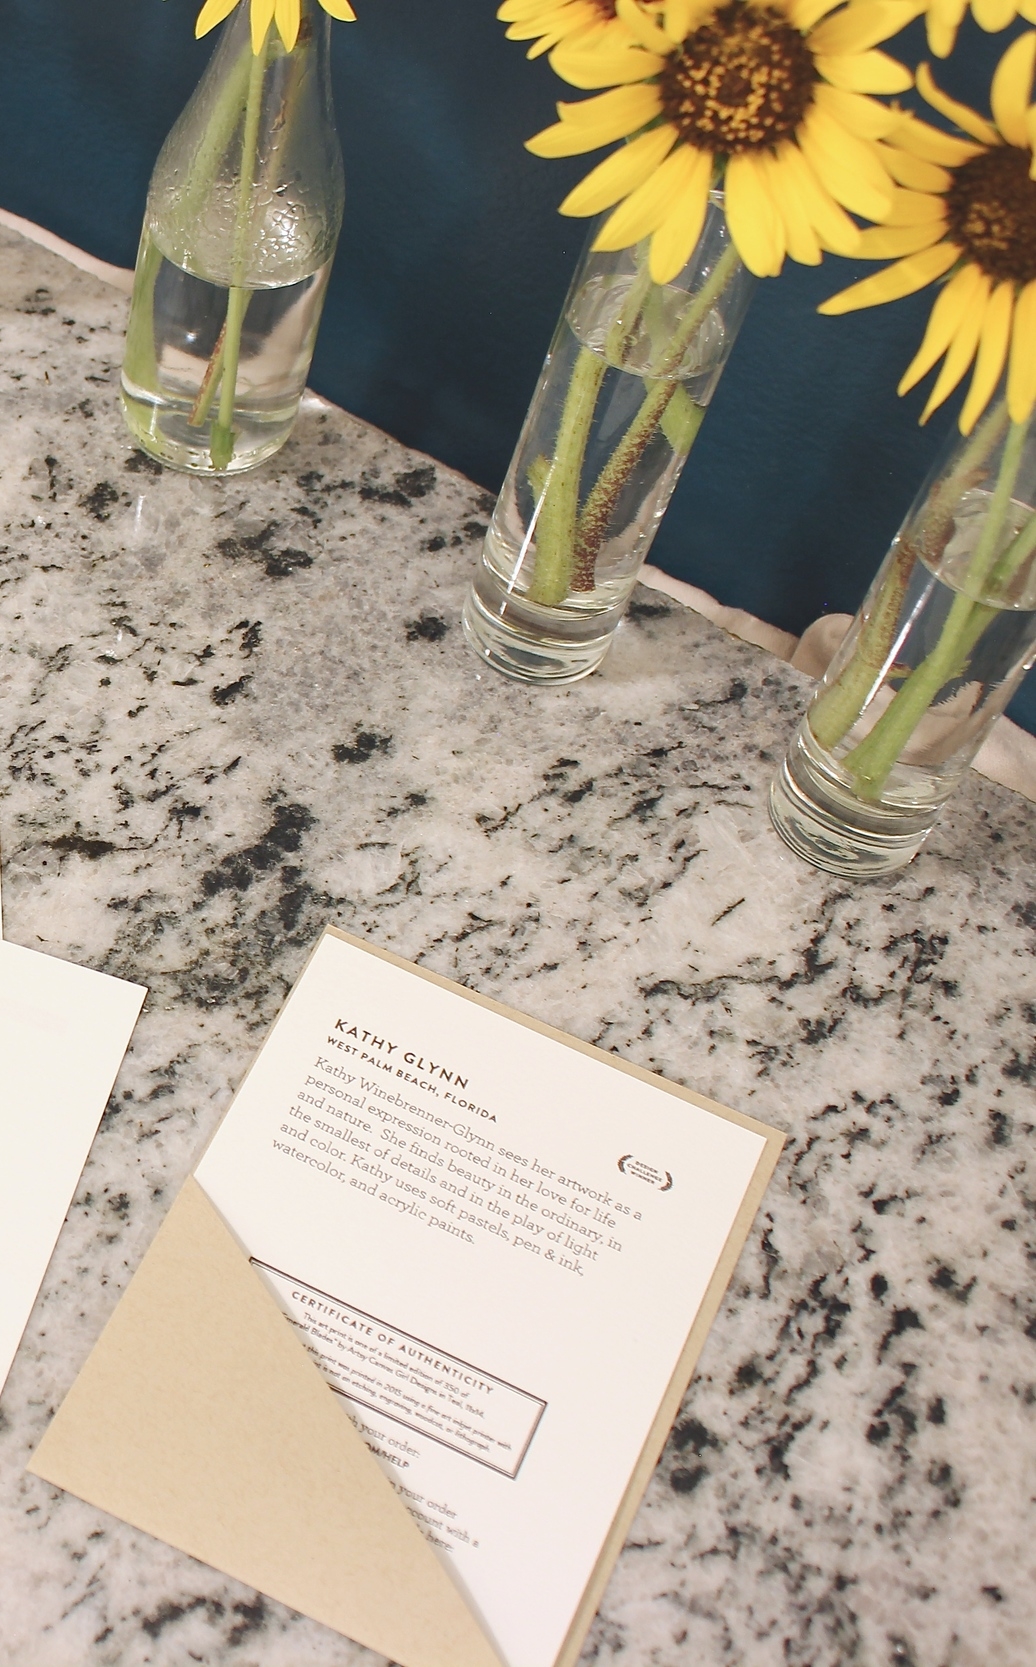
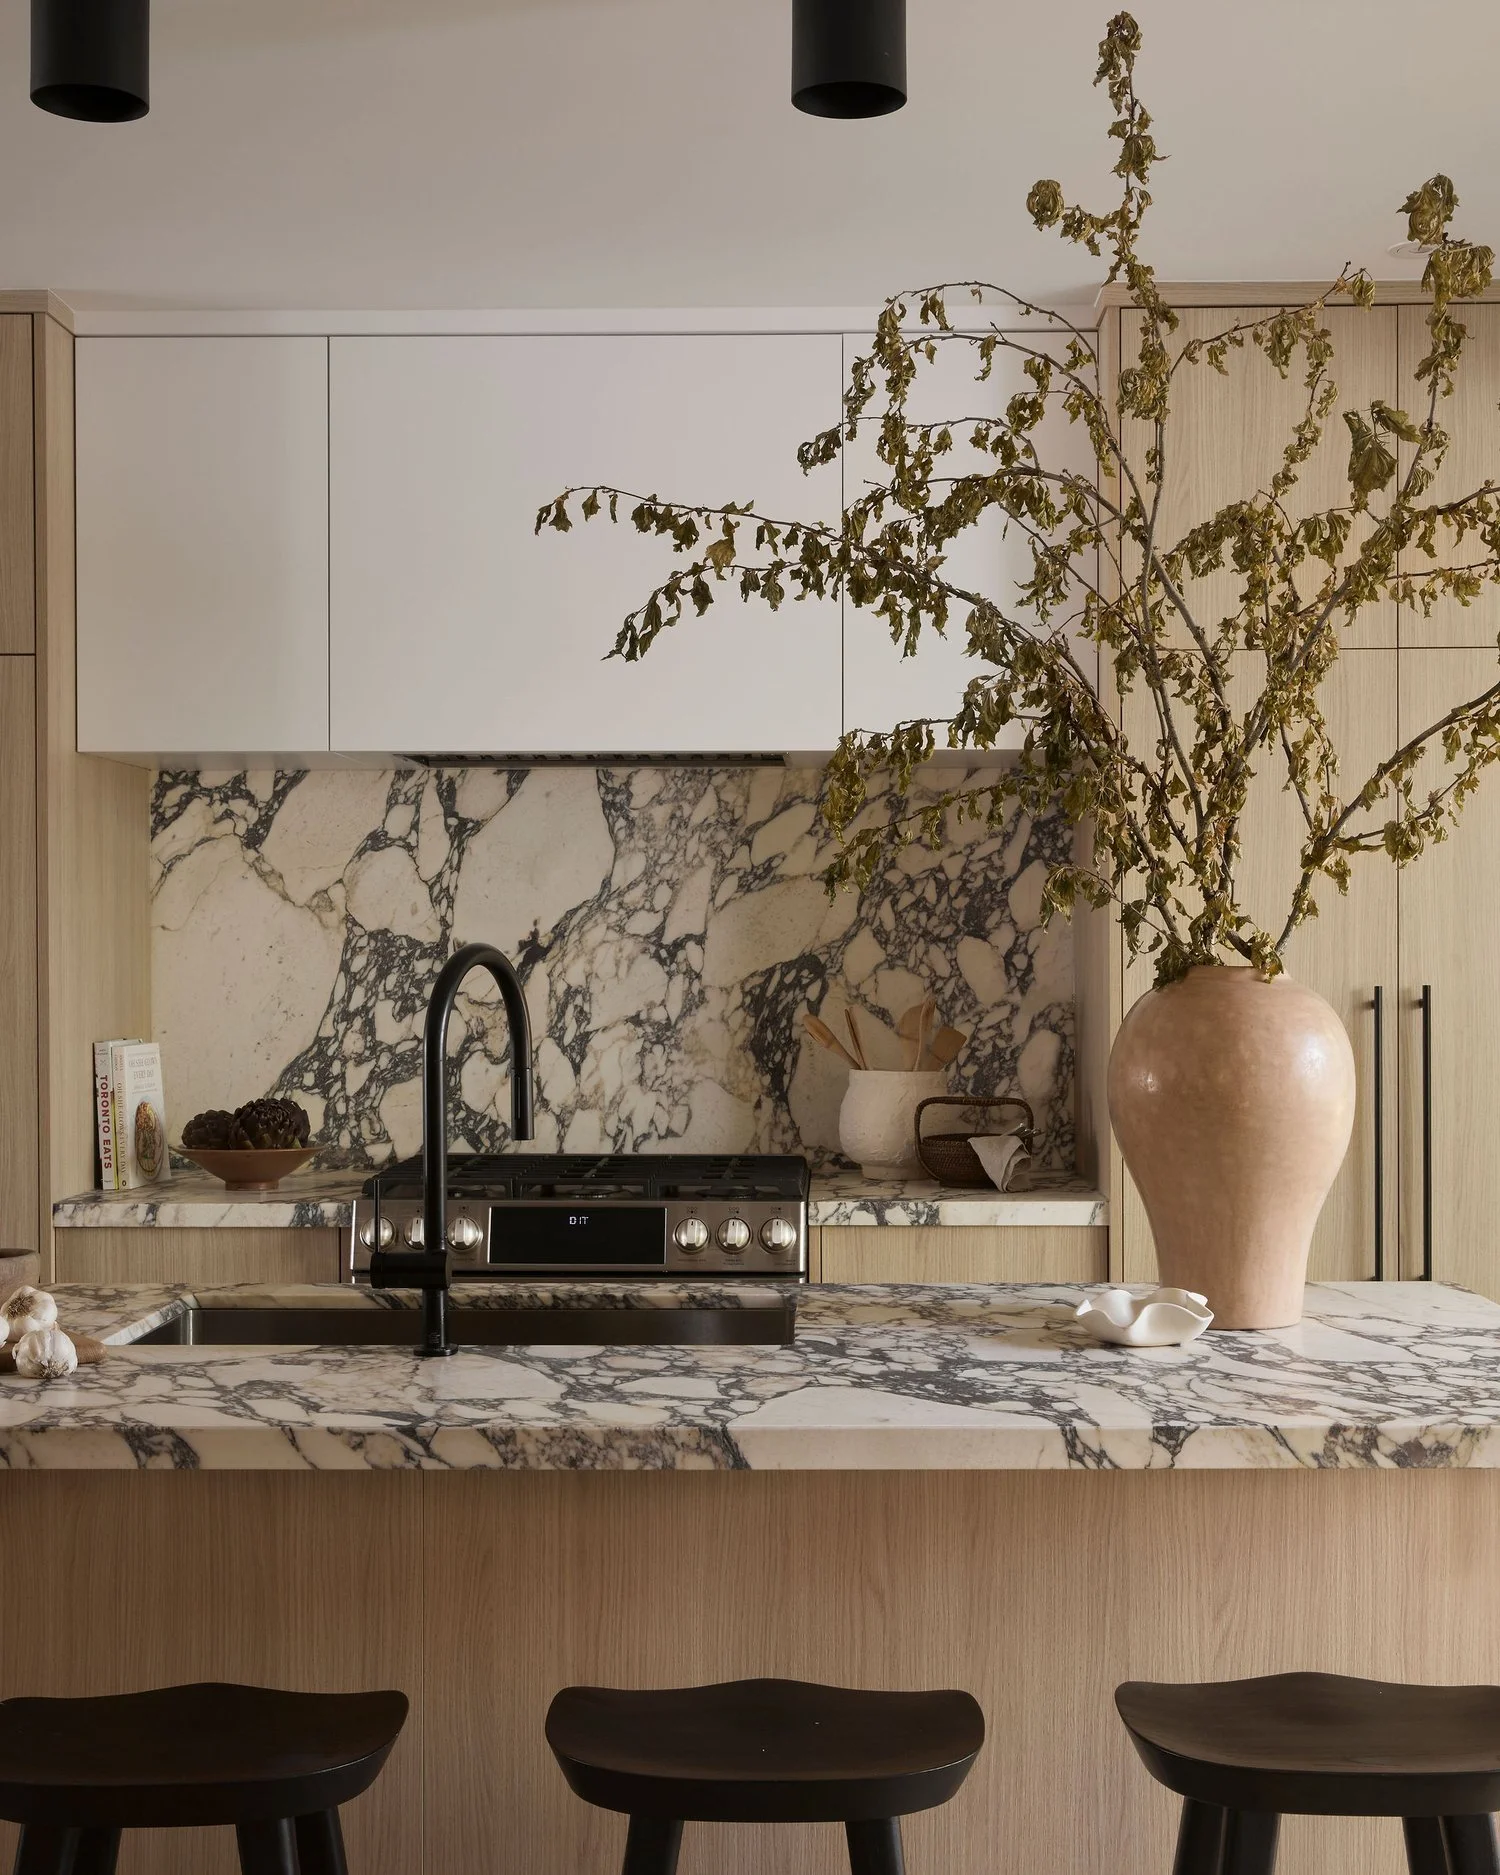
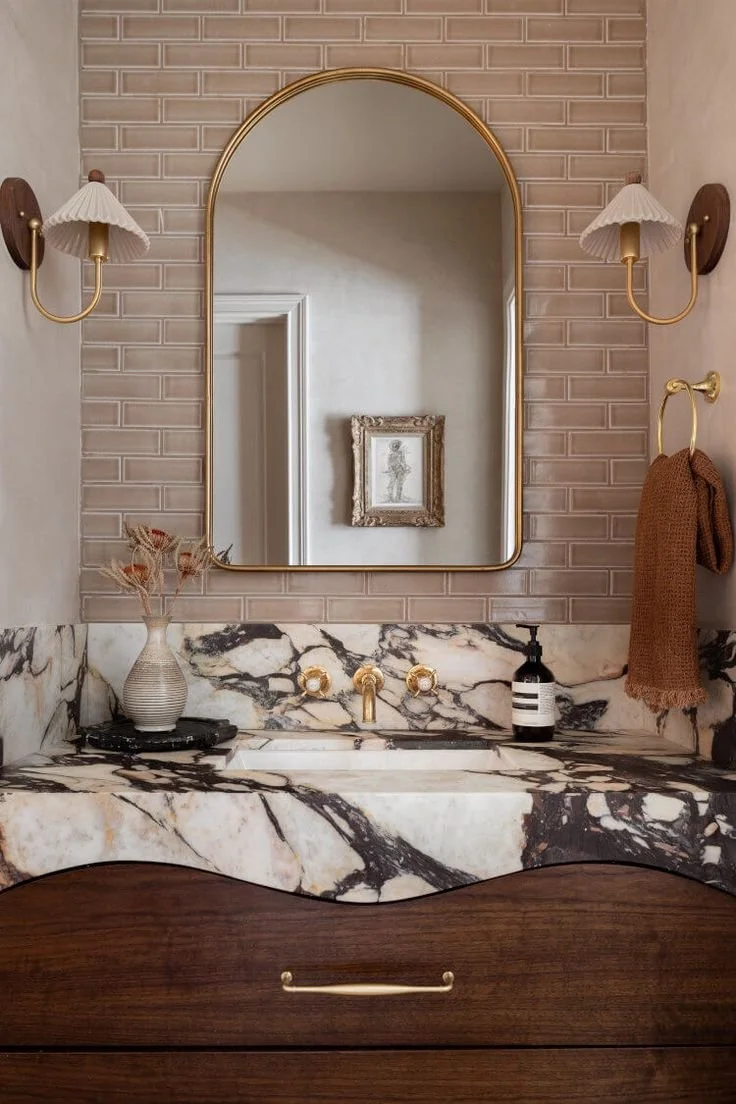
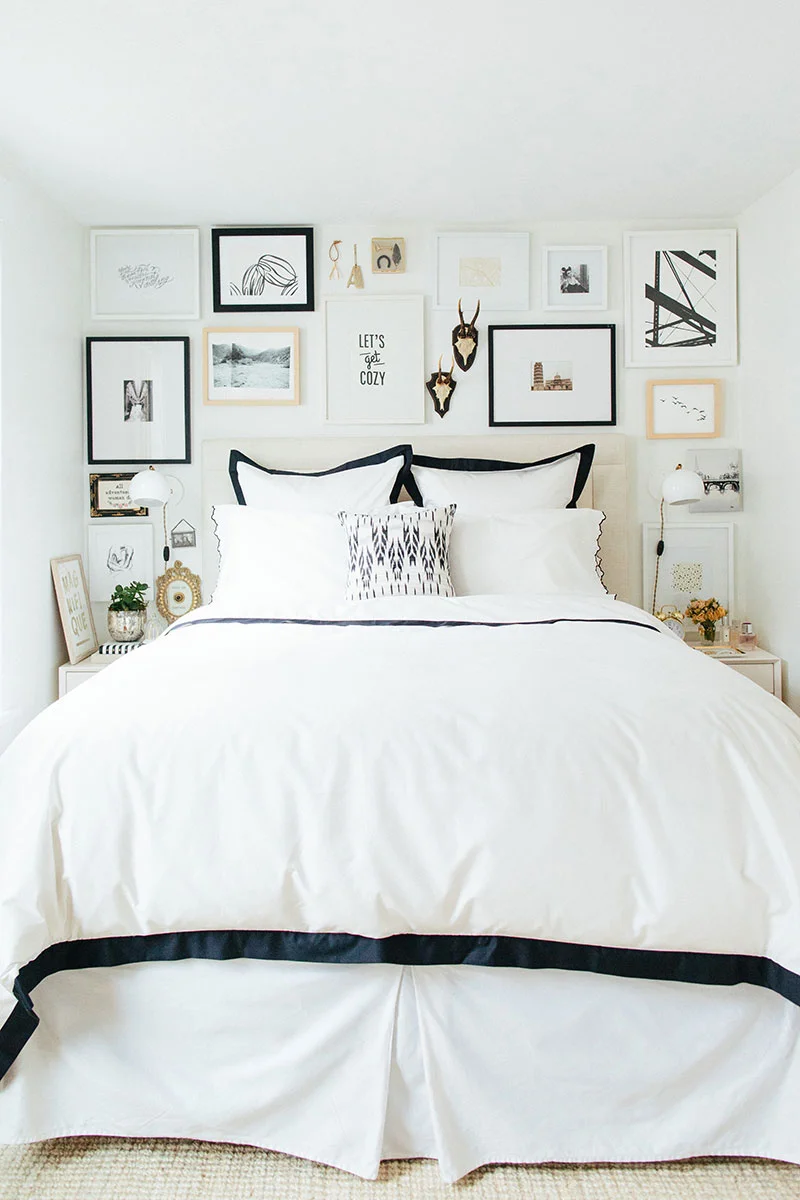
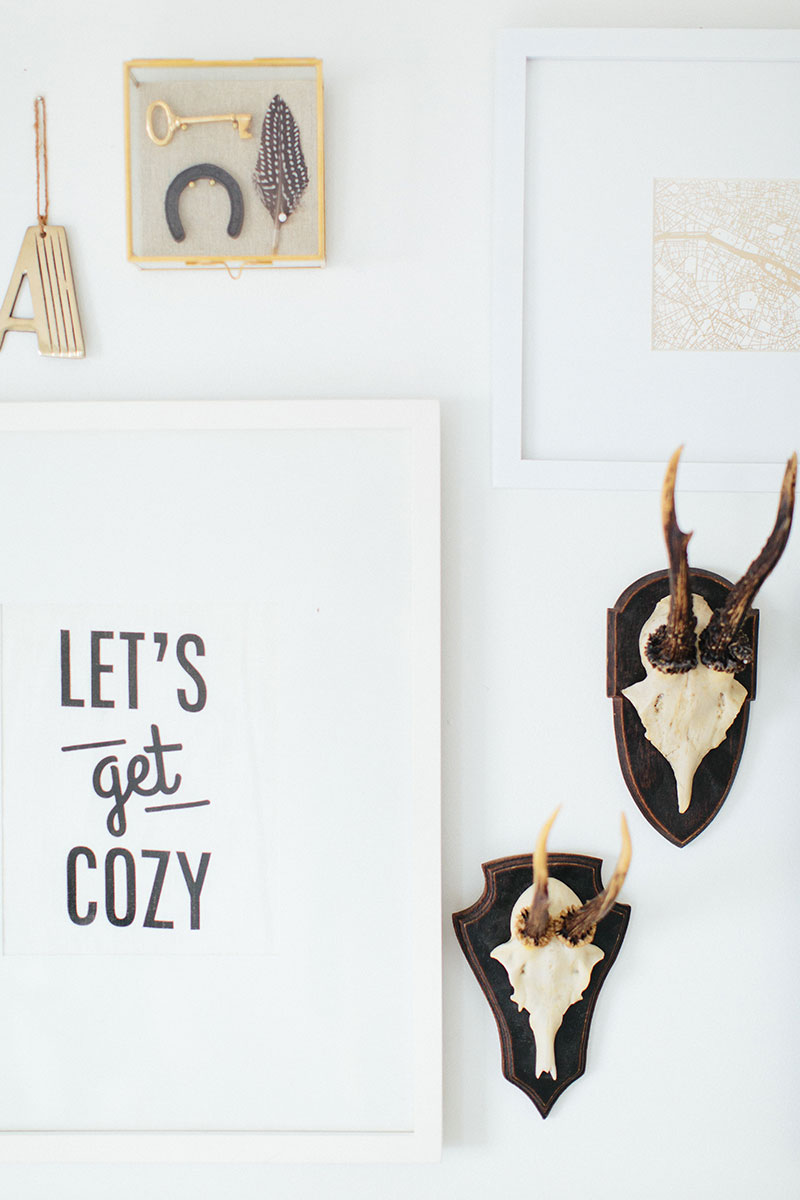
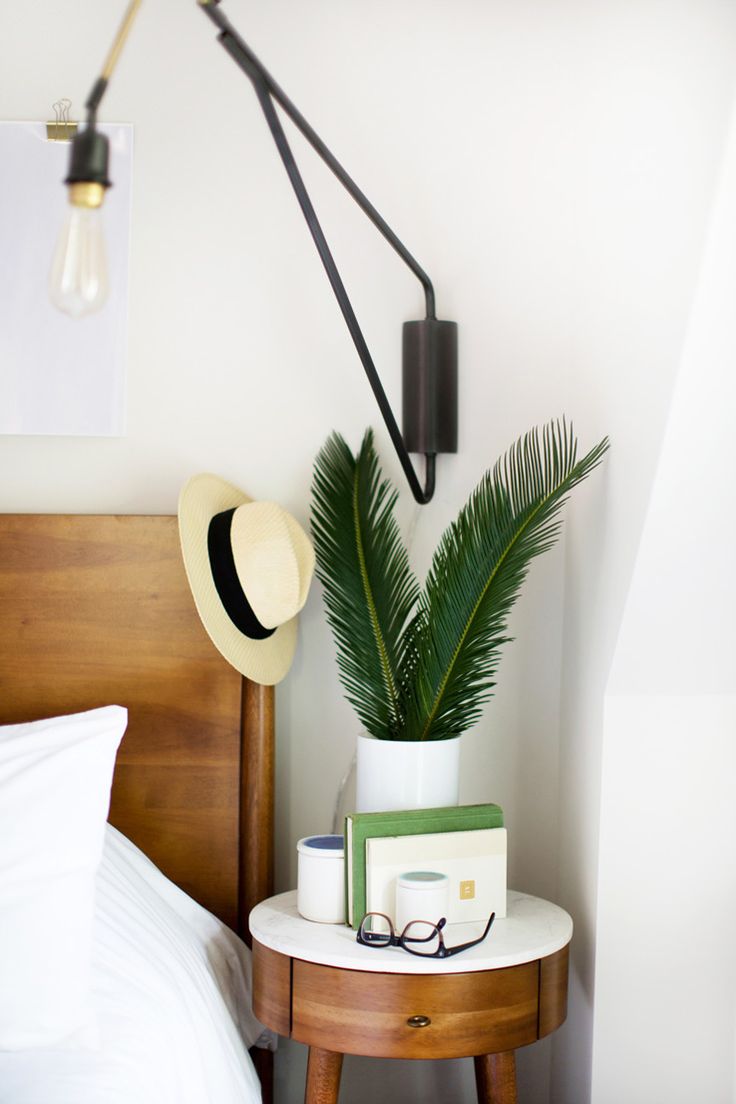
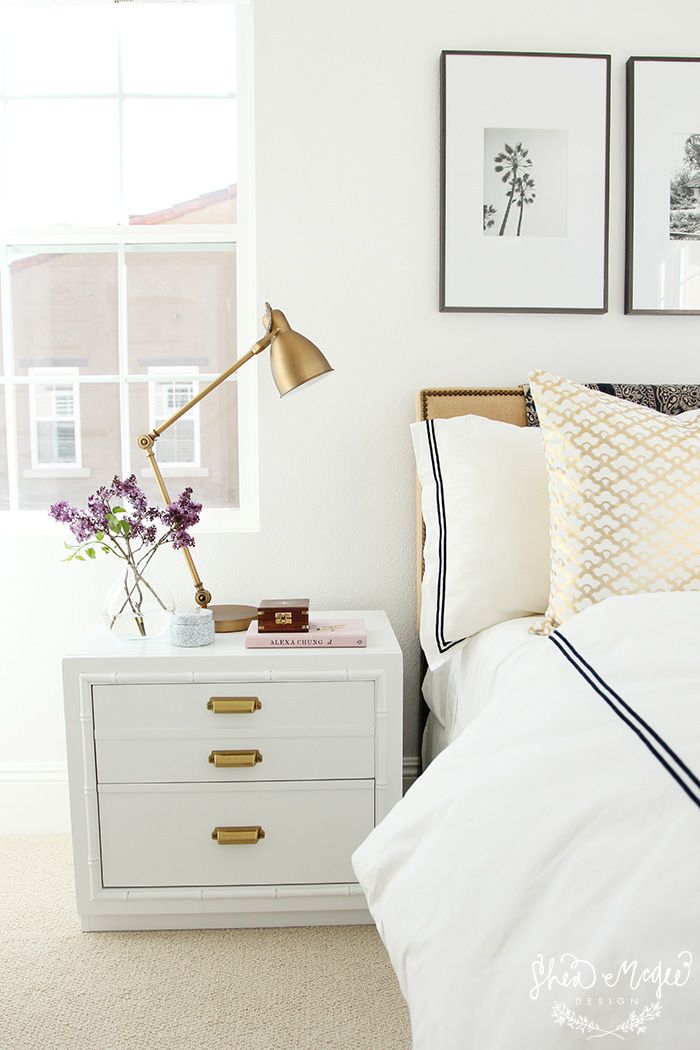
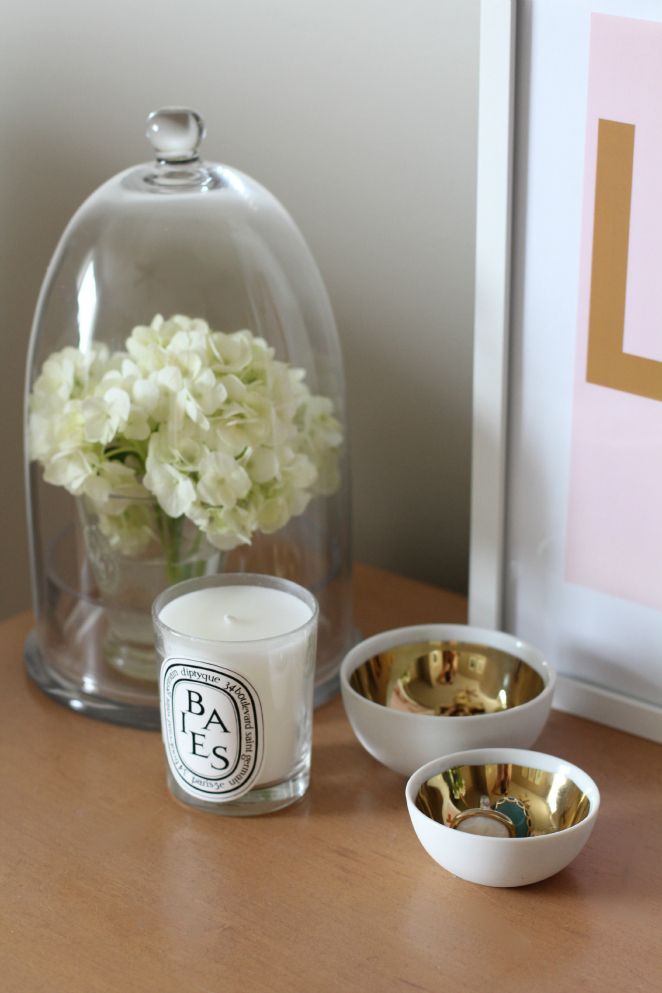
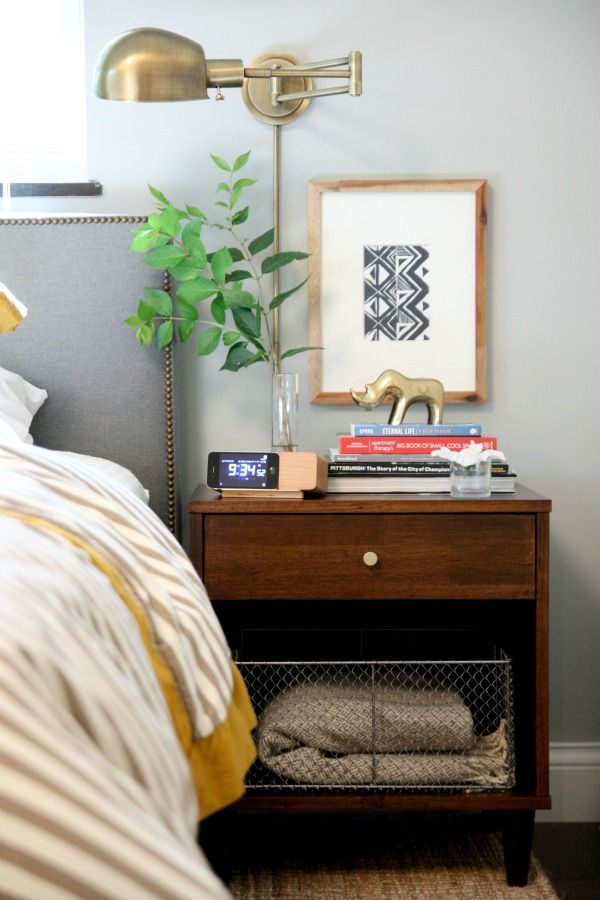
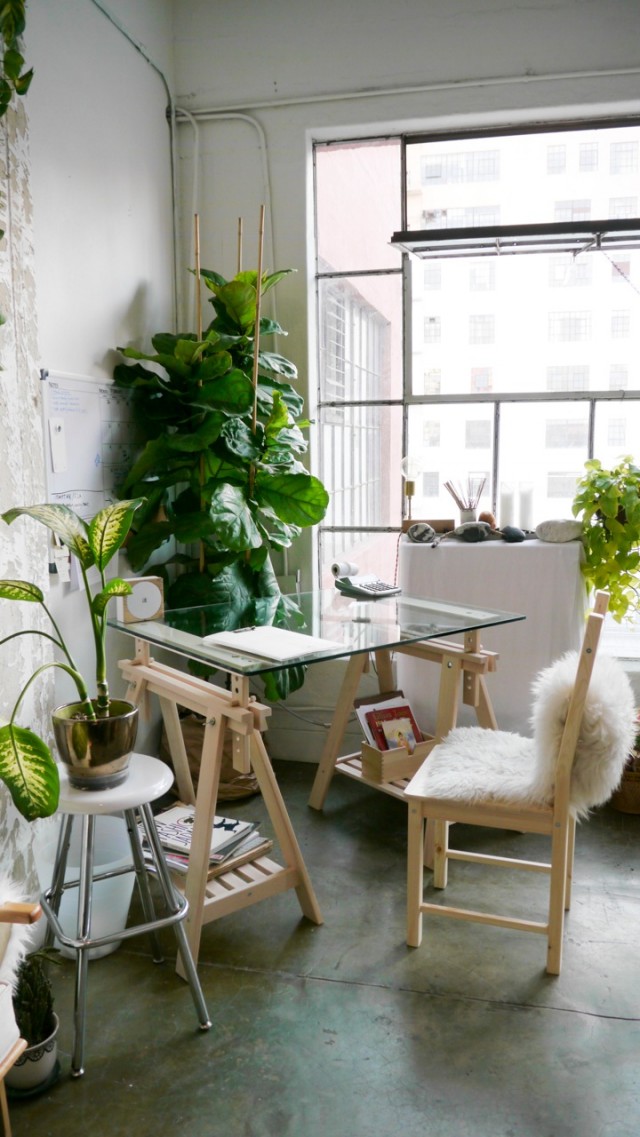
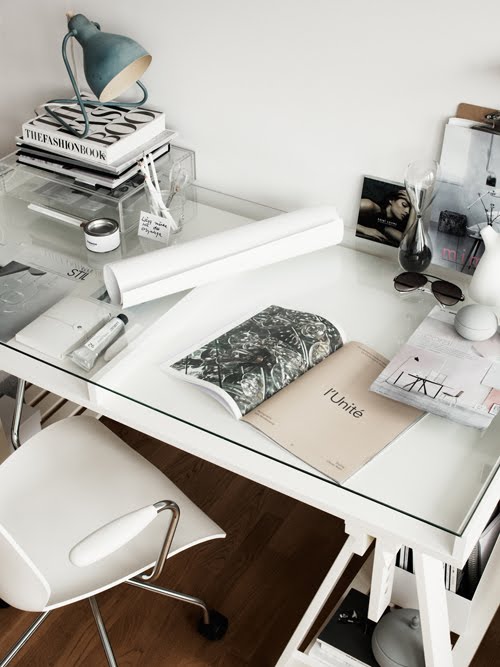
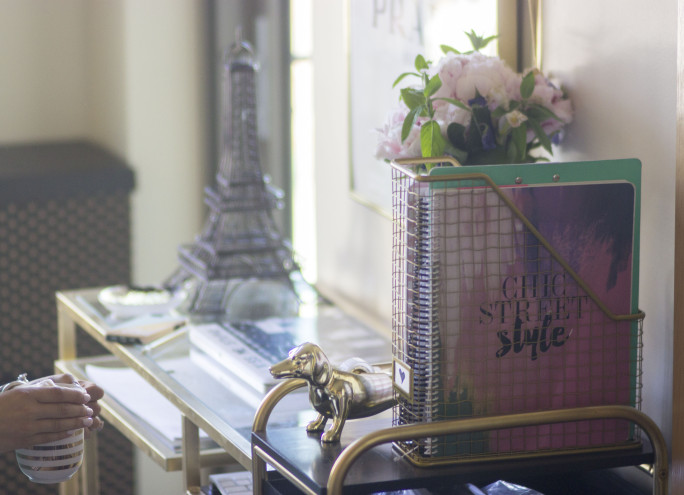
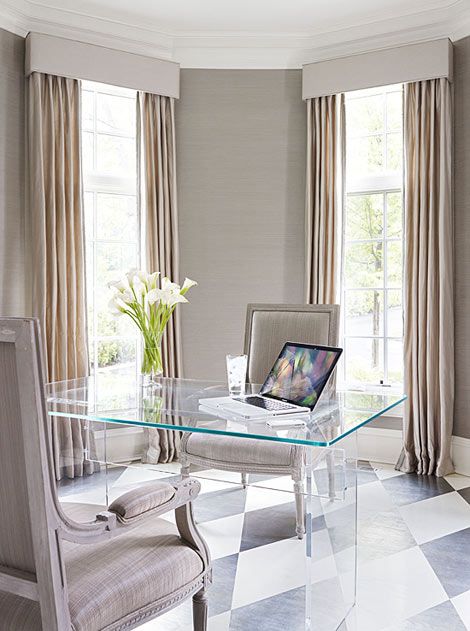
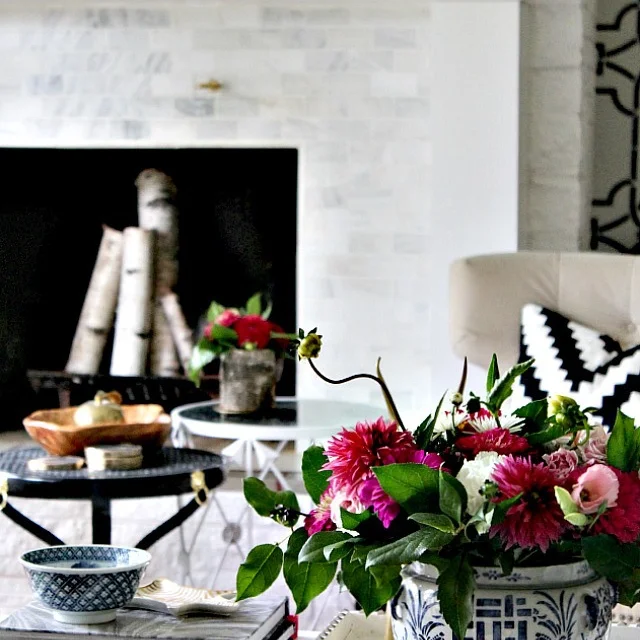
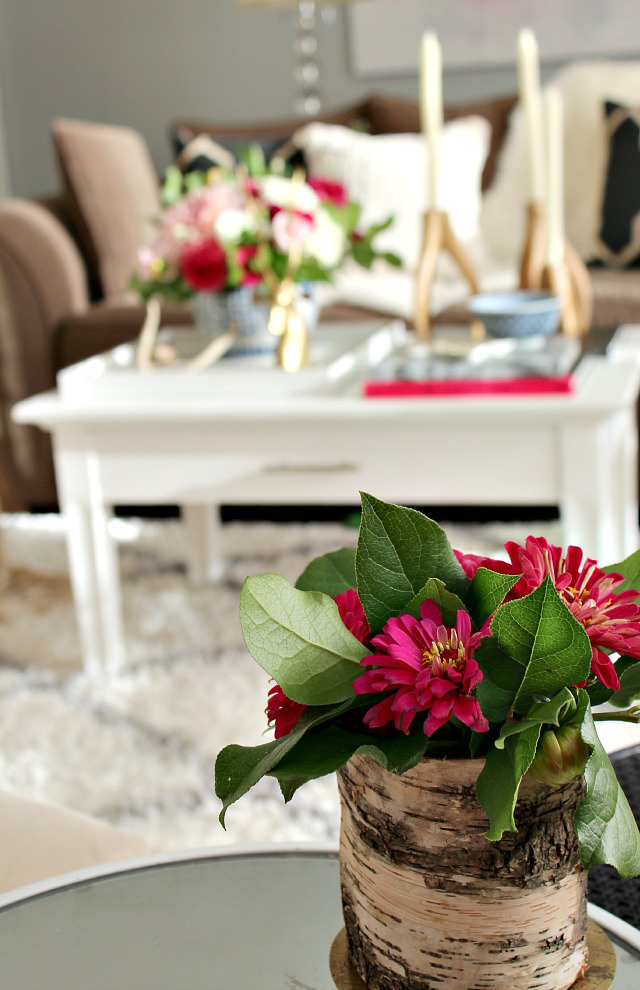
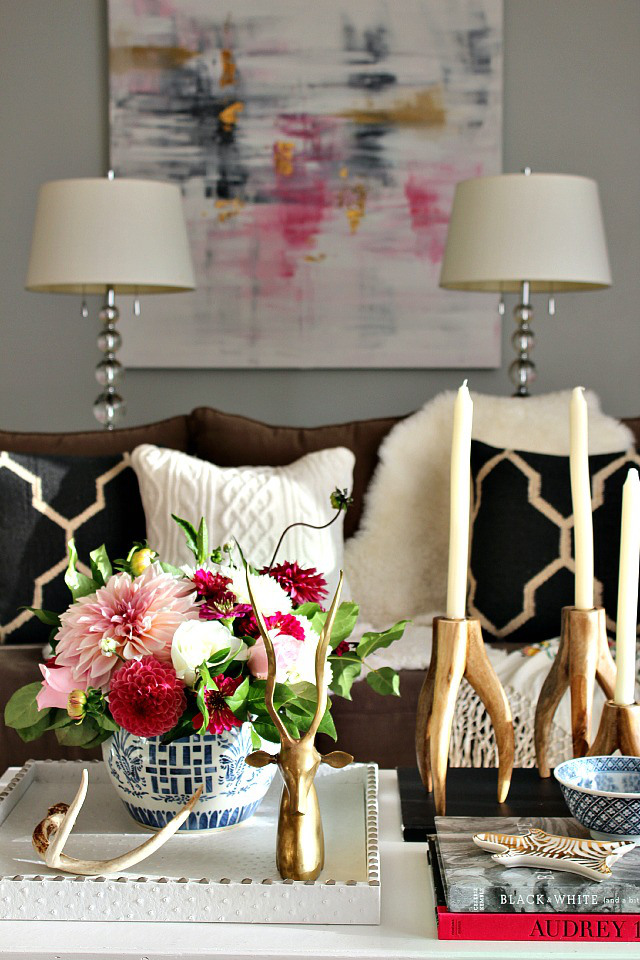
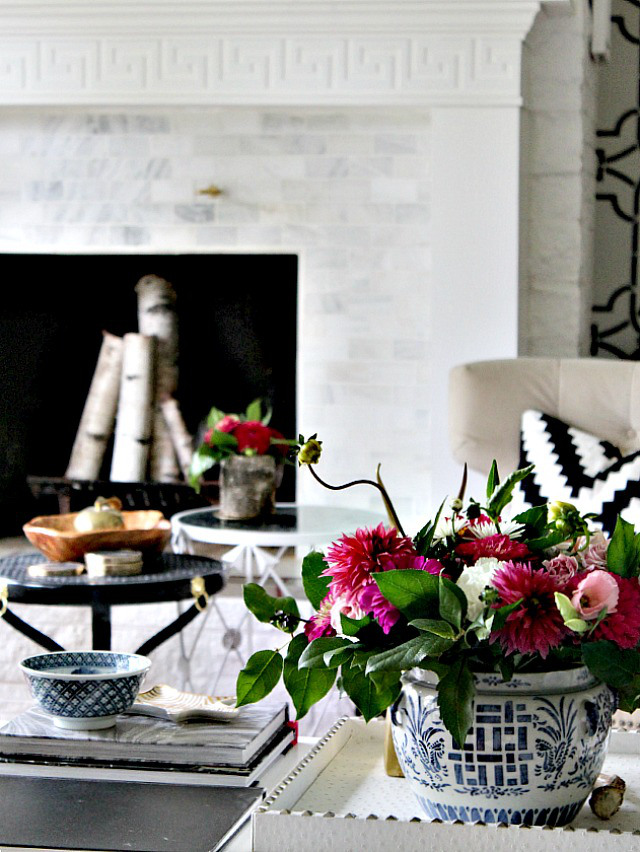
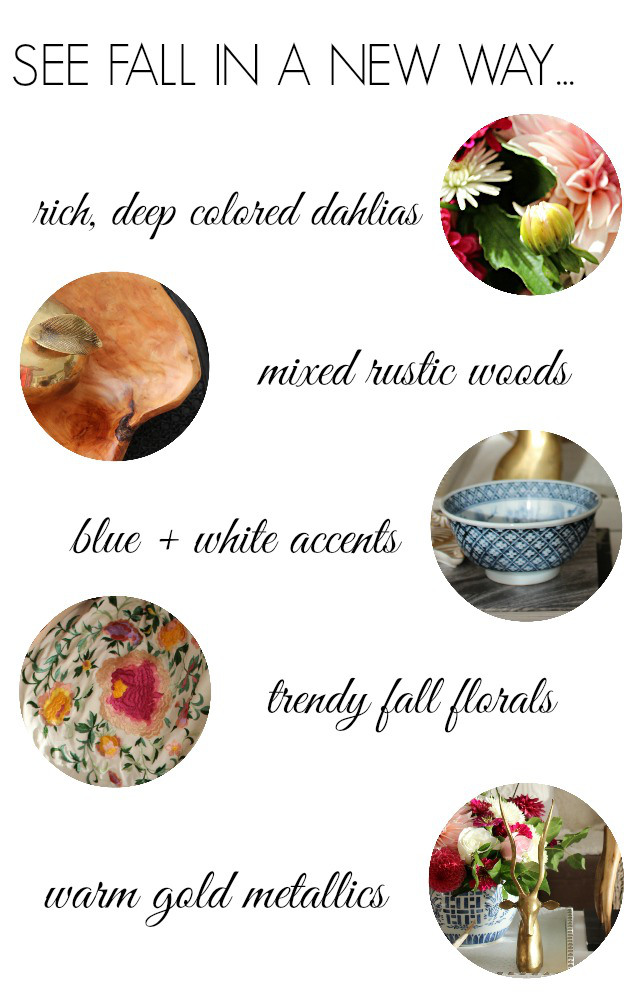
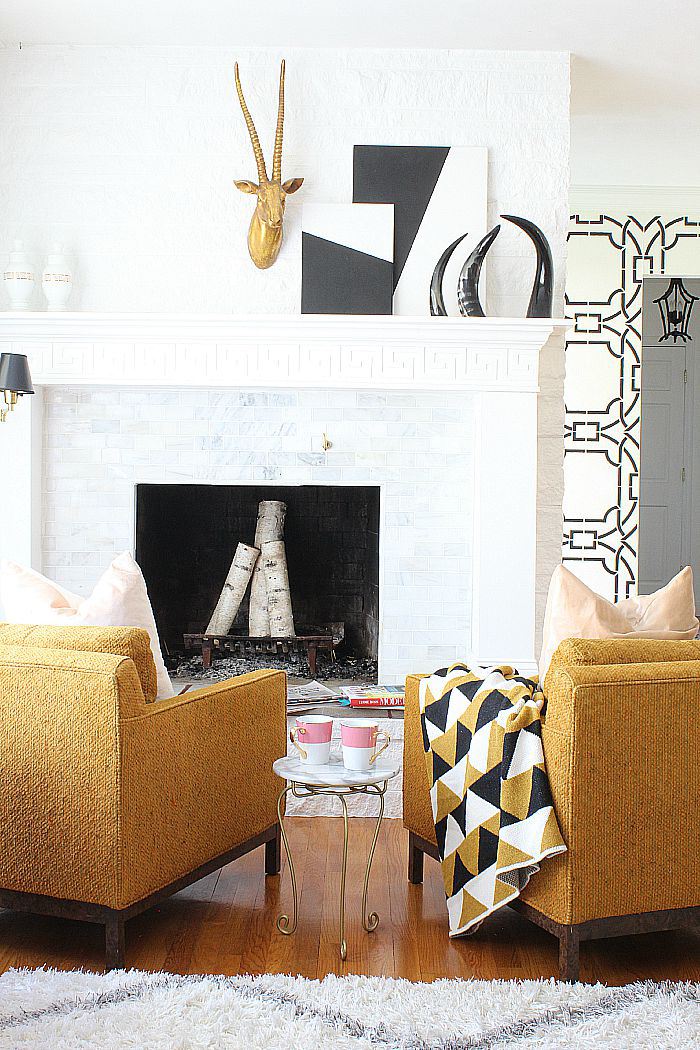
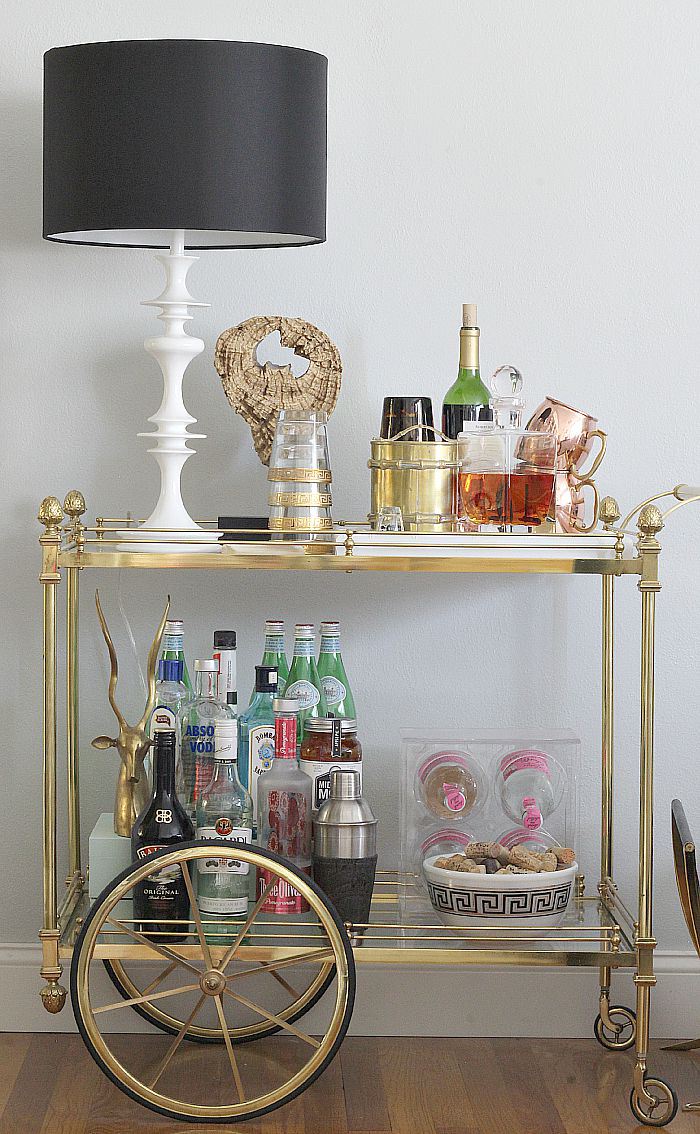
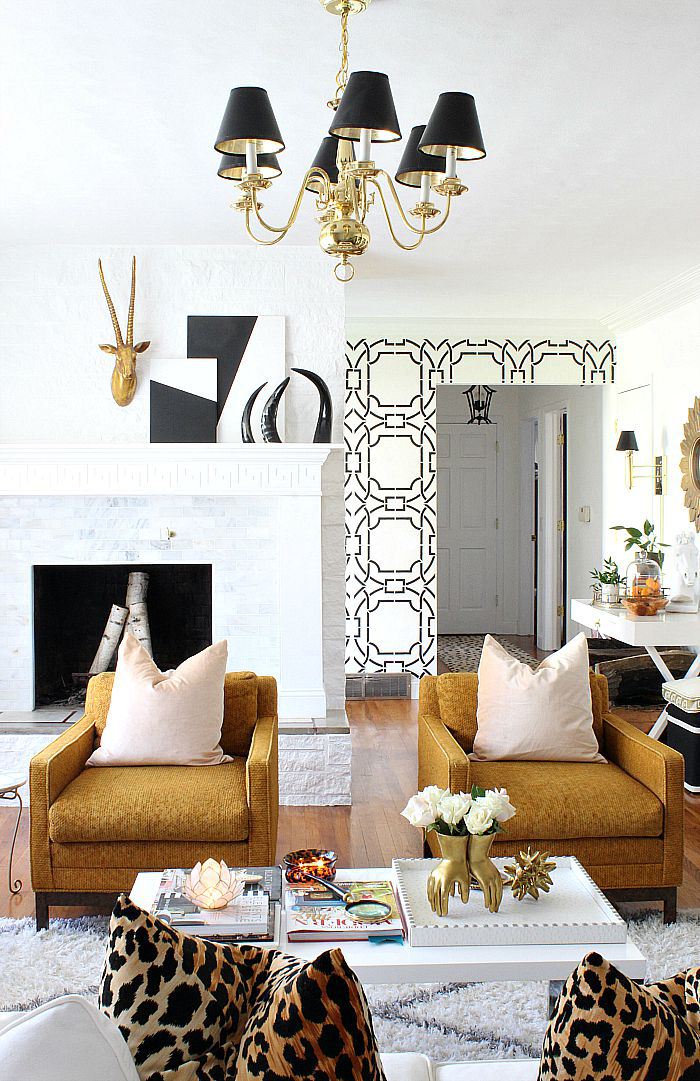
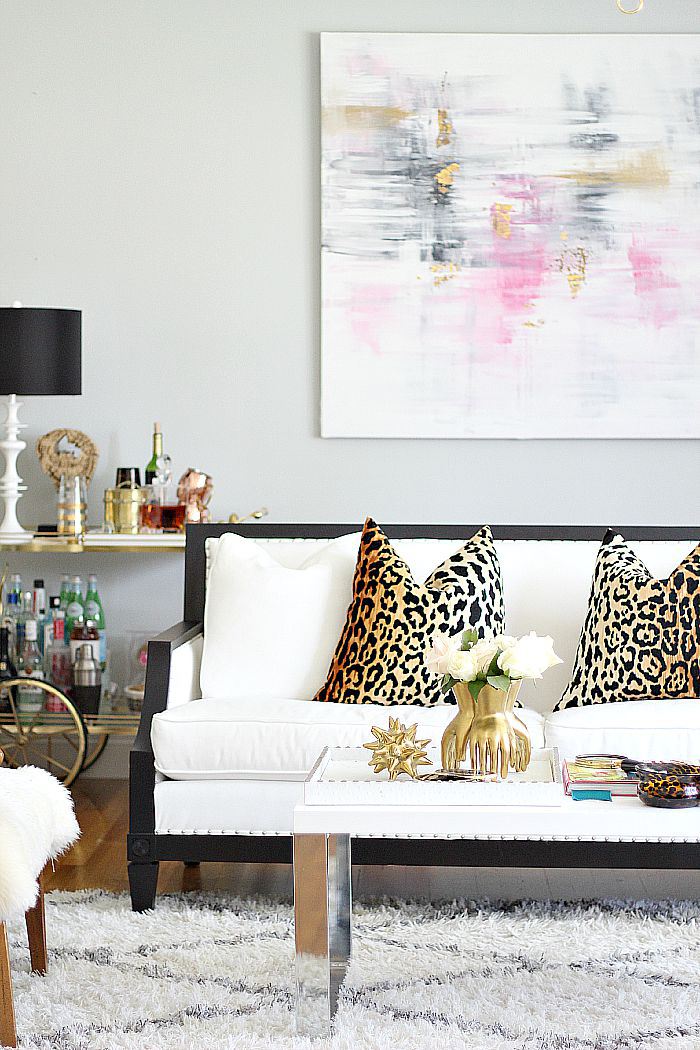
So, to kick off my Fall posts, I wanted to share some really awesome resources that I came across that a group of Bloggers put together every year. They opened up their homes for Fall and share some pretty incredible ideas for decorating for the season. I hope you enjoy these as much as I did and get inspired! Here are a few shots from one of the homes I really enjoyed from Bliss At Home's 2014 and 2015 Fall Home Tour. She used non-traditional colors and decor elements, which I love.

Click on the links below and scroll all the way to the end of each post to see all of the home tour links.

Blogger Stylin' Home Tours 2015 

Blogger Stylin' Home Tours 2014

Which home was your favorite and what is your favorite thing about Fall? Do share in the comments! 

Hello Fall! + Blogger Fall Home Tours

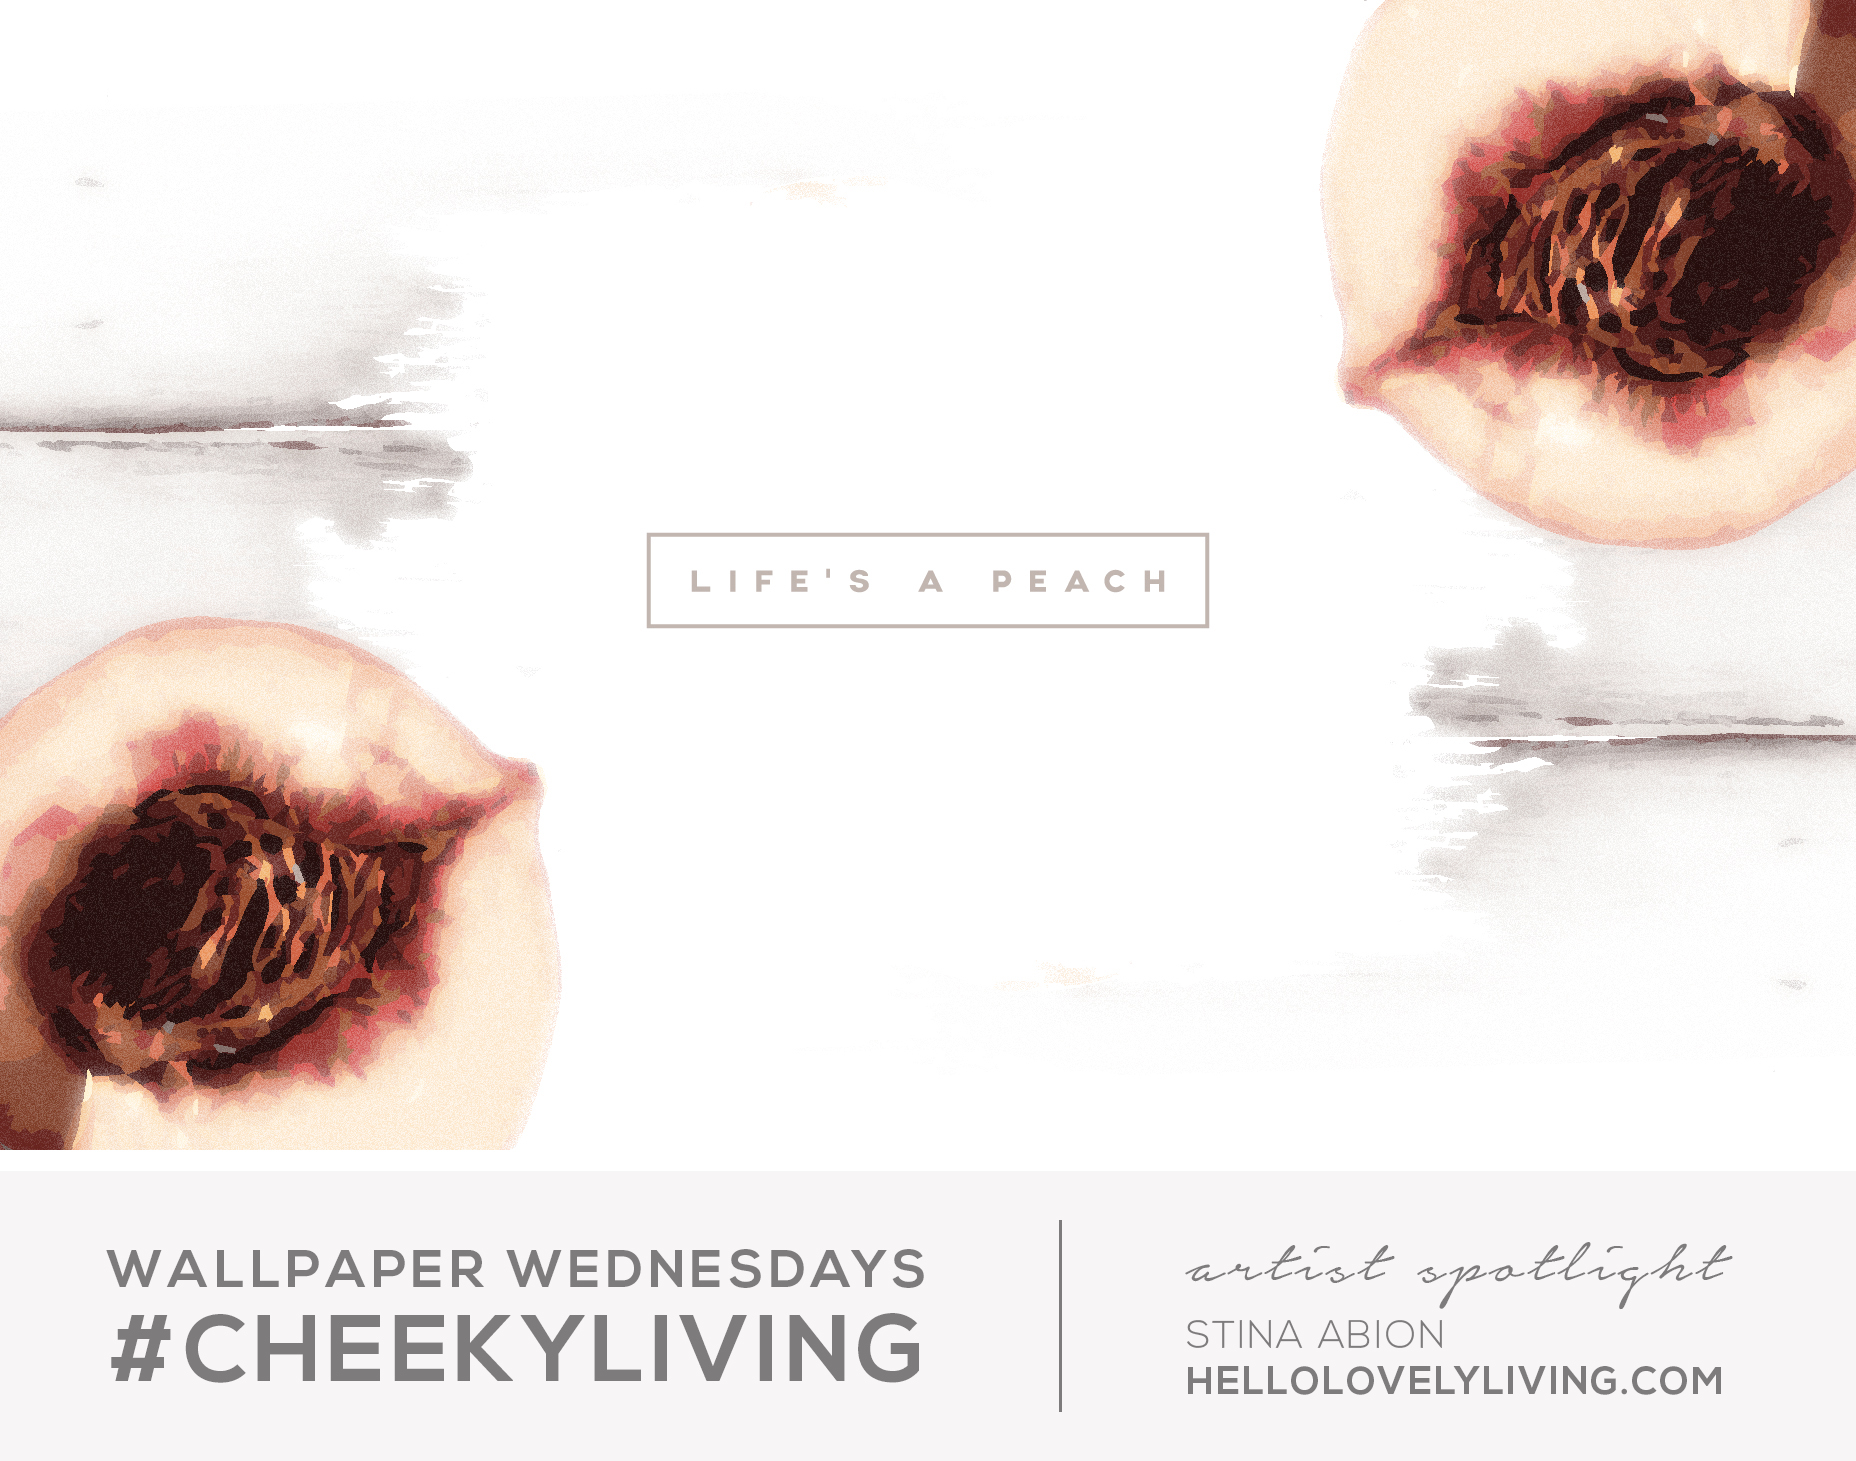
Download my free "Life's a peach wallpaper" HERE

lifestyleStina X


10 Inspiring Ways to Incorporate Nature into your Home

These Modern Macrame plant hangers are one of my favorite ways to incorporate plants into the home from this collection that I've put together. If you're looking to add plants to your home and want to explore creative ways to do so, this post is just for you. Take a look below!


Adding plants to your home can be simple, but keeping them alive - sorry, you've come to the wrong person! Haha. I am so poor at keeping plants alive, so I like to stick with low maintenance fellas like the ones I included in the story.

Well, I hope you gathered some ideas from this post. I'll be sharing a ton more of stories just like these in the coming weeks. I hope you stick around! 

Which one is your favorite? Share with me in the comments!


#stinaspicks | Handwoven Dreamcatcher
#Stinaspicks | Handwoven Dreamcatcher

Hello Loves! Friday is here! It seems like the weeks are just disappearing right before my eyes. Can you believe how quickly this year just came and went? My oldest just went back to school yesterday, and I'm pinching myself. He's one year shy of going to high school! Bring on the tears!!! I just can't let my baby grow up just yet ... or EVER! With that said, it is so important to cherish the time we have with our kids. I know I'm learning just how true that statement is with each passing day that I see my boys grow and grow. In this post, I melt over something perfect for capturing those precious newborn moments that are gone way too fast, so keep reading to find out more details!

Today I'm sharing a new series called #stinaspicks, where I share all of my curated picks from around the web. I'll be sharing these whenever I find something that I just get so excited about and can't help but shout to the world, "Hey, lookie what I found!" The thing is, I love discovering new things - and even more, I love sharing it with everyone. So, let's dive in and see what I found! 

#stinaspicks | Handwoven Dreamcatcher

So, did your heart just melt like mine just now? This one is for all of you beautiful mommies and mommies-to-be, or mommies planning-to-be! I stumbled upon this Etsy shop named Eenk that makes these outright incredibly amazing handwoven dreamcatcher props. If this doesn't make you want to just pop out a little girl ... Isn't it stunning! 

#stinaspicks | Handwoven Dreamcatcher

I adore products like these - handmade with love and full of so much charm. Dreamcatchers are so timeless and beautiful to begin with, so it was natural to fall in love with this! The white makes it so dreamy, too - like the baby is floating in the clouds. It's the most adorable setting for a newborn photo shoot. Wouldn't it also look amazing hung in a nursery, too? Heck, I would hang this in my bedroom - not kidding! 

#stinaspicks | Handwoven Dreamcatcher

I hope you enjoyed my first post in the #stinaspicks series. I'll be sharing more every week, so follow along! You can view this product here

Did you enjoy this post? If so, please double tap the heart icon to show some love and share this post with a friend! <3

This post is dedicated to my to my beautiful friend, Crystal who just welcomed a beautiful baby girl into the world. Congratulations on your wonderful addition to your family! Sending tons of love. <3


Royal Milk Tea with Boba

So, I've been on this royal milk tea binge lately and I found myself asking my hubby to take me to get some almost every day - that and pho. There's a time to get addicted to pho, and my time is NOW. Thankfully, that has died down, but my milk tea cravings continue. I decided: Why not just make that extra effort and make royal milk tea at home? It can't be that hard, right? I mean, isn't it just a ton of sugar, milk, and tea? Come to find out, it is. I'm sure the boba shop ones have some syruppy thing in it, but homemade is always better - less chemicals and mystery ingredients.  

Royal Milk Tea with Boba

Now, if you try my recipe, you will discover how extremely simple and easy it is to make this yourself, and then you'll kick yourself in the butt for all of those times you paid $3-6 for 8 oz of milk tea, only to find out it was mostly ice. Plus, your tummy won't spontaneously freak out on you and react to whatever dairy they used (true story). All of the ingredients are simple enough to find at any grocery store, and the boba pearls can be found at asian markets or online. Don't forget your wide straws too! That's the best part.

Royal Milk Tea with Boba

So, does it taste like the real thing? It's not as sweet, but that's how you know you're not killing yourself with every sip - you can control the amount of sugar you put in. I find it a pretty good substitute, and saving money is always my favorite thing to do, especially when it comes to eating out.

Royal Milk Tea with Boba

Let me show you just how simple this recipe is! 

Royal Milk Tea with Boba


Servings: 2

Prep: 5 mins

Cook: 15 mins

Total time: 20 mins


Ingredients

  • 1/2 cup tapioca pearls "boba"
  • 2 cups water
  • 2 organic black tea (2g bags x 2)
  • 1 cup organic milk
  • 5 Tbsp turbinado sugar
  • ice
  • boba straws

Instructions

  1. First cook boba by placing 1 cup of water in a small saucepan and bringing to a rapid boil. I purchased the boba that cooks in 5 minutes. Boil for 5 minutes or until soft and remove from heat.
  2. In a small saucepan, boil 1 cup of water. Once it comes to a rolling boil, place tea bags in and let boil for 4 minutes. Remove tea bags, then add milk and sugar. Once it starts to simmer, remove from heat.
  3. Prepare a cup of ice and pour the milk tea over to rapidly cool. In another cup, add boba and fill halfway with ice, then pour the chilled milked tea over. Do this twice since you will have two servings. Share with someone special and enjoy!

Notes

  • The ice will water the milk tea down, so that is why I increased the sugar. You can always cool it completely first and add less sugar.
  • Try using other teas like Assam Black Tea.

My Ingredients


I hope you get to try my recipe! Again, I used 5 minute boba to make it quicker to prepare. There's no difference in taste either - and just as addicting as the real stuff. Let's be addicted together! <3

Are you addicted to milk tea too? Share with me in the comments what your favorite flavors are. 


Lemon Roast Chicken with Sage and Thyme

There's nothing like smelling the lovely aroma that come from roasting a chicken and how it fills your entire home with deliciousness.

Lemon Roast Chicken with Sage and Thyme

Days like this are my favorite because I love how effortless and simple it is to create a meal that will last me days and taste phenomenal.

Lemon Roast Chicken with Sage and Thyme

Look out my loves, this is not your average store-bought roast chicken - although I do love those from time to time - it is bursting with fresh flavors of fresh herbs, garlic, and lemon. This recipe is so versatile and can be adapted to suit your taste by switching up the herbs and veggies.

Lemon Roast Chicken with Sage and Thyme

I love making this meal once a week so that I can have leftovers, making life so much easier during those days where I need to prepare a meal quickly.

Lemon Roast Chicken with Sage and Thyme

These leftovers will be perfect for chicken kelaguen, a Chamorro recipe from Guam that I grew up on, containing chopped chicken, lemon, peppers, and green onions. It will change your life, so maybe I'll share that next time.

Let's get into this roast chicken recipe! 

Lemon Roast Chicken with Sage and Thyme

Lemon Roast Chicken with Sage and Thyme


Servings: 4-6

Prep: 30 mins

Cook: 2 hrs

Total time: 2 hrs 30 mins


Ingredients

  • 4-5 lb whole natural chicken
  • 3 rainbow carrots, cut into 2" pieces
  • 2 celery stalks, cut into 2" pieces
  • 3 golden potatoes, quartered
  • 2 lemons, sliced
  • 1/2 of a small onion, halved
  • fresh stage and thyme
  • 6 garlic cloves, minced
  • 3 garlic cloves, whole
  • 4 Tbs unsalted butter
  • salt and pepper
  • olive oil
  • Twine to tie drumsticks

Instructions

  1. Preheat oven to 425º. Set carrots, celery, and potatoes into baking dish. Add 5-7 thyme sprigs and 1 Tbsp each of chopped sage and thyme. Drizzle with olive oil and sprinkle with salt. Mix to evenly coat. Add 4 lemon slices. Move veggies to the edges of the dish to create an open space in the center for the chicken.
  2. Prepare the butter rub by combining room temperature butter with 1 tsp salt, 1/2 tsp black pepper, chopped garlic, and 1 Tbsp each of sage and thyme.
  3. Massage butter rub under skin of chicken breasts, then evenly coat the whole chicken. Use remaining butter to coat chicken cavity. Stuff chicken cavity with onions, whole garlic, and lemons. Tie legs with twine to retain shape.
  4. Place chicken in oven and roast for 30 minutes at 425º.
  5. Reduce heat to 350º and bake for 1 hour 30 minutes. After an hour, check temperature and monitor until thermometer reads 190º at thigh. Once it reads 190º, it is done.
  6. Remove chicken from oven and let rest before cutting.

Notes

  • Depending on the type of chicken you use will determine how moist your chicken turns out. I recommend using a natural chicken without any added water or solution.
  • Baking time will vary, so a thermometer helps to determine exactly when your chicken is cooked.

This roast chicken recipe is the perfect go-to when you just want to throw something together and let the oven do the work for you. Using fresh, organic ingredients also makes a huge difference in flavor. I used a natural chicken that was free of antibiotics, hormones, and fed a veggetarian diet. The chicken was so moist and juicy and loaded with flavor. I really hope you get to try it out! 

What are your favorite chicken recipes? I love trying new recipes. Share with me in the comments!


The Easiest Way to Create a Gallery Wall from Scratch

When we moved into our new place last year, I had high aspirations for our living room walls. With 10 foot ceilings, the sky's the limit, literally - and who wants bare walls when you have all of that space to play with? Not me! Those aspirations included an accent wall featuring an art gallery and curtains on our lone ranger window. We did paint our accent wall (yay!), but the gallery wall (sadly) never made it (along with the curtains). Fast forward to the present, and I was finally able to bring my vision to life thanks to Minted, an online art marketplace featuring art from so many talented independent artists and designers from around the world! It helps that I had some of the elements already in place for the perfect backdrop for my gallery wall, but without Minted, it wouldn't have been the same. What I was able to create was a perfect little office space that I could finally call mine, with all of the pretty touches that I can feel inspired by every time I look at it.

Disclosure: Wall art was provided courtesy of Minted. I always share my honest thoughts and opinions and stand behind products I truly believe in and would purchase myself. I include affiliate links.  

Discover how I was able to easily and quickly create a gallery wall from scratch and how you can duplicate my process to create your own, too. Yes, gallery walls can look intimidating, but after going through the process, I realized just how fun and easy it actually was. With the right planning and preparation, you will think so too. Let's begin!

Find inspiration.


(via Miss Moss, Belle Maison)

Pinterest is a great place to seek inspiration and get tons of ideas for gallery wall layouts, styles, and types of framed art and objects. Here's my Pinterest board that I put together, which helped me visualize different layouts and styles. You can use it to get some ideas, too. Decide on a general idea of what look you're trying to achieve.

Measure your wall.

Choose a focal wall where you want to place your gallery. I chose an accent wall in my living room that was already painted a lovely color called Ocean Abyss by Behr Marquee. Make sure you measure the area and visualize how high you want to place it. I chose to go with eye-level. It will also depend on furniture that you plan to place in front of or around your gallery wall, so decide on that firsthand before you install it so that you can be sure that it will work with your setup. I decided to place a desk in front of my gallery wall. This is also a good time to decide how many prints you want to use. There really isn't any magic number, but balance is key and it must work within the area that you plan to place them. I went with 5 prints, with the option of adding onto that if I found other frames around the house that I wanted to incorporate. 

Hello Lovely Living

Look for art. 

The Easiest Way to Create a Gallery Wall from Scratch

Favorites: I logged onto Minted's Art Marketplace and favorited the art pieces that I liked. Favorite as many as you can, because you will need a lot of options when you finally narrow it down. Try to visualize a theme. For my gallery wall, I wanted to feel a certain way when I looked at it - to feel as if I was traveling within the prints. Ask yourself what feeling you want your gallery wall to elicit. This will inspire you and help you organize art prints within a certain theme. Also try to select a mix of prints. For example, select a variety of art that are a mix of typographic, graphic, abstract, and drawing styles. Combining a variety of prints will create an interesting gallery. Also decide on a color scheme. I chose black, white, and a print that pulled in colors that matched my accent wall. 

You can also look around your house for some wall objects and framed art that you would like to include as well. If you will be shopping around at various places for your pieces, visualize your gallery wall as you go, but stay within your theme.

Create a design mockup.

Creating a mockup will help you visualize your gallery wall and make it so much easier to decide on which prints you want to purchase. First, I saved my favorites from Minted as a pdf file. To do that, from my Macbook, all I did was select file > print > save as adobe pdf. 

If you have already purchased the art pieces and frames that you will be using, opted for homemade prints printed on photo printing paper; or plan on shopping at several retailers, skip to Step 6.

The Easiest Way to Create a Gallery Wall from Scratch

I created my mockup using Adobe Illustrator (editing software).

My step-by-step process:

  1. Layout all prints: I opened the pdf file page-by-page and was able to move each print around as a separate thumbnail. 

  2. Select prints and arrange: I selected the prints that I thought would look good together, then tried different layouts and arrangements until I had my final picks.

  3. Choose sizes and frames: I went back onto Minted and decided on the sizes I wanted to go with, then scaled the mockup prints to 25% of actual size so it would give me a true idea of how they looked in relation to each other. I also chose several frames that I liked, then copied and pasted a photo of each into Illustrator and arranged them until I could find a good mix of frames that I liked.

  4. Layout final picks: Once I had decided on which frames I wanted, I created several layouts, then picked a tentative layout to go with.

If you are planning on incorporating additional prints or objects that you will be purchasing separately or already have on hand, your imagination will help here. Visualize! Don't be worried if your layout changes, you will have another round of laying them all out. 

The Easiest Way to Create a Gallery Wall from Scratch

1. Emerald Blades limited edition print by Artsy Canvas Girl Designs 14" x 11" whitewashed herringbone // 2. Zebra from Above limited edition print by Mary Ann G. Tusa 14" x 11" whitewashed herringbone // 3. Son limited edition print by Lori Wemple 11" x 14" distressed charcoal stain // 4. Ruffled Feather limited edition print by Sarah Luna 8" x 8" white premium wood // 5. Let's Get Lost by Sam Dubeau 8" x 10" black premium wood

These are the prints that I chose and the tentative layout I went with, which ended up changing later. I chose a mix of frames - there are so many pretty ones available on Minted that it took me several days to decide on these. I wanted my gallery wall to look less structured and more like I had collected a bunch of different prints over time.

I know my process is a little complex (thanks to being a graphic designer *eek*), so don't freak out if you don't have any fancy programs, there is an easy way! Minted has a tool on their site that lets you create boards. Here are a couple of mockups that I created for fun using their tool:

Let's Get Lost by Cristina, see more art prints on Minted

Let's Get Lost board by Cristina. See more art prints on Minted

My Art Wall by Cristina, see more Minted wall art

My Art Wall board by Cristina. See more Minted wall art

Purchase your art.

The Easiest Way to Create a Gallery Wall from Scratch

Now that you are all set with your mockup, you can now commit to the prints and make your purchase. In the meantime, start gathering the supplies you will need to hang your frames. 

Supplies you will need: Screws, drywall anchors, drill and drill bits, tape, paper, scissors, measuring tape or ruler, and a pencil.

Let me tell you, I was so pleased with the way my Minted pieces arrived. They arrived straight to my door so quickly, in just 4 days! Each frame was individually packed and secured with cardboard packaging. The print itself was even wrapped in plastic and each came with individual cards with details about the artist and print. I could tell immediately that they cared about the details, which I am always fond of when it comes to products. Each print were true to color just as I had viewed them on the site, so I was really excited about that. 

Before you get all excited to unwrap all of your pieces, hold your horses! I found that it was so much easier to keep my frames clean by leaving them in the plastic that it came with. Your frames will be squeaky clean once you finally hang them.  

Lay out your art.

The Easiest Way to Create a Gallery Wall from Scratch

Gather all of your pieces and lay them out. If you created a mockup, refer to it, but adjust and change it as you like because everything always looks different in person. Try different layouts and see what looks best. You could even take photos of each layout so you can compare them. Decide on the amount of spacing you want between each piece and measure it out to see how it actually looks. Once you're happy with it, leave them laid out until you're ready to hang them. This is my rough layout - I adjusted the spacing of these later so that it was even. I decided that the vertical layout that I had done for my mockup was too narrow for the space. I also added a black mirror that I already had from IKEA.

Create a wall mockup.

Use your frames to create outlines on paper and then cut them out. Do this for all pieces. Place the cutouts on the wall relative to how you laid them out in step 6. For each cutout, I marked a center guide 3" from the top of each frame and 2" for the mirror. Make sure to check how low your wire sits to compensate for where your holes will need to be. What I did was measure the spacing between each piece at 4" and aligned the two smaller pieces with the edge of the bigger pieces on each side. Since I already had a stud on my wall, I had to use that as the starting point for the center frame, so that is why there is more space on the right side of the wall. I then laid out the other pieces, making sure to align them to create order and centering the frames at each end horizontally. For my wall mounts, I used drywall anchors, so it was very easy to install. Wherever you marked your center guides is where you will drill your holes.

Hang your art and enjoy.

Once all of your screws are in, hang your frames and measure the spacing to make sure it is equal on all sides. Voila! There you have your beautiful gallery wall! Add your furniture back in place and don't forget some lighting to set the mood. It really does change the whole feeling of a room. I was just amazed with how great this gallery turned out, and I couldn't have been more pleased with the results. 

I hope you had an amazing time with me. I know this was a long post, so thanks for staying 'til the end and putting up with my endless rambling (haha). I am so excited to get to do this and can't wait to share more exciting projects like these. Let me know if you'd like to see my entire living room. It's not exactly complete, but I'd love to share what I have. 

Thank you so much to Minted for giving me this opportunity to design my space with these incredible works of art. I am hooked on what the company is all about - quality, detail, and giving back to the community. I love it when companies have depth and purpose.

If you are ever looking for wall art, stationary, home decor, children's decor, or fabrics, I highly encourage you to visit Minted's website. I was honestly blown away with all of their products.  

That is all lovelies, until next time! If you have any questions or if I missed anything, please comment below and I'll get back to you. 

Will you be creating a gallery wall? Share with me in the comments! <3

Minted's Limited Edition Art Prints


5 Refreshing Summer Sweets that will Make you Go Vegan

Refreshing, easy, and colorful is the theme of my curated collection of vegan summer sweets. Cool down, grab something sweet, and enjoy your time soaking up the last of those summer days. I know, I'm sad that it will be over soon, too. Warning: You may just want to eat any number of these recipes immediately - so get ready to head to the grocery store! 

5 Refreshing Summer Sweets that will Make you Go Vegan

1. Summer Celebration Fruit Tart: How pretty is this tart! It's incredibly simple to make, and what makes this tart so summery are the fresh seasonal fruits and delightful toppings like fresh herbs and bee pollen. This picturesque tart is almost too pretty to eat, and it's vegan and gluten-free. What could be any better on a summer's day? (via My New Roots)

5 Refreshing Summer Sweets that will Make you Go Vegan

2. Stecco Gelato: This "stick ice cream" as it is translated to contains two of my all-time favorite fruits: blackberries and raspberries. The color of these popsicles are so rich and I am guessing that they taste just the same. These are a perfect treat on a hot, sunny day, or for those mid-afternoon moments when you get a sweet tooth. (via Smile, Beauty and More)

5 Refreshing Summer Sweets that will Make you Go Vegan

3. No Bake Blueberry Lemon Cheesecake: I love how vegan recipes look so beautiful and use the freshest ingredients. Isn't that the best part about eating - eating with your eyes? And I just loooove blueberries. They're so easy to add to anything, they taste amazing, and they are packed with antioxidants among other super-fruit powers! Everything about this recipe takes the guilt out of dessert. The crust is made from almonds and dates and the filling contains coconut oil, coconut milk, and cashew nuts. I can just imagine how creamy this is! (via Call Me Cupcake)

5 Refreshing Summer Sweets that will Make you Go Vegan

4. Coconut Lavender Lemonade: That color - I have never seen a prettier lemonade in my life! It's hard to describe the taste of lavender, but it's really light and refreshing, so don't be scared to try it. Since floral notes are not for everyone, you can get creative with this idea of infusing lemonade with various flavors. Coconut water is very hydrating and will give you that boost of energy on those hot days. (via Confectionalism)

5 Refreshing Summer Sweets that will Make you Go Vegan

5. Cantaloupe in Coconut Rose Cream: The color of this delightful creation screams SUMMER! Doesn't it make you feel refreshed just looking at it? Cantaloupe was made for summer, agree? This is completely dairy-free, too. What's the white stuff, you ask? Coconut cream. Coconuts are so versatile for vegan recipes as you've seen so far. And there's something hidden that makes this recipe so interesting. It's the rose water and cardamom powder that just do it for me. I'm dying to try it! (via Kiran Tarun)

Now that I've officially prepared a feast for your eyes, which recipe are you convinced will make you turn vegan? Haha, kidding. You don't need to become a vegan to eat vegan or feel pressured that you must say an oath. I love that there are so many recipes accessible today that show you that you don't have to sacrifice taste for eating healthy. If anything, you gain so much more flavors because vegan recipes often contain diverse ingredients that you may have never tried together. It's an adventure for your senses, so why not escape for a little bit and try something new. <3

Which of these recipes do you hope to try? Share with me in the comments!


7 Nightstand Decor Essentials

Believe it or not, there is a formula to designing the perfect nightstand. Explore my curated collection, and get inspired to take on your own space. Nightstands are a major part of the focal point of the room, with the bed being front and center, so you want it to be balanced and grab everyone's attention as soon as they enter the room. You also want your nightstand to speak something about you, so add your personal touches. Let's have a look at these inspiring spaces!

From simple, to elaborate, these nightstands all have on thing in common: I want them all! But really ... don't these spaces make you want to cozy on up in bed? It's amazing what a little thought can do for those small little tables to give each room character. Here's to helping you design your very own nightstands that will make your bedroom look as if it popped out of a Pinterest board! Read on for my 7 Decor Essentials.

7 Decor Essentials for the Perfect Nightstand

1. Nighstand: A stool gives this bedside a cheery, vintage vibe. The tables you choose will give your bedside character, so here are some points to help you decide what type of tables to go for. 

+ Decide what look you want to go for - perhaps a vintage and whimsical or polished and modern feel? For a vintage feel, try using a wood stump, an old chair, crates, or anything with a weathered appearance. For a more polished feel, opt for dressers with clean lines that are symmetrical. You may even combine the two and get an even more interesting outcome. Interesting alternatives: desk, stool, cabinet, dresser.                                               

7 Decor Essentials for the Perfect Nightstand

2.  Lighting: With so many lamp styles available, look for a pair that compliment your nightstands. Wall and pendant lamps are a break from the traditional table lamp and can free up some extra table space too. Try these unique firefly lights for a more ethereal feel. It'll make your bedroom feel all fairytale-like. 

7 Decor Essentials for the Perfect Nightstand

3. Art: Creating a gallery wall like this above your nightstand is so much fun. You may also extend it all the way around the wall above your bed if you've got the patience! If you don't think taking on a project that big is in your stars, try stacking frames on top of your nightstand instead - a very easy and casual way to display art. Incorporating some type of framed piece, whether it be a picture, art, a mirror, or another wall decor can really create a ton of visual interest in your room. 

(featured&nbsp;image via The Design Chaser)

(featured image via The Design Chaser)

Another way of adding art to the walls and giving a room some character and warmth is the stick on wood wall, which is higher now in play. With the help of this innovative solution, you can quickly turn any space into an inviting retreat without the cost of the old way of wood paneling.

Stick-on wood walls are quickly replacing the old as many interior designers and DIY enthusiasts turn to them for their easy application and realistic wood grain. They are not only eco-friendly and inexpensive, but they also provide a sense of rustic charm.

Minted is a great place to find tons of wall art from independent artists. Stay tuned for my upcoming post on how to create your very own gallery wall featuring beautiful art from Minted

7 Decor Essentials for the Perfect Nightstand

4. Plant: A leafy plant like this one is one of my favorite plants to use in the bedroom. Not only will it last you longer than flowers, but it is low maintenance and won't die if you lack a green thumb (like me). Flowers are great too, but fresh is always best. Want to be different? Succulents or cactus are perfect as well, because like leafy plants, they too last long and are low maintenance. You can even try a vase filled with eucalyptus and it'll fill your room with a wonderful scent too. Don't care for plants at all - an assortment of empty vases are just as pretty.

7 Decor Essentials for the Perfect Nightstand

5. Books: Here, a floral arrangement sits atop a few monochromatic books to add height. Not only is it nice visually, but having a few good reads nearby is always a good thing, especially before bedtime to help you get relaxed for the evening. Think of books as a pedestal for whatever you place on it.

7 Decor Essentials for the Perfect Nightstand

6. Storage: Having a jewelry dish or bowl on your nightstand is a pretty way to display some of your jewelry, and of course, prevent you from misplacing those studs as you take them off before bed. A glass shadow box is another pretty way to store and display valuables on your nightstand. 


7 Decor Essentials for the Perfect Nightstand

7. Objects: Choose one or two small objects to place on your nightstand to add a touch of personality. Decor ideas: Candle, mug, animal figurine, shell, vase, clock, etc. Place them atop your stack of books like the above picture. 

Tips:

  • Try incorporating a number of these decor essentials into your existing nightstand setup.

  • To create balance, try to design both nightstands with a unifying piece or pieces - identical tables, lamps, plants, etc.

  • You don't need to use all 7 decor items - choose a combination. Maybe you want to use a plant and some books - that works perfectly well. Get creative with your space and do what works for you. 

  • Look for items around the house. You usually have all of these items already.

Does this inspire you to update your nightstand or design one from scratch? Let me know in the comments. 

Share your nightstands with me on Instagram - tag @hellolovelyliving for me to see! <3

Featured image via The Every Girl


18 Ways to Rock the Modern Floral Print Trend + Styling Tips

Floral prints are everywhere - and I mean EVERYWHERE! It has yet to be seen that there is anything that you can not print a floral pattern on. No longer is Spring the only season for florals - it has taken on Summer too. So, where does this obsession with floral prints come from? Well, put a woman in charge of design, and I think we can all agree upon the root cause of the problem. *giggles* We are utterly kookoo about flowers. Gone are the days of floral prints looking like curtains, too. Modern floral prints are trending in both women and men's fashion, so let's take a look at what's out there.

Read on and get inspired to rock this trend with confidence!


I hope you enjoyed this fashion post! I just had to share this with you. I hope you got inspired in some way to break out and try incorporating floral prints into your wardrobe. They're so fun and flirty for women and prove that men can have a sensitive side too.

On another note, is everyone enjoying their summer? I have yet to get a mere centimeter to the closest beach. *pouts* My only hope is that it's not too late - summer is not over! Praying for a blessing. 

Happy rest of your summer!

xo stina

How do you feel about the floral print trend? Would you rock any of the featured items?


Eco-Fashion Tips + Rose Market Review and Coupon Code

I love discovering sustainable and eco-conscious companies, so I was thrilled to receive a box from Rose Market featuring vintage eco-chic pieces (stay tuned at the end for a review and discount code). What's great about vintage fashion is that it is timeless. After all, the definition of fashion can be summed up as recycled trends, so there's no surprise why vintage is always in style. Pair vintage pieces with eco-fashion, and you have the epitome of sustainable and environmentally conscious fashion. This is a perfect fit for anyone who prefers quality over quantity when it comes to clothing. Buying clothes that are made of high quality fabrics and that will last you a long time will save you a lot of money over the years compared to buying trendier and cheaper items that are likely made from fabrics that wear easily.

So, what is eco-fashion? It's simply sustainable fashion - clothing made from recycled or up-cycled materials, manufactured in an environmentally conscious way, and produced without harmful pesticides, chemicals, dyes, or bleaches. Once perceived as dull and boring and made from materials that were stiff and unattractive, eco-fashion is now a rising high quality segment and has been catching on in popularity by big name brands, designers, and celebrities. It's part of living sustainably and consciously in a world of disposable and wasteful living. Bamboo, organic cotton, and hemp are just some of the many durable materials that are being used to produce high quality clothing. I love how the demand for these materials is increasing, which means that these fabrics will become more accessible. Keep any eye out for these options and see how much of a difference these fabrics look and feel. They are truly worth it!

Here are some products made from sustainable materials:

Eco-fashion also includes items that are gently used and resold. Many companies have jumped on this growing trend and there are many apps available that make it easier than ever to buy and sell. Some big name brands will even buy back your gently used clothing and resell or recycle items for use for charitable causes (read more). Here are a few companies where you can buy/sell affordable, yet high-quality recycled fashion.

Eco-Fashion Tips + Rose Market Review and Coupon Code

Disclosure: A box was provided by Rose Market for consideration. All opinions are my own.

Rose Market is a clothing subscription service that upholds the cause for sustainable fashion and offers personalized services with outfits styled just for you. Vintage up-styled pairing pieces together with trendy accessories make up the mix when you receive your very own customized box delivered right to you. Choose from three subscription boxes - The Rosebud, The Bouquet, and The Garden Party (how cute are the names). See a detailed list of options HERE

When I opened my box, I was greeted with a personal note, which was very sweet and thoughtful. What my box came with:

  • Peach kimono-style top

  • Black scarf/belt

  • Pearl cuff bracelet

  • Rose Market Rose Spritzer

Eco-Fashion Tips + Rose Market Review and Coupon Code

Love list:

  • Chic - Very chic and timeless items. 

  • Personalized: The color of the top was a perfect choice for me as I am in love with the color peach.

  • Versatile: The items that it came with could easily create several outfits. 

  • Variety: A variety of items are included, which make it a well-rounded box of useful staples.

  • Sustainable: Items are classic and can be worn for a long time. 

Eco-Fashion Tips + Rose Market Review and Coupon Code

Overall thoughts - I really enjoyed this box, most especially what the company stands for. I am all for supporting companies that are conscious about the impact they can make on the world. It's great to know that these items were sourced sustainably. Every dollar that you spend endorses a product or brand's specific vision and encourages it's growth, so why not make it worth it! 

Get yours! Through July, receive 20% OFF your first box using the code SUMMERLOVE.

Visit RoseMarket.org for more information.


I hope you enjoyed this post! We can all make a difference in the world no matter how small. 

How do you live sustainably/eco-consciously? 


xo stina


Small Home Office Design Ideas - Glass Desk

Having a home office is the perfect way to boost productivity and creativity. Create a space that expresses who you are, and you will feel more inspired to take on the day with passion and purpose. Inspiration comes from everywhere - including your office - so fill it with things that you love. You want it to be a place that inspires you and gets you away from any distractions that the other parts of the house are full of. 

Most of us would like to say that we have all of the space in the world to create the perfect home office, but that's not always the case; however, a lack of space doesn't mean you have to sacrifice style and functionality. There are so many solutions to creating a home office that is still inspiring and has all of the essentials that an office would need to function and work.

In this post, I focus on the use of glass desks to open up small spaces. Desks are the focal point of an office, so choose a desk that you're going to love for a very long time. The see through nature of glass desks give the illusion of more space and draw the eyes around the room, instead of getting stuck on a large piece of furniture that can be too overwhelming for a small space. 

Discover these inspiring home offices featuring glass desks. They are all so pretty, so I hope you find some inspiration here that you can apply to your space. 

Sources: 1 | 2 | 3, 4 | 5, 6, 7 | 8, 9 | 10 | 11 | 12 | 13 | 14 | 15 | 16 | 17 | 18 | 19 | 20 | 21 | 22 | 23 | 24 | 25 | 26 | 27 | 28 | 29 | 30 | 31 | 32 | 33 | 34 | 35 | 36


There were so many inspiring home offices that I almost couldn't stop posting photos. Thanks so much for hanging out and gathering some ideas. It's so fun looking at pretty spaces like these - I could do this for days!

Did you see any that inspired you? I'd love to hear in the comments!


Summer Beach Essentials

Summer is here and wouldn't you like to hit the beach - not only feeling great - but looking great and enjoying the latest in beach accessories? For those of you who have the pleasure of hitting the sand this summer, here is a list of essentials that I've been spotting lately. I hope you will find inspiration from it and find something you love! There are so many fun accessories to enjoy this summer, so why not get creative at the beach. Try something new and look and feel amazing! 


1 // THE AZTEC ROUND TOWEL the beach people

2 // JUTE MAJORELLE BAG the beach people

3 // FORECAST A GLANCE SUNNIES quay eyewear

4 // ISABELA BOHO GLAM NAIL POLISH julep

4a // SUSE BOMBSHELL NAIL POLISH julep

5 // SMOCK THIS WAY PRINT KIMONO bikini lab

6 // GOLD-DIPPED Y-NECKLACE dogeared

7 // POUT HEART GLASS WATER BOTTLE bkr

8 // BENETINT LIP AND CHEEK STAIN benefit

9 // BENEBALM HYDRATING TINTED LIP BALM benefit

10 // BRIGITTE - MOONDANCE CROCHET + NEOPRENE BIKINI triangl

11 // MINI NICOLETTE TATOOS snaptats


Julep is giving away free summer beauty gifts valued at $78 for each new signup! Just click on the banner for more details and to get your very own free set. 

Poolside Beauty Welcome Box Offer

So, what do you think? I hope you found something you loved and got inspired for your next beach (or pool) trip! Soak up the sun and enjoy your summer - because we all know - summer just doesn't last long enough (for some of us)! 

Let me know what you liked - and if there are any other fabulous beach accessories that you know about - let me know below. I love discovering new things. 

Happy Summer!

xo stina


Kale & Honey Apple Pecan Slaw/Salad
Kale & Apple Pecan Slaw/Salad

Kale's one of those leafy vegetables that, at first, seem a little intimidating. Its tough appearance and deep green color give you the idea that it may taste bitter and need a ton of cooking to soften it; however, that isn't the case. Kale has a mild taste and can be eaten raw, which is actually the best way to eat it!

I love using kale in soups and stews or even baking them to make kale chips for a healthy snack. They are very high in Vitamins A, K, and C and numerous other beneficial nutrients that are amazing for your immune system and provide antioxidant and anti-aging properties. Learn more about kale HERE

Kale & Apple Pecan Slaw/Salad

Here's a simple recipe that you can whip up in no time and get your healthy on. It's a great salad to make in advance because it tastes even better when it sits and the kale soaks up all of that yummy dressing. It's slightly sweet and tart and has great texture. I hope you can try it out!

Kale & Honey Apple Pecan Slaw/Salad


Servings: 3-4

Prep: 15 mins

Cook: 0 mins

Total time: 15 mins


Ingredients

  • 3 branches of kale
  • 1 granny smith apple, cut into 1/2 cubes
  • 2 tsp lemon juice
  • 1/2 cup light mayonaise
  • 3 tsp raw honey
  • 1/4 cup pecans
  • a pinch of salt

Instructions

  1. Tear kale leaves into small pieces and discard rib part. Place in a medium sized bowl.
  2. In a separate bowl, combine cubed apples and lemon juice and let sit for a few minutes.
  3. Combine mayonaise and honey in a separate bowl. Add to kale and toss well to coat. Add apples and pecans. Mix well.
  4. Add a pinch of salt to taste and combine.
  5. Enjoy!

Notes

  • Add dried cranberries or any other types of nuts and seeds that you like.

Wasn't that so simple! I love recipes like this because they don't require any cooking time and there's less mess in the kitchen. 

This kale slaw would be a great side to go with a sandwich or wrap - or if you want to make it a meal on it's own, it's pretty filling for that too!

Hope you enjoyed this recipe! What other recipes would you like for me to share?

xo stina


Panko Crusted Parmesan Drumsticks

When that craving for something crispy, crunchy, and fried hits, what's a girl to do? I have little self-control when it comes to anything fried, so after indulging, regret usually sets in and I wish I had something healthy instead - like a salad! Isn't it funny how that works? In order to want something healthy, I have to eat something not so healthy. I guess it's my way of saying sorry to my body? Hahaha! Anyway, fried-anything is horrible to eat, unless you use healthy fats to fry with, such as coconut oil, but I have yet to go to those lengths, so on to the next best thing - baked!

Panko Crusted Parmesan Drumsticks

Here's an easy recipe that will allow you to cure your fried chicken cravings; they may not be saturated in all that deliciously yummy fat and oil, but that's the goal, right! Since these are a healthier option, help yourself to as many pieces as you want, without the guilt.

Panko Crusted Parmesan Drumsticks

If you're not familiar with panko, they are japanese-style breadcrumbs that are light and airy because they are made from bread without crusts. They remain crisper longer because they don't absorb a lot of grease. That is why they are also great for deep frying.

Panko Crusted Parmesan Drumsticks

So, the fun part - let's dive into the recipe! I'm getting hungry just typing this (I think it's time for lunch)! Thankfully I have these in my refrigerator from last night. These are great for re-baking because they will crisp back up in a few minutes. So, a big batch and leftovers is a good thing!

Panko Crusted Parmesan Drumsticks


Servings: 5

Prep: 15 mins

Cook: 45 mins

Total time: 1 hr


Ingredients

  • 10 chicken drumsticks
  • 2 eggs
  • 2 Tbs water
  • 2 cups panko breadcrumbs
  • 1/2 tsp onion powder
  • 1/2 tsp garlic powder
  • 1/2 tsp sea salt
  • 1/2 tsp black pepper
  • 4 Tbsp grated parmesan cheese
  • Olive oil

Instructions

  1. Preheat your oven to 425°. Prepare a baking sheet lined with parchment paper and set aside.
  2. Place the eggs and water into a flat dish and beat until well combined.
  3. Place all dry ingredients into a flat dish and mix well.
  4. Individually coat drumsticks with egg mixture, then with dry mix and press firmly to help it stick. Coat drumsticks a second time with egg mixture, then dry mixture. Set on the prepared baking sheet.
  5. Evenly drizzle olive oil over top. Bake for 30-45 minutes. Watch closely after 30 minutes as the crust will start to brown. Remove once it is golden brown.
  6. Let cool for 5 minutes, then serve immediately.
  7. Enjoy with a side salad and brown rice!


I hope you get to try this recipe - it's so simple to make. Set it and forget it. I love baking because it's so effortless and all of those delicious flavors get concentrated into the food. There's also less cleanup to do - who doesn't love that! If you want to pair this with a salad, try my Japanese Salad Dressing inspired by a favorite restaurant of mine back home (seen in the photo). It tastes utterly delicious paired with this recipe. To happy tummies everywhere! Enjoy : ) 

xo stina


Family Outing to "Terra" by Orly Genger
"Terra" By Orly Genger

My family and I had a wonderful time taking an impromptu stop downtown to visit this larger than life rope sculpture in the heart of Oklahoma City. The terra cotta color, of which its name is inspired, is vibrant and adds a contrast to the lush greenery that it winds through. 

Hello Lovely Living

Sunny days and perfect weather have been few and far between, so we jumped on the opportunity to get out and explore something new outdoors. Our little one had a great time sitting on the piles of rope - observing and feeling its texture. I'm so glad we can take him outside and enjoy the warmer weather! 

"Terra" By Orly Genger

It's just amazing that this is 1.4 million feet of recycled lobster-fishing rope painted with 350 gallons of terra cotta colored paint. The renowned New York based artist, Orly Genger, was inspired by Oklahoma's red dirt and brick walls when deciding on what color to paint it. Oklahoma sure has a lot of that! It's incredible how much rope this was and how much work was put into this.

Hello Lovely Living

Seeing the landscape of vibrant colors of spring and summer after a long winter is so rewarding and fulfilling. It makes me take on a greater appreciation for the colors that we tend to overlook. 

Hello Lovely Living

"The earth laughs in flowers." - Ralph Waldo Emerson

IMG_9513.JPG

My guys and their smiles. Love them! I can't wait to take my oldest son here - he would enjoy this so much. This is a perfect spot to let your kids run around for hours!

Hello Lovely Living

I was impressed with this sculpture - it inspires me to discover more of Oklahoma's art scene. There's a thriving art community here, and I hope to experience more of what makes this place unique.

Here's a snippet of information about the artist and her work: 

Made of 1.4 million feet of recycled lobster-fishing rope, and painted with 350 gallons of terra cotta colored paint, “Terra” will weave its way through the center section of Campbell Park, located at NW 11th and Broadway, just north of downtown Oklahoma City. The installation opens Monday, October 20, 2014, and runs through October, 2015.

“When visiting Oklahoma I was taken by the vastness of the open landscape and envisioned a line that would travel in a continual motion winding through the patch of land on which the work sits,” said Genger. The artist said the term “red dirt” inspired her color choice, “which relates both to the clay-like nature of the earth, and to the bricks with which we build walls.”

Dubbed the “rope wrangler,” Genger hand knits and shapes hundreds of miles of discarded lobster rope into massive sculptures that traverse the space and incorporates the piece into the landscape. Her art encourages visitors to explore the terrain in a new way and interact with the larger-than-life pieces.

Since 2005, Genger has completed several large-scale installations featuring colorful masses of hand-knotted rope. These include Red, Yellow and Blue in Madison Square Park, New York City and deCordova Sculpture Park in Boston and most recently, Current
— http://oklahomacontemporary.org/exhibits/current-exhibits/orly-genger/

See her other renowned sculptures:


Did you enjoy this post? I look forward to sharing more of my discoveries with you. There's always something beautiful out there to experience!

xo stina


Guam Sakura Style Japanese Salad Dressing

Moving away from my island home has caused me to crave some pretty random things that I would have never thought twice about when I was living there. If you're from Guam or have lived there, you may be familiar with Sakura Noodle House and their "mysterious" salad dressing. I have always wondered what was in it because it had such a unique taste and can be addicting. Their salad bar was one of my favorite parts about eating there because of all of the toppings that I could add to my salad -  especially the croutons! It's one of those restaurants that was always so comforting to go to and their food always tasted the same every time.

So, what's so special about it, you might ask? For starter's, it's salty, tangy, and creamy - not exactly the healthiest of dressings, but it sure makes for a tasty salad that you'll want to go back for seconds. Pile on the veggies because this dressing makes it all taste like it's not even good for you! My family loves this dressing (it even gets compliments). I tried to get it to taste as close to what I remember, so you can also adjust it to your liking if it's not spot on like the real deal (but I believe it's pretty close). Hope you enjoy it!

Guam Sakura Style Japanese Salad

Guam Sakura Style Japanese Salad Dressing


Servings: 3-4

Prep: 5 mins

Cook: 0 mins

Total time: 5 mins


Ingredients

  • 1/4 cup mayonaise
  • 1 garlic clove, minced
  • 1 1/2 tsp red wine vinegar
  • 1 1/2 tsp low sodium soy sauce

Instructions

  1. Mix all ingredients until combined.

Notes

  • I only had red wine vinegar available, but you may use regular vinegar or rice wine vinegar instead.
  • For a completely smooth consistency, you can blend it in a blender.
  • To control the saltiness or tanginess, adjust the soy sauce and/or vinegar as desired.
  • You may use regular soy sauce, but you may have to adjust the amount due to the higher salt content.

If you end up getting addicted to this dressing, you can thank me later! At least it will help you get more greens in your diet, and that is always a good thing, right? 

Let me know in the comments what other recipes you would like for me to share. Are there any restaurant-style foods that you miss from back home? I'd love to hear from you!

xo stina


DIY Gold Box Organizers

DIYs just make me so happy. Here's one that will give you something to do with all of those cereal boxes that you always think, I can make something out of these, but usually end up throwing them away. I've been hoarding boxes for months now because I've had a plan. So glad to finally do something with them and share the joy that is organization! 

Who can relate to me when you search for organizers and come across beautiful ones, but when you look at the price, you have to pinch yourself? I just don't get why a piece of plastic or wood has to be so expensive. I blame Target's expensive organizers for my lack of organization. Hahaha! Anywho, this is why I am just so excited about this DIY. I am on my way to having a prettier bathroom cabinet! 

Here's what you'll need:

DIY Gold Box Organizers
  • Misc. boxes (cereal, oatmeal, etc.)

  • Gold spray paint - I used Krylon Metallic Gold

  • Paper cutter

  • Double-sided tape

  • Pen

  • White card stock paper (not pictured)

Step 1

DIY Gold Box Organizers

Open your boxes at both ends and flatten.

Step 2

DIY Gold Box Organizers

Mark where you need to cut. You can decide what height you would like for your boxes. If you are using them for your drawers, measure the height of your drawer and mark your boxes accordingly. Mark both ends of your boxes. 

Step 3

DIY Gold Box Organizers

Use your guides and trim both ends of your boxes with your paper cutter. I am trimming mine at 4", so it helps to have a ruler so you don't have to mark every single box. 

You will end up with two boxes like this:

DIY Gold Box Organizers

Step 4

DIY Gold Box Organizers

Spray paint your boxes on the outside only. 

Step 5

DIY Gold Box Organizers

Place double-sided tape where the former adhesive was and firmly secure shut.

Step 6

DIY Gold Box Organizers

Cut out pieces of card stock to fit inside the bottom of your boxes.

Use any paper you like. I was just thinking how pretty it would be to use paper with designs on them. You could also use washi tape to line the top edges of the boxes to add a pop of color. 

And you're done!

DIY Gold Box Organizers

I plan on revamping my whole bathroom cabinet with these. Aren't they so easy to make? I love repurposing things. It feels good to know that I didn't spend an arm and a leg on organizers!

I hope you guys enjoyed this new DIY! I'm telling you - I have tons of DIYs that are sitting on the back burner until I find the time to do them. My little one is king of my life, so it's hard to squeeze in "me" time. DIYs are so relaxing. 

Have an amazing day, and check back for more!

xo stina


Lemongrass Chicken
Lemongrass Chicken Recipe

At my house, I always like to make diverse recipes from different cuisines and cultures. Tonight it just happened to be Vietnamese. I basically love all asian foods and dream to someday travel to Asia and delve into the street food scene where I could really taste the authentic stuff straight from the locals while experiencing all the sights and sounds around me. 

I stumbled upon making this recipe by what I remember this dish tasting like back home on Guam. Where I'm from, it's a melting pot of all types of cuisine, so I had the pleasure of enjoying so much of it and being so spoiled! Now that I am in the mainland, it's harder to come by those tastes that I was so used to back home. I've had to learn how to make the dishes that I love, so I am grateful that there are a few asian markets here where I can find almost anything I need.

Lemongrass Chicken Recipe

Lemongrass Chicken can be found at most Vietnamese and/or asian restaurants. The lemongrass gives it a beautiful aroma and mild taste. The star here, though, is the red pepper powder. It has a mild taste, so you can easily control the heat. Korean pepper powder can be found at most asian markets, but make sure to purchase the right one, as there are different types available that look the same, but aren't. I include links below to the asian ingredients that you may not find locally. Let's get started!


Lemongrass Chicken


Servings: 3

Prep: 10 mins

Cook: 15 mins

Total time: 25 mins


Ingredients

  • 3 chicken thighs (bone and skin removed)
  • 1/2 yellow onion, sliced
  • 2 stalks green onions, chopped
  • 3 stalks lemongrass
  • 2 Tbsp fish sauce
  • 1-2 tsp Korean red pepper powder
  • 2 Tbsp olive oil
  • 1/4 tsp each salt and pepper

Instructions

  1. Chop chicken thighs into 1"x 1" cubes. Cut lemongrass at a diagonal into 2" pieces.
  2. On medium high heat, in a wok, add olive oil and lemongrass and saute until arromatic and slightly browned.
  3. Add chicken and sprinkle with salt and pepper. Let the chicken cook without constantly turning it, so it can get nicely browned, about 5 minutes on each side before flipping. Do this for each side until all sides are nicely browned and carmelized.
  4. Add onions and saute for 2 minutes, then add fish sauce and cook for another 2 minutes.
  5. Add red pepper powder and stir to evenly coat the chicken. Cook for 2 minutes.
  6. Turn off heat and sprinkle green onions on top and combine.
  7. Enjoy with steamed, whit rice.

Lemongrass Chicken Recipe

Easy, huh? This recipe can be whipped up in no time and tastes just like restaurant quality. If you like things on the spicier side, just add more pepper powder. I hope you can try it out! 

xo stina


DIY Paint Swatch Wall Calendar
diy paint swatch calendar

My husband has been wanting to buy a dry erase board for quite sometime. Thanks to a previous late night Pinterest binge, I had remembered seeing a calendar that used paint swatches and thought, what a neat idea, I want to try something like that someday! I love the simplicity in using a glass surface. What came next was the pitch to the husband. Surprisingly, I was able to convince him to let me do it, which was a victory in itself because I usually get the "that's too girly" card. 

diy paint swatch calendar closeup

Don't you just love Pinterest! I love getting inspiration and putting my hands to work to make something pretty. I've always loved making things - there's just something therapeutic about it. Dry erase boards can be a big eyesore, and they always tend to get tossed to the side because you just get plain bored of using them - well we do! The cool thing about this project is that it isn't permanent and it is fully customizable. Repurpose it once you get tired of it or simply change the fabric or colors. You could even add in some photos or just about anything. Who else loves multi-purpose projects? Let's get started.

diy wall calendar supplies

Supplies

  • 24" w x 36" h picture frame (glass or polystyrene) I used polystyrene, which is cheaper, but looks comparable to glass.

  • 3/4 yard w x 40" h gold burlap or fabric of choice

  • 35 paint swatches - I used Behr paint swatches from Home Depot, size - 3.25" w x 6.5" h . You can use any paint swatches that can be trimmed to 2.75" w x 4.75" h. Choose whatever color combinations you like. I went with an ombre/gradient effect. 

  • Days of the week labels - I created a printable available for download HERE

  • Glue dots or double-sided tape

  • Tape

  • Scissors 

  • 1" circular whole puncher

  • Optional: paper cutter (makes cutting everything 10x easier)

  • Dry-erase marker


Instructions

Hello lovely living

Back 

Front

Front

Remove the wood backing from the frame. This is what you will wrap the fabric around. With the right side of the fabric facing down, place the board on top of the fabric as a guide and ensure that the pattern of the fabric is straight. Cut the excess fabric and allow 1" - 2" around the perimeter. You will also need to cut the excess fabric on each corner too. Stretch the fabric to make sure that there are no wrinkles and that it is not loose, then tape the fabric onto the back of the board.  

Original Size of Behr paint swatch&nbsp;is 3.25" w x&nbsp;6.5" h

Original Size of Behr paint swatch is 3.25" w x 6.5" h

Cut paint swatch to 2.75" w x 4.75" h

Cut paint swatch to 2.75" w x 4.75" h

Cut out the days of the week labels and set aside. Trim the paint swatches down to 2.75" w x 4.75" h.

How cute are these once they've been punched&nbsp;out? Save for a future DIY!

How cute are these once they've been punched out? Save for a future DIY!

Punch a 1" hole in the top center of each paint swatch.  

DIY Paint Swatch Wall Calendar

Starting from the bottom up, arrange the paint swatches on top of the frame and adjust as needed. You will need 7 columns and 5 rows. Use a ruler to help straighten and align them. Allow 1" around the border of the frame and an equal amount of space between each paint swatch - a 1/2 an inch or so.

Once you are happy with the overall placement, place double-sided tape or glue dots onto the back of each paint swatch and press firmly onto the fabric. Make sure to cover the edges of the paint swatch entirely with tape to ensure a strong hold once you stick it onto the fabric. Do this individually for each paint swatch until complete. 

Once you are finished sticking all of the paint swatches onto the fabric, take the days of the week labels and position them on the very top oft the first row. Place double-sided tape onto the back and stick them onto the fabric.

And your board is complete! Take the completed board and assemble your frame back together. Make sure to remove any dust or fibers that got caught on the surface of the glass/plastic before you place it back together.  

DIY Paint Swatch Wall Calendar

Now, the best part - fill in your calendar! On the front of the frame, with a dry-erase marker, write the days of the week within the circles of the paint swatches and the month at the top, then your agenda for the month. You're done! Find a convenient place to display it. I chose my entryway in my kitchen. What a pretty and fun calendar - with the perks of saying you did it yourself! 


I hope you enjoyed this simple, yet classy DIY project! I look forward to doing more projects like these. There's so much more that can be done to my home to make it "homier" - if that were a word. I love how DIY projects can add warmth to a space. I am all about building memories - and DIYs are perfect for doing that too!

Have fun, and should you decide to make this, please share a photo of it and tag me on social media!

xo stina