Posts in lifestyle
DIY Modern Plant Stand Projects Because #PlantLady
DIY Modern Plant Stand Projects Because #PlantLady | HelloLovelyLiving.com

via The House That Lars Built

Being a plant lady these days bring me great, great joy. Never in my wildest dreams would I have imagined how happy plants could make me, but they do.

Could I survive alone in a jungle? Probably.

Yes - that's how happy they make me, and maybe some of you can relate to my obsession.

Lately, I've been wanting to get my hands on every known modern plant stand out there at the moment.

Of course, not one of those has made its way into my home (YET), which makes me very sad.

So, in the meantime, I decided to compile a roundup of DIY Plant Stand Projects that makes waiting one more second that more bearable until my hubby lets me start on another DIY project.

Let's just say, I have a lot of projects that he'd like to see completed before I start on a new one!

Hopefully, I can start on another project soon enough once I share my latest project with you all, which I have nearly given up on but keep faith that it will soon come together. The struggle is real! #PrayForStina

I hope you find a project you like below in my latest Mode story and try your hand at it. Most of them are super easy to make. Have fun my fellow plant chicas!

Sharing Is Caring | HelloLovelyLiving.com


You'll Never Look At A Paper Bag The Same Way Again
You'll Never Look At A Paper Bag The Same Way Again | HelloLovelyLiving.com

via My White Obsession

How many times have you collected a million and one paper bags and asked yourself, now what am I going to do with all of these things? Well, now, I've got the perfect solution for you that'll actually improve your quality of life. Read on in my latest Mode story below - and don't mind the silliness that is my writing. It's 2:25 in the morning and your girl is lacking sleep! :)

Sharing Is Caring | HelloLovelyLiving.com


Moodboard | Modern Nordic and Boho Inspired Outdoor Space

Living in Oklahoma, being outside to enjoy the weather is a luxury. Not only is the weather bipolar, but it is either extremely cold or extremely hot for the most part of the year. In between, we're lucky to enjoy a good day or two during the week that is perfect - and for me, that means weather in the 70s - 80s! 

Now, being that I'm from an island, you can imagine how extreme this can be for me because what I'm used to back home on Guam is one of two things: rain or shine. Guam's two seasons - wet and dry -  means that if the sun isn't out, it's raining, but for the most part it's beautiful year-round. I miss being able to predict the weather almost every day and be able to enjoy outdoor activities. Since I feel serious deprivation, I jump on any opportunity to go to the park or just drive around to enjoy a good, sunny day and warm weather.

One of the things that I've been wanting to do is create a nice outdoor space on my patio so that I can enjoy any good weather on a moments notice. My sons and I enjoy going outside to get fresh air and enjoy the scenery, and we do get a nice view of the sunset, but one thing prevents us from staying outside for too long; The space is empty! I mean, let me elaborate on that. I have no furniture, no chairs, just a small wooden box with a marble slab on top to hold some plants, but that's it! I would show you a picture of it, but seriously, it's that embarrassing. 

It's been on my mind to do something with the space, but I just haven't had the budget to actually make it something worth doing. So, I've been searching for DIY projects on how I can make things myself for pennies of what it would cost to purchase something at the store. I've found a few DIYs, but not many that are simple and that don't require me to have some level of woodworking expertise or following-directions expertise (in my case). Measurements make me nervous.

So, when Douglas Elliman contacted me to be a part of their Florida Room Challenge, it came at the perfect timing. I had just come back from a family vacation from Florida - which I didn't want to come back from - and my patio had been on my mind for quite a while now. They asked me to share how I would style my dream Florida Room so that I could enjoy it year round. Challenge accepted!

What I decided to create was a space inspired by modern nordic and bohemian design. I've been into a cleaner, more minimalist and airy color palette, so I wanted to stick to warm neutrals and white. I didn't want to stick to a traditional beach feel but create something that was more modern, yet very casual and inviting. Take a look at what I put together and I will go further in depth with my choices toward the end of the post.

 
Moodboard | Modern Nordic and Boho Inspired Outdoor Space | HelloLovelyLiving.com
 

1  |  Round Paper Lanterns* | Target

2  |  Sisal Rug* | Kohl's

3  |  Kilim Turkish Cotton Throw* | Terrain

4  |  Ivory Throw Blanket | Layla Grace

5  |  White Wire Chair* | One Kings Lane

6  |  Cactus Garden* | Overstock

7  |  Bertoia Side Chair* | Design Within Reach

8  |  Ferox Aloe | Weylandts

9  |  Whitewashed Wood Wall Mural | Burke Decor

10  |  Macrame Wall Hanging* | Urban Outfitters

11  |  Tribal Pattern Throw Pillow* | Wayfair

12 |  Boston Fern Hanging Basket* | Overstock

13  |  Pear Lantern* | Amara

14  |  Seafarer Medium Lantern* | Zinc Door

15  |  'Morocco' Pillow* | Nordstrom

16  |  Decorative Pillow Sea Foam | Etsy

17  |  Artificial potted cactus | Selfridges & Co.


18  |  Ink Hatch Pillow - Ink* | Casa 

19  |  Cameo Cushion Amethyst* | Houseology 

20 |  Seafarer Small Lantern* | Zinc Door

21  |  Mini Artificial Succulent* | Norsdstrom

22 |  Tealight Lantern* | Amara

23  |  Relax Rope Accent Pillow | Kirklands

24  |  Quilted White Pillow | CB2

25  |  Art Club Concept Cushion | Superette

26 |  Mini Artificial Succulent* | Norsdstrom

27 |  Two Toned Grey Cushion* | Target

28  |  Artificial potted cactus* | Selfridges

29  |  Bungalow Sofa* | Serena & Lily

30  |  Sunshine Accent Chair* | Dot & Bo

31  |  Reversible Uncover Tripod Table* | Amara

32  |  Wire Storage Table* | Luisaviaroma

33  |  Melati Hanging Chair* | Anthropologie

34  |  Macrame Hanging Planter* | Urban Outfitters

 
via Anne Sage


CREATING MY MOOD BOARD

Before I created my mood board, I put together a Pinterest board of all of the outdoor spaces that I wanted to get ideas from, then used those photos to pick out items that I wanted to incorporate into my space. Since this is a "dream" mood board, I kinda went wild with it (a tad overboard), so fair warning that similar items can be found at cheaper prices. I chose each item based on aesthetics, not price, so I do plan on using this mood board as inspiration to find more budget-friendly pieces or ideas for DIY projects.

Here's the breakdown of how I was able to accomplish creating a modern nordic and bohemian inspired space:


2 | PLANTS

On any given day, you can catch me obsessing over plants, so of course, they had to make an appearance in my Florida Room. Boston ferns are the perfect way to add lush greenery and that pop of color in this neutral space. They're also really easy to care for, so they're a perfect choice for me. I also had to include easy to care for succulents and cactus. I say the more plants the merrier, especially when the weather warms up. Bohemian spaces are all about that jungle vibe, so you can't overdo the plants. I'd say skip the fake plants and just go with the real deal. I've found that succulents and cactus are immune to my plant-killing tendencies, so I can't go wrong with them!


4 | NATURAL FINISHES + METALS

Creating a bohemian vibe called for different natural finishes and textures. For example, I chose a variety of finishes like this Sunshine Accent Chair* with a bamboo and wicker seat and this Whitewashed Wood Wall Mural made from reclaimed boards which has a myriad of different textures and stains. I also incorporated lighter shades of wood finishes like this Pear Lantern made from pine wood and this Reversible Uncover Tripod Table* in light ash and brushed metal in aluminum on the opposite side. The Seafarer Medium Lantern* and Seafarer Small Lantern* are made with a variety of natural materials: galvanized metal, fir wood, plywood, bamboo, and jute. I love that it has a gray tone to it, which can be seen repeating in this space. Other natural fibers can be seen in the macrame decor. The tripod legs of the Bungalow Sofa* and Sunshine Accent Chair* are also where that metal comes into play. For more metal on metal action, I chose the Wire Storage Table*, White Wire Chair*, and Bertoia Side Chair* for that clean modern look.


1 | MODERN MACRAME  

I knew that I wanted to add a boho touch to my outdoor space because I love modern macrame, a zillion plants, natural textures and finishes and a relaxed vibe. So, I added this Knotted Melati Hanging Chair* that is macrame perfection. Keeping with the macrame theme, I wanted to also include this Macrame Wall Hanging* that I thought would be perfect as a wall tapestry or to divide the space. Since this is my dream Florida Room after all, I couldn't go without this Macrame Hanging Planter* as well. Hanging plants are a must.


3 | MIX & MATCH SEATING

I wanted to incorporate a lot of seating, so I went in with a white Bungalow Sofa* with hairpin legs. I actually edited the sofa to have hairpin legs, so the sofa seen actually doesn't exist; The original sofa has a rattan base. I'm loving hairpin legs and thought how pretty it would be to use them as legs for a sofa. It would be great for the outdoors because it would be completely open and perfect for small spaces. They're also a good choice for the outdoors because animals or bugs can't hide under them and nest. The platform for the sofa would probably be some type of wood. I also love the look of wire chairs, so I also added those in to touch on the modern nordic feel I was going for. As you can see, since there are so many areas to sit, you can always create separate seating areas and move furniture around to change up the space entirely.


5 | FINISHING TOUCHES

I wanted to make sure to include a lot of lighting so that the space can also be used in the evening, so the lanterns on the ground level add that perfect touch along with the hanging Round Paper Lanterns*. Tons and tons of pillows are a must as well as varying patterns and colors, but keeping with a soft color palette. The Kilim Turkish Cotton Throw* and Ivory Throw Blanket are to keep warm and bundle up to when it gets cold. I also added a Sisal Rug* to complete the space because I love outdoor rugs and how they make a space feel like an outdoor living space. I can definitely see myself enjoying this space. Every. Single. Day. There would be no reason to stay indoors with how comfortable, relaxing, and welcoming it looks!

I think I accomplished what I wanted for this room and more. It's the perfect space for any occasion and it would definitely make me happy on those days where I just want to get some fresh air in the comfort of my third story porch. I love how everything came together and how it really incorporates everything I want in an outdoor space. Thank you to Douglas Elliman for inviting me to be a part of this challenge. If you are on the lookout for amazing properties across the US, be sure to check them out, and if you're in need for some inspiration, head over to their Florida page. When I did, it just reaffirmed why my husband and I want to relocate there. 

I hope this inspires you to create a mood board for your outdoor space. Not only will it help you get all of your ideas together, but it will seriously make your dream space more attainable because it'll make your vision come to life. If you create a mood board, I'd love to see it! 

So, what do you think? How would you decorate your dream Florida Room? I'd love to hear about it in the comments below!

Disclosure: Links that are marked with an * are affiliate links.


Project Prettify! | Design The Life you Love
Design The Life You Love | HelloLovelyLiving.com

I can't get enough of home inspo on Instagram. I know I talk about Instagram waaaay too much, but it really is the place to go if you want to see what's in and what's trending in interior design - and not just the stuff found in magazines and other published media - in real homes with real people who just love designing and styling. 

Instagram is like a black hole because I could literally get lost for days scrolling through people's feeds, so I usually have to control my urge. It just amazes me how many talented creatives there are on Instagram. That's why I'm so addicted - because it opens my eyes to so much diversity in ideas and creativity, which in turn, makes me a better creative and inspires me to try something different. I've discovered my love for so many interior design styles through it, which brings me to the point of this post.

I've always been into interior design, and looking back, I can see that from early-on, I've always gravitated toward it. One of the first careers that I wanted to pursue was in interior design, and growing up, I was always the one rearranging the house and trying to convince my mom to buy home decor or paint the walls. I'm the type of person that would rather spend money on a pretty piece of home decor first than anything else I love -  and I do love my fair share of girly things like clothes, makeup, bags, and shoes, so that says a lot!

Lately, I've been feeling pulled toward simplifying my home and wanting to start from scratch. Over the years, my design tastes have drastically changed as well as what I value most in life and in my home. My husband and I have really figured out what's really important and what we want out of life in the short and long term. Quality over quantity has always been my motto, so I really want to create a space that represents that. I also want to get rid of the excess and create a cohesive design and style that I feel speaks for me and allows me to really look at my home and say, yeah, this is so me! I remember reading something to that effect in Emily Henderson's book, "Styled". If someone were to walk into your home, would they be able to gather about what type of person you are or would there be a disconnect? With a budget close to zero, starting from zilch seems like shooting myself in the foot, so here comes the why and how.

So, for my why, I really want to start applying the motto "design the life you love" to every area of my life. I also believe in adopting a minimalist lifestyle, which I plan to get into more in another post.  I desire a home that matches my tastes and that I can be inspired by and inspire others with. For so many years I'd always say, maybe someday when I own my own home, I'll do this and that, but I've realized that someday rarely ever pulls through. The only time we have is now. I want my home to represent my family and me, so that is my goal. I want it to be an inspiring place that I can be proud of even if it is just a rental. Home is where the heart is, right!

As for my how, my plan is to sell the old stuff I do have (furniture, misc. items, AKA "junk", etc.) and liquidate it into cash. The money will be used toward projects around the house where I can create a space for less by doing DIY projects and purchasing staple pieces that will go a long way toward the function of my home. The remaining cash balance will go toward debt, which is one of the main reasons I came up with this idea. I mean, why not sell everything, get cash out of it, use it to create a brand new space I actually love - for less - and then have leftover cash to put toward bills? Sounds like a no-brainer to me!

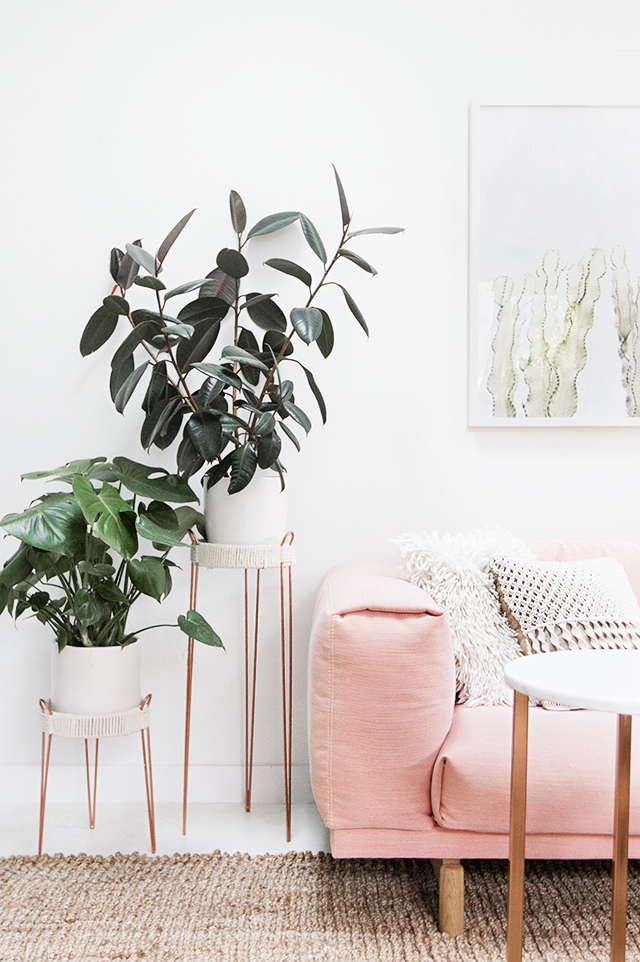
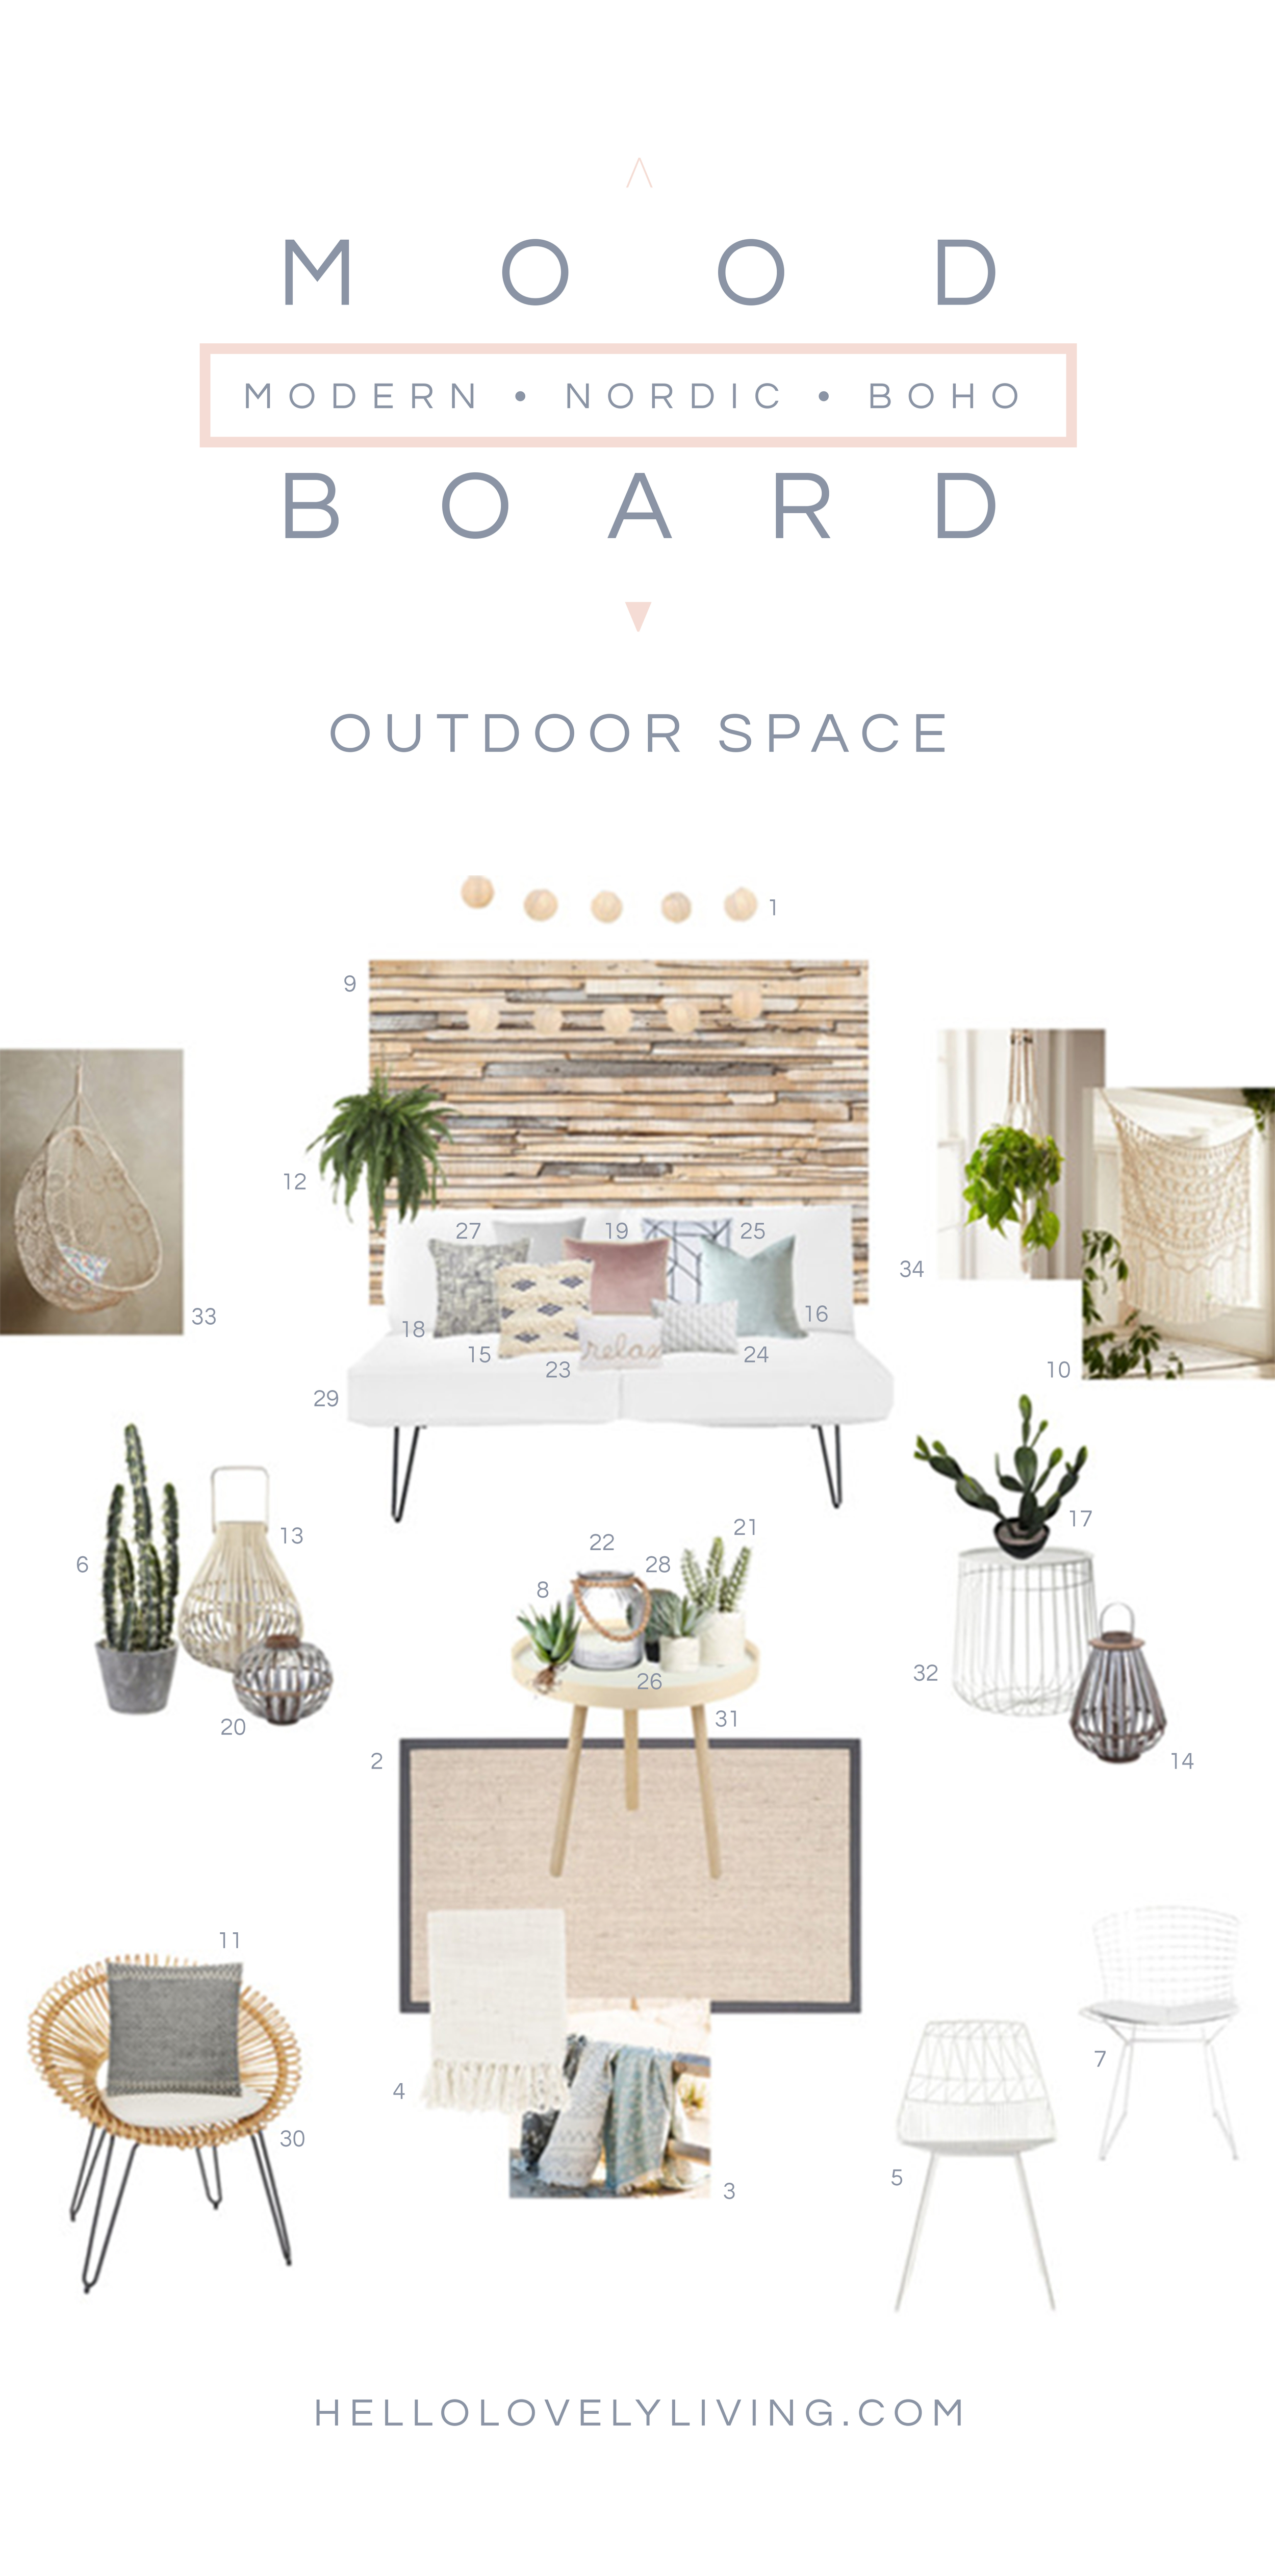
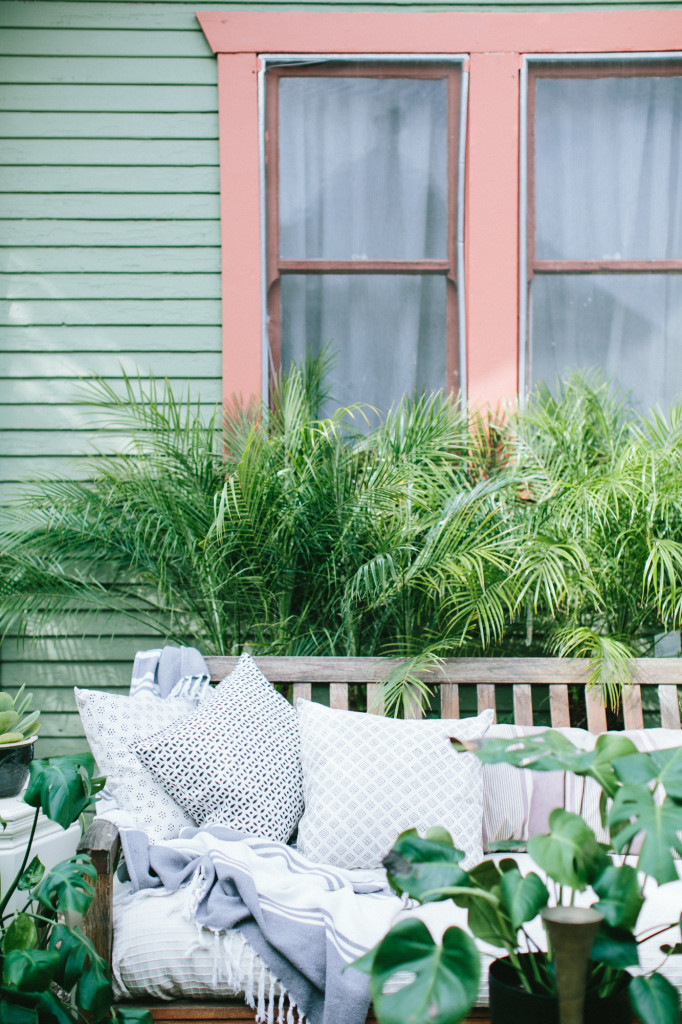
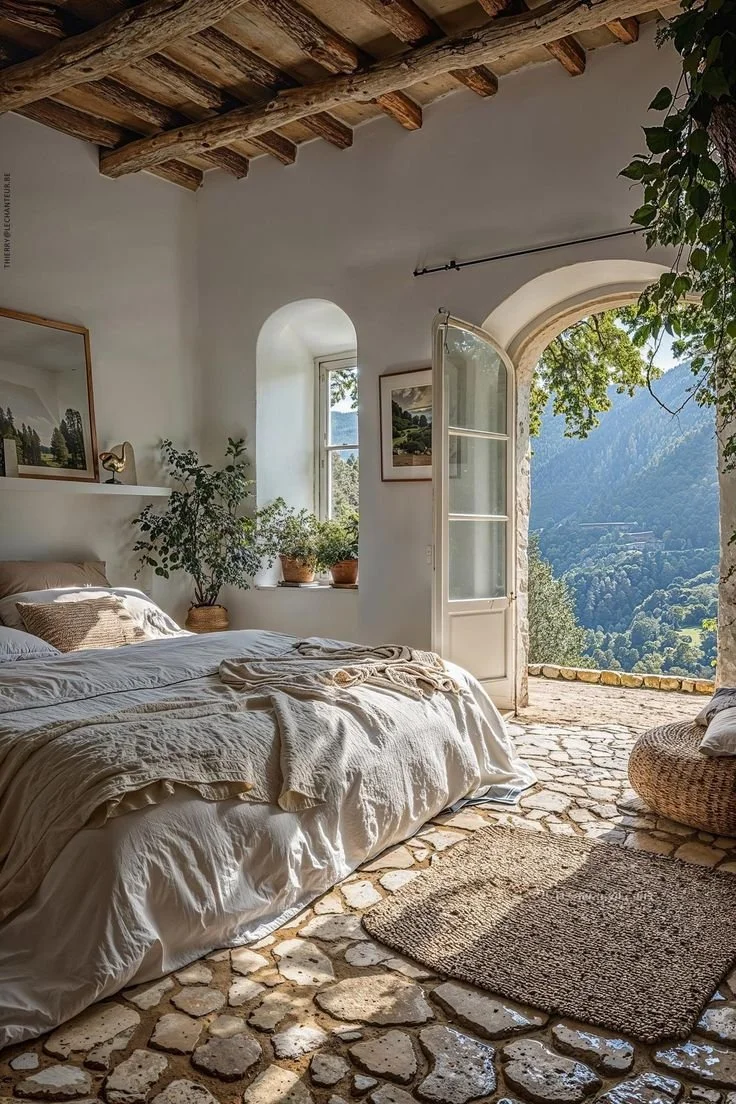
Being that I'm going for a minimalist look, I think I can pull it off. It will be a fun challenge to take on, and I'm excited just talking about it. We will be downsizing greatly and deciding what's more important by restructuring our home, not only in a financial sense but a design sense. I still can't decide exactly what style I'm going for, but I do know that I've been loving modern Scandinavian/Nordic, mid-century modern, and bohemian design. Let's hope that I can make up my mind soon.

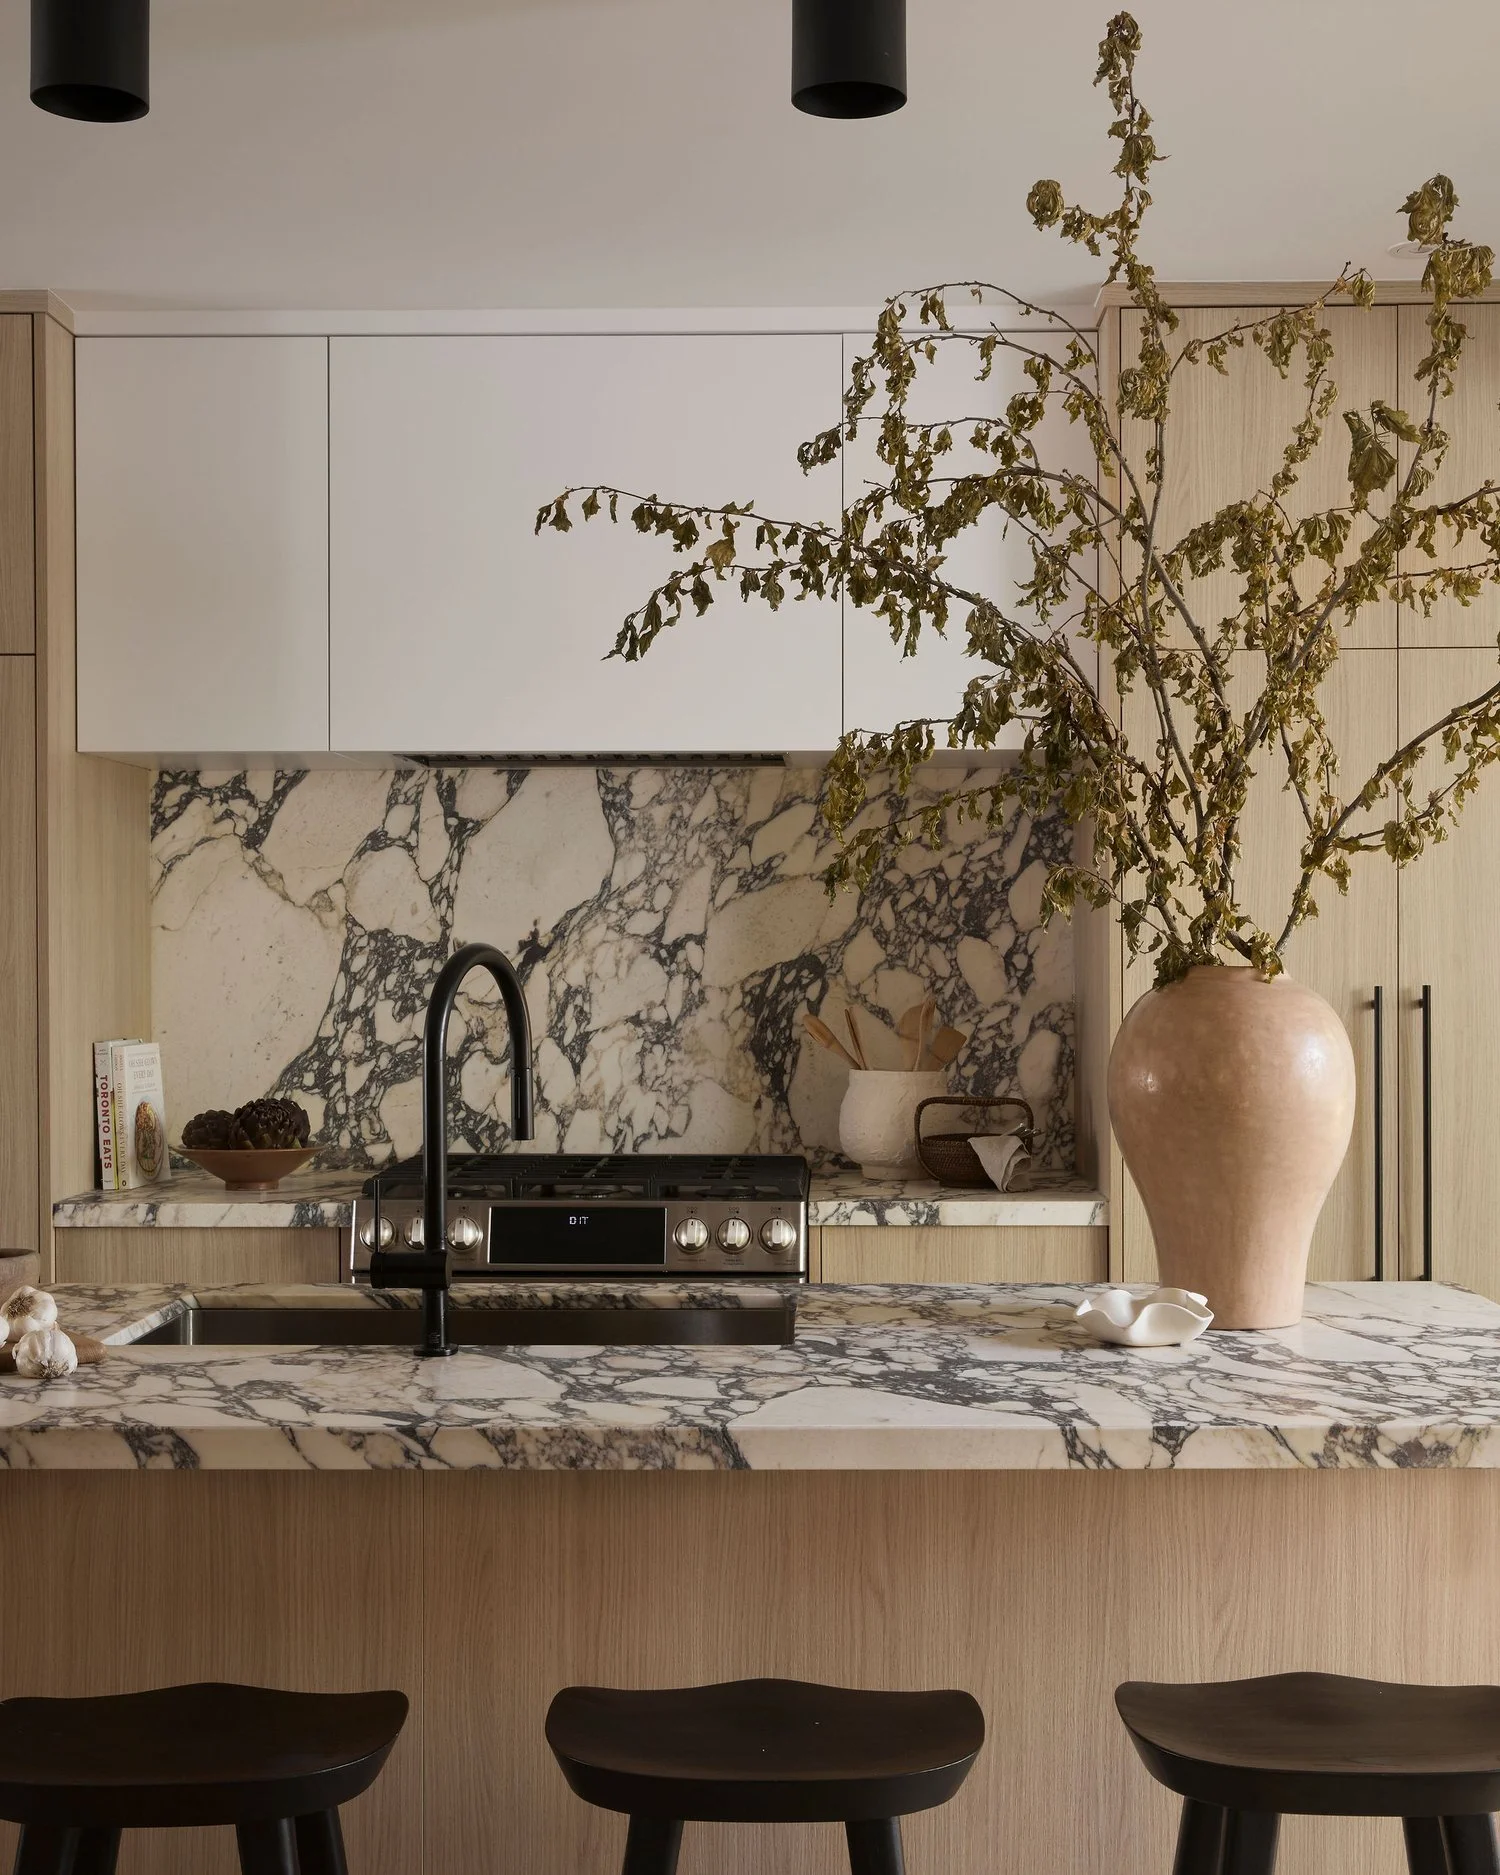
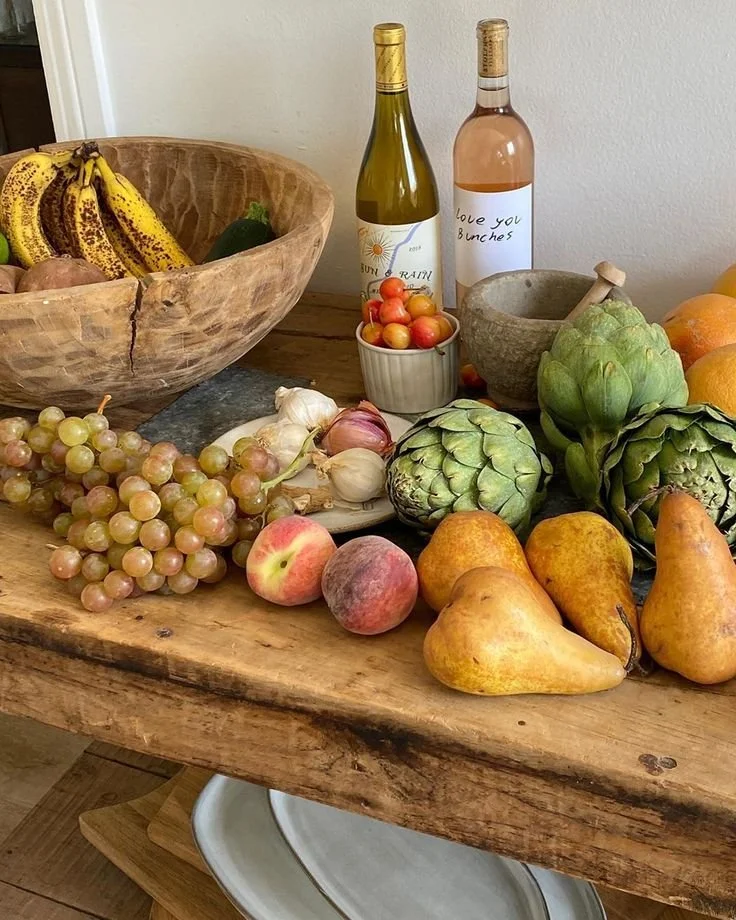
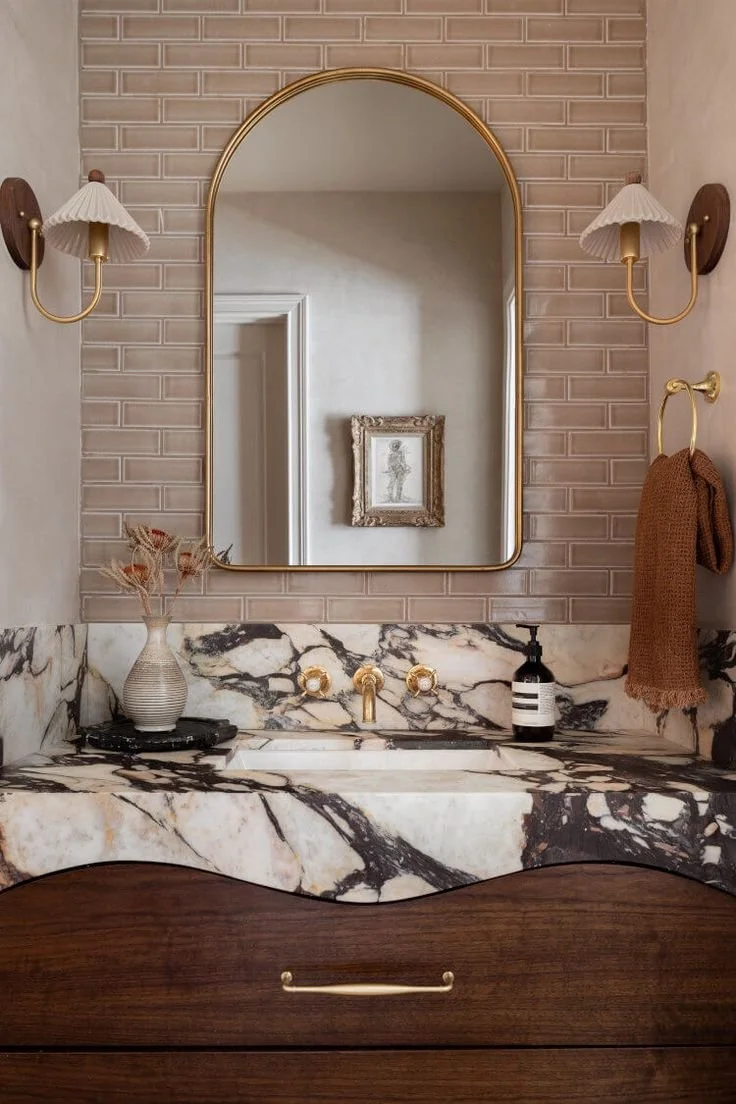
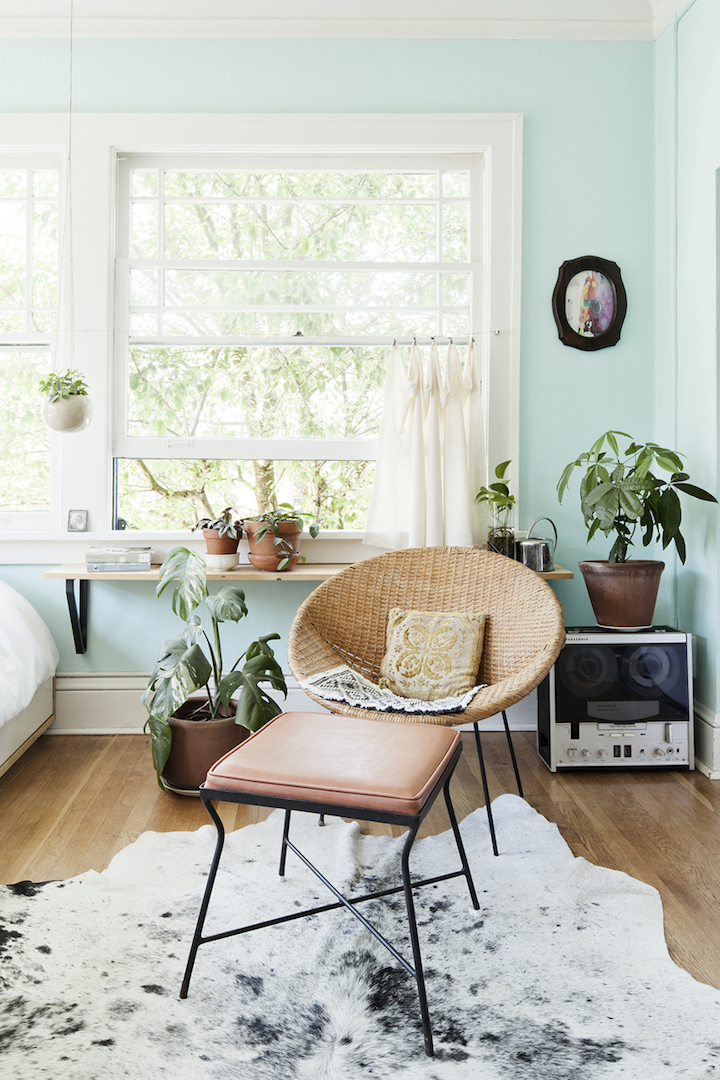
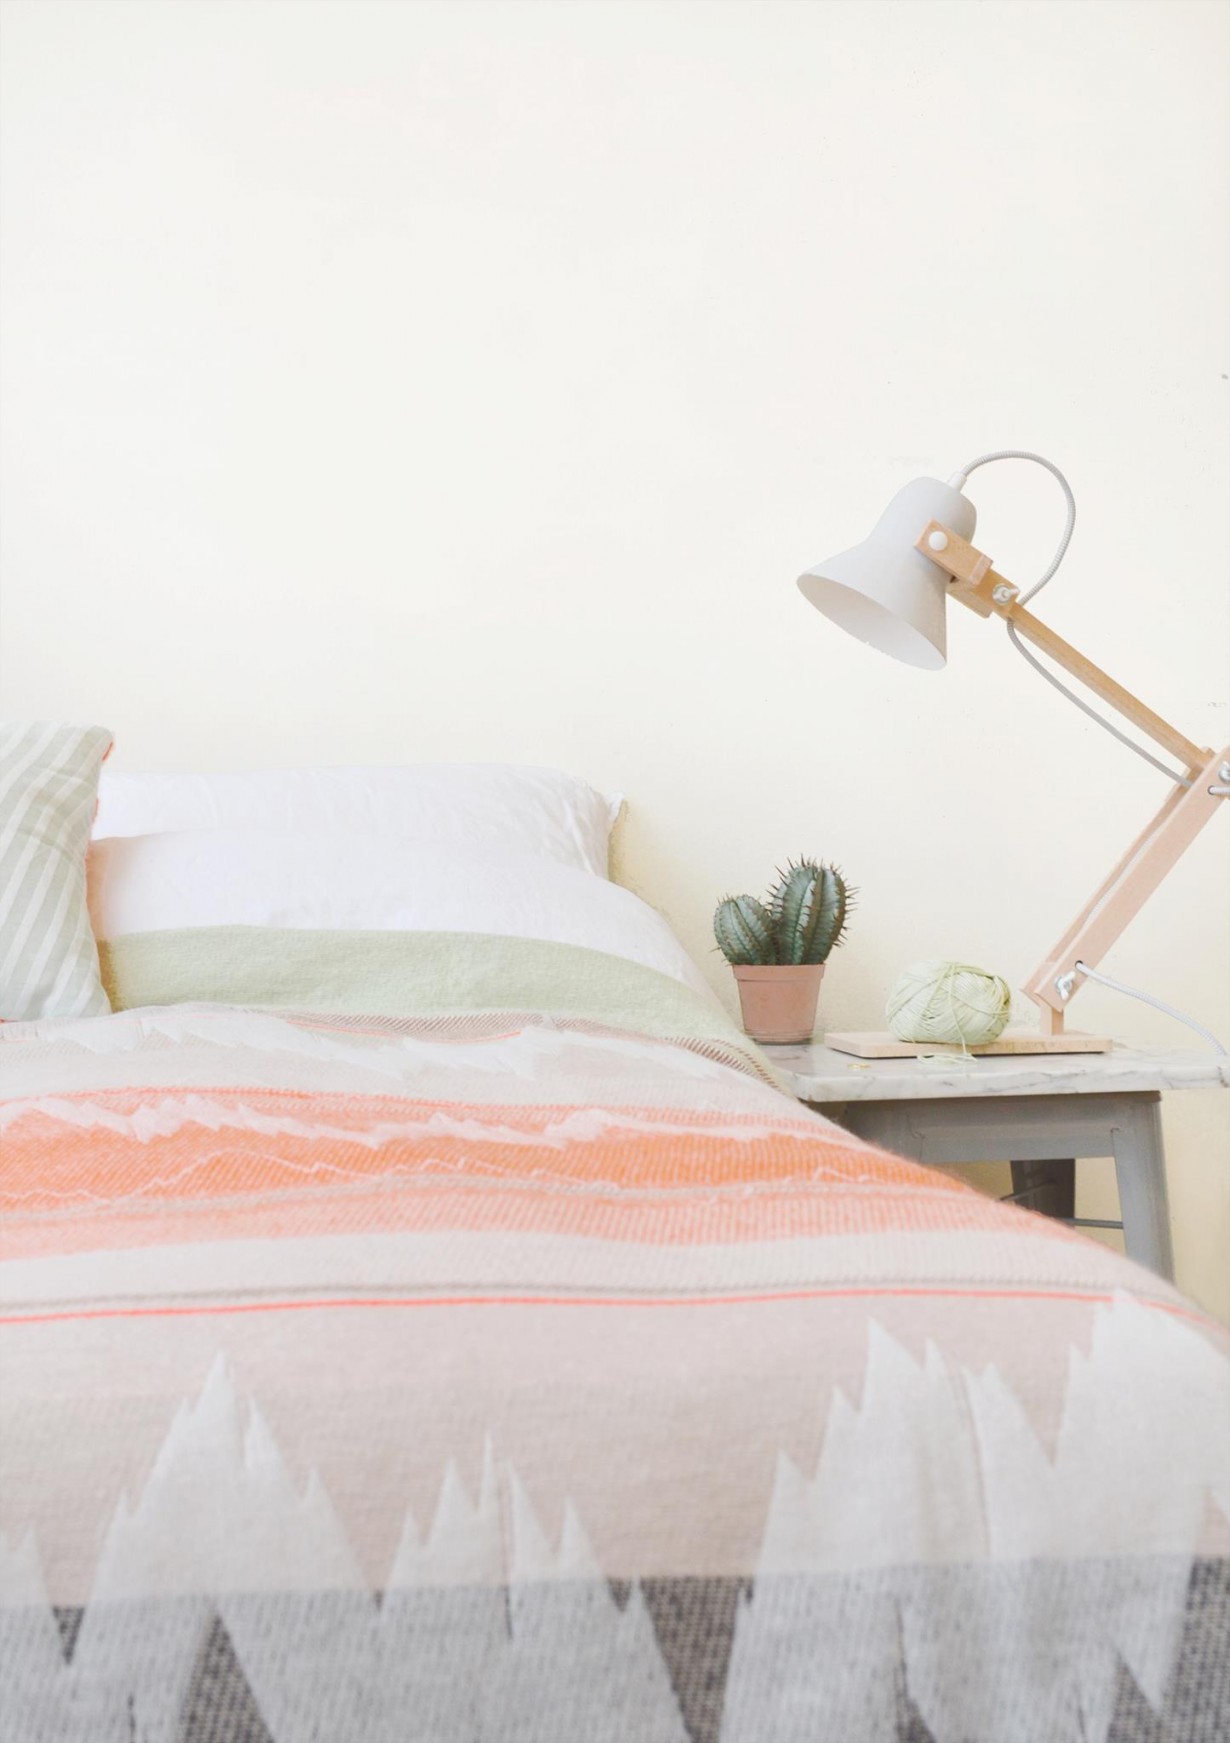
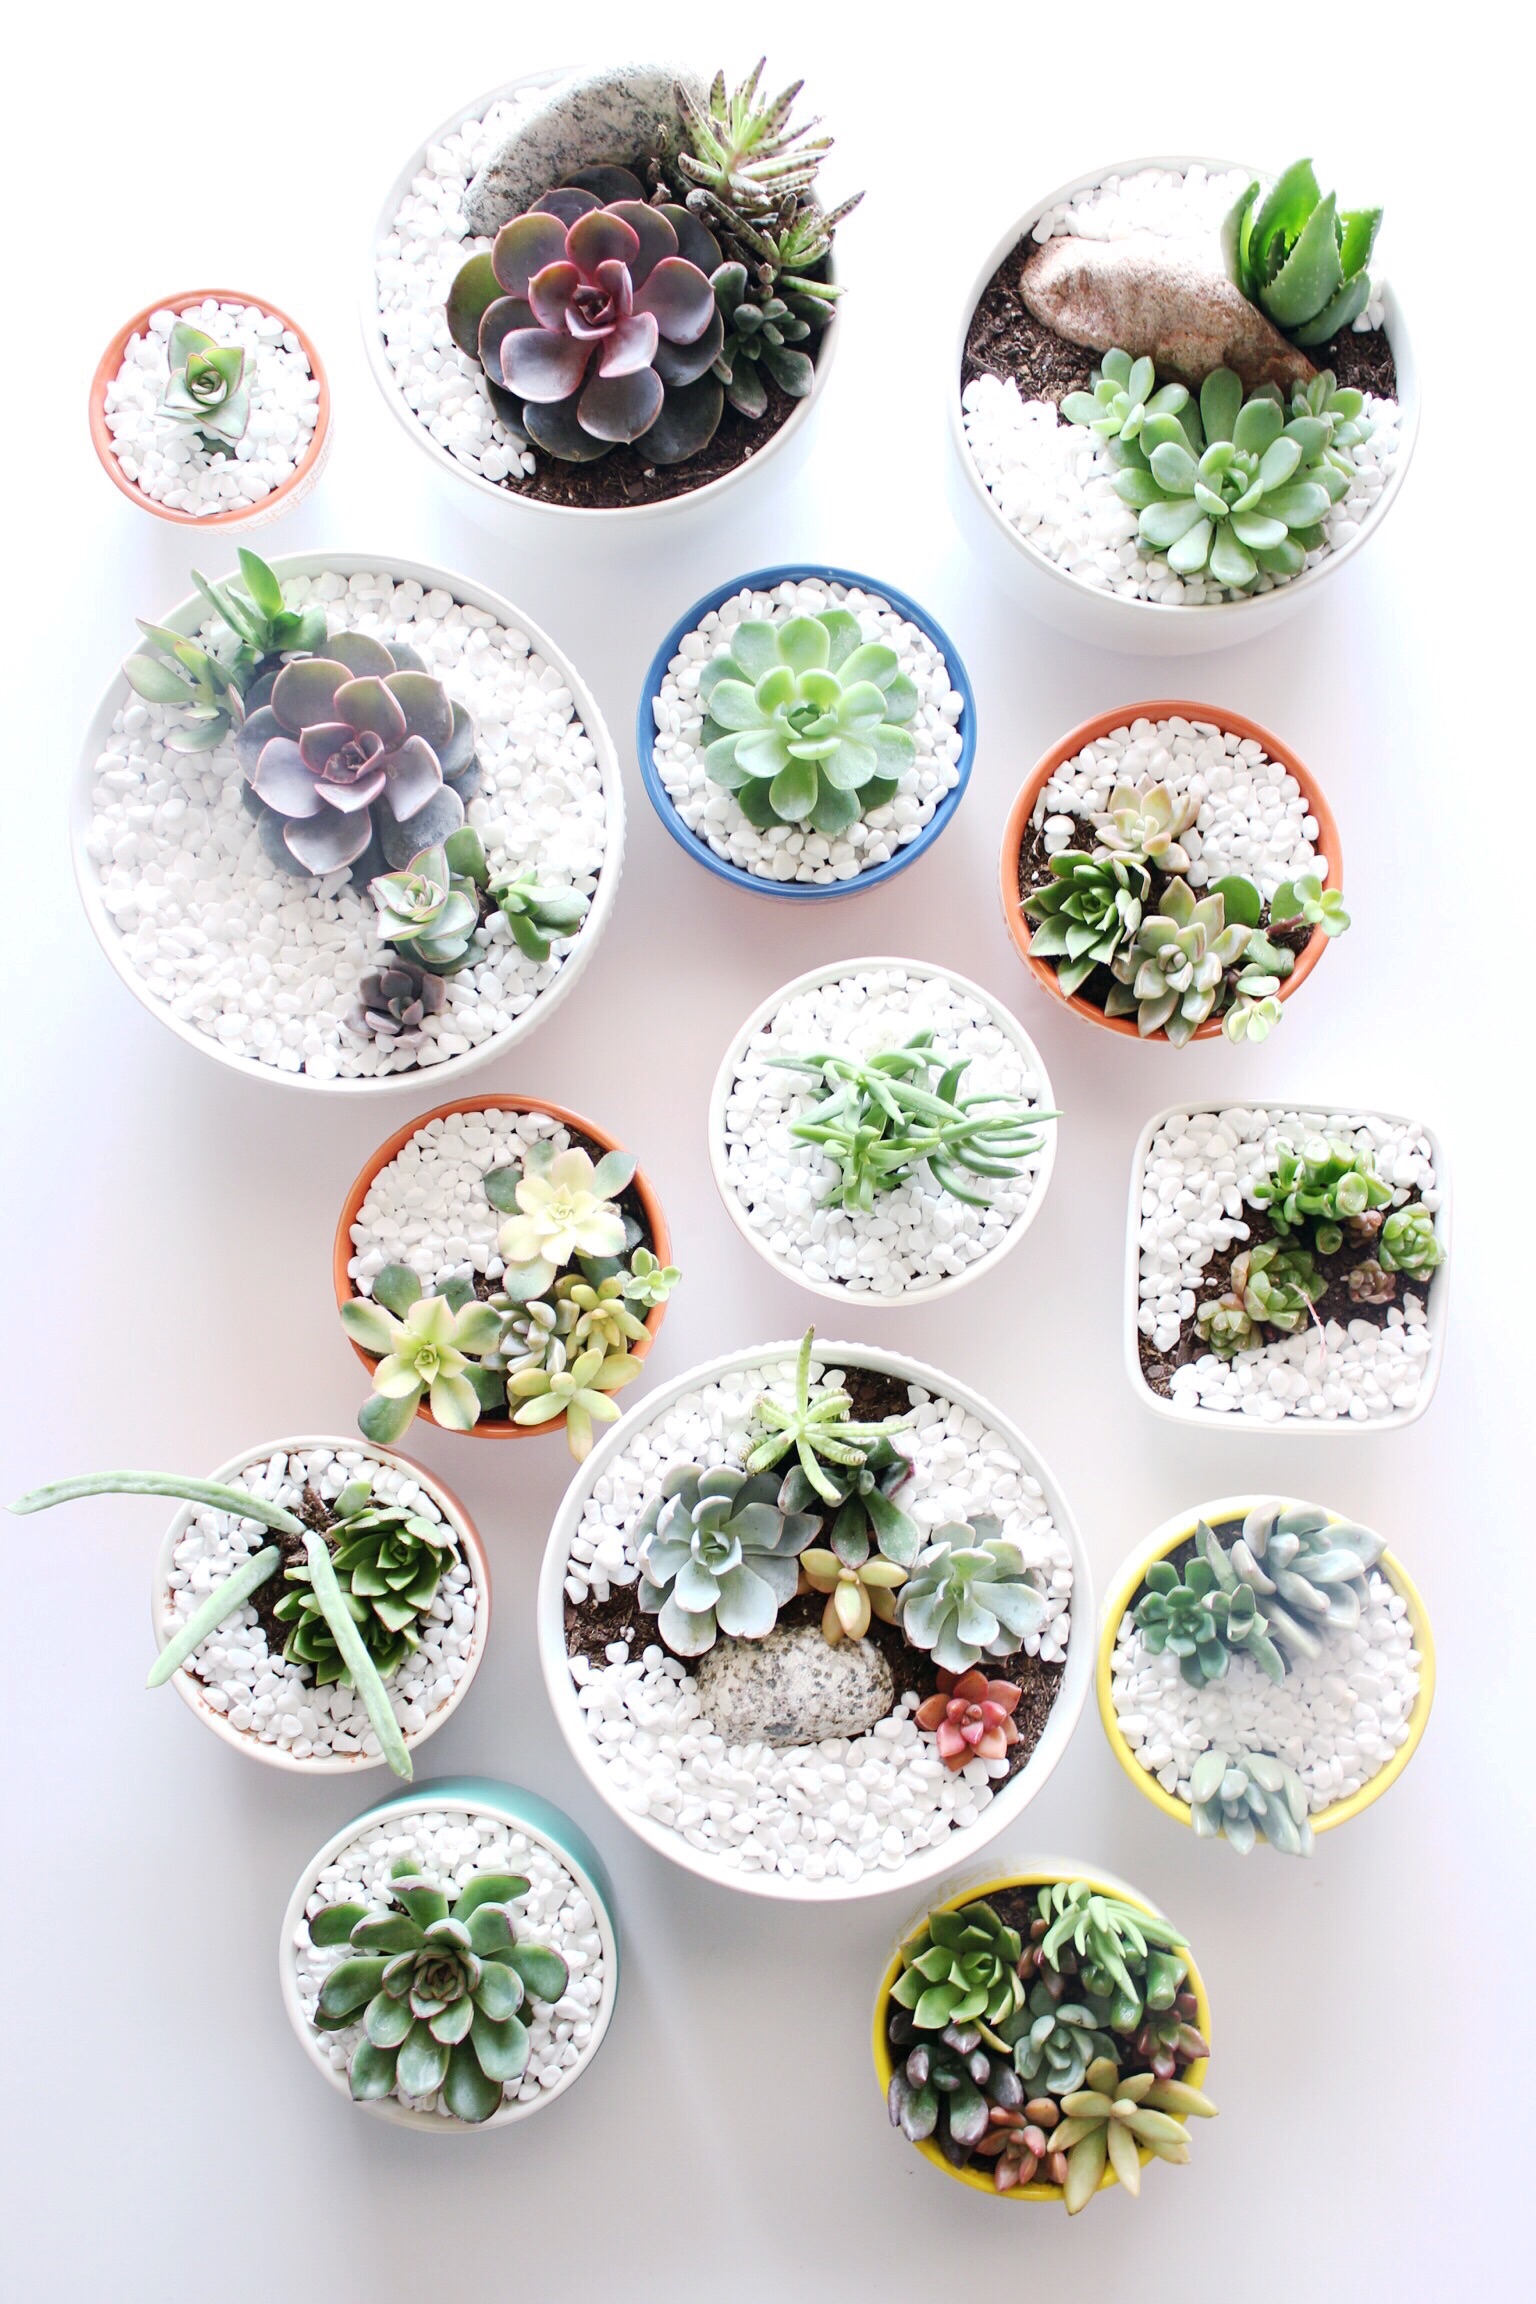
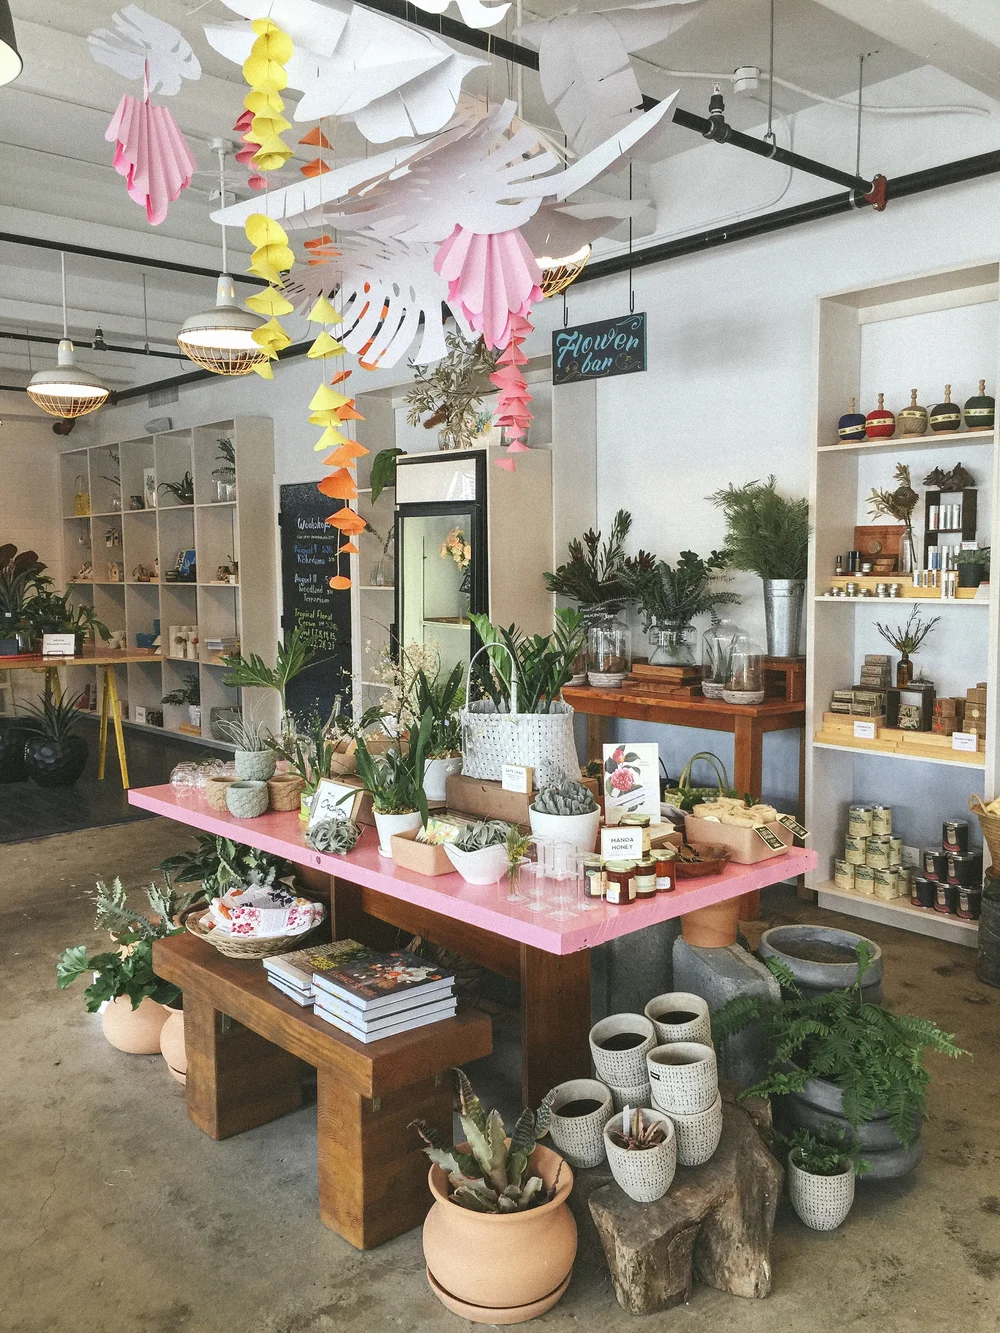
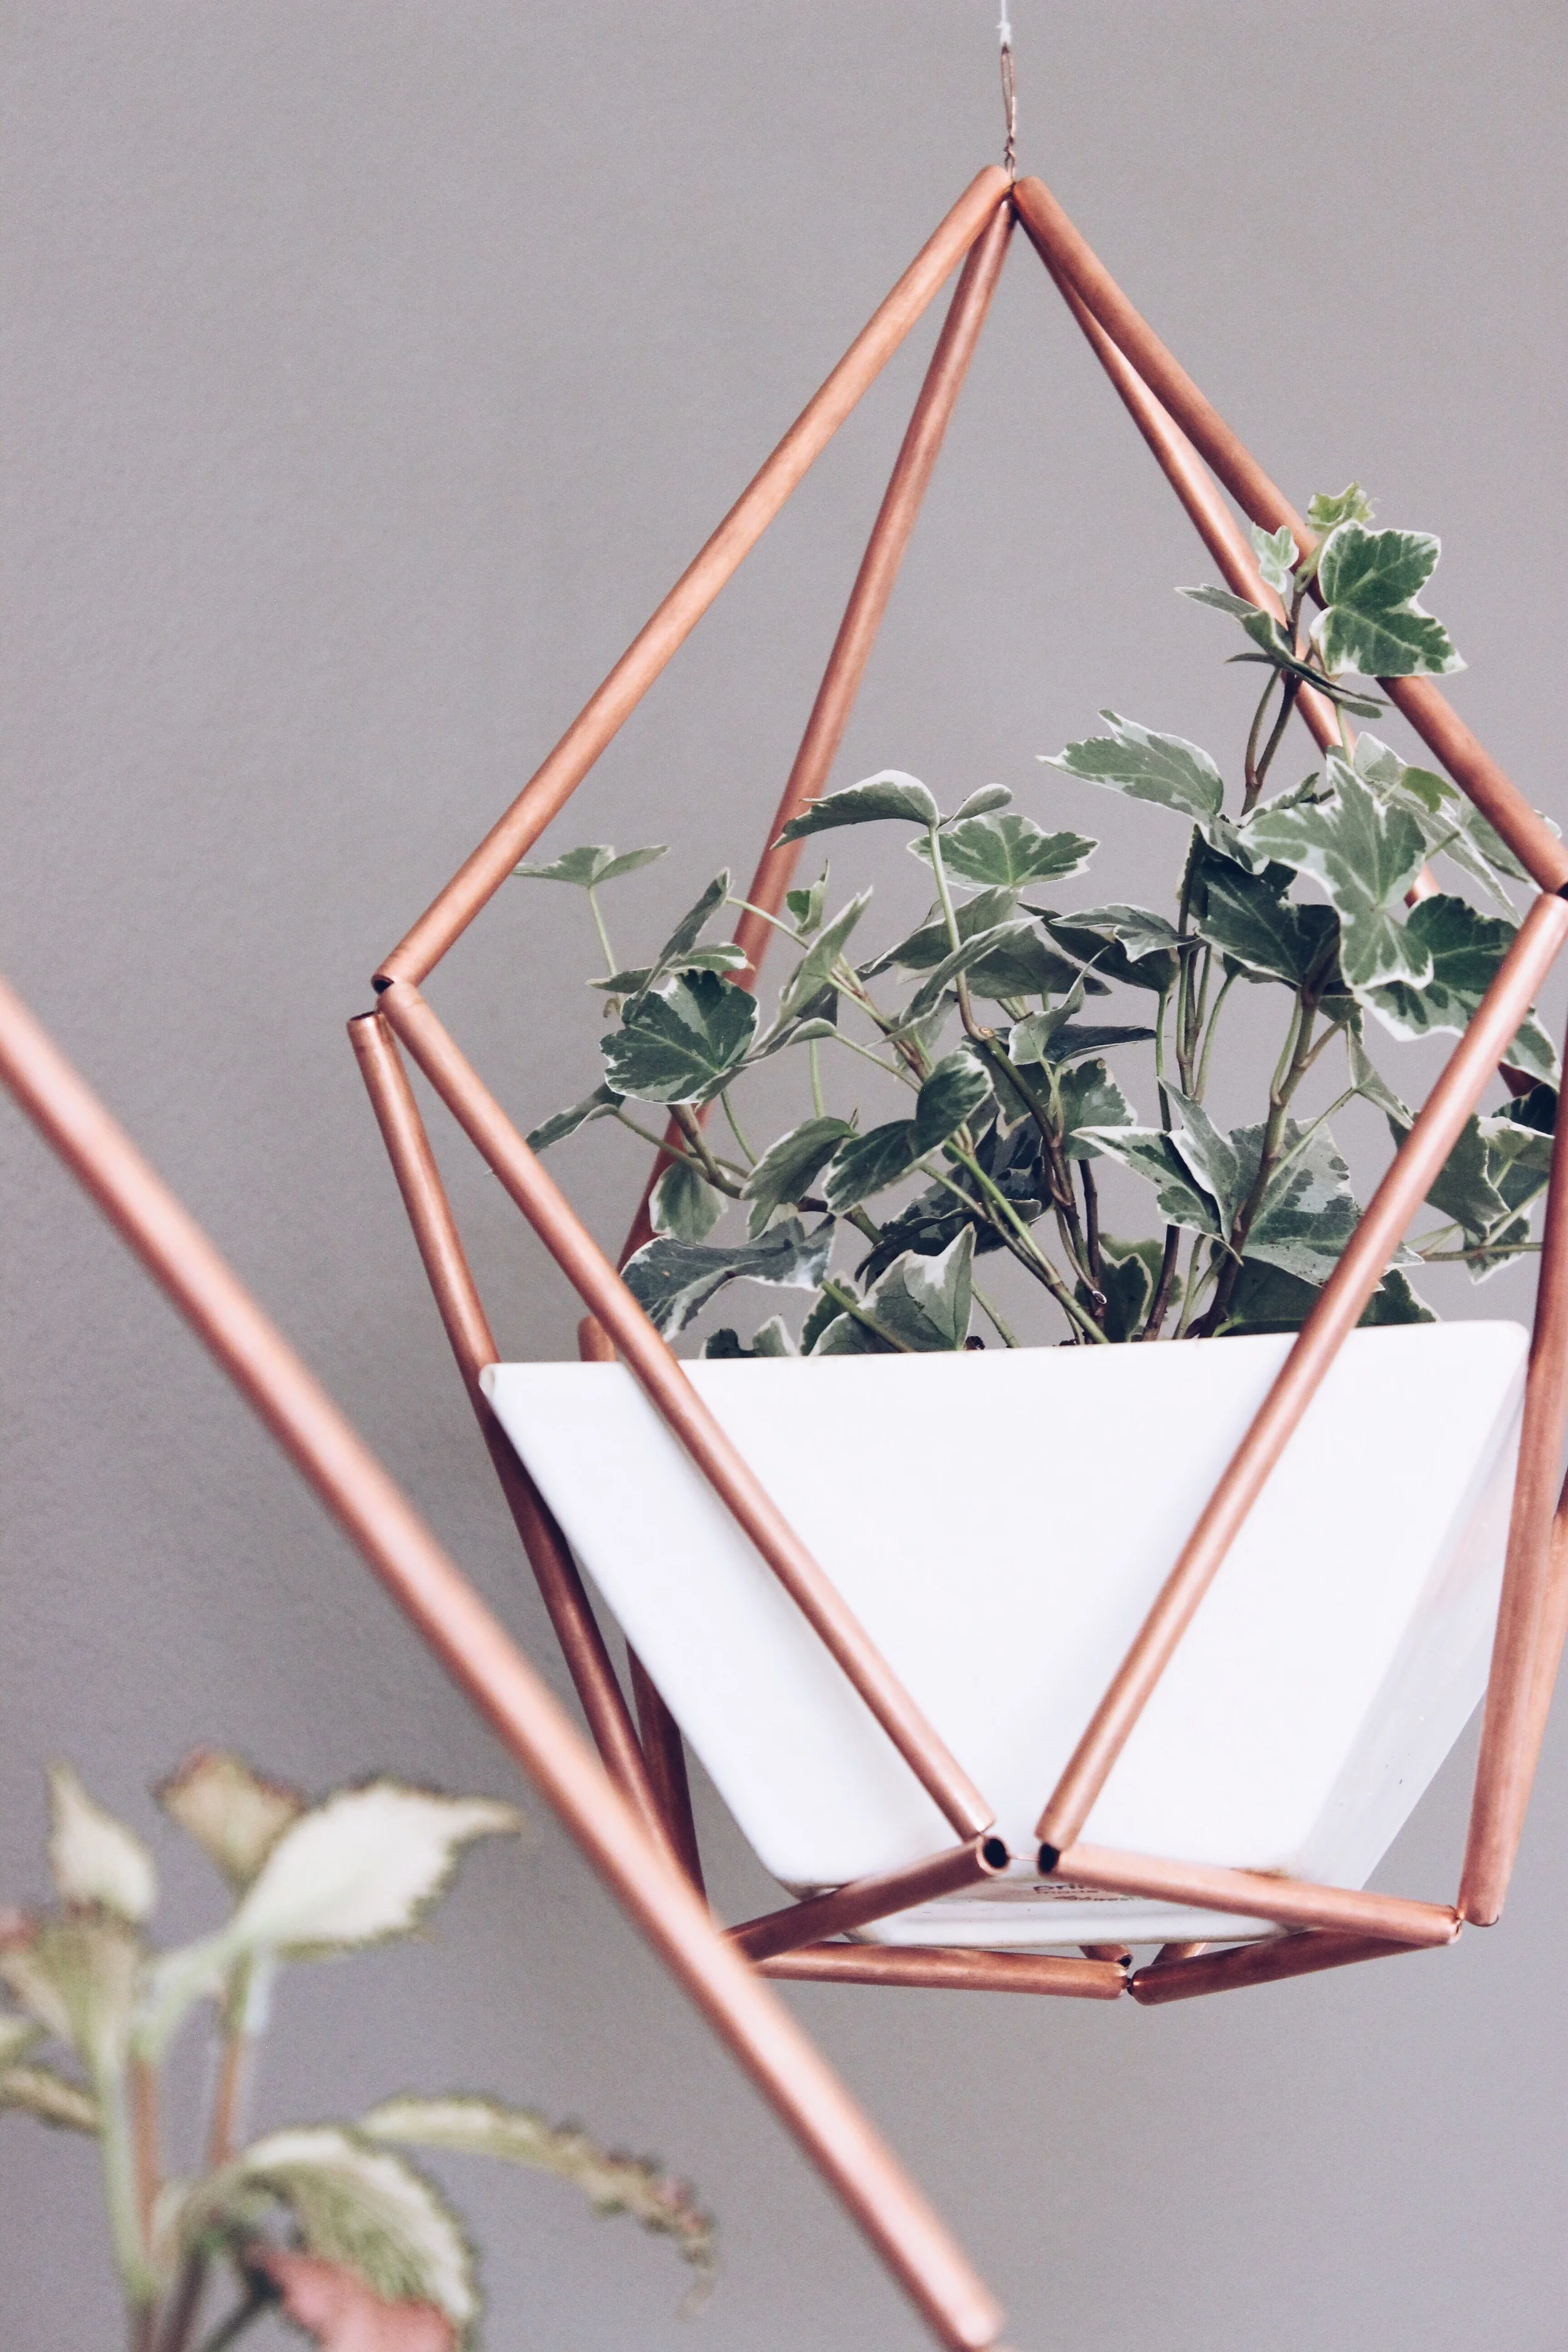
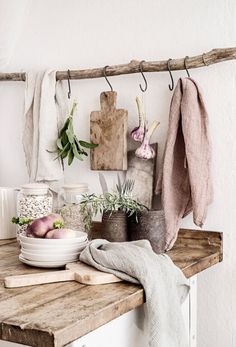
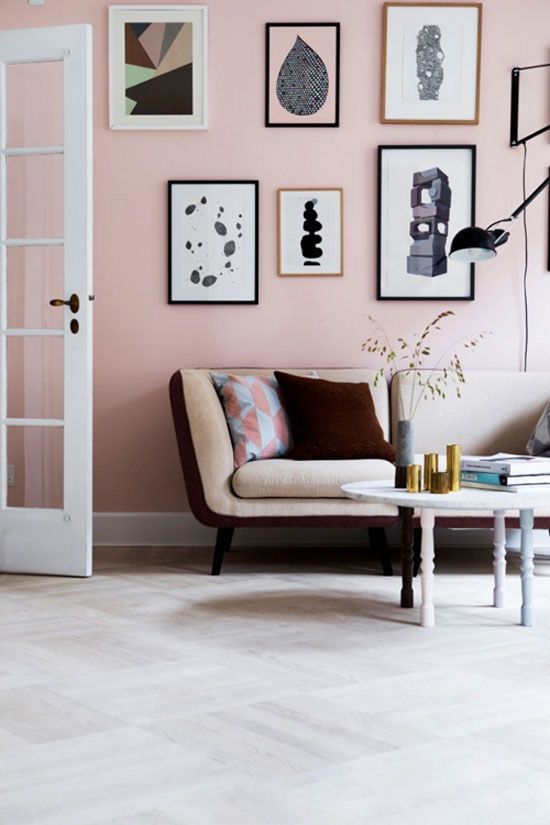
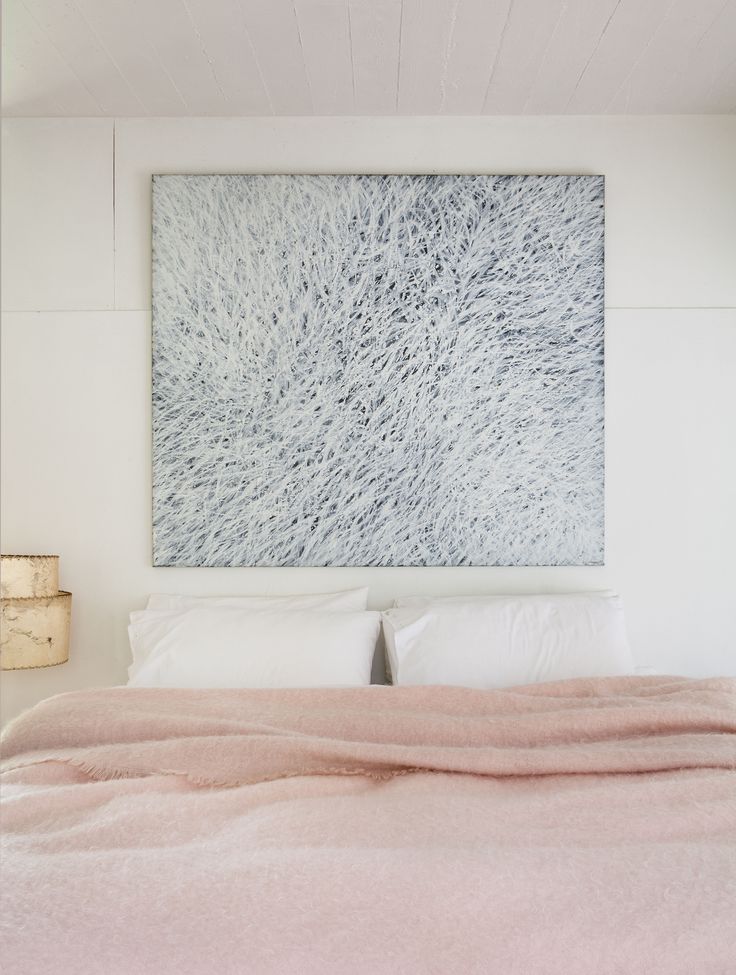
Here are some inspiring spaces I've been adoring lately!

Design The Life You Love | HelloLovelyLiving.com

via Gimmii

Design The Life You Love | HelloLovelyLiving.com

via Fjeldborg

In summary, I feel that nothing in life should make you feel like you are stuck with it, so if there's anything you want to ever change, be it as small as the color of your nails or more drastic like revamping your home, always know that you can do it. Life is all about change, and change is necessary for growth. In my case, I feel like taking this step is one of those things. What you surround yourself with, there you are, so why not make it count! Create your best life and live it as authentically you as possible. This is the journey I'm on at this point, and I am excited to share the process with you so that you can gain inspiration from it. Stay tuned for more to come in this series: Project Prettify!

What do you think? Would you be up for selling all of your furniture to create an entirely new space? I'd love to hear what you think in the comments below!


Exciting Updates + New Project
image.jpg

I'm so glad that it's starting to warm up here in Oklahoma City. Being stuck inside for most of the year can get pretty depressing, so Spring makes me so excited! I had the chance to revisit the Myriad Botanical Gardens with my husband and two boys the other day and it was just really nice to see all the blooms and greenery and get inspired by nature again.

image.jpg
image.jpg

The Myriad Botanical Gardens is located in the heart of the city and is directly across the Devon Energy Center - the tallest building in Oklahoma City. I just learned that the original idea of the gardens was to create a space similar to the Tivoli Gardens of Copenhagen, Denmark. How neat! I'm not sure if they accomplished that, but it's really an amazing place nonetheless.

image.jpg
image.jpg
image.jpg

There's also a greenhouse called the Crystal Bridge Tropical Conservatory, which I have yet to go inside of. I always feel so inspired everytime I go to the gardens, and my phone always runs out of batteries because of all the snapping I do! It was a much needed getaway. 

As for the blog, I've finally got around to updating the site, and I am so so motivated to get back into posting more content on here. I've been MIA for about a month, so I've had a lot of ideas for the future of this site running through my head. I LOVE blogging; Life just got so hectic and it took me a while to get back to my creative space. I'm excited to feel inspired again, and I have a few things in the works.

I've been wanting to update the site for a long time and give it a more modern, minimalist, and bright aesthetic to match my changing tastes. So, I created a new logo, changed a few things, and I think I accomplished the new look, which makes me feel really inspired. There's something about changing things up that gets me energized. I've always been that way, and I really get bored of things very fast. You'll probably see a lot of rearranging here because I'm always making things feel new and fresh! I hope you like the slightly new design. Let me know if you like it!

image.jpg

Besides the blog remodel, I have been working on a project since last month. If you follow me on Instagram, I've posted quite a bit about my latest obsession. Why must I get obsessed with so many things all the time! I'm obsessed with getting obsessed. Ha!

image.jpg

So, this latest obsession is with succculents and cactus. Well, I've always been obsessed with them, but since I've been a plant-killer my whole life, I didn't have the guts to try my hand at these babies. That is until someone inspired me on Instagram to start propogating my own succulents, and it helped that my husband surprised me with my first batch of succulents shortly after.  Thanks hubs! I now have about four trays of succulent leaves that I'm propogating.

Caring for succulents has been exciting for me and so I've decided to create succulent gardens as well! I've received so much amazing feedback on Instagram, so it's really something that I want to continue sharing with you guys.

image.jpg

The great news is that I'll be launching a shop here on the site really soon and will be listing mini succulent gardens that you will be able to add to your cart and have shipped to you! I will also be slowly adding more things to my shop as time allows, so more will be in the works for that. If you want to stay current with what's happening, I post more frequent updates on Instagram. 

That's my quick update for now. There's so much more on my mind, but I don't want to overwhelm this post (and you). One last thing: What would you like to see more of here on Helly Lovely Living? More DIY? Home Inspo? Any specific topics? I'm all ears. I have a few things coming up that I can't wait to share with you all. I'll be back at it in a few days! Have an amazing weekend!


The Danish Retailer That May Rival Ikea
The Danish Retailer That May Rival Ikea | HelloLovelyLiving.com

via Bloomingvile

I am completely and utterly obsessed with this Danish company that just hit the US market. In my latest Mode story, I'm getting a bit controversial. It may touch a soft spot for you Ikea lovers. Nonetheless, I am an Ikea lover myself, and that's exactly why I've fallen for this Scandinavian home goods company I'm about to share with you. If you're on top of the minimalist movement, you'll see what I'm talking about. Their products will make you swoon. Now if only they had a store the size of five football fields so I could spend eight hours inside. Read on for the full deets.

Are you an Ikea addict? How many hours could you spend in their store?


Cute Cactus Crafts For the Cactus Obsessed

via The House That Lars Built

I have not been exempt from this cactus obsession that has swept the world of DIY and crafting. I don't know what it is about transforming something real into variations of utter cuteness, but I'm not complaining. I love anything that adds life and cheer to my world, so if cactus bring any sort of joy to my life, then so be it. I welcome them with open arms in any way, shape, or form! If you're of the same accord, I gathered some cute cactus crafts that are super easy to make and oh-so-adorbs. Check them out in my latest Mode story below!

What is your favorite cactus craft? I'd love to hear about it in the comments below!


Warby Parker Glasses Home Try-On | Review
Warby Parker Home Try-On - Seymour | HelloLovelyLiving.com

If you're like me and are a part of the four-eyed club, you'll be absolutely thrilled about this life-changing service I'm about to share with you. I don't know about you, but when I try on glasses, it takes me forever, and I mean, FOREVER to choose out a frame. After all, I'm going to have to wear the suckers, so I best like them, and that means hours upon hours of tirelessly trying out frame after frame. I admit, I'm not one to take purchases lightly. And I'm not just talking about big purchases - from lotion to eggs, I'm horrible at picking things out. I research and dwell on what I'm about to buy for a loooong time. I guess it's the indecisive person in me, which irritates the shiz out of my husband! Oh well, he can live with me. 

Warby Parker Home Try-On | HelloLovelyLiving.com

Getting to the point of this post, and not my indecisiveness, I have known about Warby Parker for quite some time but never got around to actually trying them out - until now! I've gone more than a year without glasses, so this is a big deal for me. I'm not sure if they first thought of the idea of home-try-ons, but I first heard about it from them. How does Warby Parker work? It works like this: On their site, you choose 5 frames that you want to try, add them to your cart, then they send them to you so you can try them on at home. You do have to enter a valid credit card, but that's about it. I received my box in less than a week. Once you're finished, send them back in the same box with the free return shipping label, then order your frame(s).

Warby Parker Home Try-On | HelloLovelyLiving.com

So what's so revolutionary about this idea, you ask? Well, it allows you to really try on your frames in the comfort of your home without someone pressuring you to hurry-up-and-buy! Take photos, share with your family and friends, and test them out on the town. At the end of it all (and if you're indecisive like myself), you'll come out of it stress-free and with frames that you truly love. Do as many home try-ons as you need before you commit to buying any.

Here are the frames that I decided to try:

Warby Parker Finch - Striped Molasses | HelloLovelyLiving.com
Warby Parker Mitchell - Whiskey Tortoise | HelloLovelyLiving.com
Warby Parker Welty - Whiskey Tortoise | HelloLovelyLiving.com
Warby Parker Upton - Oak Barrel | HelloLovelyLiving.com
Warby Parker Seymour - Whiskey Tortoise | HelloLovelyLiving.com

I have always wanted to own tortoise frames, so I may have gone a little overboard choosing them, but I am happy with my selections. The quality of these frames is really nice, and for $95 for prescription eyeglasses, it really doesn't get any better in my opinion. Once I really sat down to take a look at how I looked in them in photos, it really made a difference. It's so much better than trying to take a mental note of how each one looked! 

Warby Parker Home Try-On - Finch, Mitchell, Welty, Upton, Seymour | HelloLovelyLiving.com

I honestly love how each of them look, so this will be tough sticking to one! Mitchell and Seymour are very similar, I almost can't tell the difference, and I'm really loving the color and style of Upton! It looks so nice photographed. Warby Parker has a zillion and one amazing frames to choose from, and they're all so pretty, so you may have a hard time selecting which ones to try at first. My advice is to try something new! It can't hurt. That's what I did, and I'm so glad I did. I discovered new styles that I wouldn't normally try, and they actually look good with my face shape. If you want to know which one I went with, follow along on Instagram!

Warby Parker Home Try-On | HelloLovelyLiving.com

It's easy to get your 5 pairs to try on at home for free. Simply visit Warby Parker's Free Home Try-On and you'll be on your way! I also like to check for coupon codes whenever I buy stuff online, so you can see if there is any Warby Parker coupon code currently available here. I hope you enjoyed this post and found it helpful! I love when I find a service that makes life easier, especially when it comes to shopping. If you decide to do a home try-on, I'd love to see what you picked. Tag me on Instagram @hellolovelyliving

A special thank you to my Mom! This was her birthday gift - for me to get me a new pair of glasses! 

Which ones do you like? Let me know in the comments. I'd love to have your input!


Disclosure: Affiliate links included in this post. I always share my honest opinions. All photos were taken by me.


Botanical Shops: So Pretty You'll Want to Live There
Botanical Shop | Paiko Hawaii

Botanical Shop | Paiko Hawaii

Among the other million things I've discovered and fell in love with on Instagram are these pretty little botanical shops. They're filled with all the things I dream of - plants of all kinds, vases, pots, novelties, home and kitchen goods, plant stands, and the list goes on. I'm currently dreaming up having my own shop one day where I can fill them with everything I have come to love. Until then, the inspiration from these shops is enough to fuel me to getting there. I hope you enjoy having a look at them.

Have you ever been to a botanical shop like these? I'd love to hear about it in the comments below!

HelloLovelyLiving.com


DIY Copper Himmeli Hanging Planter + Mrs. Meyer's Giveaway

Hello Lovelies! I've been wanting to make these gorgeous copper himmeli, so when I needed to create a DIY submission after being selected as a semi-finalist for The Hunt for the First-Ever Mrs. Meyer's Homemaker, I knew I just had to make these. It looks like a challenge to make, but don't let that stop you - I found it to be so fun and relaxing.

If you're not familiar with himmeli, they are hanging geometric ornaments that originate from Finland and are traditionally made from straw. The word himmeli is actually derived from the German word for heaven, himmel, which I found really interesting. I fell in love with their modern and minimalist aesthetic, and they're so visually striking and can be made to form larger, more complex geometric patterns.

I absolutely love copper, but find copper decor to be quite expensive, so I thought this would be the perfect way for me to finally get my hands on a copper piece without the high price tag.  All of the supplies are easily accessible and really affordable. I believe I spent less than $40 for all of the supplies to make two, so you should definitely consider making these instead of purchashing them. It's also so much more rewarding to make your own things to appreciate. Let's get started with this DIY!


Materials & Tools


  • Copper tube ¼” diameter, 20 ft 
  • Copper wire 22 gauge, 25 ft
  • Junior tube cutter for cutting copper
  • 2 - Repurposed ceramic bowls
  • 2 - Small plants
  • Ruler
  • Scissors
  • Marker  

For hanging:

  • 2 - Swag hooks (30 lbs)
  • Fishing line (15 lbs)
  • Measuring tape
  • Drill

INSTRUCTIONS


To make each himmeli:

1 | With tube cutter, cut copper tube into the following lengths:

8" - 4 pcs

6" - 8 pcs

3" - 4 pcs 

2 | Measure copper wire to 10 ½ ft and cut. Using one end, string tubes (one of each) in the following order: 8", 6", 3", 6". For first set only: Leave about 2" of wire at the top. Fold over tube to secure. Taking the opposite, longer end of the wire, string back through 8" tube. Tighten tubes together so that they are securely in place.

3 | Repeat steps 2 and 3 until you have made four sets.

4 | Cut a piece of wire 16" and string through all of the bottom 3" tubes to connect. Join and secure by twisting the ends together, cut any excess wire, then hide exposed wire inside one of the tube openings. 

5 | Join the top of the himmeli by twisting the two wires at the top. Cut any excess wire, then hide any exposed wire inside one of the tube openings. Taking another piece of wire, about 2" long, loop under pipes to create a ring, then twist to secure. Place excess wire inside one of the exposed tube openings.

6 | If the copper has tarnished while assembling, polish with a mixture of salt and lemon to form a paste. Let sit for 15 seconds and scrub in small, circular motions. Rinse with warm water and then wipe with a cloth.

 7 | To hang the himmeli, refer to the instructions that come with your swag hooks. Determine how far out from the wall you would like it to hang, then center that point in relation to your wall. Using that point as a guide, drill your holes and then secure your hooks. String fishing line through the himmeli ring, adjust height, then tie securely. Cut any excess line. 

8 | Place your plant inside your bowl and fill it with soil. Place planter in himmeli. Let your copper himmeli delight you for years to come!

If you enjoyed this DIY, I shot a video for Mrs. Meyer's, so you can go and see how the finished product turned out! While you're there, please support me in my run to become Mrs. Meyer's First-Ever Homemaker by tapping the heart icon next to my video and casting your vote for me! The voting period ends on Feb. 15, so I hope you're able to stop by before then and show some love! You can also learn more about what this contest entails for me here. 

I really do hope you try your hand at this DIY. It's super easy to make and I created this in hopes that you guys could have a himmeli of your own without spending an arm and a leg to get one. Don't forget to enter the giveaway below!


GIVEAWAY


Mrs. Meyer's Giveaway | HelloLovelyLiving.com

What do you think about himmeli?  I'd love to hear your thoughts in the comments below! 

HelloLovelyLiving.com


VOTE FOR ME To Become Mrs. Meyer's First-Ever Homemaker
image.jpg

I have some very exciting news to share with you all, and if you already follow me on Instagram or Facebook, you may already know what I'm talking about!

More than two months ago, I saw that Mrs. Meyer's was on the hunt for their first-ever homemaker. All's I had to do was create a DIY and post a :15 video showing it off and telling them what inspires me. This was totally made for me! Not only am I obsessed with Mrs. Meyer's amazing natural products, but I am also obsessed with DIYs. 

If you're not familiar with Mrs. Meyer's they make cleaning products that are natural, safe, and effective, but the cake-topper is that they smell AMAZING. Not kidding and not just saying that. And you know how I am about that natural living lifestyle!  So, of course I couldn't pass on this opportunity! I uploaded two videos to Instagram. This one and this one. Since this was just the first round, I was praying that I would make it to the second round and be amongst the 15 semi-finalists.  

And then, it happened! I received an email saying that I had been selected as a semi-finalist and that I needed to create another video!! I was beaming with excitement (and still am) and was so excited to be chosen amongst so many great entries. So, I got to working and decided to create a copper himmeli plant hanger. I wanted to challenge my DIY skills and create something I've never made before and something that I'd appreciate for years to come.

image.jpg

It turned out to be a real beauty. I'll be posting how to create this DIY along with all of the other photos in the coming days, so come back for that! 

Now, for the best part. What does the winner receive? For one, the winner will be flown to NYC to collaborate with Mrs. Meyer's and create more awesome DIYs and videos. The winner will also get creative with influencers, Grace Bonney of Design• Sponge and Paul Lowe of Sweet Paul. How sweet is that?! But the prize that makes this something of dreams is the $75k paycheck! How many dreams can come true in one? A kazillion. Do you know how many people I can encourage and inspire with that kind of money? Also a kazillion. ;)

So, friends, I have a 1 in 15 chance of taking all!! How exciting is that?? Will you help me get there? Will you be a part of my dream come true? I hope you will say yes! See my finished DIY in my video entry linked below. You can also get to know me a bit more: What inspires me and what Mrs. Meyer's homegrown inspiration means to me.


Thank you so much for all of your support. It means the world to me that you get to be a part of this once in a lifetime opportunity! My dream is to continue to inspire and encourage you all! 


Into The Woods: The Forest School Movement
Into The Woods: The Forest School Movement | Forest School Movement

If you've gotten to know me a bit so far, you'll know how much I love nature, so when I came across the idea of forest schools, I was in literal amazement. Having a 15 month old myself, the question of early childhood learning is at the corner of my mind these days. Should I go the traditional route, or should I look into alternative learning environments? I've chosen the latter.

With so many options out there, parents needn't feel restricted any longer. I am just opening up my eyes to so many possibilities, and I wanted to share some of that information with any of you who may be considering the same path.

Below, I've put together some very useful information about forest schools, their benefits and links to books that offer insight into something often overlooked - the impact of nature on our children. I hope you'll enjoy this story!

What are your thoughts on forest schools? Would you ever consider enrolling your child(ren) into one?

lifestyleStina X


Book Review | Oh Joy!
image.jpg

If you follow me on Instagram, you may have seen that I picked up a bunch of reads recently. Thankfully, the library had a bunch of books I've been wanting to take home. It feels nice walking out with a bunch of amazing books without spending a dime. Anyway, I thought it would be nice to share a little mini review about my reads to hold myself accountable to actually finishing the darn things. Yes, I'm one of those. By "those" I mean someone who NEVER finishes books. So bad. I also thought you guys would enjoy this and possibly get inspired in some way. 

The first book I decided to delve into was Oh Joy! mainly because it is so colorful and bubbly. I actually skimmed through almost every single page before I even left the library, so that kinda speaks for itself as to how eye-catching the photos are in this book. When I actually sat down to read it, I wasn't as wowed as I would've been because I had already ruined the surprise for myself. 

Oh Joy! was created by Joy Cho of ohjoy.blogs.com, and the thing that inspires me about this book is that she is also a blogger and has reached incredible success. She is doing so many amazing things that I can only dream of doing in the future like creating her own line of products! She created this book to share some of her tips, but it is mainly filled with tons of DIY projects that are super fun. 

image.jpg

One of the tips that I really loved and benefitted from was how to style patterns because I've always been hesitant when it comes to mixing and playing with patterns. She explains how to mix two patterns by choosing one that is simple and one that is more fanciful. 

image.jpg

I also liked her tips on how to create color palettes by choosing a base palette then adding an unexpected pop of color. She is known for her vibrant use of color, so I'm pretty sure she knows a thing or two in this area. 

image.jpg

Her ideas are very whimsical and add that touch of cheer. I especially love how she adds flowers in unexpected places, like these party hats. So very cute. I could definitely see myself putting flowers any and everywhere!  Thanks, Joy, for telling me that it's totally okay so that no one can question me!

image.jpg
image.jpg
image.jpg
image.jpg

Her DIYs are super easy and fun, so this book is perfect for anyone who loves to make things that are bright and colorful. Some of my favorite DIYs were the Edible Confetti p.22, Alphabet Fruit p. 84, Pop-up-wrap p. 94, and Ombre Fruit Vases p. 140.

image.jpg

There are so many clever ideas in here that basically take something simple and add color and whimsy to make it bring a smile to your face. She also provides some templates at the end of the book so that you can create these DIYs with ease.

Overall, I really enjoyed Oh Joy! and would recommend it in a heartbeat. It's so nice to open up a book that cheers you up and that inspires you to really take that extra step to make something ordinary, special. 

I hope you enjoyed this mini review of sorts. I'm inspired to make more DIYs for you guys and to really get creative with it. It would be amazing to one day have a book like Oh Joy! 

What books are you currently reading? I'd love to hear about it in the comments below!  

lifestyleStina Xjoy cho, oh joy, diy


Merry Christmas from Hello Lovely Living
Merry Christmas | Hello Lovely Living

Merry Christmas dolls! This time of the year is a very special time for me and my family. Aside from the warm and cozy feeling I get and LOVE during this time, I reflect on the amazing love of Jesus. I pray that the love that surpasses all understanding fill your heart today and that you are blessed abundantly coming into the new year. 

It's been a really amazing year, and I can't wait for what's to come in 2016. So much has happened with this blog, and there is so much to come in the near future. Firstly, I can not wait to share an exciting project that I will be announcing in January. It's a huge deal for me, so I hope you will join me and follow along for this once in a lifetime project that I'll be a part of. I'll be announcing it on here and my social accounts, so stay tuned for that!

Secondly, Ena (my partner for Wallpaper Wednesdays) and I will be sharing another free resource soon, which we will be announcing next week. We also have been getting together ideas for other fun stuff, but our lips are sealed for now. I hope you stick around to see what we have in store!

Lastly, I look forward to providing more value through Hello Lovely Living with more free resources, helpful content, and of course, more fun stuff that will get you inspired! 

Are there any specific resources or projects you would like to see? I'd love to hear about it in the comments.


lifestyleStina X


Color Crush | Blush

^ click on images to expand ^


1|2|3|4|5|6|7|8|9|10|11|12|13|14|15


I've had this recent fascination with the blush pink color family, so I thought I'd share some color inspiration today. I've been drawn to muted tones lately that have a gray undertone to them. I can't get over crushing over these colors and I'm surely hoping I get to use these colors in my home one day soon.

As you can see, there is really no limit to how blush tones can be used. If you're feeling rather non-committal, go for a blush colored blanket (13), hand towel (2), or wall tapestry (9). Feeling bold - paint an accent wall (1, 6, 9, 11) or your patio (15). Blush tones go very well with white, cream, gray, green, black, and copper.

I'm pretty sure this color addiction will continue because from the looks of my Instagram, I've been gravitating toward these colors for a while now. If you're in love with this color family like I am, be sure to follow my Pinterest board - Color Crush | Blush, which I'll be updating with more inspo. 

What color(s) are you crushing on lately? I'd love to hear in the comments below!


A Whole New Vibe: Freshen Up Your Home For The New Year

via The Fresh Exchange Blog

2016 is right around the corner, so you know what that means, it's out with the old and in with the new! I thought it would be appropriate to extend that same mentality into the home and think of ways to create a new vibe that anyone could easily replicate. Take a look at a few simple ways that you can freshen up your home, then in the comments below, share with me ways you freshen up your home for the new year.

lifestyleStina Xhome


Mini Sweet Potato & Banana Pankcakes
image.jpg

If I could have pancakes every morning, I would. But really, who has the time to make them every single morning? Not this mama - and with a little one to prepare breakfast for as well - I need quick and easy options. This easy homemade pancake recipe is one that you can make ahead of time, freeze and just warm up in the oven.

image.jpg

This particular morning, I wanted to make pancakes for Uriah because I love how great of a finger food they are, and he definitely loves them. I had a sweet potato on hand, so I decided to use that and add some other yummy additions such as banana (his favorite) and honey. 

image.jpg

I really loved how my recipe turned out. These are soft and creamy in the center because of all of that yummy sweet potato and crispy on the edges. They aren't too sweet, either. 

image.jpg

I drizzled maple syrup over them for photography purposes, but just served them to him plain. Before you put these into the freezer, you could also drizzle them with a little maple syrup or honey so that once you warm them up, they're already set without any need to add syrup. 

image.jpg

I also added a touch of poppy seeds because I think they're just fun and a nice subtle taste.

image.jpg

My oldest son also enjoyed eating these, so this recipe is not just for the little ones. Now let's get into this yummy recipe! 

Mini Sweet Potato & Banana Pankcakes


Servings: 7-8 servings

Prep: 10 mins

Cook: 20 mins

Total time: 30 mins


Ingredients

  • 1 small sweet potato (pale flesh)
  • 1 banana
  • 1 egg
  • 1/2 cup cake flour
  • 1 Tbsp raw honey
  • 1/4 tsp poppy seeds
  • 1/2 tsp baking powder
  • butter

Instructions

  1. Steam sweet potato until soft. Mash until smooth.
  2. Combine sweet potato, banana (mashed), egg, and honey. Add in dry ingredients and mix well.
  3. In a skillet, on medium heat, melt a Tbsp of butter. Add batter using a 1 tsp measuring spoon. Flip when edges are cooked. Repeat until finished.

Notes

  • Place in an airtight container or bag and freeze. To warm up, bake for 5-10 mins in 350° oven.
  • Drizzle with honey or maple syrup for added sweetness.
  • Makes 35-40 - 2" pancakes.
  • I use organic ingredients whenever possible.

I hope you get to try this recipe for your toddler. It's super simple and perfect for getting that nutrition into their little tummies. 

What is your favorite thing to serve your toddler for breakfast? I'd love to hear in the comments!

Stina | Hello Lovely Living

Thanks so much for visiting! make sure to check me out on my social accounts for more lovely content.

xo stina

Sharing is Caring | Hello Lovely Living


Uriah's Woodland Themed 1st Birthday Party
Woodland Themed 1st Birthday Party | Hello Lovely Living

My baby is officially a big boy now - THE BIG "1"! How did this happen so fast? It was just yesterday that I was looking into his eyes for the first time. Since that very moment, I have spent every single day enjoying everything about him and he has filled my heart with immense joy and love. I have learned to sing, dance, laugh, and enjoy life like never before all because of this precious heart that I have been blessed to nurture. I am so proud to be his mommy!

Woodland Themed 1st Birthday Party | Hello Lovely Living

I wanted to make his 1st birthday completely special and handmade with love. So, with three days to put it all together, two hands, a baby in tow, and a budget - it was game! I was able to pull it off, and I am so happy with how it all came together. Here's the rundown, so you can get inspired to recreate this easy setup!

Woodland Themed 1st Birthday Party | Hello Lovely Living

So, I decided that a woodland theme would be so cute. I'm so over the mass commercialized characters, so I was looking for something more whimsical and off the beaten path. After scouring Pinterest, I was able to get inspired and come up with a bunch of ideas. You can view my Pinterest board HERE. I then made a list and planned out all of the supplies I needed, which made it super easy and stress-free when it came time to shop.

Woodland Themed 1st Birthday Party | Hello Lovely Living

It turns out, I actually didn't really need all that much on my list. I improvised with stuff I already had at home, which worked out amazingly well. I also cut back on a lot of other ideas I had because I may have gotten a tiny bit excessive.

Woodland Themed 1st Birthday Party | Hello Lovely Living

These garlands were one of the first things on my list. I purchased the largest marshmallows I could find (campfire ones) and strung them threw some beige and white twine to create this really fun marshmallow garland. I also had to use 3M hooks to hang these because they were pretty heavy.

Inspired by: Homegrown & Healthy

Woodland Themed 1st Birthday Party | Hello Lovely Living

For my burlap garland, I purchased pre-cut burlap pendants and drew out the letters of his name with chalk. Taking white cardstock paper, I cut out triangles to alternate between the burlap. I punched holes in each corner and strung them through with twine. A large needle comes in handy here. I then used tape to secure the ends of the string to the wall and also made tiny bows out of string to tape on top of each end as a finishing touch.

Woodland Themed 1st Birthday Party | Hello Lovely Living

Originally, I wanted to fill these wafer sugar cones with fruit, but they ended up looking like little rustic trees on their own, so I kept it as is. I love how they look!

Inspired by: On To Baby

Woodland Themed 1st Birthday Party | Hello Lovely Living

These smores were so easy and quick to make. All I did was gently temper some semisweet chocolate with a little vegetable oil, dip the large marshmallows to coat just halfway, then coat the top with graham cracker crumbs. So fun and pretty.

Inspired by: Spaceships and Laserbeams

Woodland Themed 1st Birthday Party | Hello Lovely Living

I found wood rounds at Marshall's and Target. The one's from Marshall's were larger and more expensive, but better quality. The ones from Target were in the arts and crafts section and were really affordable. I'll have a list of all of the supplies at the end of this post. 

Woodland Themed 1st Birthday Party | Hello Lovely Living

I found a frame that was lying around the house and decided to cover it with moss. I covered the frame in tape first, then glued the moss on top. This is more of a temporary hold, so I could remove it afterward and not damage the frame. I just placed a piece of white cardstock paper inside, then used a dry-erase marker to write "Uriah's Woodland One-derland".

Inspired by: Ruffled Blog

Woodland Themed 1st Birthday Party | Hello Lovely Living

I wanted to incorporate a bunch of cute forest animal figurines. At Michael's, I was only able to find and purchase a wolf, so I was so glad that I came across a pack at Walmart that included a cub, wolf, fox, and fawn. They looked perfect alongside some piles of moss - like a miniature woodland.

Woodland Themed 1st Birthday Party | Hello Lovely Living

Ar first, I tried looking for a number "1", but for some reason, it was so hard to find, so I came up with this easy DIY. I cut out the number from a styrofoam plate, then taped a wooden scewer to the back and spray painted it all metallic gold. The effect was amazing. It turned out looking like stone and had this really pretty texture to it. 

Woodland Themed 1st Birthday Party | Hello Lovely Living

For the base, I cut a foam ball in half and glued moss to it. This project was so simple and basically free for me since I had all of the supplies on hand. I placed "Bambi" on top, and it turned out perfect!   

Inspired by: Ruffled Blog

Woodland Themed 1st Birthday Party | Hello Lovely Living

I decided to go with a simple, white banana cake with honey buttercream frosting. It was supposed to be three layers, but I was so tired that I forgot to place the third layer on top! It was sooo good, guys. I wanted to do a healthy cake for Uriah, and this recipe was pretty clean. Instead of regular oil, I used coconut oil, and I cut down on the powdered sugar and used a little honey.

Cake recipe: Bake or Break  | Frosting recipe: Wicked Good Kitchen | How to assemble a layer cake: Martha Stewart

Woodland Themed 1st Birthday Party | Hello Lovely Living

This bunting was so cute and really easy to make. I just took two types of paper and cut out triangles, strung them on twine, and tied them to wooden skewers. I wrote the number "1" in the center with a black marker. It was perfect and super cute.  

Woodland Themed 1st Birthday Party | Hello Lovely Living

A single, white candle placed at the back was the finishing touch, along with the cub figurine. The cake was placed on the wood platter atop an inverted glass bowl. 

Woodland Themed 1st Birthday Party | Hello Lovely Living

I purchased one bunch of ferns and it turned out to be perfect for the cake centerpiece and little pieces to frame the table with. The moss also hid the bowl really nicely and created that natural look I was going for.

Woodland Themed 1st Birthday Party | Hello Lovely Living

Not only did this cake look nice, but it tasted so good, almost like banana bread. This is definitely not one of those cakes that will go to waste if you have leftovers. It was 8" in diameter and the perfect size for us. 

Woodland Themed 1st Birthday Party | Hello Lovely Living

Since I couldn't find a white tablecloth in time, I just used a white sheet that I already had, and it worked out perfectly. The white backdrop made everything stand out so well.

Woodland Themed 1st Birthday Party | Hello Lovely Living

I also made these chocolate covered pretzel sticks, which resembled birch branches. They were made from white chocolate and drizzled with milk chocolate. I had these vases on-hand, which displayed them so nicely.

Inspired by: Hostess With The Mostess

Woodland Themed 1st Birthday Party | Hello Lovely Living

I had mason jars that I filled with the leftover marshmallows and a single fern. I love that rustic, yet clean look.

Woodland Themed 1st Birthday Party | Hello Lovely Living

I also labeled each treat with wooden tags with fun names such as "Twigs" for the pretzel sticks, "Trees" for the sugar cones, and "Smores" for the marshmallows. 

Woodland Themed 1st Birthday Party | Hello Lovely Living

Here, Uriah is eyeing what he's going to grab first! 

Woodland Themed 1st Birthday Party | Hello Lovely Living

We had so much fun with this party, and it was so easy to put together. We even made sure to dress him up in his plaid shirt so he could look just like a lumberjack!

Woodland Themed 1st Birthday Party | Hello Lovely Living

This cute garland just added that final touch. Since the big kids and adults got to eat pizza, I made Uriah miniature sized pineapple and ham pizzas, too. It was his first time eating pizza, and of course, he loved it! He was officially joining the big kids club.

Woodland Themed 1st Birthday Party | Hello Lovely Living

Yummy... He had his hands full with all of those sweets. 

Woodland Themed 1st Birthday Party | Hello Lovely Living

I caught those little hands in action. Hmm... I wonder which one Uriah ate?

Woodland Themed 1st Birthday Party | Hello Lovely Living

His daddy couldn't miss this day for the world. 

Woodland Themed 1st Birthday Party | Hello Lovely Living

His cousins and Auntie were there to celebrate too - and of course his curly-haired big bro was right there by his side!

Woodland Themed 1st Birthday Party | Hello Lovely Living

It was such a joy to see my baby turn 1 and enjoy his birthday. I will never forget this day! It was too much fun for me, and Uriah skipped all of his naps, so that's a great indicator of how much fun he had, too. I love this cutie so much, and I am so happy with how this all turned out!


Supply List

Decor

  • Wood Rounds:  2 - large, $9.99 each - Marshall's | 2 - small, $4.99 each - Target
  • Forest Moss: $6.59 (40% off coupon) regular $10.99 - Michaels
  • Boston Fern: 1 bush, $9.49 - Michaels
  • Animal Figurines: Forest Grey Wolf, $4.99 - Michaels | Wildlife Figurine Set, $14.97 - Walmart
  • DIY Cake Topper: Wooden skewers | 2 types of paper: 1 - rust, 1 - brown paper bag | Candles: $0.90 (clearance), Target | Twine | Animal figurine
  • DIY Picture Frame: Old Frame | Moss | Tape | Glue 
  • DIY Number Stand: Styrofoam plate | Gold metallic spray paint | Moss | Foam ball (cut in half) | Animal figurine
  • DIY Burlap Banner: Burlap Banner Kit, $7.99 - Michaels | White cardstock paper for pendants | Chalk | Twine: beige and white, $1.50 - Michaels
  • DIY Marshmallow Garland: Large campfire marshmallows, $3.98 Walmart | Twine
  • Repurposed glass vases 
  • Mason jars
  • Wooden tags

Total Cost: $80.37 


As you can see, most of the supplies, I already had on-hand. That's the fun in doing a DIY party. I'm pretty sure you can find a lot of these things lying around the house too! I didn't mind spending a little more on the wood platters because I definitely can use them in the future. I also could've saved a few dollars if I just cut out the burlap pieces for the banner myself. All in all, this was a super budget-friendly setup that is easily customizable and so much fun to put together.

If you plan on doing a woodland themed party for your little one, I hope this helps you get inspired with some ideas. It is super easy and so adorable. I tried to cover everything, so if I missed anything, let me know in the comments. Have fun!

Will you be putting a woodland themed party together? I'd love to hear about it in the comments!

Disclosure: Affiliate links are included.


Miniature Versions of Your Favorite Holiday Sweets

via Cake Time

The holidays are up and coming, and all I can think about are sweets! Since I'm not normally a sweets kind of person, I tend to get all excited once the holidays roll around because I love the desserts that are only around for a short period of time. When I stumbled across these miniature gingerbread houses, I just died! They are so adorable. I may just make them so I can stare at them all day. Not eat, just stare!

If you fell in love with these like I just did, you will definitely love this collection I put together of the tiniest and cutest holiday desserts out there. Being that they are so cute, you may just not want to eat them too, but seeing that they also look so delicious, that's probably not possible. Happy staring and happy eating! Hope you try these out.


Did you see something yummy? Let me know which one was your favorite in the comments!

lifestyleStina Xsweets, desserts


Matcha Monday | Honey Caramel Matcha Popcorn
image.jpg

Caramel corn is so addicting, but adding matcha and honey as well... It doesn't get any better than this. All caramel corn really is, is butter and sugar, so when you think about all of those yummy ingredients together, you're talking about the party of all parties in your mouth. Thanks to my husband for suggesting I put matcha into my caramel - I couldn't put down the container without finishing every last piece. Here's to changing caramel corn forever! Read on for the recipe. 

Honey Caramel Matcha Popcorn


Servings: 8 - 2 cup servings

Prep: 0 mins

Cook: 25 mins

Total time: 20 mins


Ingredients

  • 2/3 cup popcorn kernels
  • 2 Tbsp olive oil
  • 1/2 cup raw organic honey
  • 1/2 cup brown sugar
  • 1 tsp matcha powder
  • 1/2 cup butter
  • 1/4 tsp salt
  • 1/4 tsp baking soda

Instructions

  1. For popcorn: Pop kernals in two batches. In a large 4-quart heavy-bottomed pot with lid on, heat 1 Tbsp of oil on medium heat and add 1/3 cup of kernals. Gently shake pot to distribute heat and oil on kernals and leave lid slightly adjar to allow steam to escape. Once it begins to pop, watch carefully and shake pot occasionally. Remove from heat as soon as you notice popping stops at 2 to 3 seconds apart. Repeat steps for second batch. Pour popcorn onto a 17.25" x 11.5" baking sheet lined with parchment paper.
  2. For caramel: On medium high heat, melt butter, brown sugar, honey, matcha powder, and salt in a large saucepan and heat until boiling.
  3. Once boiling, reduce heat to medium and allow to boil for 3 minutes without stirring. It will start to bubble, so watch it carefully.
  4. Remove from heat and add baking soda. Stir to combine. The mixture will get even more bubbly.
  5. Pour caramel over popcorn and gently mix to coat. Place in a 250° heated oven at 5 minute intervals and mix to evenly coat each time. When all kernels appear evenly coated, you may remove from the oven. Allow to cool before storing.

Notes

  • For more matcha flavor, just add more matcha powder.
  • Store in an air-tight container.

Homemade popcorn is just way more fun and even way more delicious. This is perfect for the holidays because of that rich, green color that the matcha powder creates. Just package in pretty little gift bags or containers and you have a simple DIY gift that anyone will love. I hope you try this out! 

Look out for more matcha recipes coming soon.

What is your favorite popcorn flavor? Share with me in the comments!