Posts in home
How Do You Keep Your Plants Safe During A Big Move?

Relocating to a new home is a major undertaking, and while most people focus on packing furniture and personal belongings, it's easy to overlook one of the most delicate parts of the move—your plants. These living organisms require special care and attention to ensure they survive the transition.


In this article, we’ll walk you through the essential steps to safely move your plants, from pre-move preparation to post-move acclimation. Whether you're hiring a professional moving company in Brisbane or handling the relocation yourself, following these tips will help your greenery thrive in its new environment.

No. 1

Prepare Properly and Choose the Right Help

The first and most crucial step in relocating your plants is proper preparation and selecting experienced movers who understand the fragility of plant life. Unlike furniture or boxes, plants are sensitive to temperature changes, handling, and travel conditions. That’s why it’s important to work with a reliable moving company that has experience transporting plants safely.

Keep in mind that your plants will likely need more attention than your other belongings, so early planning is essential to ensure they arrive healthy and intact.

Preparing Your Plants Before Moving Day

To give your plants the best chance of surviving the move, start preparing them several weeks in advance. Their health and condition before the move will significantly impact how well they handle the journey.

Pre-Move Plant Care Tips:

  • Inspect for pests and disease: Check each plant for bugs or signs of illness. Treat any issues before moving day.

  • Prune damaged leaves and branches: Trimming helps the plant conserve energy and prevents breakage during transport.

  • Repot into lightweight containers: If your plants are in heavy ceramic pots, transfer them to plastic pots a few weeks before the move to reduce weight and avoid breakage.

  • Water lightly the day before: Avoid watering on moving day to prevent spills. A light watering the day before keeps the soil moist without oversaturation.

Key Pre-Move Steps Recap:

  • Examine every plant for insects or symptoms of disease

  • Change pots to lighter ones if necessary

  • Shorten long branches or leaves to avoid breakage

  • Water very lightly the day before moving

These simple preparations can dramatically improve your plants’ survival rate and help them transition more smoothly to their new home.

No. 2

Packing Methods That Maintain Plant Stability

Packing your plants properly is essential to keeping them upright and secure during transit. The goal is to minimize movement while allowing for air circulation.

Best Practices for Packing Plants:

  • Use open-top boxes to allow airflow and avoid suffocating the plants.

  • Fill empty spaces in the box with towels, newspaper, or packing paper to keep pots stable.

  • For tall or top-heavy plants, use soft ties or stakes to support the stems and prevent bending or snapping.

  • Label boxes clearly with “Live Plants” and “This Side Up” to ensure careful handling.

These packing techniques help maintain plant stability and reduce the risk of damage during the move.
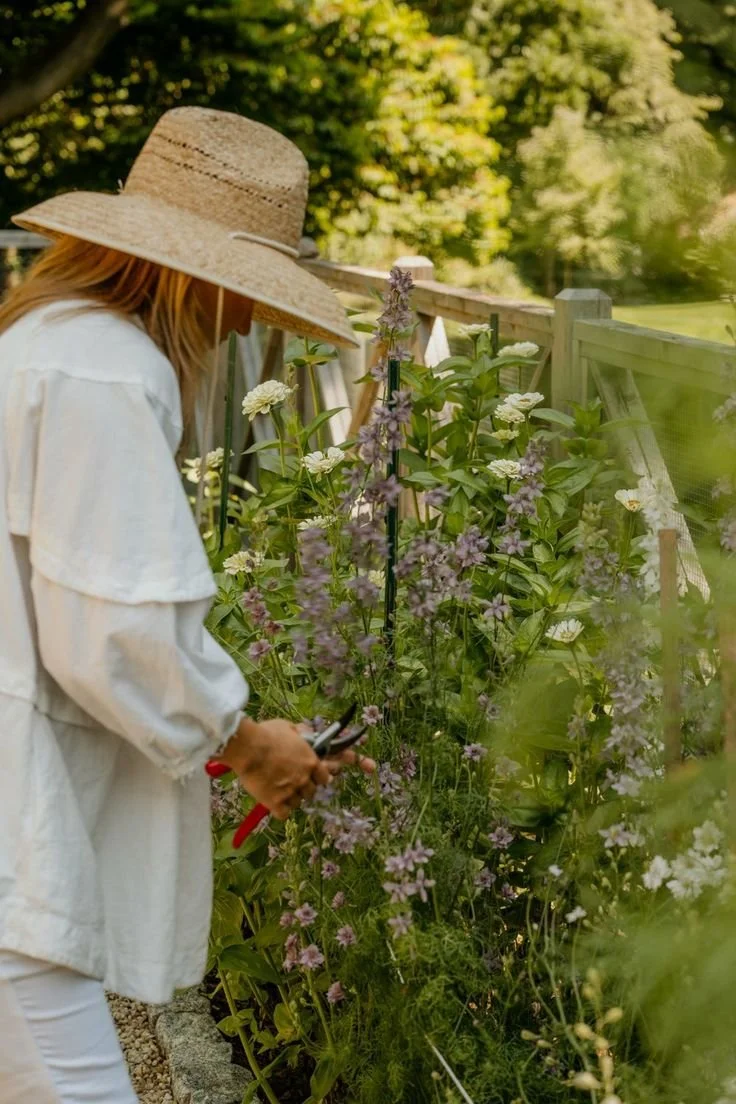
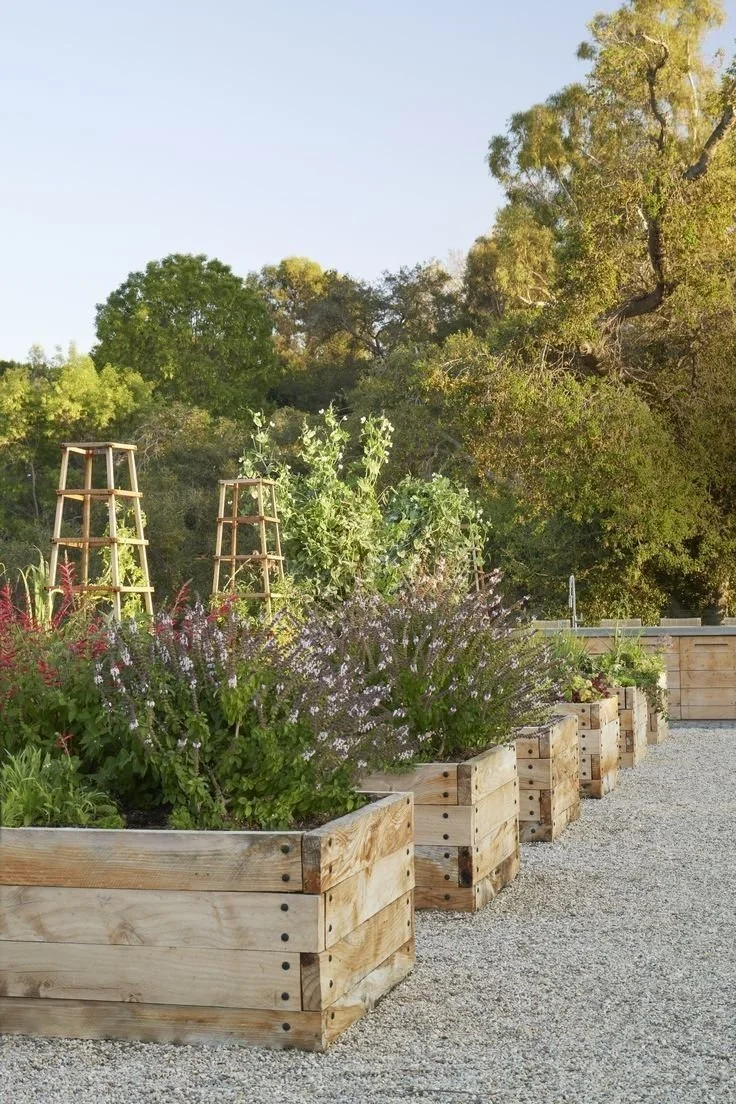
 
 
hellolovelyliving terrain

Terrain

Grow your love for nature with Terrain’s premium garden supplies! From tools to décor, they have everything you need to nurture your garden and your passion.


No. 3

Helping Your Plants Adjust After the Move

Once you arrive at your new home, your plants will need time to adjust to their new environment. The transition can be stressful, so it’s important to ease them into their new surroundings gradually.

Post-Move Plant Care Tips:

  • Unpack immediately: Remove plants from boxes as soon as possible to allow them to breathe.

  • Place in shaded areas initially: Let your plants acclimate slowly by keeping them out of direct sunlight for the first few days.

  • Avoid heavy watering or fertilizing: Your plants are already under stress, so hold off on feeding or soaking them until they’ve settled.

  • Monitor for signs of stress: Yellowing leaves or drooping may occur, but with proper care, most plants will recover quickly.

By giving your plants time to adapt, you’ll help them thrive in their new home.

Takeaways

Relocating your plants doesn’t have to be stressful. With the right preparation, thoughtful packing, and gentle post-move care, your greenery can make a successful transition right alongside you.

In this article, we’ve covered:

  • How to prepare your plants before moving day

  • The best packing methods to ensure stability

  • How to help your plants adjust after the move

  • The importance of choosing a moving company that understands plant care

If you want to make your move as smooth and stress-free as possible, consider enlisting the help of experienced professionals who treat your belongings—and your plants—with the care they deserve. Don’t wait—reach out to a trusted moving crew today and ensure your next chapter begins with healthy, happy plants by your side.

Looking for Home resources?

Looking to enhance your living space and create a sanctuary that supports your well-being? Explore our home partners who offer a wide range of resources to elevate your home environment.


homeHLL x Editor


Creative Ways To Use Landscape Boulders In Outdoor Design

When it comes to outdoor design, few elements offer the timeless appeal and versatility of landscape boulders. These natural giants are more than just decorative rocks—they're powerful tools that can shape, define, and enhance any exterior space. Whether you're working on a tranquil backyard retreat, a commercial property, or a sprawling public park, boulders bring both aesthetic charm and functional value to the table.


In this article, we’ll explore the many ways landscape boulders can be used to transform your yard or garden. From anchoring focal points and stabilizing slopes to defining walkways and enhancing water features, you’ll discover how these natural stones can elevate your outdoor design with texture, structure, and a grounded sense of beauty.

No. 1

Boulders as Focal Points in Garden Design

One of the most popular and visually impactful ways to use landscape boulders is as focal points. These large stones can serve as the centerpiece of a flower bed, lawn, or patio area, drawing the eye and adding a sense of permanence to your design.

Creative Focal Point Ideas:

  • Anchor a flower bed with a large boulder surrounded by colorful perennials.

  • Highlight a water feature by integrating boulders around a pond or fountain.

  • Create a natural sculpture in a minimalist garden using a single, striking stone.

By varying the size, shape, and placement of your boulders, you can craft unique arrangements that add visual depth and organic flow to your space.

No. 2

Retaining Walls and Slope Stabilization

On properties with uneven terrain, landscape boulders serve a dual purpose: they are both practical and aesthetically pleasing. Boulders can be used to build retaining walls that prevent soil erosion while enhancing the natural beauty of your yard.

Benefits of Boulder Retaining Walls:

  • Erosion control on sloped properties

  • A natural, rustic appearance that blends with the environment

  • No need for mortar or concrete when dry-stacked properly

  • Complements native plants, gravel paths, and woodland settings

These walls are especially effective in gardens that aim for a naturalistic or woodland aesthetic, adding structure without sacrificing beauty.

No. 3

Defining Pathways and Outdoor Zones

Boulders can also be used to subtly define spaces within your landscape. Whether you’re guiding foot traffic or creating a sense of separation between different zones, strategically placed stones can enhance both functionality and visual flow.

Ideas for Space Definition:

  • Line a garden path with smaller boulders to guide movement.

  • Use boulders to frame a seating area or fire pit, adding natural boundaries.

  • Create outdoor “rooms” by placing boulders at key transition points.

Unlike fences or walls, boulders provide soft division that feels organic and unobtrusive, making them ideal for open-concept outdoor spaces.


hellolovelyliving rejuvenation

Rejuvenation

Rejuvenation believes in the power of thoughtful design - explore their extensive range of outdoor hardware, including stylish accessories that add character and charm to your home's exterior.


No. 4

Enhancing Water Features

Water and stone are a match made in landscaping heaven. Boulders can be seamlessly integrated into ponds, streams, and waterfalls, giving your water features a natural, rugged aesthetic.

Why Use Boulders in Water Features:

  • They help control water flow and prevent erosion.

  • Provide natural spots for aquatic plants, moss, or wildlife.

  • Create a tranquil, spa-like atmosphere in your backyard.

From cascading waterfalls to serene koi ponds, boulders add texture, sound, and dimension to any water-based installation.

No. 5

Boulders in Modern and Minimalist Landscapes

Even in sleek, contemporary designs, boulders can play an important role. A single, well-placed boulder can act as a sculptural element, adding contrast and grounding the space.

Modern Uses for Boulders:

  • Place a solitary boulder on a gravel bed for a Zen-inspired look.

  • Use geometric hardscaping alongside irregular boulders for visual tension.

  • Combine different textures and sizes for a dynamic, layered effect.

In minimalist landscapes, less is more. A thoughtfully chosen boulder becomes a statement piece, offering a sense of permanence and balance.

No. 6

Design Considerations: Scale, Texture, and Color

To make the most of your boulders, it’s essential to consider how they interact with the rest of your landscape. The scale, texture, and color of each stone should complement your existing plants, hardscapes, and architectural features.

Tips for Harmonious Boulder Design:

  • Choose boulders that match or contrast with your home’s exterior or patio materials.

  • Group boulders in odd numbers (3, 5, 7) for a more natural look.

  • Pair boulders with mulch, gravel, or native plants to enhance their visual impact.

  • Avoid overuse—strategic placement is key to avoiding clutter.

By thoughtfully integrating boulders into your design, you ensure they enhance rather than overwhelm your outdoor space.

Takeaways

Landscape boulders are more than just decorative stones—they are powerful design tools that bring structure, texture, and timeless beauty to any outdoor space. Whether you're using them to prevent erosion, define pathways, or create sculptural focal points, boulders offer a unique blend of form and function.

In this article, we’ve explored the many creative ways to use landscape boulders:

  • As focal points in gardens and patios

  • For retaining walls and slope stabilization

  • To define pathways and outdoor zones

  • In water features for a natural, flowing look

  • As sculptural elements in modern landscapes

By considering factors like scale, placement, and aesthetic harmony, you can unlock the full potential of these natural elements. Whether your goal is to create a serene retreat or a bold, artistic statement, landscape boulders can help you achieve a design that is both visually compelling and structurally sound.

Looking for Home resources?

Looking to enhance your living space and create a sanctuary that supports your well-being? Explore our home partners who offer a wide range of resources to elevate your home environment.


homeHLL x Editor


The Perfect Flooring Choices For Every Room In Your House

When it comes to home renovations, few upgrades are as transformative—and practical—as new flooring. The right floor can elevate the aesthetic of a room, improve comfort, and even increase your property’s value. But with so many materials and styles available, how do you know which flooring is best for each space?


In this article, we’ll walk you through the most suitable flooring options for every room in your house. From the entrance hall to the bedrooms, we’ll explore which materials offer the best combination of durability, style, and functionality. Whether you’re planning a full home makeover or simply updating one room, this guide will help you make informed decisions that blend beauty with practicality.

No. 1

Entrance Hall

The entrance hall is the first impression guests have of your home—and it’s also the area that takes the biggest beating. With muddy shoes, wet umbrellas, and heavy foot traffic, this space demands a flooring option that’s both tough and easy to clean.

Best Choice: Luxury Vinyl Tile (LVT)

  • Durable and resistant to scratches and scuffs

  • Water-resistant, making it ideal for wet or dirty shoes

  • Easy to maintain—a quick wipe is all it takes to keep it looking fresh

  • Available in a wide range of styles and finishes, including wood and stone looks

No. 2

Living Room

Your living room is your sanctuary—a place for relaxation, entertainment, and comfort. The flooring here should reflect that cozy, welcoming atmosphere.

Top Options:

  • Luxury Carpet:

    • Adds warmth and softness underfoot

    • Enhances the room’s acoustic properties

    • Ideal for creating a snug, inviting environment

  • Laminate Flooring (for a modern touch):

    • Mimics the look of hardwood while being more affordable

    • Easier to clean and maintain than carpet

    • Great for households looking for a sleeker, more contemporary vibe

No. 3

Kitchen/Dining Room

The kitchen and dining areas are prone to spills, stains, and heavy usage, so your flooring needs to be both stylish and resilient.

Best Flooring for Combined Kitchen/Dining Rooms:

  • Luxury Vinyl Tile (LVT)

  • Sheet Vinyl

  • Tiles

These materials are:

  • Waterproof or water-resistant

  • Easy to clean

  • Durable enough to withstand dropped utensils and food spills

For Separate Dining Rooms:

  • Carpet can work for a formal look, but is harder to maintain

  • LVT is a popular alternative—it offers the look of wood with better stain resistance and easier upkeep


hellolovelyliving aircraft

Aircraft

Achieve spotless floors with Aircraft hard floor cleaners! Designed for efficiency and effectiveness, their products ensure a clean and safe environment for everyone.

Elevate your home or office cleanliness today!


No. 4

Stairs

Stairs are high-traffic zones and pose a safety risk if not properly floored. Slippery surfaces can lead to accidents, so traction and durability are key.

Recommended Flooring: Hard-Wearing Carpet

  • Provides grip to prevent slips and falls

  • Cushions footsteps, reducing noise

  • Withstands the wear and tear of daily use

No. 5

Upstairs Hallway

Much like the stairs, the upstairs hallway sees a lot of movement and benefits from flooring that can handle frequent use while minimizing noise.

Best Option: Hard-Wearing Carpet

  • Durable enough for daily foot traffic

  • Offers the extra element of soundproofing to reduce noise from footsteps

  • Adds a layer of warmth and comfort to the upper floor

No. 6

Bathrooms

Bathrooms are moisture-heavy environments, making waterproof flooring an absolute must. You’ll also want something that resists mold and is easy to clean.

Top Picks:

  • Groutless Tiles:

    • Eliminate the mold-prone grout lines

    • Offer a sleek, modern look

    • Easy to clean and maintain

  • Luxury Vinyl Tile (LVT):

    • Water-resistant and mold-resistant

    • Softer underfoot than traditional tiles

    • Available in a variety of stylish finishes

Avoid traditional tiles with grout unless you’re committed to regular deep cleaning.

No. 7

Bedrooms

Bedrooms are personal spaces, and the flooring you choose should reflect the room’s purpose and the needs of its occupants.

Best Flooring by Bedroom Type:

  • Adult Bedrooms:

    • Laminate Flooring: Stylish, easy to clean, and cost-effective

    • Vinyl Flooring: Soft underfoot and available in wood-look designs

  • Children’s Bedrooms:

    • Carpet: Offers cushioning to prevent injuries during play

    • Provides warmth and comfort, especially for toddlers and young kids

Avoid:

  • Stone or tile flooring, which can feel cold and uninviting in a bedroom setting

Takeaways

Flooring is more than just a surface—it’s a foundation for your home’s style, comfort, and functionality. By choosing the right flooring for each room, you not only enhance the look of your space but also ensure it meets the practical demands of daily life.

In this article, we’ve explored the best flooring options for every area of your home:

  • LVT for high-traffic and moisture-prone zones

  • Carpet for warmth, comfort, and soundproofing

  • Laminate for a modern, low-maintenance aesthetic

  • Groutless tiles for sleek, mold-resistant bathrooms

Use this guide as your go-to resource when planning your next flooring upgrade. With the right materials in the right places, you can breathe new life into your home—one room at a time.

Looking for Home resources?

Looking to enhance your living space and create a sanctuary that supports your well-being? Explore our home partners who offer a wide range of resources to elevate your home environment.


homeHLL x Editor


Living Room Design: Tips For Creating A Warm And Inviting Space

Your living room is more than just a place to sit—it’s where life unfolds. It’s where you welcome guests, relax after a long day, and connect with loved ones. That’s why designing a warm and inviting living room is about more than just aesthetics—it’s about creating a space that feels like home.


In this article, we’ll explore how to transform your living room into a cozy, stylish, and welcoming environment. From choosing the right furniture to adding thoughtful accessories, every detail matters. Whether you’re starting from scratch or refreshing your current setup, these tips will help you create a space that’s both functional and full of character.

No. 1

The Essentials of a Warm Living Room

A warm and inviting living room starts with a few foundational elements that set the tone for the entire space.

Lighting

Lighting is one of the most powerful tools in interior design. To create a cozy atmosphere:

  • Use layered lighting: Combine overhead lights with floor lamps, table lamps, and wall sconces.

  • Choose warm-toned bulbs (2700K–3000K) for a soft, ambient glow.

  • Consider dimmable lights to adjust the mood throughout the day.

Color Palette

Warmth can also be achieved through color. Opt for tones that evoke comfort and calm:

  • Earthy hues: Terracotta, olive green, and warm browns

  • Neutrals with depth: Cream, beige, taupe, and soft greys

  • Accent colors: Mustard yellow, rust, or deep navy for contrast

Layout and Flow

The layout of your furniture should encourage conversation and comfort:

  • Arrange seating to face each other or around a focal point like a fireplace or TV.

  • Leave enough space for easy movement—avoid overcrowding.

  • Use rugs to define zones, especially in open-plan areas.

No. 2

The Central Role of the Sofa in the Living Space

No piece of furniture defines a living room quite like the sofa. It’s the anchor of the space, both visually and functionally. As highlighted in an article by Euro Weekly News, the sofa is the central element of the living room, shaping the flow of the space and reflecting your personal style.

Choosing the Right Sofa

When selecting a sofa, consider:

  • Shape: L-shaped corner sofas are great for large families or entertainers, while traditional two- or three-seaters suit smaller spaces.

  • Material: Velvet adds luxury, corduroy offers durability, and leather brings timeless elegance.

  • Functionality: Look for options with built-in storage, reclining features, or even sofa beds for added utility.

Your sofa should not only look good but also support your lifestyle. Whether you’re hosting movie nights or curling up with a book, it should invite you to relax and stay awhile.

No. 3

How to Coordinate Your Sofa with Armchairs and Accessories

Creating a cohesive living room means thinking beyond the sofa. Your armchairs, coffee tables, and accessories should complement one another without being overly matchy.

Tips for Harmonious Coordination:

  • Mix, don’t match: Choose armchairs in a complementary color or texture rather than identical to your sofa.

  • Balance proportions: Pair a large sectional with more delicate chairs, or vice versa.

  • Unify with accents: Use cushions, throws, or artwork to tie different pieces together through color or pattern.

  • Consider symmetry: Placing two armchairs opposite your sofa can create a balanced, welcoming layout.

Adding a statement chair or a contrasting ottoman can also bring personality and depth to the room.


hellolovelyliving lulu and georgia

Lulu and Georgia

At Lulu and Georgia, you'll find exclusive designer collaborations, uniquely curated collections, and one-of-a-kind vintage pieces to bring your home to life


No. 4

Small Details, Big Ambiance: Rugs, Cushions, and Throws

It’s often the little things that make a space feel truly lived-in and loved. Thoughtful accessories can elevate your living room from functional to fabulous.

Rugs

  • Define your seating area and add texture.

  • Choose a rug large enough to fit under the front legs of all major furniture pieces.

  • Opt for warm tones or layered patterns for added coziness.

Cushions

  • Mix sizes, shapes, and fabrics for a curated look.

  • Use them to introduce color, pattern, or seasonal themes.

  • Don’t overdo it—3 to 5 cushions per sofa is usually enough.

Throws

  • Drape a soft throw over the back or arm of the sofa for instant warmth.

  • Choose materials like wool, knit, or faux fur for extra texture.

  • Throws are also a great way to add a pop of color or tie in your room’s palette.

These small touches not only enhance comfort but also allow you to refresh your space easily and affordably.

Takeaways

Designing a warm and inviting living room is all about balance—between function and style, comfort and elegance, personality and practicality. Your sofa, as the central element of the living room, plays a starring role in this balance, anchoring the space and setting the tone for everything else.

By choosing the right lighting, colors, layout, and accessories, you can create a space that welcomes you home every day. Whether you’re entertaining guests or enjoying a quiet evening alone, your living room should be a place where you feel completely at ease.

So take your time. Choose pieces that speak to you. Layer in warmth through textures and tones. And remember: the best living rooms aren’t just beautiful—they’re full of life, comfort, and memories waiting to be made.

Looking for Home resources?

Looking to enhance your living space and create a sanctuary that supports your well-being? Explore our home partners who offer a wide range of resources to elevate your home environment.


homeHLL x Editor


Preventing Bathroom Mold From Hitting Your Healthy Home

One of the most persistent and widespread issues in modern homes—regardless of size, age, or location—is mold. While it may start as a small, unsightly spot in a corner, mold can quickly become a serious problem. Beyond its unpleasant appearance, it poses health risks and can spread rapidly, leading to costly damage and the need for professional remediation.


The bathroom, with its constant exposure to humidity and moisture, is one of the most common breeding grounds for mold. That’s why it’s essential to take proactive steps to prevent its growth before it becomes a major issue.

In this article, we’ll walk you through practical, effective strategies to keep your bathroom mold-free. From smart cleaning habits to improving ventilation and monitoring plumbing, these tips will help you maintain a healthier, safer, and more comfortable home.

No. 1

Clean Regularly

Few things attract mold more than neglected, cluttered spaces. Dust and grime build up in corners and on shelves, creating the perfect environment for moisture to settle—and mold to thrive.

Tips for Mold-Resistant Cleaning:

  • Declutter surfaces: Keep towels, washcloths, and toiletries off counters when not in use.

  • Use mold-resistant cleaners: Focus on corners, grout lines, and hard-to-reach areas.

  • Wipe down soap scum: Mold feeds on soap residue, so clean it off as soon as it appears.

  • Dry wet items: Don’t leave damp towels or clothes in the bathroom.

A consistent cleaning routine is your first line of defense against mold growth.

No. 2

Prioritize Proper Ventilation

Bathrooms are naturally humid, but without proper airflow, moisture lingers—and mold follows. Ensuring your bathroom is well-ventilated can significantly reduce the risk of mold buildup.

Ventilation Best Practices:

  • Run the exhaust fan: Keep it on for at least 20 minutes after every shower or bath.

  • Open windows or doors: Allow fresh air to circulate and moisture to escape.

  • Wipe down damp surfaces: Use a dry cloth on mirrors, tiles, and walls.

  • Install a dehumidifier: Especially in bathrooms without windows or with poor airflow.

By keeping the air moving and moisture levels low, you make it much harder for mold to take hold.

No. 3

Always Keep an Eye on Your Plumbing

Even a small leak can lead to a big mold problem. Moisture from faulty plumbing can seep into walls, floors, and hidden spaces, creating the perfect conditions for mold to spread unnoticed.

Plumbing Maintenance Tips:

  • Inspect pipes and faucets: Look for signs of leaks, such as water stains or discoloration.

  • Check seals and joints: Ensure there’s no moisture buildup around tubs, sinks, or toilets.

  • Schedule professional inspections: A plumbing expert, such as Bluefrog Plumbing, can catch hidden leaks before they escalate.

Addressing plumbing issues early not only prevents mold but also protects the structural integrity of your home.


hellolovelyliving rejuvenation

Rejuvenation

Elevate your space with Rejuvenation's timeless bathroom plumbing fixtures – where style meets functionality.


No. 4

Get Smart About Drying the Space

Daily habits make a big difference in mold prevention. Creating a routine that prioritizes dryness and cleanliness will help keep mold at bay.

Smart Drying Habits:

  • Hang towels and washcloths: Avoid leaving them in piles or on the floor.

  • Store toiletries on dry surfaces: Moisture under bottles can lead to mold growth.

  • Use moisture-resistant materials: Consider mildew-proof paint, vinyl wallpaper, or waterproof baseboards.

These small changes can have a big impact on your bathroom’s long-term cleanliness and health.

No. 5

Inspect and Repair

Even with the best prevention strategies, mold can still find a way in. That’s why regular inspections are key to catching it early—before it spreads.

Inspection Checklist:

  • Check corners and grout lines: Mold often starts in hidden or overlooked areas.

  • Look behind toilets and under sinks: These spots are especially prone to hidden moisture.

  • Inspect around bathtubs and showers: Cracked caulking or loose tiles can harbor mold.

If you spot mold, a simple vinegar and lemon spray might do the trick for small patches. However, for larger infestations, don’t hesitate to call in professional mold remediation services.

takeways

Mold may be a common household issue, but it’s far from harmless. Left unchecked, it can damage your home and jeopardize your health. Fortunately, with a proactive approach, you can keep your bathroom mold-free and maintain the comfort and safety of your living space.

By cleaning regularly, ensuring proper ventilation, monitoring plumbing, adopting smart drying habits, and conducting routine inspections, you’ll drastically reduce the risk of mold taking hold in your home.

Remember: prevention is always better than cure. The sooner you start implementing these habits, the easier it will be to protect your home from mold in the long run.

Looking for Home resources?

Looking to enhance your living space and create a sanctuary that supports your well-being? Explore our home partners who offer a wide range of resources to elevate your home environment.


homeHLL x Editor


How To Go All Out For Every Season Without The Mess

Okay, so let’s be real—seasonal decorating has officially evolved from a casual holiday tradition into a full-blown lifestyle. Scroll through TikTok, YouTube Shorts, or Instagram, and you’ll see it everywhere: curated autumn mantels, spooky Halloween villages, pastel Easter tablescapes (yes, complete with Easter trees), and even entire summer lemon-themed kitchens. It’s no longer just about hanging a wreath at Christmas—it’s about transforming your entire home with the changing seasons.


It’s basically a year-round sport now—and honestly? It’s fun. Maybe it leans a little too far into overconsumption at times, but for many, seasonal decorating brings genuine joy. It sparks creativity, adds personality to your space, and lets you celebrate the little moments throughout the year. Whether it’s cozy fall vibes, twinkling winter lights, or pastel spring blooms, there’s something magical about transforming your home to match the season.

That said, let’s not ignore the elephant in the room: clutter.

Going for that charming, Hallmark-movie aesthetic is delightful—but it comes with a price. With every new season comes new décor, and with new décor comes the challenge of storing, organizing, and rotating everything without turning your home into a maze of bins, boxes, and overflowing totes. Sure, there are plenty of organization tips floating around online, but to truly master the art of year-round decorating without the mess, you might need to take it a step further.

So, how can you enjoy a beautifully decorated home for every season and holiday—without drowning in clutter? That’s exactly what we’ll explore in this article. We’re diving into how you can fully enjoy the magic of seasonal decorating—without letting it take over your space. From smart storage solutions to mastering the art of décor rotation, we’ll help you keep your home festive and functional all year long.

No. 1

A Few Decorations Can Turn into a Whole Thing

It always starts innocently enough. Maybe you pick up a few pumpkins in October or string some twinkly lights in December. Totally normal, right? But then it snowballs. One day, you’re opening a tote labeled Fall, only to discover five more labeled Fall 2, Fall Misc, and Fall Breakables. Before you know it, you’re one Amazon order away from living inside a full-blown Hobby Lobby display.

The truth is, seasonal decorating can escalate quickly. And while there's nothing wrong with going all-in for the holidays, it becomes a problem when your décor starts to compete with your living space. That’s when it’s time to rethink your approach.

No. 2

Sometimes, Home Storage Won’t Cut It

Most people stash their seasonal décor in garages, basements, or closets. And while that works for a while, eventually you may find yourself running out of room—or worse, sacrificing valuable living space just to house your growing collection of seasonal cheer.

If your home is starting to feel more like a storage unit than a sanctuary, it might be time to get creative with your storage solutions. One option worth considering is self storage. It’s surprisingly affordable and offers a way to keep your seasonal items safe, organized, and out of the way until you need them.

Benefits of Using Self Storage for Seasonal Decor:

  • Frees up space in your home

  • Keeps items safe from damage or clutter

  • Makes it easier to rotate décor by season

  • Allows for better organization and labeling

  • Reduces stress and visual clutter in your living areas

While it’s not the right solution for everyone, it’s definitely worth exploring—especially if you’re committed to decorating year-round.

No. 3

Just Master the Art of Rotation

Technically, you’re already rotating your décor every few months—swapping spring florals for summer citrus, or Halloween pumpkins for Thanksgiving turkeys. But the key isn’t just about when you rotate—it’s about how you do it.

If you’re just tossing everything into bins and hoping future-you will figure it out, spoiler alert: future-you is going to be very annoyed.

Tips for Seamless Seasonal Rotation:

  • Sort by season: Keep items grouped by holiday or theme to make swapping easier.

  • Label everything clearly: Use color-coded bins or detailed labels for quick access.

  • Chronological order: Store bins in the order you’ll need them throughout the year.

  • Declutter before packing: Don’t store what you won’t use next year.

  • Use clear bins: So you can see what’s inside without opening everything.

By creating a rotation system that’s intuitive and organized, you’ll save time, reduce stress, and actually enjoy the process of decorating each season.


hellolovelyliving terrain

Terrain

Embrace the season with Terrain: Discover cozy décor, warm hues, and autumn entertaining essentials.


No. 4

Know What to Retire Gracefully

Let’s face it—not all décor is meant to last forever. Especially with the rise of mass-produced, cheaply made seasonal items, it’s easy to accumulate things that don’t hold up over time. And while it’s tempting to keep everything “just in case,” that mindset leads to clutter.

Make it a habit to review your collection each season. If something is broken, faded, or no longer fits your style, it’s okay to let it go.

What to Do With Retired Decor:

  • Donate gently used items to local shelters, schools, or thrift stores

  • Upcycle or repurpose broken pieces for DIY projects

  • Recycle materials where possible

  • Trash items that are beyond repair

Letting go of items that no longer serve you creates space—both physically and mentally—for new inspiration and creativity.

Takeaways

Seasonal decorating is a joyful, creative way to celebrate the rhythm of the year. It brings warmth to your home, marks special moments, and adds a touch of magic to everyday life. But like anything, it’s best enjoyed in moderation—and with a plan.

By being intentional with your décor, organizing your storage, and rotating items with care, you can fully embrace the fun of seasonal decorating without letting it overrun your space. Whether you’re a minimalist with a flair for subtle touches or a maximalist who loves going all out, the key is to find a system that works for you.

So go ahead—hang the twinkle lights, set up the Easter tree, and bring out the summer lemons. Just make sure you’ve got a plan for where it all goes when the season ends.

Your home should feel festive—but also functional. With a little strategy and a lot of heart, you can have both.

Looking for Home resources?

Looking to enhance your living space and create a sanctuary that supports your well-being? Explore our home partners who offer a wide range of resources to elevate your home environment.


homeHLL x Editor


10 Things To Think About Before You Relocate

Relocating can be one of the most transformative decisions you make in your life. It often brings a mix of excitement and uncertainty—offering the promise of new beginnings while also demanding careful planning and emotional readiness. Whether you're moving across the country or to a new continent, it's a decision that requires more than just logistics—it calls for clarity, intention, and alignment with your life’s bigger picture.


In this article, we’ll walk you through ten essential factors to consider before relocating. These insights are designed to help you evaluate your motivations, prepare for the practicalities, and ensure that your move supports your long-term goals. From understanding your life vision to managing moving costs, this guide will help you make a confident, informed decision about your next chapter.

No. 1

Your Life Goals

The very best place to start here is to make sure that you're considering your life goals. When it comes to any big decision in life, particularly with where you live or the idea of moving, you need to ensure that it fits in with what you actually want in life. So if you're not sure what it is that you want or what you're working towards, you need to get clear on this first before making any big decisions.

No. 2

The Lifestyle You Want

As a step on from that, you also need to think about the type of lifestyle that you want. This is closely related to the idea of your goals, but is also more focused on the idea of how you actually want to live. Relocating can really influence the way you live your life. So, you need to think about the way of life in the area that you're considering and whether that works with what you want.

No. 3

The Reason Behind the Move

Another thing for you to focus on here is the reason behind the move. This one sounds quite obvious, but it can be easy to forget about too. You need to make sure that it's for the right reasons. Now, a lot of the time we relocate for work, or it's because we're looking for a better quality of life. So you just need to make sure that the reason you want to move and why you're considering it really fits with what you're trying to do with your life. Ultimately, you need to decide if it's worth it.


hellolovelyliving the container store

The Container Store

Your ultimate destination for innovative storage and organization solutions for home or office—offering everything from stylish bins and shelves to custom closet systems.


No. 4

The Logistics of Moving

Relocation involves more than just packing boxes. The logistics can be complex and time-consuming, especially if you're moving long-distance or internationally. Consider hiring a reputable moving company, organizing your belongings in advance, and creating a detailed timeline. Planning ahead will reduce stress and help the process go smoothly. Don’t underestimate the value of a well-organized move—it can make all the difference.

No. 5

The Cost of Moving

Moving can be expensive, and hidden costs often arise. From selling your current home to hiring movers and covering travel expenses, it’s essential to create a detailed budget. Get quotes, compare services, and factor in unexpected costs. Having a financial plan in place will help you avoid last-minute stress and ensure that your relocation is both feasible and financially sound.

No. 6

The Living Costs in Your New Area

Beyond the cost of the move itself, consider the ongoing cost of living in your new location. Will your income support the same standard of living? Are housing, groceries, transportation, and healthcare more expensive? Researching these factors ahead of time will help you make a realistic assessment of whether the move is financially sustainable in the long run.

No. 7

Finding Your Dream Home

One of the most exciting aspects of relocating is finding a new place to call home. Whether you're buying or renting, take the time to explore your options and prioritize what matters most—location, size, amenities, or proximity to work and schools. If necessary, consider temporary housing while you search for the perfect fit. Feeling comfortable and happy in your new space is key to a successful transition.

No. 8

Settling Into the New Area

Once you’ve arrived, settling into your new neighborhood is the next big step. This can be especially challenging if the new area is vastly different from what you're used to. Make an effort to explore your surroundings, meet your neighbors, and get involved in the community. The sooner you feel connected, the easier it will be to adjust and feel at home.

No. 9

Whether It’s Right for Your Family

If you're relocating with a partner or children, their well-being is a top priority. Consider how the move will affect their lives—education, career opportunities, social connections, and emotional health. Open communication and involving them in the decision-making process can ease the transition and ensure that everyone feels heard and supported.

No. 10

If Your Heart’s in It

At the end of the day, the most important question is: Does this move feel right? Trust your intuition. If you feel excited, hopeful, and aligned with the decision, it’s likely the right path. But if you’re filled with doubt or unease, take a step back and reassess. Your inner voice is a powerful guide—listen to it.

Takeaways

Relocation is more than a change of address—it’s a life shift. It can open doors to new opportunities, fresh perspectives, and personal growth. But to make the most of it, you need to approach the decision with clarity, intention, and preparation.

By reflecting on your goals, assessing the practicalities, and tuning into your heart, you’ll be better equipped to make a move that truly supports your journey. Whether you decide to pack up or stay put, the most important thing is that your choice feels right for you and your future.

So take your time, do your research, and trust the process. If everything aligns and you feel ready—go for it. Your next adventure awaits.

Looking for Home resources?

Looking to enhance your living space and create a sanctuary that supports your well-being? Explore our home partners who offer a wide range of resources to elevate your home environment.


homeHLL x Editor


From Yard Waste To Compost: How Removal Services Recycle Naturally

As sustainability becomes a global priority, communities are rethinking how they handle organic waste. What was once seen as a burden—piles of leaves, grass clippings, and branches—is now being transformed into nutrient-rich compost. 


Across neighborhoods and cities, eco-conscious companies are finding smarter, greener ways to turn waste into renewal. Among the most impactful innovations are professional yard waste removal services that focus on recycling nature itself.

These services don’t just clear clutter from your garden—they help close the loop in the natural ecosystem. By transforming organic debris into compost, they reduce landfill waste, cut carbon emissions, and return valuable nutrients to the soil. It’s an elegant, sustainable cycle that benefits everyone—from homeowners to the planet.

In this article, we’ll explore how professional yard waste removal services are revolutionizing natural recycling. You’ll discover how these services reduce landfill waste, support soil health, and contribute to a more sustainable future. Whether you're a homeowner looking to clean your garden responsibly or a city planner seeking scalable green solutions, this guide will illuminate the powerful role composting plays in environmental stewardship.

No. 1

The Growing Role of Yard Waste Removal in a Sustainable World

The global shift toward environmental responsibility has reshaped how people think about outdoor cleanup. Instead of dumping garden debris into landfills, modern waste removal services ensure that organic materials are repurposed and reused. This approach not only saves space in already overflowing dumpsites but also prevents harmful methane emissions that occur when yard waste decomposes in tightly packed landfill environments.

Professional services handle everything from collection to composting, ensuring the waste is processed properly and safely. Many even collaborate with local composting facilities to transform leaves, grass, and branches into valuable soil enhancers. Here’s how sustainable yard waste programs make a difference:

  • Collecting leaves, branches, and grass clippings for composting.

  • Preventing harmful gases from being released in landfills.

  • Reducing transportation emissions through efficient routes.

  • Converting organic waste into nutrient-rich soil.

  • Supporting eco-friendly gardening and landscaping efforts.

This green approach not only keeps communities cleaner but also contributes to a healthier, more resilient environment.

No. 2

From Waste to Worth: The Power of Natural Recycling

Composting is one of nature’s most efficient recycling systems. 

Through controlled decomposition, organic materials like leaves, twigs, and food scraps break down into humus—a rich, earthy material packed with nutrients. When spread over lawns, gardens, or farms, compost improves soil structure, boosts plant growth, and reduces the need for chemical fertilizers. The process is both simple and powerful. 

Once collected by removal services, organic waste is shredded, aerated, and left to decompose under carefully monitored conditions. Microorganisms work their magic, breaking down materials naturally until what remains is fertile, sustainable compost.

This transformation reduces dependence on synthetic soil enhancers and promotes biodiversity. It also helps combat climate change by locking carbon into the soil rather than releasing it into the atmosphere. Composting, in many ways, is nature’s way of giving back. Benefits of composting include:

  • Enriching soil with vital nutrients.

  • Reducing landfill waste and methane emissions.

  • Enhancing water retention in soil.

  • Supporting plant growth without chemicals.

  • Creating a closed-loop environmental system.

No. 3

How Composting Services Are Changing Urban Landscapes

Urban areas are often the biggest contributors to waste buildup—but they’re also where innovation thrives. Many cities have adopted municipal composting programs that partner with private companies to handle organic waste more efficiently. 

By integrating composting into waste management systems, these cities are reducing landfill dependency while supplying local gardens, parks, and farms with eco-friendly fertilizer.

For residents, this means easier cleanup and a chance to participate in a larger environmental mission. Businesses benefit too, as sustainable practices often enhance their public image and reduce disposal costs.

Modern composting services now use advanced sorting and tracking technologies to ensure every load of organic material is processed responsibly. Whether for residential neighborhoods or large-scale landscaping projects, these initiatives help keep cities cleaner and greener. Examples of urban composting success stories include:

  • Citywide compost bins for residents to dispose of organic waste.

  • Community gardens are supplied with locally produced compost.

  • Partnerships between municipalities and green waste companies.

  • Reduction of urban landfill overflow and pollution.

  • Educational programs teaching citizens how to compost at home.

Through collaboration, cities are showing that sustainability and modern living can thrive side by side.


hellolovelyliving crowd farming

Crowd Farming

Adopt a tree to support a farmer and receive your harvest at home throughout the season.


No. 4

The Science Behind Turning Waste into Compost

Behind the seemingly simple act of composting lies a fascinating scientific process. When organic waste is gathered and properly managed, natural bacteria, fungi, and insects begin breaking it down. Heat, moisture, and oxygen accelerate the process, resulting in a nutrient-dense product that can be used to enrich soil and promote plant health.

Unlike landfill decomposition, which happens without oxygen and releases methane, composting occurs in aerobic conditions. This ensures a cleaner, faster, and more sustainable outcome. The result is a soil enhancer that supports carbon capture, water filtration, and long-term fertility.

Composting success depends on maintaining a balanced mix of “greens” (like grass clippings and vegetable scraps) and “browns” (like leaves and branches). The right balance ensures healthy microbial activity and prevents unpleasant odors. Scientific benefits of composting include:

  • Decreasing greenhouse gas emissions through aerobic decomposition.

  • Supporting microbial diversity in the soil.

  • Improving soil structure for better water absorption.

  • Reintroducing carbon and nutrients into the ecosystem.

  • Reducing reliance on chemical fertilizers.

No. 5

Why Natural Recycling Matters

When we think of recycling, we often picture glass, plastic, or paper. Yet, natural recycling through composting is equally crucial. Organic matter makes up a large portion of household waste, and when not managed properly, it can have severe environmental consequences.

By choosing composting services, homeowners and businesses can significantly reduce their ecological footprint. Every bag of leaves or bundle of branches that’s composted instead of trashed contributes to a cleaner, more sustainable planet.

These small, everyday choices make a big difference. When multiplied across thousands of homes and businesses, they can lead to meaningful environmental change and a reduction in global waste.

Takeaways

Sustainability starts in our backyards—literally. Every homeowner who participates in responsible garden cleanup contributes to a larger cycle of renewal and regeneration. By working with eco-conscious services, you can ensure that your organic waste doesn’t just disappear—it transforms into something valuable.

Through composting, natural materials return to the earth as nourishment, closing the loop in an endless cycle of growth and renewal. Choosing professional waste removal isn’t just about keeping your property clean; it’s about making a small yet powerful choice for a sustainable planet.

In the end, embracing environmentally responsible removal is a step toward a cleaner tomorrow. When we recycle naturally, we don’t just manage waste—we create life from it, turning what’s unwanted into something the earth can celebrate once again.

This post is sponsored.

Looking for Home resources?

Looking to enhance your living space and create a sanctuary that supports your well-being? Explore our home partners who offer a wide range of resources to elevate your home environment.


home, sustainabilityHLL x Editor


What You Need To Know Before Scheduling A Junk Pick-up Service

Decluttering feels amazing—until you’re staring down a garage of mystery boxes, a lumpy sofa that’s outstayed its welcome, and a calendar that’s already full. Calling a professional junk pick up service can turn that chaos into curb-side calm, sparing you multiple trips, heavy lifting, and disposal guesswork. With a bit of planning, you’ll cut costs, avoid day-of surprises, and make sure your stuff is handled responsibly from doorstep to destination.


hellolovelyliving junk removal service


In this article, we’ll walk you through everything you need to know before scheduling a junk removal appointment. From understanding what items are accepted to comparing pricing models, prepping your space, and choosing a sustainable provider, this comprehensive guide will help you make informed decisions and ensure a smooth, efficient experience. Whether you're cleaning out a single room or managing a large estate, the right planning can turn your cluttered chaos into clean, organized calm.

No. 1

Know what they take—and what they don’t

Most providers will remove common household cast-offs: furniture, mattresses, appliances, grills, yard waste, electronics, and general debris. Fewer will accept renovation rubble, hot tubs, pianos, or anything that requires special equipment or disassembly. Nearly all draw a hard line on hazardous materials—paint, solvents, pesticides, automotive fluids, propane tanks, and certain batteries—which demand specialized disposal.

Before you book, request the company’s current “yes/no” list. 

For borderline items (refrigerators with refrigerant, oversized TVs, exercise equipment, or play sets), ask whether prep is required—defrosting, disconnecting, draining fuel, or partial disassembly. A five-minute call can save a failed appointment.

Smart move: Text photos of unusual items during the quote. Visual confirmation leads to accurate pricing and fewer day-of refusals.

No. 2

Demystify pricing so the quote matches the bill

Junk removal pricing typically follows one of three models:

  • Volume-based: You pay by how much of the truck you fill (eighth, quarter, half, three-quarters, full).

  • Item-based: Set prices for a sofa, mattress, refrigerator, etc.

  • Time and labor: An hourly rate for complex clean-outs or on-site sorting.

To compare apples to apples, clarify:

  • What’s included: loading, transport, disposal fees, basic labor, and sweep-up.

  • What costs extra: stairs or long carries, demolition/disassembly, heavy items, weekend/same-day service, or after-hours pickups.

  • How quotes are finalized: on-site estimates versus photo estimates, and the tolerance for load changes.

  • Payment: accepted methods, deposits, and when you’re charged.

Two companies can look identical on headline price but differ dramatically on surcharges, professionalism, and care for your property. Ask how they protect floors, walls, and doorframes—and whether they carry the right insurance.

No. 3

Prep to save time—and money

A bit of pre-work can shave both minutes and dollars:

  • Stage items together: The closer to your driveway or entry, the faster the load. Clear hallways, roll up rugs, and prop doors for quick access.

  • Sort by destination: Keep donation-ready items (clean, functional) separate from true junk; recycling and donations can reduce disposal fees.

  • Disassemble selectively: Remove table legs, flatten boxes, and break down bed frames. Keep hardware in a taped bag.

  • Unplug and drain: Defrost freezers, disconnect washers, and empty gas-powered tools to prevent leaks.

  • Protect your privacy: Shred papers, wipe hard drives, and remove SIM cards from electronics.

Prefer a hands-off approach? Many teams offer full-service “point and it’s gone.” It costs more, but the convenience can be worth it—especially on tight timelines.


hellolovelyliving houzz

Houzz

Make your home project a reality. Find inspiration, products, and the pros to make it happen - all in one place.


No. 4

Choose a provider that diverts, not just dumps

Sustainable removal isn’t just good optics; it can be good economics. 

Ask how the company sorts for donation and recycling, which local partners they use, and whether they provide donation receipts. Well-established haulers maintain relationships with charities, refurbishers, and recycling facilities—keeping reusable items out of landfills and sometimes reducing your disposal costs.

For anything the hauler cannot legally accept, check your municipality’s guidelines or consult a high-authority source on safe handling. 

For example, the U.S. Environmental Protection Agency explains best practices for household hazardous waste and lists common items requiring special care. Building disposal into your plan—from paint to pesticides—prevents last-minute scrambling.

No. 5

Verify credentials, insurance, and professionalism

You’re inviting a crew into your space. Vet them like you would any contractor:

  • Insurance: Request proof of general liability and workers’ compensation.

  • Licensing and permits: Requirements vary by city or county; reputable firms know the rules.

  • Equipment and appearance: Clean trucks, uniforms, safety gear, and floor/wall protection signal professional standards.

  • Team size and experience: A larger, well-coordinated crew works faster, which matters for big jobs.

  • Reputation: Scan reviews for themes—punctuality, communication, care in tight spaces, and accuracy of estimates.

If your building needs a certificate of insurance (COI) or has elevator reservations, confirm the provider can supply documents and accommodate time windows.

No. 6

Plan the logistics so “pickup day” runs smoothly

A little choreography avoids stress:

  • Access and parking: Reserve curb space, notify your HOA, and confirm loading dock hours if applicable.

  • Elevators and stairs: Book elevator windows, and tell the crew about stair-only access or tight turns.

  • Pets and kids: Keep them safely away from open doors and pathways.

  • Walk-throughs: Do a quick tour with the crew lead before loading begins to prioritize items, and a final lap after to confirm nothing was missed.

  • Paperwork and receipts: Confirm final volume or item counts, request donation receipts, and keep a record of the invoice for taxes or reimbursement.

No. 7

Match the service to the job

Not every project requires the same approach:

  • Single items: A sofa or mattress pickup may qualify for a lower minimum if scheduled alongside nearby jobs—ask about “route-based” pricing.

  • Room or garage clean-outs: Consider a two-phase plan: donations first, landfill second. Freeing space early speeds the final sweep.

  • Estate or hoarding situations: Look for providers with specialized training, protective equipment, and sensitivity to family dynamics.

  • Post-renovation debris: Verify acceptance of construction waste and whether a debris bag or temporary dumpster would be more cost-effective.

When you’re on a deadline—moving, listing a home, or prepping for contractors—book as early as possible. If you need speed, ask about standby lists and same-day windows.

No. 8

Safety, damages, and your peace of mind

Accidents are rare with a skilled crew, but safeguards matter:

  • Pathway protection: Request floor runners, corner guards, and door jamb protectors for tight spaces.

  • Load management: Pros use lifting straps and dollies; they won’t “muscle” items at the expense of safety.

  • Weather plans: Rain happens—confirm how they’ll protect items and your floors.

  • Claims process: Ask how damages are reported and resolved, and how quickly you can expect updates.

Good companies will walk you through their protocol before the first box moves.

No. 9

Timing and seasonality: when to schedule

Spring and summer are peak seasons for moves and clean-outs, so appointments fill fast. If you’re flexible, midweek and mid-month slots are often easier to snag. 

When aligning with other services—house cleaning, painters, carpet installers—schedule removal before the refresh so crews aren’t working around piles. For relocations, aim to schedule junk pick up at least a week ahead; for estate or multi-space projects, consider holding two windows a few days apart to handle donations and hold-outs without stress.

No. 10

A quick comparison checklist

Use this side-by-side list to pick the right provider:

  • Accepts all your items—or has clear referrals for what they don’t.

  • Transparent pricing, with surcharges disclosed in advance.

  • Donation and recycling partners named, with receipts available.

  • Proof of insurance and any required licenses on request.

  • Professional communication: confirmations, ETA texts, and a named lead on arrival.

  • Clear pathways, protection for floors/walls, and a sweep-up before departure.

  • Accurate, respectful handling of special requests or building rules.

Takeaways

A reliable junk pick-up service should simplify your life—not complicate it. By confirming what’s included, prepping your space, verifying credentials, and choosing a provider committed to sustainability, you’ll ensure a smooth experience from start to finish.

The right crew will handle your clutter with care, keep reusable items in circulation, and leave your space cleaner, clearer, and more functional. Whether you’re downsizing, renovating, or just reclaiming your garage, a well-planned junk removal can make all the difference.

So the next time you’re ready to declutter, remember: you’re not just clearing space—you’re making room for peace of mind and a more sustainable future.

This post is sponsored.

Looking for Home resources?

Looking to enhance your living space and create a sanctuary that supports your well-being? Explore our home partners who offer a wide range of resources to elevate your home environment.


homeHLL x Editor


The Ultimate Guide To Decluttering Your Home

Do you find that your home is overflowing with clutter? If so, you're not alone. Clutter can slowly creep into every corner of our lives, making our homes feel chaotic and overwhelming. But here’s the good news—it doesn’t have to stay that way.


In this article, we’ll explore simple, effective strategies to help you declutter your home without feeling stressed or overwhelmed. From organizing by category to developing a sustainable system, these methods are designed to help you take control of your space and create a more peaceful, functional environment. Whether you’re tackling a single drawer or your entire house, these tips will guide you every step of the way.

No. 1

Declutter by Category, Not by Room

One of the most common mistakes people make when decluttering is trying to go room by room. While this may seem logical, it often leads to burnout and frustration. Instead, try decluttering by category—a method popularized by Marie Kondo, which allows you to focus on one type of item at a time.

Why Decluttering by Category Works:

  • Helps you see the full scope of what you own

  • Prevents decision fatigue by narrowing your focus

  • Makes it easier to identify duplicates and unnecessary items

Start with something manageable, like clothing. Go through every coat, jacket, and pair of jeans—whether they’re in the hallway closet, your bedroom, or the laundry room. Once you’ve tackled one category, move on to the next, such as books, kitchenware, or sentimental items.

If the clutter feels overwhelming, consider hiring a junk removal service to help you clear out large or unwanted items quickly and efficiently.

No. 2

Work with Your Heart, Not Just Your Head

When deciding what to keep and what to let go of, it’s important to engage your emotions—not just your logic. Ask yourself: Do I truly like this item? Does it bring me joy or serve a meaningful purpose? If the answer is no, it may be time to let it go.

Common Emotional Barriers to Decluttering:

  • Fear of waste or contributing to landfills

  • Worry about needing the item in the future

  • Sentimental attachment to gifts or inherited items

A helpful rule of thumb: if you haven’t used or worn something in the last six months, it’s probably safe to donate, recycle, or discard it. To ease guilt about waste, consider donating to local charities or using eco-friendly disposal services that prioritize recycling and reuse.

Once you decide to part with something, remove it from your space immediately. The longer it lingers, the more likely you are to second-guess your decision.


hellolovelyliving the container store

The Container Store

Your ultimate destination for innovative storage and organization solutions for home or office—offering everything from stylish bins and shelves to custom closet systems.


No. 3

Develop a Decluttering System That Works for You

You might think that having a system sounds restrictive, but in reality, it can be incredibly freeing. A good system turns decluttering into a habit rather than a one-time event. It helps you stay organized and prevents clutter from creeping back into your life.

Elements of an Effective Decluttering System:

  • The One-In, One-Out Rule: For every new item you bring into your home, remove one.

  • Weekly Reset: Set aside 15–30 minutes each week to tidy up and reassess clutter hotspots.

  • Donation Station: Keep a box or bin in a closet where you can place items to donate as you come across them.

  • Labeling and Storage: Use clear bins, labels, and drawer organizers to keep everything in its place.

By making decluttering part of your routine, it becomes second nature—something you do instinctively rather than something you dread.

Takeaways

As we’ve discussed in this article, decluttering your home isn’t just about creating a cleaner space—it’s about creating a more peaceful, intentional life. By organizing by category, making emotionally sound decisions, and developing a system that works for you, you can transform your home into a sanctuary of calm and clarity.

Remember, you don’t have to do it all at once. Start small, stay consistent, and celebrate your progress. Whether you’re clearing out a single drawer or your entire garage, every step you take brings you closer to a home that truly supports your well-being.

Helpful Resources for Decluttering Success

Start today—because a clutter-free home is just the beginning of a more peaceful, joyful life.

Looking for Home resources?

Looking to enhance your living space and create a sanctuary that supports your well-being? Explore our home partners who offer a wide range of resources to elevate your home environment.


homeHLL x Editor


How To Make Gardening Joyful Again

Gardening has long been celebrated as a therapeutic escape—a space where time slows down, the mind quiets, and the soul reconnects with nature. For many, it’s not just about cultivating plants, but about cultivating peace. However, even the most passionate green thumbs can find themselves overwhelmed, exhausted, or disconnected from the joy they once felt digging in the dirt.


In this article, we’ll explore practical, heart-centered ways to make gardening joyful again. From enlisting the help of professionals to using the right tools and techniques, we’ll show you how to reclaim gardening as a source of happiness, not stress. Whether you're managing physical limitations, battling burnout, or simply want to fall in love with your garden all over again, these tips will help you nurture not just your plants—but yourself.

No. 1

Gardening: More Than Just a Hobby

Gardening is more than a weekend activity—it’s a form of self-care. Studies have shown that spending time in the garden can significantly reduce stress, improve mood, and even boost physical health. The act of planting, nurturing, and watching life grow offers a sense of accomplishment and connection that’s hard to replicate elsewhere.

But like any hobby, gardening must remain enjoyable to be beneficial. When it starts to feel like a chore, its therapeutic benefits begin to fade. That’s why it’s essential to approach gardening in a way that feels manageable, sustainable, and—most importantly—joyful.

No. 2

Let Go of the “Perfect Gardener” Myth

It’s easy to fall into the trap of thinking that to be a “real gardener,” you must do everything yourself. But that mindset can quickly turn a joyful activity into a burden. The truth is, you don’t need to do it all alone—and you don’t need to be perfect to reap the healing benefits of gardening.

If mobility issues, time constraints, or mental fatigue are getting in the way, there’s nothing wrong with asking for help. In fact, getting support can free you up to focus on the parts of gardening that truly bring you joy—whether that’s planting flowers, harvesting herbs, or simply sitting in your garden with a cup of tea.

No. 3

Work With Someone Who Can Keep Your Soil Healthy

Healthy soil is the foundation of a thriving garden. But maintaining it can be more complex and time-consuming than many hobbyists realize. From balancing nutrients and adjusting pH levels to refreshing mulch and improving texture, a quality soil supply requires consistent attention.

Why Soil Health Matters:

  • It determines how well your plants absorb water and nutrients

  • It affects plant growth, resilience, and bloom quality

  • Poor soil can lead to disease, pests, and stunted growth

Working with a local soil expert can take the guesswork out of the equation. They can help you test your soil, recommend the right amendments, and ensure your garden bed is primed for success. With their guidance, you can focus on the fun parts—like choosing what to grow and watching it flourish.


hellolovelyliving terrain

Terrain

Indoor and outdoor living, garden, and entertaining essentials that are well-designed, lasting, and beautiful.


No. 4

Work With a Lawn Expert

Let’s be honest—mowing the lawn is rarely the highlight of anyone’s gardening experience. It’s repetitive, time-consuming, and often the very task that makes your garden feel like a list of chores rather than a sanctuary.

Benefits of Hiring a Lawn Care Professional:

  • Keeps your grass healthy and well-trimmed

  • Frees up your time for more enjoyable gardening tasks

  • Enhances the overall look and feel of your outdoor space

A professional lawn care service can help maintain your yard so that when you step outside, you’re greeted by a peaceful, inviting space—not a to-do list. This small shift can make a big difference in how you experience your garden.

No. 5

Work With the Right Tools—or Someone Who Has Them

Some gardening tasks are soothing—like planting, watering, and pruning. Others, like reshaping uneven terrain or improving drainage, require heavy-duty equipment and technical know-how.

And that’s okay.

You don’t need to own a shed full of machinery to be a gardener. If you’re facing larger projects or physical limitations, it’s perfectly reasonable to call in a professional who has the right tools and experience.

When to Call in the Pros:

By outsourcing the heavy lifting, you can create a more functional garden space that’s easier to maintain—and more enjoyable to spend time in.

No. 6

Reclaim the Joy: Focus on What You Love

Ultimately, the key to joyful gardening is focusing on what you love most. Maybe it’s the smell of fresh soil, the satisfaction of harvesting your own vegetables, or the beauty of blooming flowers. Whatever it is, make that your priority.

Ways to Reconnect With the Joy of Gardening:

  • Create a small sensory garden with fragrant herbs and colorful blooms

  • Start a container garden for easier access and less maintenance

  • Invite friends or family to garden with you—it’s more fun together

  • Keep a garden journal to track progress and celebrate small wins

  • Take breaks and simply enjoy your space—no tasks required

Gardening doesn’t have to be all-or-nothing. Even small moments of connection with your garden can bring peace and pleasure.

Takeaways

As we've explored in this article, gardening should be a source of joy—not stress. Whether you’re a seasoned green thumb or a beginner with a few pots on the balcony, the key is to make it work for you. That means letting go of perfection, embracing help when needed, and focusing on the parts of gardening that light you up inside.

By working with experts, using the right tools, and simplifying where you can, you create space to reconnect with the reasons you started gardening in the first place. You’re not just growing plants—you’re growing peace, purpose, and presence.

So take a deep breath, step into your garden, and remember: this is your sanctuary. Let it be a place of healing, joy, and renewal—one bloom at a time.

Helpful Resources for Joyful Gardening

Let gardening be your joy again—because you deserve a space that nurtures you, just as much as you nurture it.

Looking for Home resources?

Looking to enhance your living space and create a sanctuary that supports your well-being? Explore our home partners who offer a wide range of resources to elevate your home environment.


homeHLL x Editor


The Landscaping Secrets The Pros Will Never Tell You About

If you’ve ever admired a beautifully manicured garden or a perfectly balanced outdoor space, chances are it was the work of a professional landscaper. Their creations often seem effortless—lush lawns, vibrant flower beds, and artful arrangements that feel both natural and refined. But what’s the secret behind these picture-perfect landscapes?


In this article, we’ll uncover the insider techniques professional landscapers use to achieve stunning results—many of which they rarely share. From smart planting strategies to clever soil enrichment methods, these tips will help you elevate your outdoor space and bring a touch of professional polish to your own garden.

No. 1

They Make Their Own Mulch

One of the first secrets many professional landscapers won’t openly share is that they often make their own mulch. Rather than buying it from costly suppliers, they repurpose garden waste from their projects.

How They Do It:

  • They invest in a chipper or shredder.

  • Garden waste—especially strongbark and twigs—is shredded into fine material.

  • This recycled mulch is then used to nourish soil, suppress weeds, and retain moisture.

It’s a sustainable and cost-effective approach that not only reduces waste but also enhances the health of the garden.

No. 2

They Plant in Ways That Mimic Nature

Another landscaping secret is the naturalistic planting style many pros adopt. Instead of rigid rows or symmetrical layouts, they mimic the randomness found in nature.

Why It Works:

  • Irregular clusters and staggered rows create visual interest.

  • Natural arrangements improve airflow and reduce disease spread.

  • The garden feels more organic and welcoming.

While it may seem counterintuitive, this method results in a more harmonious and aesthetically pleasing landscape.

No. 3

They Use Much More Hardscaping Than You Ever Would

Professional landscapers know that hardscaping—the use of non-plant elements like stone, gravel, and pavers—is essential for creating balance and structure in a garden. They’re not afraid to make the most of paving and gravel when it makes sense, especially if you need something low-maintenance. 

Common Hardscaping Features:

  • Gravel walkways

  • Stone patios

  • Retaining walls

  • Decorative edging

These elements reduce maintenance, improve drainage, and provide contrast to softscaping (plants and greenery). Don’t be afraid to incorporate more hardscaping into your design—it can dramatically enhance both function and form.


hellolovelyliving terrain

Terrain

Grow your love for nature with Terrain’s premium garden supplies! From tools to décor, they have everything you need to nurture your garden and your passion.


No. 4

They Layer Bulbs

One of the most magical effects in a professional garden is the continuous bloom of flowers throughout the season. The secret? Layering bulbs.

How It’s Done:

  • Plant bulbs in layers based on their bloom times.

  • Early bloomers like crocuses go on top, followed by tulips, then late bloomers like alliums.

  • As one layer fades, the next emerges, ensuring constant color.

This technique requires planning and knowledge of bloom cycles, but the payoff is a dynamic, ever-changing garden display.

No. 5

They Let Tree Wounds Heal Naturally

There’s a common misconception that tree wounds need to be painted or sealed. However, most professional landscapers know that trees are best left to heal on their own.

Why Natural Healing Works:

  • Trees form a protective barrier called callus tissue.

  • Painting wounds can trap moisture and promote rot.

  • Open air allows the wound to dry and close naturally.

Unless advised otherwise by an arborist, it’s best to let nature take its course when it comes to tree injuries.

No. 6

They Sprinkle Compost on Lawns

Instead of overseeding, many professionals opt to top-dress lawns with a thin layer of compost. This enriches the soil and promotes healthier, greener grass.

Benefits of Compost Top-Dressing:

  • Adds essential nutrients directly to the soil.

  • Improves soil structure and water retention.

  • Encourages microbial activity and root growth.

This method is especially effective for lawns that appear dull or patchy due to nutrient deficiencies rather than a lack of seeds.

No. 7

They Mow High

Another lesser-known trick is mowing grass at a higher setting and leaving the clippings behind.

Why Mowing High Works:

  • Taller grass shades the soil, reducing water evaporation.

  • It promotes deeper root systems and stronger turf.

  • Grass clippings decompose quickly, returning nutrients to the soil.

This technique, known as “grasscycling,” not only improves lawn health but also reduces the need for fertilizers.

Takeaways

Professional landscapers have a wealth of knowledge that goes far beyond planting flowers and trimming hedges. As we’ve revealed in this article, their success lies in thoughtful strategies, sustainable practices, and a deep understanding of how nature works.

Key takeaways:

  • Make your own mulch to save money and reduce waste.

  • Mimic natural planting patterns for a more organic and beautiful garden.

  • Use hardscaping to add structure and minimize maintenance.

  • Layer bulbs for continuous blooms throughout the season.

  • Let tree wounds heal naturally to avoid rot and promote recovery.

  • Top-dress your lawn with compost instead of overseeding.

  • Mow high and leave clippings to nourish your lawn naturally.

By adopting these professional techniques, you can transform your outdoor space into a thriving, low-maintenance landscape that looks like it was designed by an expert. Whether you’re starting from scratch or enhancing an existing garden, these secrets will help you achieve stunning results with confidence.


Looking for Home resources?

Looking to enhance your living space and create a sanctuary that supports your well-being? Explore our home partners who offer a wide range of resources to elevate your home environment.


homeHLL x Editor


Hidden Home Dangers, And How To Solve Them

Many of us like to believe that our homes are sanctuaries—places of safety, comfort, and peace. However, the reality is that even the most well-kept homes can harbor hidden dangers that pose serious health and safety risks. From invisible gases to outdated materials, these threats often go unnoticed until it’s too late.


In this article, we’ll uncover some of the most common hidden hazards found in homes today and provide practical solutions to mitigate them. Whether you're a homeowner, renter, or property manager, understanding these risks is the first step toward creating a healthier, safer living environment for you and your loved ones.

No. 1

Radon Gas

One of the most serious yet often overlooked threats in the home is radon gas. This naturally occurring radioactive gas seeps into homes through cracks in the foundation and can accumulate to dangerous levels.

Why It’s Dangerous:

Radon is the second leading cause of lung cancer after smoking. According to the U.S. Environmental Protection Agency (EPA), it causes tens of thousands of lung cancer deaths each year.

How to Fix It:

  • Test your home using a radon test kit, available online or at most hardware stores.

  • Install a mitigation system if levels are high. These systems typically involve a vent pipe and fan to redirect radon gas outside.

  • Cost-effective solutions are available, and many homeowners find that mitigation systems are relatively inexpensive compared to the health risks.

No. 2

Carbon Monoxide

Another invisible and odorless gas that poses a serious threat is carbon monoxide (CO). Often dubbed the “silent killer,” CO can accumulate in homes due to faulty appliances, particularly gas boilers or heaters.

Symptoms of CO Exposure:

  • Headaches

  • Dizziness

  • Nausea

  • Confusion

  • In severe cases, unconsciousness or death

What You Can Do:

  • Install a carbon monoxide detector on every floor of your home, especially near sleeping areas.

  • Have your boiler and gas appliances inspected regularly by a certified technician.

  • Act immediately if your detector goes off—evacuate and call emergency services.

No. 3

Lead Paint Dust

If your home was built before 1978, there’s a chance it contains lead-based paint. Over time, this paint can deteriorate and release toxic dust into the air.

Health Risks:

  • Lead exposure is particularly dangerous for children, potentially causing developmental delays and reduced IQ.

  • Adults may experience high blood pressure, kidney damage, and reproductive issues.

How to Address It:

  • Hire certified lead abatement professionals to safely remove or seal lead paint.

  • Avoid DIY removal, as improper techniques can spread lead dust throughout your home.

  • Repaint with lead-free paint once the area is cleared.


hellolovelyliving energy muse

Energy Muse

In a world that’s constantly pulling us away from ourselves, the 7.83Hz Earth Frequency Generator offers a gentle invitation to return—to calm, to clarity, to the natural rhythm our bodies were designed to follow.


No. 4

Dryer Vent Fires

Dryer vent fires are an often underestimated hazard. Lint and debris can accumulate in the dryer vent, creating a highly flammable environment.

Warning Signs:

  • Clothes take longer to dry

  • The dryer feels unusually hot

  • Burning smell during operation

Preventive Measures:

  • Clean your dryer vent at least once a year.

  • Hire a professional for dryer vent cleaning if the vent is long or difficult to access.

  • Check the lint trap before every load to reduce buildup.

For more information on dryer safety, visit the U.S. Fire Administration.

No. 5

Asbestos in Insulation

Asbestos was commonly used in insulation and other building materials up until the 1980s. When disturbed, asbestos fibers become airborne and can be inhaled, leading to severe health conditions.

Health Risks:

  • Mesothelioma

  • Lung cancer

  • Asbestosis

What You Should Do:

  • Do not disturb suspected asbestos-containing materials.

  • Hire licensed asbestos removal professionals to test and, if necessary, remove the material.

  • Never attempt DIY asbestos removal, as it poses serious health risks.

No. 6

Pesticide Overspray

Using pesticides on your lawn or garden can inadvertently introduce harmful chemicals into your home. These substances can cling to shoes and clothing, or drift indoors through open windows and doors.

Potential Health Effects:

  • Respiratory irritation

  • Hormonal disruption

  • Neurological effects, especially in children

How to Protect Your Home:

  • Remove shoes before entering your home to avoid tracking in pesticides.

  • Use HEPA filters in your HVAC system or air purifiers to reduce airborne contaminants.

  • Vacuum regularly with a HEPA-filter vacuum cleaner to capture lingering particles.

For more guidance, check out the National Pesticide Information Center.

Takeaways

While our homes should be places of comfort and protection, hidden dangers can compromise our health and safety without warning. As we've explored in this article, threats like radon gas, carbon monoxide, lead paint, dryer vent fires, asbestos, and pesticide overspray are real—but they’re also manageable with the right knowledge and precautions.

Key takeaways:

  • Test for invisible gases like radon and carbon monoxide.

  • Inspect older homes for lead paint and asbestos.

  • Maintain appliances and clean vents regularly.

  • Be mindful of chemical use both inside and outside your home.

By staying informed and proactive, you can significantly reduce these risks and create a healthier, safer environment for you and your family. Don’t wait for a warning sign—take action today to safeguard your home from these hidden hazards.

Looking for Home resources?

Looking to enhance your living space and create a sanctuary that supports your well-being? Explore our home partners who offer a wide range of resources to elevate your home environment.


homeHLL x Editor


3 Steps To Manage Home Renovations With Your Newborn In The House

Having a newborn is one of the most exhausting, transformative, and heartwarming experiences life has to offer. Between sleepless nights, feeding schedules, and endless diaper changes, your entire world shifts to revolve around this tiny new life. It’s beautiful—but undeniably overwhelming.


Now, imagine adding home renovations into that already chaotic mix. Whether you’ve recently purchased a fixer-upper or discovered urgent repairs that can’t wait, managing both a newborn and a renovation project can feel like a Herculean task. If you’re not feeling at least a little stressed, you might just have the emotional resilience of an astronaut.

In this article, we’ll guide you through practical, sanity-saving strategies to help you navigate home renovations while caring for your newborn. With the right approach, you can protect your baby’s well-being, maintain your peace of mind, and still get the work done.

No. 1

Schedule Work Around Your Baby's Routine

Your newborn’s sleep schedule is sacred—and any reputable contractor should understand that. Before hiring your renovation team, have a conversation about your baby’s daily routine. Ask them to plan the noisiest tasks during times when your baby is awake or when you can leave the house for a walk or errands.

Tips to consider:

  • Protect morning naps – These are often the longest and most restorative for your baby.

  • Communicate openly – Let your contractors know you may need them to pause during feedings or when your baby finally drifts off after a fussy spell.

  • Set clear boundaries – You’re not being difficult; you’re being a parent.

Most contractors have families of their own and will likely be more than willing to accommodate your needs. Just be upfront from the beginning and don’t hesitate to speak up if something isn’t working.

No. 2

Create a Safe, Sealed-Off Space

Renovations can kick up a surprising amount of dust and debris—something you definitely don’t want near a newborn with developing lungs. That’s why it’s crucial to create a completely separate, sealed-off area in your home where your baby can sleep, feed, and play safely.

Here’s how to protect your baby’s environment:

  • Seal doorways with plastic sheeting to prevent dust from spreading.

  • Use air purifiers in your baby’s room to improve air quality.

  • Keep windows closed near the renovation zone to avoid airborne particles.

If your renovation is extensive and sealing off an area isn’t feasible, consider staying with family or friends during the messiest phases. For example, if you're working with a contractor like Mr. Remodel for a major roof replacement, it might be wise to plan a short getaway while the work is being done.

Be realistic—if your kitchen is being demolished, it’s not fair to expect contractors to eliminate all dust. But you can expect them to clean up after themselves and respect your space.


hellolovelyliving albeebaby

Albeebaby

Sweet dreams start here.
Explore Babyletto cribs at Albee Baby—where style, safety, and comfort come together for your little one’s perfect nursery.


No. 3

Talk Through Your Non-Negotiables Clearly

When you’re juggling a newborn and a renovation, clarity is your best friend. Don’t assume your contractors will intuitively know what you need—spell it out clearly and early.

Make your expectations known before the project starts:

  • Designate entrances – If you want workers to use a specific door to avoid tracking dirt through the house, tell them.

  • Set quiet hours – Let them know which times are off-limits for noisy work.

  • Outline safety concerns – Whether it’s tools being left out or doors being left open, make your concerns known.

Contractors are professionals, but they’re not mind readers. The more specific you are about your needs, the smoother the process will be for everyone involved.

Takeaways

Navigating home renovations while caring for a newborn may sound like a recipe for chaos, but with thoughtful planning and clear communication, it’s entirely doable. In this article, we’ve covered key strategies to help you manage both responsibilities without sacrificing your sanity—or your baby’s comfort.

To recap:

  • Coordinate work around your baby’s schedule to protect their sleep.

  • Create a sealed-off, safe space to shield your newborn from dust and noise.

  • Communicate your non-negotiables clearly and confidently with your renovation team.

With these tips in place, you’ll be well-equipped to handle the demands of both parenting and property improvement. And remember—this phase, like all things with babies, is temporary. Soon enough, the renovations will be complete, and you’ll be enjoying your upgraded home with your growing little one in peace.

Let the hammering commence—quietly, of course.

Looking for Home resources?

Looking to enhance your living space and create a sanctuary that supports your well-being? Explore our home partners who offer a wide range of resources to elevate your home environment.


homeHLL x Editor


Why A Quality Roof Adds So Much Value To Your Home

When it comes to enhancing your home, there are countless areas to consider—from interior remodels to landscaping upgrades. However, one of the most impactful and often underestimated improvements is upgrading your roof. A high-quality, well-maintained roof does far more than just protect your home from the elements—it also boosts curb appeal, increases energy efficiency, and significantly raises your property value.


In this article, we’ll explore the key reasons why investing in a new or upgraded roof is a smart move for any homeowner. Whether you're preparing to sell or simply want to improve your living space, a roof renovation offers both immediate and long-term benefits that are hard to ignore.

No. 1

Positive First Impressions

When approaching a home, one of the first elements that catches the eye is the roof. If it appears worn, damaged, or outdated, that impression lingers. On the other hand, a clean, modern roof creates a welcoming and polished appearance that enhances the overall aesthetic of your property.

  • A well-maintained roof helps your home stand out in the neighborhood.

  • It contributes to strong curb appeal, which is crucial whether you're selling or simply taking pride in your home.

  • A new roof signals that the property is cared for, setting the tone for what buyers or guests can expect inside.

A visually appealing roof is more than just a cosmetic improvement—it’s a statement of quality and care.

No. 2

Long-Term Durability

While many people view a roof upgrade as purely aesthetic, its functional benefits are even more critical. Your roof is your home’s first line of defense against the elements, and a compromised roof can lead to a host of problems, including:

  • Water damage

  • Mold growth

  • Structural issues

By investing in a durable, high-quality roof, you’re safeguarding your home from these potential hazards. It also means fewer repairs and less maintenance over time, saving you money and stress in the long run.

Hiring a local roofer who understands your region’s specific weather challenges ensures your new roof is built to withstand whatever nature throws at it. This kind of strategic investment preserves your home’s integrity and value for years to come.

No. 3

Enhanced Property Value

Upgrading almost any part of your home can increase its value, but some improvements offer a higher return on investment than others. A new roof is one of those high-impact upgrades that can significantly boost your property’s worth.

  • A visually appealing roof suggests that the entire home is well-maintained.

  • Potential buyers are more likely to make strong offers when they know the roof won’t need immediate attention.

  • A modern, energy-efficient roof can be a key selling point in competitive markets.

In short, a roof that performs well and looks great can be a major asset when it comes time to sell. It gives buyers peace of mind and adds a layer of value that’s both visible and practical.


hellolovelyliving rejuvenation

Rejuvenation

Jumpstart your next home project with Rejuvenation's Home Project Guides! Expert tips, inspiration, and resources to bring your vision to life.

Start planning today!


No. 4

Energy Efficiency

When thinking about energy efficiency, most homeowners focus on appliances, windows, or insulation. However, your roof plays a surprisingly important role in maintaining a comfortable indoor climate.

Modern roofing materials are designed to:

  • Reflect sunlight and reduce heat absorption

  • Improve insulation, keeping warm air in during winter and cool air in during summer

  • Lower your energy bills by reducing the need for heating and cooling

A roof built with energy-efficient materials can make your home more comfortable year-round while also reducing your carbon footprint. This is especially appealing to eco-conscious buyers and anyone looking to cut down on utility expenses.

Takeaways

Upgrading your roof is one of the most valuable improvements you can make to your home. As we’ve outlined in this article, a new or renovated roof offers a wide range of benefits—from enhancing curb appeal and increasing property value to improving durability and boosting energy efficiency.

Whether you're planning to sell your home or simply want to enjoy a more comfortable and efficient living space, a roof upgrade is a smart, forward-thinking investment. It’s not just about aesthetics—it’s about protection, performance, and long-term value.

So, if you're considering your next home improvement project, don’t overlook the roof. It might just be the upgrade that delivers the biggest return.

Looking for Home resources?

Looking to enhance your living space and create a sanctuary that supports your well-being? Explore our home partners who offer a wide range of resources to elevate your home environment.


homeHLL x Editor


Three Changes To Make Your Property More Appealing

Are you considering making improvements to your property but unsure where to begin? Whether you're preparing to sell, looking to increase value, or simply want to enjoy your space more, there are countless ways to enhance your home. The key lies in identifying the changes that offer the most impact based on your budget, lifestyle, and goals.


Many people prefer to start with their interiors and upgrade the most used rooms, such as the kitchen or the bathroom. Others will change the outside of their property and make improvements to their garden or upgrade their roof. It depends on the type of property you own and when you last made changes to certain areas.

In this article, we’ll explore three effective and inspiring upgrades that can significantly boost your property’s appeal—both inside and out. From modernizing your kitchen to refreshing your garden and interiors, these ideas are designed to help you fall in love with your home all over again.

No. 1

Upgrade Your Kitchen

One of the most popular—and rewarding—places to start is the kitchen. As the heart of the home, it’s where meals are prepared, conversations are had, and memories are made. Because of its central role, upgrading your kitchen can greatly enhance both functionality and aesthetics.

Here are a few impactful ways to improve your kitchen:

  • Upgrade old appliances like your oven with energy-efficient models

  • Upgrade countertops to granite, quartz, or butcher block

  • Install new cabinetry or repaint existing ones

  • Add a stylish backsplash for a modern touch

Even small changes—like new lighting fixtures or updated hardware—can make a big difference. A visit to your local home improvement store can spark ideas and help you visualize the transformation.

No. 2

Improve Your Garden

When was the last time you truly invested in your garden? While regular maintenance is important, making structural or design changes can turn your outdoor space into a true extension of your home.

Consider the following upgrades:

  • Add a deck or patio to create a dedicated entertaining space

  • Install outdoor lighting for ambiance and safety

  • Incorporate raised beds or planters for a touch of greenery

  • Invest in quality outdoor furniture for comfort and style

Decking, in particular, is a fantastic way to define your garden space. It provides a focal point and a practical area for hosting BBQs, lounging, or enjoying your morning coffee. With the right setup, your garden can become a year-round haven.


Terrain

Indoor and outdoor living, garden, and entertaining essentials that are well-designed, lasting, and beautiful.


No. 3

Redecorate Your Interiors

If you're working with a tighter budget, redecorating your interiors is a cost-effective yet powerful way to breathe new life into your home. Over time, walls can become dull, and outdated color schemes can make your space feel tired.

Here’s how to refresh your interiors:

  • Apply a fresh coat of paint to brighten and modernize rooms

  • Experiment with bold colors like deep green, navy, or mustard yellow

  • Update soft furnishings such as curtains, cushions, and rugs

  • Rearrange furniture to improve flow and functionality

You don’t have to commit to a full renovation to make a noticeable difference. Even a simple color change can dramatically alter the mood and energy of a room. Don’t be afraid to step outside the neutral palette—bold colors, when used thoughtfully, can add personality and warmth.

Takeaways

We hope this guide has inspired you to think creatively about how to enhance your property. Whether you choose to upgrade your kitchen, revamp your garden, or redecorate your interiors, each of these changes has the potential to significantly increase your home’s appeal and functionality.

In this article, we’ve focused on three key areas that offer both aesthetic and practical benefits. The best part? You can tailor each suggestion to fit your budget and personal style.

So, what changes are you planning to make to your property? Which of these ideas do you think will have the biggest impact? Is there a tip or suggestion you feel we missed? Let us know in the comments—we’d love to hear from you and continue the conversation on making your home the best it can be.

Looking for Home resources?

Looking to enhance your living space and create a sanctuary that supports your well-being? Explore our home partners who offer a wide range of resources to elevate your home environment.


homeHLL x Editor


Stop The Chill: Surprising Ways Your Home Loses Heat

Winter has a way of reminding us just how essential a warm, cozy home truly is. Yet, if you’ve ever found yourself cranking up the thermostat only to still feel a lingering chill, you’re certainly not alone. Many homes lose heat through unexpected and often overlooked areas—causing discomfort and driving up energy bills.


In this article, we’ll explore some surprising and lesser-known ways your home may be losing heat. From your garage to your basement window wells—and even your indoor air quality—we’ll uncover how these hidden culprits affect your comfort and what you can do to fix them. The good news? Most of these solutions are simple, affordable, and incredibly effective.

No. 1

The Garage: A Hidden Heat Drain

If your home has an attached garage, it could be one of the biggest contributors to heat loss. Because garages are typically not insulated to the same standard as the rest of the house, cold air can easily seep through shared walls and into adjacent rooms. Every time the garage door opens, a rush of frigid outdoor air enters—forcing your heating system to work harder to maintain a comfortable temperature.

Key issues include:

  • Gaps around the garage door

  • Thin, outdated doors

  • Uninsulated garage walls

Over time, this constant exposure to cold air not only affects your comfort but can also significantly increase your heating costs. Fortunately, there are effective solutions:

These simple improvements can dramatically reduce heat loss and make your home warmer and more energy-efficient.

No. 2

Basement Window Wells: A Cold Air Gateway

Homes with basements often have window wells—recessed openings that allow natural light and ventilation into below-ground spaces. While they serve practical purposes, especially in colder climates like the Midwest, Northeast, and Mountain states, they can also be a major source of heat loss in winter.

Why? Because:

  • Window wells sit close to cold soil and outdoor air, allowing frigid temperatures to transfer through the basement windows.

  • Cold air seeps into the basement, then spreads throughout the home.

A simple and effective solution is to install a window well cover. These covers:

  • Seal out drafts, snow, and rain

  • Improve insulation

  • Enhance safety without blocking natural light

By addressing this often-overlooked area, you can prevent cold air from creeping in and keep your basement—and the rest of your home—much warmer.


hellolovelyliving arhaus fire pit

Arhaus

Cozy up under the stars with Arhaus fire pits. The perfect blend of warmth, style, and timeless design for your outdoor space.


No. 3

You Need More Lüften: The German Secret to a Warmer Home

In Germany, the practice of lüften—opening windows wide for a few minutes each day—is a time-honored tradition, even in the coldest months. At first glance, it might seem counterintuitive to open windows in winter when you’re trying to retain heat. However, this method can actually help your home stay warmer.

Here’s how it works:

  • Stale, polluted indoor air is harder to heat than fresh air.

  • Fresh air heats up more quickly, making your heating system more efficient.

  • Short bursts of ventilation (5–10 minutes) refresh the air without significantly dropping indoor temperatures.

By incorporating lüften into your daily routine, you can improve air quality, reduce humidity, and make your heating system more effective—all without sacrificing warmth.

Takeaways

Naturally, there are many factors that can make it difficult to keep your home warm, such as poor insulation or an aging heating system. But once you’ve addressed the usual suspects, these lesser-known tips can make a surprising difference.

In this article, we’ve highlighted three unexpected sources of heat loss:

  • The garage, with its uninsulated walls and drafty doors

  • Basement window wells, which act as gateways for cold air

  • Indoor air quality, where practices like lüften can improve heating efficiency

By tackling these hidden heat drains, you can enjoy a cozier, more energy-efficient home all winter long—without the need for major renovations. Sometimes, it’s the smallest changes that bring the biggest warmth.

Looking for Home resources?

Looking to enhance your living space and create a sanctuary that supports your well-being? Explore our home partners who offer a wide range of resources to elevate your home environment.


homeHLL x Editor


Why Your Attic Still Smells Damp After Getting New Insulation

Many homeowners assume that simply renovating their attic with fresh insulation will eliminate that persistent damp smell. However, this approach often fails—and in some cases, it can even make the issue worse. Damp odors in the attic are usually symptoms of deeper, underlying problems that insulation alone cannot resolve.


In this article, we’ll explore the most common reasons why your attic might still smell damp even after insulation has been installed. From hidden roof leaks to poor ventilation and missing vapor barriers, we’ll break down the root causes and offer practical solutions to help you restore a dry, fresh-smelling attic space.

No. 1

Hidden Roof Leaks

One of the most frequent culprits behind attic dampness and the main reason people get damp smells in their attics is hidden roof leaks. Even if your roof appears intact from both the inside and outside, usually, the main issue is that small cracks or gaps can allow water to seep in over time, saturating the internal structure and creating a musty odor.

Common causes include:

  • Tiny cracks in shingles or underlayment

  • Ice dams forming during winter

  • Faulty flashing around chimneys or vents

These issues often go unnoticed until the damage becomes significant. The best course of action is to hire a professional roofing contractor who can inspect the roof thoroughly and recommend appropriate repairs. Addressing these leaks at the source is essential to eliminating the damp smell for good.

No. 2

Bathroom and Kitchen Vents Dumping Into the Attic

Another major contributor to attic moisture is improper venting from bathrooms and kitchens. Some builders, in an effort to cut costs, route HVAC and exhaust vents directly into the attic instead of outside the home.

This setup leads to:

  • Excess humidity being trapped in the attic

  • Increased risk of mold and mildew

  • Persistent damp odors

To resolve this, vents should be relocated or rerouted to expel air directly outside—ideally through the nearest exterior wall or roof outlet. This change can dramatically reduce moisture accumulation and improve overall attic air quality.

No. 3

Poor Ventilation

Inadequate attic ventilation is another common reason for lingering damp smells. Without proper airflow, moisture becomes trapped, creating a humid environment that fosters mold and mildew growth.

To improve ventilation:

  • Install soffit and ridge vents to allow consistent airflow

  • Use two-way vents to create cross-breezes

  • Ensure vents aren’t blocked by insulation or debris

Proper ventilation helps regulate humidity levels and allows moist air to escape before it can cause damage. In many cases, simply increasing airflow can significantly reduce or eliminate damp odors.


hellolovelyliving smell away

Smell Away

Say goodbye to stubborn odors with the Smell Away® Odor Neutralizing Machine! Perfect for homes, it eliminates pet smells, cooking odors, dampness, and more—leaving your space fresh and inviting.

Shop now for cleaner, healthier air!


No. 4

Improper Insulation Installation

Even with new insulation, improper installation can exacerbate dampness. If insulation is placed over wet materials or installed without addressing existing moisture issues, it can trap water and worsen the smell.

Warning signs include:

  • Wet or soggy insulation

  • Visible mold or moss behind insulation layers

  • A musty odor that persists despite recent upgrades

To check for this issue, carefully pull back a section of insulation and inspect the area behind it. If you find moisture or mold, you’ll need to remove the affected material, dry the area thoroughly, and possibly replace the insulation with new, dry material.

No. 5

No Vapor Barrier

A vapor barrier is a critical component in preventing moisture buildup in attics. Without it, warm, moist air from the living spaces below can rise into the attic, condense on cooler surfaces, and create an environment ripe for mold and mildew.

Without a vapor barrier, you may experience:

  • Condensation during cooler temperatures

  • Increased humidity levels

  • Persistent damp smells

Installing a proper vapor barrier helps block moisture from entering the attic in the first place. This barrier should be placed on the warm side of the insulation (typically facing the interior of the home) to effectively prevent condensation.

Takeaways

If your attic still smells damp after adding insulation, it’s likely that the underlying issue hasn’t been resolved. Insulation alone cannot fix problems like hidden leaks, poor ventilation, or improper vapor control.

In this article, we’ve explored the most common reasons why damp odors persist in attics and provided actionable solutions to address each one. By identifying the true source of the moisture—whether it’s a leaking roof, misdirected vents, or missing vapor barriers—you can take targeted steps to eliminate the smell and protect your home from further damage.

Ultimately, a dry, fresh-smelling attic isn’t just about comfort—it’s about maintaining the structural integrity and health of your entire home. With the right approach, you can ensure your attic remains a clean, dry, and functional space for years to come.

Looking for Home resources?

Looking to enhance your living space and create a sanctuary that supports your well-being? Explore our home partners who offer a wide range of resources to elevate your home environment.


homeHLL x Editor


Extend The Life Of Your Home With These Tips

There are countless compelling reasons to want your home to stand the test of time. Beyond the obvious financial benefits—such as preserving and even increasing your property’s value—a well-maintained home is simply a better place to live. It functions more efficiently, looks more appealing, and provides a sense of pride and security that’s hard to quantify.


In this article, we’ll explore essential strategies to help extend the life of your home. From regular inspections and moisture control to HVAC maintenance and foundation protection, these practical tips will help you ensure your home remains a safe, beautiful, and valuable space for years to come.

No. 1

Regular Inspections

One of the simplest yet most effective ways to preserve your home is by conducting regular inspections. This proactive habit allows you to identify and address minor issues before they escalate into costly repairs.

Focus your inspections on key areas such as:

  • Roofing: Look for missing shingles, leaks, or signs of wear.

  • Foundation: Check for cracks or water pooling.

  • Plumbing: Monitor for leaks, corrosion, or low water pressure.

  • Electrical systems: Ensure wiring and outlets are safe and up to code.

Aim to inspect these areas at least twice a year to keep your home in optimal condition. Making this a routine part of your home care will pay dividends over time.

No. 2

Maintain Your Roof & Gutters

Your roof is your home’s first line of defense against the elements, and your gutters play a critical role in directing water away from the structure. Together, they protect everything beneath them.

To keep them in top shape:

  • Clean gutters regularly to prevent blockages and water damage.

  • Inspect for missing or damaged shingles and repair them promptly.

  • Check for signs of leaks both inside and outside the home

Addressing these issues early can prevent extensive water damage and structural deterioration. While some tasks can be DIY, don’t hesitate to hire professionals to carry out an early roof repair before it gets any worse.

No. 3

Control Moisture Levels

Moisture is one of the most underestimated threats to a home’s longevity. Left unchecked, it can lead to mold, rot, and even structural damage.

To manage moisture effectively:

  • Fix leaks immediately, whether from plumbing or the roof.

  • Ventilate high-humidity areas like bathrooms and kitchens.

  • Use dehumidifiers in basements or damp-prone rooms.

These simple actions can dramatically reduce the risk of moisture-related damage and help your home stay healthier and more resilient.


Rejuvenation

Rejuvenation believes in the power of thoughtful design - explore their extensive range of outdoor hardware, including stylish accessories that add character and charm to your home's exterior.


No. 4

Maintain Your HVAC Systems

Your heating, ventilation, and air conditioning (HVAC) systems work hard to keep your home comfortable year-round. Proper maintenance not only extends their lifespan but also improves energy efficiency and indoor air quality.

Here’s how to care for your HVAC systems:

  • Replace filters regularly (typically every 1–3 months).

  • Schedule annual professional inspections to ensure optimal performance.

  • Clean vents and ducts to maintain airflow and reduce allergens.

By investing a little time and effort into HVAC maintenance, you’ll enjoy a more comfortable home and avoid costly repairs down the line.

No. 5

Protect the Foundation

The foundation is literally what your home is built on—so protecting it is non-negotiable. Water is the biggest threat here, as it can erode and weaken the structure over time, which can damage the foundation.

To safeguard your foundation:

  • Ensure proper drainage by grading landscaping away from the house.

  • Inspect for cracks or signs of settling and address them promptly.

  • Install or maintain gutters and downspouts to direct water safely away.

If you notice any warning signs, consult a professional to assess the situation. Early intervention can prevent major structural issues and preserve your home’s integrity.

No. 6

Maintain Exterior Surfaces

Caring for your home’s exterior isn’t just about aesthetics—it’s also about protection. Paint, siding, and trim shield your home from weather damage and wear.

To keep your exterior in top shape:

  • Repaint or reseal surfaces as needed to maintain a protective barrier.

  • Inspect for signs of wear, such as peeling paint or cracked siding.

  • Perform touch-ups promptly to prevent small issues from escalating.

Regular upkeep of your home’s exterior will not only enhance curb appeal but also extend the life of the materials and structure beneath.

Takeaways

Extending the life of your home doesn’t require massive renovations or constant upgrades. Instead, it’s about consistent, thoughtful maintenance and a proactive approach to small issues before they become major problems.

By following the strategies outlined in this article—from regular inspections and moisture control to HVAC and foundation care—you’ll be well on your way to preserving your home’s value, functionality, and beauty for many years to come.

Whether you’re planning to stay in your home for decades or simply want to protect your investment, these practices will help you create a living space that’s not only long-lasting but also a true source of pride.

Looking for Home resources?

Looking to enhance your living space and create a sanctuary that supports your well-being? Explore our home partners who offer a wide range of resources to elevate your home environment.


homeHLL x Editor


How To Properly Winterize A Desert Home

When people think of states like Arizona, Nevada, or New Mexico, the image that usually comes to mind is one of scorching sunshine, palm trees, endless cacti, and dry heat. Thanks to pop culture portrayals like Breaking Bad, many assume that a light jacket is all you’ll ever need. And sure, in the summer, when triple-digit temperatures are the norm, that assumption makes sense.


But here’s the reality check: winter still exists in the desert—and it’s colder than you think.

In this article, we’ll debunk the myth that desert homes don’t need winterizing, explain why the cold hits differently in arid climates, and walk you through simple, effective ways to keep your desert home warm and comfortable during the colder months. Whether you're a full-time resident or a seasonal snowbird, these tips will help you avoid the all-too-common mistake of underestimating the desert chill.

No. 1

Desert Homes Aren’t Exactly Built for the Cold

Here’s the thing many newcomers don’t realize: desert homes are designed to beat the heat, not the cold. Their architecture is focused on staying cool during those blistering summer days. That means:

  • Tile floors that stay cool underfoot

  • High ceilings that promote airflow

  • Minimal insulation

  • Drafty sliding doors and windows

All of these features are fantastic when it’s 105°F outside—but once winter hits, they can turn your home into an icebox. That moment when you step out of a warm bed onto a freezing tile floor? In the desert, that’s not just a moment—it’s the whole house.

And depending on the age of your home, your heating options might vary wildly. Some older homes don’t have heaters at all. Others might have outdated systems in need of repair, while newer builds may include HVAC systems or even wood stoves. Some residents rely solely on space heaters, which can be effective but come with their own limitations.

No. 2

Desert Cold Just Hits Different

So why does a 45-degree night in the desert feel colder than the same temperature elsewhere?

It’s all about the dry air and rapid temperature drop. In humid climates, moisture in the air can act as a buffer, slowing down how quickly your body loses heat. But in the desert, the dry air allows heat to escape from your body faster, making the cold feel sharper and more penetrating. It’s not just chilly—it’s bone-deep.

That’s why desert locals often say, “It’s a different kind of cold.” And they’re not wrong.


hellolovelyliving rock solar

Rock Solar

Eco-friendly portable power solutions for commercial use, homes, RVs, and campers and cabins. Harness clean energy, reduce your carbon footprint, and power your life sustainably.


No. 3

But How Can You Make Your Desert Home Warmer?

The good news? You don’t need to go full cabin-in-the-woods mode with firewood stacked outside and thermal curtains on every window (although if you have a real fireplace, that’s a cozy bonus).

Instead, here are simple, practical ways to winterize your desert home without a major renovation:

1. Add Rugs to Tile Floors

Tile is great for summer, but in winter, it’s a heat-sapping nightmare. Lay down thick area rugs or runners in high-traffic areas and bedrooms to keep your feet warm and reduce heat loss.

2. Use Heavier Curtains

Swap out your light, breezy summer drapes for thermal or blackout curtains. These help insulate your windows and keep the warmth inside—especially at night when temperatures drop quickly.

3. Seal Drafts Around Doors and Windows

Desert homes often have older sliding doors or single-pane windows that let cold air seep in. Use weatherstripping, draft stoppers, or caulk to seal gaps and prevent heat from escaping.

4. Upgrade Bedding and Sleepwear

Trade in your thin summer sheets for a thick comforter or duvet. Add flannel sheets, wear fuzzy socks, and keep an extra blanket nearby. These small changes make a big difference on cold desert nights.

5. Inspect and Maintain Heating Systems

If your home has a central heating system, wood stove, or space heaters, make sure they’re in good working order before winter hits. Schedule a heater repair service if needed, and consider upgrading to a more efficient system if your current one is outdated.

Takeaways

Just because you live in the desert doesn’t mean you’re immune to winter. In fact, the cold in arid regions can be surprisingly intense—especially at night. The architecture of desert homes, while perfect for summer, often lacks the insulation and heating infrastructure needed for colder months.

By taking a few simple steps—like adding rugs, sealing drafts, and swapping out your bedding—you can make your home significantly warmer and more comfortable. And if you’re a snowbird or new to the area, don’t make the rookie mistake of assuming you won’t need a coat. You will.

Winterizing your desert home isn’t about overhauling your lifestyle—it’s about making smart, seasonal adjustments that keep you cozy when the desert chill sets in. So go ahead, pull out those fuzzy socks and thermal curtains—your bones will thank you.

Looking for Home resources?

Looking to enhance your living space and create a sanctuary that supports your well-being? Explore our home partners who offer a wide range of resources to elevate your home environment.


homeHLL x Editor