Posts in home
How To Transform Your Backyard into The Serene Outdoor Oasis You Deserve

Your backyard holds more potential than you might realize. It’s not just a patch of grass or an afterthought behind your home—it’s a canvas for peace, connection, and restoration. It’s where slow mornings can stretch a little longer, where evenings soften after a long day, and where quiet moments finally get the space they deserve.


In this article, we’ll explore how to thoughtfully transform your backyard into a serene outdoor oasis. From defining your emotional vision to selecting lasting materials and working with local experts, this guide focuses on creating a space that doesn’t just look beautiful—it feels like relief the moment you step outside.

No. 1

Start With a Clear Vision of What Your Ideal Outdoor Space Feels Like

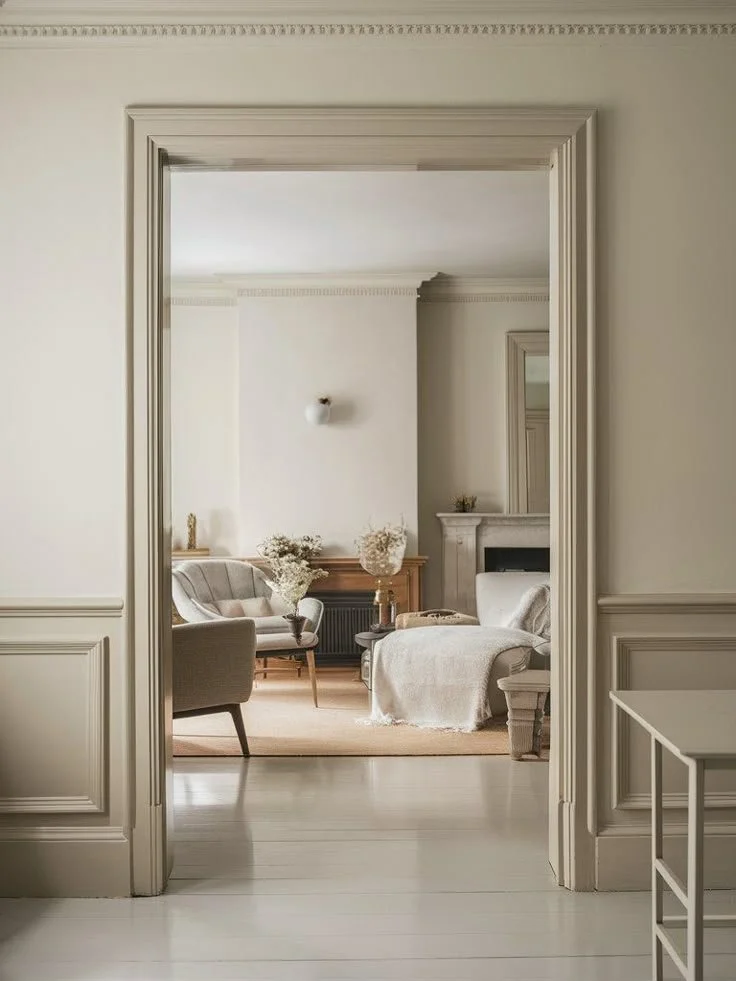
Before you pick up a shovel or scroll through endless inspiration boards, pause and consider how you want your backyard to feel—not just how it should look. Do you envision a space that’s calm and grounded? Lush and tropical? Clean and modern with room to breathe?

These emotional cues are more important than fleeting trends. They serve as your compass, guiding every design decision with purpose.

  • Observe how you already use the space: Do you seek shade in the afternoon? Do you long for a quiet corner to read or a place to gather with friends?

  • Design around emotion: When your choices are rooted in how you want to feel, everything from furniture to layout to plant selection begins to align naturally.

  • Visualize the experience: Sketch your ideas, collect textures, and imagine how light moves across the yard throughout the day. This step not only saves money in the long run but ensures your outdoor space feels authentic and intentional.

No. 2

Explore Local Experts for Custom Pool Remodeling & Renovation

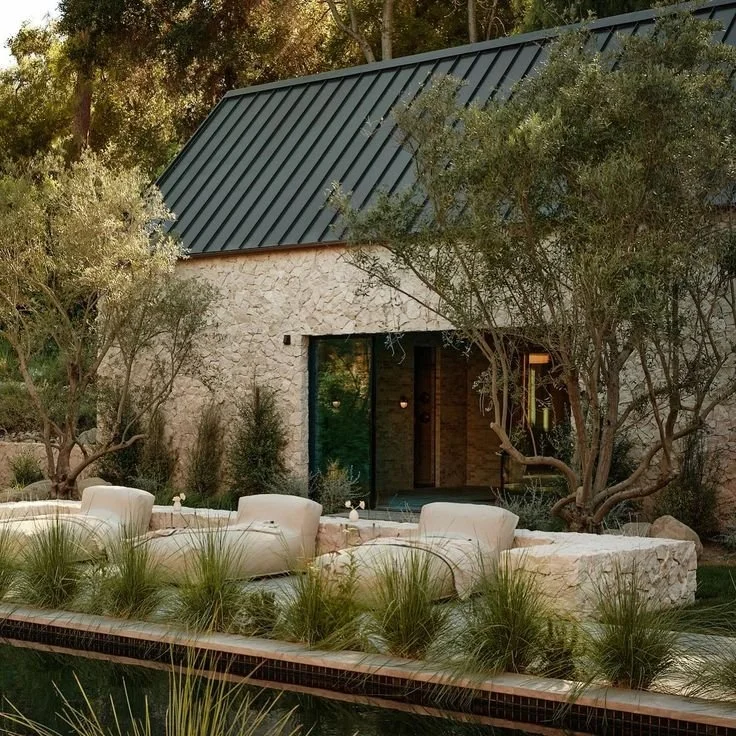
A pool can become the centerpiece of your outdoor oasis—but only if it’s designed with care and context. This is where working with local professionals makes a difference.

Hiring specialists in custom pool remodeling & renovation in my area means your project is guided by people who understand your region’s climate, soil conditions, and lifestyle. Their insights help you make smarter decisions about:

  • Pool shapes and sizes that complement your yard’s layout

  • Finishes and materials that withstand local weather

  • Design features that enhance usability and aesthetic flow

Whether you’re updating an existing pool or reimagining the entire space around it, local experts help you avoid costly missteps and reveal creative possibilities you might not have considered.

Think beyond the swim—consider how your pool connects to seating areas, shaded zones, and garden paths. The goal is not just function, but flow.

No. 3

Practical Tips for Choosing Materials That Last and Look Beautiful

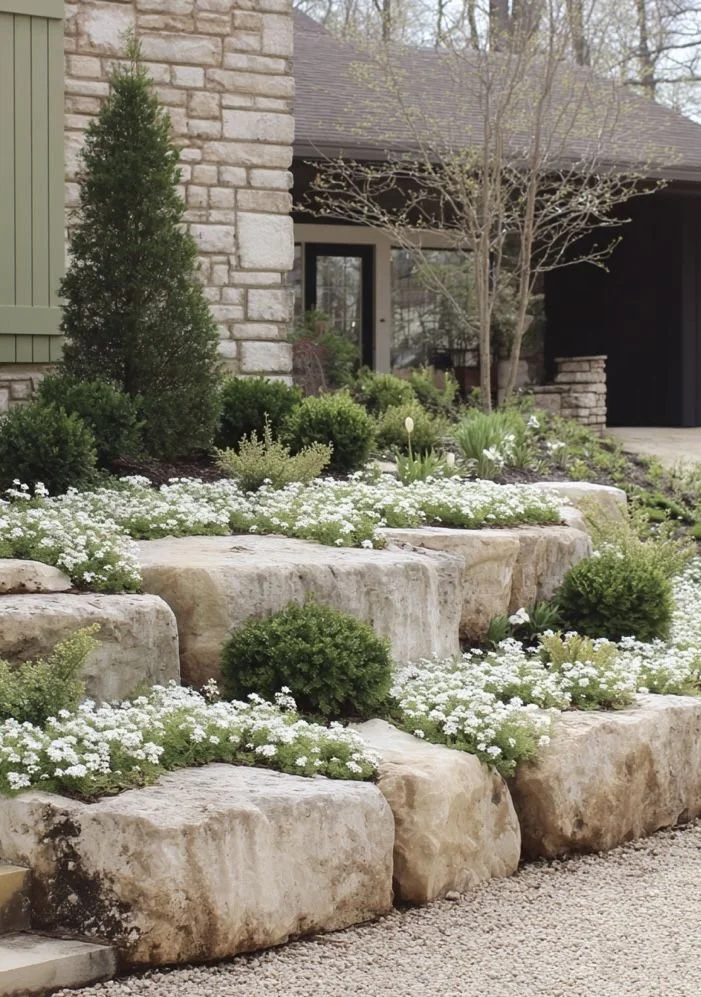
Outdoor materials must strike a balance between durability and design. They need to endure the elements like natural stone, textured concrete, and quality porcelain tiles, while still contributing to the overall serenity of the space.

Surfaces:

  • Natural stone: Cool underfoot and visually timeless

  • Textured concrete: Slip-resistant and versatile

  • Porcelain tiles: Durable and available in a range of elegant finishes
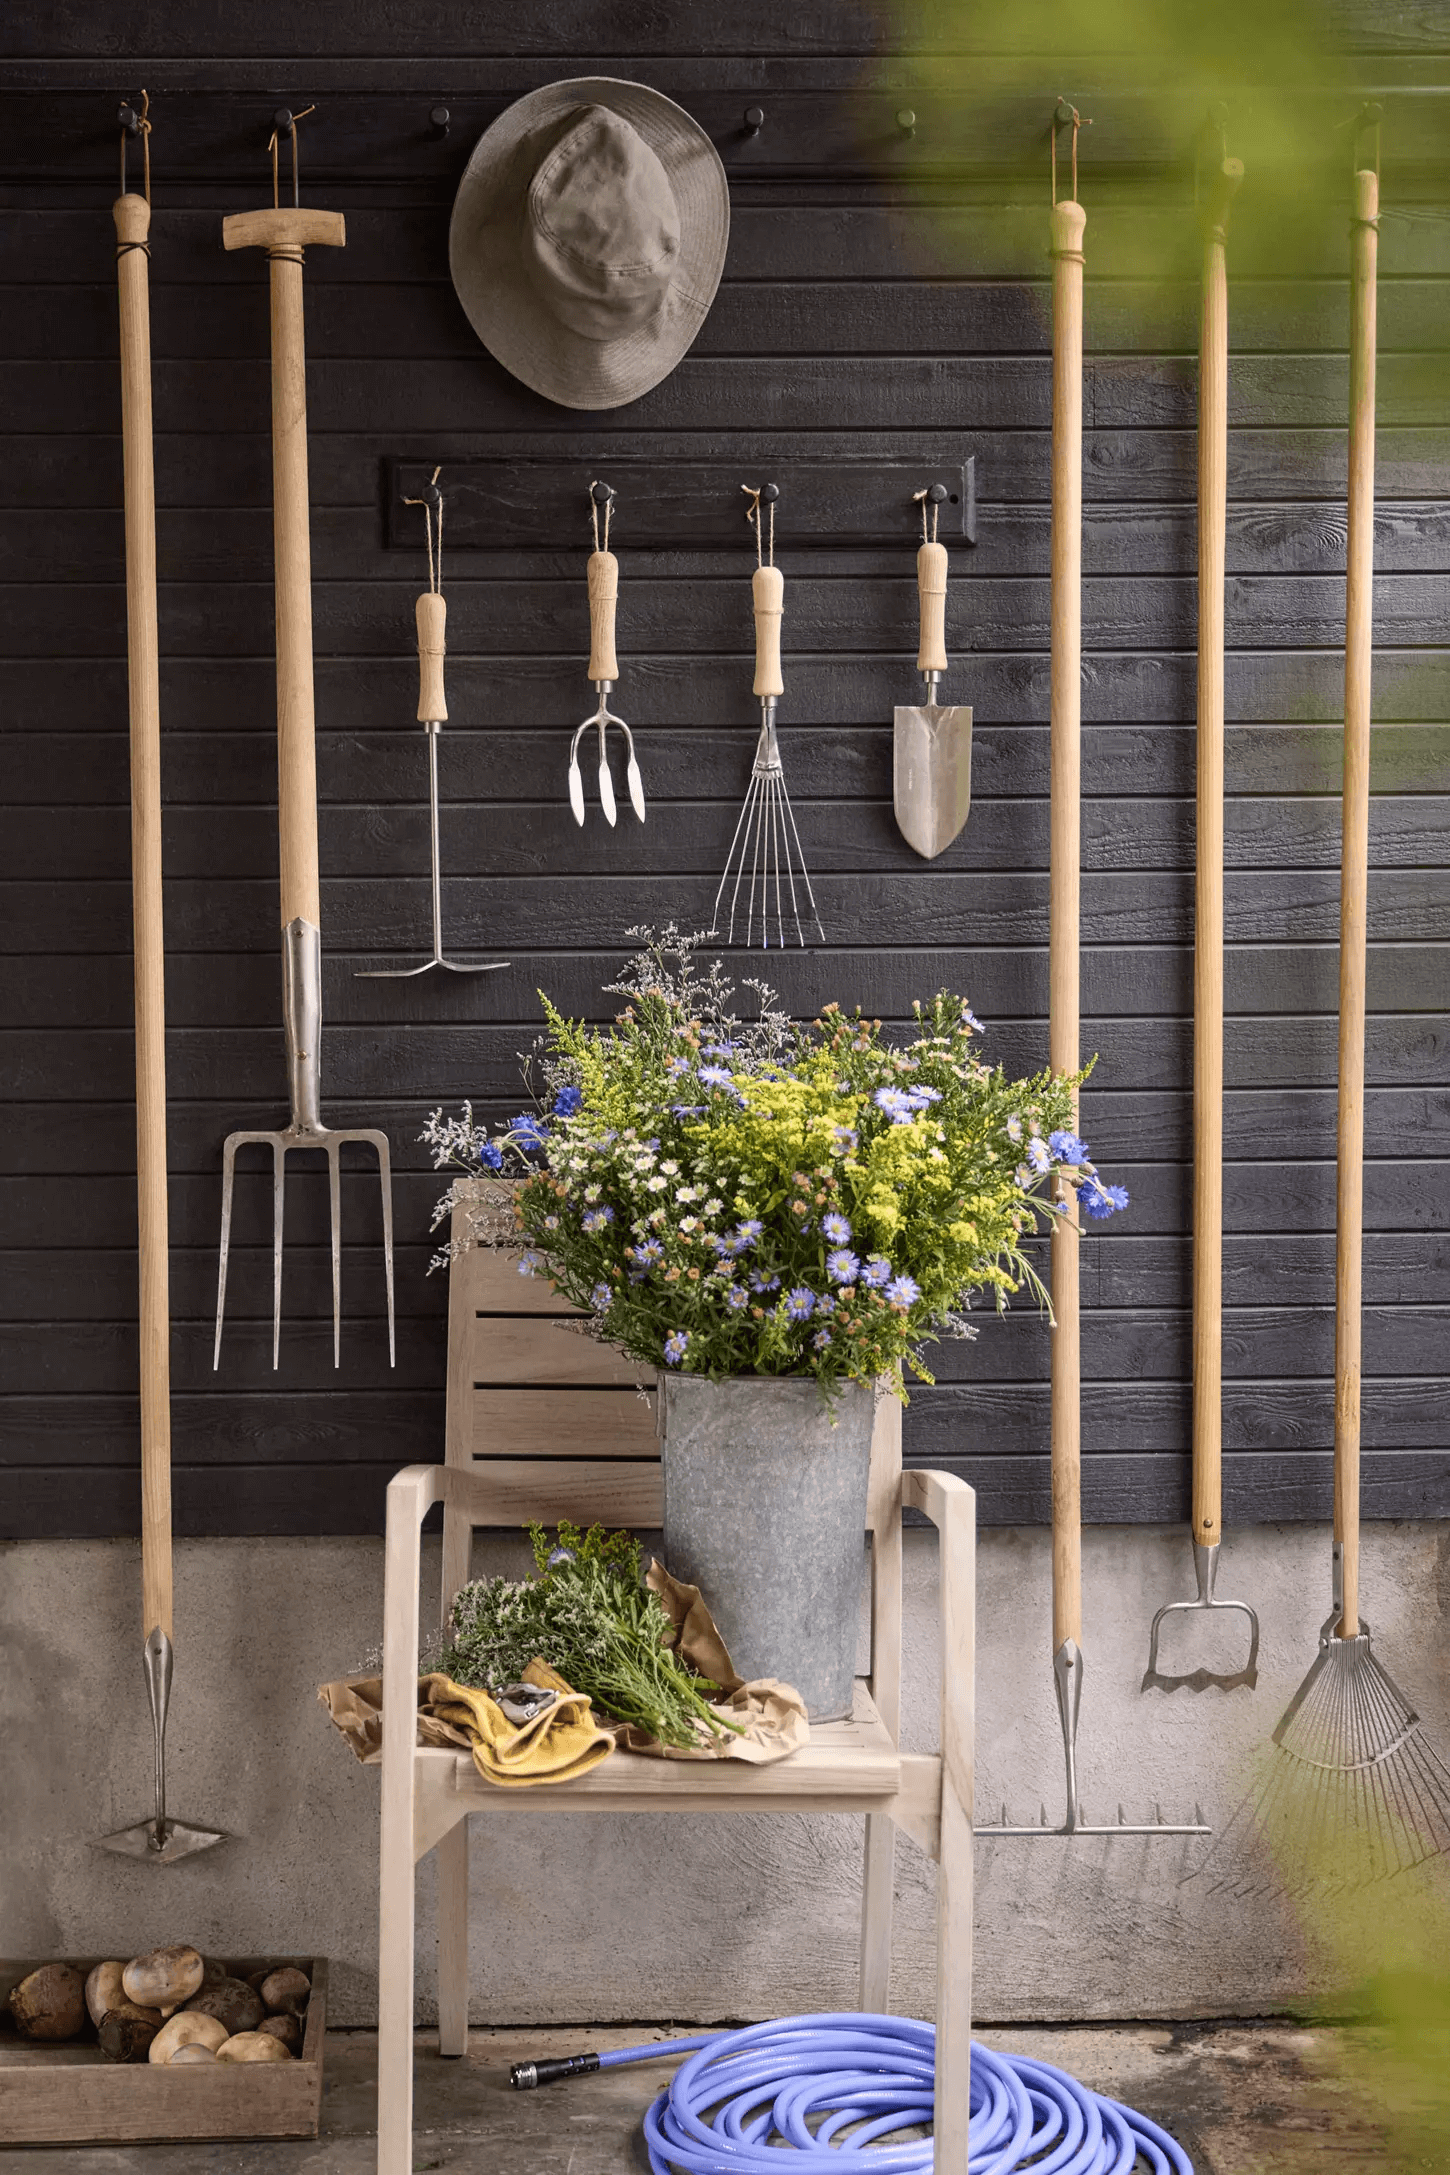
Wood Elements:

  • Choose treated or composite wood for decks and pergolas to prevent warping and fading

  • Use natural wood accents sparingly to add warmth without increasing maintenance

Furnishings:

  • Prioritize structural strength for outdoor furniture

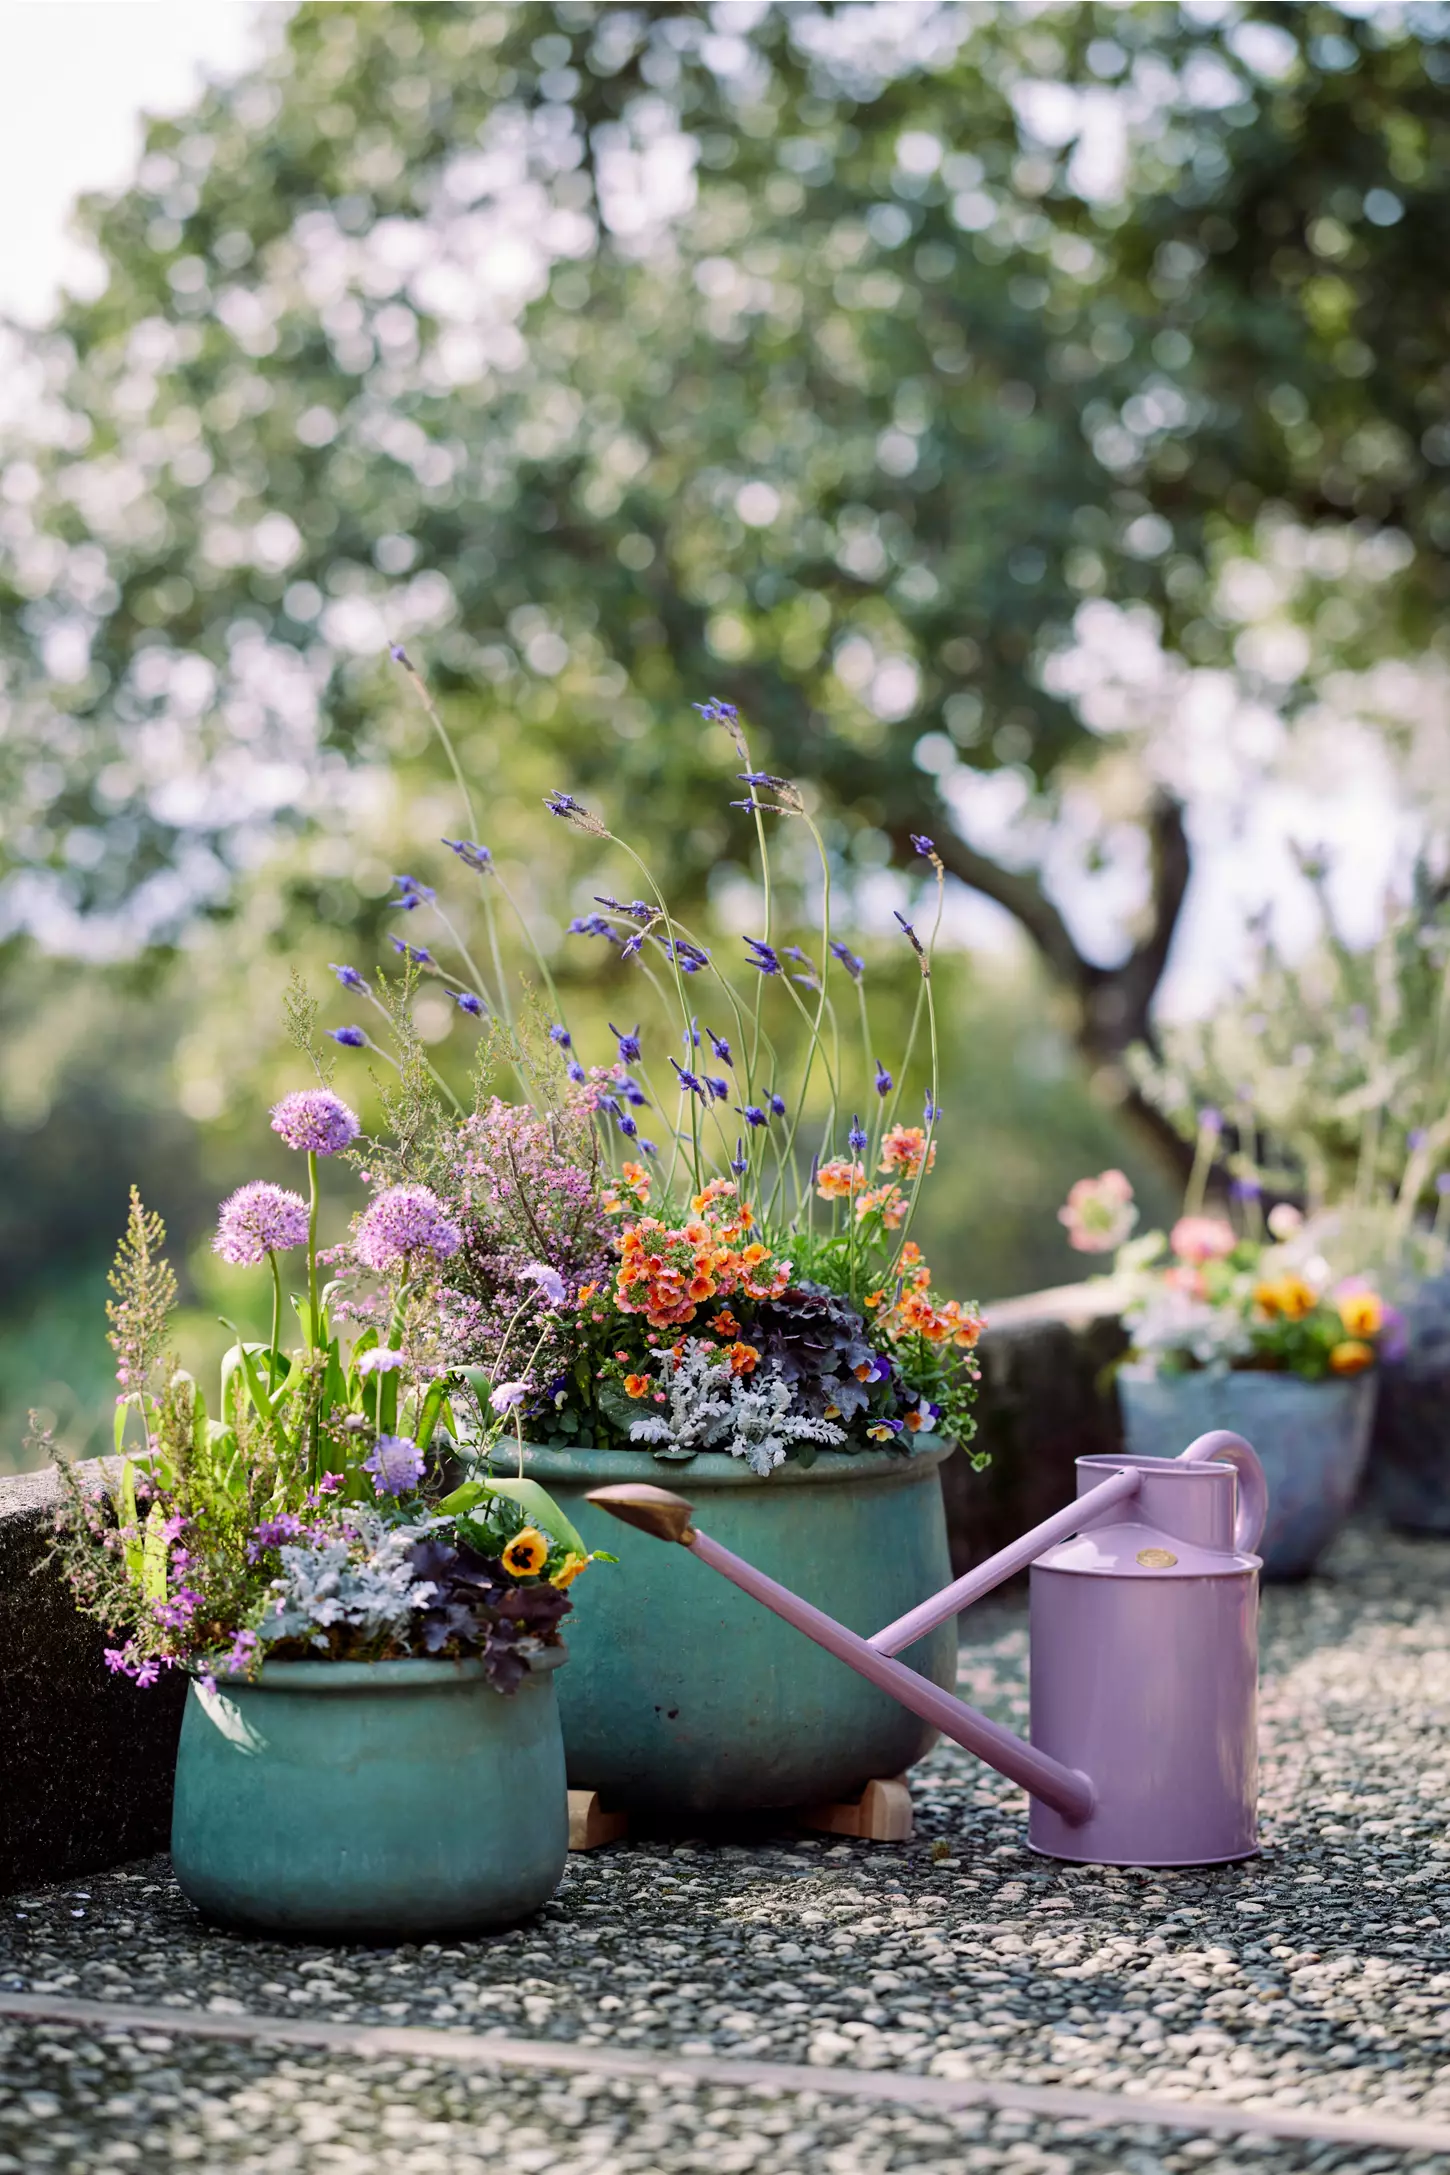
  • Add softness with weather-resistant cushions, throws, and planters

Low-maintenance doesn’t mean lifeless. It means choosing finishes that age gracefully and still look inviting when life gets busy.
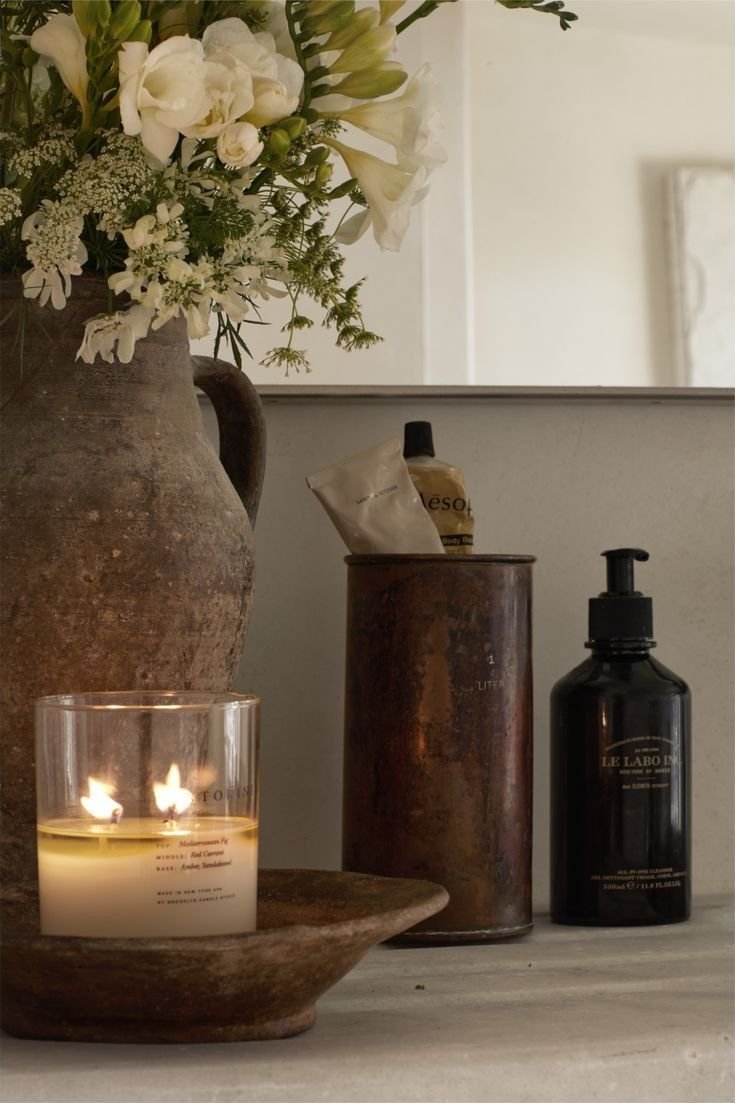
 
 
hellolovelyliving terrain

Terrain

Indoor and outdoor living, garden, and entertaining essentials that are well-designed, lasting, and beautiful.


No. 4

Add Layers That Invite You to Stay

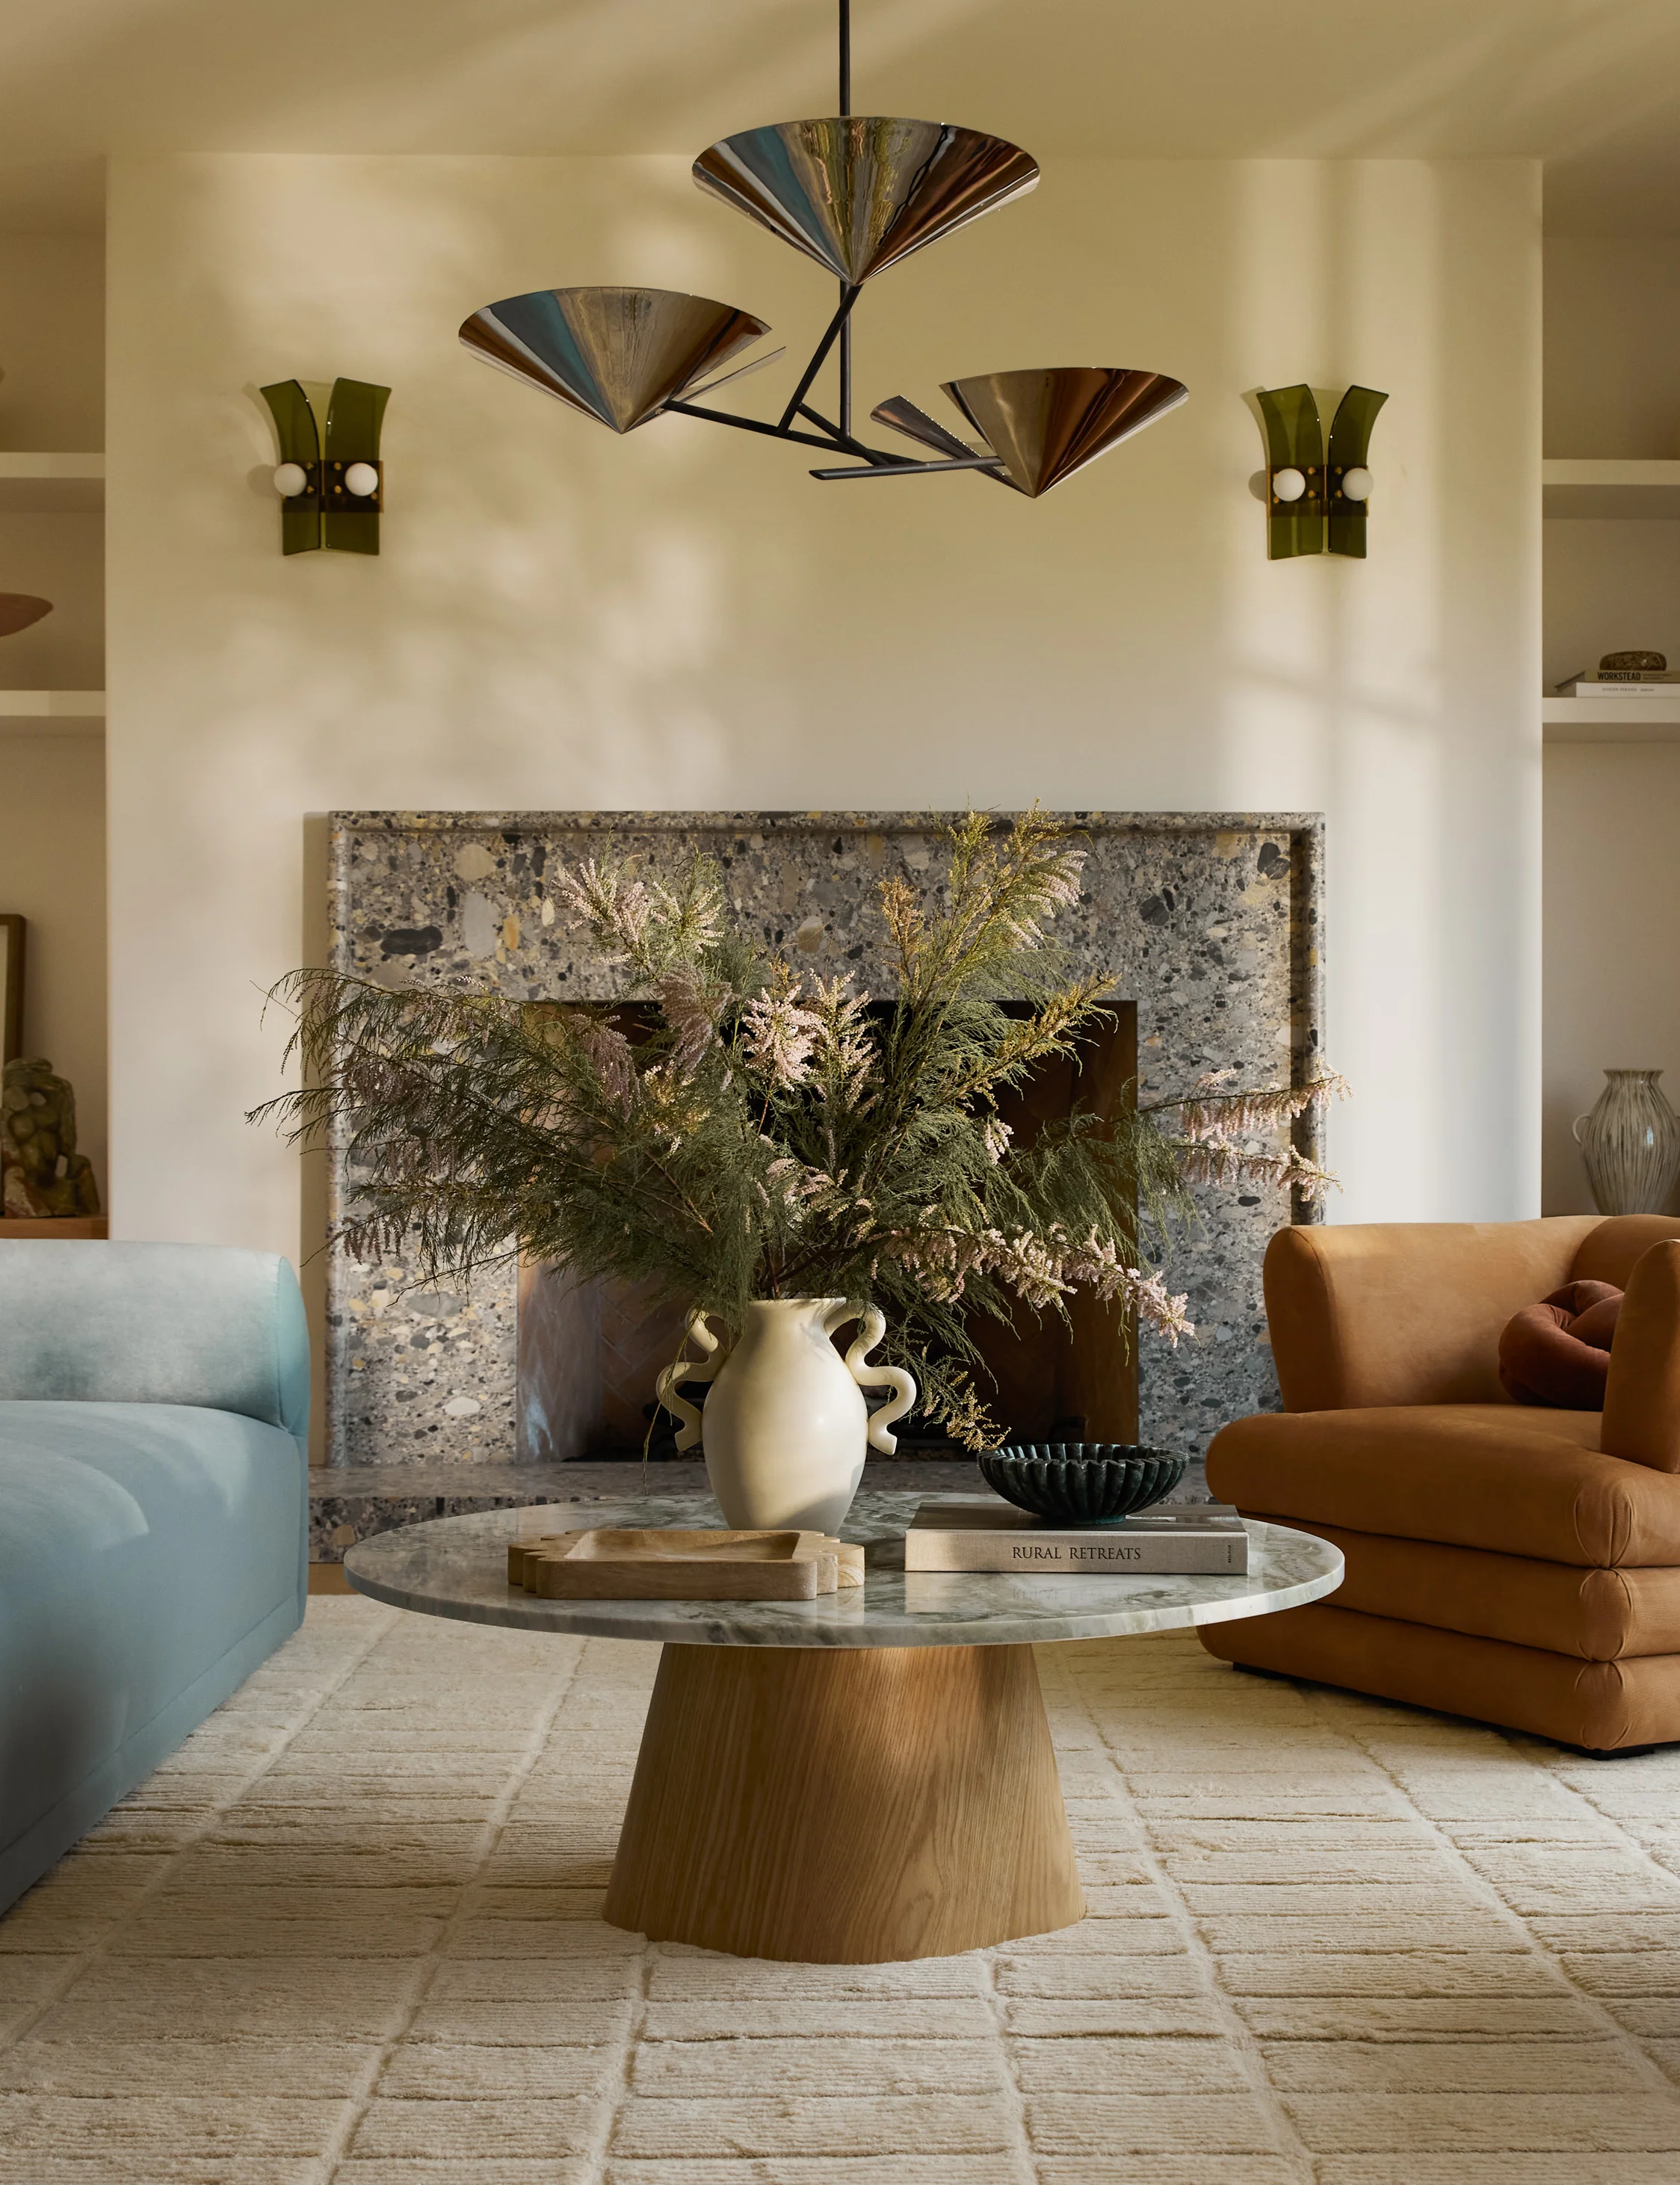
A serene outdoor space is built in thoughtful layers. Each element should invite you to linger, to breathe, and to return.
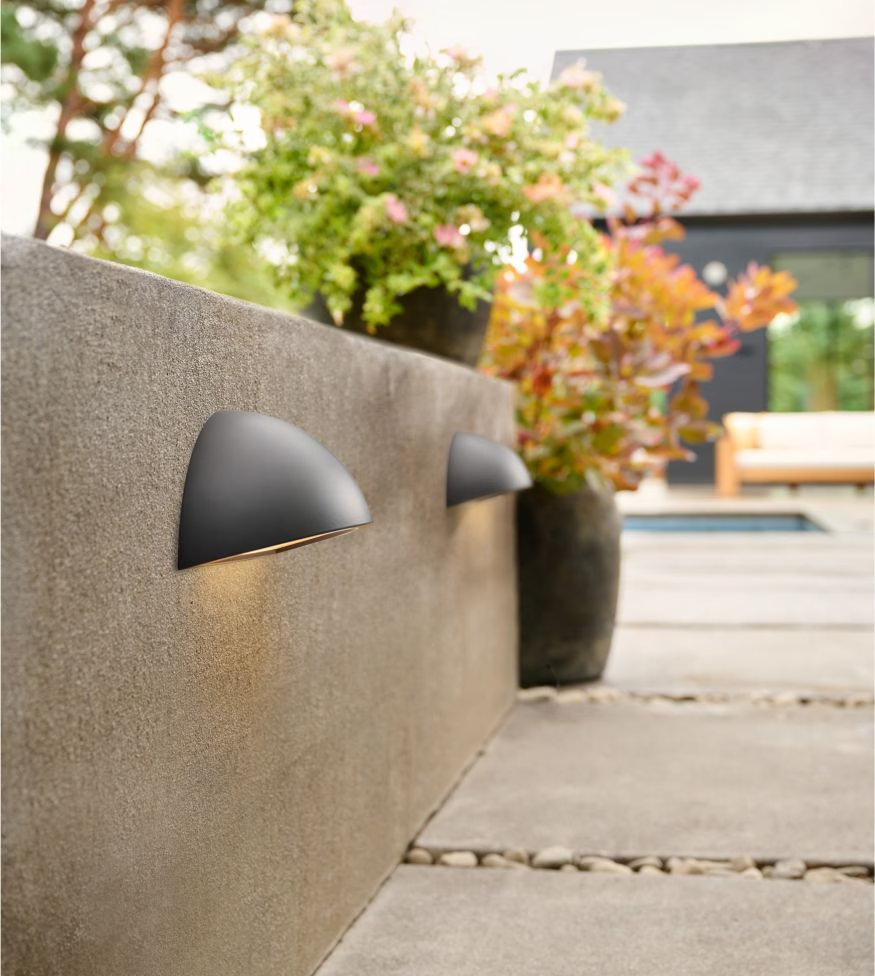
Lighting:

  • Use soft, indirect lighting to create atmosphere

  • Add uplighting in trees, pathway lights, and subtle fixtures near seating areas

  • Avoid harsh overhead lights that disrupt the mood
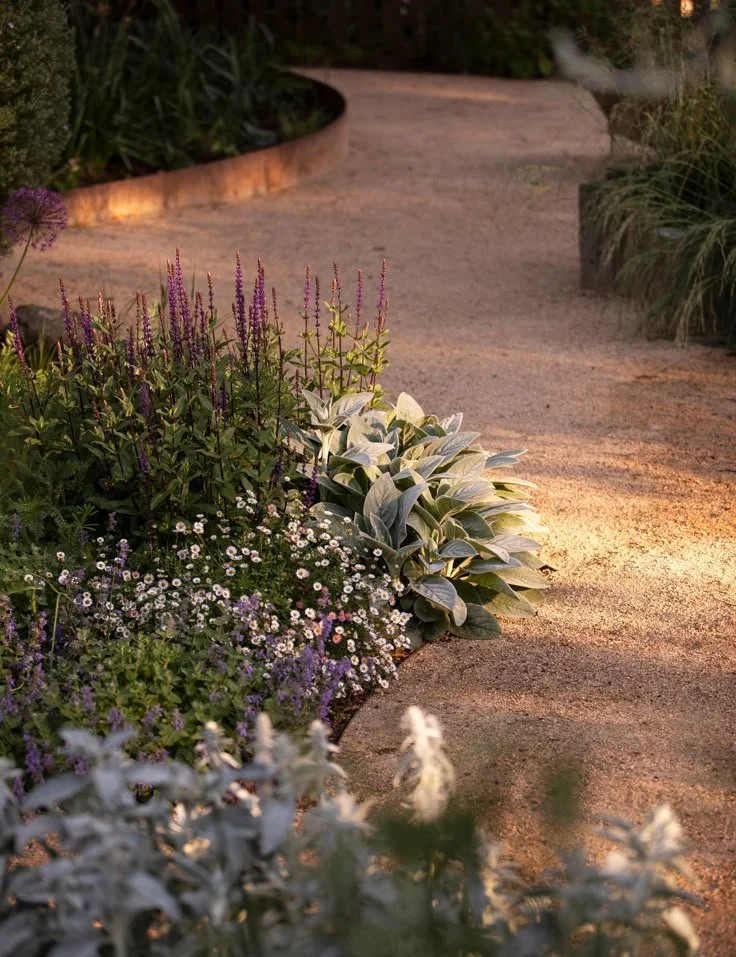
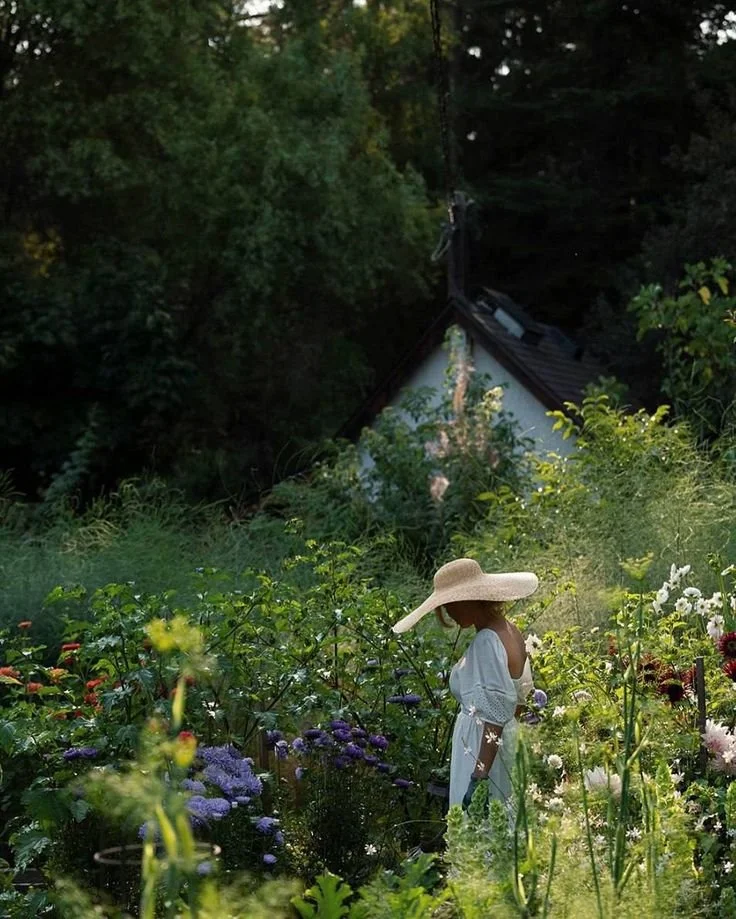
Planting:

  • Mix heights and textures to create visual interest

  • Include open space to allow for stillness and movement

  • Choose plants that thrive in your climate and require minimal upkeep
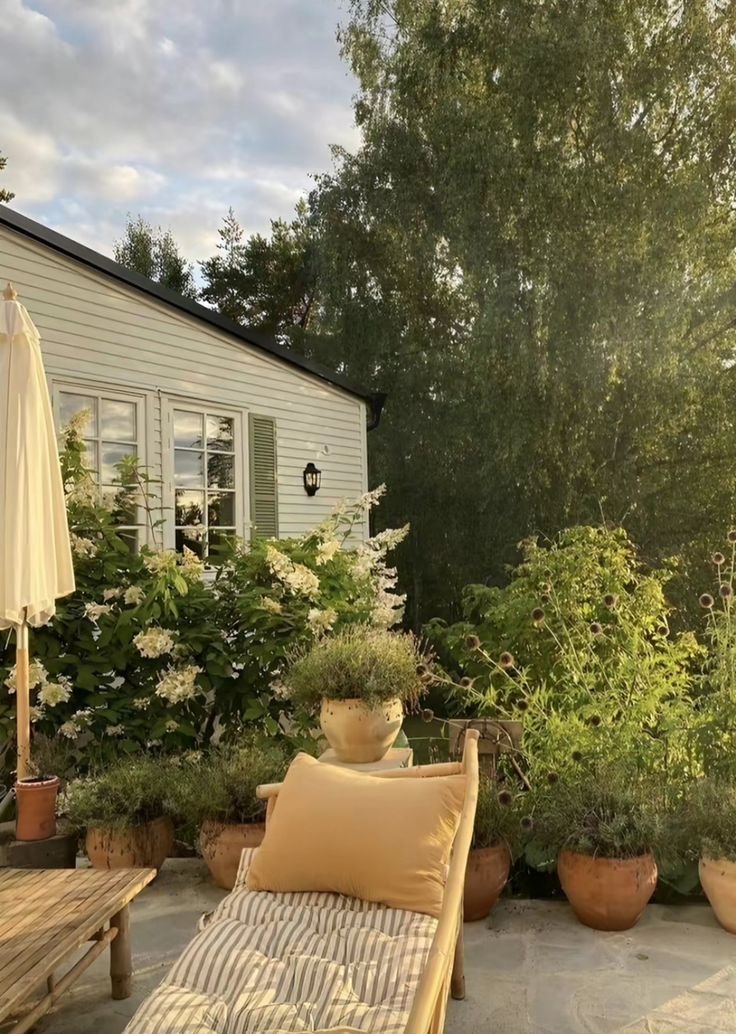
Comfort:

  • Incorporate shade structures like pergolas, umbrellas, or trees

  • Provide multiple seating options—lounges, benches, hammocks—for different moods and moments

  • Consider outdoor rugs and side tables to make the space feel complete

In the end, a serene backyard isn’t about perfection. It’s about intention. When each choice supports how you want to feel, your outdoor space becomes a place you return to—not out of obligation, but out of desire.

Takeaways

Your backyard is more than a backdrop—it’s a sanctuary waiting to be shaped. Whether you’re starting from scratch or refining an existing space, the key to creating a true outdoor oasis lies in designing with emotion, not just aesthetics.

In this article, we’ve explored how to:

  • Define your emotional vision for the space

  • Work with local experts for custom pool remodeling and renovation

  • Choose materials that are both beautiful and enduring

  • Layer lighting, plants, and furnishings to invite relaxation

When you design with intention, your backyard becomes more than a weekend project—it becomes a daily retreat. A place where time slows down, where comfort meets beauty, and where you can finally exhale.

Let your outdoor space reflect not just how you want it to look, but how you want it to feel. That’s when it truly becomes an oasis.

Looking for Home resources?

Looking to enhance your living space and create a sanctuary that supports your well-being? Explore our home partners who offer a wide range of resources to elevate your home environment.


homeHLL x Editor


What To Look For When You’re Comparing Different Home Styles

When people talk about comparing home styles, the conversation often drifts toward surface-level preferences—rooflines, siding, porch size. While these elements are certainly part of a home’s character, they are not where the real differences lie. A home style is more than a visual statement; it is a framework that shapes how life unfolds within its walls, long after the novelty fades.


In this article, we’ll explore the deeper dimensions of home design—how space is used, how architecture sets emotional tone, how light and materials evolve over time, and how a home’s structure supports or resists change. These are the elements that truly matter when choosing a home style that aligns with your lifestyle, values, and long-term comfort.

Rather than relying on trendy talking points or predictable checklists, this guide invites you to look beneath the surface and consider how form, space, and intent influence the way you want to live.

No. 1

How Space Is Meant to Be Used

Every home style carries an implicit philosophy about movement and interaction. Some designs encourage openness and flow, while others emphasize separation and intentional transitions. This isn’t about square footage—it’s about how space communicates permission.

  • Open layouts foster overlap. Conversations spill across rooms, sound travels freely, and privacy becomes a conscious choice rather than a given.

  • Compartmentalized styles prioritize boundaries. They create mental pauses between activities and offer natural zones for focus and solitude.

When comparing home styles, observe how rooms relate to one another. Pay attention to:

  • Sightlines between spaces

  • Door placement and circulation paths

  • How walls guide or restrict movement

A floor plan may appear efficient on paper but feel awkward in daily life. Style influences these spatial relationships more than most people realize.

No. 2

The Emotional Tone of Architecture

Architecture sets the emotional tone before a single piece of furniture enters the space. Elements like ceiling height, window placement, and room proportions affect how a home feels—whether energized, grounded, expansive, or intimate.

  • Some styles lean into drama, using vertical emphasis and bold volumes.

  • Others feel settled and human-scaled, offering comfort through proportion and restraint.

Ask yourself: How does the structure make me feel when I imagine moving through it slowly—not entertaining guests, but simply living?

A home that feels impressive may also feel exhausting over time. One that seems understated might become increasingly comforting. This emotional resonance is difficult to quantify, but it is often the most enduring factor in long-term satisfaction.

No. 3

Light as a Design Philosophy

Natural light is not distributed equally across home styles. Some designs treat light as a central feature, while others use it more selectively.

  • Light-centric styles shape rooms around windows and orientation, maximizing daylight throughout the day.

  • Contrast-driven styles create interplay between bright and subdued areas, offering moments of visual rest.

Consider:

  • How light enters at different times of day

  • Whether the style favors symmetry (which can limit flexibility with sunlight)

  • How light supports energy, rest, and mood

Viewing light as a design philosophy reveals how a home style supports your rhythms without saying a word.


hellolovelyliving houzz

Houzz

Make your home project a reality. Find inspiration, products, and the pros to make it happen - all in one place.


No. 4

Storage Without Clutter

Storage is often overlooked in style discussions, yet it profoundly shapes daily life. Some architectural styles integrate storage seamlessly into the structure, while others treat it as an afterthought.

Look beyond closet counts. Ask:

  • Where would everyday items live?

  • How are shoes, coats, tools, and seasonal gear accommodated?

  • Does the style anticipate your needs, or does it rely on furniture to solve storage problems?

Styles that respect storage contribute to a sense of calm. Those that don’t can lead to visual noise and disorganization over time.

No. 5

How Materials Age Over Time

Every home style has a relationship with aging. Some are designed to develop character as materials wear. Others aim to maintain a pristine, uniform appearance.

  • Natural materials like wood and stone gain depth and patina.

  • Smooth, synthetic finishes may show wear more quickly and unevenly.

Think about:

  • How surfaces will change with daily use

  • Your tolerance for visible aging and imperfection

  • Whether the style embraces or resists the passage of time

This isn’t about maintenance anxiety—it’s about choosing a style that aligns with your values. A home that demands constant perfection can create stress. One that allows for aging can feel forgiving and lived-in.

No. 6

Flexibility for Change

Life evolves. A strong home style leaves room for that evolution without losing its identity.

  • Highly specific styles may feel rigid, making future alterations disruptive.

  • Flexible styles act as frameworks that adapt easily to new needs.

Ask:

  • Can the style accommodate future additions or layout changes?

  • How would it handle different uses for existing spaces?

  • Does it support growth, or does it resist it?

A flexible home style absorbs change gracefully, supporting your life as it unfolds.

No. 7

The Relationship Between Interior and Exterior

A home doesn’t end at the front door. Some styles blur the line between inside and outside, creating continuity. Others emphasize enclosure and shelter.

Consider:

  • How outdoor spaces connect to interior rooms

  • Whether the transition is gradual or abrupt

  • If the style invites you outward or keeps focus inward

This relationship affects how you experience the seasons and how often outdoor areas become part of daily living rather than occasional extras.

No. 8

Scale and Presence

Scale refers to how a home relates to the human body. Presence refers to how it occupies visual space. A home can be large but feel approachable—or modest but feel imposing.

Pay attention to:

  • Door and window proportions

  • Ceiling transitions

  • How the home feels when you stand inside it

Styles that respect human scale often feel more comfortable, even when expansive. Those that ignore it can feel cold or overwhelming. Once noticed, this subtle quality becomes impossible to ignore.

No. 9

Construction Logic Beneath the Style

Every home style is built on a construction philosophy. Some prioritize simplicity and repetition; others celebrate complexity and detail.

This affects:

  • Build timelines

  • Future modifications

  • Long-term maintenance

A style with straightforward structural logic is easier to adapt and sustain. One with intricate detailing may offer beauty but require more care and expertise over time.

No. 10

Personal Identity Without Performance

A home style works best when it feels natural—not performative. The most appealing designs support how you actually live, not how you want to appear.

Ask yourself:

  • Which styles feel comfortable to imagine on an ordinary day?

  • Which ones feel like they’re trying too hard to impress?

That’s why many people are drawn to exclusive barndominium plans. These designs offer honesty, flexibility, and a refreshing approach to space. They prioritize function, openness, and ease over image, making them a compelling alternative to more traditional or ornate styles.

Takeaways

Comparing home styles isn’t about finding the “best” one. It’s about discovering which design philosophy fits your life without friction.

In this article, we’ve looked beyond aesthetics to examine how home styles handle space, light, aging, flexibility, and emotion. These deeper considerations reveal the true character of a home—how it supports your habits, your energy, your growth.

The right style doesn’t demand attention. It earns appreciation slowly, through daily interactions that feel effortless and intuitive. And that’s usually the one worth choosing.

Looking for Home resources?

Looking to enhance your living space and create a sanctuary that supports your well-being? Explore our home partners who offer a wide range of resources to elevate your home environment.


homeHLL x Editor


How NYC’s Seasonal Weather Impacts Fine Art Storage And How To Prevent Damage

Owning fine art is a privilege that comes with a deep sense of responsibility. Beyond its aesthetic and cultural value, artwork is often fragile, sensitive to its environment, and susceptible to gradual deterioration if not properly cared for. In a city like New York, where seasonal weather changes are both dramatic and unpredictable, the need for proper fine art storage becomes not just important—but essential.


In this article, we’ll explore how each season in NYC uniquely affects fine art materials, and how collectors, designers, and homeowners can take proactive steps to protect their collections. From winter’s dry indoor air to summer’s oppressive humidity, we’ll break down the risks and offer expert strategies to ensure your artwork remains preserved, vibrant, and structurally sound all year long.

No. 1

Why Seasonal Weather Matters for Fine Art

Fine art materials—whether canvas, paper, wood, or metal—are inherently reactive to their environments. These materials expand, contract, absorb, and degrade depending on temperature, humidity, and air quality. In urban environments like NYC, these fluctuations are amplified by indoor heating, air conditioning, pollution, and even pest activity.

Key Environmental Risks:

  • Temperature fluctuations cause expansion and contraction

  • Humidity changes lead to warping, mold, or brittleness

  • Airborne pollutants accelerate chemical degradation

  • Pests target organic materials like paper and wood

Understanding how these elements interact with artwork is the first step toward long-term preservation.

No. 2

Winter Weather and Indoor Heating Risks

Cold Temperatures and Rapid Transitions

Winter in NYC brings sharp temperature drops. Moving artwork between frigid outdoor air and heated interiors can cause materials like canvas and wood to expand or contract too quickly, resulting in:

  • Cracking paint layers

  • Warped frames

  • Separation of mixed media layers

Paper-based art is particularly vulnerable, as cold air holds less moisture, leading to excessive dryness.

Dry Indoor Air from Heating Systems

Forced-air heating systems significantly reduce indoor humidity. Dry conditions can:

  • Shrink canvas and paper

  • Weaken adhesives

  • Loosen frames

  • Make surfaces brittle and prone to cracking

Winter Storage Tips:

  • Maintain stable indoor temperatures

  • Use humidifiers or humidity monitoring devices

  • Keep artwork away from heating vents and radiators

  • Store in climate-controlled rooms or professional storage facilities

No. 3

Spring Moisture and Humidity Challenges

Rising Humidity Levels

As NYC transitions into spring, rising humidity introduces a new set of risks. Moisture in the air can:

  • Cause paper to ripple

  • Loosen canvas tension

  • Swell wooden frames

  • Encourage mold growth

Increased Risk of Condensation

Warm indoor air meeting cool surfaces can create condensation. This moisture can settle on or inside artwork, especially if stored in poorly ventilated areas.

Spring Storage Tips:

  • Ensure proper ventilation in storage spaces

  • Use moisture-absorbing materials like silica gel

  • Inspect artwork regularly for early signs of mold

  • Avoid placing art directly against exterior walls


Artifact Uprising

Turn your memories into timeless treasures with Artifact Uprising. Create custom personalized photo books and albums that tell your story, your way.


No. 4

Summer Heat and Environmental Stress

High Temperatures and Prolonged Exposure

NYC summers are notoriously hot and humid. Prolonged exposure to high temperatures can:

  • Soften adhesives

  • Warp frames

  • Fade pigments

  • Accelerate chemical reactions in mixed media

Humidity and Air Quality Concerns

Summer air carries both moisture and pollutants. These particles settle on artwork surfaces, leading to:

  • Discoloration

  • Surface degradation

  • Increased aging of materials

This is where professional fine art storage nyc becomes invaluable. These facilities offer climate-controlled environments that remain stable regardless of outdoor conditions.

Summer Storage Tips:

  • Keep artwork out of direct sunlight

  • Use temperature-controlled storage consistently

  • Avoid handling art during peak heat hours

  • Monitor air quality and cleanliness in storage environments

No. 5

Fall Transition Period and Material Stress

Temperature Swings and Environmental Instability

Fall in NYC brings fluctuating temperatures—warm days and cool nights. These shifts create stress on layered materials like:

  • Oil paintings

  • Mixed media pieces

  • Sculptures with composite materials

Repeated expansion and contraction can lead to:

  • Cracking

  • Warping

  • Delamination

Pest Activity Increases

As temperatures drop, pests seek shelter indoors. Paper, textiles, and wood become prime targets for insects such as:

  • Silverfish

  • Termites

  • Carpet beetles

Fall Storage Tips:

  • Seal storage areas against pests

  • Inspect packaging and storage materials regularly

  • Avoid using cardboard or untreated wood

  • Maintain consistent indoor conditions during seasonal transitions

No. 6

Materials Most Affected by Seasonal Changes

Canvas and Oil Paintings

  • Highly sensitive to humidity and temperature shifts

  • Repeated stress leads to surface cracking and structural instability

Works on Paper

  • Absorb moisture quickly

  • Become brittle in dry conditions

  • Vulnerable to mold, foxing, and ink bleeding

Sculptures and Mixed Media

  • Wood swells or cracks

  • Metal corrodes or tarnishes

  • Composite materials may react unevenly, causing fractures

No. 7

Smart Storage Practices That Protect Fine Art

Climate Stability Over Perfection

  • Aim for consistent temperature and humidity, not perfection

  • Avoid frequent changes in the environment

Proper Packaging and Spacing

  • Use archival-quality materials for wrapping and storage

  • Allow for airflow around each piece

  • Never stack artwork directly against each other

Regular Monitoring and Maintenance

  • Conduct routine inspections

  • Use environmental monitoring tools

  • Limit handling to reduce accidental damage

No. 8

When Home Storage Isn’t Enough

While short-term home storage may suffice for some pieces, long-term preservation often requires specialized environments. Urban apartments in NYC rarely offer the climate stability needed to protect valuable or delicate artwork.

Why Choose Professional Fine Art Storage in NYC:

  • Controlled temperature and humidity

  • Air filtration systems to reduce pollutants

  • Security and fire protection

  • Expert handling and installation services

For high-value or irreplaceable pieces, investing in professional storage is not just wise—it’s essential.

Takeaways

Seasonal weather in NYC is inevitable—but damage to your fine art collection doesn’t have to be. By understanding how each season affects various materials and implementing smart storage practices, you can preserve your artwork’s beauty, value, and integrity for generations to come.

In this article, we’ve covered:

  • How each season uniquely impacts fine art

  • The materials most vulnerable to environmental changes

  • Practical, preventative storage strategies

  • The value of professional fine art storage solutions

Whether you're a seasoned collector or a new art enthusiast, the key to preservation lies in consistency, awareness, and proactive care. With the right environment and thoughtful planning, your art can weather every season—remaining as timeless and inspiring as the day it was created.

Looking for Home resources?

Looking to enhance your living space and create a sanctuary that supports your well-being? Explore our home partners who offer a wide range of resources to elevate your home environment.


homeHLL x Editor


The New Rustic: Modern Farmhouse Decor Trends For 2026

The modern farmhouse aesthetic has long been celebrated for its perfect harmony of rustic charm and contemporary elegance. With its roots in simplicity, warmth, and functionality, this design style has evolved from a passing trend into a timeless staple in interior design. As we look ahead, the modern farmhouse of 2026 is undergoing a stylish transformation—one that embraces deeper color palettes, sustainable choices, and a more curated, personal approach to decorating.


In this article, we’ll explore the top modern farmhouse decor trends for 2026 that are redefining the “new rustic.” Whether you’re planning a full home makeover or simply want to refresh a few key spaces, these insights will help you stay ahead of the curve while preserving the cozy, lived-in feel that makes this style so beloved.

No. 1

Embrace Moody Hues and Earthy Tones

While crisp white shiplap and soft neutrals have long been synonymous with farmhouse interiors, the 2026 version is leaning into richer, moodier tones that add depth and sophistication.

How to Bring It Home:

  • Paint a feature wall, kitchen island, or built-in bookshelf in shades like deep forest green, navy blue, or burnt terracotta.

  • Introduce these hues through textiles—think velvet throw pillows, chunky knit blankets, or a patterned area rug.

  • Layer these colors with natural textures like wood, leather, and linen for a grounded, organic feel.

These deeper tones maintain the farmhouse connection to nature while adding a dramatic, modern edge.

No. 2

Mix Materials with Confidence

Gone are the days of sticking strictly to wood and metal. The modern farmhouse of 2026 is all about layering textures and finishes to create visual interest and tactile richness.

How to Mix It Up:

  • Pair reclaimed wood beams with sleek marble countertops in the kitchen.

  • Combine a rustic farm table with upholstered dining chairs and polished concrete flooring.

  • In the living room, contrast a leather sofa with linen curtains, jute rugs, and ceramic accessories.

This interplay between raw and refined materials adds character and dimension to every room.

No. 3

Prioritize Sustainable and Authentic Decor

Sustainability is no longer a buzzword—it’s a design imperative. The modern farmhouse is uniquely positioned to embrace this shift, with its emphasis on authenticity, craftsmanship, and timeless appeal.

How to Decorate Sustainably:

  • Shop local antique stores and flea markets for one-of-a-kind treasures like vintage dough bowls, aged wooden crates, or pre-loved furniture.

  • Choose decor made from natural, renewable materials such as bamboo, cork, rattan, and wool.

  • Look for handcrafted pieces that tell a story and bring soul into your space.

Decor with a past adds meaning and longevity to your home, aligning perfectly with farmhouse values.


hellolovelyliving Lulu & Georgia

Lulu & Georgia

At Lulu and Georgia, you'll find exclusive designer collaborations, uniquely curated collections, and one-of-a-kind vintage pieces to bring your home to life.


No. 4

Make a Statement with Lighting

Lighting in 2026 is no longer an afterthought—it’s a focal point. Think of it as the jewelry of your home, adding sparkle, structure, and style.

How to Light It Right:

  • Install a bold chandelier over the dining table or a series of oversized metal pendants above the kitchen island.

  • Opt for fixtures that blend materials, such as black iron with brass accents or wood beads with woven shades.

  • Use lighting to create zones within open-plan spaces, adding both function and flair.

A single lighting upgrade can dramatically transform the mood and aesthetic of a room.

No. 5

Blend Vintage Charm with Contemporary Comfort

At the heart of the modern farmhouse style is the ability to feel timeless yet current. The key to achieving this balance lies in the artful mix of old and new.

How to Curate the Look:

  • Pair a sleek modern sofa with a distressed antique cabinet.

  • Hang contemporary abstract art above a weathered wooden console.

  • Combine modern lighting with vintage mirrors, or place a mid-century chair beside a farmhouse-style fireplace.

This curated contrast keeps your home from feeling overly themed and instead creates a space that feels collected and lived-in.

Takeaways

As we move into 2026, the modern farmhouse style is embracing a richer, more layered identity. It’s no longer just about white walls and barn doors—it’s about personal expression, sustainability, and design-forward thinking. By incorporating moody tones, mixing materials, choosing authentic decor, and making bold lighting choices, you can evolve your home into a space that feels both grounded in tradition and refreshingly modern.

In this article, we’ve highlighted the key trends that define the next chapter of modern farmhouse decor. Whether you’re renovating a single room or reimagining your entire home, these ideas will help you stay ahead of the curve while staying true to the cozy, welcoming spirit that defines the farmhouse ethos.

So go ahead—embrace the new rustic. Let your home tell a story that’s warm, stylish, and uniquely yours.

Looking for Home resources?

Looking to enhance your living space and create a sanctuary that supports your well-being? Explore our home partners who offer a wide range of resources to elevate your home environment.


homeHLL x Editor


How To Turn Your Bathroom Into A Spa

After a long, exhausting day, the thought of visiting a tranquil spa is nothing short of a dream. But what if you could bring that serene, indulgent experience into your own home? With just a few thoughtful touches, your bathroom can become a rejuvenating haven that rivals even the most exclusive wellness retreats.


In this article, we’ll guide you through practical and inspiring ways to create a spa-like atmosphere in your bathroom. From visual elements and soothing scents to calming sounds and luxurious textures, you’ll discover how to engage all your senses and turn your daily routine into a ritual of relaxation.

No. 1

Visual Relaxation: Set the Mood with Minimalism and Nature-Inspired Design

Spas like Spencer’s Spa are known for their minimalist aesthetic, and for good reason. A clutter-free, calming environment helps the mind unwind and invites a sense of peace. To replicate this ambiance at home, start with your bathroom’s color palette.

Tips for Creating a Visually Calming Space:

  • Use earthy tones such as soft browns, muted greens, and gentle greys to bring a natural, grounding feel to the room.

  • Install dimmable lighting to adjust brightness based on your mood or time of day.

  • Declutter surfaces by storing personal items neatly in cabinets or baskets to reduce visual noise.

  • Incorporate natural elements like bamboo accessories, wooden trays, or a small indoor plant for an organic touch.

Remember: Less is more. The goal is to create a space that feels open, breathable, and serene.

No. 2

A Spa Touch: Add Comfort and Functionality

While your bathroom may not offer full-scale hydrotherapy, it can still provide a deeply soothing experience with a few strategic upgrades.

Elevate Your Bathing Experience:

  • Install a massage shower head to enjoy a spa-like water massage every day—an affordable yet transformative addition.

  • Consider a Japanese soaking tub if you have limited space. These deep, compact tubs are designed for full-body immersion and relaxation.

  • Invest in a towel warmer to wrap yourself in cozy warmth post-bath or shower, especially during colder seasons.

  • Upgrade your towels to plush, high-quality options like luxury Versace towels for that extra indulgent touch.

These enhancements not only add comfort but also elevate your everyday routine into a mindful self-care ritual.

No. 3

A Scent of Luxury: Engage Your Sense of Smell with Aromatherapy

Aromatherapy is a cornerstone of the spa experience. Scents have the power to influence mood, reduce stress, and promote overall well-being. Incorporating fragrance into your bathroom is both simple and impactful.

Ways to Introduce Calming Aromas:

  • Use essential oils such as lavender, eucalyptus, or jasmine in a diffuser.

  • Light scented candles during your bath to create a warm, inviting glow and a relaxing scent profile.

  • Apply scented lotions or bath oils to nourish your skin while enhancing the sensory experience.

Choose fragrances that resonate with you personally—your bathroom should feel like your own sanctuary.


hellolovelyliving rejuvenation

Rejuvenation

Rejuvenation believes in the power of thoughtful design - explore their extensive range of bath fixtures, including stylish accessories and hardware that add character and charm to your space.


No. 4

Soothing Sounds: Create an Auditory Escape

Sound plays a powerful role in relaxation. Whether it’s gentle music, nature sounds, or calming instrumental tracks, the right audio can help your mind drift away from daily stress.

How to Add Sound to Your Spa-Like Bathroom:

  • Use a waterproof Bluetooth speaker to stream your favorite playlists or ambient soundscapes.

  • Explore spa music apps or platforms like Spotify and YouTube that offer curated relaxation playlists.

  • Try nature sounds like rainfall, ocean waves, or forest ambiance to bring the outdoors in.

Soft, continuous sound can help mask background noise and deepen your sense of immersion.

No. 5

Taste the Luxury: Indulge in a Spa-Worthy Treat

While taste may not be the first sense you think of when designing a spa bathroom, it can still play a role in enhancing your experience. A small indulgence can elevate your relaxation to a whole new level.

Ideas for Treating Your Taste Buds:

  • Sip on herbal tea like chamomile, peppermint, or green tea for a calming effect.

  • Enjoy a glass of champagne or sparkling water while soaking in the tub.

  • Keep a small dish of dark chocolate or fruit nearby for a touch of indulgence.

These little luxuries can make your spa night feel extra special and complete the sensory experience.

Takeaways

Creating a spa-like bathroom doesn’t require a massive renovation or a luxury budget. With a few intentional changes—like calming colors, soothing scents, upgraded fixtures, and thoughtful details—you can transform your space into a sanctuary of peace and relaxation.

Whether you’re unwinding after a long day or carving out time for self-care, your bathroom can become a place where stress melts away and serenity takes over. So light a candle, turn on some soft music, and let your home spa experience begin.

Because you deserve more than just a bathroom—you deserve a retreat.

Looking for Home resources?

Looking to enhance your living space and create a sanctuary that supports your well-being? Explore our home partners who offer a wide range of resources to elevate your home environment.


homeHLL x Editor


5 Best Timber Frame Garage Kits For Crafting A Durable, Stylish Workspace

Timber-frame garage kits are transforming backyards across the country, offering homeowners a fast, sustainable, and visually striking alternative to steel or block construction. Whether you're looking to add a workshop, a hobby studio, or a garage apartment that blends seamlessly with your home’s siding, these kits deliver both beauty and performance.


Unlike conventional builds that require months of scheduling subcontractors, timber-frame kits arrive pre-cut, labeled, and ready to assemble—often in a matter of days. And beyond convenience, they offer a compelling environmental benefit: heavy timbers sequester carbon, reducing embodied emissions by up to 31% compared to concrete or steel, according to a 2024 Reuters sustainability report.

In this article, we’ll walk you through the top five timber-frame garage kits available in the U.S., comparing them across five weighted criteria: structural durability, design flexibility, ease of assembly, value for money, and company support. Whether you're a seasoned builder or a first-time DIYer, this guide will help you choose a kit that fits your needs, budget, and skill level—with confidence.

How We Ranked the Top Timber-Frame Garage Kits

To ensure a fair and practical comparison, we evaluated each kit using five key factors that matter most to real buyers. Each factor was weighted based on its real-world importance:

  • Structural Durability (25%): Wood species, lumber grade, and engineered load ratings.

  • Design Versatility (20%): Ability to customize bays, add lofts, or modify plans.

  • Ease of Assembly (20%): Pre-cut parts, manuals, and tech support.

  • Value for Money (20%): Cost per square foot versus what’s included.

  • Company Reputation & Support (15%): Reviews, years in business, and customer service.

We multiplied each raw score by its weight to rank the kits, tagging each with a “best for” label so you can quickly find the one that fits your priorities.


No. 1

Hamill Creek Timber Homes – Best for Custom, High-End Builds

Founded in 1989 in Meadow Creek, British Columbia, Hamill Creek Timber Homes specializes in bespoke timber-frame structures crafted from Douglas-fir, Western red cedar, or spruce. Every garage begins as a custom design, with traditional mortise-and-tenon joinery and in-house engineering.

What You Can Order

  • Frame-Only Kit: Pre-cut timbers, pegs, and hardware with on-site raising guidance.

  • Lock-Up Shell: Frame plus wall and roof panels, doors, and windows.

  • Turnkey Package: Weather-tight shell ready for interior finishes.

Typical Investment

Expect $60–$90 per square foot for the frame alone. That range, as outlined in Hamill Creek’s timber frame home design and build process, already bundles structural engineering, 3-D and shop drawings, all fasteners and hardware, and sustainably harvested Douglas-fir, spruce, or Western red cedar that arrives pre-cut and sealed with a UV-protective finish.

Adding enclosure and finishes can take a luxury garage past $100 per square foot. Hence, most buyers start by confirming what is already bundled in the kit and then layer on siding, doors, and insulation to match their target budget. Because designs are bespoke, final quotes still vary with span, wood species, and window package.

Why It Tops the Premium Category

  • Fully custom designs with no stock-plan limitations.

  • Select timbers are test-fit in the shop for seamless on-site assembly.

  • Heritage craftsmanship, built to last for generations.

Choose Hamill Creek if you want a garage that feels like a piece of architecture, not an afterthought—and you're ready to collaborate with expert timber framers.

No. 2

DC Structures – Best Overall, Ready-to-Assemble Package

Based in Oregon since 1985, DC Structures offers pre-engineered garage kits that arrive as a complete, labeled bundle—ideal for DIYers who want barn-style charm with predictable assembly.


hellolovelyliving timber frame garage kit

A DC Structures pre-engineered garage kit delivers barn-inspired curb appeal with a predictable, ready-to-assemble package.


Why It Leads the Pack

  • Premium Lumber: Select-Structural Douglas-fir, free of heart center.

  • Transparent Pricing: The Sellwood 24 × 24 kit starts at $24,759.

  • Code-Ready Plans: Engineered for your local snow, wind, and seismic zone.

  • DIY-Friendly: Pre-cut, pre-drilled parts with a detailed manual.

Expect to pay more as you scale: three- and four-bay versions, or the clear-span Voyager workshop, climb well past six figures, yet the trade-off is a kit that combines craft-grade timber, predictable timelines, and near-zero parts hunting.

Choose DC Structures if you want barn-inspired aesthetics, an all-inclusive materials list, and the satisfaction of raising the frame yourself without drawing a single blueprint.

Assembly Snapshot

A three-person crew can dry-in a small model in 5–7 days. Larger kits may require a telehandler for trusses.

No. 3

Timberlyne – Best Barn-Style Character

Formerly Sand Creek Post & Beam, Timberlyne builds nostalgic post-and-beam kits with steep gables, overhangs, and carriage doors that evoke classic Americana.

Signature Models

  • Poppy 30 × 24: Two-car garage starting around $29,900.

  • Lily 32 × 48: Lofted barn starting at $55,203.

What Sets It Apart

  • Authentic Barn Bones: 8×8 Eastern white-pine posts with steel plate joinery.

  • Design Playground: Add RV bays, lean-tos, or swap siding.

  • Community Raise: Heavy timbers turn assembly into a barn-raising event.

Cost snapshot

Expect mid-market pricing: about $30,000 for a basic two-bay shell and $70,000 or more for lofted carriage-house versions, before slab, doors, or finishes. Turnkey installation typically runs about $125 dollars per square foot or higher, according to Timberlyne’s national average estimate (pricing guide).

Choose Timberlyne if curb appeal matters as much as covered parking, and you are ready for the hands-on satisfaction of lifting full-dimension timbers into place.


hellolovelyliving rejuvenation

Rejuvenation

Rejuvenation believes in the power of thoughtful design - explore their extensive range of home decor, including stylish accessories and hardware that add character and charm to your home. Get free design services when you book an appointment.


No. 4

Jamaica Cottage Shop – Best Budget DIY Pick

Vermont-based Jamaica Cottage Shop offers rough-sawn post-and-beam kits that are beginner-friendly and budget-conscious.

Entry Model & Pricing

  • 14 × 20 Shell Pre-Cut Kit: $11,044

  • Three-Season Upgrade: $12,577

  • Four-Season Kit: $26,112

What You Get

  • Hemlock posts, pine siding, and pre-cut, labeled parts.

  • Galvanized hardware and pressure-treated sill plate.

  • No crane required—just a scaffold and a few friends.

Build experience

Most owners report weather-tightening the shell over a long weekend with three people and a rented scaffold; no crane required. The rough lumber creates a rustic New England look, but expect visible knots and checks as the wood seasons.

Limitations to know

A fourteen-foot width is tight for full-size trucks, and upgrades such as the overhead door, windows, and insulation add cost quickly. Even so, JCS remains the most affordable path to a true post-and-beam garage, ideal if you value sweat equity over polished joinery.

Choose Jamaica Cottage Shop when your top priorities are price, simplicity, and the satisfaction of saying you built it yourself.

No. 5

Brooks Post & Beam – Best Traditional Craftsmanship

Brooks Post & Beam in New Hampshire has been handcrafting mortise-and-tenon frames from Eastern white pine since 1979.

Flagship Kit

  • Jefferson 24 × 30: $54,200 for frame + decking

What Sets It Apart

  • Heirloom Joinery: Oak-pegged joints, no steel plates.

  • Shop-Cut Precision: Test-fit bents ensure smooth on-site assembly.

  • Flexible Enclosure: Choose from SIPs, tongue-and-groove, or custom siding.

Cost snapshot

Expect 35–45 dollars per square foot for a frame-only kit like the Attitash (1,200 sq ft, 42,500 dollars total) and 80 dollars or more per square foot for weather-tight packages with structural insulated panels (Brooks cost overview).

Choose Brooks Post & Beam when you want a carriage-barn garage that looks museum-ready on day one and still feels solid after another hundred New England winters.


Quick-Glance Comparison Table

HLL x Timber Frame Kits - Quick-Glance Comparison Table

*Material-only pricing. †1 = pro crew essential, 5 = beginner-friendly. ‡Based on species, joinery, and engineering.

This snapshot lets you line up costs against build difficulty. If price and simplicity rank highest, Jamaica Cottage Shop leads. For heirloom quality, Hamill Creek or Brooks merit the splurge, while DC Structures balances craft, completeness, and budget.


Assess Your Needs and Skills

Before choosing a kit, ask yourself:

  • What will the garage hold? A compact SUV needs at least 14 × 22 feet. A two-car workshop with storage may need 24 × 36 feet or more.

  • What’s your tool comfort level? Even beginner kits involve heavy posts and power tools.

  • Do you have help? Most kits require at least three people for safe assembly.

Pro Tip: Visualize your layout with car widths, door swings, and work zones before ordering.

 
hellolovelyliving planning your timber frame garage layout

Visualizing real car widths, door swings, and work zones makes it easier to choose the right timber-frame garage size.

An honest appraisal of space needs and skill level prevents mid-build surprises and keeps the project fun, exactly what a new workspace should be.


Budget the Whole Build, Not Just the Kit

Timber-frame kits represent only half the bill. Map out each line item now so surprises do not ambush you on delivery day.

hellolovelyliving timber-frame garage breakdown

Kit prices are only part of the story—foundation, labor, freight, permits, and finishes all belong in your timber-frame garage budget.

 
hellolovelyilving Budget the Whole Build, Not Just the Kit

*Figures reflect national 2025 averages; local rates will vary.

Pro tip: add ten percent to whatever total you calculate. Lumber price swings, weather delays, and “while-we-re-at-it” upgrades rarely drop to zero, and that buffer turns an emergency into an easy yes.

Keep this worksheet handy, plug in quotes as they arrive, and you will know the real budget long before the first beam comes off the truck.


Know What’s in the Crate—and What’s Not

Before signing, confirm:

  • Frame, fasteners, and hardware

  • Wall and roof sheathing or SIPs

  • Siding, roofing, trim

  • Doors and windows (or rough openings)

  • Stamped engineering drawings

Anything missing lands in your shopping cart. For context, roofing a 24 × 24 foot garage with corrugated metal runs $4,000-$6,000 nationwide (HomeGuide metal roof cost guide), and a single carriage-style overhead door averages about $2,600-$6,500 installed (Angi garage door cost report). Those two items alone can erase the savings of a frame-only bargain.

If energy efficiency matters, ask whether the supplier offers factory-cut structural insulated panels; ordering them with the kit typically costs 15-25% less than retrofitting later, according to 2025 pricing from panel fabricators.

Finally, verify the lumber grade on your invoice. “Select-Structural Douglas-fir” is a world apart from utility-grade pine, and a clear spec protects you if the shipment arrives looking more like firewood than framing.


Permits and Codes: Nail Them Down Early

hellolovelyliving Permits and Codes Nail Them Down Early

*National 2025 averages; confirm locally.


Pro tip: Most top-tier suppliers such as Hamill Creek, DC Structures, and Timberlyne will adjust their engineering for your snow, wind, and seismic zone. Send them the zoning numbers from Step 1, so plans move through review without friction.

Handle paperwork first, and raising day becomes a celebration rather than a stop-work order.


Site Prep Tips for a Smooth Assembly

  1. Grade and drain: Your building pad should sit 2-4” higher than the surrounding ground and slope 1/4” per foot (about 2%) away from the slab to shed water (Concrete Network slope guide).

  2. Pour early: A 4-inch residential slab reaches about 70% strength in seven days; schedule kit delivery for day eight or later so anchors do not pull out of green concrete (Concrete Network curing timeline).

  3. Embed bolts accurately: Follow the kit’s foundation plan, because shifted anchor bolts remain the main cause of day-one delays reported by timber-frame crews.

  4. Stage materials: Reserve a flat, 40’ area for the flatbed and another 400 to 600 sq. ft. for sorting bundles by wall section. Lay plywood, gravel, or both if the site turns muddy.

  5. Book lift equipment: A 6,000 lb telehandler rents for $200 to $830 per day nationwide (BigRentz forklift rental guide); reserve an extra day in case the weather stalls the raise.

  6. Protect the timbers: Stack bundles on dunnage and cover with breathable tarps. Direct sun can warp green pine, and standing water adds hundreds of pounds to each post.

A well-prepared pad lets the raising crew spend energy pegging joints, not hunting for missing bolts or dry ground.

Assemble Safely and Efficiently

  1. Stage before you lift: Lay out beams in order of use, and pre-install knee braces while parts are waist-high. This reduces ladder time and keeps hands away from swinging loads.

  • Size the crew: Plan on 3-4 people for each bent: one signal caller, one plumb checker, and two riggers. A 6x8x10’ Douglas-fir post weighs about 180lbs; never attempt to lift it solo.

  • Use the right gear: A telehandler or boom truck keeps beams at chest height. According to the Occupational Safety and Health Administration forklift safety overview, forklifts reduce lifting injuries by about 70% compared with manual hoists (OSHA powered industrial trucks guide). Tie-offs are required when anyone works 6’ or more above the deck, and hard hats stay on whenever the hook is in the air.

  • Square as you go: Check diagonals on the first bent, and lock with temporary braces before moving to the next. Small errors multiply once rafters arrive.

  • Pace the work: Accuracy beats speed. Pause after every two lifts to verify plumb and bolt torque. A steady rhythm keeps morale high and prevents rework.


Maintenance Tips to Protect Your Investment

hellolovelyliving Maintenance Tips to Protect Your Investment

Plan on about one gallon of stain per two-hundred square feet of rough-sawn siding; a two-bay garage typically needs four or five gallons.


FAQ

How much does a timber-frame garage cost, all in?

National averages place a prefab single-bay timber garage between $20,000–$35,000 for a single-bay and $45,000–$80,000 for a two-bay garage, including slab, freight, and finishes (Fixr, HomeAdvisor).

Do I need a building permit?

Yes. Most counties require permits for structures over 200 sq ft. Fees range from $150–$500, plus extras for electrical or plumbing.

How long will the assembly take?

  • DIY 14×20 kit: 2–3 days

  • Pre-engineered 2-bay: 5–7 days

  • Custom heavy timber: 2–3 weeks

Can I insulate and heat later?

Yes. Use spray foam, batts, or SIPs. Plan conduit in the slab now for future upgrades.

What upkeep does the wood require?

Rinse annually, re-stain every 3–5 years, clear gutters twice a year, and inspect joints after the first heating season.

Takeaways

Choosing a timber-frame garage isn’t just a design decision—it’s a smart, sustainable investment. According to a 2024 Reuters climate report, replacing steel or concrete with timber can cut embodied emissions by 14–31%. Every cubic meter of kiln-dried wood stores nearly a metric ton of CO₂, and regional sourcing further reduces your carbon footprint.

Timber kits also offer long-term adaptability. With easy insulation, wiring, and solar upgrades, your garage evolves with your needs—without demolition waste.

In short, a timber-frame garage is more than a structure. It’s a handcrafted, carbon-smart space you’ll be proud to raise—and even prouder to use.

For more timber-frame insights, pricing tools, and DIY guides, explore our full library of resources and start planning your dream garage today.


Looking for Home resources?

Looking to enhance your living space and create a sanctuary that supports your well-being? Explore our home partners who offer a wide range of resources to elevate your home environment.


homeHLL x Editor


Holiday Safety At Home: Outdoor Risks Homeowners Overlook

The holiday season brings with it a magical blend of joy, tradition, and celebration. From twinkling lights to festive front-yard displays, homeowners across the country transform their properties into winter wonderlands. But amid the excitement of decorating and preparing for guests, it’s easy to overlook the very real safety risks that can arise just outside your front door.


In this article, we’ll explore the most commonly overlooked outdoor hazards during the holidays—ranging from icy walkways and overloaded electrical systems to unstable decorations and weather-related threats. With a few proactive steps, you can safeguard your home, protect your guests, and ensure that your holiday season remains both merry and safe.

No. 1

Watch Your Step: Navigating Trip Hazards

One of the most frequent causes of holiday-related injuries is also one of the simplest: slips, trips, and falls. As temperatures drop and snow begins to accumulate, outdoor surfaces become increasingly treacherous.

Icy Patches and Hidden Dangers

Ice is a silent threat during the winter months. It often forms in shaded areas and can remain hidden even on sunny days. To reduce the risk of injury:

  • Shovel snow promptly from driveways, porches, and walkways.

  • Apply salt or sand to high-traffic areas to improve traction.

  • Pay attention to shaded zones, where ice tends to linger longer.

  • Be cautious of black ice, which can form overnight from melting snow and is nearly invisible.

Decorations That Become Obstacles

Holiday decorations, while beautiful, can inadvertently create trip hazards:

  • Extension cords stretched across sidewalks or driveways are a common culprit. Use outdoor-rated cord covers or secure cords along the edges of walkways.

  • Lawn ornaments and inflatables should be placed away from foot traffic and securely anchored to prevent movement.

  • Pathway lighting should be installed with care to avoid creating uneven surfaces or obstructions.

No. 2

Electrical Safety: More Than Just Lights

Holiday lighting adds charm and warmth to your home, but it also increases the demand on your electrical system. Improper use of lights and extension cords is a leading cause of house fires during the holiday season.

Choosing the Right Gear

Before you begin decorating, take the time to inspect your equipment:

  • Check for damage such as frayed wires, cracked sockets, or loose connections.

  • Discard and replace any damaged lights or cords.

  • Use only outdoor-rated products, which are designed to withstand moisture and freezing temperatures.

Avoid Overloading Circuits

Plugging too many light strands into a single outlet can overload your circuit and create a fire risk. To prevent this:

  • Use power strips with built-in circuit breakers.

  • Spread your lighting setup across multiple outlets.

  • Set your lights on timers to ensure they’re not left on overnight or while you're away.

No. 3

The Risks of DIY Christmas Light Installation

While the DIY approach to holiday decorating is popular, it comes with significant risks—especially when it involves climbing ladders in winter conditions.

Ladder Safety in Cold Weather

  • Uneven or icy ground increases the risk of ladder instability.

  • Cold temperatures can make ladder rungs slippery and reduce your grip strength.

  • Falls from ladders are a common cause of serious holiday injuries.

Electrical Hazards

Without proper knowledge, DIY electrical setups can result in:

  • Unsafe circuits

  • Short circuits

  • Increased fire risk

For a safer and more professional result, many homeowners turn to experts for Aiken Christmas lights installation for homes. Professional installers bring the right tools, experience, and safety protocols to ensure a dazzling display—without the personal risk.


hellolovelyliving rejuvenation

Rejuvenation

Upgrade your space with Rejuvenation's path and deck lighting – where functionality meets timeless design.


No. 4

Bracing for Winter Weather

Beyond slips and electrical concerns, winter weather itself poses several hazards that homeowners often overlook.

Securing Outdoor Decorations

Strong winter winds can turn unsecured decorations into dangerous projectiles. To prevent damage:

  • Stake down inflatables and large ornaments securely.

  • Use heavy-duty fasteners for wreaths and garlands.

  • Avoid placing lightweight items in exposed areas.

Tree Maintenance

Heavy snow and ice can cause tree branches to snap, posing a threat to:

  • Roofs

  • Vehicles

  • Power lines

Before the first major storm:

  • Inspect trees for dead or weak limbs.

  • Prune branches that hang over structures or driveways.

  • Hire a professional arborist if necessary for high or large limbs.

Takeaways

The holidays should be a time of celebration, not emergency room visits or costly repairs. By staying vigilant and addressing these often-overlooked outdoor risks, you can ensure that your home remains a safe and welcoming place for family, friends, and neighbors.

From preventing slips on icy walkways to securing decorations and managing electrical loads responsibly, a little foresight goes a long way. Remember, safety doesn’t mean sacrificing festivity—it means enhancing it with peace of mind.

So as you hang the lights and welcome the season, take a few extra moments to protect what matters most. A safe holiday is a truly happy holiday.

Looking for Home resources?

Looking to enhance your living space and create a sanctuary that supports your well-being? Explore our home partners who offer a wide range of resources to elevate your home environment.


homeHLL x Editor


Introducing 3 Different Ways To Buy Your First Home

Buying your first home is one of the most significant financial decisions you’ll ever make. It’s not just about choosing the right property—it’s about choosing the right method of purchase that aligns with your financial situation, long-term goals, and lifestyle. Whether you're working with a tight budget, looking for flexibility, or fortunate enough to have substantial savings, the way you choose to buy can have a lasting impact on your financial health.


In this article, we’ll break down three of the most common ways to buy your first home: the traditional mortgage route, shared ownership schemes, and buying outright. Each method comes with its own set of advantages and drawbacks, and understanding these will help you make an informed, confident decision.

No. 1

The Traditional Route: Taking Out a Mortgage

When most people think about buying a property, they immediately think of a mortgage. This is the most common method of financing a property purchase, especially for first-time buyers.

How It Works:

  • You put down a deposit—typically between 5% and 10% of the property’s value.

  • You borrow the remaining amount from a lender.

  • You repay the loan in monthly installments over an agreed term, with added interest.

Pros:

  • Access to a wider range of properties: You're not limited to specific schemes or property types.

  • Build equity over time: As you make payments, you gradually own more of your home.

  • Potential for appreciation: If property values rise, your investment grows.

Cons:

  • Interest costs: Over the life of the loan, you may pay significantly more than the original purchase price—sometimes up to 50% more.

  • Interest rate fluctuations: If you're on a variable-rate mortgage, your monthly payments could increase if rates rise.

  • Deposit requirements: Saving even 10% of a property’s value can be challenging, especially in high-cost areas.

Is It Right for You?

If you have a stable income, can save a reasonable deposit, and want access to a broad range of properties, a traditional mortgage might be the best fit. Just be sure to factor in long-term costs and interest rate risks.

No. 2

Shared Ownership: A Stepping Stone to Full Homeownership

For buyers who may struggle to afford a traditional mortgage, shared ownership schemes offer a more accessible path to getting on the property ladder.

How It Works:

  • You purchase a share of a property (typically 25% to 75%).

  • You pay rent on the remaining share owned by a housing association or developer.

  • Over time, you can buy additional shares—a process known as staircasing—until you own the property outright.

Pros:

  • Lower upfront costs: Deposits are based only on the share you’re buying, making it more affordable.

  • Accessible for lower incomes: It opens the door to homeownership for those who might otherwise be priced out.

  • Opportunity to increase ownership: You can gradually buy more of the property as your financial situation improves.

Cons:

  • Dual payments: You’ll need to pay both a mortgage and rent, which can be financially complex.

  • Limited property options: Shared ownership homes are often limited to new builds or specific developments.

  • Restrictions on resale: There may be limitations on who you can sell to and how much you can sell for.

Is It Right for You?

If you're eager to own a home but can’t afford a full mortgage, shared ownership can be a great compromise. Just be sure to use a shared ownership calculator to understand your monthly obligations and long-term affordability.


hellolovelyliving houzz

Houzz

Make your home project a reality. Find inspiration, products, and the pros to make it happen - all in one place.


No. 3

Buy Outright: The Fastest, Simplest Route (If You Can Afford It)

If you’re in the fortunate position of having enough funds to buy a property outright, this method offers unmatched simplicity and long-term savings.

How It Works:

  • You purchase the property in full with no need for a mortgage or loan.

  • You avoid interest payments, monthly repayments, and lender fees.

Pros:

  • No interest or mortgage fees: You pay only the purchase price, saving tens of thousands over time.

  • Faster transaction: Without a lender involved, the buying process is typically quicker and more flexible.

  • Greater negotiating power: Sellers often prefer cash buyers, which can give you leverage on price.

Cons:

  • Large upfront cost: You’ll need substantial liquid assets to make this work.

  • Tied-up capital: Your money is locked in real estate, which may limit liquidity for other investments or emergencies.

  • Proof of funds: You may need to provide documentation to verify the source of your funds, which can involve additional steps.

Is It Right for You?

If you have the money available and want to avoid the complexities of borrowing, buying outright is a smart, efficient choice. Just ensure you’re not compromising your financial flexibility in the process.

Takeaways

As we've explored in this article, there’s no one-size-fits-all approach to buying your first home. Each method—whether it’s a traditional mortgage, shared ownership, or buying outright—has its own set of benefits and challenges. The right choice depends on your financial situation, long-term goals, and personal preferences.

Before making a decision:

  • Assess your current finances: How much can you afford to pay upfront? What monthly payments are sustainable?

  • Consider your future plans: Are you planning to stay in the property long-term? Do you expect your income to increase?

  • Explore all options: Use online calculators, speak with financial advisors, and research local housing schemes.

Remember, buying a home is not just a financial transaction—it’s a life decision. Take the time to weigh your options carefully, and choose the path that sets you up for long-term stability and success.

For more advice on home buying, mortgages, and financial planning, be sure to explore the rest of our blog.

Looking for Home resources?

Looking to enhance your living space and create a sanctuary that supports your well-being? Explore our home partners who offer a wide range of resources to elevate your home environment.


homeHLL x Editor


5 Tips To Boost Your Gardening Skills

Gardening is often seen as a natural talent—something you're either born with or not. You may look at a seasoned gardener with lush flowerbeds and thriving vegetables and wonder how they make it look so effortless. The truth is, no one is born with superior gardening skills. Like any other craft, gardening is a learned skill that develops through experience, observation, and a willingness to get your hands dirty.


Whether you've just moved into your first home with a garden, purchased an allotment, or simply want to transform your outdoor space into something beautiful and productive, it’s normal to feel overwhelmed at first. There’s a lot to learn—but with the right mindset and a step-by-step approach, you’ll be amazed at how quickly your skills grow.

In this article, we’ll explore five essential tips to help you build your gardening skills gradually and sustainably. These beginner-friendly strategies are designed to boost your confidence, minimize frustration, and set you on the path toward becoming a capable and passionate gardener.

No. 1

Start Small

One of the most important principles for beginner gardeners is to start small. It’s easy to get carried away with big plans and ambitious projects, but taking on too much too soon can lead to disappointment.

Why Starting Small Matters:

  • Allows you to focus on learning the basics

  • Reduces the risk of burnout or frustration

  • Increases your chances of early success

Begin with a single flowerbed, a few containers, or a small section of your yard. This manageable space will give you the opportunity to practice essential skills like planting, watering, pruning, and soil care without feeling overwhelmed. As your confidence and knowledge grow, you can gradually expand your garden.

No. 2

Make a Plan

Before you start digging or planting, take time to create a clear plan for your garden. Having a vision helps guide your decisions and keeps your efforts focused.

Ask Yourself:

  • What is the main purpose of your garden?

  • Do you want to grow vegetables, attract pollinators, or create a relaxing retreat?

  • How much time can you realistically dedicate to maintenance?

Whether your goal is to grow your own food, support local wildlife, enhance your home’s curb appeal, or simply enjoy a peaceful outdoor space, defining your objectives will help you choose the right plants and layout. A well-thought-out plan also helps you avoid costly mistakes and ensures your garden evolves in a way that suits your lifestyle.

No. 3

Do Your Research

Gardening may seem like a trial-and-error process, but there’s a wealth of information available to help you make informed decisions. From books and blogs to video tutorials and online forums, you’ll find guidance on virtually every aspect of gardening.

Top Ways to Learn:

  • Read gardening books and magazines for seasonal tips and plant care advice

  • Watch YouTube tutorials for visual, step-by-step instructions

  • Join online gardening communities to ask questions and share experiences

  • Use mobile apps that help identify plants, track watering schedules, and plan layouts

Need to grow a certain type of vegetable or build a limestone gravel path in your backyard? Want to build a raised bed or install a drip irrigation system? There’s a tutorial out there for it. Over time, you’ll become more self-reliant and confident in your gardening decisions.


hellolovelyliving terrain

Terrain

Grow your love for nature with Terrain’s premium garden supplies! From tools to décor, they have everything you need to nurture your garden and your passion.


No. 4

Visit Garden Centers

Your local garden center is more than just a place to buy plants—it’s a valuable learning resource. Regular visits can help you become familiar with different plant varieties, gardening tools, and seasonal trends.

Benefits of Visiting Garden Centers:

  • See plants in various stages of growth

  • Learn how plants are grouped and labeled

  • Get expert advice from knowledgeable staff

  • Discover new tools and products that make gardening easier

Simply walking through a garden center can be an educational experience. Observe how different plants are displayed, read the care instructions on labels, and don’t hesitate to ask questions. The more you immerse yourself in the gardening world, the more confident you’ll become.

No. 5

Keep Practicing

Gardening is a journey, not a destination. Even the most experienced gardeners face setbacks—plants die, pests invade, and weather can be unpredictable. The key is to keep practicing and learning from your mistakes.

Tips for Ongoing Improvement:

  • Keep a gardening journal to track what works and what doesn’t

  • Take photos of your garden’s progress through the seasons

  • Reflect on your successes and failures to refine your approach

  • Celebrate small victories, like your first bloom or harvest

Every mistake is a learning opportunity. Over time, you’ll develop a deeper understanding of your garden’s unique needs and how to respond to challenges. Be patient with yourself and stay committed—your efforts will pay off in the form of a thriving garden and a valuable new skillset.

Takeaways

As we've discussed in this article, becoming a skilled gardener doesn’t require natural talent—it requires curiosity, consistency, and a willingness to learn. By starting small, making a thoughtful plan, tapping into available resources, engaging with your local gardening community, and practicing regularly, you’ll build a strong foundation for long-term success.

Gardening is not only a rewarding hobby but also a meaningful way to connect with nature, reduce stress, and create something beautiful. Whether you're growing vegetables, flowers, or simply cultivating a peaceful space to relax, the skills you develop will serve you for a lifetime.

So grab your gloves, pick up a trowel, and take the first step. Your garden—and your green thumb—are waiting to grow.

For more gardening insights, seasonal tips, and beginner-friendly advice, be sure to explore the rest of our blog. Happy gardening!

Looking for Home resources?

Looking to enhance your living space and create a sanctuary that supports your well-being? Explore our home partners who offer a wide range of resources to elevate your home environment.


homeHLL x Editor


Creating A Modern Space At Home

Modern home design is more than just a trend—it’s a lifestyle. It’s about creating a space that feels open, intentional, and effortlessly stylish while remaining functional and livable. Whether you're planning a full renovation or simply looking to refresh a few rooms, embracing modern design principles can transform your home into a sanctuary of simplicity and sophistication.


In this article, we’ll walk you through the essential steps to create a modern space at home. From establishing a clean foundation to choosing low-maintenance elements and curating your decor with purpose, these tips will help you design a home that not only looks beautiful but also works seamlessly for your everyday life.

No. 1

Start With a Clean Foundation

Modern design thrives on simplicity and openness. The first step toward achieving a contemporary look is to strip back the unnecessary and create a clean, uncluttered canvas.

Key Elements to Consider:

  • Neutral walls: Opt for soft whites, warm grays, or muted earth tones to create a calm backdrop. These shades enhance natural light and make rooms feel larger.

  • Decluttered surfaces: Keep countertops, tables, and shelves mostly clear. Only display items that serve a purpose or bring you joy.

  • Purposeful storage: Use built-in cabinetry, minimalist shelving, or hidden compartments to keep everyday items out of sight but easily accessible.

This minimalist approach, often inspired by brutalist design, may seem stark at first, but it allows your home’s architecture and carefully chosen decor to shine.

No. 2

Prioritize Functionality

A hallmark of modern design is its focus on function. A modern space should not only look good but also serve the needs of your lifestyle.

Functional Design Tips:

  • Choose streamlined furniture: Look for clean lines, structured shapes, and neutral tones. Think low-profile sofas, sleek dining tables, and minimalist chairs.

  • Incorporate multipurpose pieces: Ottomans with hidden storage, extendable dining tables, and modular shelving systems are perfect for maximizing space.

  • Blend storage into the design: Integrated cabinetry and concealed compartments help maintain a clutter-free aesthetic.

By prioritizing utility without sacrificing style, you create a home that feels both elegant and effortless.

No. 3

Go for Low Maintenance

One of the most appealing aspects of modern living is the ease it brings. A low-maintenance home not only saves time and energy but also contributes to a more relaxed and polished environment.

Low-Maintenance Ideas:

  • Use wholesale artificial flowers: High-quality faux greenery adds life and color without the upkeep of real plants.

  • Choose durable materials: Opt for easy-to-clean surfaces like quartz countertops, vinyl flooring, and stain-resistant fabrics.

  • Simplify cleaning routines: Minimalist spaces are easier to keep tidy, especially when everything has a designated place.

The goal is to create a home that looks effortlessly put-together, even during the busiest days.


hellolovelyliving lulu and georgia

Lulu & Georgia

At Lulu and Georgia, you'll find exclusive designer collaborations, uniquely curated collections, and one-of-a-kind vintage pieces to bring your home to life.


No. 4

Be Intentional With Decor

Modern design doesn’t mean sterile or colorless. Instead, it emphasizes intentionality—every piece should have a purpose or make a statement.

Decorating Tips for a Modern Look:

  • Limit your color palette: Choose one or two accent colors and repeat them subtly through textiles, artwork, and accessories.

  • Curate, don’t clutter: Select a few impactful pieces rather than filling every surface. Think sculptural vases, abstract art, or a single, well-placed plant.

  • Mix textures and materials: Combine matte finishes with glossy surfaces, or pair natural wood with metal accents to add depth and interest.

This curated approach ensures your space feels cohesive, calm, and visually engaging.

Takeaways

As we've explored in this article, creating a modern space at home is not about following strict rules—it’s about embracing simplicity, functionality, and intentional design. By starting with a clean foundation, choosing practical yet stylish furnishings, minimizing maintenance, and curating your decor with care, you can transform your home into a modern haven that reflects your personality and supports your lifestyle.

Modern design is timeless because it focuses on what truly matters: comfort, clarity, and purpose. Whether you're updating a single room or reimagining your entire home, these principles will help you create a space that feels fresh, functional, and uniquely yours.

So take a step back, declutter, and design with intention—your modern dream home is just a few thoughtful choices away.

Looking for Home resources?

Looking to enhance your living space and create a sanctuary that supports your well-being? Explore our home partners who offer a wide range of resources to elevate your home environment.


homeHLL x Editor


What Causes Roof Damage – And Can You Prevent It?

Roofs are one of the most essential components of any home, acting as the first line of defense against the elements. They keep us dry, regulate indoor temperatures, and contribute significantly to the structural integrity and aesthetic of our homes. While roofs are built to endure a great deal of environmental stress, they are not immune to damage. Over time, exposure to weather, biological growth, and even human activity can lead to deterioration, leaks, and costly repairs.


In this article, we’ll explore the most common causes of roof damage, examine how different roofing materials respond to wear and tear, and provide practical tips to help you minimize damage and extend the lifespan of your roof. Whether you’re a homeowner looking to maintain your current roof or planning a new installation, this guide will equip you with the knowledge to make informed decisions and protect your investment.

No. 1

What Causes Roof Damage?

Roof damage can result from a variety of factors, many of which are environmental. Understanding these causes can help you take proactive steps to mitigate potential issues before they escalate.

1. Weather-Related Damage

Weather is the most frequent culprit when it comes to roof deterioration.

  • High winds can tear off shingles and hurl debris—like tree branches—onto your roof.

  • Heavy rainfall may lead to drainage issues, which combined with freezing temperatures, can form destructive ice dams.

  • Hailstorms can crack or loosen roofing materials, especially in colder months.

  • UV radiation during hot summers can cause materials to blister, warp, or curl, particularly in asphalt-based roofs.

2. Biological Growth

Moss, algae, and mildew are more than just unsightly—they can be harmful.

  • These organisms retain moisture, accelerating the decay of roofing materials.

  • Moss buildup can block gutters, causing water to overflow and damage fascia boards or seep into the home.

3. Animal and Human Activity

Roofs are also vulnerable to damage from animals and people.

  • Nesting animals such as birds or squirrels can dislodge tiles and chew through materials.

  • Termites and insects may compromise wooden roofing elements.

  • Foot traffic, especially on brittle materials like clay or slate, can lead to cracks or breakage if not handled carefully.

4. Poor Installation

Subpar workmanship can lead to premature roof failure.

  • Improper nailing, uneven shingle placement, and loose flashing can create weak points.

  • Inadequate structural support can lead to sagging, especially when heavy materials or solar panels are added without reinforcement.

No. 2

How Different Roofing Materials Experience Damage

Not all roofing materials are created equal. Each type has its own vulnerabilities and strengths, which can influence how it responds to environmental stressors.

Felt Roofing

  • Pros: Affordable and moisture-resistant.

  • Cons: Susceptible to damage from temperature extremes, especially heat and freezing.

Asphalt Shingles

  • Pros: Versatile and resilient against wind and hail.

  • Cons: Vulnerable to moss growth and degradation in extreme heat.

Wooden Shakes

  • Pros: Aesthetic appeal and decent all-weather protection.

  • Cons: Prone to rot and insect infestation if not properly maintained.

Metal Roofing

  • Pros: Excellent wind resistance and impervious to moss or mildew.

  • Cons: Can corrode in salty or snowy environments without proper coating.

Clay Tiles

  • Pros: Resistant to UV rays, water, insects, and mold.

  • Cons: Brittle—easily cracked by hail or foot traffic.

Concrete Tiles

  • Pros: Durable and long-lasting.

  • Cons: Very heavy, requiring strong structural support; can crack in freezing conditions.

Slate Tiles

  • Pros: Extremely robust; can last over a century.

  • Cons: Heavy and expensive; needs reinforced support to prevent sagging.


hellolovelyliving houzz

Houzz

Make your home project a reality. Find inspiration, products, and the pros to make it happen - all in one place.


No. 3

How to Minimize Roof Damage

While it’s impossible to eliminate all risks, there are several proactive measures you can take to reduce the likelihood of roof damage and extend its lifespan.

1. Choose the Right Roofing Material for Your Climate

Selecting a material suited to your local weather conditions is crucial.

  • Cold and wet climates: Asphalt shingles or slate.

  • Hot and sunny regions: Clay tiles or metal roofing.

  • Wind-prone areas: Metal roofing offers superior resistance.

Observe what materials are commonly used in your neighborhood—they’re often chosen for good reason.

2. Ensure Proper Installation

A roof is only as good as its installation.

  • Hire a licensed, professional roofing company.

  • Look for companies that offer warranties and have positive customer reviews.

  • Ensure proper structural support, especially for heavy materials like slate or concrete.

3. Clean Your Roof Regularly

Routine cleaning helps prevent long-term damage from biological growth.

  • Remove moss, algae, and mildew every few years.

  • Hire a professional pressure cleaning company to avoid damaging delicate materials.

  • Cleaning also improves curb appeal and can increase property value.

4. Maintain Clean Gutters

Clogged gutters can lead to water damage and ice dams.

  • Clean gutters at least once a year, or more often if you have overhanging trees.

  • Install gutter guards to reduce debris buildup.

5. Be Cautious When Walking on the Roof

Some roofing materials are not designed to bear weight.

  • Avoid walking on clay, slate, or brittle tiles.

  • Hire professionals for inspections or repairs to prevent accidental damage.

6. Trim Overhanging Trees

Branches can cause both immediate and long-term damage.

  • Falling limbs during storms can crack tiles or puncture the roof.

  • Leaves and twigs can clog gutters and promote moss growth.

Regularly trimming trees near your roof reduces these risks significantly.

7. Address Minor Issues Promptly

Small problems can quickly escalate if ignored.

  • Fix loose shingles, cracked tiles, or damaged flashing as soon as they’re noticed.

  • Water infiltration can cause mold, rot, and structural damage if left unchecked.

  • Schedule annual roof inspections to catch issues early.

Takeaways

As we’ve discussed in this article, your roof is a vital part of your home’s defense system, and while it’s built to last, it’s not immune to damage. From weather and wildlife to poor installation and neglect, there are many factors that can compromise its integrity over time.

Fortunately, by understanding the causes of roof damage and taking proactive steps—such as choosing the right materials, ensuring proper installation, and maintaining your roof regularly—you can significantly extend its lifespan and avoid costly repairs.

Remember, a well-maintained roof not only protects your home but also enhances its value and energy efficiency. With the right care and attention, your roof can continue to shield your home for decades to come.

Looking for Home resources?

Looking to enhance your living space and create a sanctuary that supports your well-being? Explore our home partners who offer a wide range of resources to elevate your home environment.


homeHLL x Editor


How To Kid-Proof Your Kitchen And Still Make It Beautiful

Designing a kitchen that’s both stylish and child-friendly can feel like an impossible balancing act—especially when little hands are constantly pulling open drawers, climbing on counters, or turning walls into art canvases. But what if you didn’t have to choose between safety and aesthetics?


In this article, we’ll reveal expert tips and clever design strategies to help you create a beautiful kitchen that’s also kid-proof. From invisible safety features to high-performance materials and smart layout choices, you’ll discover how to maintain a home you’re proud of—without compromising on safety for your little ones.

No. 1

Invisible Safety Hardware: Subtle Protection That Blends In

Childproofing doesn’t have to mean bulky plastic locks or unsightly barriers. Today’s modern safety solutions are designed to be discreet, blending seamlessly into your kitchen’s design while offering essential protection.

Key Features of Invisible Safety Hardware:

  • Hidden cabinet locks: Installed inside cabinetry, these locks keep dangerous items out of reach without disrupting the visual flow of your kitchen.

  • Handleless cabinet design: Push-to-open or recessed handles eliminate climbing hazards and reduce the risk of clothing snags.

  • Soft-close mechanisms: These not only add a luxurious touch but also prevent drawers and cabinets from slamming shut on tiny fingers.

By integrating these subtle safety measures, you can maintain a sleek, modern kitchen aesthetic while ensuring your child’s safety is never compromised.

No. 2

High-Performance Finishes: Durable Beauty That Lasts

Children are naturally curious—and messy. That’s why choosing the right finishes is crucial to maintaining a kitchen that looks great and stands up to daily wear and tear.

Top High-Performance Materials and Finishes:

  • Anti-fingerprint cabinetry: Matte or satin finishes repel oils and reduce visible smudges, keeping surfaces cleaner for longer.

  • Non-porous kitchen countertops: Materials like quartz or solid surface resist stains from juice, markers, and food spills while offering superior hygiene.

  • Washable wall paint: Opt for scrubbable emulsions like Dulux Easycare, which allow you to wipe away grime without damaging the paint.

Trending Colors for 2025:

  • Warm neutrals: Soft taupes, beiges, and creams that hide smudges and create a cozy atmosphere.

  • Deep greens: Nature-inspired hues that are both calming and forgiving when it comes to fingerprints and stains.

These finishes not only enhance the visual appeal of your kitchen but also make cleaning up after your little ones a breeze.

No. 3

Integrated Appliance Safety: Seamless and Secure

Appliances can pose significant safety risks for children if not properly secured or thoughtfully placed. Fortunately, integrated appliance design offers both safety and style.

Smart Appliance Integration Tips:

  • Built-in appliances: Embedding ovens, dishwashers, and bins into cabinetry prevents tipping hazards and creates a streamlined look.

  • Induction cooktops: These remain cool to the touch unless in contact with compatible cookware, significantly reducing burn risks.

  • Wall-mounted ovens: Installing ovens at an elevated height keeps them out of reach of small children.

  • Concealed bins and dishwashers: Hiding these behind cabinet panels discourages curious hands from exploring sharp cutlery or waste.

By integrating the appliances, you not only enhance the kitchen’s design but also create a safer environment for your children.


hellolovelyliving rejuvenation

Rejuvenation

Elevate your kitchen design with Rejuvenation's exquisite hardware and decor collection - where style meets functionality.


No. 4

Strategic Furniture and Layout: Design That Works for Everyone

The layout and furnishings of your kitchen play a major role in both its functionality and safety. With a few thoughtful adjustments, you can create a space that accommodates both adults and children comfortably.

Design Strategies for a Kid-Friendly Layout:

  • Rounded edges: Choose countertops and islands with curved corners to reduce the risk of injury from accidental bumps.

  • Performance fabrics: Opt for materials that are bleach-cleanable and resistant to spills, stains, and even marker drawings.

  • Dedicated kid zone: Set aside a lower drawer or cabinet filled with safe items and snacks. This encourages independence and satisfies curiosity without compromising safety.

These subtle layout choices help create a kitchen that’s as practical as it is beautiful—designed for real life with kids in mind.

Takeaways

As we’ve explored in this article, creating a kitchen that balances beauty with childproofing is not only possible—it’s easier than ever with the right design strategies. By incorporating invisible safety hardware, choosing high-performance finishes, integrating appliances, and planning a thoughtful layout, you can enjoy a kitchen that’s both stunning and safe.

You don’t have to sacrifice style for security. With a few smart choices, your kitchen can be a space where your children are protected, your design vision is realized, and your home remains a place you’re proud to show off.

So go ahead—design boldly, live safely, and enjoy every moment in your family-friendly dream kitchen.

Looking for Home resources?

Looking to enhance your living space and create a sanctuary that supports your well-being? Explore our home partners who offer a wide range of resources to elevate your home environment.


homeHLL x Editor


Expert Tips To Customize Your Kitchen With RTA Cabinets Online

Designing a kitchen that reflects your personal style while maintaining functionality can feel like a daunting task. From layout planning to material selection, every detail matters. Fortunately, the rise of Ready-to-Assemble (RTA) cabinets available online has revolutionized the way homeowners approach kitchen customization. These cabinets offer a flexible, cost-effective solution that makes it easier than ever to create a space that is both beautiful and practical.


In this article, we’ll provide expert guidance on how to personalize your kitchen using RTA cabinets purchased online. From assessing your kitchen needs and selecting the right cabinet style to maximizing storage and incorporating unique features, we’ll walk you through each step of the process. Whether you're planning a full renovation or a simple refresh, this guide will help you make informed decisions that align with your aesthetic and functional goals.

No. 1

Assessing Your Kitchen Needs

Before purchasing RTA cabinets online, it’s essential to evaluate your kitchen’s unique requirements. Understanding how you use your kitchen on a daily basis will help you make smarter design choices.

Key Considerations:

  • Storage needs: Do you need more space for cookware, pantry items, or utensils?

  • Workflow: How do you move through your kitchen while cooking or cleaning?

  • Appliance placement: Ensure cabinets won’t obstruct or clash with appliances.

  • Family lifestyle: Consider how many people use the kitchen and how often.

Taking accurate measurements and identifying must-have features will help you avoid costly mistakes later. This foundational step ensures that your cabinet choices will support both form and function.

No. 2

Selecting the Right Cabinet Style

The style of your cabinets sets the tone for your entire kitchen. RTA cabinet retailers typically offer a wide variety of designs, from minimalist to ornate, allowing you to find a look that complements your home’s aesthetic.

Popular Cabinet Styles:

  • Shaker: Clean lines and timeless appeal

  • Raised panel: Classic and elegant, ideal for traditional kitchens

  • Flat panel: Sleek and modern for contemporary spaces

  • Glass-front: Adds visual interest and display space

Don’t overlook the importance of hardware. Handles and knobs are more than functional—they’re design elements that can elevate your kitchen’s overall appearance.

No. 3

Choosing Quality Materials

Material selection is crucial when it comes to durability and long-term satisfaction. While RTA cabinets are often more affordable than custom-built options, that doesn’t mean you have to sacrifice quality.

Common Material Options:

  • Solid wood: Durable and high-end, but more expensive

  • Plywood: Strong and moisture-resistant, ideal for kitchen environments

  • MDF (Medium-Density Fiberboard): Budget-friendly and smooth, but less durable

Understanding the pros and cons of each material will help you make a choice that balances cost, longevity, and appearance.


hellolovelyliving bedrosians

Bedrosians

Elevate your kitchen's style with Bedrosians' stunning backsplash designs—where function meets flawless beauty.


No. 4

Planning the Layout

A well-planned layout is the backbone of a functional kitchen. Thanks to online design tools and software, visualizing your space has never been easier.

Layout Planning Tips:

  • Use the kitchen work triangle (sink, stove, refrigerator) for efficiency

  • Ensure adequate clearance between cabinets and appliances

  • Consider adding an island for extra prep space and storage

  • Use corner cabinets or pull-out shelves to maximize hard-to-reach areas

Taking the time to plan your layout ensures that your kitchen will not only look great but also work seamlessly for your daily routines.

No. 5

Maximizing Storage Solutions

Customization isn’t just about aesthetics—it’s also about making your kitchen more functional. Smart storage solutions can transform even the smallest kitchens into highly efficient spaces.

Smart Storage Features to Consider:

  • Pull-out shelves for easy access to deep cabinets

  • Lazy Susans for corner cabinets

  • Deep drawers for pots and pans

  • Tray dividers for baking sheets and cutting boards

  • Built-in spice racks or pantry pull-outs

These additions make it easier to stay organized and reduce clutter, enhancing the overall usability of your kitchen.

No. 6

Incorporating Unique Features

Adding unique design elements can give your kitchen a personalized touch that reflects your taste and lifestyle.

Creative Customization Ideas:

  • Glass-front cabinets to showcase dishware or collectibles

  • Open shelving for a modern, airy feel

  • Decorative moldings for a touch of elegance

  • Under-cabinet lighting to brighten workspaces

  • Accent finishes like distressed wood or two-tone color schemes

These features not only enhance visual appeal but also improve functionality, making your kitchen a space you’ll love spending time in.

No. 7

Budgeting Wisely

A well-planned budget is essential for a successful kitchen remodel. One of the biggest advantages of RTA cabinets is their affordability compared to custom cabinetry.

Budgeting Tips:

  • Compare prices across multiple online retailers

  • Factor in hidden costs like shipping, assembly hardware, and installation

  • Set aside a contingency fund (10–15% of your total budget) for unexpected expenses

  • Prioritize spending on high-impact areas like cabinet materials and hardware

Being financially prepared ensures that your project stays on track and avoids unnecessary stress.

No. 8

Maintaining Cabinets Over Time

Proper maintenance extends the life of your cabinets and keeps them looking new for years to come.

Maintenance Best Practices:

  • Clean with mild soap and warm water

  • Wipe spills immediately to prevent staining or warping

  • Avoid abrasive cleaners or scrubbers

  • Check and tighten hinges and handles regularly

  • Follow the manufacturer’s care instructions for best results

Routine care not only preserves the appearance of your cabinets but also protects your investment.

No. 9

Seeking Inspiration Online

The internet is a treasure trove of design inspiration. Browsing through kitchen galleries, social media, and design forums can spark ideas and help you refine your vision.

Ways to Stay Inspired:

  • Create a Pinterest board to collect your favorite designs

  • Follow home improvement influencers on Instagram or YouTube

  • Explore before-and-after transformations for real-world examples

  • Join online communities to ask questions and share experiences

Visualizing what’s possible will keep you motivated and focused throughout your project.

No. 10

Consulting with Experts

Even with all the tools and resources available online, sometimes professional advice can make all the difference. Many RTA cabinet retailers offer free consultations with experienced designers.

Benefits of Expert Guidance:

  • Get help with layout planning and style selection

  • Avoid common pitfalls and costly mistakes

  • Receive tailored recommendations based on your space and budget

  • Ensure your final design is both practical and cohesive

Taking advantage of expert support can streamline the process and give you confidence in your decisions.

Takeaways

Customizing your kitchen with RTA cabinets purchased online is a smart, flexible, and cost-effective way to create a space that reflects your personality and meets your everyday needs. As we’ve explored in this article, success lies in careful planning, thoughtful design, and attention to detail.

From assessing your kitchen’s unique requirements to selecting the right materials, styles, and storage solutions, every step you take brings you closer to the kitchen of your dreams. With the added benefit of online tools, expert consultations, and endless inspiration at your fingertips, there’s never been a better time to take control of your kitchen remodel.

Whether you’re updating a small space or redesigning your entire kitchen, RTA cabinets offer the perfect balance of style, functionality, and affordability. Take your time, trust the process, and enjoy the journey of creating a kitchen that’s truly your own.

Looking for Home resources?

Looking to enhance your living space and create a sanctuary that supports your well-being? Explore our home partners who offer a wide range of resources to elevate your home environment.


homeHLL x Editor


Why LA Is A Great Place To Move To With Family

Relocating to a new city is a major life decision—especially when you're moving with your family. If you're considering a move to Los Angeles, you're not alone. Known for its sunshine, diversity, and endless entertainment, LA might not be the first place that comes to mind for families, but it’s actually one of the most dynamic and enriching places to raise children.


In this article, we’ll walk you through why LA is a fantastic place to move with your family, and highlight some of the best kid-friendly activities the city has to offer. From sun-soaked beaches to interactive museums and world-famous theme parks, there’s something for every child (and parent!) to enjoy. But before you dive into all the fun, we’ll also touch on the practical first step: finding a reliable long-distance moving company to make your transition smooth and stress-free.

No. 1

Start with a Trusted Long-Distance Moving Company

Before you can enjoy everything LA has to offer, the first and most important step is to choose a reputable moving company that specializes in long-distance relocations. A professional team will ensure your family’s belongings are transported safely and on time, giving you peace of mind during what can otherwise be a stressful process.

Look for movers with:

  • Verified reviews and testimonials

  • Experience in long-distance moves

  • Transparent pricing and insurance options

  • Excellent customer service and communication

Once your move is in motion, you can begin exploring your new surroundings and discovering why Los Angeles is such a great place to raise a family.

No. 2

Explore LA’s Iconic Beaches

When the sun is shining—and in LA, that’s most of the year—there’s no better place to be than the beach. Los Angeles is home to some of the most beautiful and family-friendly beaches in the country.

Fun Activities for Kids at the Beach

  • In the water: Swimming, snorkeling, paddleboarding, and kayaking

  • On the sand: Building sandcastles, playing frisbee, beach volleyball, or simply running around

  • Nearby amenities: Many beaches have adjacent playgrounds, restrooms, and picnic areas

Bringing a picnic is a great way to extend your beach day and keep the kids energized. Plus, having snacks on hand is always a smart move when little ones start to get restless.

No. 3

Visit Local Museums for Hands-On Learning

Museums in LA aren’t just for adults—they’re designed to engage visitors of all ages. Many offer interactive exhibits that encourage kids to explore, touch, and learn through play.

Top Family-Friendly Museums in LA

  • California Science Center – Free admission and packed with hands-on science exhibits

  • Natural History Museum of Los Angeles County – Dinosaurs, gems, and nature walks

  • Kidspace Children’s Museum – Located in Pasadena, this museum is designed specifically for younger children

  • La Brea Tar Pits and Museum – A fascinating blend of science and history with real fossils

Many of these museums also offer seasonal workshops and educational programs that can keep your kids entertained and learning throughout the year.


hellolovelyliving viator

Viator

From guided tours of iconic landmarks to off-the-beaten-path adventures, explore a diverse selection of activities catered to your interests and preferences.


No. 4

Enroll in Local Sports Camps

If your children are active and enjoy sports, LA offers a wide variety of seasonal sports camps that cater to all skill levels. These camps are typically run by local schools, community centers, or private organizations and are especially popular during school breaks.

Benefits of Sports Camps

  • Keep kids active and healthy

  • Encourage teamwork and discipline

  • Help children make new friends

  • Introduce them to new sports in a supportive environment

Whether your child is into soccer, basketball, swimming, tennis, or baseball, there’s a camp for them. Even if they’re not naturally athletic, beginner-friendly camps can be a great way to build confidence and discover new interests.

No. 5

Spend a Day at World-Class Theme Parks

Few cities in the world can rival Los Angeles when it comes to theme parks. If you’re looking for a full day of fun and excitement, you’re in the right place.

Top Theme Parks in and Around LA

  • Disneyland Resort – The ultimate family destination with rides for all ages

  • Universal Studios Hollywood – A mix of thrilling rides and behind-the-scenes movie magic

  • Six Flags Magic Mountain – Perfect for families with older kids who love roller coasters

  • LEGOLAND California – A bit of a drive, but ideal for younger children

While theme parks can be a bit pricey, they offer unforgettable experiences and are perfect for celebrating birthdays, holidays, or just enjoying a weekend adventure. Plus, after a full day of rides and excitement, your kids will be more than ready for a good night’s sleep!

No. 6

Why LA Is a Great Place to Raise a Family

Beyond the activities, Los Angeles offers a vibrant, diverse community and a lifestyle that balances urban excitement with natural beauty. From the mountains to the ocean, from cultural festivals to farmers markets, LA provides a rich environment for children to grow, learn, and thrive.

Additional Family-Friendly Perks of Living in LA

  • Excellent schools: Both public and private options are available across the city

  • Diverse neighborhoods: Find a community that fits your family’s lifestyle and values

  • Outdoor lifestyle: Parks, hiking trails, and year-round sunshine encourage active living

  • Cultural exposure: LA is a melting pot of cultures, offering children a global perspective

Takeaways

Moving to Los Angeles with your family might seem like a bold choice, but it could also be one of the most rewarding decisions you ever make. As we’ve explored in this article, LA is bursting with opportunities for fun, learning, and connection. From its iconic beaches and interactive museums to sports camps and world-famous theme parks, the city offers something for every member of the family.

Start by choosing a reliable moving company to make your transition smooth, then dive into everything this incredible city has to offer. Whether you’re building sandcastles in Santa Monica, exploring dinosaurs at the Natural History Museum, or enjoying a magical day at Disneyland, LA is a place where family memories are made every single day.

So pack your bags, embrace the sunshine, and get ready for your next great adventure in the City of Angels.

Looking for Home resources?

Looking to enhance your living space and create a sanctuary that supports your well-being? Explore our home partners who offer a wide range of resources to elevate your home environment.


homeHLL x Editor


The Long-Term Dangers Of Humidity In The Home

Depending on where you live, humidity might be an unavoidable part of daily life. Whether it’s the sticky heat of summer or the damp air of winter caused by constant indoor heating, excess moisture in your home can lead to more than just discomfort—it can cause serious, long-term damage to your property and even affect your health.


In this article, we’ll explore the hidden dangers of high humidity in your home. From structural deterioration to mold growth and health concerns, we’ll break down the key problems that can arise—and provide insight into how to prevent or mitigate them before they lead to costly repairs.

No. 1

It Can Rot Your Home From the Inside

When moisture levels rise indoors, one of the first victims is your home’s wooden framework. Wood is a porous material, and when it absorbs water, it begins to degrade over time.

How Moisture Damages Wood

  • Rotting: Prolonged exposure to humidity weakens wood fibers, leading to rot.

  • Warping: Floors may become uneven, and doors may stick or fail to close properly.

  • Structural Weakness: Over time, compromised wood can lose its load-bearing capacity, increasing the risk of cracks or collapse.

Even if you seal wooden components, moisture can still infiltrate behind walls, under floors, and into hidden cavities. Once inside, it’s difficult to detect until the damage is done.

No. 2

It Can Stress Your Foundation

Humidity doesn’t just stay in the air—it eventually settles, and gravity pulls moisture downward. This makes basements and crawl spaces particularly vulnerable.

Foundation Risks from Humidity

  • Soil Expansion and Contraction: Moisture causes the soil around your foundation to shift, putting pressure on walls and footings.

  • Concrete Deterioration: Persistent dampness weakens concrete and erodes mortar joints.

  • Visible Warning Signs: Musty odors, damp patches, and white powdery residue (efflorescence) on basement walls are all red flags.

Unchecked humidity in these lower areas can compromise the integrity of your entire home. If you notice any of these signs, it’s crucial to take action to manage moisture levels.

No. 3

It Grows Mold and Mildew

Even if moisture isn’t visibly damaging your home’s structure, it can still create the perfect environment for mold and mildew to thrive—especially in dark, poorly ventilated areas.

Where Mold Hides

  • Behind drywall and wallpaper

  • Inside ceilings and insulation

  • In corners of bathrooms, kitchens, and basements

  • Within crawl spaces and attic voids

Once mold takes hold, it spreads quickly. Remediation can be expensive and invasive, often requiring the help of mold restoration specialists. Worse still, if the underlying humidity issue isn’t resolved, mold will likely return.


hellolovelyliving smell away

Smell Away

Say goodbye to stubborn odors with the Smell Away® Odor Neutralizing Machine! Perfect for homes, it eliminates pet smells, cooking odors, dampness, and more—leaving your space fresh and inviting.

Shop now for cleaner, healthier air!


No. 4

It Can Affect Your Health

Excess humidity doesn’t just harm your home—it can also impact your well-being. Moist environments promote the growth of mold spores, bacteria, and dust mites, all of which can compromise indoor air quality.

Health Risks Linked to High Humidity

  • Respiratory issues such as asthma and chronic coughing

  • Allergic reactions including sneezing, itchy eyes, and sinus irritation

  • Fatigue and general discomfort

  • Increased risk of infections in those with weakened immune systems

Children, the elderly, and individuals with pre-existing health conditions are especially vulnerable to the effects of poor indoor air quality caused by high humidity.

No. 5

How to Reduce Humidity in Your Home

Fortunately, there are several effective strategies for controlling indoor humidity and protecting both your home and your health.

Improve Ventilation

  • Install or upgrade exhaust fans in bathrooms, kitchens, and laundry rooms.

  • Open windows when weather permits to allow fresh air to circulate.

  • Use ceiling fans to keep air moving and prevent moisture buildup.

Use Dehumidifiers

  • Place portable dehumidifiers in high-moisture areas like basements or bedrooms.

  • Consider a whole-house dehumidifier if humidity is a widespread issue.

  • Empty and clean the units regularly to maintain efficiency.

Seal Entry Points

  • Inspect windows, doors, and vents for leaks.

  • Use weather stripping and caulk to seal gaps.

  • Ensure your attic and crawl spaces are properly insulated and ventilated.

Maintain Your HVAC System

  • Replace filters regularly to ensure optimal airflow.

  • Schedule annual maintenance to keep your system running efficiently.

  • Consider adding a humidity control feature to your thermostat.

Address Water Intrusion

  • Check for plumbing leaks and repair them promptly.

  • Ensure gutters and downspouts direct water away from your foundation.

  • Grade landscaping to slope away from the home.

Takeaways

Humidity might seem like a minor inconvenience, but as we’ve outlined in this article, it can lead to serious consequences if left unchecked. From rotting wood and foundation stress to mold growth and health hazards, excess moisture has the potential to damage your home from the inside out.

The good news is that with the right preventative measures—improving ventilation, sealing leaks, using dehumidifiers, and maintaining your HVAC system—you can keep humidity under control and protect your living environment.

Don’t wait until you see visible damage or feel the effects on your health. Take proactive steps now to ensure your home stays dry, safe, and comfortable all year long.

Looking for Home resources?

Looking to enhance your living space and create a sanctuary that supports your well-being? Explore our home partners who offer a wide range of resources to elevate your home environment.


homeHLL x Editor


Moving To A New Home? Take These Steps If You Have Kids

Moving to a new home is a major life event—one that’s often filled with excitement, anticipation, and, let’s be honest, a fair amount of stress. When you add kids into the mix, the process becomes even more complex. Between managing logistics, emotions, and endless to-do lists, it’s easy to feel overwhelmed.


In this article, we’ll walk you through a few practical, family-focused strategies to help make your move smoother and more manageable. From securing the right home loan to packing with your children in mind and exploring your new neighborhood together, these tips are designed to reduce stress and create a more positive moving experience for the whole family.

No. 1

Secure Your Loan First

One of the most important steps in the moving process—especially when buying a home—is securing your mortgage early. Since purchasing a home is likely one of the largest financial commitments you’ll ever make, it’s essential to approach it with careful planning and the right loan product for your situation.

No. 2

Consider a VA Jumbo Loan

If you or your spouse is currently serving in the U.S. military or are a veteran with an honorable discharge, a VA jumbo loan could be an excellent option. This type of loan allows qualified borrowers to purchase higher-value homes without the need for a traditional down payment or private mortgage insurance (PMI). It’s a powerful benefit that can make your move more financially manageable.

Once your loan is secured, you’ll have one of the biggest items on your moving checklist completed—giving you peace of mind and the freedom to focus on the rest of your move.

No. 3

Pack Your Kids’ Rooms Last

Children often struggle with change, and moving to a new home can be especially unsettling for them. One way to ease this transition is by carefully planning the order in which you pack your home.

Why It Helps to Pack Their Rooms Last

Keeping your kids’ rooms intact for as long as possible helps maintain a sense of normalcy during a time of upheaval. Familiar surroundings can provide comfort and stability, which are especially important when everything else feels like it’s changing.

Label Boxes with Extra Detail

When you do start packing their rooms, be sure to label boxes clearly—and not just with your child’s name.

Include detailed descriptions such as:

  • Stuffed animals

  • Pajamas and clothing

  • Favorite books

  • Art supplies

  • Toys and action figures

  • School materials

This extra effort will pay off when you arrive at your new home and need to quickly recreate a comforting space for your children. Being able to find their favorite bedtime book or superhero toy right away can make a big difference in how they adjust.


hellolovelyliving the container store

The Container Store

Your ultimate destination for innovative storage and organization solutions for home or office—offering everything from stylish bins and shelves to custom closet systems.


No. 4

Learn About Your New Area Together

Whether you're moving across town or across the country, taking time to explore your new neighborhood can help your kids feel more excited and less anxious about the move.

Make It a Family Activity

Sit down with your children and research your new community together.

Use your computer, tablet, or smartphone to look up:

  • Local libraries

  • Parks and playgrounds

  • Swimming pools or splash pads

  • Indoor play gyms or trampoline parks

  • Dog parks (if you have pets)

  • Ice cream shops and family-friendly restaurants

  • Their new school and nearby landmarks

Create a Custom Google Map

To make your discoveries even more engaging, create a custom Google Map with all the places you’ve found. Drop pins for each location and save the map to your phone for easy access. You can even print out a copy for your kids to hang in their room or bring along during the move.

Takeaways

Moving with children doesn’t have to be chaotic or overwhelming. As we’ve outlined in this article, a few thoughtful strategies can go a long way in reducing stress and making the experience more enjoyable for everyone involved.

Quick Recap of Key Tips:

  • Secure your home loan early, and explore options like the VA jumbo loan if you qualify

  • Pack your kids’ rooms last to maintain their sense of routine and comfort

  • Label boxes clearly with detailed contents to make unpacking easier

  • Explore your new neighborhood together, and create a custom map to get your kids excited about the move

By involving your children in the process and planning with their needs in mind, you can transform a potentially stressful event into a meaningful family experience. And who knows? Along the way, you might even create some lasting memories that make your new house feel like home from day one.

Looking for Home resources?

Looking to enhance your living space and create a sanctuary that supports your well-being? Explore our home partners who offer a wide range of resources to elevate your home environment.


homeHLL x Editor


How To Touch Up Wall Paint Without Leaving Patchy Marks

Touching up wall paint might seem like a simple task: dip a brush, dab the spot, and walk away. But more often than not, that tiny fix turns into a glaring patch that catches the light—and your eye—every time you walk by. Even if the color match is perfect, the result can still look off due to differences in sheen, texture, or application technique.


In this article, we’ll explore how to touch up wall paint the right way—without leaving behind patchy, mismatched marks. From understanding why touch-ups often go wrong to mastering the tools and techniques that help blend them seamlessly, this guide will help you achieve a flawless finish. Whether you're fixing a scuff, nail hole, or small dent, these expert tips will ensure your walls look freshly painted—not freshly patched.

No. 1

Why Touch-Up Paint Often Looks Patchy

Even with the exact same paint, touch-ups can still stand out.

Here's why:

1. Paint Aging and Fading

Paint changes over time. Exposure to sunlight, air, and everyday wear can dull or fade the original color. When you apply fresh paint, it may appear richer or cleaner, making the touched-up area more noticeable—even if the color is technically the same.

2. Sheen Shifts

Sheen is a major factor in how paint reflects light. While two paints may both be labeled "eggshell," the finish can change subtly as it ages. Fresh paint often has a sharper, more reflective sheen, which can make your touch-up glow like a spotlight under certain lighting conditions.

3. Lighting Angles

Light plays tricks on the eye. A touch-up that looks perfect from one angle may stand out from another, especially under directional lighting like track lights or sunlight. This is especially true if the paint was applied with a different tool or thickness than the original coat.

No. 2

Assessing Whether a Touch-Up Is the Right Solution

Before you break out the brush, take a moment to evaluate the situation.

When a Small Touch-Up Works

  • Minor scuffs or scratches

  • Nail holes or small dents

  • Areas where the wall hasn’t faded significantly

  • You have the original paint (and it’s still in good condition)

In these cases, a well-executed touch-up can blend in beautifully.

When to Repaint the Whole Wall or Section

  • The paint is several years old and has faded unevenly

  • The wall has a noticeable texture or roller pattern

  • The area to be repaired is larger than a few inches

  • You no longer have the original paint or can’t match the sheen

In these situations, repainting the entire wall—or at least the section between corners—will usually yield a more consistent, professional look.

No. 3

Preparing the Wall Surface Properly

Proper prep is the difference between a seamless touch-up and a glaring patch.

Cleaning Away Dust and Oils

Dust, fingerprints, and cooking residue can prevent new paint from adhering properly. Use a soft cloth with mild soap and water to clean the area. For stubborn marks, a melamine sponge (like a Magic Eraser) can remove grime without stripping the paint.

Sanding and Feathering Edges

If you’ve filled a hole or patched a dent, the surface may be slightly raised. Lightly sand the area with fine-grit sandpaper to smooth the patch and feather the edges into the surrounding wall. This helps the new paint blend more naturally.

Priming Small Spots (When Necessary)

Primer is essential when:

  • Covering dark or stained areas

  • Painting over joint compound or spackle

  • Working on high-absorption surfaces

Without primer, the touched-up area may absorb paint differently, resulting in a visible halo or sheen mismatch.


hellolovelyliving anthropologie

Anthropologie

Anthropologie is for creative people who pursue a sense of adventure and take a thoughtful, personal approach to interior décor and the harmony of home.


No. 4

How to Match Paint Correctly

Even the best technique can’t save a bad match.

Here’s how to get it right:

Using Leftover Paint From the Original Job

If you still have the original can of paint, you’re in luck. Stir it thoroughly before use—paint separates over time, and using the top layer without mixing can cause color inconsistencies.

Getting a Color Match From a Paint Store

No leftover paint? No problem. Most hardware or paint stores can create a custom match using a small chip from your wall. Try removing a sample from behind a switch plate or outlet cover. While it might not be perfect, modern color-matching technology gets impressively close.

Checking Sheen and Finish

Sheen is just as important as color. Two paints labeled “satin” may look very different depending on the brand or age. Always double-check the finish before applying. If possible, test a small area first to confirm the match.

No. 5

Tools and Techniques for Seamless Touch-Up Painting

Using the right tools—and applying the paint the right way—can make all the difference.

Choosing the Right Tool

  • Brush: Ideal for tiny spots and detail work

  • Mini roller: Best for matching the subtle texture of roller-applied walls

  • Sponge: Useful for blending edges on smooth or irregular surfaces

The goal is to replicate the texture of the original paint job. If the wall was rolled, use a roller. If it was brushed, stick with a brush.

The Feathering Technique

Instead of painting a solid patch, use a feathering motion:

  1. Start in the center of the repair.

  2. Apply light pressure and spread the paint outward.

  3. Gradually reduce pressure as you move away from the spot.

This technique softens the edges and helps the new paint blend seamlessly into the old.

Layering Thin Coats

Avoid the temptation to glob on a thick coat. Heavy applications can reflect light differently and create raised edges. Instead, apply two or three thin coats, allowing each to dry fully before adding the next.

No. 6

Drying Time, Lighting, and Final Inspection

Don’t judge your work too soon—paint changes as it dries.

Check the Wall Under Different Lighting

Observe the touch-up during the day and at night. Natural and artificial light can highlight differences in color and sheen. A patch that looks perfect in daylight might stand out under overhead lighting.

Allow Full Cure Time

Paint often darkens or softens slightly as it cures. Give it at least 24–48 hours before deciding if another coat is needed. What looks mismatched at first may even out once the paint settles.

No. 7

Common Mistakes to Avoid

Avoid these frequent pitfalls for a smoother finish:

  • Using too much paint on the brush or roller

  • Skipping cleaning or sanding

  • Ignoring sheen differences

  • Painting a hard-edged circle instead of feathering

  • Overlooking wall texture

These small errors can make even a good color match look obvious. Taking a few extra minutes to prep and apply properly will save you from frustration later.

No. 8

When to Call a Professional

Sometimes, no matter how careful you are, the touch-up just won’t blend.

This is especially true for:

  • Textured walls or specialty finishes

  • Glossy or decorative coatings

  • Large or unevenly faded areas

In these cases, it’s often worth hiring a professional painter to repaint the full wall or section. As noted by experts like Brothers Colors Painting St. Pete, pros have the tools and experience to deliver a flawless finish—especially when blending is tricky.

Takeaways

Touching up wall paint doesn’t have to be a frustrating guessing game. As we’ve explored in this article, the key to a seamless repair lies in preparation, precision, and patience. By understanding why touch-ups often fail and following the right steps—from cleaning and sanding to feathering and matching sheen—you can restore your walls without leaving behind a patchy reminder.

Final Touch-Up Checklist:

  • Clean the area thoroughly

  • Sand and feather edges if needed

  • Use primer on patched or dark spots

  • Match both color and sheen

  • Choose the right tool for the job

  • Apply thin, feathered coats

  • Inspect under different lighting

  • Allow full cure time before judging

With the right approach, your touch-up can disappear into the background—just as it should. So next time you spot a scuff or scratch, don’t stress. Armed with these expert tips, you’ll be ready to tackle it with confidence and skill.

Looking for Home resources?

Looking to enhance your living space and create a sanctuary that supports your well-being? Explore our home partners who offer a wide range of resources to elevate your home environment.


homeHLL x Editor


How To Prep Your Home For Winter Without Overspending

As the crisp air of autumn gives way to winter’s chill, the thought of cozy nights indoors becomes more appealing. But with that comfort often comes a not-so-cozy reality: rising heating bills and the fear of costly home maintenance. Fortunately, preparing your home for winter doesn’t have to mean draining your savings.


In this article, we’ll guide you through a series of practical, budget-friendly strategies to winterize your home efficiently. From sealing drafts and maintaining your furnace to improving insulation and using your thermostat wisely, these smart solutions will help you stay warm without overspending. Whether you're a homeowner or a renter, these tips are designed to be accessible, effective, and easy to implement.

No. 1

Your First Mission: Stop the Drafts

Drafts are one of the most common culprits behind heat loss and high energy bills. These sneaky air leaks allow cold air to seep in and warm air to escape, making your heating system work overtime. Fortunately, stopping drafts is both simple and affordable.

What to Do About Drafty Windows

Windows are a major source of heat loss, but you don’t need to replace them to see improvement. Start with a basic inspection—look for cracks, gaps, or loose seals around the window frames.

Budget-friendly fixes:

  • Caulk: Use exterior-grade caulk to seal small gaps around the outside of window frames.

  • Weatherstripping: Apply self-adhesive foam or rubber tape to the inside edges where the window sash meets the frame.

  • Window insulation kits: These kits include clear plastic film that you apply over the window interior and shrink with a hairdryer. They’re inexpensive and surprisingly effective at reducing drafts and condensation.

Don’t Forget Your Doors

Exterior doors can be just as drafty as windows. Check the condition of the weatherstripping around the frame and replace it if it’s worn or damaged. Install a door sweep at the bottom of the door to block cold air from sneaking in underneath. These small upgrades can make a noticeable difference in your home’s warmth and energy efficiency.

No. 2

Show Your Furnace a Little Love

Your furnace is the workhorse of your winter comfort. Keeping it in top shape ensures it runs efficiently and safely throughout the cold months.

Why a Professional Tune-Up Matters

A yearly furnace inspection by a licensed technician is a wise investment. During a tune-up, the technician will:

  • Clean the burners and blower components

  • Inspect the heat exchanger for cracks

  • Test safety controls and carbon monoxide levels

  • Lubricate moving parts to reduce wear

This maintenance not only improves performance but also extends the life of your furnace and helps prevent costly breakdowns during the coldest days of the year.

One Easy DIY Task: Change the Filter

Between professional visits, changing your furnace filter is a simple but crucial task. A clogged filter restricts airflow, reduces efficiency, and lowers indoor air quality.

Filter change tips:

  • Check your filter monthly during peak usage

  • Replace it when it appears dirty or clogged

  • Use the correct size and type recommended by your furnace manufacturer

This five-minute task can significantly improve your system’s performance and reduce energy consumption.

No. 3

Beef Up Your Home’s Insulation

Insulation acts as your home’s thermal armor, keeping the heat inside where it belongs. While a full insulation upgrade can be pricey, there are several targeted improvements that deliver big results on a small budget.

Take a Peek in the Attic

Since heat rises, your attic is the most important place to check. If you can see the tops of your ceiling joists, your insulation is likely insufficient.

DIY attic insulation tips:

  • Add batt insulation (pre-cut rolls) or loose-fill insulation

  • Rent a blower from a home improvement store for easy installation

  • Focus on even coverage and avoid compressing the material

This upgrade can drastically reduce heat loss and improve overall comfort.

Find and Fill the Small Gaps

Heat escapes through more than just windows and doors. Look for gaps around:

  • Pipes and vents

  • Electrical wiring

  • Rim joists in the basement

Use expanding spray foam or rigid foam board to seal these areas. These materials are inexpensive, easy to apply, and highly effective at stopping air leaks.


hellolovelyliving houzz

Houzz

Make your home project a reality. Find inspiration, products, and the pros to make it happen - all in one place.


No. 4

Use Your Thermostat Smarter

Your thermostat is a powerful tool for managing energy use. With a few adjustments, you can save money without sacrificing comfort.

Thermostat tips:

  • Lower the temperature by 7–10°F for 8 hours a day (e.g., while you sleep or are away)

  • Use a programmable thermostat to automate temperature changes

  • Consider a smart thermostat for even more control and remote access

If a new thermostat isn’t in your budget, simply get into the habit of manually adjusting it. Turning the heat down when you leave the house or go to bed can lead to noticeable savings over the course of the season.

No. 5

Don’t Overlook Your Roof

Your roof is your home’s first line of defense against the elements. If it’s compromised, even the best insulation won’t keep your home warm.

Why a Roof Inspection Matters

  • Missing shingles or damaged flashing can let in cold air and moisture

  • Poor ventilation can lead to ice dams and mold growth

  • Leaks can cause structural damage and reduce insulation effectiveness

Schedule a quick inspection with a top rated roofing company in Lincoln NE or your local area. Catching small issues early can prevent costly repairs later and ensure your roof is winter-ready.

Takeaways

Winterizing your home doesn’t have to be overwhelming or expensive. As we’ve explored in this article, a few strategic, low-cost improvements can significantly enhance your home’s comfort and energy efficiency.

Key takeaways:

  • Seal drafts around windows and doors

  • Maintain your furnace with professional tune-ups and regular filter changes

  • Add insulation where it counts—especially in the attic

  • Use your thermostat wisely to reduce energy waste

  • Inspect your roof to ensure it’s ready to protect your home

By taking action now, you’ll not only stay warm all winter long—you’ll also enjoy peace of mind knowing you’re saving money and protecting your home. So grab your caulk gun, check your filter, and give your thermostat a little attention. A cozy, cost-effective winter is well within reach.

Looking for Home resources?

Looking to enhance your living space and create a sanctuary that supports your well-being? Explore our home partners who offer a wide range of resources to elevate your home environment.


homeHLL x Editor


Budget-Friendly Exterior Projects That Add Curb Appeal In A Weekend

First impressions matter—and when it comes to your home, that first impression is all about curb appeal. Whether you're preparing to sell or simply want to take pride in your property, enhancing your home's exterior can make a world of difference. The good news? You don’t need a major renovation budget or weeks of work to make your home shine.


In this article, we’ll walk you through a series of quick, affordable exterior upgrades that can be completed in a single weekend. These projects are designed to deliver maximum visual impact with minimal cost and effort. From a fresh coat of paint on your front door to trimming overgrown shrubs, these simple updates will help your home stand out for all the right reasons.

No. 1

Give Your Front Door a Fresh Coat of Paint

Your front door is the focal point of your home’s exterior—it’s the first thing guests and passersby notice. A dull, chipped, or outdated door can drag down your entire curb appeal. Fortunately, this is one of the easiest and most cost-effective projects you can tackle.

Why it works:

  • A bold color adds personality and charm.

  • A fresh coat of paint instantly makes your home look well-maintained.

  • It’s a quick afternoon project with a high return on investment.

Tips for success:

  • Choose a color that complements your home’s overall palette. Popular choices include navy blue, deep red, cheerful yellow, or classic black.

  • Clean and sand the door before painting to ensure a smooth, long-lasting finish.

  • Use exterior-grade paint for durability.

For less than the cost of a dinner out, you can dramatically improve your home’s entrance and create a warm, welcoming vibe.

No. 2

Refresh Your Flower Beds

Neglected flower beds can make even the most beautiful home look tired. A few hours of landscaping can breathe new life into your yard and make your home feel vibrant and cared for.

Step-by-step refresh:

  • Remove weeds and any dead or overgrown plants.

  • Edge the beds to create clean, defined lines.

  • Cultivate the soil to promote healthy plant growth.

  • Add colorful annuals for an instant pop of color.

  • Apply fresh mulch to suppress weeds and retain moisture.

Budget tip:

You don’t need to splurge on expensive plants. A few strategically placed flowers and a bag or two of mulch can go a long way in transforming your garden beds.

No. 3

Power Wash Walkways and Siding

Over time, dirt, mildew, and grime accumulate on your home’s exterior surfaces, making them look dull and worn. A few hours with a power washer can strip away years of buildup and reveal the beauty underneath.

Areas to clean:

  • Siding

  • Driveways

  • Walkways

  • Porches or patios

How to do it:

  • Rent a power washer from your local hardware store.

  • Start on a low-pressure setting to avoid damaging surfaces.

  • Work from the top down for an even clean.

The transformation is immediate and incredibly satisfying. Your home will look brighter, fresher, and more inviting—without a single drop of paint.


hellolovelyliving rejuvenation

Rejuvenation

Rejuvenation believes in the power of thoughtful design - explore their extensive range of outdoor hardware, including stylish accessories that add character and charm to your home's exterior.


No. 4

Upgrade Your House Numbers

This small detail is often overlooked, but modern house numbers can make a big impact. Outdated or hard-to-read numbers detract from your home’s appearance and functionality.

Why update them?

  • Improves your home’s style and curb appeal.

  • Makes it easier for guests, delivery drivers, and emergency services to find your home.

  • Takes less than 10 minutes to install.

Style tips:

  • Choose a font and finish that complements your home’s architecture.

  • Consider placement—make sure the numbers are clearly visible from the street.

  • For a modern touch, opt for brushed metal, matte black, or backlit numbers.

This is a quick win that adds polish and personality to your home’s exterior.

No. 5

Tidy Up the Roofline

Your roofline frames your home and plays a key role in curb appeal. Clogged gutters, sagging downspouts, and debris buildup can make your property look neglected—and even lead to costly water damage.

What to do:

  • Clean out gutters and remove leaves, twigs, and debris.

  • Check for damage or leaks and make necessary repairs.

  • Ensure downspouts are secure and directing water away from your foundation.

Safety first:

If your home is more than one story or you’re not comfortable on a ladder, consider hiring Naperville gutter cleaning services to handle the job safely and efficiently.

A clean roofline not only enhances your home’s appearance but also protects its structural integrity.

No. 6

Trim Overgrown Shrubs and Trees

Overgrown landscaping can hide your home’s best features and create a cluttered, chaotic appearance. A simple pruning session can open up your yard and highlight your home’s architecture.

What to trim:

  • Bushes and shrubs that block windows or pathways

  • Tree branches that touch the roof or siding

  • Plants that have lost their shape or are growing unevenly

Pro tip:

Use clean, sharp tools and trim with intention—aim for symmetry and shape. This no-cost project delivers a surprisingly dramatic improvement in your home’s overall look.

Takeaways

Improving your home’s curb appeal doesn’t require a hefty budget or a team of contractors. As we’ve explored in this article, a handful of simple, affordable projects can make a significant difference in just a couple of days.

Weekend curb appeal checklist:

  • Paint your front door

  • Refresh flower beds

  • Power wash siding and walkways

  • Upgrade house numbers

  • Clean the roofline and gutters

  • Trim overgrown landscaping

These budget-friendly exterior updates not only enhance your home’s visual appeal but also increase its value and create a more welcoming environment for you and your guests. So roll up your sleeves, grab your tools, and give your home the facelift it deserves—one weekend is all it takes to make a lasting impression.

Looking for Home resources?

Looking to enhance your living space and create a sanctuary that supports your well-being? Explore our home partners who offer a wide range of resources to elevate your home environment.


homeHLL x Editor


How To Furnish A Home For The First Time

Moving into a new home—whether it's your first apartment, a larger family house, or simply a fresh start—can be both exciting and overwhelming. The blank canvas of an empty space may seem daunting at first, but it also presents a unique opportunity: the chance to create a living environment that reflects your personality, lifestyle, and comfort.


In this article, we’ll guide you through the essential steps of furnishing your new home, from measuring your space and finding affordable furniture to adding those all-important finishing touches. Whether you're working with a tight budget or simply want to make smart, stylish choices, these tips will help you transform your new house into a warm, welcoming home.

No. 1

Check the Measurements: Start with a Solid Foundation

Before you buy a single piece of furniture, it’s crucial to understand the dimensions of your new space. Measuring each room allows you to plan effectively and avoid costly mistakes—like purchasing a sofa that won’t fit through the doorway or a dining table too large for the area.

Why measurements matter:

  • Prevents overcrowding or underutilized space

  • Helps you visualize furniture placement

  • Ensures smooth delivery and installation

What to measure:

  • Room dimensions (length, width, and height)

  • Doorways, hallways, and staircases

  • Window and outlet placements

  • Existing architectural features (e.g., fireplaces, built-ins)

Once you have your measurements, sketch a simple floor plan. Use this as a guide when shopping so you can choose pieces that not only fit but also flow well within the space.

No. 2

Finding Affordable Furniture: Style on a Budget

Furnishing a home doesn’t have to break the bank. If you're moving out for the first time or transitioning from hand-me-downs to furniture of your own, there are plenty of cost-effective ways to furnish your space without compromising on style.

Where to find budget-friendly furniture:

  • Second-hand stores: Thrift shops and consignment stores often carry high-quality, gently used items.

  • Estate sales: These can be treasure troves for unique and vintage pieces at a fraction of retail prices.

  • Online marketplaces: Platforms like Facebook Marketplace, Craigslist, or OfferUp offer local deals and negotiable prices.

  • Discount retailers: Stores like IKEA, Wayfair, and Target provide stylish options for every budget.

Tips for smart shopping:

  • Prioritize essential items first (bed, sofa, dining table)

  • Mix and match high and low-end pieces

  • Don’t rush—take your time to find items that fit your space and style

  • Look for multi-functional furniture (e.g., storage ottomans, sofa beds)

Furnishing your home gradually allows you to make thoughtful decisions and avoid impulse buys that may not serve you in the long run.

No. 3

Don’t Forget the Exterior: Make the Most of Your Outdoor Space

While it’s easy to focus solely on the interior, your outdoor space is an extension of your home and deserves attention too. Whether you have a backyard, patio, or balcony, investing in outdoor living can enhance your lifestyle and increase your home's functionality.

Ideas for enhancing your exterior:

  • DIY Timber Frame Kits: These are an affordable and practical way to build garden structures like sheds, pergolas, or workspaces.

  • Outdoor seating: Add garden furniture such as benches, loungers, or a dining set for relaxation and entertaining.

  • Barbecue area: Create an outdoor cooking space for family meals and gatherings.

  • Lighting: Solar-powered lights or string lights can add ambiance and safety.

By utilizing your outdoor space, you expand your living area and create new opportunities for leisure, dining, and even productivity.


hellolovelyliving lulu and georgia

Lulu & Georgia

At Lulu and Georgia, you'll find exclusive designer collaborations, uniquely curated collections, and one-of-a-kind vintage pieces to bring your home to life.


No. 4

Finishing Touches: Turn a House into a Home

Once the major furniture pieces are in place, it’s time to add the elements that truly make your space feel like home. These finishing touches reflect your personality and bring warmth, texture, and charm to each room.

Decorative ideas to personalize your space:

  • Wall art: Hang paintings, prints, or photos to add visual interest. If you're renting, use existing nail holes or removable adhesive strips to avoid damage.

  • Soft furnishings: Cushions, throws, and rugs add comfort and color while tying your décor together.

  • Ornaments and accessories: Incorporate vases, candles, books, and personal mementos to create a lived-in feel.

  • Plants: Indoor greenery not only beautifies a space but also improves air quality and mood.

These small details can make a big impact, turning an otherwise generic space into a cozy, inviting home that feels uniquely yours.

Takeaways

Furnishing a new home is a journey—one that blends creativity, practicality, and personal expression. While the blank canvas of an empty house may seem intimidating at first, it’s also a powerful opportunity to shape your environment in a way that supports your lifestyle and reflects your identity.

In this article, we’ve walked through the essential steps of homemaking: measuring your space, sourcing affordable furniture, utilizing outdoor areas, and adding meaningful finishing touches. Whether you're starting from scratch or simply upgrading your current setup, these tips will help you make informed, confident decisions.

Remember, your home doesn’t need to be “finished” overnight. Take your time, enjoy the process, and let your space evolve with you. With thoughtful planning and a bit of creativity, you’ll soon find yourself in a home that not only looks great but feels just right.

Looking for Home resources?

Looking to enhance your living space and create a sanctuary that supports your well-being? Explore our home partners who offer a wide range of resources to elevate your home environment.


homeHLL x Editor