Posts in home
How To Make A Builder-Grade Home Feel More Intentional

Builder-grade homes aren’t inherently bad. In fact, they’re often functional, affordable, and move-in ready. But let’s be honest—they can also feel a bit... uninspired. You walk in and everything is “fine,” but nothing feels particularly personal or intentional. The same light fixtures, the same doors, the same trim—it’s like someone hit copy and paste on your entire floor plan.


Transforming a builder-grade home into something that feels custom doesn’t have to involve gutting the kitchen or living in a construction zone for half a year. Of course, if you're ready for full-scale renovations and want to dive into comprehensive home upgrades—go for it. Truly, that can be an amazing investment. But it’s important to understand that it’s not the only path. In reality, achieving a custom, curated feel often comes down to a few intentional, high-impact design choices that make the space feel thoughtfully styled rather than straight from a template.

In this article, we’ll show you how to transform a standard builder-grade home into a space that feels curated, elevated, and uniquely yours—without tearing down walls or living through months of renovation dust. These are high-impact, low-effort upgrades that make your home feel custom without the custom price tag.

No. 1

Start with What Your Eyes Notice First

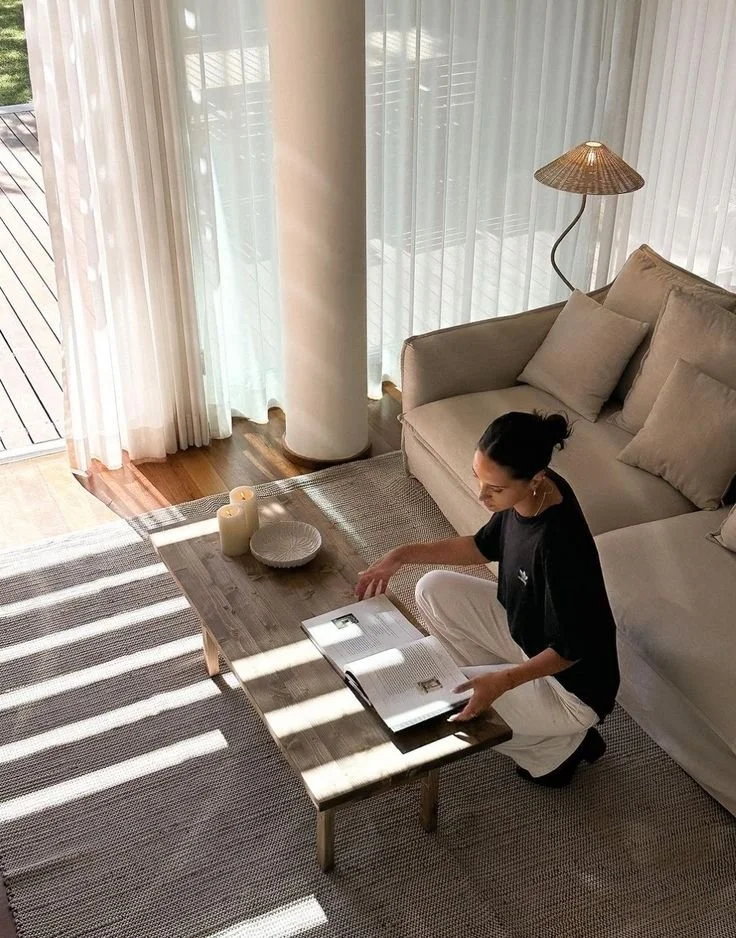
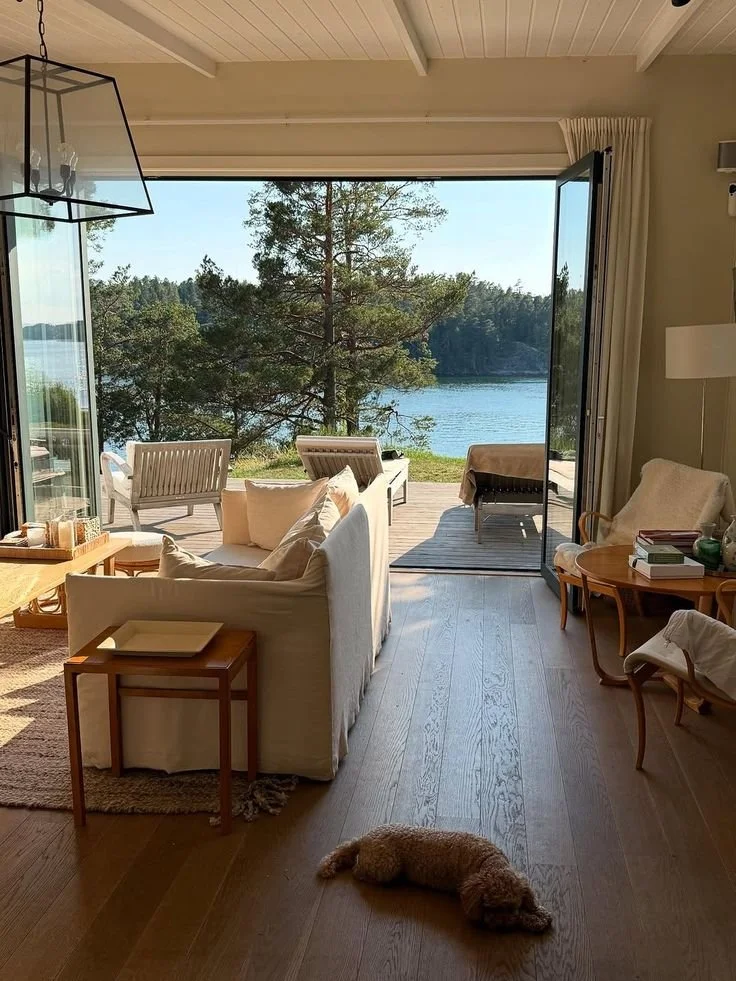
The quickest way to make your home feel more expensive and intentional is to upgrade the things people notice in the first ten seconds. These are the visual cues that set the tone for the entire space—and they’re often the most overlooked.

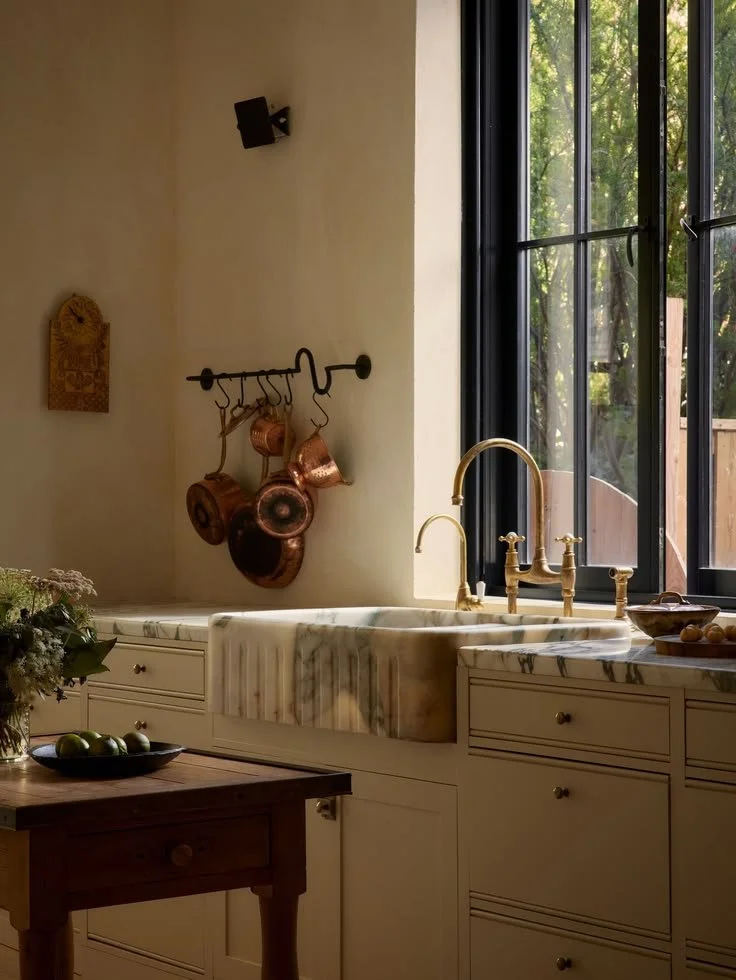
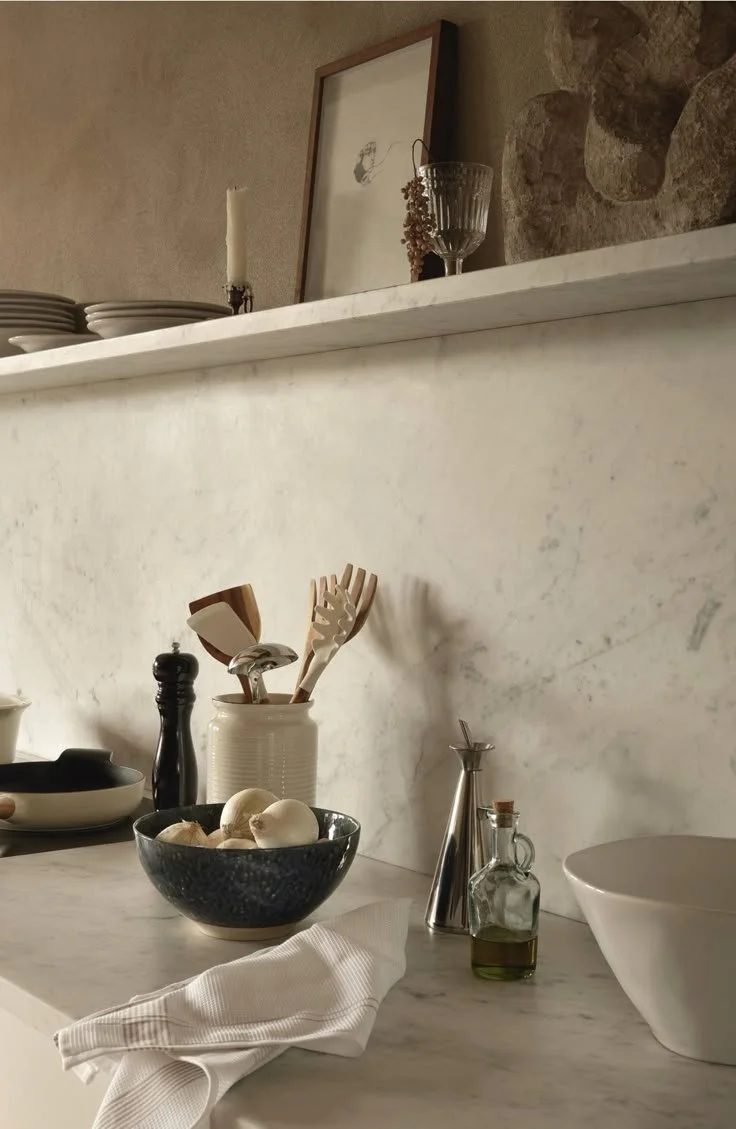
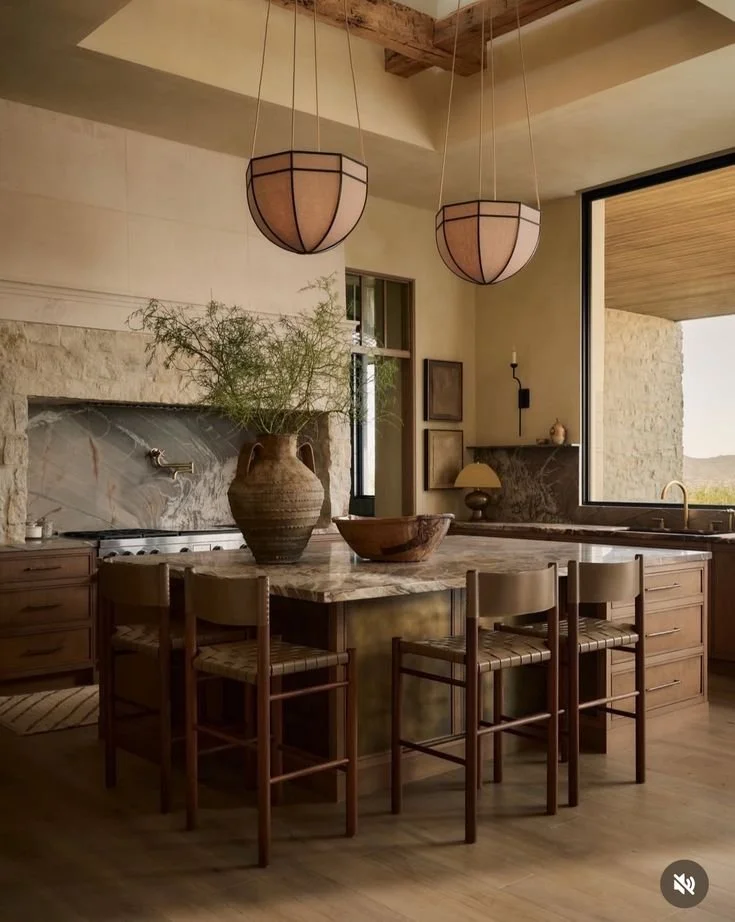
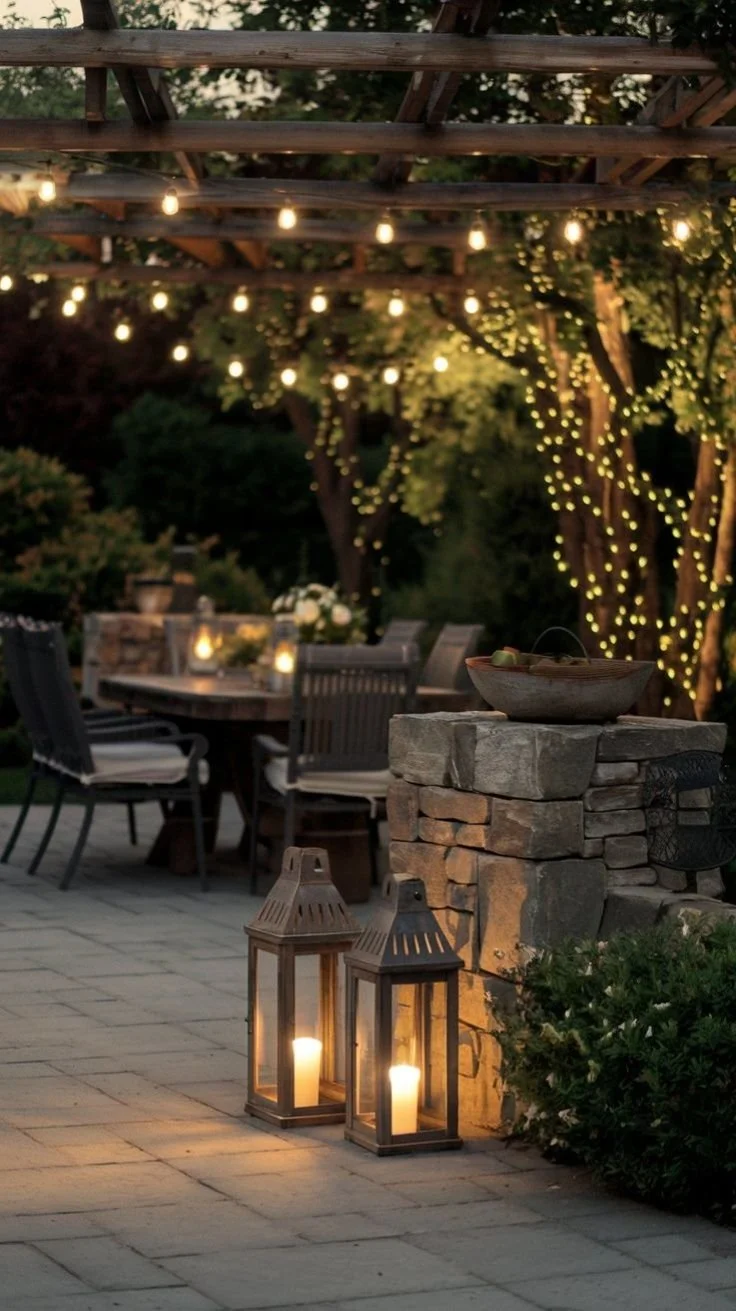
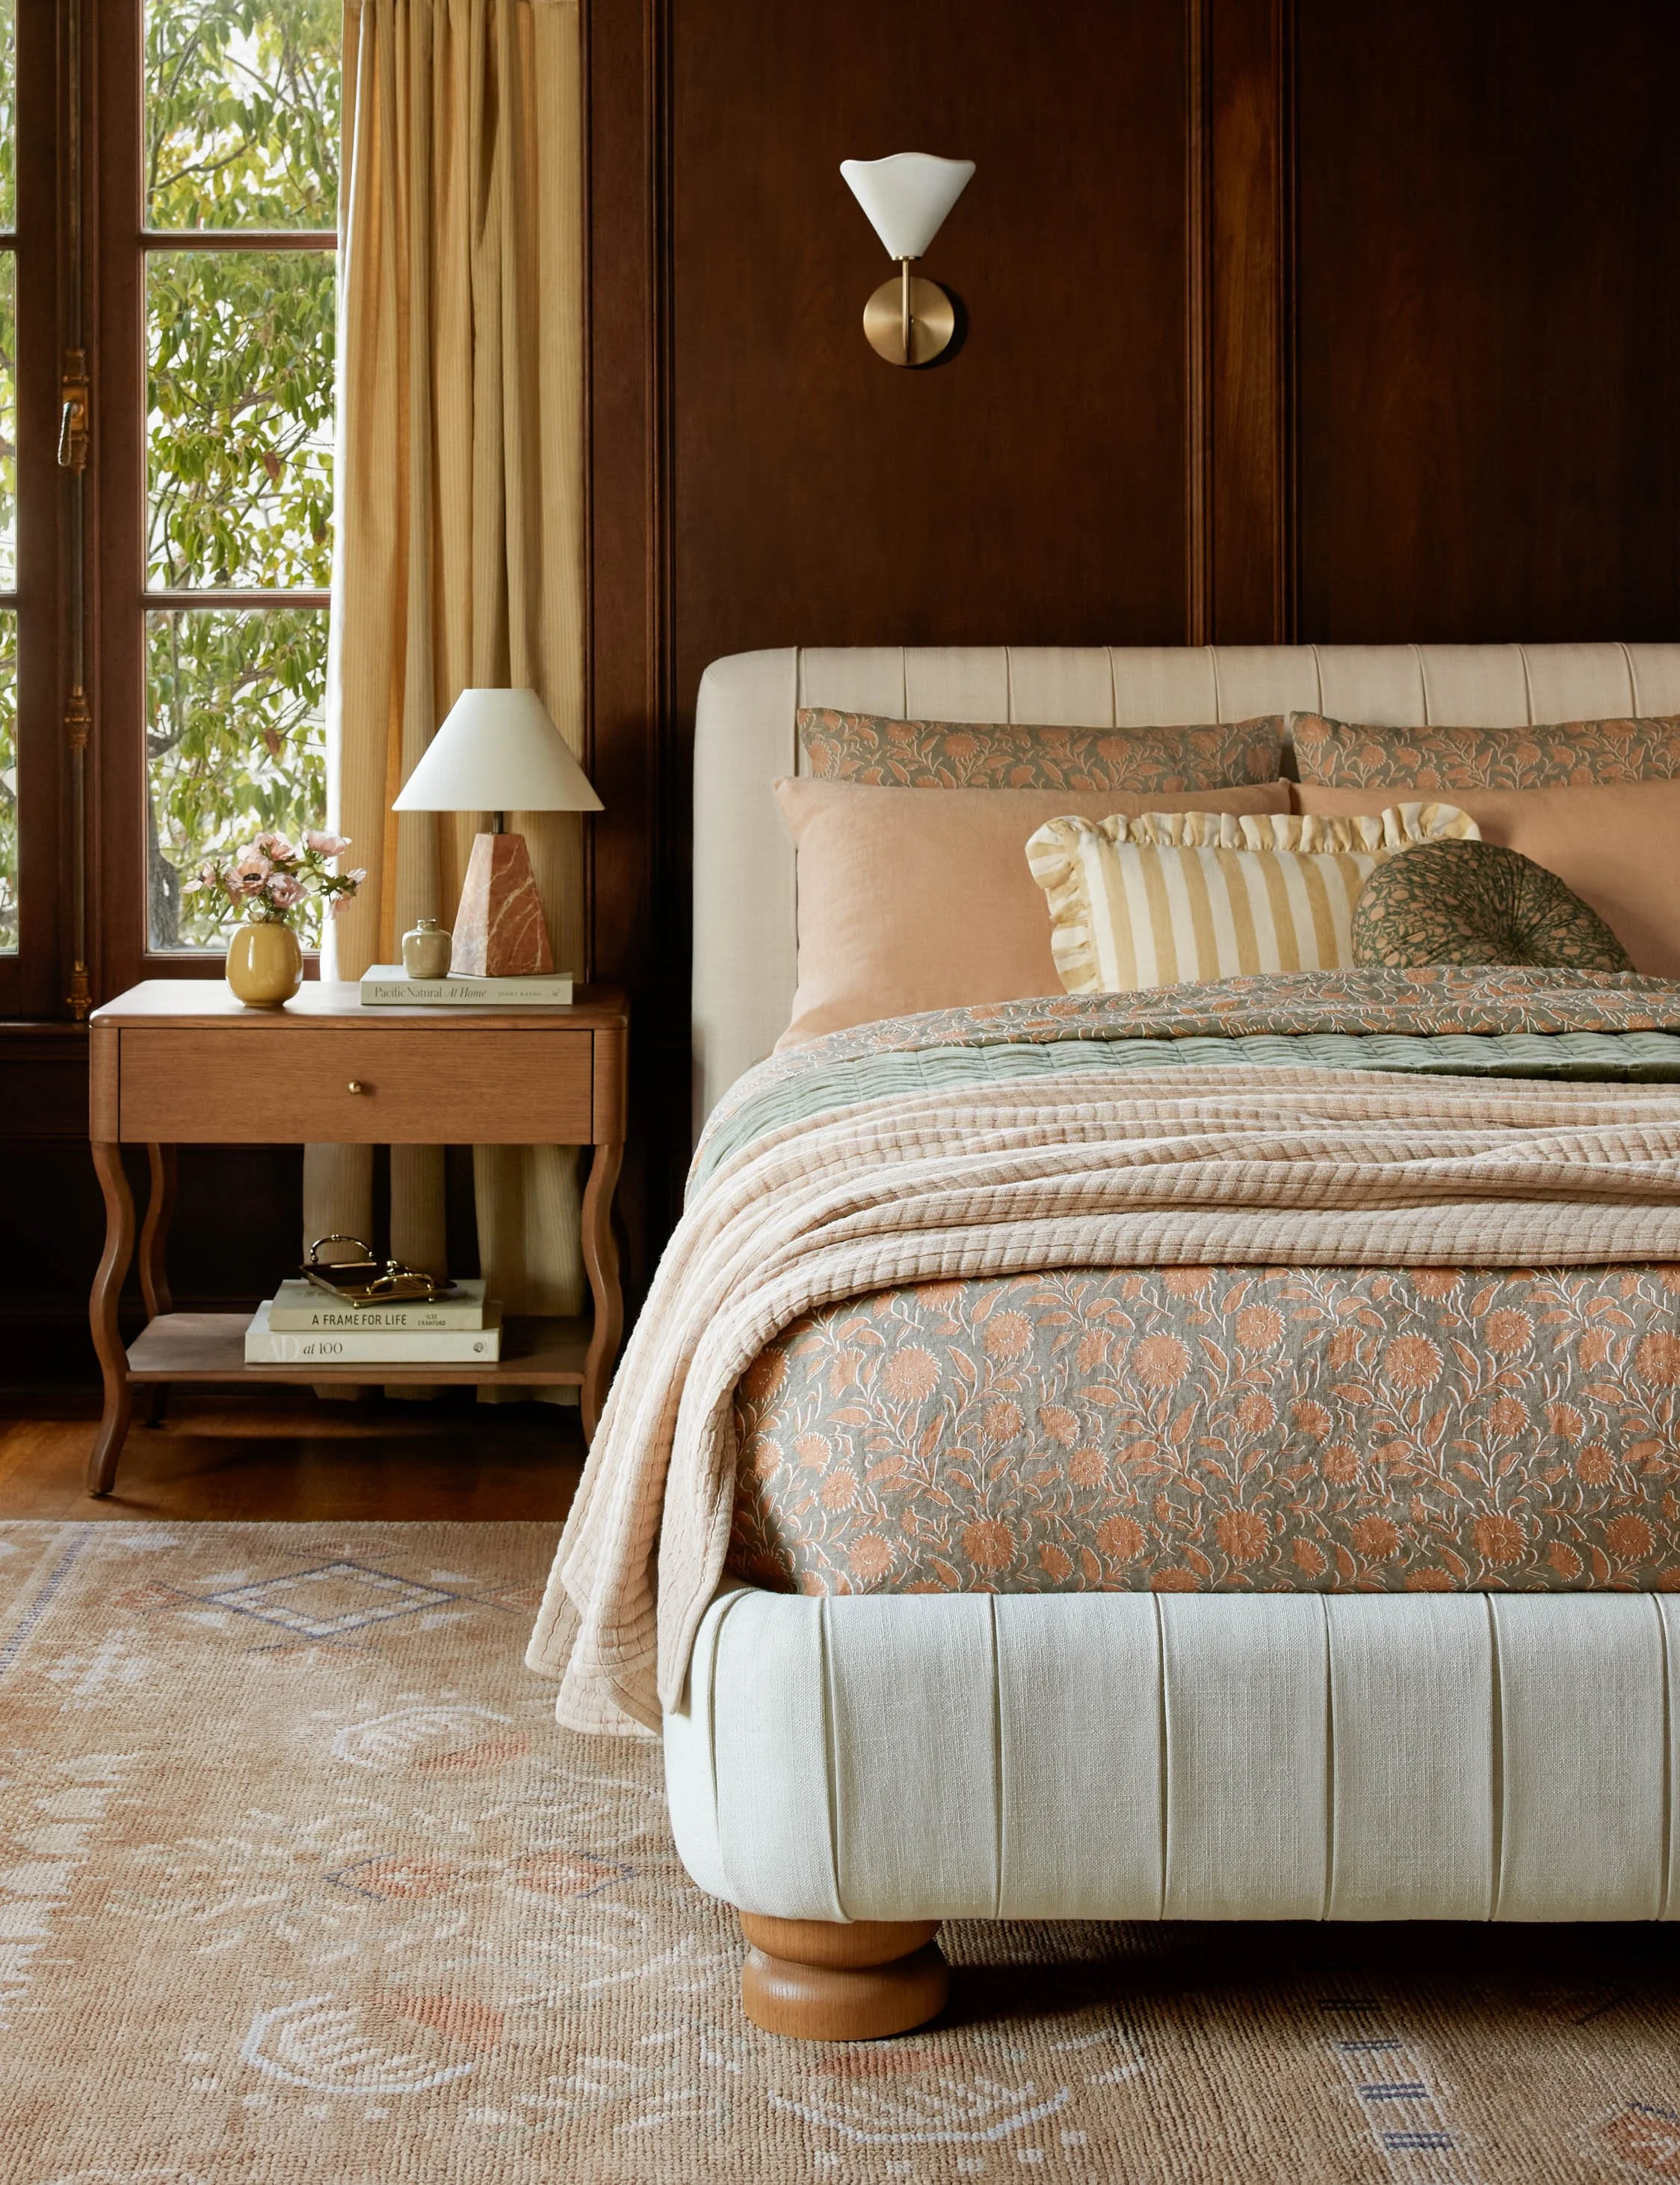
Lighting Matters—A Lot

Basic flush-mount lights can make a room feel flat and lifeless. Swapping them out for something with shape, texture, or even just a bit of personality can completely shift the mood of a space. You don’t need to spend a fortune—just choose fixtures that feel like a design choice, not a default.

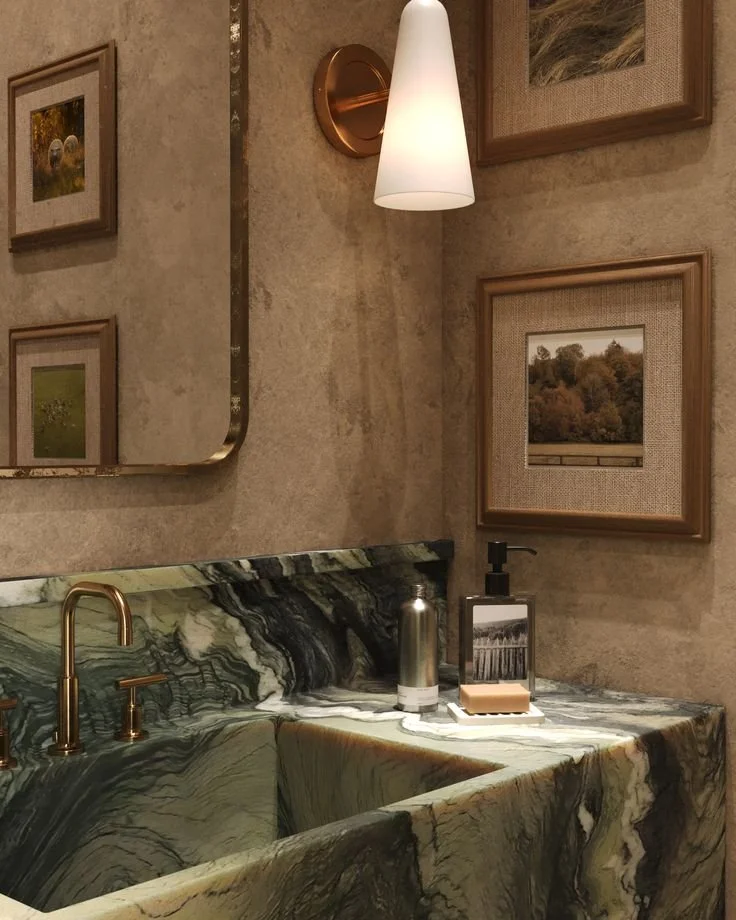
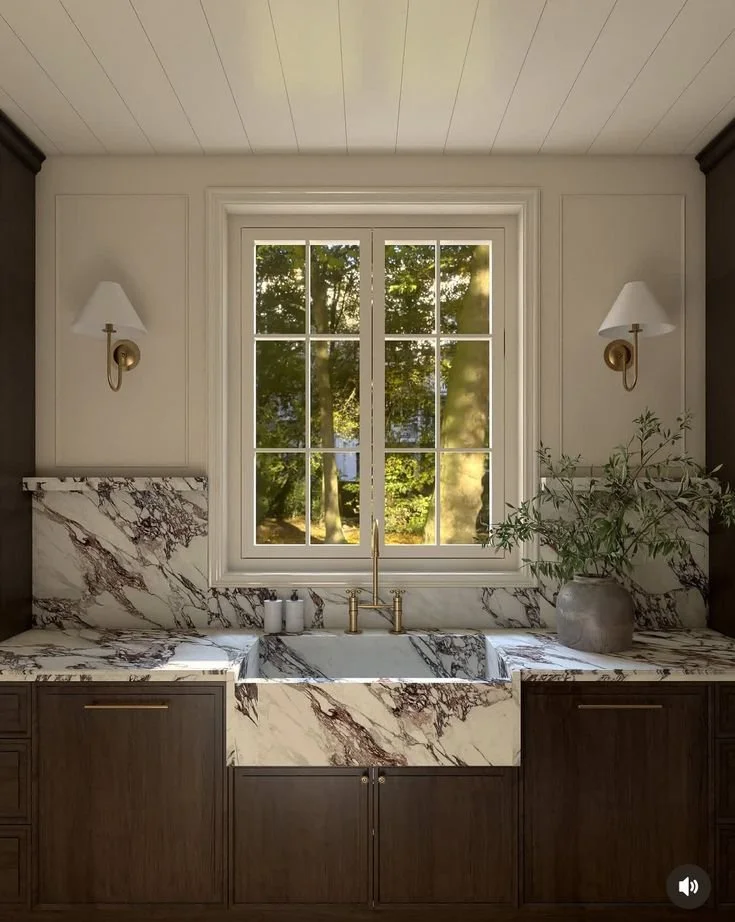
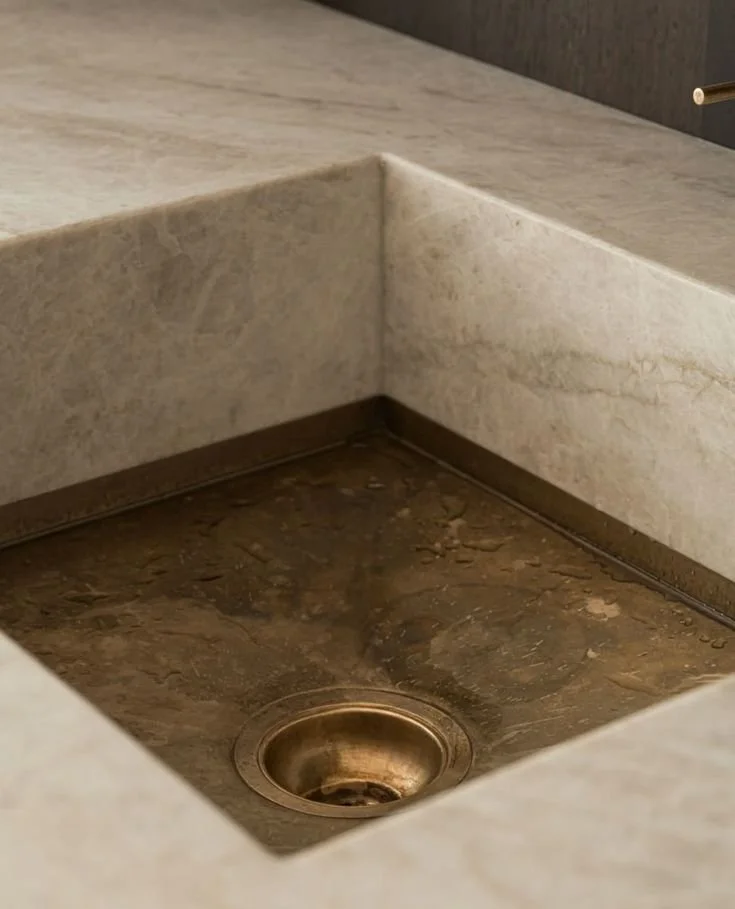
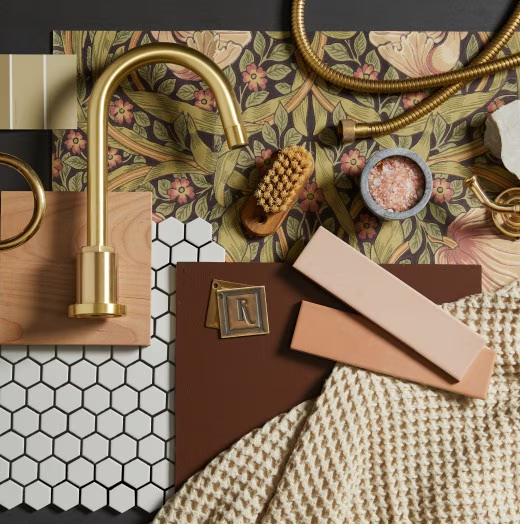
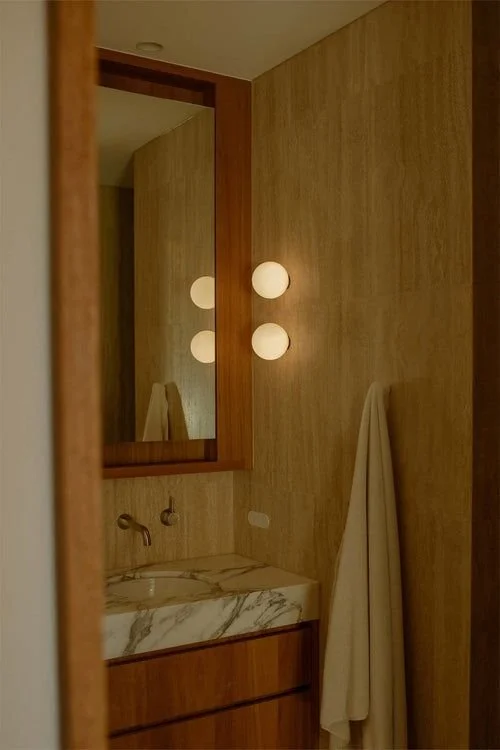
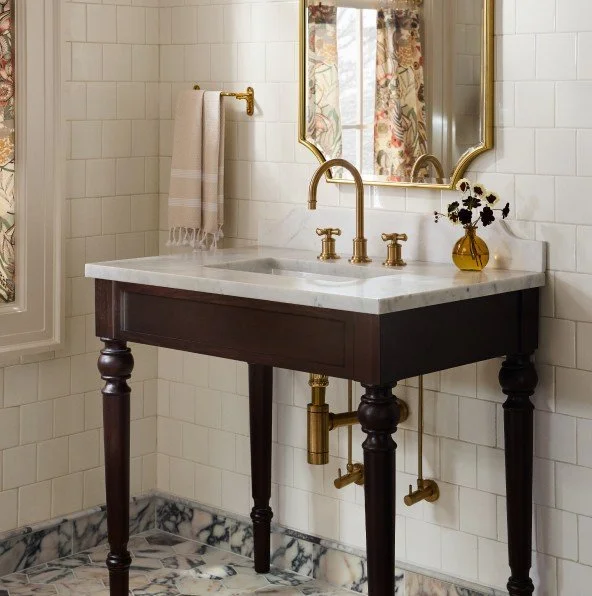
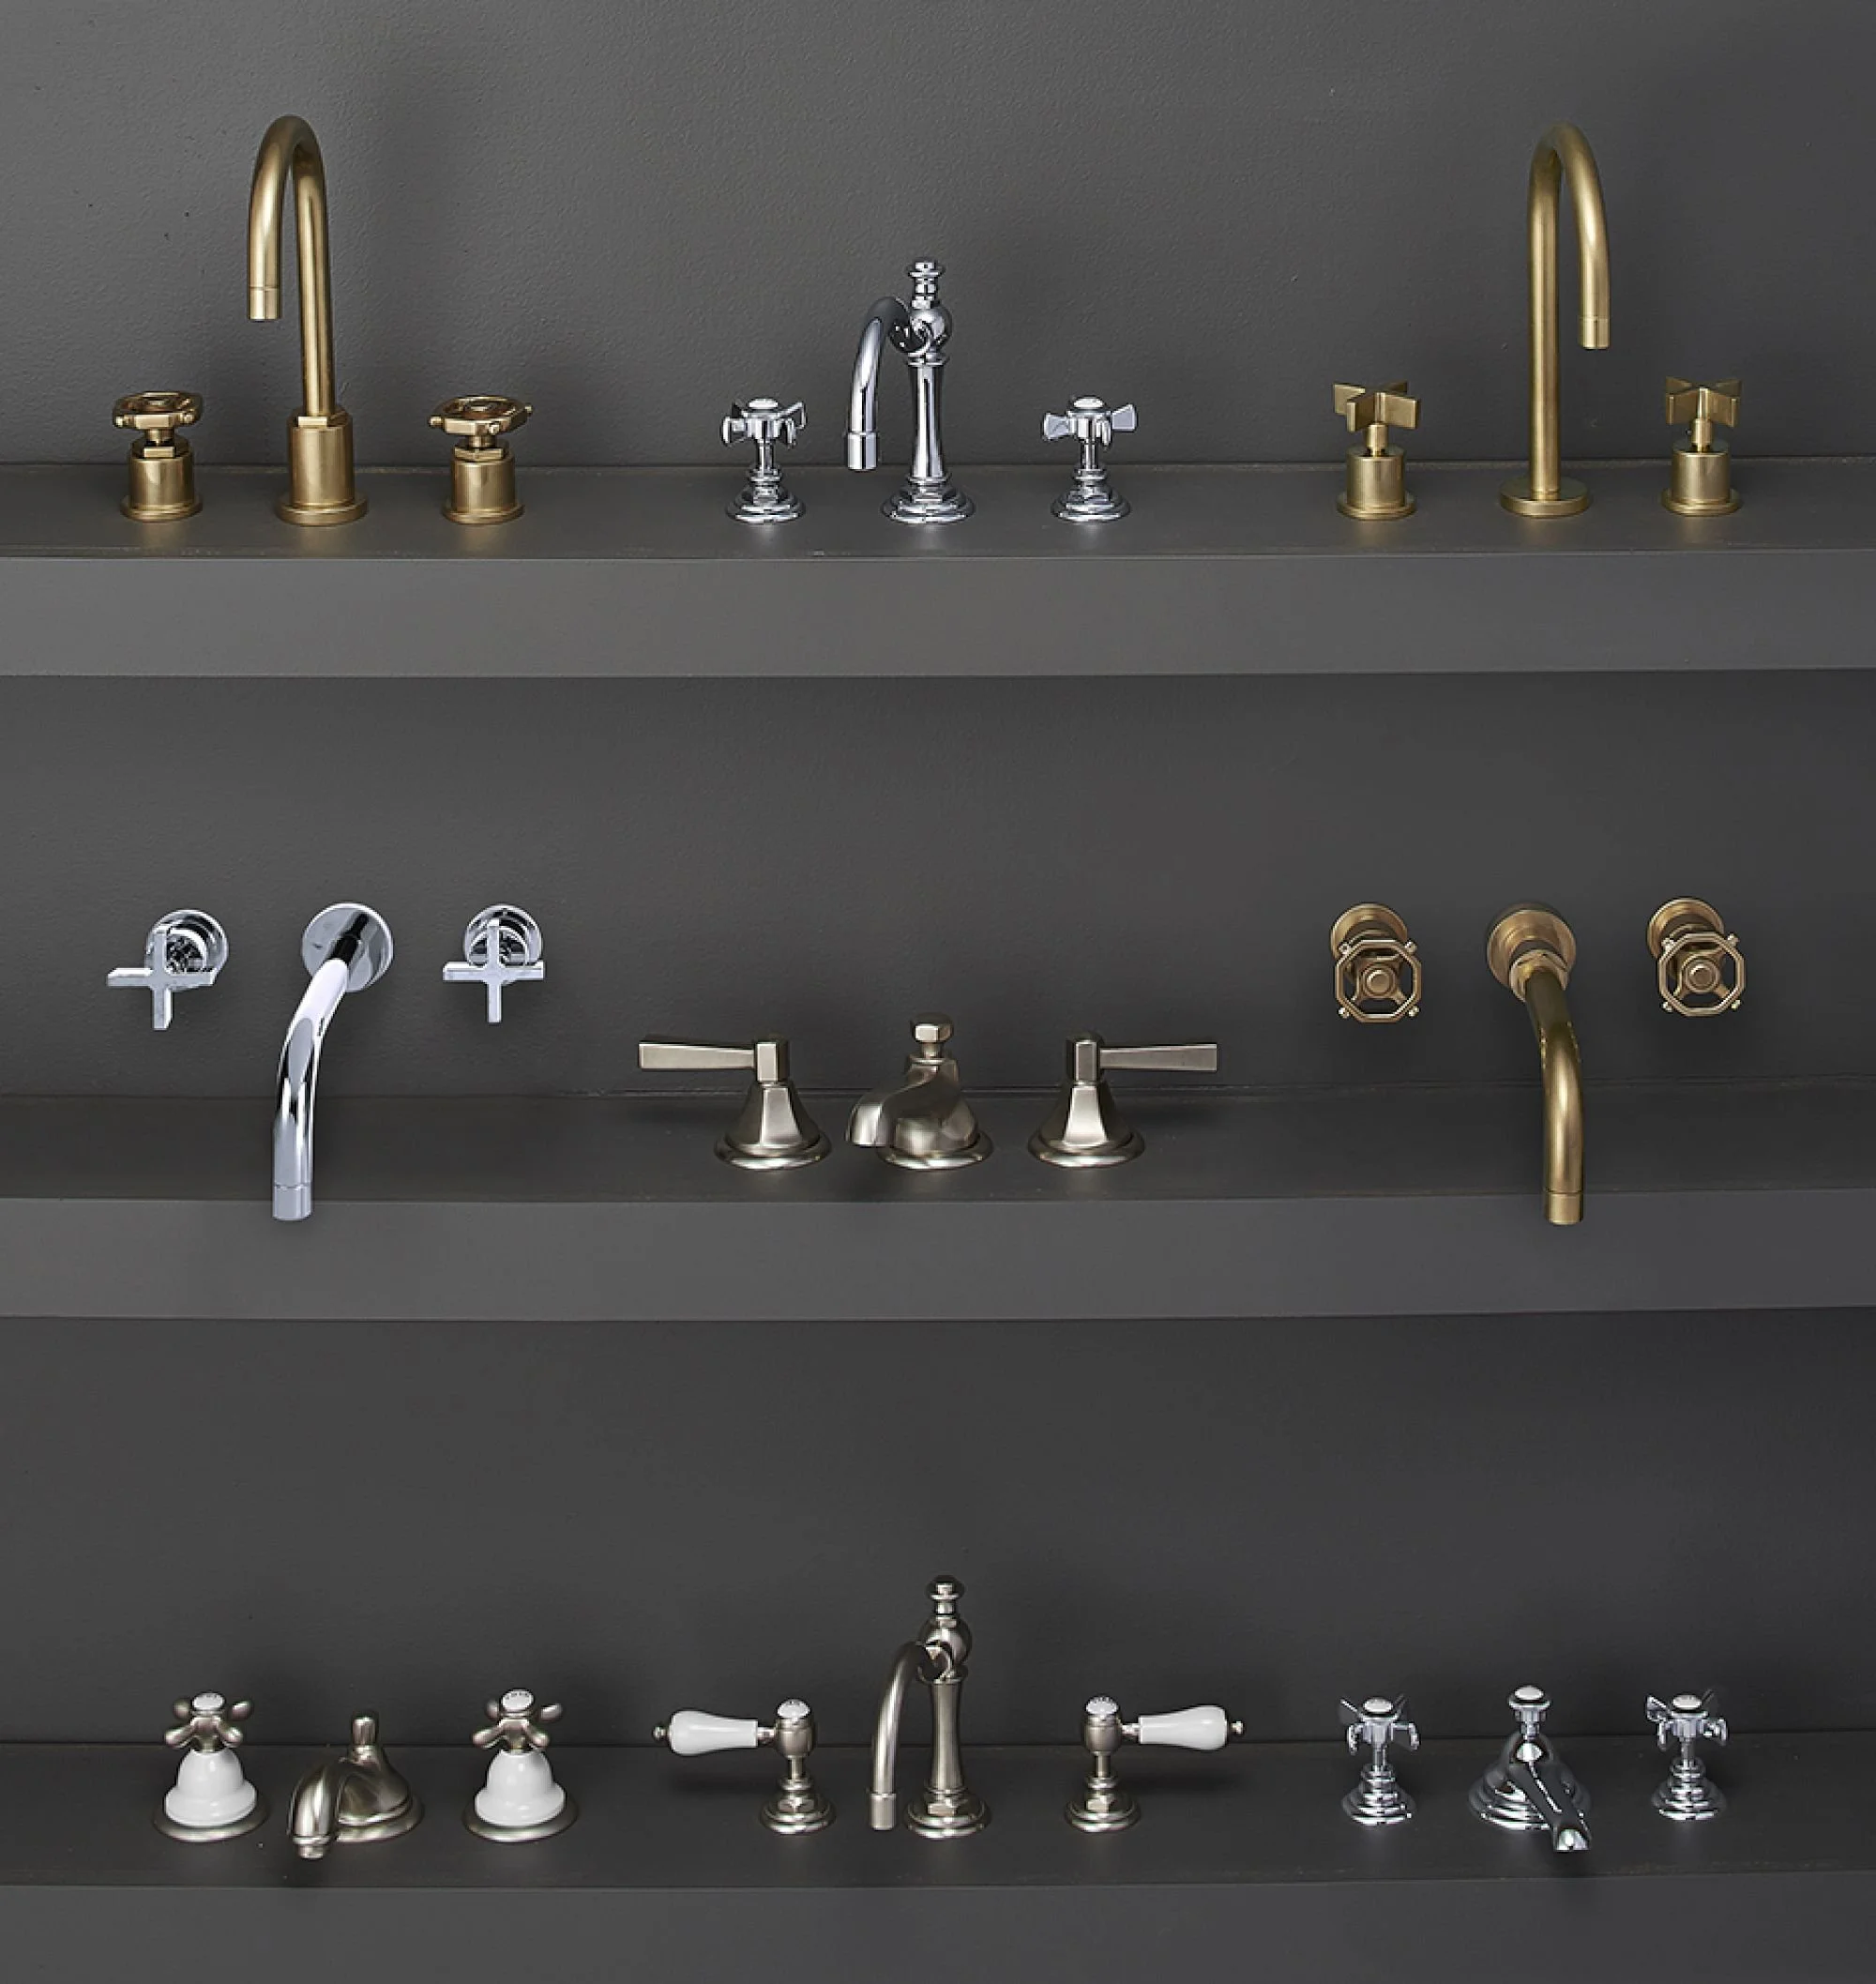
Hardware: Small Detail, Big Impact

Builder-grade hardware is usually the cheapest, most generic option available. Think flimsy cabinet pulls and hollow-feeling door handles. Replacing them with pieces that have weight, texture, or a unique finish makes your home feel instantly more elevated.

  • Swap out kitchen and bathroom cabinet hardware

  • Upgrade door handles to something more substantial

  • Choose finishes that complement your overall style (brass, matte black, brushed nickel)
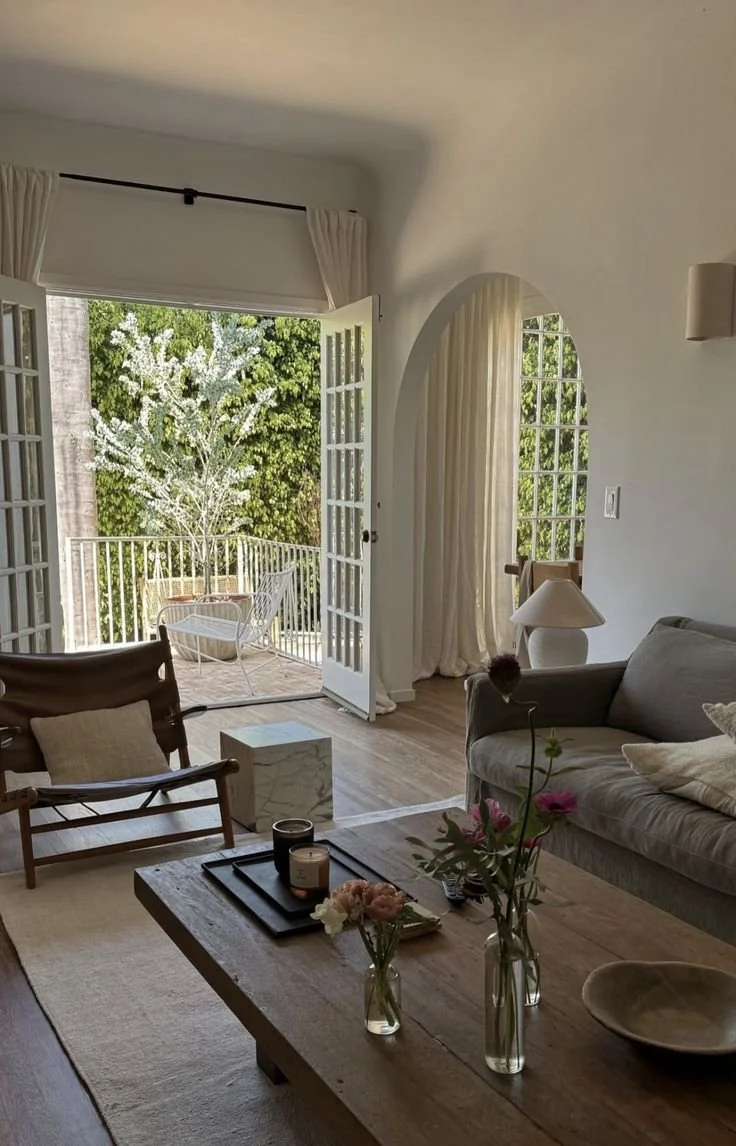
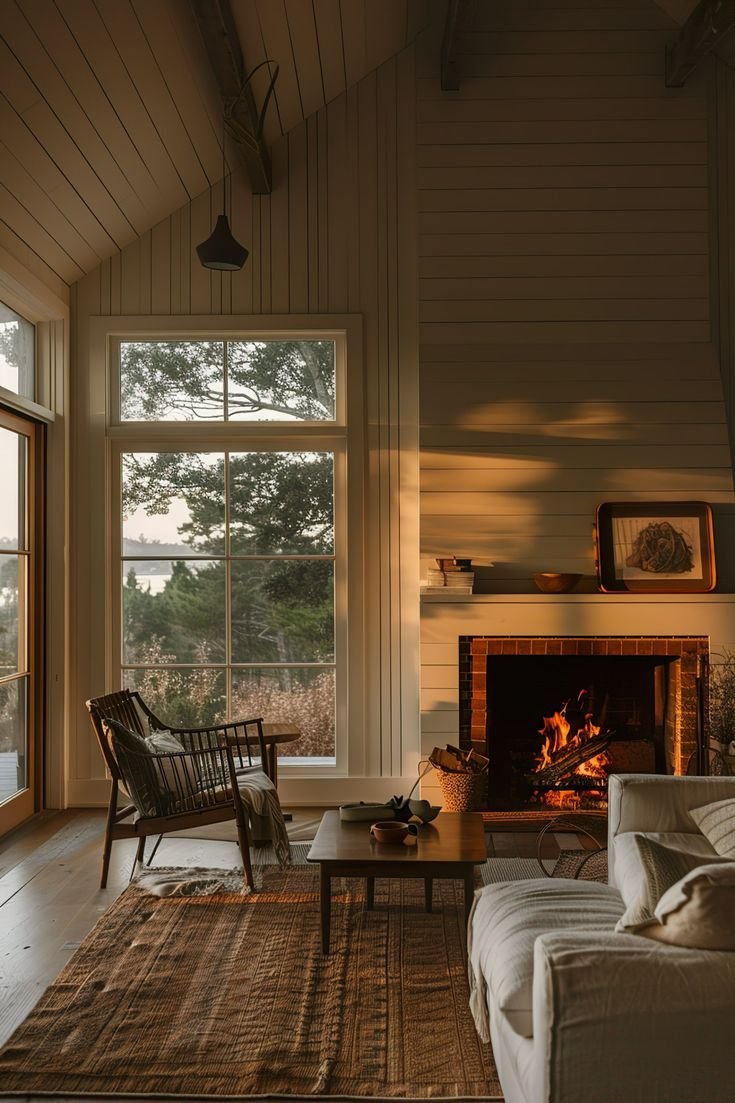
Paint with Purpose

If your walls are still “Builder’s White,” it’s time for a change. That stark, cold white can make everything feel sterile. Instead, opt for a warmer white or a soft neutral that adds depth without overwhelming the space.

A fresh coat of paint is one of the most affordable ways to make a home feel custom—and it’s something you can do in a weekend.

No. 2

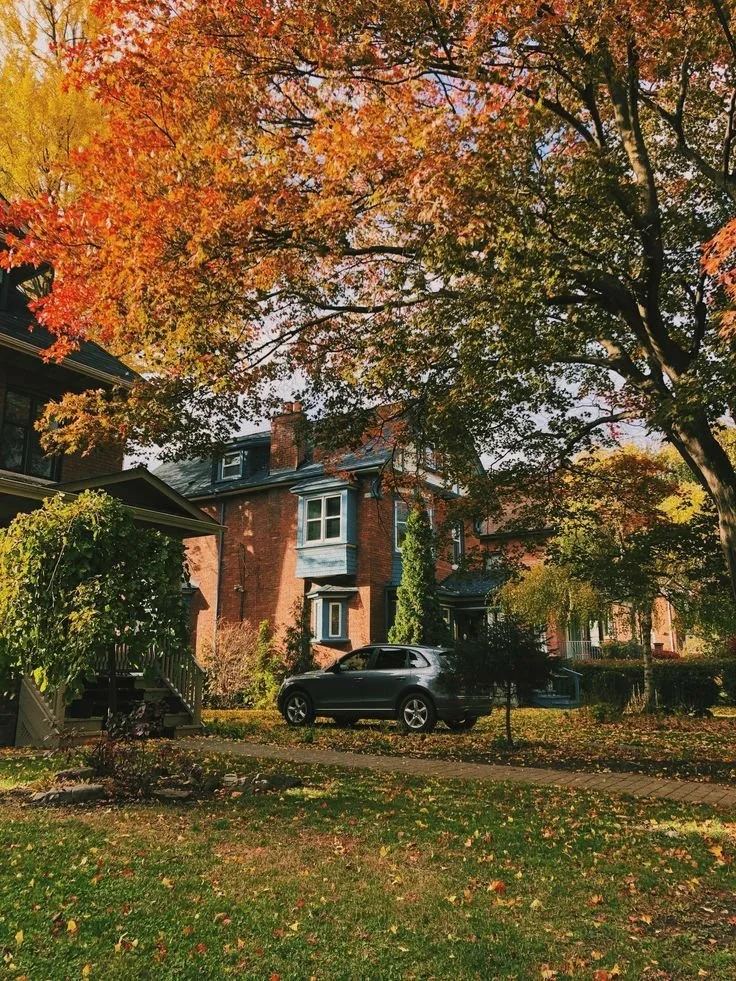
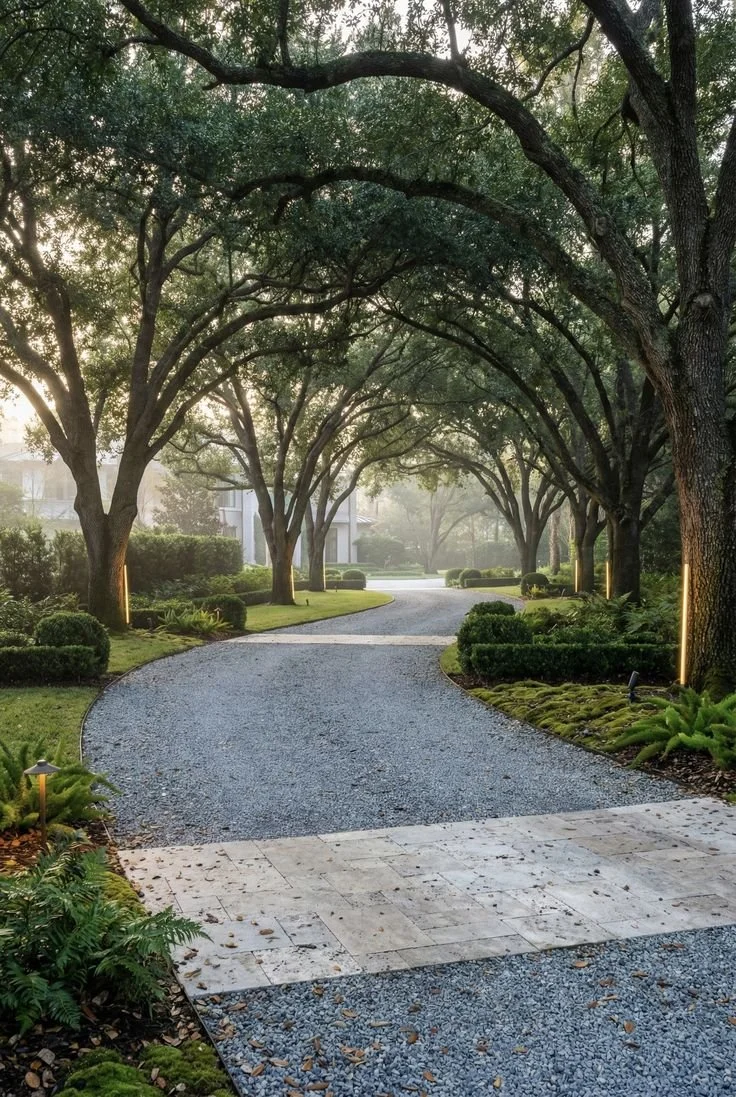
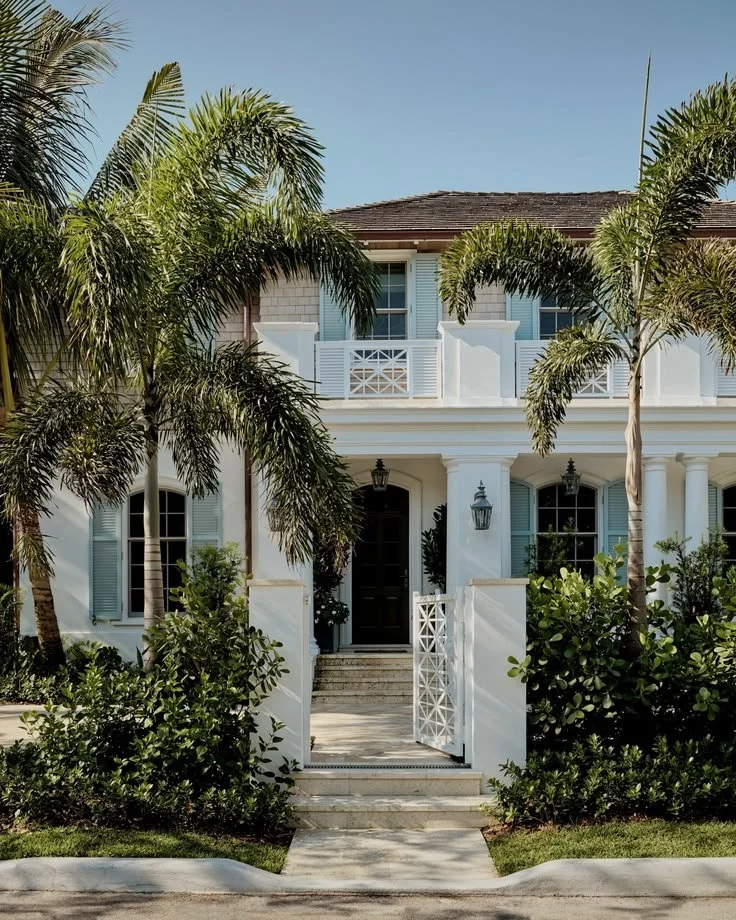
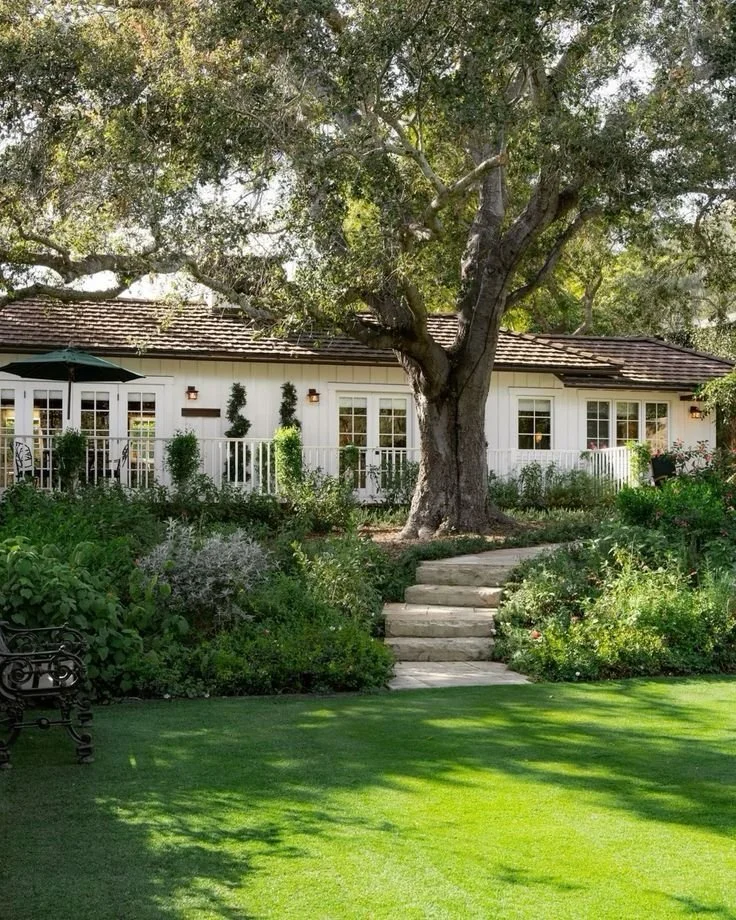
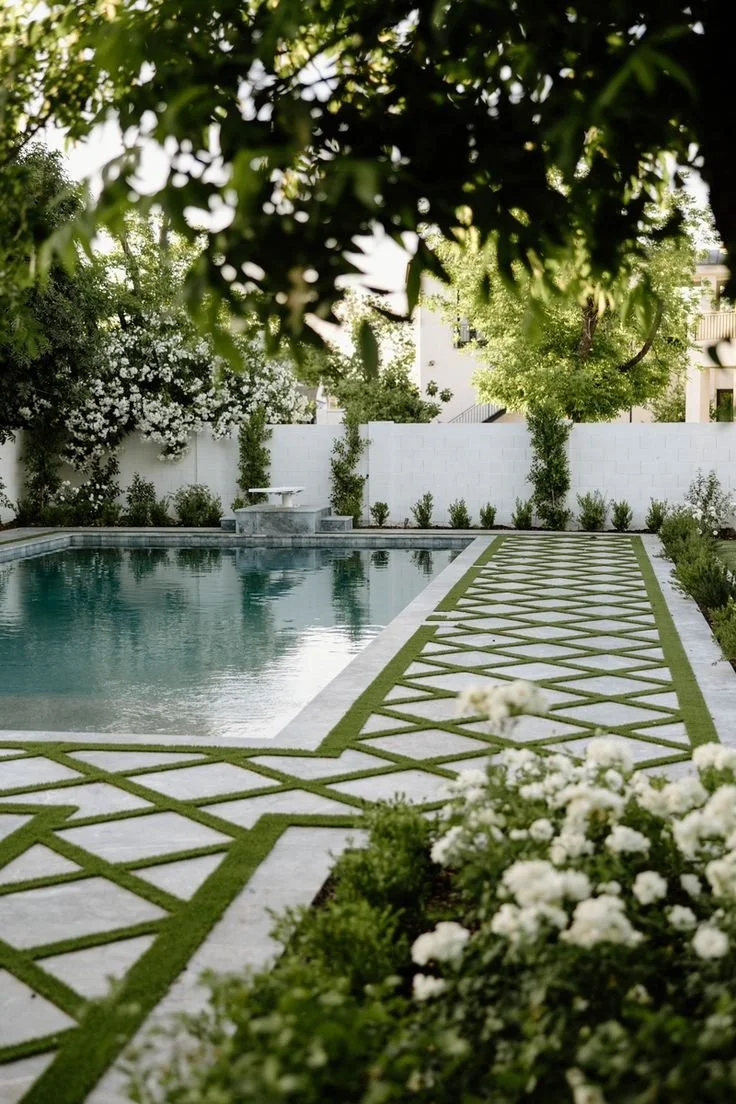
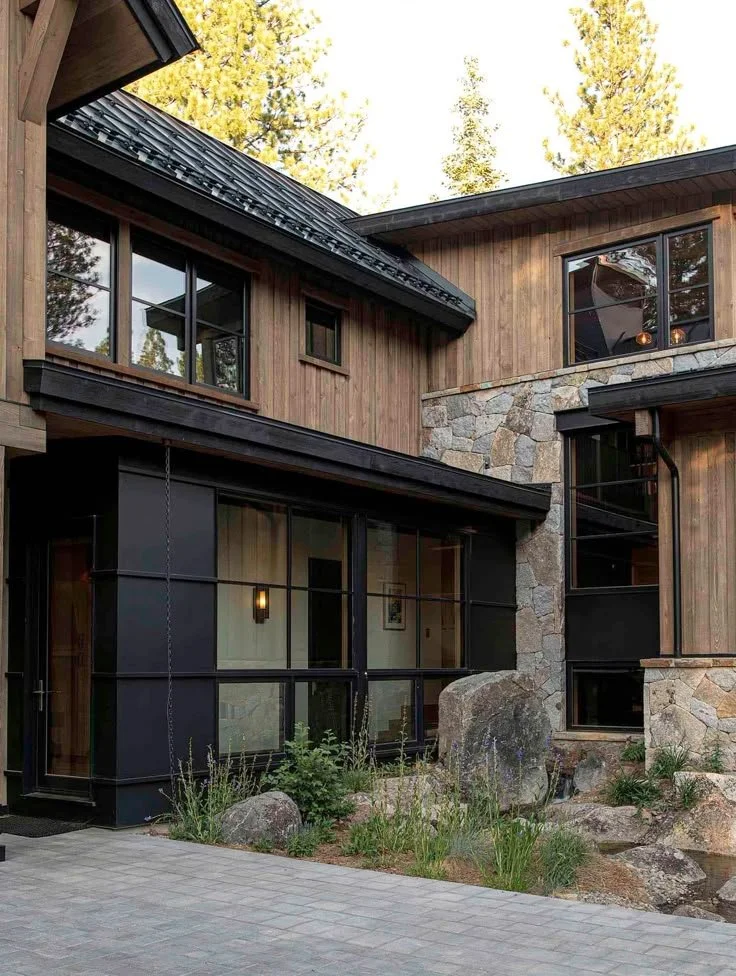
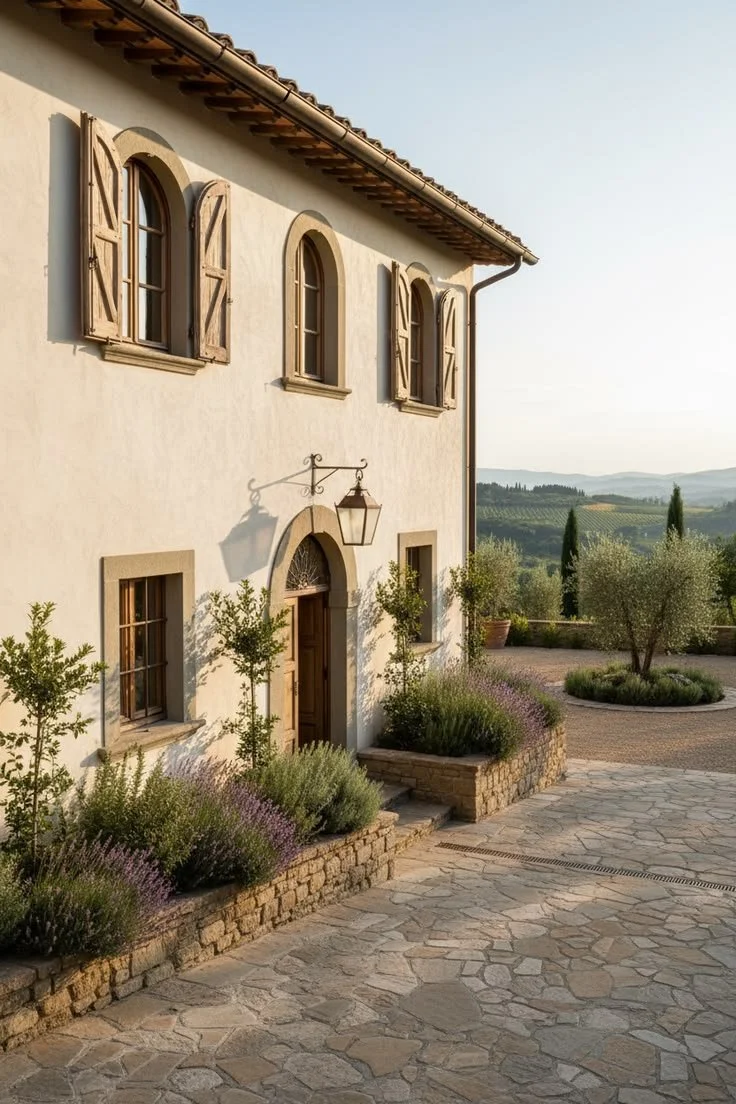
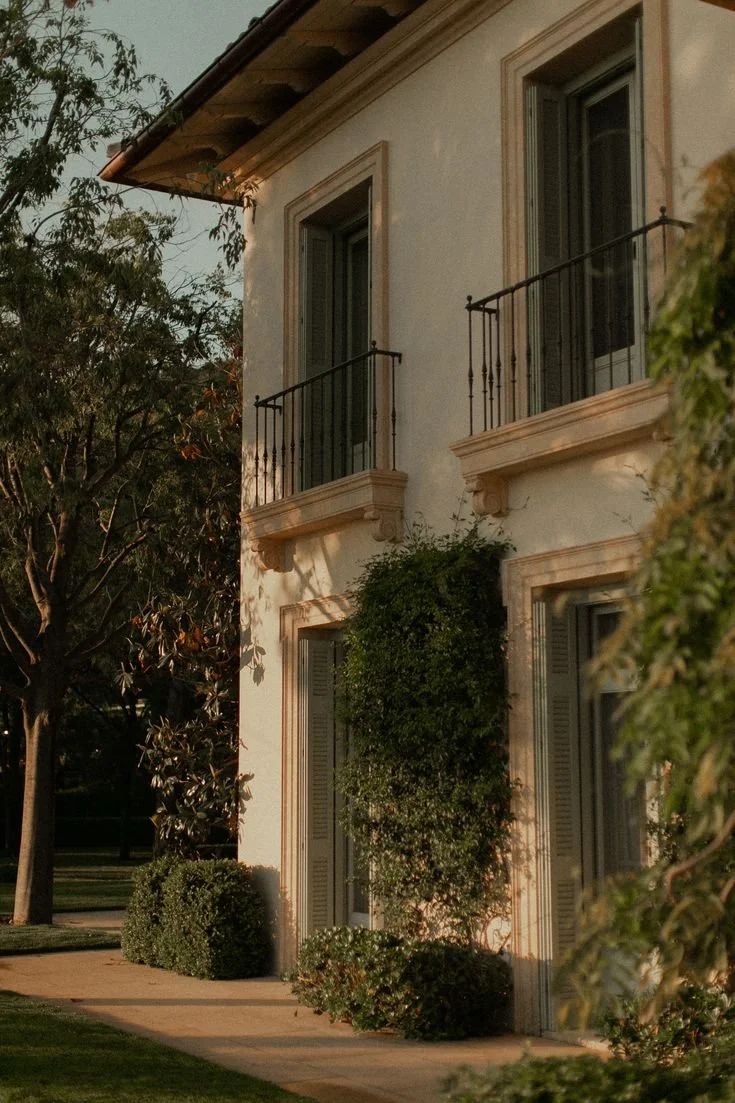
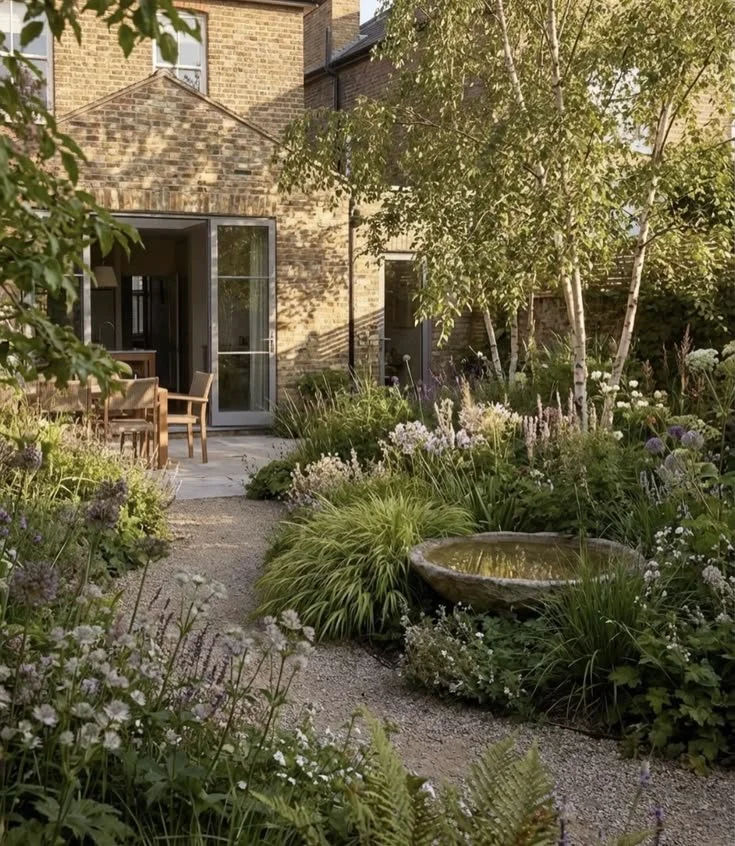
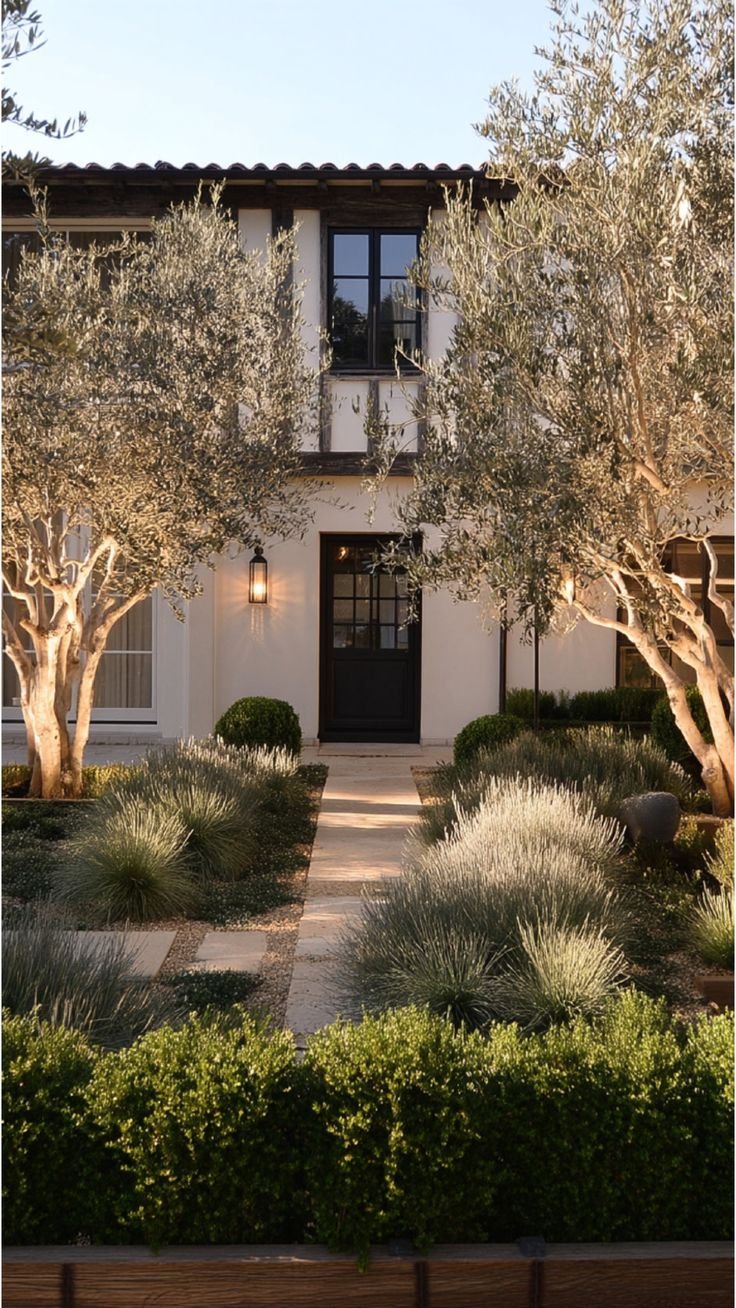
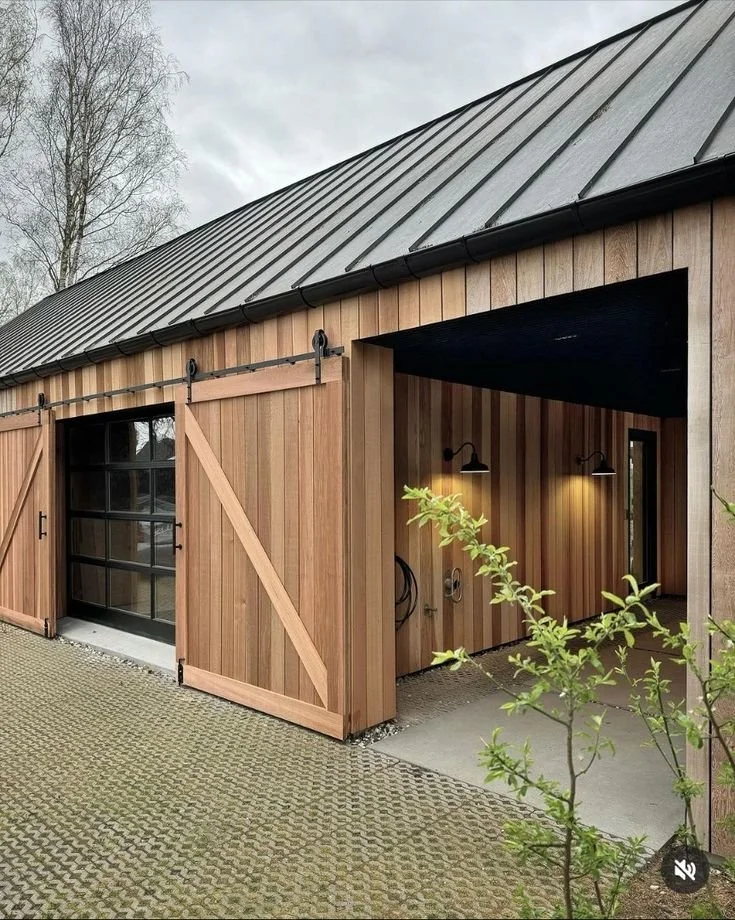
Use Exterior Texture to Set the Tone

Here’s the part most people skip: the exterior. And then they wonder why, even after decorating the inside, the house still feels builder-grade. The truth is, the outside of your home sets the tone for everything inside. If it looks flat and basic, the interior has to work twice as hard to feel intentional.

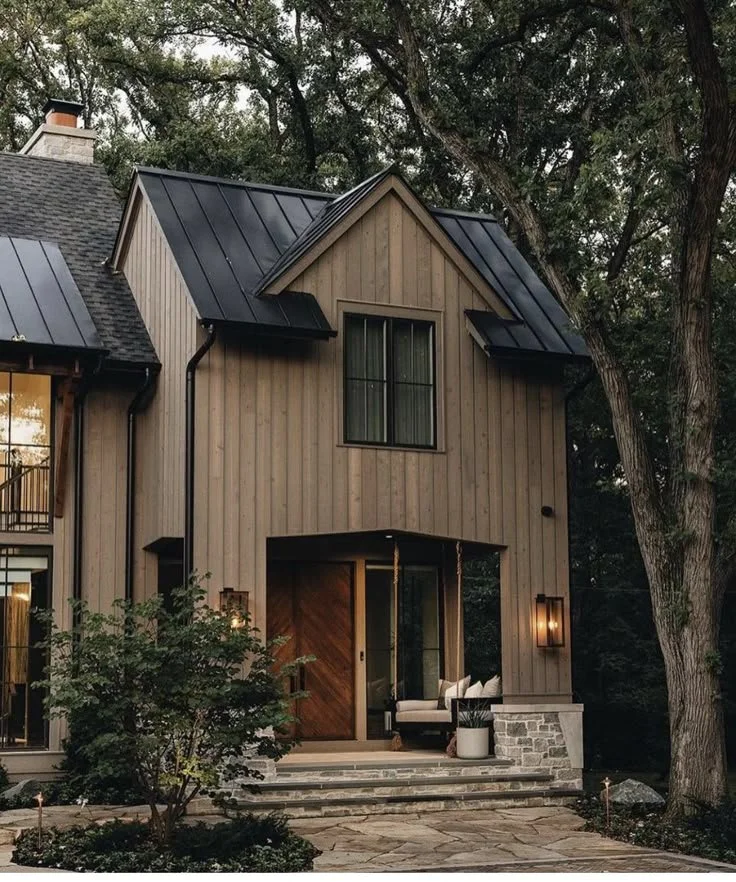
Add Texture and Contrast

Adding texture to your home’s exterior can instantly make it look more custom. This could include:

  • Mixing materials (brick, stone, wood, or metal accents)

  • Upgrading trim details around windows and doors

  • Painting or replacing the front door with something bold or unique

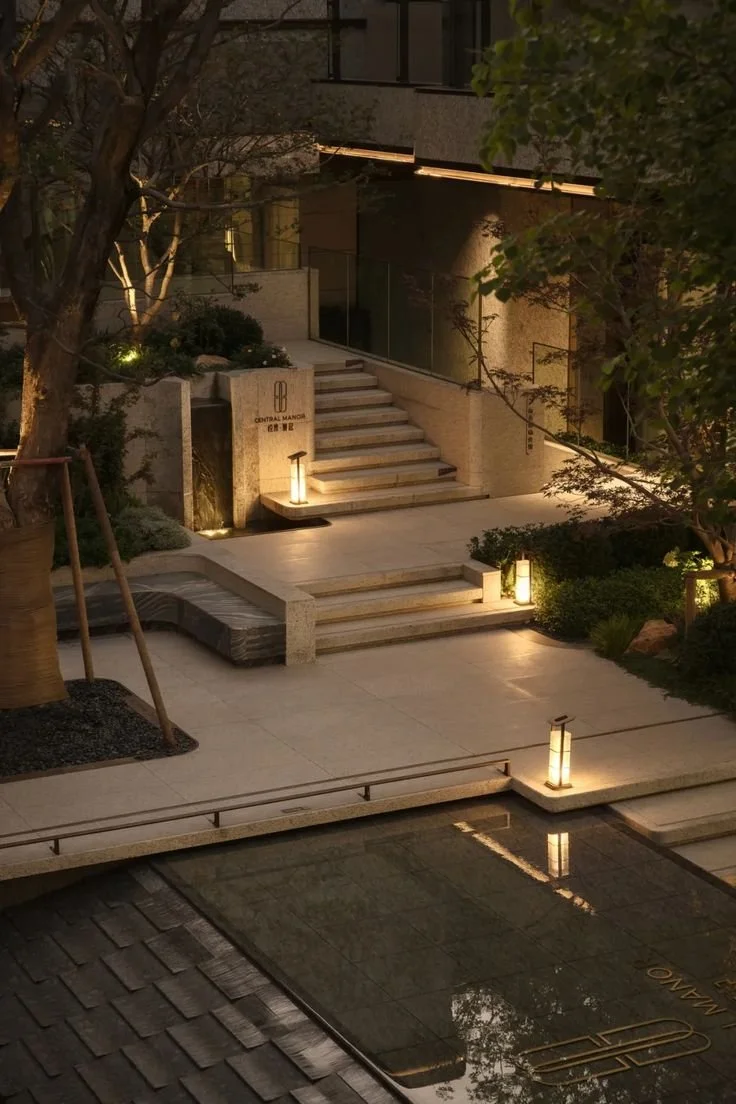
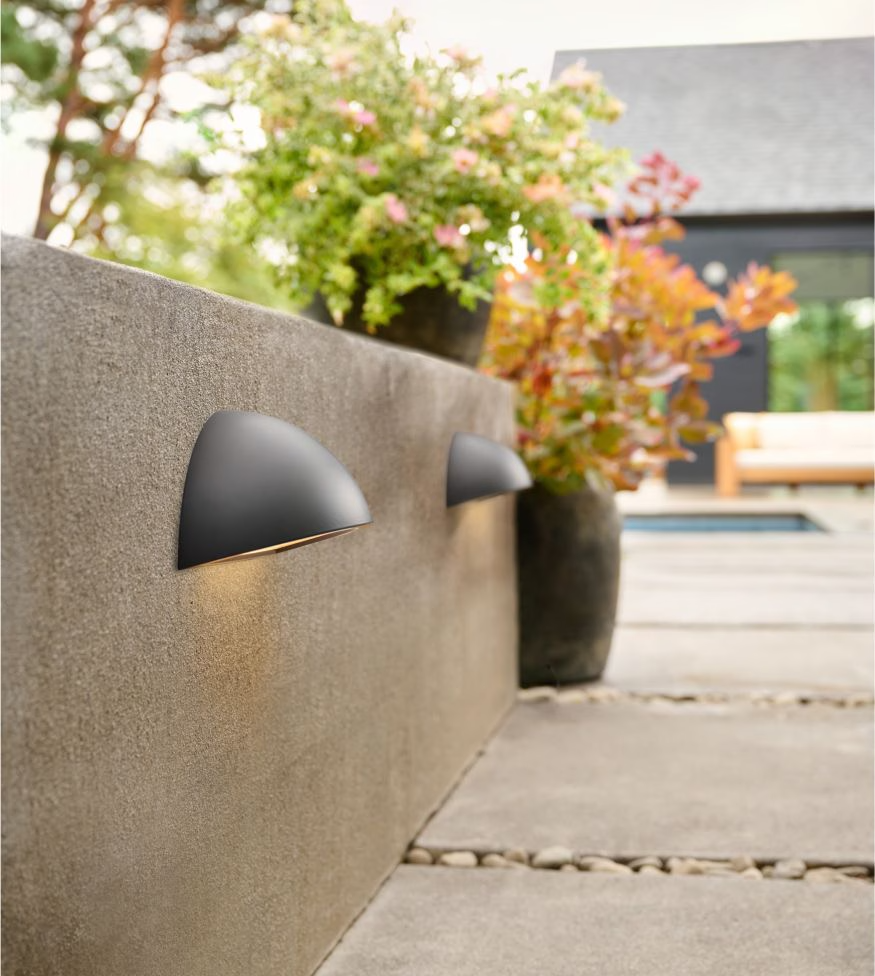
  • Updating exterior lighting fixtures for more character

Consider a Siding Upgrade

Most homeowners never think about their siding—but it’s one of the most transformative changes you can make. A new color, texture, or material can make your home look like a completely different (and far more expensive) property.

Pro tip: Consult a siding contractor to explore your options. You might be surprised how impactful this change can be.


hellolovelyliving rejuvenation

Rejuvenation

Rejuvenation believes in the power of thoughtful design - explore their extensive range of home decor, including stylish accessories and hardware that add character and charm to your home. Get free design services when you book an appointment.


No. 3

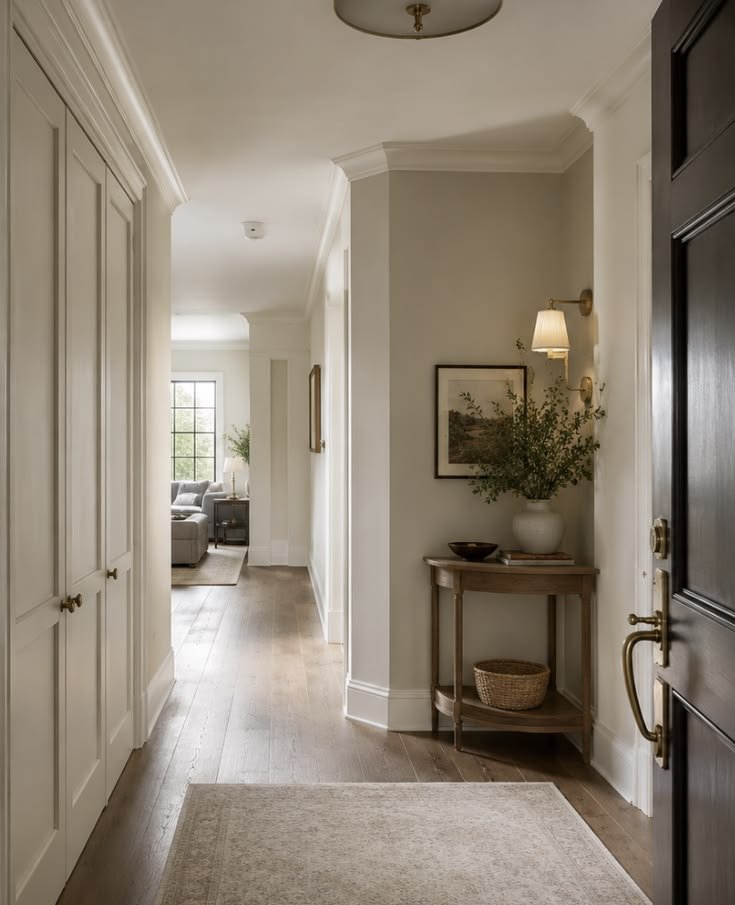
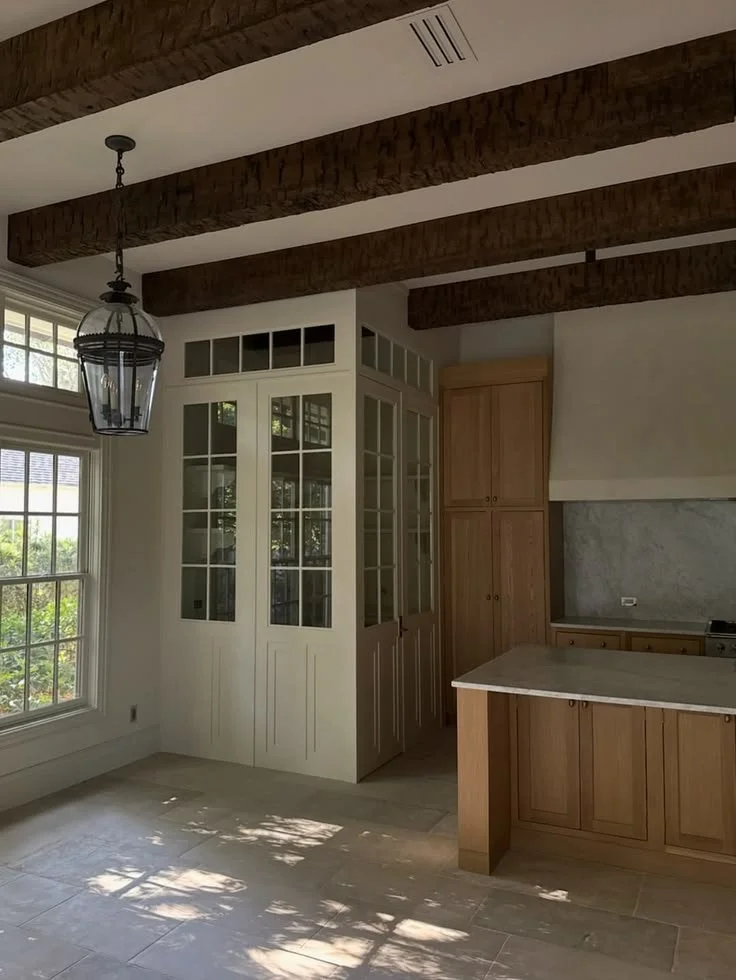
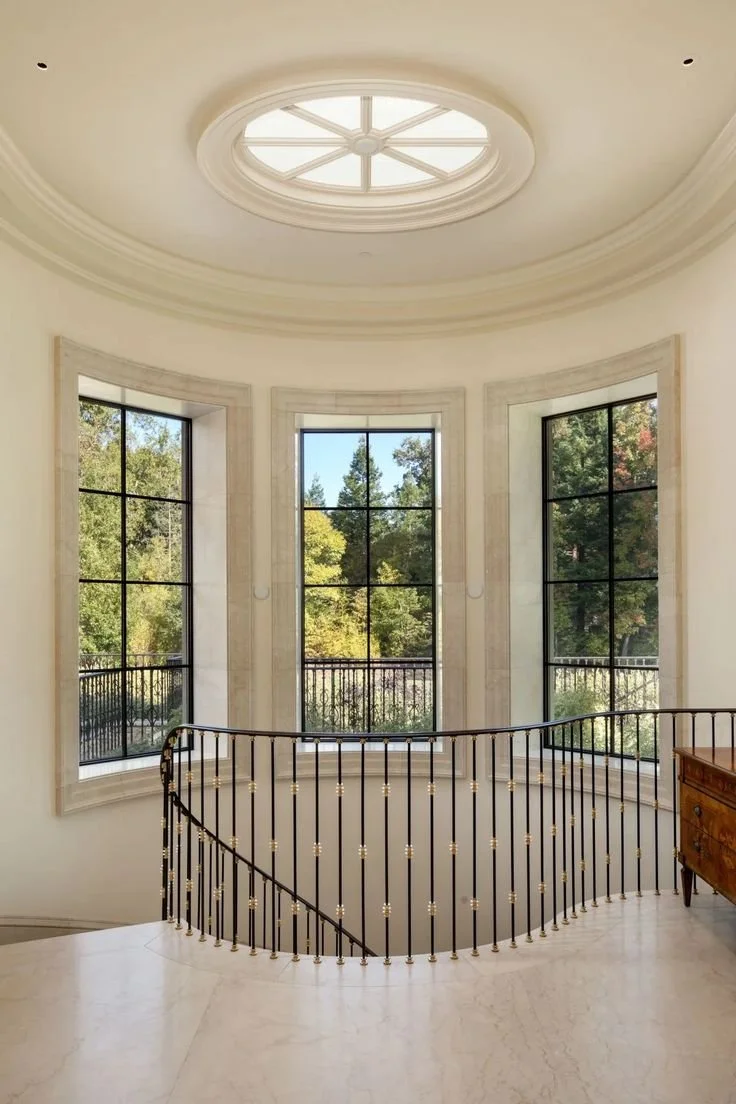
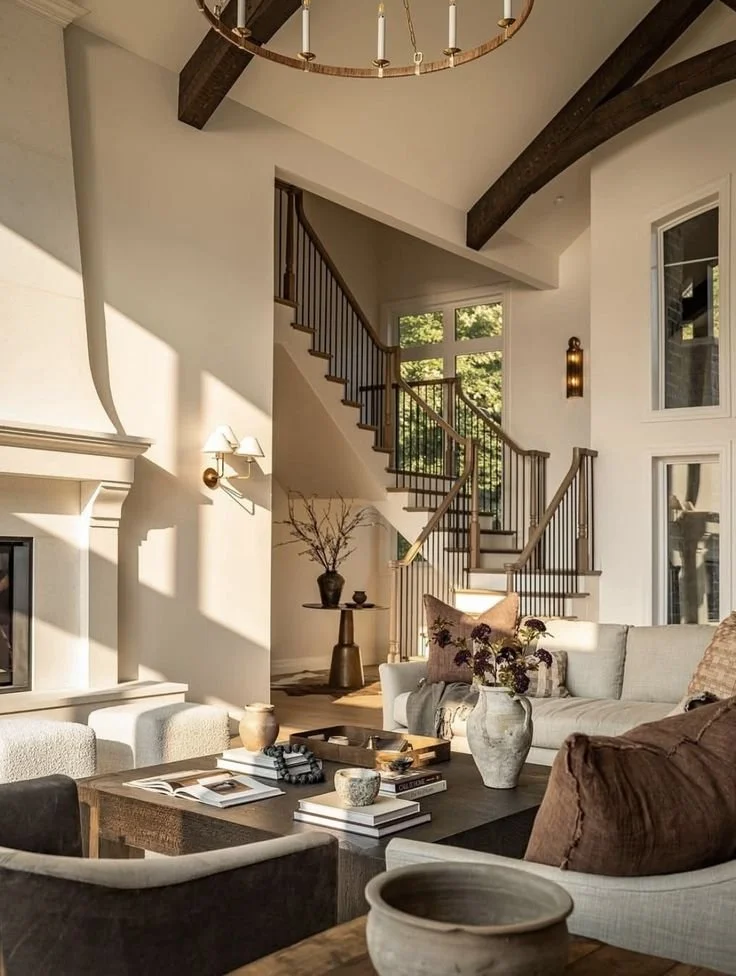
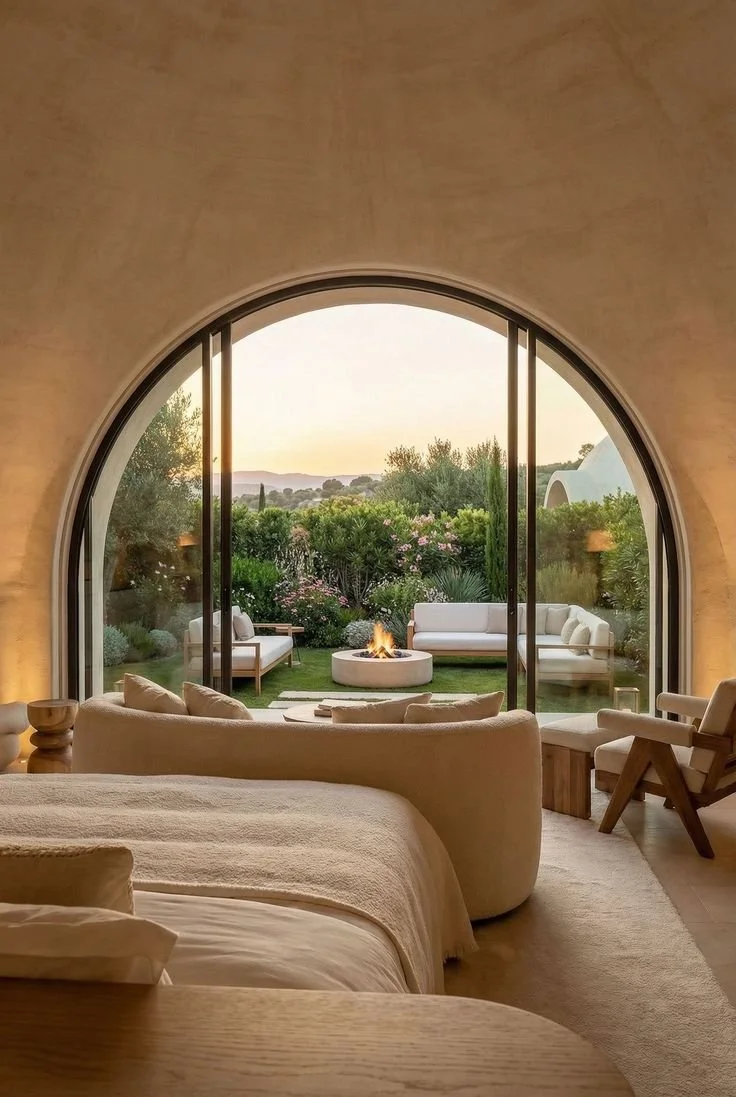
Add Architectural Details for Instant Charm

One of the biggest giveaways of a builder-grade home is the lack of architectural detail. Flat walls, minimal trim, and basic doors make everything feel a little too smooth and a lot too boring.

Elevate with Subtle Touches

Adding architectural elements doesn’t have to be expensive or complicated. In fact, small changes can make a big difference:

  • Crown moulding adds elegance and polish to any room

  • Ornate baseboards give a sense of craftsmanship

  • Rosettes and corner blocks add vintage charm to doorways and windows

  • Wainscoting or board and batten can break up blank walls and add texture

These upgrades are often DIY-friendly and cost-effective, but they dramatically increase the perceived value and style of your home.

Takeaways

You don’t need a massive renovation budget to make your builder-grade home feel like a custom masterpiece. In this article, we’ve shown that thoughtful details—like upgraded lighting, better hardware, textured exteriors, and architectural accents—can completely transform your space.

The key is to focus on the elements that people notice first and the features that add character. With a few strategic updates, you can turn a cookie-cutter house into a home that feels uniquely yours.

Custom isn’t about cost—it’s about intention. Start small, stay consistent, and watch your space come to life.

Looking for Home resources?

Looking to enhance your living space and create a sanctuary that supports your well-being? Explore our home partners who offer a wide range of resources to elevate your home environment.


homeHLL x Editor


Essential Care Tips For Aluminium Windows In Sydney

In recent years, many Australian homeowners have made the smart decision to upgrade from traditional timber frames to sleek, modern aluminium windows. This shift isn’t just about aesthetics—it’s about durability, performance, and long-term value. Aluminium offers a low-maintenance alternative that stands up to Australia’s harsh weather conditions, and not a single homeowner has looked back with regret.


However, even the most durable materials require care. In this article, we’ll explore why it’s so important to maintain your aluminium windows over time. From saving money on repairs to ensuring your family’s safety, proper upkeep delivers a host of benefits that go far beyond appearances.

Aluminium Windows: A Smart Investment That Needs Protection

Aluminium windows are designed to last for decades, but that doesn’t mean they’re invincible. Exposure to high temperatures, urban pollution, and coastal salt air can take a toll on even the best installations. While you can manage basic cleaning on your own, more complex issues—like damaged seals, corroded hinges, or stiff frames—require professional attention.

If you’ve already invested in upgrading your home with aluminium windows, it only makes sense to protect that investment. Let’s take a closer look at the key reasons why aluminium window repairs in Sydney is essential.

No. 1

It Will Save You Money in the Long Run

One of the most compelling reasons to maintain your aluminium windows is the financial benefit. Small issues, when ignored, often snowball into costly repairs or even full replacements.

Maintenance Tips That Save You Cash:

  • Clean hinges and handles regularly to prevent rust and wear

  • Lubricate moving parts to reduce friction and extend lifespan

  • Inspect seals and weather stripping for early signs of damage

  • Address minor repairs before they become major problems

A little attention now can prevent you from spending hundreds—or even thousands—later.

No. 2

Improved Functionality and Ease of Use

Your windows should open and close effortlessly. If they begin to stick, jam, or feel stiff, it’s a clear sign that they need maintenance. Over time, dust, grime, and environmental wear can affect their performance.

Well-Maintained Windows Offer:

  • Smooth operation with minimal effort

  • Better ventilation and airflow

  • Enhanced energy efficiency

  • Reduced strain on window mechanisms

Most aluminium window systems are built to last 30 years or more—but only if you give them the care they deserve.

No. 3

Enhanced Privacy and Noise Reduction

In densely populated Australian suburbs, privacy is a valuable commodity. Aluminium windows not only provide a visual barrier but also help block out external noise, creating a more peaceful indoor environment.

Proper Maintenance Ensures:

  • Seals remain tight to reduce sound infiltration

  • Glass and frames stay clean for optimal visibility and appearance

  • Insulation properties are preserved for thermal comfort

Whether it’s noisy neighbours or traffic sounds, well-maintained windows help keep the outside world where it belongs.


hellolovelyliving aircraft

Aircraft

Achieve spotless floors with Aircraft hard floor cleaners! Designed for efficiency and effectiveness, their products ensure a clean and safe environment for everyone.

Elevate your home or office cleanliness today!


No. 4

Boosted Home Security

Security is a top priority for any homeowner. Aluminium windows are designed with strength in mind, but without regular maintenance, their protective features can be compromised.

Maintenance Enhances Security By:

  • Ensuring locks and latches function correctly

  • Preventing corrosion that weakens frames and hinges

  • Keeping intruders out by maintaining structural integrity

A neglected window can become a weak point in your home’s defences. Regular checks and repairs help keep your family safe.

No. 5

Preserving Aesthetic Appeal and Property Value

Curb appeal matters—especially if you’re considering selling your home in the future. Clean, well-maintained aluminium windows enhance your property’s appearance and signal to potential buyers that the home has been well cared for.

Visual Benefits of Maintenance:

  • Prevents staining and discolouration

  • Keeps frames looking sleek and modern

  • Avoids unsightly corrosion or grime build-up

A home that looks good from the outside is more likely to attract interest—and command a higher price.

Takeaways

Aluminium windows are a fantastic addition to any Australian home, offering durability, style, and energy efficiency. But like any valuable asset, they require care and attention to perform at their best.

In this article, we’ve explored five key reasons why maintaining your aluminium windows is essential—from saving money and improving functionality to enhancing security and preserving property value. While basic cleaning can be done yourself, don’t hesitate to call in the professionals for more complex repairs or inspections.

Your windows are more than just a view to the outside—they’re a vital part of your home’s comfort, safety, and appeal. Take care of them, and they’ll take care of you for decades to come.

Looking for Home resources?

Looking to enhance your living space and create a sanctuary that supports your well-being? Explore our home partners who offer a wide range of resources to elevate your home environment.


homeHLL x Editor


Why You Must Repair Balcony Leaks Immediately

Your home should be your sanctuary—a place where you can relax, unwind, and escape the pressures of the outside world. From upgrading furniture to enhancing décor, there are countless ways to improve comfort and enjoyment at home. With modern technology and entertainment options readily available, staying in has never been more appealing.


However, true comfort at home also relies on a solid foundation—both literally and figuratively. Regular home maintenance is essential to avoid costly repairs and to preserve the safety and value of your property. In this article, we’ll explore one often-overlooked issue that can have serious consequences if ignored: leaking balcony repairs. Below, we outline five compelling reasons why addressing balcony leaks promptly is not just advisable—it’s essential.

No. 1

Prevent Structural Damage

One of the most critical reasons to repair a leaking balcony without delay is to prevent serious structural damage. When water seeps into concrete, timber, or steel reinforcements, it can lead to:

  • Concrete deterioration

  • Steel corrosion

  • Timber rot

  • Weakened load-bearing elements

Over time, this damage compromises the integrity and safety of the entire building. What starts as a minor leak can evolve into a major structural issue, requiring extensive and expensive restoration work. By acting quickly, you protect your home’s framework and avoid the risk of collapse or long-term instability.

No. 2

Reduce Repair Costs and Avoid Major Renovations

Addressing a leaking balcony early is a cost-effective strategy. The longer a leak is left untreated, the more extensive the damage becomes—not just to the balcony itself, but to surrounding areas like walls, ceilings, and interior spaces.

Early Repairs Save You Money:

  • Minor fixes are significantly cheaper than full-scale renovations

  • Avoids the need for balcony replacement

  • Prevents damage to adjacent rooms and finishes

Whether you're getting a house ready for family gatherings or simply want to enjoy your outdoor space safely, prompt repairs ensure your balcony remains a functional and enjoyable part of your home.

No. 3

Protect Interior Spaces from Water Damage

It’s easy to overlook the impact of a leaking balcony, especially since it’s an external feature. But water doesn’t stay confined—it travels, often finding its way into your home’s interior.

Potential Indoor Damage Includes:

  • Ceiling and wall staining

  • Flooring damage

  • Electrical system hazards

  • Insulation deterioration

Unchecked moisture can compromise the health and safety of your living environment, leading to increased repair costs and potential hazards. By fixing the leak early, you protect both the exterior and interior of your home.


hellolovelyliving rejuvenation

Rejuvenation

Rejuvenation believes in the power of thoughtful design - explore their extensive range of home decor, including stylish accessories and hardware that add character and charm to your home. Get free design services when you book an appointment.


No. 4

Prevent Health Risks from Mold and Mildew

Moisture from a leaking balcony creates the perfect breeding ground for mold and mildew, both of which can have serious health implications. These fungi thrive in damp environments and can spread quickly through walls and ceilings.

Health Risks Include:

  • Respiratory issues

  • Allergic reactions

  • Poor indoor air quality

Additionally, condensation from leaks can make balcony surfaces slippery and hazardous, increasing the risk of slips and falls. Hiring a professional repair team ensures these issues are addressed thoroughly and safely, restoring a healthy environment for everyone in the home.

No. 5

Preserve Property Value and Meet Building Standards

A well-maintained home retains its value, while visible signs of neglect—like water damage or balcony leaks—can significantly reduce its market appeal. For homeowners planning to sell, unresolved leaks are a red flag for potential buyers and can lead to lower offers or failed inspections.

Benefits of Timely Repairs:

  • Maintain or increase property value

  • Ensure compliance with building codes and safety regulations

  • Enhance buyer confidence during property inspections

By addressing leaks promptly, you not only protect your investment but also demonstrate responsible homeownership.

Takeaways

A leaking balcony may seem like a minor inconvenience, but its consequences can be far-reaching. From structural damage and costly repairs to health hazards and decreased property value, the risks of ignoring a leak are simply too great.

In this article, we’ve highlighted five compelling reasons why immediate balcony repairs are essential. Whether you're safeguarding your home’s structure, protecting your family’s health, or preserving your property’s value, taking swift action is the smart—and safe—choice.

Don’t wait for a small leak to become a big problem. Contact a professional repair team today and ensure your home remains secure, comfortable, and valuable for years to come.

Looking for Home resources?

Looking to enhance your living space and create a sanctuary that supports your well-being? Explore our home partners who offer a wide range of resources to elevate your home environment.


homeHLL x Editor


How Long Should A Quality House Paint Job Last?

A fresh coat of paint does more than just enhance a home's aesthetic appeal—it also serves as a protective barrier against the elements. However, many homeowners often ask the same question: How long should a quality house paint job last? The answer is not as straightforward as one might hope, as several key factors influence the longevity of a paint job.


In this article, we’ll explore the various elements that affect how long your home’s paint will hold up. From the importance of surface preparation and the type of paint used to environmental exposure and maintenance practices, understanding these components will help you make informed decisions and extend the life of your investment.

No. 1

The Role of Surface Preparation

One of the most critical yet often overlooked aspects of a long-lasting paint job is surface preparation. Professional house painters in Wellington, NZ, and similar regions emphasize the importance of preparing surfaces to withstand local weather conditions.

Why Preparation Matters:

  • Cleaning: Removes dirt, mildew, and contaminants that hinder paint adhesion.

  • Stripping and Sanding: Eliminates old, peeling paint and smooths the surface.

  • Priming: Seals the surface and ensures better bonding of the new paint.

As the old saying goes, “Proper preparation prevents poor performance.” This is especially true when it comes to achieving a durable, long-lasting finish.

Skipping or rushing through these steps can lead to premature peeling, cracking, or bubbling—signs that your paint job may not last as long as expected.

No. 2

The Type of Paint Used

Not all paints are created equal. The quality and formulation of the paint significantly impact its durability and resistance to wear.

Key Differences:

  • Premium Exterior Paints: Contain additives that resist fading, cracking, and mildew. These paints are specifically designed to endure harsh weather conditions.

  • Budget Paints: May save money upfront but often lack the resilience needed for long-term performance.

  • Interior Paints: While they face fewer environmental challenges, choosing the right finish (e.g., washable or moisture-resistant) can extend their lifespan.

Investing in high-quality paint pays off in the long run by reducing the frequency of repainting and maintaining a vibrant appearance.

No. 3

Environmental Conditions and Exposure

The climate and location of your home play a major role in how long a paint job will last. Homes exposed to intense sunlight, moisture, or wind will experience faster wear and tear.

Environmental Factors to Consider:

  • Sunlight: UV rays can cause fading and chalking, especially on darker colors.

  • Humidity and Rain: Promote mold growth and blistering if the paint isn’t moisture-resistant.

  • Wind and Salt Air: Can erode paint, particularly in coastal regions.

Homes located in shaded or sheltered areas tend to retain their paint finish longer due to reduced exposure to these elements.


hellolovelyliving rejuvenation

Rejuvenation

Rejuvenation believes in the power of thoughtful design - explore their extensive range of home decor, including stylish accessories and hardware that add character and charm to your home. Get free design services when you book an appointment.


No. 4

Application Techniques Matter

Even the best paint won’t last if it’s applied incorrectly. The method of application significantly affects the longevity and appearance of the finish.

Best Practices for Application:

  • Even Coats: Apply multiple thin layers rather than one thick coat to prevent drips and ensure uniform coverage.

  • Proper Tools: Use the right brushes, rollers, or sprayers for the surface and type of paint.

  • Drying Time: Allow sufficient time between coats to ensure proper curing.

A skilled painter’s technique can add years to the life of a paint job, while poor application can shorten it drastically.

No. 5

Average Lifespan for Exterior Paint

On average, a quality exterior paint job lasts between 5 to 10 years. However, this can vary based on surface material, climate, and maintenance.

Surface-Specific Lifespans:

  • Wood Siding: Typically requires repainting every 4–7 years due to expansion and contraction.

  • Stucco or Brick: Can hold paint for up to 10 years or more with proper care.

  • Fiber Cement or Vinyl: May last 7–15 years depending on environmental exposure.

Regular inspections and touch-ups can help extend the life of your home’s exterior paint.

No. 6

Interior Paint Durability

Interior paint generally lasts longer than exterior paint, primarily because it’s not exposed to harsh weather conditions.

Room-by-Room Lifespan:

  • Living Rooms & Bedrooms: 7–10 years with minimal wear.

  • Hallways: 5–7 years due to higher traffic and scuffing.

  • Kitchens & Bathrooms: 3–5 years, as moisture and stains are more common.

Choosing washable or moisture-resistant finishes can help maintain a fresh look between repainting cycles.

No. 7

The Importance of Regular Maintenance

Routine maintenance is a simple yet effective way to prolong the life of a paint job and keep your home looking its best.

Maintenance Tips:

  • Clean Surfaces: Use mild soap and water to remove dirt and grime.

  • Inspect Annually: Look for signs of damage such as cracks, chips, or mildew.

  • Touch-Up Promptly: Address small issues before they escalate into larger problems.

Preventative care not only extends the life of your paint but also protects the underlying structure from moisture and decay.

No. 8

Signs That Repainting Is Needed

Knowing when to repaint can save you from more extensive repairs down the line. Watch for these common indicators:

  • Peeling or Cracking: Suggests poor adhesion or aging paint.

  • Fading: Indicates UV damage and loss of pigment.

  • Blistering or Bubbling: Often caused by moisture trapped beneath the paint.

  • Chalking: A powdery residue on the surface, signaling paint breakdown.

Repainting at the right time preserves curb appeal and prevents deeper structural issues.

Takeaways

A high-quality house paint job should last between five and ten years, depending on factors such as surface preparation, paint quality, environmental exposure, and maintenance. By investing in premium materials, using proper application techniques, and maintaining your painted surfaces regularly, you can significantly extend the life of your paint and protect your home.

In this article, we’ve explored the essential elements that influence paint longevity, from climate considerations and application methods to signs that it’s time to repaint. With the right approach, your home can maintain its beauty and structural integrity for years to come.

A well-executed paint job is more than just a cosmetic upgrade—it’s a long-term investment in your property’s value and protection.

Looking for Home resources?

Looking to enhance your living space and create a sanctuary that supports your well-being? Explore our home partners who offer a wide range of resources to elevate your home environment.


homeHLL x Editor


How Seasonal Lighting Creates A Stronger Neighborhood Connection?

As the days grow shorter and the chill of winter settles in, many neighborhoods fall into a quiet lull. The lively energy of summer fades, and streets that once echoed with conversation and activity become darker and more subdued. Yet, amid this seasonal shift, something remarkable happens—porches begin to glow, rooftops sparkle, and windows radiate warmth. This transformation is more than just festive decoration; it’s a powerful expression of community spirit.


In this article, we explore how seasonal lighting does more than brighten homes—it strengthens neighborhood bonds, enhances safety, and fosters a deeper sense of connection among residents. From increasing walkability to sparking spontaneous conversations, the simple act of lighting up a home can illuminate the entire community.

No. 1

Brighten Your Block: How Lighting Boosts Walkability

One of the most immediate and tangible benefits of seasonal lighting is its impact on walkability. During the winter months, early sunsets and cold temperatures often discourage outdoor activity. Standard streetlights, while functional, can leave long stretches of sidewalk in shadow, making evening walks feel uninviting or even unsafe.

Seasonal lights, however, fill in those gaps with a warm, ambient glow. When multiple homes participate, they create a continuous ribbon of light that not only beautifies the street but also makes it feel safer and more welcoming.

Benefits of Enhanced Walkability:

  • Encourages evening strolls and dog walks

  • Increases visibility and perceived safety

  • Promotes spontaneous neighborly encounters

  • Invites families to explore the neighborhood together

A well-lit block becomes a magnet for foot traffic, turning quiet streets into vibrant, walkable spaces where community life thrives—even after dark.

No. 2

Sparking Conversation and Community Connection

Light has a natural way of drawing people in. A warmly lit home sends a subtle but powerful message: someone is home, someone cares, and you’re welcome here. In the often isolating winter months, this message becomes even more meaningful.

A festive display can serve as a conversation starter, breaking down social barriers and encouraging interaction between neighbors. Compliments on decorations often lead to longer chats, shared stories, and even new friendships.

How Lighting Strengthens Social Bonds:

  • Creates opportunities for casual conversation

  • Encourages shared traditions and friendly competition

  • Fosters a sense of collective identity and pride

  • Builds trust and familiarity among neighbors

When an entire street embraces seasonal lighting, it becomes more than a collection of homes—it becomes a community with a shared purpose and a unified voice.

No. 3

The Psychological Comfort of a Warmly Lit Street

Beyond aesthetics and social benefits, seasonal lighting taps into a deeper psychological need for comfort and security. The soft, golden glow of holiday lights evokes feelings of nostalgia, warmth, and serenity, especially during the darkest and coldest months of the year.

This emotional response is closely tied to the Danish concept of hygge, which emphasizes coziness, contentment, and well-being. A warmly lit street can lift spirits, reduce stress, and create a sense of emotional refuge for residents and visitors alike.

Emotional and Psychological Benefits:

  • Reduces seasonal stress and anxiety

  • Evokes positive memories and associations

  • Enhances feelings of safety and belonging

  • Encourages mindfulness and appreciation of the present moment

Neighborhoods that feel cared for and visually inviting often experience higher resident satisfaction and lower rates of petty crime. In this way, lighting becomes not just decoration, but a form of community care.


hellolovelyliving rejuvenation

Rejuvenation

Upgrade your space with Rejuvenation's path and deck lighting – where functionality meets timeless design.


No. 4

Cohesive Designs and Professional Installations

While individual creativity adds charm, a coordinated lighting strategy can elevate a neighborhood’s appearance to a whole new level. When residents collaborate on themes, color palettes, or display styles, the result is a visually harmonious and strikingly beautiful environment.

Professional lighting services can help homeowners achieve a polished, elegant look that enhances the architectural features of their homes. A well-executed design not only increases curb appeal but also contributes to a sense of unity and sophistication across the entire block.

Advantages of Professional Installation:

  • Accentuates home architecture

  • Ensures safety and durability

  • Offers time-saving convenience

  • Provides cohesive, high-end aesthetics

For those seeking a refined and cohesive display, hiring a reputable service for outdoor holiday light installation in Fishers, Indiana, can transform a simple idea into a neighborhood-wide celebration. A unified lighting effort can even turn a street into a local destination, attracting visitors and boosting community pride.

FAQ

Why does seasonal lighting make neighborhoods feel more connected?

Seasonal lighting creates a shared visual experience, encourages outdoor activity, and makes it easier for neighbors to interact. It fosters a sense of unity and collective pride.

Does lighting really improve safety and walkability?

Yes. Additional lighting fills in dark areas left by streetlights, increasing visibility and making people feel more secure when walking at night.

What are the emotional benefits of seasonal lighting?

Warm, ambient lighting can reduce stress, evoke nostalgia, and create a sense of comfort and belonging—especially during the darker winter months.

Should I hire a professional for my holiday lighting?

If you're looking for a cohesive, polished look or have a complex design in mind, hiring a professional can save time and ensure safety while enhancing your home’s appearance.

How can I encourage my neighbors to participate in seasonal lighting?

Start by decorating your own home and sharing your enthusiasm. Consider suggesting a theme or organizing a small block event to inspire others to join in.

By embracing the power of seasonal lighting, we can transform not just our homes, but our entire neighborhoods—creating spaces that are brighter, warmer, and more connected all winter long.

TAkeaways

Seasonal lighting is far more than a decorative tradition—it is a powerful tool for community building. As winter encourages solitude, lights invite connection. They draw people out of their homes, spark conversations, and create shared experiences that strengthen neighborhood bonds.

In this article, we’ve explored how lighting enhances walkability, fosters social interaction, provides psychological comfort, and unites communities through shared design. Every light strung, every glowing wreath, and every illuminated window contributes to a collective message: we are here, we care, and we are in this together.

So as the season approaches, consider how your own lighting choices can help illuminate not just your home, but the spirit of your neighborhood. Because when we light up our streets, we also light up our connections—with each other, and with the place we call home.

Key Takeaways:

  • Seasonal lighting increases walkability, making streets feel safer and more inviting.

  • Festive displays spark conversations, helping neighbors connect and build relationships.

  • Warm lighting offers psychological comfort, reducing stress and promoting well-being.

  • Coordinated themes or professional designs enhance curb appeal and community pride.

  • Lighting is a form of community care, signaling presence, engagement, and unity.

Looking for Home resources?

Looking to enhance your living space and create a sanctuary that supports your well-being? Explore our home partners who offer a wide range of resources to elevate your home environment.


homeHLL x Editor


How Much To Replace Siding On A House

Replacing the siding on your home is one of the most impactful renovations you can undertake. Not only does it dramatically enhance curb appeal, but it also improves energy efficiency, protects against the elements, and can significantly increase your property’s value. However, the cost of siding replacement varies widely depending on several key factors, including the type of material, the size of the home, labor rates, and the complexity of the installation.


In this article, we’ll break down the average costs associated with siding replacement, explore pricing by material type, evaluate labor and removal expenses, and highlight additional cost factors that homeowners should consider. Whether you're planning a full exterior makeover or replacing worn-out siding, this guide will help you budget effectively and choose the best option for long-term performance and value.

No. 1

Why Replacing Siding Matters

Siding serves as your home’s first line of defense against moisture, pests, and fluctuating temperatures. Over time, damaged or outdated siding can compromise this protection, leading to structural issues, higher energy bills, and diminished curb appeal. Replacing it not only refreshes the appearance of your home but also strengthens its integrity and insulation.

For homeowners looking to plan accurately, many rely on professional residential takeoff services to estimate material quantities, labor costs, and waste factors. This ensures transparency and helps avoid unexpected expenses during the project.

No. 2

Average Cost to Replace Siding

The national average cost to replace siding on a typical home ranges from $6,000 to $25,000, depending on the material chosen and the size of the property. On a per-square-foot basis, most homeowners pay between $8 and $20, which includes both materials and installation.

  • Smaller homes or partial replacements fall on the lower end of the range.

  • Larger homes or premium siding materials push the cost higher.

Beyond aesthetics, new siding can improve insulation, reduce maintenance needs, and boost resale value—making it a worthwhile investment.

No. 3

Cost by Siding Material Type

Vinyl Siding

  • Cost: $4 to $12 per sq ft installed

  • Pros: Affordable, low maintenance, weather-resistant
    Vinyl is the most popular siding material due to its cost-effectiveness and wide variety of styles and colors. It requires minimal upkeep and offers solid durability in most climates.

Fiber Cement (e.g., Hardie Board)

  • Cost: $8 to $16 per sq ft installed

  • Pros: Fire-resistant, durable, long lifespan
    Fiber cement siding mimics the look of wood or masonry but offers superior resistance to rot, insects, and fire. It’s heavier and more labor-intensive to install, which increases the overall cost.

Wood Siding

  • Cost: $7 to $15 per sq ft installed

  • Pros: Natural beauty, customizable, timeless appeal
    Wood siding offers a classic aesthetic but requires regular maintenance such as staining and sealing. Over time, this can become costly, though many homeowners value its authentic look.

Engineered Wood Siding

  • Cost: $6 to $12 per sq ft installed

  • Pros: More affordable than natural wood, lightweight, durable
    Engineered wood provides the appearance of real wood with greater resistance to moisture and pests. It’s easier to install and typically more budget-friendly over time.

Metal Siding (Aluminum or Steel)

  • Cost: $8 to $20 per sq ft installed

  • Pros: Durable, fire-resistant, modern aesthetic
    Metal siding is sleek and long-lasting, though costs can vary depending on the type of metal and design complexity. It’s particularly popular for contemporary or industrial-style homes.

Stucco

  • Cost: $7 to $17 per sq ft installed

  • Pros: Energy-efficient, well-insulated, ideal for hot climates
    Stucco is a long-lasting option that works well in dry, warm regions. It requires professional installation and can last for decades with proper care.


hellolovelyliving houzz

Houzz

Make your home project a reality. Find inspiration, products, and the pros to make it happen - all in one place.


No. 4

Labor Costs

Labor typically accounts for 30% to 50% of the total siding replacement cost. Installers generally charge between $2 and $8 per square foot, depending on the material and project complexity.

Factors That Increase Labor Costs:

  • Removing old siding

  • Repairing structural damage

  • Installing house wrap or insulation

  • Working on multi-story homes

  • Navigating complex architectural features

Vinyl and engineered wood tend to be the most labor-friendly materials, while fiber cement and stucco are more labor-intensive, increasing total project costs.

No. 5

Cost to Remove Old Siding

Most siding replacement projects require the removal and disposal of existing materials.

Homeowners can expect to pay:

  • $1 to $3 per sq ft for tear-off

  • $200 to $600 for disposal fees

If underlying damage, such as rot or mold, is discovered, repair costs can range from $300 to $3,000, depending on severity.

No. 6

Cost by Home Size

Here’s a rough estimate of siding replacement costs based on home size, including materials and labor:

  • 1,000 sq ft home: $4,000 – $12,000

  • 1,500 sq ft home: $6,000 – $18,000

  • 2,000 sq ft home: $8,000 – $24,000

  • 2,500 sq ft home: $10,000 – $30,000

These figures do not include structural repairs or optional upgrades.

No. 7

Additional Cost Factors

1. Insulation Upgrades

Adding foam board or insulated siding improves energy efficiency and comfort.
Cost: $1,500 to $5,000

2. House Wrap or Vapor Barrier

Prevents moisture buildup and enhances insulation.
Cost: $1,000 to $2,500

3. Trim, Fascia, and Soffits

Replacing or upgrading these elements enhances aesthetics and protects roof edges.
Cost: $1,000 to $4,000

4. Painting or Staining

Required for wood or some fiber cement products.
Cost: $2 to $5 per sq ft

No. 8

Longevity and Maintenance by Material

The overall long-term cost of siding is directly impacted by the type of material chosen. While some options may seem more affordable upfront, their maintenance needs and lifespan can significantly affect their value over time.

Here's a breakdown of common siding materials and their expected longevity:

  • Vinyl Siding: Known for its affordability and low maintenance, vinyl typically lasts between 20 to 40 years, making it a popular choice for budget-conscious homeowners.

  • Fiber Cement: Exceptionally durable and resistant to fire, pests, and rot, fiber cement siding offers a lifespan of 40 to 50 years, with minimal upkeep required.

  • Wood Siding: Valued for its natural beauty and classic appeal, wood siding can last 20 to 30 years, but it demands frequent maintenance such as painting, staining, and sealing.

  • Engineered Wood: Designed to mimic the look of real wood while offering enhanced durability, engineered wood siding generally provides around 30 years of reliable service with less maintenance.

  • Metal Siding (Aluminum or Steel): Highly resistant to weather and fire, metal siding can endure for 40 to 60 years with minimal upkeep, making it a strong long-term investment.

  • Stucco: When properly installed and maintained, stucco siding can last an impressive 50 to 80 years, especially in dry, warm climates where it performs best.

While higher-quality materials may come with a steeper initial price, they often deliver greater long-term value through extended lifespan and reduced maintenance costs. Choosing a durable siding material is an investment not just in aesthetics, but in the future performance and cost-efficiency of your home.

No. 9

Energy Efficiency Benefits

New siding can significantly improve your home’s insulation, especially when paired with house wrap or insulated panels. Homeowners can save 10% to 20% on annual energy bills, making siding replacement not just a cosmetic upgrade but a functional one as well.

No. 10

Return on Investment (ROI)

Siding replacement consistently ranks among the top home improvement projects for return on investment:

  • Vinyl siding: 60%–80% ROI

  • Fiber cement siding: Up to 86% ROI

  • Engineered wood siding: 70%–80% ROI

New siding enhances curb appeal and reduces maintenance, making homes more attractive to buyers.

No. 11

When to Replace Siding

Signs that it’s time to replace your siding include:

  • Cracks, warping, or rotting

  • Frequent repainting

  • Rising energy bills

  • Mold or moisture issues

  • Pest damage

  • Faded or outdated appearance

Addressing these issues early can prevent more serious structural problems and reduce repair costs in the long run.

FAQ

What is the average cost to replace siding on a house?

Most homeowners spend between $6,000 and $25,000, depending on the siding material and the size of the home.

Which siding material is the most affordable?

Vinyl siding is the most budget-friendly option, costing $4 to $12 per square foot installed.

Does replacing siding increase home value?

Yes. New siding improves curb appeal and offers a high return on investment, especially with materials like fiber cement and vinyl.

How long does siding typically last?

Lifespan varies by material:

  • Vinyl: 20–40 years

  • Fiber cement: 40–50 years

  • Wood: 20–30 years

  • Engineered wood: ~30 years

  • Metal: 40–60 years

  • Stucco: 50–80 years

Can new siding improve energy efficiency?

Absolutely. Replacing siding—especially with insulated options—can reduce energy bills by 10% to 20% annually.

Takeaways

Replacing the siding on your home is a valuable investment that enhances appearance, improves energy efficiency, and protects your property from the elements. While costs vary based on material, home size, and labor complexity, most homeowners can expect to spend between $6,000 and $25,000.

In this article, we’ve outlined the key cost factors, from material types and labor rates to insulation upgrades and long-term maintenance. By understanding these variables, homeowners can make informed decisions that align with their budget, aesthetic preferences, and performance expectations.

Whether you're upgrading outdated siding or addressing damage, a well-planned replacement project offers lasting benefits. With thoughtful planning and accurate construction estimation, you can choose siding that delivers durability, visual appeal, and long-term value for your home.

Looking for Home resources?

Looking to enhance your living space and create a sanctuary that supports your well-being? Explore our home partners who offer a wide range of resources to elevate your home environment.


homeHLL x Editor


4 Common Challenges Buyers Face When Navigating The Home Market

Buying a home is one of life’s most exciting milestones—but it can also be one of the most complex. Even with diligent research and preparation, many buyers encounter unexpected hurdles that can turn a thrilling experience into a stressful one. From financial surprises to decision fatigue, the journey to homeownership often involves more twists and turns than anticipated.


In this article, we’ll explore four of the most common challenges that homebuyers face in today’s market. By understanding these obstacles and learning how to address them proactively, you can approach the home-buying process with greater clarity, confidence, and peace of mind.

No. 1

Feeling Unsure About Where to Start

One of the most common challenges for buyers—especially first-time buyers—is simply knowing where to begin. With an overwhelming number of listings, neighborhoods, and opinions to consider, it’s easy to feel lost in the early stages of the search.

How to Solve It:

Start by defining your priorities before you begin touring homes.

Consider how key factors such as:

  • Location

  • Budget

  • Commute time

  • School districts

  • Future plans

...fit together to support your lifestyle and long-term goals.

Creating a clear framework from the outset helps you stay focused and avoid decision fatigue. In competitive markets—like buying a home in Colorado—having a well-defined plan can be especially helpful when properties move quickly and decisiveness is crucial.

No. 2

Pricing That Does Not Match Expectations

Many buyers experience sticker shock when they begin actively looking at homes. Whether due to rising market prices, bidding wars, or limited inventory, the reality of what your budget can buy may not align with your initial expectations.

How to Solve It:

Rather than relying solely on listing prices, take time to review recent sales in your desired area. This gives you a more accurate understanding of:

  • What homes are actually selling for

  • How long properties stay on the market

  • Which features are driving price differences

By grounding your expectations in real market data, you’ll be better equipped to make competitive offers and avoid unnecessary frustration.

No. 3

Financing Falling Through Late in the Process

There are few things more disheartening than reaching the final stages of a home purchase only to have financing fall apart. Whether due to interest rate changes, documentation issues, or unexpected expenses, last-minute disruptions can derail even the most promising deals.

How to Solve It:

Stay in close communication with your lender throughout the process. To reduce the risk of financing issues:

  • Get pre-approved before making offers

  • Keep your financial documents organized and up-to-date

  • Avoid major purchases or credit changes during the buying process

  • Ask your lender about potential rate fluctuations and how they may affect your loan

Buyers who remain proactive and flexible are better positioned to handle surprises without losing momentum.


Aircraft

Achieve spotless floors with Aircraft hard floor cleaners! Designed for efficiency and effectiveness, their products ensure a clean and safe environment for everyone.

Elevate your home or office cleanliness today!


No. 4

Navigating Paperwork and Ownership Details

The legal and logistical side of buying a home can feel overwhelming, particularly for those unfamiliar with real estate transactions. From contracts and disclosures to title reports and closing documents, the volume of paperwork can be daunting.

How to Solve It:

Don’t hesitate to ask questions and seek clarification at every stage. A knowledgeable real estate agent or attorney can help you:

  • Understand the terms of your purchase agreement

  • Review inspection reports and disclosures

  • Verify title and ownership details

  • Stay on track with deadlines and required documentation

Taking the time to fully understand each document not only reduces stress but also ensures you’re making informed decisions every step of the way.

Takeaways

The path to homeownership is rarely without its bumps, but being aware of common challenges can make the journey far more manageable. Whether you’re unsure where to start, surprised by pricing, caught off guard by financing issues, or overwhelmed by paperwork, know that these experiences are all part of the process—and they can be navigated with the right mindset and support.

In this article, we’ve highlighted four key obstacles buyers often face and provided practical strategies to overcome them. By approaching your home search with preparation, patience, and perspective, you can transform uncertainty into empowerment.

With a clear plan, reliable guidance, and a willingness to adapt, the road to your new home can be not only smoother—but also more rewarding.

Looking for Home resources?

Looking to enhance your living space and create a sanctuary that supports your well-being? Explore our home partners who offer a wide range of resources to elevate your home environment.


homeHLL x Editor


What Is A 3-Zone Mini Split And Why Is It Ideal For Multi-Room Cooling

Maintaining the perfect indoor temperature is essential for comfort, productivity, and overall well-being. However, when it comes to cooling multiple rooms efficiently, many homeowners find themselves limited by traditional HVAC systems. These conventional setups often struggle to provide consistent temperatures across different spaces, leading to hot spots, high energy bills, and frustrated occupants.


In this article, we’ll explore the advantages of a 3-zone mini split system—a modern, ductless solution designed for precise climate control in multiple rooms. From energy efficiency to customizable comfort, we’ll break down how this system works, why it’s ideal for multi-room cooling, and how it can transform your home’s climate management.

No. 1

Understanding a 3-Zone Mini Split

A 3-zone mini split is a type of ductless air conditioning system that allows you to cool three separate areas of your home independently. The system consists of one outdoor compressor unit connected to three indoor air handlers, each installed in a different room or zone.

Each indoor unit operates independently, meaning you can set different temperatures in different rooms based on personal preferences or usage patterns. This makes the 3-zone mini split a highly flexible and efficient solution for homes with varying cooling needs.

No. 2

How a 3-Zone Mini Split Works

The system functions by linking multiple indoor units to a single outdoor compressor via refrigerant lines. Each indoor unit is equipped with its own thermostat and remote control, allowing occupants to adjust the temperature in their specific zone without impacting others.

This setup ensures that energy is used only where and when it’s needed, avoiding the inefficiencies of whole-house systems that cool unused rooms. The result is a smarter, more targeted approach to climate control.

No. 3

Energy Efficiency and Cost Savings

One of the most compelling benefits of a 3-zone mini split is its energy efficiency. Unlike traditional ducted systems, mini splits don’t lose energy through leaky or poorly insulated ductwork. Instead, they deliver cooled air directly to each room.

This direct delivery method reduces energy waste and can lead to significant savings on monthly utility bills. Many homeowners report a noticeable drop in energy costs after switching to a mini split system, making it a financially savvy investment over time.


hellolovelyliving aroma retail

Aroma Retail

The Scent Machine Pro is an efficient whole-home and whole-business solution for safe aromatics—ready to diffuse free-standing or ported into HVAC.

Scent your entire home or business up to 10,000 sq. ft. on a timer and on-demand via an app in less than 5 minutes.


No. 4

Customizable Comfort for Every Room

With a 3-zone mini split, you gain the ability to customize the temperature in three separate rooms. Whether it’s a bedroom, home office, or living room, each space can be tailored to suit individual comfort levels.

For example:

  • Keep the bedroom cooler at night for better sleep

  • Maintain a moderate temperature in the living room for family gatherings

  • Set a warmer environment in the office for productivity

This level of control ensures that everyone in the household stays comfortable, no matter where they are.

No. 5

Simple Installation and Flexible Placement

Mini split systems are known for their easy and non-invasive installation. Since they don’t require ductwork, there’s no need to tear into walls or ceilings. Indoor units can be mounted on walls or ceilings with minimal structural changes, and the outdoor compressor can be placed conveniently outside the home.

This makes mini splits an excellent option for:

  • Older homes without existing ductwork

  • Home additions or renovations

  • Apartments or smaller residences

Their flexible placement options make them adaptable to virtually any layout.

No. 6

Quiet Operation for Peaceful Living

Unlike noisy window units or portable air conditioners, 3-zone mini splits are designed for whisper-quiet operation. The loudest component—the compressor—is located outside, while the indoor units emit minimal sound.

This makes them perfect for:

  • Bedrooms

  • Nurseries

  • Home offices

  • Libraries or study areas

Even during the hottest days, you can enjoy a calm, quiet indoor environment without the constant hum of traditional units.

No. 7

Heating and Cooling for Year-Round Comfort

Most 3-zone mini split systems are equipped with both heating and cooling capabilities, making them a year-round solution. Whether it’s summer heat or winter chill, the system can maintain a consistent indoor climate without the need for separate heaters or fans.

Benefits include:

  • Simplified climate control throughout the year

  • Reduced need for multiple appliances

  • Lower overall energy consumption

This dual functionality adds value and convenience, especially in regions with fluctuating temperatures.

No. 8

Cleaner Indoor Air Quality

Each indoor unit in a mini split system comes with advanced air filtration capabilities. These filters trap dust, allergens, and airborne particles, continuously circulating clean air throughout your home.

Improved air quality can benefit:

  • Allergy sufferers

  • Individuals with asthma or respiratory issues

  • Households with pets or children

By maintaining cleaner air, mini splits contribute to a healthier indoor environment for everyone.

No. 9

Ideal for Renovations and Additions

If you’re planning to renovate your home or add new rooms, a 3-zone mini split offers a practical and cost-effective solution. Installing ductwork in older homes or new extensions can be expensive and disruptive. Mini splits eliminate this hassle by offering ductless installation with minimal construction.

This makes them ideal for:

  • Attic or basement conversions

  • Garage apartments

  • Sunrooms or enclosed patios

  • Guest suites or in-law quarters

You can quickly and efficiently cool new spaces without overhauling your existing HVAC system.

No. 10

Environmental Considerations

Modern mini split systems are designed with eco-friendly refrigerants that have a lower environmental impact. Combined with their energy efficiency, these systems support a more sustainable lifestyle.

Key environmental benefits include:

  • Reduced greenhouse gas emissions

  • Lower electricity consumption

  • Long-term sustainability

By choosing a 3-zone mini split, you’re not only improving your home’s comfort—you’re also making a responsible choice for the planet.

Takeaways

A 3-zone mini split is a versatile, efficient, and environmentally conscious solution for multi-room cooling. With its ability to deliver customized comfort, quiet operation, and year-round climate control, it stands out as an ideal choice for modern homeowners.

In this article, we’ve covered how 3-zone mini splits work, their installation advantages, energy-saving benefits, and their potential to improve indoor air quality and overall comfort. Whether you’re upgrading your current system, renovating your home, or simply seeking a smarter way to manage indoor temperatures, a 3-zone mini split offers the perfect balance of performance, efficiency, and convenience.

If you're looking for a reliable way to maintain consistent comfort across multiple rooms, this system is well worth considering. Experience the difference of personalized climate control—room by room, season by season.

Looking for Home resources?

Looking to enhance your living space and create a sanctuary that supports your well-being? Explore our home partners who offer a wide range of resources to elevate your home environment.


homeHLL x Editor


Sustainable Modern Furniture For A Minimalist And Stylish Home

In an era where environmental consciousness is shaping consumer behavior, interior design is no exception. The fusion of sustainability and minimalism has emerged as a defining trend in modern living spaces. Homeowners are increasingly seeking furniture that not only reflects their aesthetic preferences but also aligns with their values—particularly those centered on environmental responsibility and ethical production.


In this article, we explore how sustainable and eco-friendly furniture options can elevate minimalist interiors, offering both style and substance. From responsibly sourced materials to timeless design choices, you'll discover practical ways to create a space that’s elegant, functional, and kind to the planet.

No. 1

Embracing Minimalism with Purpose

Minimalism is more than just a design trend—it’s a lifestyle rooted in intentionality. In upscale areas like Coral Gables, homeowners are furnishing their spaces with premium modern furniture in Coral Gables that emphasizes clean lines, open layouts, and purposeful design. This aesthetic doesn’t sacrifice comfort or personality; rather, it enhances both by eliminating clutter and focusing on quality.

Eco-friendly furniture fits seamlessly into this philosophy. Each piece is thoughtfully designed to serve a dual role—functional and decorative—while contributing to a calming, serene environment. The result is a home that feels open, breathable, and in harmony with nature.

No. 2

Eco-Friendly Materials for Modern Living

Sustainable furniture is defined by its use of responsibly sourced materials. This includes:

  • Certified wood from managed forests

  • Recycled metals that reduce mining impact

  • Bamboo, a fast-growing renewable resource

  • Reclaimed wood, which brings character and history

These materials are not only environmentally responsible but also offer unique textures and visual appeal. Each piece tells a story, adding depth and authenticity to your interior.

No. 3

Non-Toxic Finishes for Healthier Homes

Traditional furniture often contains harmful chemicals in paints, stains, and adhesives, which can release volatile organic compounds (VOCs) into the air. In contrast, sustainable furniture manufacturers prioritize:

  • Natural finishes like beeswax or linseed oil

  • Low-VOC or VOC-free paints and stains

  • Formaldehyde-free glues and adhesives

These alternatives contribute to better indoor air quality and promote a healthier living environment. Choosing non-toxic options supports a holistic approach to wellness and reinforces your commitment to sustainability.


hellolovelyliving maiden home

Maiden Home

Embrace simplicity with Maiden Home: Discover timeless, minimalist furniture and decor that brings effortless elegance to every space.


No. 4

Quality Over Quantity

Minimalism encourages mindful consumption. Instead of filling your home with numerous items, focus on acquiring a few high-quality pieces that are built to last. Benefits include:

  • Longer lifespan, reducing the need for frequent replacements

  • Better craftsmanship, often with attention to detail

  • Greater emotional value, as each piece is chosen with care

Investing in durable furniture reduces waste and supports a more sustainable, cost-effective approach to home design.

No. 5

Modular and Multi-Functional Designs

Space-saving and adaptable, modular furniture is ideal for minimalist homes. These pieces are designed to evolve with your needs, offering flexibility without sacrificing style. Examples include:

  • Storage beds with built-in compartments

  • Nesting tables that can be tucked away when not in use

  • Expandable dining tables for hosting without clutter

  • Convertible sofas that double as guest beds

Such designs reduce the need for excess furniture, helping to maintain a clean, organized, and sustainable space.

No. 6

Natural Textiles and Fabrics

Upholstery and soft furnishings are another opportunity to make eco-conscious choices. Opt for:

  • Organic cotton

  • Linen

  • Hemp

These natural fibers are biodegradable, require fewer pesticides, and often consume less water during production. They offer a soft, breathable alternative to synthetic materials and support sustainable agriculture.

No. 7

Supporting Ethical Production

Sustainability extends beyond materials to include ethical labor practices. Choosing furniture from brands that value:

  • Fair wages

  • Safe working conditions

  • Transparent supply chains

ensures that your purchases contribute to a more equitable global economy. Ethical production supports communities and reinforces the values of conscious living.

No. 8

Local Artisans and Small-Scale Producers

Buying locally made furniture not only reduces transportation emissions but also supports regional economies. Benefits of choosing local and handmade items include:

  • Lower carbon footprint

  • Unique craftsmanship

  • Stronger connection to the maker and story behind the piece

Handcrafted furniture often features superior quality and a distinctive aesthetic that mass-produced items can’t replicate. These pieces become focal points in minimalist interiors, adding warmth and personality.

No. 9

Timeless Aesthetics Over Trends

Minimalist design thrives on timeless appeal. Instead of chasing fleeting trends, focus on:

  • Neutral color palettes

  • Classic silhouettes

  • Versatile materials

This approach ensures your furniture remains stylish for years to come, reducing the need for constant updates and helping to prevent unnecessary waste. A timeless setup fosters a sense of calm and continuity in your home.

No. 10

Repurposing and Upcycling

Sustainability also means giving new life to old items. Upcycled and secondhand furniture can be transformed into stunning, functional pieces with a bit of creativity. Examples include:

  • Refinished vintage dressers

  • Reupholstered chairs

  • Repurposed wood pallets turned into coffee tables

These pieces not only reduce landfill waste but also bring character and charm to your space. Supporting upcycled furniture encourages a circular economy and celebrates resourcefulness.

No. 11

DIY Eco-Friendly Furniture Care

Maintaining your furniture sustainably is just as important as choosing it wisely.

Use:

  • Plant-based cleaning products

  • Soft cloths for dusting

  • Natural oils for conditioning wood

Regular care and timely repairs extend the life of your furniture, preserving its beauty and functionality. This practice reduces the need for replacements and keeps your home aligned with eco-conscious values.

takeaways

Concocting a minimalist space with sustainable and eco-friendly furniture is more than a design choice—it’s a lifestyle decision that benefits both people and the planet. From responsibly sourced materials to ethical production and timeless aesthetics, every decision you make contributes to a more balanced, intentional way of living.

In this article, we’ve explored how to:

  • Embrace minimalism with purpose

  • Choose sustainable materials and non-toxic finishes

  • Prioritize quality and multi-functional design

  • Support ethical and local production

  • Incorporate timeless, upcycled, and well-maintained pieces

By prioritizing sustainability in your furniture choices, you create a home that is not only stylish and functional but also deeply connected to nature and social responsibility. It’s a space where elegance meets ethics—where every piece tells a story of care, intention, and respect for the world we live in.

Looking for Home resources?

Looking to enhance your living space and create a sanctuary that supports your well-being? Explore our home partners who offer a wide range of resources to elevate your home environment.


homeHLL x Editor


How To Create A Thoughtfully Designed Home That Enhances Your Lifestyle

The design of your home is far more than just a visual statement—it's a reflection of your lifestyle, values, and personal well-being. A thoughtfully designed space goes beyond aesthetic appeal to support how you live, work, relax, and connect with others. It's about creating an environment that feels intentional, functional, and deeply personal.


In this article, we’ll explore essential tips for designing a home that not only looks beautiful but also enhances your everyday life. From optimizing flow and functionality to incorporating meaningful storytelling through design, these strategies will help you transform your house into a home that truly supports your lifestyle and well-being.

No. 1

Optimized Flow and Functionality

A well-designed home begins with a layout that supports the natural rhythm of your daily life. Every room should feel connected and purposeful, offering smooth transitions between spaces that align with how you move through your day.

Key Considerations:

  • Logical room placement: For example, placing the kitchen near the dining area enhances convenience and encourages social interaction during meals.

  • Uncluttered pathways: Keep hallways and entryways clear to allow for easy movement and practical drop zones for shoes, coats, and bags.

  • Zoning: Define spaces for specific activities—such as cooking, relaxing, or working—to reduce chaos and improve functionality.

When your home flows intuitively, it becomes easier to maintain, more enjoyable to live in, and better suited to your unique lifestyle.

No. 2

Purpose-Driven Spaces

Every area in your home should serve a clear purpose. Purpose-driven design ensures that each room or corner contributes meaningfully to your daily routine, rather than simply filling space.

Examples of Purposeful Design:

  • Reading nooks with cozy seating and good lighting

  • Home offices that support productivity and focus

  • Meditation corners or wellness spaces for relaxation

  • Play areas that encourage creativity and safe exploration for children

By assigning intention to each space, you create a home that feels cohesive, efficient, and tailored to your needs.

No. 3

Considered Lighting

Lighting plays a crucial role in both the functionality and mood of your home. A layered lighting approach enhances ambiance, supports well-being, and ensures that each space is equipped for various activities.

Types of Lighting to Incorporate:

  • Ambient lighting: General illumination from ceiling fixtures or recessed lights

  • Task lighting: Focused light for specific activities like reading, cooking, or working

  • Accent lighting: Decorative lighting that highlights architectural features or artwork

Maximize natural light wherever possible, and use mirrors or light-colored surfaces to reflect it throughout your space. Thoughtful lighting design not only elevates the aesthetic but also supports your mental and emotional health.


hellolovelyliving lulu and georgia

Lulu & Georgia

At Lulu and Georgia, you'll find exclusive designer collaborations, uniquely curated collections, and one-of-a-kind vintage pieces to bring your home to life.


No. 4

Personal Connection and Storytelling

Your home should tell your story. It should reflect your personality, your history, and the things that matter most to you. Thoughtful design incorporates elements that are meaningful—not just trendy.

Ways to Personalize Your Space:

  • Display family heirlooms or vintage pieces with sentimental value

  • Create gallery walls with family photos or your own artwork

  • Showcase collections that reflect your hobbies or travels

  • Incorporate cultural or historical elements that celebrate your heritage

These personal touches transform your home from a generic space into a sanctuary that feels uniquely yours.

No. 5

Attention to Detail and Quality

The difference between a well-designed home and a truly exceptional one often lies in the details, as many home builders opt for different textures and visually appealing architecture to create a sensory experience. From material choices to craftsmanship, quality matters—both in terms of aesthetics and longevity.

Design Details That Make a Difference:

  • High-quality materials: Invest in durable furniture and finishes that stand the test of time

  • Textural variety: Mix wood, metal, fabric, and stone to create a rich sensory experience

  • Architectural features: Add interest with crown molding, built-ins, or custom millwork

  • Tactile elements: Use soft textiles, natural fibers, and layered textures to engage the senses

When you prioritize quality and detail, your home becomes more comfortable, more beautiful, and more enduring.

No. 6

Adaptability and Functionality

A thoughtfully designed home should evolve with your life. Whether your family is growing, your work situation changes, or your needs shift over time, your space should be able to adapt.

Tips for Flexible Design:

  • Multi-functional furniture: Choose pieces that serve more than one purpose, like a sleeper sofa or a dining table with storage

  • Modular layouts: Use furniture arrangements that can be easily reconfigured

  • Neutral foundations: Opt for timeless base colors and styles that can be updated with accessories

  • Expandable spaces: Design rooms that can transition from nursery to office, or guest room to gym

Adaptability ensures that your home continues to support your lifestyle, no matter how it changes.

Takeaways

Creating a thoughtfully designed home is a journey—one that requires time, intention, and a deep understanding of how you want to live. It’s not just about choosing the right furniture or color palette; it’s about crafting an environment that nurtures your well-being, reflects your personality, and adapts to your evolving needs.

In this article, we’ve explored how to make your home more functional, meaningful, and uniquely yours by:

  • Optimizing flow and layout

  • Creating purpose-driven spaces

  • Using layered lighting for mood and function

  • Incorporating personal stories and connections

  • Paying attention to quality and detail

  • Designing for adaptability and long-term use

When you approach your home with thoughtfulness and care, you create more than just a beautiful space—you create a sanctuary that supports your life, your loved ones, and your sense of self. So take the time to design with intention, and enjoy the comfort and joy that comes from living in a space that truly feels like home.

Looking for Home resources?

Looking to enhance your living space and create a sanctuary that supports your well-being? Explore our home partners who offer a wide range of resources to elevate your home environment.


homeHLL x Editor


Smart Home Water Leak Detection: Winter Protection While You're Away

Bay Area homeowners cherish their winter escapes—whether it's skiing in Tahoe, visiting family for the holidays, or heading to warmer climates for a seasonal reset. But while you're enjoying time away, your Sunnyvale or Mountain View home may be quietly vulnerable. Every day your house sits unoccupied during the colder months increases the risk of undetected water damage. A small leak, left unnoticed, can escalate into a costly disaster in just a few days.


In this article, we’ll explore how smart water leak detection systems are transforming home protection for Bay Area residents. You’ll learn how these systems work, why they’re essential for winter travel, which devices are best for your needs, and how to prepare your home before you leave. With the right tools in place, you can travel with peace of mind—knowing your home is protected 24/7.

No. 1

The Hidden Danger of Unmonitored Homes

Traditional advice often suggests shutting off your main water supply before leaving town. While this may prevent some leaks, it also introduces new complications:

  • Irrigation systems stop functioning

  • Water heaters may malfunction

  • Inconvenience for anyone checking on your home

More critically, this method offers no protection if a pipe bursts after you've already left. Without real-time monitoring, even a minor leak can go undetected for days.

No. 2

When Small Leaks Become Major Disasters

A pinhole leak dripping just one gallon per hour may seem insignificant—until you do the math. Over a week-long trip, that’s 168 gallons of water. That’s enough to:

  • Destroy hardwood flooring

  • Soak drywall and insulation

  • Create ideal conditions for mold growth

  • Damage furniture, electronics, and personal items

The average insurance claim for water damage in the U.S. is around $11,000, but in the Bay Area, where property values and repair costs are higher, the financial impact can be far greater.

No. 3

How Smart Leak Detection Systems Work

Sensors, Alerts, and Automatic Shutoffs

Modern smart leak detection systems combine three powerful technologies:

  • Point-of-use sensors that detect moisture in vulnerable areas

  • Flow monitoring that analyzes your home’s water usage patterns

  • Automatic shutoff valves that instantly stop water flow when a leak is detected

Together, these components provide comprehensive protection—often stopping a leak before it becomes a catastrophe.

WiFi-Connected Monitoring from Anywhere

The real game-changer? Connectivity.

When a sensor detects moisture or abnormal flow, you receive an instant alert on your smartphone—whether you’re in Hawaii or just at work in Palo Alto. You can:

  • Monitor your home’s water system in real time

  • Shut off the water remotely with a single tap

  • Receive temperature alerts to prevent frozen pipes


hellolovelyliving houzz

Houzz

Make your home project a reality. Find inspiration, products, and the pros to make it happen - all in one place.


No. 4

Top Smart Water Leak Detection Systems for Bay Area Homes

Flo by Moen: Whole-Home Protection

  • Installs on your main water line

  • Monitors water flow, pressure, and temperature

  • Learns your usage patterns with AI

  • Sends freeze warnings and shuts off water automatically when leaks are detected
    Price: $500–$700 + professional installation

Phyn Plus: AI-Powered Precision

  • Creates a “water fingerprint” for every fixture

  • Identifies specific sources of leaks (e.g., a running toilet)

  • Offers detailed usage reports and alerts
    Price: $700–$850 installed

Leak Detection Sensors: Budget-Friendly Protection

  • Brands like Honeywell and Samsung SmartThings offer individual sensors

  • Battery-powered and WiFi-connected

  • Alert you when moisture is detected (no automatic shutoff)
    Price: $30–$80 per sensor

No. 5

Critical Locations to Monitor in Your Home

To maximize protection, place sensors in the most leak-prone areas:

Water Heater and Supply Lines

  • Water heaters can fail without warning

  • Place a sensor at the base to catch leaks early

Under Sinks and Behind Toilets

  • Common leak zones due to corroded supply lines or worn seals

  • Install sensors inside bathroom and kitchen cabinets

Washing Machine and Dishwasher Connections

  • High-pressure supply lines are prone to failure

  • Place sensors behind or beneath these appliances

No. 6

Real-Time Alerts That Actually Save Your Home

Smartphone Notifications Explained

  • Minor anomalies trigger FYI alerts

  • Sustained flow issues generate urgent warnings

  • Major spikes (e.g., burst pipes) trigger emergency alerts and automatic shutoff

Temperature Monitoring for Freeze Prevention

  • Advanced systems track water temperature

  • Alerts are sent when pipes approach freezing

  • Some systems enable a protective drip to prevent bursts

What to Do When You Get an Alert 800 Miles Away

  1. Check the app—many systems allow remote shutoff

  2. Contact a neighbor or property manager to inspect the issue

  3. Document any damage and notify your insurance provider immediately

No. 7

Automatic Water Shutoff: Your Digital Insurance Policy

How Instant Shutoff Prevents Catastrophe

  • Automatic shutoff valves respond within 3–5 seconds of detecting a major leak

  • This rapid response can reduce damage by up to 90%

Manual Override Options for Peace of Mind

  • High-quality systems allow manual control

  • You can override shutoffs or confirm alerts before action is taken

No. 8

Installation Options: DIY vs. Professional

Simple Sensor Installation Anyone Can Do

  • Place sensors in key locations

  • Connect to your WiFi network

  • Battery life: 2–3 years

  • Setup time: under 1 hour for a full sensor network

When to Hire a Licensed Plumber

  • Whole-home systems like Flo or Phyn require professional installation

  • A licensed plumber ensures correct placement and integration with your plumbing

  • Installation typically takes 2–3 hours

No. 9

Cost Analysis: Investment vs. Potential Damage

System Prices and Monthly Fees

  • Entry-level sensor networks: $150–$300 (no monthly fees)

  • Whole-home systems: $500–$850 + installation

  • Optional monitoring services: $0–$15/month

Insurance Discounts and Incentives

  • Many insurers offer 5–15% discounts on water damage premiums

  • Some providers offer free systems or installation as part of their risk prevention programs

ROI: One Leak Pays for the System

  • Bay Area water damage claims often exceed $15,000

  • A $700 system that prevents one incident saves you $10,000+ in repairs, deductibles, and premium increases

No. 10

Bay Area Homeowner Success Stories

San Jose Family Avoids $30K in Damage

The Chens installed a Flo system before a two-week vacation. On day three, they received an alert about abnormal flow in a guest bathroom. They shut off the water remotely and had a neighbor investigate—a failed toilet supply line. Total damage: a wet floor. Without the system, the damage could’ve included ruined subfloors and collapsed ceilings.

Mountain View Home Saved During Freeze

During a cold snap, a homeowner received a 2 AM freeze alert. She activated the system’s protective drip feature and adjusted her thermostat. By morning, outdoor temps had dropped to 25°F—but her pipes remained intact.

No. 11

Preparing Your Smart System Before You Travel

Pre-Trip Testing Checklist

  • Trigger sensors to verify alerts are working

  • Practice using the app’s remote shutoff

  • Check sensor battery levels

  • Confirm emergency contacts are updated

Setting Up Emergency Contacts

  • Add trusted neighbors or property managers to your alert list

  • Provide them with your home’s water shutoff location

  • Some systems allow temporary app access for helpers

Takeaways

Smart leak detection systems are no longer a luxury—they’re a necessity for Bay Area homeowners who travel during the winter months. Whether you invest in a full-featured system like Flo or Phyn, or opt for budget-friendly sensors in key locations, you’re taking a proactive step to protect your home, your finances, and your peace of mind.

In this article, we’ve explored how smart water monitoring technology can prevent catastrophic damage, save you thousands in repair costs, and even lower your insurance premiums. With real-time alerts, remote control, and automatic shutoff capabilities, these systems offer 24/7 protection—so you can enjoy your winter getaway without worry.

Don’t wait for a leak to become a lesson. Equip your home with smart protection before your next trip.

Looking for Home resources?

Looking to enhance your living space and create a sanctuary that supports your well-being? Explore our home partners who offer a wide range of resources to elevate your home environment.


homeHLL x Editor


3 Understated Home Upgrades To Make This Year

When it comes to home renovations, it’s easy to get swept up in the allure of bold design trends, luxury finishes, and Pinterest-worthy makeovers. But while these flashy upgrades might look impressive, they don’t always offer the best return on investment—or improve your day-to-day living experience in meaningful ways.


In this article, we’ll explore a selection of understated yet highly impactful home upgrades that are worth your attention in 2026. These are the kinds of renovations that may not make your guests gasp in awe, but they’ll make your home more efficient, comfortable, safe, and valuable in the long run. From insulation to electrical systems and bathroom enhancements, these practical improvements are the foundation of a truly livable home.

Why Understated Renovations Matter

Before diving into the specifics, it’s important to understand why subtle upgrades are often the smartest choices. While aesthetics are important, your home should first and foremost support your lifestyle. It should be a place of comfort, safety, and functionality. The best renovations are those that quietly improve your daily life behind the scenes.

These types of upgrades:

  • Improve energy efficiency and reduce utility bills

  • Enhance safety and compliance with modern building codes

  • Increase long-term property value

  • Make your home more attractive to future buyers

  • Require less frequent maintenance or replacement

Let’s take a closer look at some of the most worthwhile understated renovations to consider for your home in 2026.

No. 1

Insulation: The Unsung Hero of Home Comfort

Insulation may not be glamorous, but it’s one of the most valuable investments you can make in your home. Proper insulation helps regulate indoor temperatures, keeping your space warm in the winter and cool in the summer. This not only enhances comfort but also significantly reduces energy consumption.

Key Benefits of Upgrading Insulation:

  • Lower energy bills through improved thermal efficiency

  • Reduced environmental impact by minimizing energy waste

  • Increased property value due to improved energy performance

  • Enhanced indoor comfort year-round

If your home is older or hasn’t been evaluated recently, it’s worth consulting with professionals like Insulation Commandos to assess your insulation needs. They can help you explore options such as spray foam, blown-in cellulose, or fiberglass batts, depending on your home’s structure and climate.

No. 2

Electrical System Upgrades: Safety First

Your home’s electrical system is its nervous system—quietly powering everything from lights and appliances to security systems and HVAC units. Yet, it’s often overlooked until something goes wrong. Outdated or overloaded wiring can pose serious safety risks, including electrical fires and power outages.

Why You Should Prioritize Electrical Upgrades:

  • Improved safety by reducing fire hazards and system failures

  • Increased capacity to support modern appliances and smart home tech

  • Compliance with current building codes and insurance requirements

  • Boosted resale value by offering peace of mind to buyers

While a new circuit breaker isn’t exactly a show-stopper during a home tour, it’s a critical component of a safe and functional home. If you're looking for understated upgrades to invest in within your home, or if your electrics haven’t been updated in decades—and you’re unsure of their condition—it’s time to bring in a licensed electrician for an inspection and potential upgrade.

No. 3

Bathroom Upgrades: Functional Luxury

Bathrooms are among the most frequently used spaces in any home, and upgrading them can have a surprisingly large impact on both comfort and resale value. While you don’t need to go all-out with marble floors and spa tubs, thoughtful updates can make your bathroom more efficient, stylish, and enjoyable to use.

Smart Bathroom Renovations to Consider:

  • Water-saving fixtures like low-flow toilets and faucets

  • Modern lighting to enhance visibility and ambiance

  • Updated plumbing for reliability and efficiency

  • Built-in storage to reduce clutter and improve organization

According to industry data, bathroom renovations typically recoup 60% to 70% of their cost at resale. But beyond financial return, a well-designed bathroom simply makes daily routines more pleasant. Focus on upgrades that improve usability, reduce maintenance, and align with your lifestyle.


hellolovelyliving rejuvenation

Rejuvenation

Elevate your space with Rejuvenation's timeless bathroom plumbing fixtures – where style meets functionality.


No. 4

The Bigger Picture: Function Over Flash

While it’s tempting to focus on cosmetic upgrades—like trendy backsplashes or designer furniture—the most valuable renovations are often the ones you don’t see. These behind-the-scenes improvements are what make a house feel like a home: warm, safe, efficient, and reliable.

Why These Upgrades Matter:

  • They improve quality of life without requiring constant attention

  • They reduce long-term costs by improving energy use and durability

  • They make your home more marketable if you decide to sell

  • They align with sustainable living goals in an eco-conscious era

The best part? You don’t have to choose between function and beauty. Many of these upgrades can be paired with aesthetic improvements to create a home that’s both stylish and smart.

Takeaways

There’s no shortage of ways to upgrade your home, but not all renovations are created equal. While flashy improvements might catch the eye, it’s the subtle, strategic upgrades that truly enhance your living experience and add lasting value.

In this article, we’ve highlighted three essential areas to focus on in 2026: insulation, electrical systems, and bathroom upgrades. These may not be the most glamorous changes, but they’re the ones that will make your home more comfortable, efficient, and safe for years to come.

So as you plan your next renovation, think beyond appearances. Invest in the features that support your lifestyle, protect your investment, and make your home a better place to live—day in and day out.

Looking for Home resources?

Looking to enhance your living space and create a sanctuary that supports your well-being? Explore our home partners who offer a wide range of resources to elevate your home environment.


homeHLL x Editor


How To Fall In Love With Your Home Again

Your home should be your sanctuary—the one place in the world where you feel completely at ease, genuinely happy, and entirely yourself. If that’s not how you feel when you walk through your front door, then it’s time to make a change. While life is often busy and full of distractions, creating a space that brings you peace and joy is not only possible—it’s essential for your well-being.


In this article, we’ll explore a variety of practical, manageable ways to transform your home into a place you truly love. From small cosmetic updates to tackling long-overdue repairs, we’ll guide you through the steps to make your living space more personal, functional, and fulfilling. Whether you’re ready for a full makeover or just want to make a few tweaks, we’ve got you covered.

No. 1

Start with Small Updates

Let’s begin with the simplest and most accessible changes—those small updates that can make a surprisingly big impact. You don’t need to gut your home and start from scratch to fall in love with it again. Sometimes, all it takes is a fresh coat of paint or a few new decorative touches to breathe new life into a room.

Easy Updates to Consider:

  • Repainting the walls in a color that reflects your personality

  • Swapping out old decor for pieces that inspire or comfort you

  • Adding new lighting to brighten up dark corners

  • Changing cabinet hardware for a fresh, modern look

The key here is to focus on the elements that don’t feel quite right and adjust them to better suit your taste. These small changes can help your home feel more aligned with who you are today.

No. 2

Address the Bigger Issues

While small updates are important, they won’t make much of a difference if your home has underlying problems that are being ignored. If there are major issues—like a leaky roof or faulty wiring—these need to be addressed as a priority.

Common Problems to Fix:

  • Leaking roofs that cause water damage and stress

  • Outdated or unsafe electrical systems

  • Plumbing issues that affect daily functionality

  • Structural concerns that compromise safety

We get it—tackling these problems can be overwhelming, especially when time and money are tight. But the longer these issues are left unresolved, the more they can impact your comfort and peace of mind. Investing in repairs now will save you from bigger headaches down the road and help you feel more secure in your space.

No. 3

Reclaim Your Garden Space

When was the last time you really looked at your garden? If it’s been a while, chances are it’s become overgrown and neglected. But your outdoor space holds so much potential—it can be a peaceful retreat, a social hub, or simply a beautiful view from your window.

Steps to Rejuvenate Your Garden:

  • Start with basic maintenance: mow the lawn, trim hedges, and clear debris

  • Visualize your ideal garden: do you want a flower bed, a vegetable patch, or a patio?

  • Consider professional help: services like tree installation and transplant arborists can help bring your vision to life

Even if you’re not a natural gardener, reclaiming this space can do wonders for your mental well-being and your connection to your home.


hellolovelyliving rejuvenation

Rejuvenation

Jumpstart your next home project with Rejuvenation's Home Project Guides! Expert tips, inspiration, and resources to bring your vision to life.

Start planning today!


No. 4

Give Your Bedroom a Makeover

Your bedroom should be your personal haven—a place where you can unwind, recharge, and feel completely at ease. If your current setup doesn’t offer that, it’s time for a bedroom makeover.

Bedroom Refresh Ideas:

  • Repaint the walls in calming colors like soft blues, greens, or neutrals

  • Hang artwork or photos that make you smile

  • Upgrade your bedding for added comfort and style

  • Add ambient lighting to create a cozy atmosphere

Clutter can also be a major source of stress, so consider investing in bespoke storage solutions to keep your space tidy and functional. A well-organized bedroom can dramatically improve your quality of sleep and overall mood.

No. 5

Upgrade to a Glamorous New Kitchen

The kitchen is often considered the heart of the home, and if yours feels outdated or uninspiring, it can affect how you feel about your entire living space. You don’t need a full remodel to make a difference—even small upgrades can transform the look and feel of your kitchen.

Budget-Friendly Kitchen Upgrades:

  • Replace cupboard doors or handles for a modern touch

  • Update countertops with affordable alternatives like laminate or butcher block

  • Add a fresh coat of paint to walls or cabinets

  • Install new lighting fixtures to brighten the space

If you do have the budget for a full renovation, go for it! But if not, these smaller changes can still make your kitchen a place you enjoy spending time in.

Takeaways

Loving where you live isn’t about having the biggest house or the most expensive furniture—it’s about creating a space that feels like home. A place that reflects your personality, supports your lifestyle, and brings you comfort at the end of a long day.

In this article, we’ve explored a range of ways to help you reconnect with your home, from quick fixes and aesthetic updates to more significant repairs and renovations. Remember, you don’t have to do everything at once. Start small, tackle one project at a time, and gradually shape your space into something you truly love.

Your home should be your favorite place in the world. If it’s not yet, it can be—with just a little time, intention, and care.

Looking for Home resources?

Looking to enhance your living space and create a sanctuary that supports your well-being? Explore our home partners who offer a wide range of resources to elevate your home environment.


homeHLL x Editor


9 Steps For A Low Maintenance Home

As we age, our priorities shift—especially when it comes to our living spaces. The sleek, high-maintenance features that once excited us may now feel burdensome. Instead, we begin to value simplicity, comfort, and ease of upkeep. Fortunately, creating a home that aligns with these evolving needs is entirely possible.


In this article, we’ll explore practical, stylish, and sustainable ways to transform your home into a more manageable and enjoyable space as you grow older. From smart flooring choices to tech upgrades and garden simplification, these tips will help you design a home that supports your lifestyle today—and in the years to come.

No. 1

Flooring: Simplify for Cleanliness and Comfort

One of the most labor-intensive elements of any home is the flooring. If your home is still carpeted—especially after years of family life—it may be showing signs of wear and tear. Carpets can trap dust, allergens, and stains, making them difficult to maintain.

Consider These Alternatives:

  • Mixing tile and wood floors: Durable, easy to clean, and timeless in style.

  • Vinyl plank flooring: A budget-friendly, low-maintenance option that mimics the look of wood.

  • Area rugs: Add warmth and comfort without the upkeep of wall-to-wall carpeting.

Opting for flooring that can be easily wiped or swept clean will drastically reduce your daily maintenance tasks.

No. 2

Artificial Turf: A Low-Maintenance Lawn Alternative

Maintaining a lush, green lawn can be time-consuming and physically demanding. If gardening is becoming more of a chore than a joy, artificial turf may be the solution.

Benefits of Artificial Turf:

  • No mowing or watering required

  • Always looks pristine

  • Durable and weather-resistant

To ensure a natural look and proper installation, consult a professional landscaper. They can help you design a yard that’s both beautiful and effortless to maintain.

No. 3

Smart Technology: Automate Your Home for Ease

Modern technology offers a wide range of tools to make home management easier and more efficient.

Smart Upgrades to Consider:

  • Robotic vacuum cleaners: Keep your floors tidy with minimal effort.

  • Heat induction hob: Safer and more energy-efficient than traditional stovetops.

  • Smart thermostats and lighting: Automate temperature and lighting control for comfort and energy savings.

These upgrades not only reduce your workload but also enhance safety and help lower utility costs—an important consideration as you plan for the future.


hellolovelyliving thrive market

Thrive Market

Healthy living made easy!

Shop Thrive Market for organic groceries, sustainable products, and everyday essentials—all delivered to your door.

Save money, live well.


No. 4

Bungalow Living: Eliminate the Need for Stairs

While stairs may not be a problem now, they can become a significant obstacle later in life. Transitioning to a bungalow-style home is a proactive step that can prevent mobility issues from becoming daily frustrations.

Advantages of Single-Level Living:

  • Improved accessibility

  • Reduced risk of falls

  • Easier navigation for mobility aids

If relocating isn’t an option, consider installing a stairlift or converting a ground-floor room into a bedroom.

No. 5

Downsize the Garden: More Enjoyment, Less Work

A sprawling garden may have once been your pride and joy, but it can become overwhelming to maintain. Fortunately, there are several ways to reduce the workload without sacrificing outdoor enjoyment.

Garden Simplification Ideas:

  • Reduce lawn space: Replace with patios, gravel, or raised beds.

  • Install low-maintenance plants: Opt for native species that require less care.

  • Create a wild garden zone: Embrace a natural look that supports local wildlife.

You can also extend your home into the garden with a sunroom or patio, adding functional indoor-outdoor living space while reducing yard maintenance.

No. 6

Avoid High-Maintenance Design Choices

While unique home features may seem appealing, they often come with hidden upkeep costs. As you age, simplicity becomes a virtue.

Features to Avoid:

  • Indoor or outdoor water features: Require constant cleaning and maintenance.

  • Complex lighting systems: Can be difficult to repair and replace.

  • Unusual materials: May need special care or frequent upkeep.

Instead, choose classic, timeless designs that are easy to maintain and won’t become burdensome over time.

No. 7

Professional Upgrades: Invest in Expert Help

You don’t have to take on every home improvement project yourself. Hiring professionals can ensure quality results and save you time and energy.

Why Hire a Pro:

  • Expertise ensures longevity and safety

  • Saves time and reduces stress

  • Increases property value

Whether it's installing new flooring, updating your kitchen, or redesigning your garden, professional help can make all the difference in achieving a home that works for you—not against you.

No. 8

Schedule Regular Home Maintenance Checks

Preventative maintenance is key to avoiding costly repairs down the line. Don’t wait until something breaks—stay ahead of issues with routine inspections.

Areas to Monitor:

  • Roof and gutters

  • Plumbing and electrical systems

  • Heating and cooling units

  • Foundation and insulation

Scheduling annual or bi-annual checks can help you catch small problems before they become major expenses.

No. 9

Go Green: Sustainable Choices for Long-Term Benefits

Eco-friendly upgrades not only benefit the environment but also reduce your home’s operating costs and increase its value.

Green Options to Explore:

  • Solar panels: Generate your own electricity and reduce utility bills.

  • Energy-efficient windows and insulation: Improve comfort and reduce heating/cooling costs.

  • Rainwater harvesting systems: Conserve water for gardening and outdoor use.

These sustainable choices are more affordable than ever and can be tailored to fit most budgets. They also offer long-term savings and may qualify for tax incentives or rebates.

Takeaways

As your lifestyle evolves, so should your home. By making thoughtful, strategic changes today, you can create a living space that not only reflects your current needs but also anticipates future ones.

In this article, we’ve covered practical steps to help you design a low-maintenance, age-friendly home—from smart flooring and garden solutions to tech upgrades and sustainable choices. These improvements will make your home easier to manage, safer to live in, and more enjoyable every day.

Remember, aging doesn’t mean giving up on style or comfort—it means embracing a smarter way to live. With the right adjustments, your home can continue to be a sanctuary of ease, beauty, and independence for years to come.

Looking for Home resources?

Looking to enhance your living space and create a sanctuary that supports your well-being? Explore our home partners who offer a wide range of resources to elevate your home environment.


homeHLL x Editor


How To Transform Your Backyard into The Serene Outdoor Oasis You Deserve

Your backyard holds more potential than you might realize. It’s not just a patch of grass or an afterthought behind your home—it’s a canvas for peace, connection, and restoration. It’s where slow mornings can stretch a little longer, where evenings soften after a long day, and where quiet moments finally get the space they deserve.


In this article, we’ll explore how to thoughtfully transform your backyard into a serene outdoor oasis. From defining your emotional vision to selecting lasting materials and working with local experts, this guide focuses on creating a space that doesn’t just look beautiful—it feels like relief the moment you step outside.

No. 1

Start With a Clear Vision of What Your Ideal Outdoor Space Feels Like

Before you pick up a shovel or scroll through endless inspiration boards, pause and consider how you want your backyard to feel—not just how it should look. Do you envision a space that’s calm and grounded? Lush and tropical? Clean and modern with room to breathe?

These emotional cues are more important than fleeting trends. They serve as your compass, guiding every design decision with purpose.

  • Observe how you already use the space: Do you seek shade in the afternoon? Do you long for a quiet corner to read or a place to gather with friends?

  • Design around emotion: When your choices are rooted in how you want to feel, everything from furniture to layout to plant selection begins to align naturally.

  • Visualize the experience: Sketch your ideas, collect textures, and imagine how light moves across the yard throughout the day. This step not only saves money in the long run but ensures your outdoor space feels authentic and intentional.

No. 2

Explore Local Experts for Custom Pool Remodeling & Renovation

A pool can become the centerpiece of your outdoor oasis—but only if it’s designed with care and context. This is where working with local professionals makes a difference.

Hiring specialists in custom pool remodeling & renovation in my area means your project is guided by people who understand your region’s climate, soil conditions, and lifestyle. Their insights help you make smarter decisions about:

  • Pool shapes and sizes that complement your yard’s layout

  • Finishes and materials that withstand local weather

  • Design features that enhance usability and aesthetic flow

Whether you’re updating an existing pool or reimagining the entire space around it, local experts help you avoid costly missteps and reveal creative possibilities you might not have considered.

Think beyond the swim—consider how your pool connects to seating areas, shaded zones, and garden paths. The goal is not just function, but flow.

No. 3

Practical Tips for Choosing Materials That Last and Look Beautiful

Outdoor materials must strike a balance between durability and design. They need to endure the elements like natural stone, textured concrete, and quality porcelain tiles, while still contributing to the overall serenity of the space.

Surfaces:

  • Natural stone: Cool underfoot and visually timeless

  • Textured concrete: Slip-resistant and versatile

  • Porcelain tiles: Durable and available in a range of elegant finishes

Wood Elements:

  • Choose treated or composite wood for decks and pergolas to prevent warping and fading

  • Use natural wood accents sparingly to add warmth without increasing maintenance

Furnishings:

  • Prioritize structural strength for outdoor furniture

  • Add softness with weather-resistant cushions, throws, and planters

Low-maintenance doesn’t mean lifeless. It means choosing finishes that age gracefully and still look inviting when life gets busy.


hellolovelyliving terrain

Terrain

Indoor and outdoor living, garden, and entertaining essentials that are well-designed, lasting, and beautiful.


No. 4

Add Layers That Invite You to Stay

A serene outdoor space is built in thoughtful layers. Each element should invite you to linger, to breathe, and to return.

Lighting:

  • Use soft, indirect lighting to create atmosphere

  • Add uplighting in trees, pathway lights, and subtle fixtures near seating areas

  • Avoid harsh overhead lights that disrupt the mood

Planting:

  • Mix heights and textures to create visual interest

  • Include open space to allow for stillness and movement

  • Choose plants that thrive in your climate and require minimal upkeep

Comfort:

  • Incorporate shade structures like pergolas, umbrellas, or trees

  • Provide multiple seating options—lounges, benches, hammocks—for different moods and moments

  • Consider outdoor rugs and side tables to make the space feel complete

In the end, a serene backyard isn’t about perfection. It’s about intention. When each choice supports how you want to feel, your outdoor space becomes a place you return to—not out of obligation, but out of desire.

Takeaways

Your backyard is more than a backdrop—it’s a sanctuary waiting to be shaped. Whether you’re starting from scratch or refining an existing space, the key to creating a true outdoor oasis lies in designing with emotion, not just aesthetics.

In this article, we’ve explored how to:

  • Define your emotional vision for the space

  • Work with local experts for custom pool remodeling and renovation

  • Choose materials that are both beautiful and enduring

  • Layer lighting, plants, and furnishings to invite relaxation

When you design with intention, your backyard becomes more than a weekend project—it becomes a daily retreat. A place where time slows down, where comfort meets beauty, and where you can finally exhale.

Let your outdoor space reflect not just how you want it to look, but how you want it to feel. That’s when it truly becomes an oasis.

Looking for Home resources?

Looking to enhance your living space and create a sanctuary that supports your well-being? Explore our home partners who offer a wide range of resources to elevate your home environment.


homeHLL x Editor


What To Look For When You’re Comparing Different Home Styles

When people talk about comparing home styles, the conversation often drifts toward surface-level preferences—rooflines, siding, porch size. While these elements are certainly part of a home’s character, they are not where the real differences lie. A home style is more than a visual statement; it is a framework that shapes how life unfolds within its walls, long after the novelty fades.


In this article, we’ll explore the deeper dimensions of home design—how space is used, how architecture sets emotional tone, how light and materials evolve over time, and how a home’s structure supports or resists change. These are the elements that truly matter when choosing a home style that aligns with your lifestyle, values, and long-term comfort.

Rather than relying on trendy talking points or predictable checklists, this guide invites you to look beneath the surface and consider how form, space, and intent influence the way you want to live.

No. 1

How Space Is Meant to Be Used

Every home style carries an implicit philosophy about movement and interaction. Some designs encourage openness and flow, while others emphasize separation and intentional transitions. This isn’t about square footage—it’s about how space communicates permission.

  • Open layouts foster overlap. Conversations spill across rooms, sound travels freely, and privacy becomes a conscious choice rather than a given.

  • Compartmentalized styles prioritize boundaries. They create mental pauses between activities and offer natural zones for focus and solitude.

When comparing home styles, observe how rooms relate to one another. Pay attention to:

  • Sightlines between spaces

  • Door placement and circulation paths

  • How walls guide or restrict movement

A floor plan may appear efficient on paper but feel awkward in daily life. Style influences these spatial relationships more than most people realize.

No. 2

The Emotional Tone of Architecture

Architecture sets the emotional tone before a single piece of furniture enters the space. Elements like ceiling height, window placement, and room proportions affect how a home feels—whether energized, grounded, expansive, or intimate.

  • Some styles lean into drama, using vertical emphasis and bold volumes.

  • Others feel settled and human-scaled, offering comfort through proportion and restraint.

Ask yourself: How does the structure make me feel when I imagine moving through it slowly—not entertaining guests, but simply living?

A home that feels impressive may also feel exhausting over time. One that seems understated might become increasingly comforting. This emotional resonance is difficult to quantify, but it is often the most enduring factor in long-term satisfaction.

No. 3

Light as a Design Philosophy

Natural light is not distributed equally across home styles. Some designs treat light as a central feature, while others use it more selectively.

  • Light-centric styles shape rooms around windows and orientation, maximizing daylight throughout the day.

  • Contrast-driven styles create interplay between bright and subdued areas, offering moments of visual rest.

Consider:

  • How light enters at different times of day

  • Whether the style favors symmetry (which can limit flexibility with sunlight)

  • How light supports energy, rest, and mood

Viewing light as a design philosophy reveals how a home style supports your rhythms without saying a word.


hellolovelyliving houzz

Houzz

Make your home project a reality. Find inspiration, products, and the pros to make it happen - all in one place.


No. 4

Storage Without Clutter

Storage is often overlooked in style discussions, yet it profoundly shapes daily life. Some architectural styles integrate storage seamlessly into the structure, while others treat it as an afterthought.

Look beyond closet counts. Ask:

  • Where would everyday items live?

  • How are shoes, coats, tools, and seasonal gear accommodated?

  • Does the style anticipate your needs, or does it rely on furniture to solve storage problems?

Styles that respect storage contribute to a sense of calm. Those that don’t can lead to visual noise and disorganization over time.

No. 5

How Materials Age Over Time

Every home style has a relationship with aging. Some are designed to develop character as materials wear. Others aim to maintain a pristine, uniform appearance.

  • Natural materials like wood and stone gain depth and patina.

  • Smooth, synthetic finishes may show wear more quickly and unevenly.

Think about:

  • How surfaces will change with daily use

  • Your tolerance for visible aging and imperfection

  • Whether the style embraces or resists the passage of time

This isn’t about maintenance anxiety—it’s about choosing a style that aligns with your values. A home that demands constant perfection can create stress. One that allows for aging can feel forgiving and lived-in.

No. 6

Flexibility for Change

Life evolves. A strong home style leaves room for that evolution without losing its identity.

  • Highly specific styles may feel rigid, making future alterations disruptive.

  • Flexible styles act as frameworks that adapt easily to new needs.

Ask:

  • Can the style accommodate future additions or layout changes?

  • How would it handle different uses for existing spaces?

  • Does it support growth, or does it resist it?

A flexible home style absorbs change gracefully, supporting your life as it unfolds.

No. 7

The Relationship Between Interior and Exterior

A home doesn’t end at the front door. Some styles blur the line between inside and outside, creating continuity. Others emphasize enclosure and shelter.

Consider:

  • How outdoor spaces connect to interior rooms

  • Whether the transition is gradual or abrupt

  • If the style invites you outward or keeps focus inward

This relationship affects how you experience the seasons and how often outdoor areas become part of daily living rather than occasional extras.

No. 8

Scale and Presence

Scale refers to how a home relates to the human body. Presence refers to how it occupies visual space. A home can be large but feel approachable—or modest but feel imposing.

Pay attention to:

  • Door and window proportions

  • Ceiling transitions

  • How the home feels when you stand inside it

Styles that respect human scale often feel more comfortable, even when expansive. Those that ignore it can feel cold or overwhelming. Once noticed, this subtle quality becomes impossible to ignore.

No. 9

Construction Logic Beneath the Style

Every home style is built on a construction philosophy. Some prioritize simplicity and repetition; others celebrate complexity and detail.

This affects:

  • Build timelines

  • Future modifications

  • Long-term maintenance

A style with straightforward structural logic is easier to adapt and sustain. One with intricate detailing may offer beauty but require more care and expertise over time.

No. 10

Personal Identity Without Performance

A home style works best when it feels natural—not performative. The most appealing designs support how you actually live, not how you want to appear.

Ask yourself:

  • Which styles feel comfortable to imagine on an ordinary day?

  • Which ones feel like they’re trying too hard to impress?

That’s why many people are drawn to exclusive barndominium plans. These designs offer honesty, flexibility, and a refreshing approach to space. They prioritize function, openness, and ease over image, making them a compelling alternative to more traditional or ornate styles.

Takeaways

Comparing home styles isn’t about finding the “best” one. It’s about discovering which design philosophy fits your life without friction.

In this article, we’ve looked beyond aesthetics to examine how home styles handle space, light, aging, flexibility, and emotion. These deeper considerations reveal the true character of a home—how it supports your habits, your energy, your growth.

The right style doesn’t demand attention. It earns appreciation slowly, through daily interactions that feel effortless and intuitive. And that’s usually the one worth choosing.

Looking for Home resources?

Looking to enhance your living space and create a sanctuary that supports your well-being? Explore our home partners who offer a wide range of resources to elevate your home environment.


homeHLL x Editor


How NYC’s Seasonal Weather Impacts Fine Art Storage And How To Prevent Damage

Owning fine art is a privilege that comes with a deep sense of responsibility. Beyond its aesthetic and cultural value, artwork is often fragile, sensitive to its environment, and susceptible to gradual deterioration if not properly cared for. In a city like New York, where seasonal weather changes are both dramatic and unpredictable, the need for proper fine art storage becomes not just important—but essential.


In this article, we’ll explore how each season in NYC uniquely affects fine art materials, and how collectors, designers, and homeowners can take proactive steps to protect their collections. From winter’s dry indoor air to summer’s oppressive humidity, we’ll break down the risks and offer expert strategies to ensure your artwork remains preserved, vibrant, and structurally sound all year long.

No. 1

Why Seasonal Weather Matters for Fine Art

Fine art materials—whether canvas, paper, wood, or metal—are inherently reactive to their environments. These materials expand, contract, absorb, and degrade depending on temperature, humidity, and air quality. In urban environments like NYC, these fluctuations are amplified by indoor heating, air conditioning, pollution, and even pest activity.

Key Environmental Risks:

  • Temperature fluctuations cause expansion and contraction

  • Humidity changes lead to warping, mold, or brittleness

  • Airborne pollutants accelerate chemical degradation

  • Pests target organic materials like paper and wood

Understanding how these elements interact with artwork is the first step toward long-term preservation.

No. 2

Winter Weather and Indoor Heating Risks

Cold Temperatures and Rapid Transitions

Winter in NYC brings sharp temperature drops. Moving artwork between frigid outdoor air and heated interiors can cause materials like canvas and wood to expand or contract too quickly, resulting in:

  • Cracking paint layers

  • Warped frames

  • Separation of mixed media layers

Paper-based art is particularly vulnerable, as cold air holds less moisture, leading to excessive dryness.

Dry Indoor Air from Heating Systems

Forced-air heating systems significantly reduce indoor humidity. Dry conditions can:

  • Shrink canvas and paper

  • Weaken adhesives

  • Loosen frames

  • Make surfaces brittle and prone to cracking

Winter Storage Tips:

  • Maintain stable indoor temperatures

  • Use humidifiers or humidity monitoring devices

  • Keep artwork away from heating vents and radiators

  • Store in climate-controlled rooms or professional storage facilities

No. 3

Spring Moisture and Humidity Challenges

Rising Humidity Levels

As NYC transitions into spring, rising humidity introduces a new set of risks. Moisture in the air can:

  • Cause paper to ripple

  • Loosen canvas tension

  • Swell wooden frames

  • Encourage mold growth

Increased Risk of Condensation

Warm indoor air meeting cool surfaces can create condensation. This moisture can settle on or inside artwork, especially if stored in poorly ventilated areas.

Spring Storage Tips:

  • Ensure proper ventilation in storage spaces

  • Use moisture-absorbing materials like silica gel

  • Inspect artwork regularly for early signs of mold

  • Avoid placing art directly against exterior walls


Artifact Uprising

Turn your memories into timeless treasures with Artifact Uprising. Create custom personalized photo books and albums that tell your story, your way.


No. 4

Summer Heat and Environmental Stress

High Temperatures and Prolonged Exposure

NYC summers are notoriously hot and humid. Prolonged exposure to high temperatures can:

  • Soften adhesives

  • Warp frames

  • Fade pigments

  • Accelerate chemical reactions in mixed media

Humidity and Air Quality Concerns

Summer air carries both moisture and pollutants. These particles settle on artwork surfaces, leading to:

  • Discoloration

  • Surface degradation

  • Increased aging of materials

This is where professional fine art storage nyc becomes invaluable. These facilities offer climate-controlled environments that remain stable regardless of outdoor conditions.

Summer Storage Tips:

  • Keep artwork out of direct sunlight

  • Use temperature-controlled storage consistently

  • Avoid handling art during peak heat hours

  • Monitor air quality and cleanliness in storage environments

No. 5

Fall Transition Period and Material Stress

Temperature Swings and Environmental Instability

Fall in NYC brings fluctuating temperatures—warm days and cool nights. These shifts create stress on layered materials like:

  • Oil paintings

  • Mixed media pieces

  • Sculptures with composite materials

Repeated expansion and contraction can lead to:

  • Cracking

  • Warping

  • Delamination

Pest Activity Increases

As temperatures drop, pests seek shelter indoors. Paper, textiles, and wood become prime targets for insects such as:

  • Silverfish

  • Termites

  • Carpet beetles

Fall Storage Tips:

  • Seal storage areas against pests

  • Inspect packaging and storage materials regularly

  • Avoid using cardboard or untreated wood

  • Maintain consistent indoor conditions during seasonal transitions

No. 6

Materials Most Affected by Seasonal Changes

Canvas and Oil Paintings

  • Highly sensitive to humidity and temperature shifts

  • Repeated stress leads to surface cracking and structural instability

Works on Paper

  • Absorb moisture quickly

  • Become brittle in dry conditions

  • Vulnerable to mold, foxing, and ink bleeding

Sculptures and Mixed Media

  • Wood swells or cracks

  • Metal corrodes or tarnishes

  • Composite materials may react unevenly, causing fractures

No. 7

Smart Storage Practices That Protect Fine Art

Climate Stability Over Perfection

  • Aim for consistent temperature and humidity, not perfection

  • Avoid frequent changes in the environment

Proper Packaging and Spacing

  • Use archival-quality materials for wrapping and storage

  • Allow for airflow around each piece

  • Never stack artwork directly against each other

Regular Monitoring and Maintenance

  • Conduct routine inspections

  • Use environmental monitoring tools

  • Limit handling to reduce accidental damage

No. 8

When Home Storage Isn’t Enough

While short-term home storage may suffice for some pieces, long-term preservation often requires specialized environments. Urban apartments in NYC rarely offer the climate stability needed to protect valuable or delicate artwork.

Why Choose Professional Fine Art Storage in NYC:

  • Controlled temperature and humidity

  • Air filtration systems to reduce pollutants

  • Security and fire protection

  • Expert handling and installation services

For high-value or irreplaceable pieces, investing in professional storage is not just wise—it’s essential.

Takeaways

Seasonal weather in NYC is inevitable—but damage to your fine art collection doesn’t have to be. By understanding how each season affects various materials and implementing smart storage practices, you can preserve your artwork’s beauty, value, and integrity for generations to come.

In this article, we’ve covered:

  • How each season uniquely impacts fine art

  • The materials most vulnerable to environmental changes

  • Practical, preventative storage strategies

  • The value of professional fine art storage solutions

Whether you're a seasoned collector or a new art enthusiast, the key to preservation lies in consistency, awareness, and proactive care. With the right environment and thoughtful planning, your art can weather every season—remaining as timeless and inspiring as the day it was created.

Looking for Home resources?

Looking to enhance your living space and create a sanctuary that supports your well-being? Explore our home partners who offer a wide range of resources to elevate your home environment.


homeHLL x Editor


The New Rustic: Modern Farmhouse Decor Trends For 2026

The modern farmhouse aesthetic has long been celebrated for its perfect harmony of rustic charm and contemporary elegance. With its roots in simplicity, warmth, and functionality, this design style has evolved from a passing trend into a timeless staple in interior design. As we look ahead, the modern farmhouse of 2026 is undergoing a stylish transformation—one that embraces deeper color palettes, sustainable choices, and a more curated, personal approach to decorating.


In this article, we’ll explore the top modern farmhouse decor trends for 2026 that are redefining the “new rustic.” Whether you’re planning a full home makeover or simply want to refresh a few key spaces, these insights will help you stay ahead of the curve while preserving the cozy, lived-in feel that makes this style so beloved.

No. 1

Embrace Moody Hues and Earthy Tones

While crisp white shiplap and soft neutrals have long been synonymous with farmhouse interiors, the 2026 version is leaning into richer, moodier tones that add depth and sophistication.

How to Bring It Home:

  • Paint a feature wall, kitchen island, or built-in bookshelf in shades like deep forest green, navy blue, or burnt terracotta.

  • Introduce these hues through textiles—think velvet throw pillows, chunky knit blankets, or a patterned area rug.

  • Layer these colors with natural textures like wood, leather, and linen for a grounded, organic feel.

These deeper tones maintain the farmhouse connection to nature while adding a dramatic, modern edge.

No. 2

Mix Materials with Confidence

Gone are the days of sticking strictly to wood and metal. The modern farmhouse of 2026 is all about layering textures and finishes to create visual interest and tactile richness.

How to Mix It Up:

  • Pair reclaimed wood beams with sleek marble countertops in the kitchen.

  • Combine a rustic farm table with upholstered dining chairs and polished concrete flooring.

  • In the living room, contrast a leather sofa with linen curtains, jute rugs, and ceramic accessories.

This interplay between raw and refined materials adds character and dimension to every room.

No. 3

Prioritize Sustainable and Authentic Decor

Sustainability is no longer a buzzword—it’s a design imperative. The modern farmhouse is uniquely positioned to embrace this shift, with its emphasis on authenticity, craftsmanship, and timeless appeal.

How to Decorate Sustainably:

  • Shop local antique stores and flea markets for one-of-a-kind treasures like vintage dough bowls, aged wooden crates, or pre-loved furniture.

  • Choose decor made from natural, renewable materials such as bamboo, cork, rattan, and wool.

  • Look for handcrafted pieces that tell a story and bring soul into your space.

Decor with a past adds meaning and longevity to your home, aligning perfectly with farmhouse values.


hellolovelyliving Lulu & Georgia

Lulu & Georgia

At Lulu and Georgia, you'll find exclusive designer collaborations, uniquely curated collections, and one-of-a-kind vintage pieces to bring your home to life.


No. 4

Make a Statement with Lighting

Lighting in 2026 is no longer an afterthought—it’s a focal point. Think of it as the jewelry of your home, adding sparkle, structure, and style.

How to Light It Right:

  • Install a bold chandelier over the dining table or a series of oversized metal pendants above the kitchen island.

  • Opt for fixtures that blend materials, such as black iron with brass accents or wood beads with woven shades.

  • Use lighting to create zones within open-plan spaces, adding both function and flair.

A single lighting upgrade can dramatically transform the mood and aesthetic of a room.

No. 5

Blend Vintage Charm with Contemporary Comfort

At the heart of the modern farmhouse style is the ability to feel timeless yet current. The key to achieving this balance lies in the artful mix of old and new.

How to Curate the Look:

  • Pair a sleek modern sofa with a distressed antique cabinet.

  • Hang contemporary abstract art above a weathered wooden console.

  • Combine modern lighting with vintage mirrors, or place a mid-century chair beside a farmhouse-style fireplace.

This curated contrast keeps your home from feeling overly themed and instead creates a space that feels collected and lived-in.

Takeaways

As we move into 2026, the modern farmhouse style is embracing a richer, more layered identity. It’s no longer just about white walls and barn doors—it’s about personal expression, sustainability, and design-forward thinking. By incorporating moody tones, mixing materials, choosing authentic decor, and making bold lighting choices, you can evolve your home into a space that feels both grounded in tradition and refreshingly modern.

In this article, we’ve highlighted the key trends that define the next chapter of modern farmhouse decor. Whether you’re renovating a single room or reimagining your entire home, these ideas will help you stay ahead of the curve while staying true to the cozy, welcoming spirit that defines the farmhouse ethos.

So go ahead—embrace the new rustic. Let your home tell a story that’s warm, stylish, and uniquely yours.

Looking for Home resources?

Looking to enhance your living space and create a sanctuary that supports your well-being? Explore our home partners who offer a wide range of resources to elevate your home environment.


homeHLL x Editor


How To Turn Your Bathroom Into A Spa

After a long, exhausting day, the thought of visiting a tranquil spa is nothing short of a dream. But what if you could bring that serene, indulgent experience into your own home? With just a few thoughtful touches, your bathroom can become a rejuvenating haven that rivals even the most exclusive wellness retreats.


In this article, we’ll guide you through practical and inspiring ways to create a spa-like atmosphere in your bathroom. From visual elements and soothing scents to calming sounds and luxurious textures, you’ll discover how to engage all your senses and turn your daily routine into a ritual of relaxation.

No. 1

Visual Relaxation: Set the Mood with Minimalism and Nature-Inspired Design

Spas like Spencer’s Spa are known for their minimalist aesthetic, and for good reason. A clutter-free, calming environment helps the mind unwind and invites a sense of peace. To replicate this ambiance at home, start with your bathroom’s color palette.

Tips for Creating a Visually Calming Space:

  • Use earthy tones such as soft browns, muted greens, and gentle greys to bring a natural, grounding feel to the room.

  • Install dimmable lighting to adjust brightness based on your mood or time of day.

  • Declutter surfaces by storing personal items neatly in cabinets or baskets to reduce visual noise.

  • Incorporate natural elements like bamboo accessories, wooden trays, or a small indoor plant for an organic touch.

Remember: Less is more. The goal is to create a space that feels open, breathable, and serene.

No. 2

A Spa Touch: Add Comfort and Functionality

While your bathroom may not offer full-scale hydrotherapy, it can still provide a deeply soothing experience with a few strategic upgrades.

Elevate Your Bathing Experience:

  • Install a massage shower head to enjoy a spa-like water massage every day—an affordable yet transformative addition.

  • Consider a Japanese soaking tub if you have limited space. These deep, compact tubs are designed for full-body immersion and relaxation.

  • Invest in a towel warmer to wrap yourself in cozy warmth post-bath or shower, especially during colder seasons.

  • Upgrade your towels to plush, high-quality options like luxury Versace towels for that extra indulgent touch.

These enhancements not only add comfort but also elevate your everyday routine into a mindful self-care ritual.

No. 3

A Scent of Luxury: Engage Your Sense of Smell with Aromatherapy

Aromatherapy is a cornerstone of the spa experience. Scents have the power to influence mood, reduce stress, and promote overall well-being. Incorporating fragrance into your bathroom is both simple and impactful.

Ways to Introduce Calming Aromas:

  • Use essential oils such as lavender, eucalyptus, or jasmine in a diffuser.

  • Light scented candles during your bath to create a warm, inviting glow and a relaxing scent profile.

  • Apply scented lotions or bath oils to nourish your skin while enhancing the sensory experience.

Choose fragrances that resonate with you personally—your bathroom should feel like your own sanctuary.


hellolovelyliving rejuvenation

Rejuvenation

Rejuvenation believes in the power of thoughtful design - explore their extensive range of bath fixtures, including stylish accessories and hardware that add character and charm to your space.


No. 4

Soothing Sounds: Create an Auditory Escape

Sound plays a powerful role in relaxation. Whether it’s gentle music, nature sounds, or calming instrumental tracks, the right audio can help your mind drift away from daily stress.

How to Add Sound to Your Spa-Like Bathroom:

  • Use a waterproof Bluetooth speaker to stream your favorite playlists or ambient soundscapes.

  • Explore spa music apps or platforms like Spotify and YouTube that offer curated relaxation playlists.

  • Try nature sounds like rainfall, ocean waves, or forest ambiance to bring the outdoors in.

Soft, continuous sound can help mask background noise and deepen your sense of immersion.

No. 5

Taste the Luxury: Indulge in a Spa-Worthy Treat

While taste may not be the first sense you think of when designing a spa bathroom, it can still play a role in enhancing your experience. A small indulgence can elevate your relaxation to a whole new level.

Ideas for Treating Your Taste Buds:

  • Sip on herbal tea like chamomile, peppermint, or green tea for a calming effect.

  • Enjoy a glass of champagne or sparkling water while soaking in the tub.

  • Keep a small dish of dark chocolate or fruit nearby for a touch of indulgence.

These little luxuries can make your spa night feel extra special and complete the sensory experience.

Takeaways

Creating a spa-like bathroom doesn’t require a massive renovation or a luxury budget. With a few intentional changes—like calming colors, soothing scents, upgraded fixtures, and thoughtful details—you can transform your space into a sanctuary of peace and relaxation.

Whether you’re unwinding after a long day or carving out time for self-care, your bathroom can become a place where stress melts away and serenity takes over. So light a candle, turn on some soft music, and let your home spa experience begin.

Because you deserve more than just a bathroom—you deserve a retreat.

Looking for Home resources?

Looking to enhance your living space and create a sanctuary that supports your well-being? Explore our home partners who offer a wide range of resources to elevate your home environment.


homeHLL x Editor


5 Best Timber Frame Garage Kits For Crafting A Durable, Stylish Workspace

Timber-frame garage kits are transforming backyards across the country, offering homeowners a fast, sustainable, and visually striking alternative to steel or block construction. Whether you're looking to add a workshop, a hobby studio, or a garage apartment that blends seamlessly with your home’s siding, these kits deliver both beauty and performance.


Unlike conventional builds that require months of scheduling subcontractors, timber-frame kits arrive pre-cut, labeled, and ready to assemble—often in a matter of days. And beyond convenience, they offer a compelling environmental benefit: heavy timbers sequester carbon, reducing embodied emissions by up to 31% compared to concrete or steel, according to a 2024 Reuters sustainability report.

In this article, we’ll walk you through the top five timber-frame garage kits available in the U.S., comparing them across five weighted criteria: structural durability, design flexibility, ease of assembly, value for money, and company support. Whether you're a seasoned builder or a first-time DIYer, this guide will help you choose a kit that fits your needs, budget, and skill level—with confidence.

How We Ranked the Top Timber-Frame Garage Kits

To ensure a fair and practical comparison, we evaluated each kit using five key factors that matter most to real buyers. Each factor was weighted based on its real-world importance:

  • Structural Durability (25%): Wood species, lumber grade, and engineered load ratings.

  • Design Versatility (20%): Ability to customize bays, add lofts, or modify plans.

  • Ease of Assembly (20%): Pre-cut parts, manuals, and tech support.

  • Value for Money (20%): Cost per square foot versus what’s included.

  • Company Reputation & Support (15%): Reviews, years in business, and customer service.

We multiplied each raw score by its weight to rank the kits, tagging each with a “best for” label so you can quickly find the one that fits your priorities.


No. 1

Hamill Creek Timber Homes – Best for Custom, High-End Builds

Founded in 1989 in Meadow Creek, British Columbia, Hamill Creek Timber Homes specializes in bespoke timber-frame structures crafted from Douglas-fir, Western red cedar, or spruce. Every garage begins as a custom design, with traditional mortise-and-tenon joinery and in-house engineering.

What You Can Order

  • Frame-Only Kit: Pre-cut timbers, pegs, and hardware with on-site raising guidance.

  • Lock-Up Shell: Frame plus wall and roof panels, doors, and windows.

  • Turnkey Package: Weather-tight shell ready for interior finishes.

Typical Investment

Expect $60–$90 per square foot for the frame alone. That range, as outlined in Hamill Creek’s timber frame home design and build process, already bundles structural engineering, 3-D and shop drawings, all fasteners and hardware, and sustainably harvested Douglas-fir, spruce, or Western red cedar that arrives pre-cut and sealed with a UV-protective finish.

Adding enclosure and finishes can take a luxury garage past $100 per square foot. Hence, most buyers start by confirming what is already bundled in the kit and then layer on siding, doors, and insulation to match their target budget. Because designs are bespoke, final quotes still vary with span, wood species, and window package.

Why It Tops the Premium Category

  • Fully custom designs with no stock-plan limitations.

  • Select timbers are test-fit in the shop for seamless on-site assembly.

  • Heritage craftsmanship, built to last for generations.

Choose Hamill Creek if you want a garage that feels like a piece of architecture, not an afterthought—and you're ready to collaborate with expert timber framers.

No. 2

DC Structures – Best Overall, Ready-to-Assemble Package

Based in Oregon since 1985, DC Structures offers pre-engineered garage kits that arrive as a complete, labeled bundle—ideal for DIYers who want barn-style charm with predictable assembly.


hellolovelyliving timber frame garage kit

A DC Structures pre-engineered garage kit delivers barn-inspired curb appeal with a predictable, ready-to-assemble package.


Why It Leads the Pack

  • Premium Lumber: Select-Structural Douglas-fir, free of heart center.

  • Transparent Pricing: The Sellwood 24 × 24 kit starts at $24,759.

  • Code-Ready Plans: Engineered for your local snow, wind, and seismic zone.

  • DIY-Friendly: Pre-cut, pre-drilled parts with a detailed manual.

Expect to pay more as you scale: three- and four-bay versions, or the clear-span Voyager workshop, climb well past six figures, yet the trade-off is a kit that combines craft-grade timber, predictable timelines, and near-zero parts hunting.

Choose DC Structures if you want barn-inspired aesthetics, an all-inclusive materials list, and the satisfaction of raising the frame yourself without drawing a single blueprint.

Assembly Snapshot

A three-person crew can dry-in a small model in 5–7 days. Larger kits may require a telehandler for trusses.

No. 3

Timberlyne – Best Barn-Style Character

Formerly Sand Creek Post & Beam, Timberlyne builds nostalgic post-and-beam kits with steep gables, overhangs, and carriage doors that evoke classic Americana.

Signature Models

  • Poppy 30 × 24: Two-car garage starting around $29,900.

  • Lily 32 × 48: Lofted barn starting at $55,203.

What Sets It Apart

  • Authentic Barn Bones: 8×8 Eastern white-pine posts with steel plate joinery.

  • Design Playground: Add RV bays, lean-tos, or swap siding.

  • Community Raise: Heavy timbers turn assembly into a barn-raising event.

Cost snapshot

Expect mid-market pricing: about $30,000 for a basic two-bay shell and $70,000 or more for lofted carriage-house versions, before slab, doors, or finishes. Turnkey installation typically runs about $125 dollars per square foot or higher, according to Timberlyne’s national average estimate (pricing guide).

Choose Timberlyne if curb appeal matters as much as covered parking, and you are ready for the hands-on satisfaction of lifting full-dimension timbers into place.


hellolovelyliving rejuvenation

Rejuvenation

Rejuvenation believes in the power of thoughtful design - explore their extensive range of home decor, including stylish accessories and hardware that add character and charm to your home. Get free design services when you book an appointment.


No. 4

Jamaica Cottage Shop – Best Budget DIY Pick

Vermont-based Jamaica Cottage Shop offers rough-sawn post-and-beam kits that are beginner-friendly and budget-conscious.

Entry Model & Pricing

  • 14 × 20 Shell Pre-Cut Kit: $11,044

  • Three-Season Upgrade: $12,577

  • Four-Season Kit: $26,112

What You Get

  • Hemlock posts, pine siding, and pre-cut, labeled parts.

  • Galvanized hardware and pressure-treated sill plate.

  • No crane required—just a scaffold and a few friends.

Build experience

Most owners report weather-tightening the shell over a long weekend with three people and a rented scaffold; no crane required. The rough lumber creates a rustic New England look, but expect visible knots and checks as the wood seasons.

Limitations to know

A fourteen-foot width is tight for full-size trucks, and upgrades such as the overhead door, windows, and insulation add cost quickly. Even so, JCS remains the most affordable path to a true post-and-beam garage, ideal if you value sweat equity over polished joinery.

Choose Jamaica Cottage Shop when your top priorities are price, simplicity, and the satisfaction of saying you built it yourself.

No. 5

Brooks Post & Beam – Best Traditional Craftsmanship

Brooks Post & Beam in New Hampshire has been handcrafting mortise-and-tenon frames from Eastern white pine since 1979.

Flagship Kit

  • Jefferson 24 × 30: $54,200 for frame + decking

What Sets It Apart

  • Heirloom Joinery: Oak-pegged joints, no steel plates.

  • Shop-Cut Precision: Test-fit bents ensure smooth on-site assembly.

  • Flexible Enclosure: Choose from SIPs, tongue-and-groove, or custom siding.

Cost snapshot

Expect 35–45 dollars per square foot for a frame-only kit like the Attitash (1,200 sq ft, 42,500 dollars total) and 80 dollars or more per square foot for weather-tight packages with structural insulated panels (Brooks cost overview).

Choose Brooks Post & Beam when you want a carriage-barn garage that looks museum-ready on day one and still feels solid after another hundred New England winters.


Quick-Glance Comparison Table

HLL x Timber Frame Kits - Quick-Glance Comparison Table

*Material-only pricing. †1 = pro crew essential, 5 = beginner-friendly. ‡Based on species, joinery, and engineering.

This snapshot lets you line up costs against build difficulty. If price and simplicity rank highest, Jamaica Cottage Shop leads. For heirloom quality, Hamill Creek or Brooks merit the splurge, while DC Structures balances craft, completeness, and budget.


Assess Your Needs and Skills

Before choosing a kit, ask yourself:

  • What will the garage hold? A compact SUV needs at least 14 × 22 feet. A two-car workshop with storage may need 24 × 36 feet or more.

  • What’s your tool comfort level? Even beginner kits involve heavy posts and power tools.

  • Do you have help? Most kits require at least three people for safe assembly.

Pro Tip: Visualize your layout with car widths, door swings, and work zones before ordering.

 
hellolovelyliving planning your timber frame garage layout

Visualizing real car widths, door swings, and work zones makes it easier to choose the right timber-frame garage size.

An honest appraisal of space needs and skill level prevents mid-build surprises and keeps the project fun, exactly what a new workspace should be.


Budget the Whole Build, Not Just the Kit

Timber-frame kits represent only half the bill. Map out each line item now so surprises do not ambush you on delivery day.

hellolovelyliving timber-frame garage breakdown

Kit prices are only part of the story—foundation, labor, freight, permits, and finishes all belong in your timber-frame garage budget.

 
hellolovelyilving Budget the Whole Build, Not Just the Kit

*Figures reflect national 2025 averages; local rates will vary.

Pro tip: add ten percent to whatever total you calculate. Lumber price swings, weather delays, and “while-we-re-at-it” upgrades rarely drop to zero, and that buffer turns an emergency into an easy yes.

Keep this worksheet handy, plug in quotes as they arrive, and you will know the real budget long before the first beam comes off the truck.


Know What’s in the Crate—and What’s Not

Before signing, confirm:

  • Frame, fasteners, and hardware

  • Wall and roof sheathing or SIPs

  • Siding, roofing, trim

  • Doors and windows (or rough openings)

  • Stamped engineering drawings

Anything missing lands in your shopping cart. For context, roofing a 24 × 24 foot garage with corrugated metal runs $4,000-$6,000 nationwide (HomeGuide metal roof cost guide), and a single carriage-style overhead door averages about $2,600-$6,500 installed (Angi garage door cost report). Those two items alone can erase the savings of a frame-only bargain.

If energy efficiency matters, ask whether the supplier offers factory-cut structural insulated panels; ordering them with the kit typically costs 15-25% less than retrofitting later, according to 2025 pricing from panel fabricators.

Finally, verify the lumber grade on your invoice. “Select-Structural Douglas-fir” is a world apart from utility-grade pine, and a clear spec protects you if the shipment arrives looking more like firewood than framing.


Permits and Codes: Nail Them Down Early

hellolovelyliving Permits and Codes Nail Them Down Early

*National 2025 averages; confirm locally.


Pro tip: Most top-tier suppliers such as Hamill Creek, DC Structures, and Timberlyne will adjust their engineering for your snow, wind, and seismic zone. Send them the zoning numbers from Step 1, so plans move through review without friction.

Handle paperwork first, and raising day becomes a celebration rather than a stop-work order.


Site Prep Tips for a Smooth Assembly

  1. Grade and drain: Your building pad should sit 2-4” higher than the surrounding ground and slope 1/4” per foot (about 2%) away from the slab to shed water (Concrete Network slope guide).

  2. Pour early: A 4-inch residential slab reaches about 70% strength in seven days; schedule kit delivery for day eight or later so anchors do not pull out of green concrete (Concrete Network curing timeline).

  3. Embed bolts accurately: Follow the kit’s foundation plan, because shifted anchor bolts remain the main cause of day-one delays reported by timber-frame crews.

  4. Stage materials: Reserve a flat, 40’ area for the flatbed and another 400 to 600 sq. ft. for sorting bundles by wall section. Lay plywood, gravel, or both if the site turns muddy.

  5. Book lift equipment: A 6,000 lb telehandler rents for $200 to $830 per day nationwide (BigRentz forklift rental guide); reserve an extra day in case the weather stalls the raise.

  6. Protect the timbers: Stack bundles on dunnage and cover with breathable tarps. Direct sun can warp green pine, and standing water adds hundreds of pounds to each post.

A well-prepared pad lets the raising crew spend energy pegging joints, not hunting for missing bolts or dry ground.

Assemble Safely and Efficiently

  1. Stage before you lift: Lay out beams in order of use, and pre-install knee braces while parts are waist-high. This reduces ladder time and keeps hands away from swinging loads.

  • Size the crew: Plan on 3-4 people for each bent: one signal caller, one plumb checker, and two riggers. A 6x8x10’ Douglas-fir post weighs about 180lbs; never attempt to lift it solo.

  • Use the right gear: A telehandler or boom truck keeps beams at chest height. According to the Occupational Safety and Health Administration forklift safety overview, forklifts reduce lifting injuries by about 70% compared with manual hoists (OSHA powered industrial trucks guide). Tie-offs are required when anyone works 6’ or more above the deck, and hard hats stay on whenever the hook is in the air.

  • Square as you go: Check diagonals on the first bent, and lock with temporary braces before moving to the next. Small errors multiply once rafters arrive.

  • Pace the work: Accuracy beats speed. Pause after every two lifts to verify plumb and bolt torque. A steady rhythm keeps morale high and prevents rework.


Maintenance Tips to Protect Your Investment

hellolovelyliving Maintenance Tips to Protect Your Investment

Plan on about one gallon of stain per two-hundred square feet of rough-sawn siding; a two-bay garage typically needs four or five gallons.


FAQ

How much does a timber-frame garage cost, all in?

National averages place a prefab single-bay timber garage between $20,000–$35,000 for a single-bay and $45,000–$80,000 for a two-bay garage, including slab, freight, and finishes (Fixr, HomeAdvisor).

Do I need a building permit?

Yes. Most counties require permits for structures over 200 sq ft. Fees range from $150–$500, plus extras for electrical or plumbing.

How long will the assembly take?

  • DIY 14×20 kit: 2–3 days

  • Pre-engineered 2-bay: 5–7 days

  • Custom heavy timber: 2–3 weeks

Can I insulate and heat later?

Yes. Use spray foam, batts, or SIPs. Plan conduit in the slab now for future upgrades.

What upkeep does the wood require?

Rinse annually, re-stain every 3–5 years, clear gutters twice a year, and inspect joints after the first heating season.

Takeaways

Choosing a timber-frame garage isn’t just a design decision—it’s a smart, sustainable investment. According to a 2024 Reuters climate report, replacing steel or concrete with timber can cut embodied emissions by 14–31%. Every cubic meter of kiln-dried wood stores nearly a metric ton of CO₂, and regional sourcing further reduces your carbon footprint.

Timber kits also offer long-term adaptability. With easy insulation, wiring, and solar upgrades, your garage evolves with your needs—without demolition waste.

In short, a timber-frame garage is more than a structure. It’s a handcrafted, carbon-smart space you’ll be proud to raise—and even prouder to use.

For more timber-frame insights, pricing tools, and DIY guides, explore our full library of resources and start planning your dream garage today.


Looking for Home resources?

Looking to enhance your living space and create a sanctuary that supports your well-being? Explore our home partners who offer a wide range of resources to elevate your home environment.


homeHLL x Editor