Posts in home
The Soul Of The Home: Creating A Sanctuary Tailored To Your Unique Needs

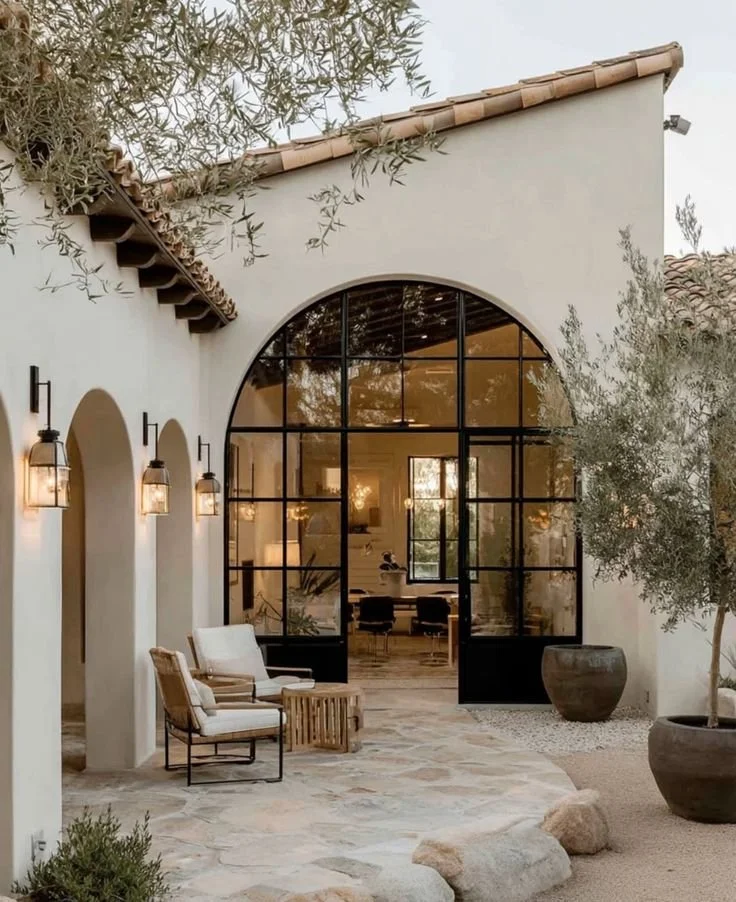
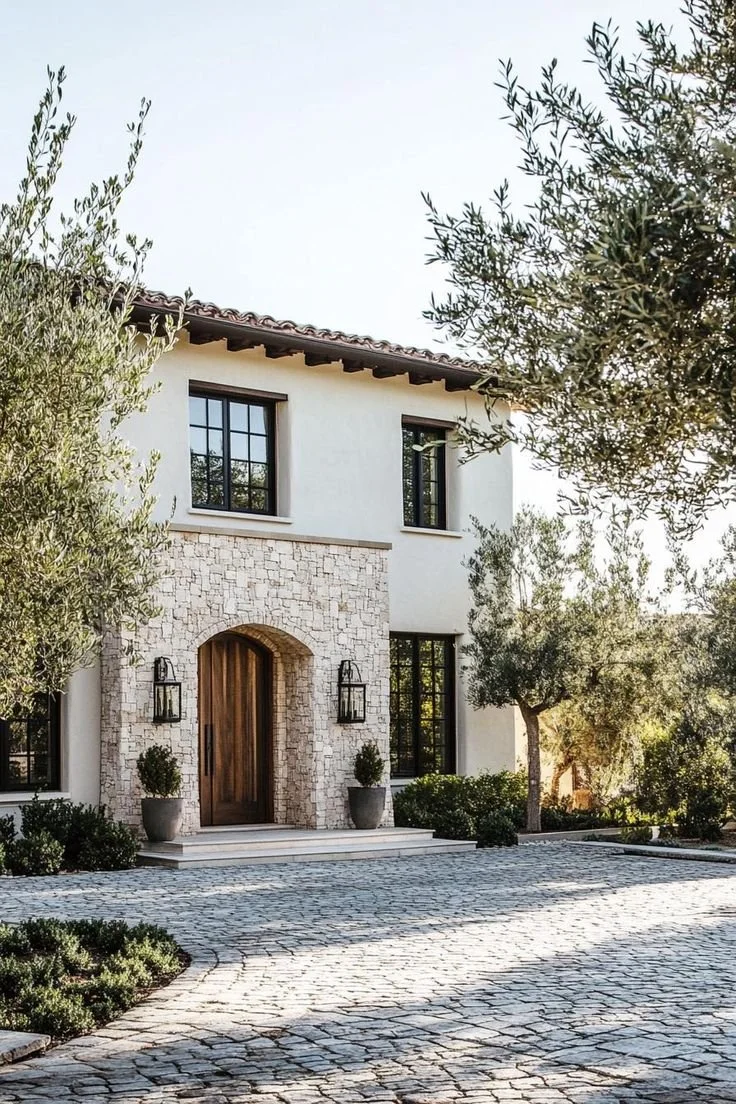
There’s something magical about walking into a home that just feels right. You know the feeling—when everything flows naturally, when each room serves its purpose without any fuss, and when the whole place somehow reflects who you really are.


But here’s the thing: creating that kind of home doesn’t happen by accident. It’s not about following the latest trends or copying what looks good in magazines. It’s about understanding what you actually need and building your living environment around those needs.

In this article, we’ll explore what makes a home feel deeply personal, how to design around your real routines (not aspirational ones), why function and beauty should work together, and when professional guidance can help you bring it all to life.

No. 1

What Makes a Home Feel Like Yours?

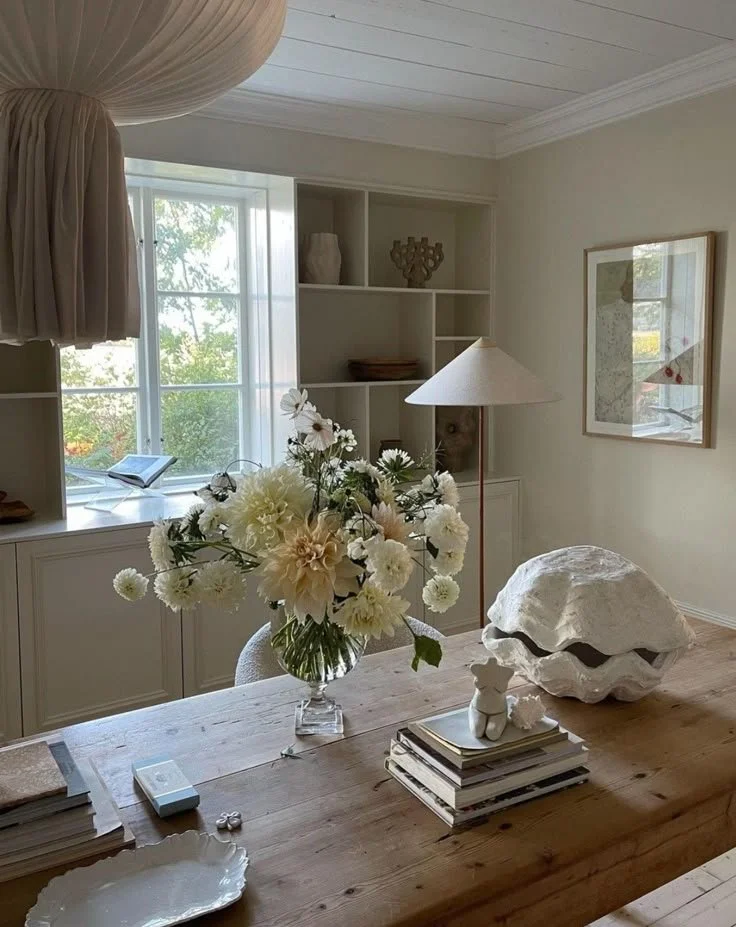
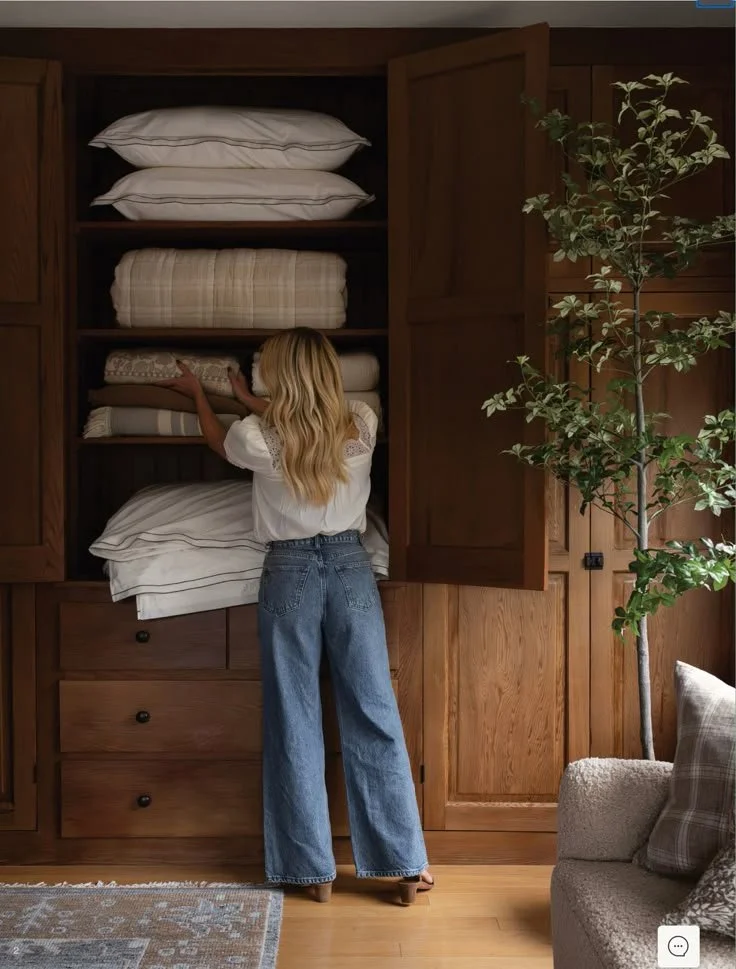
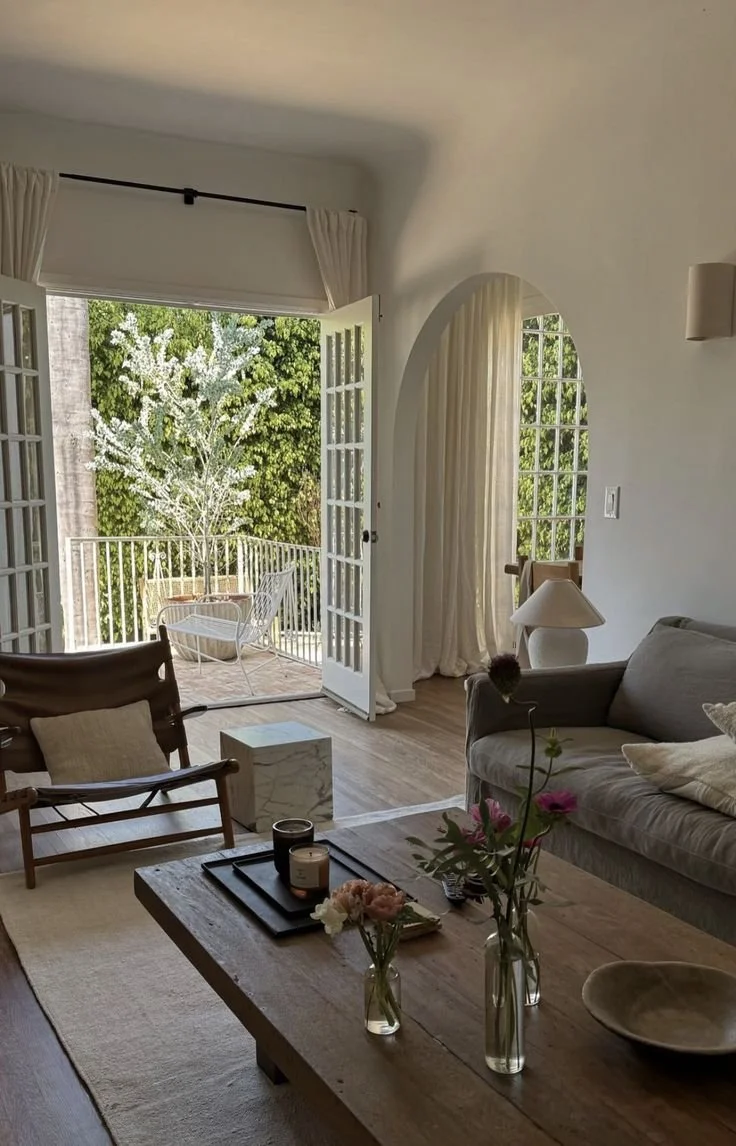
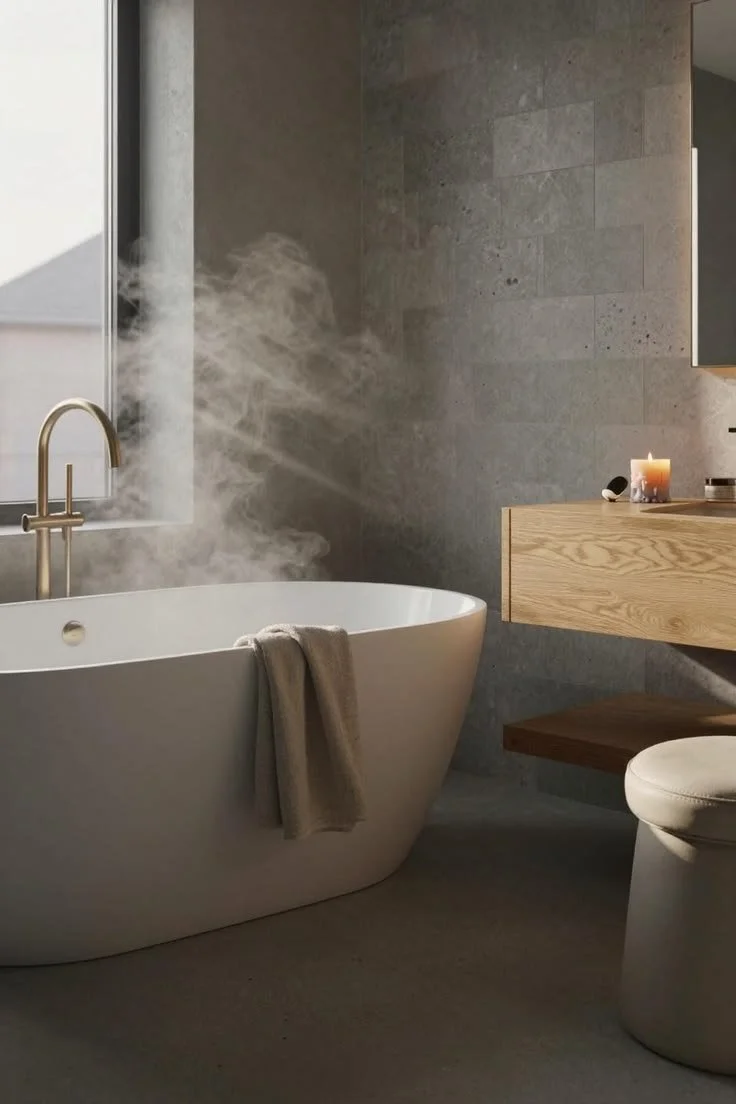
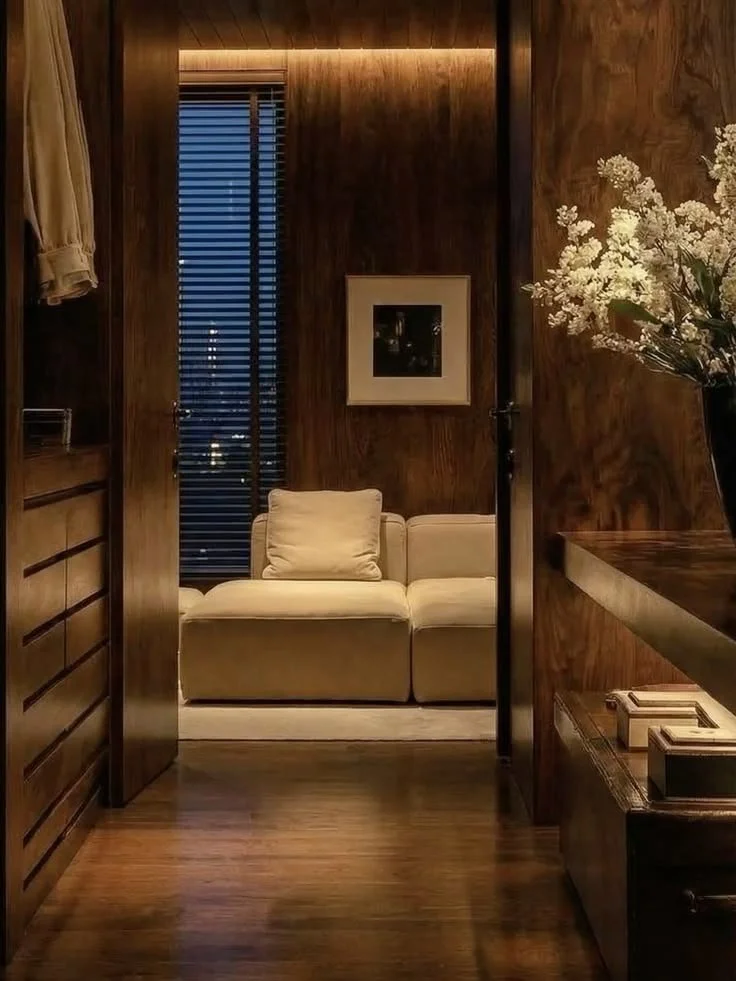
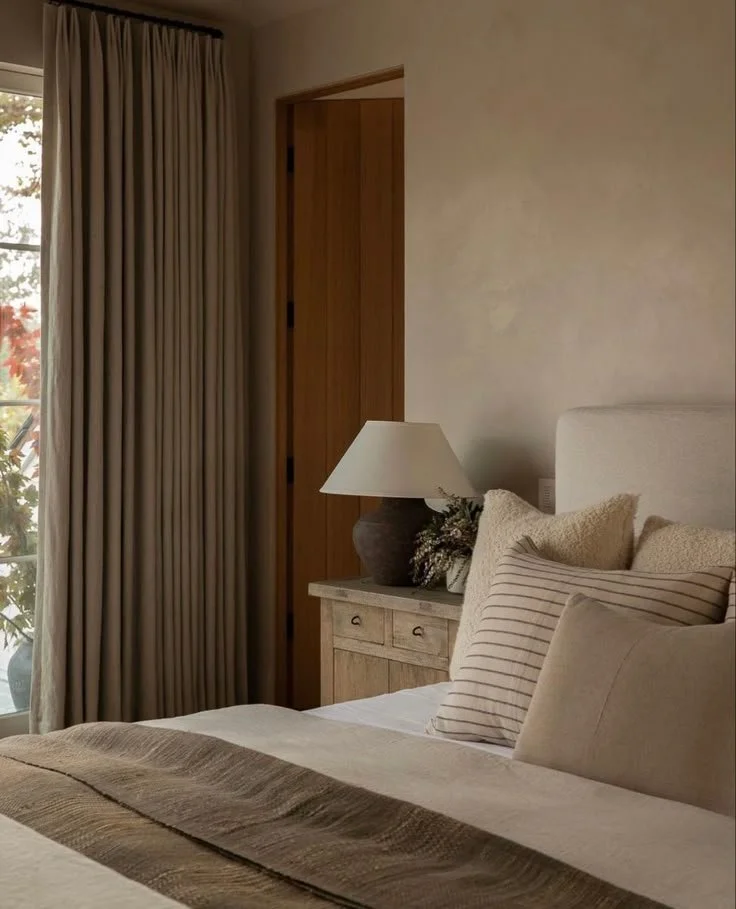
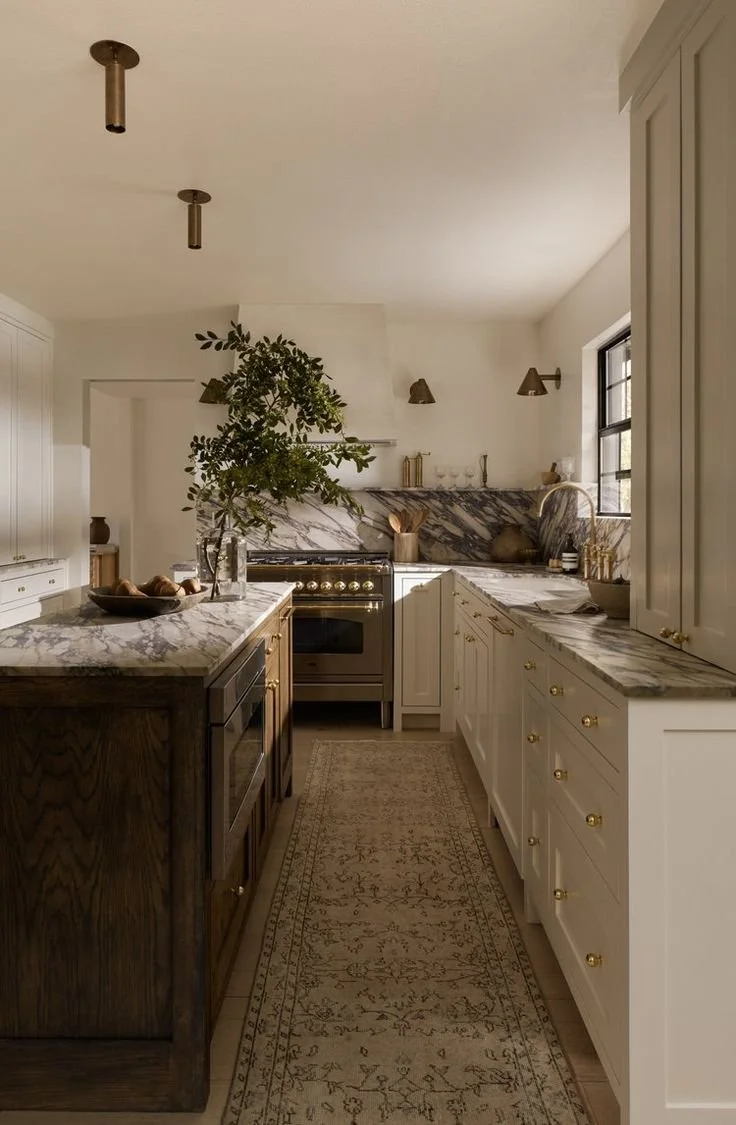
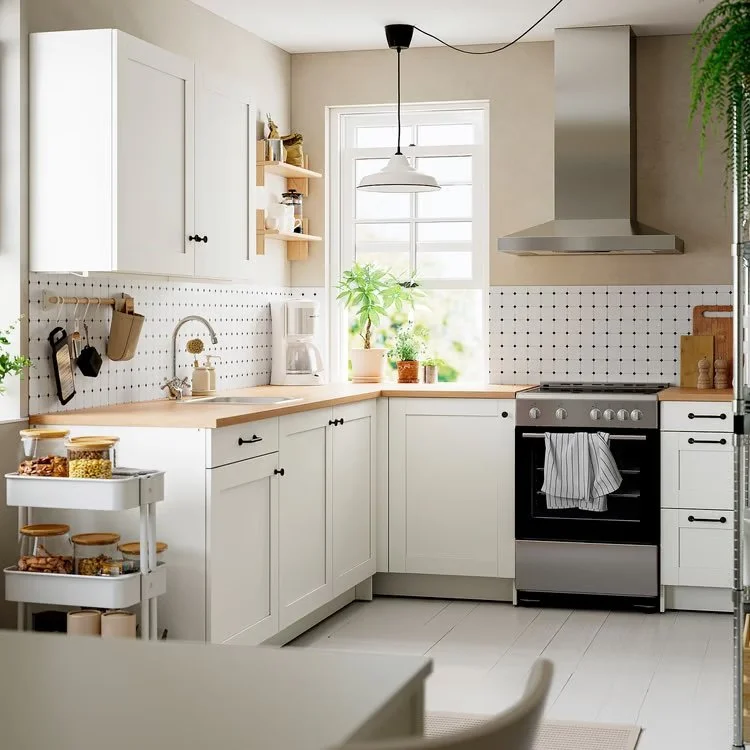
The truth is, your home should work as hard as you do. Every corner, every piece of furniture, and every design choice should serve a purpose in your daily life. Some people need a quiet reading nook where they can escape after long days. Others require a bustling kitchen that can handle weekend gatherings with friends.

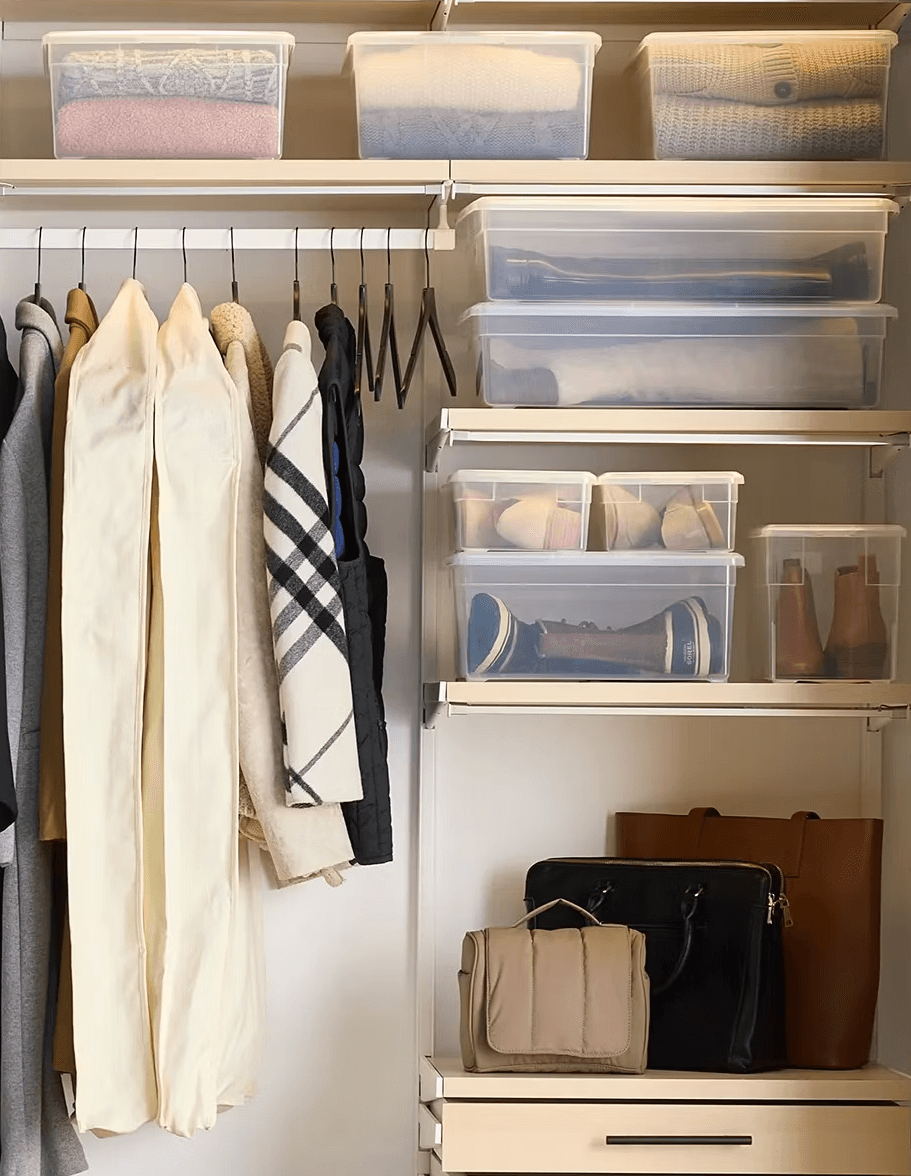
Picture this: you walk through your front door, and instead of feeling overwhelmed by clutter or frustrated by a poor layout, you feel genuinely relaxed. Your keys have their designated spot, your coat hangs exactly where it should, and that pile of mail that usually haunts your kitchen counter? It has an organized home, too.

No. 2

Start With How You Actually Live

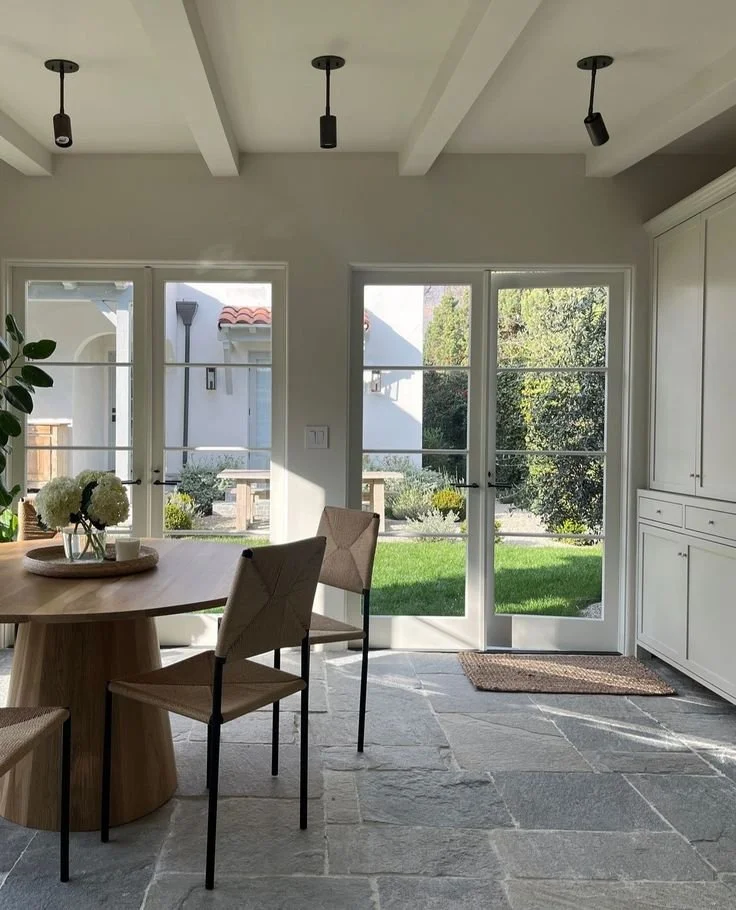
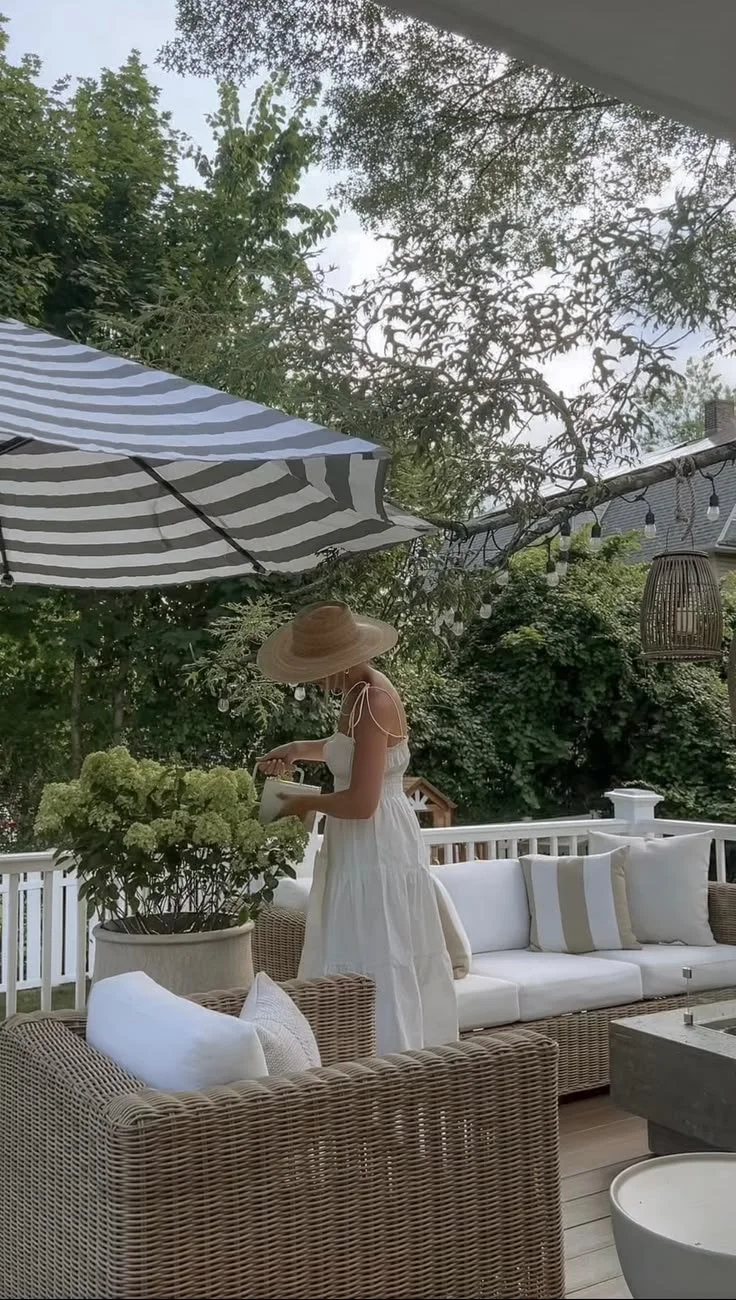
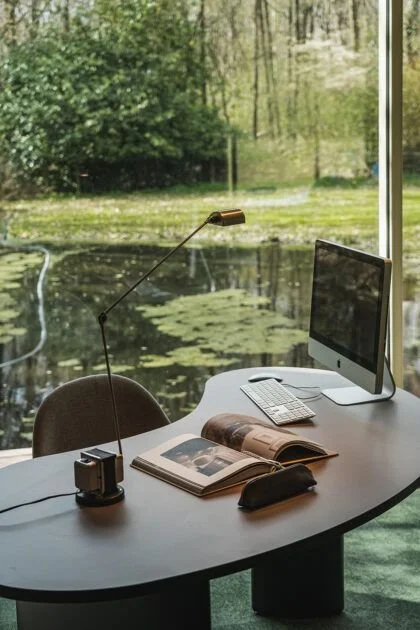
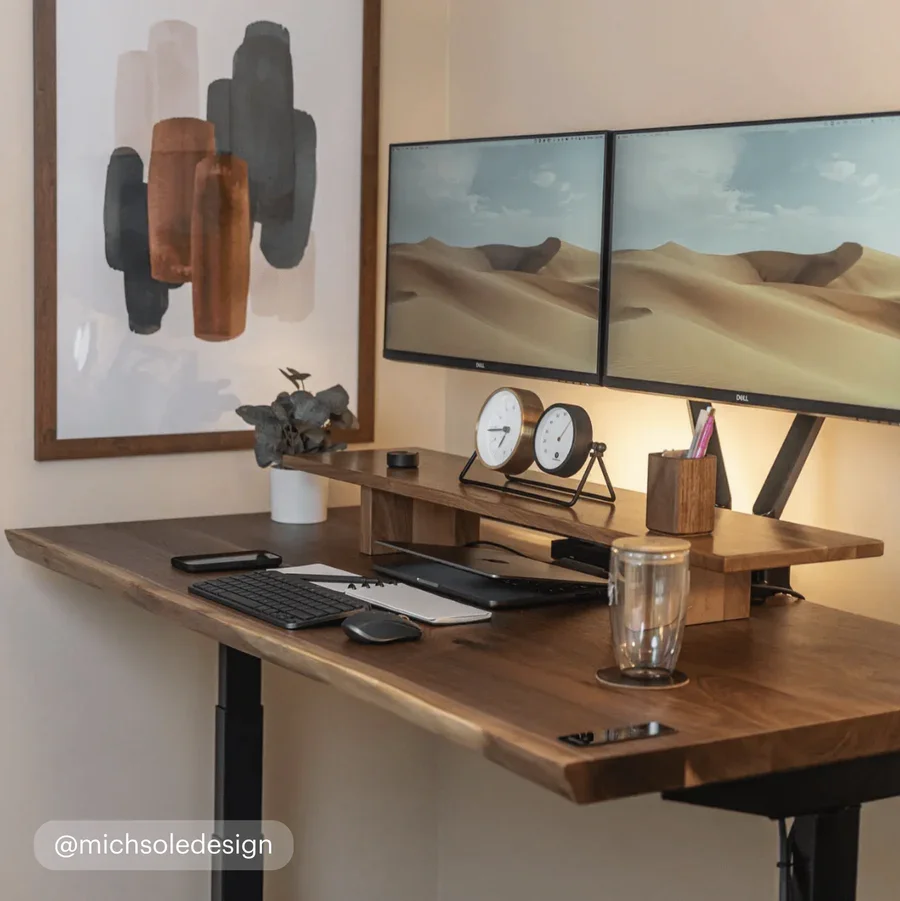
Before you start rearranging furniture or picking paint colors, take a moment to observe your daily routines. Do you work from home and need a dedicated office area? Are you someone who loves cooking elaborate meals, or do you prefer quick, simple food prep?

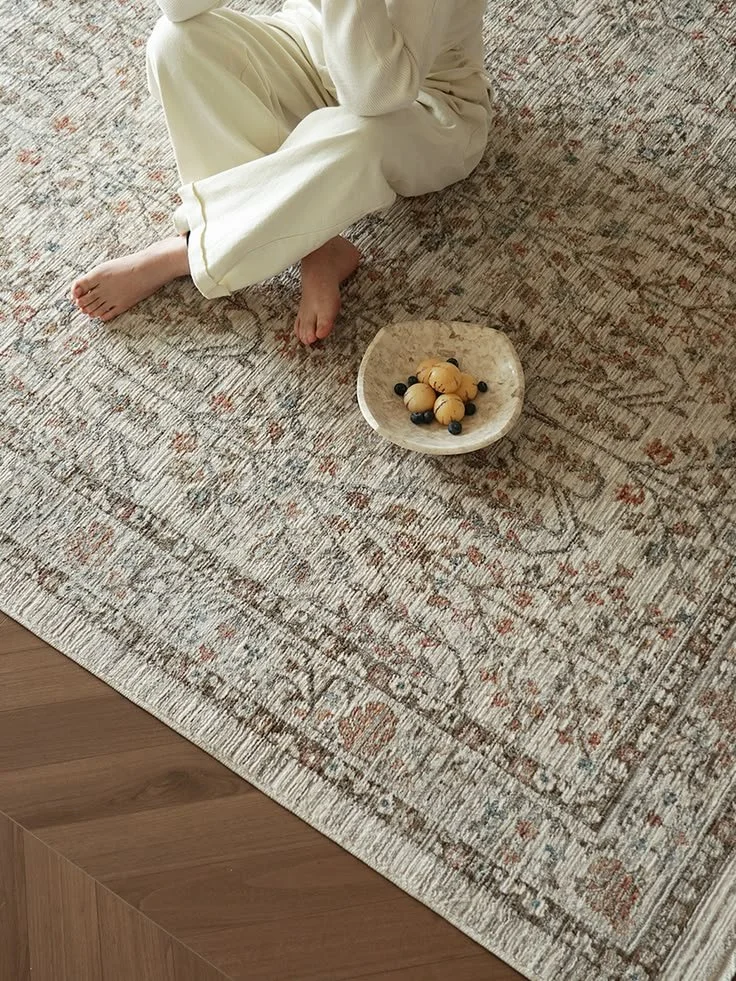
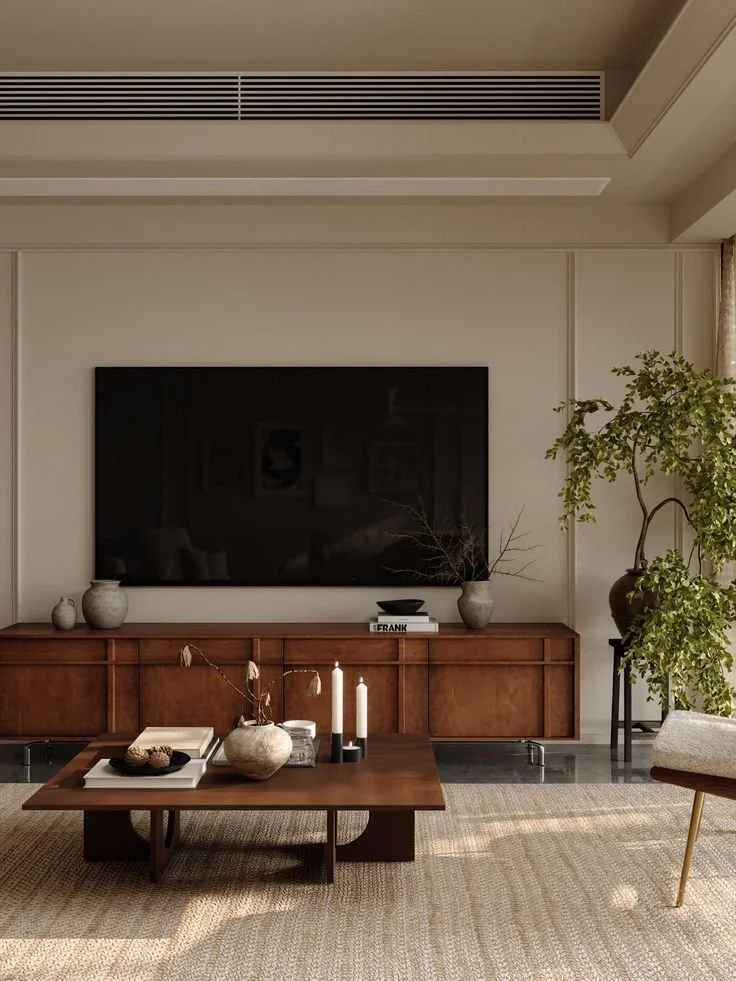
The other day, someone mentioned they’d been struggling with their living room layout for months. It turned out they’d arranged everything around the TV—but they rarely watched it. What they actually did every evening was curl up in the corner with a book and a cup of tea. One simple furniture swap later, and suddenly their whole evening routine felt more natural.

Your habits tell the real story of what your home needs to support.

No. 3

Function First, Pretty Second

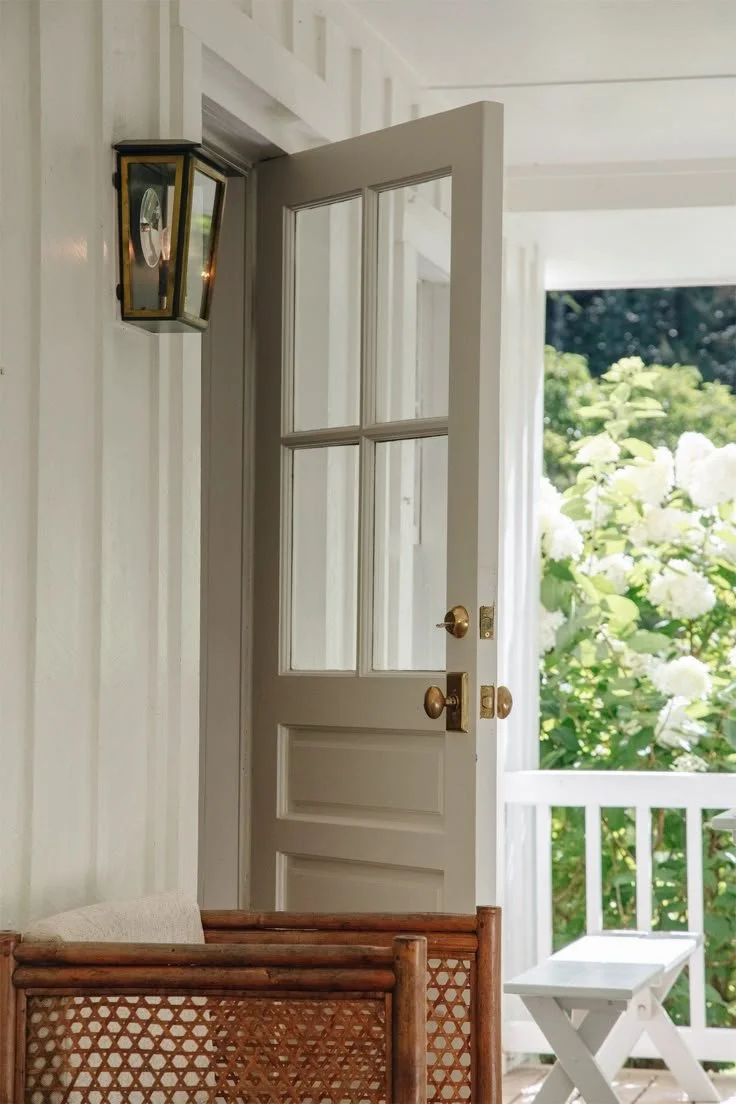
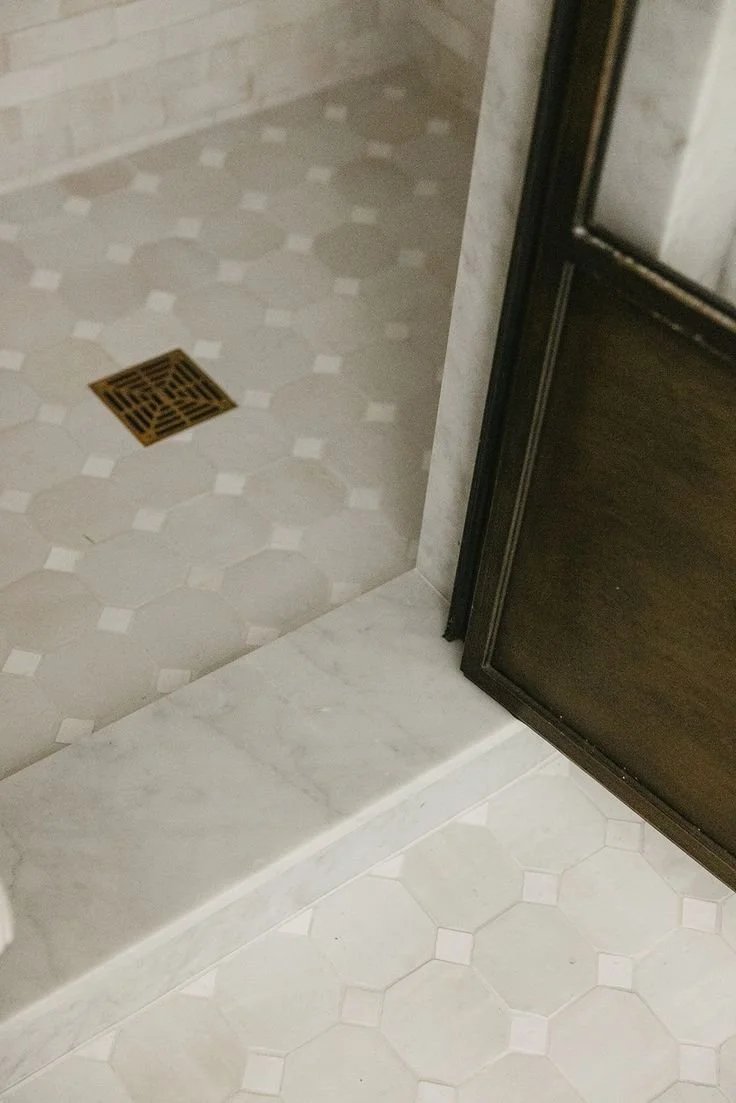
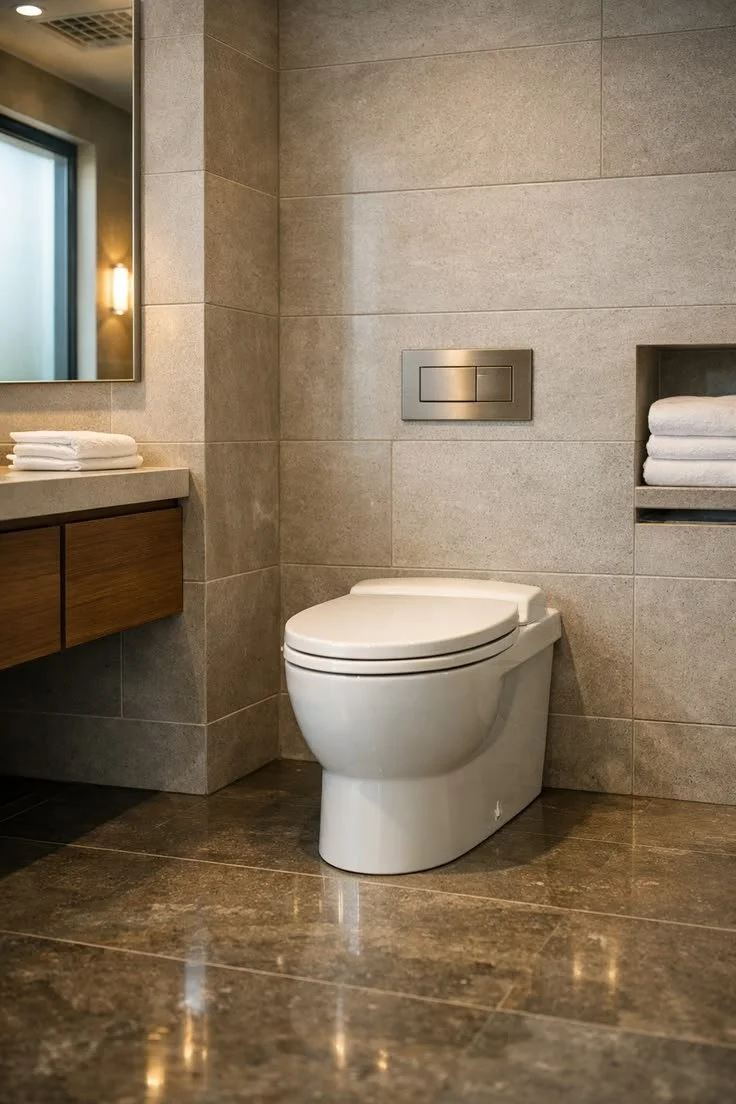
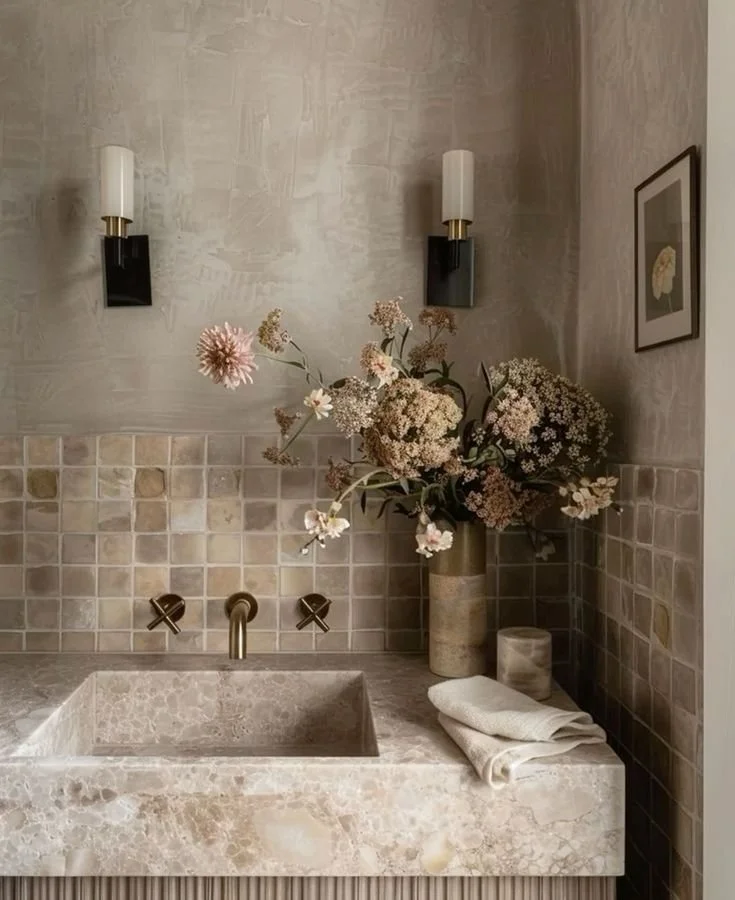
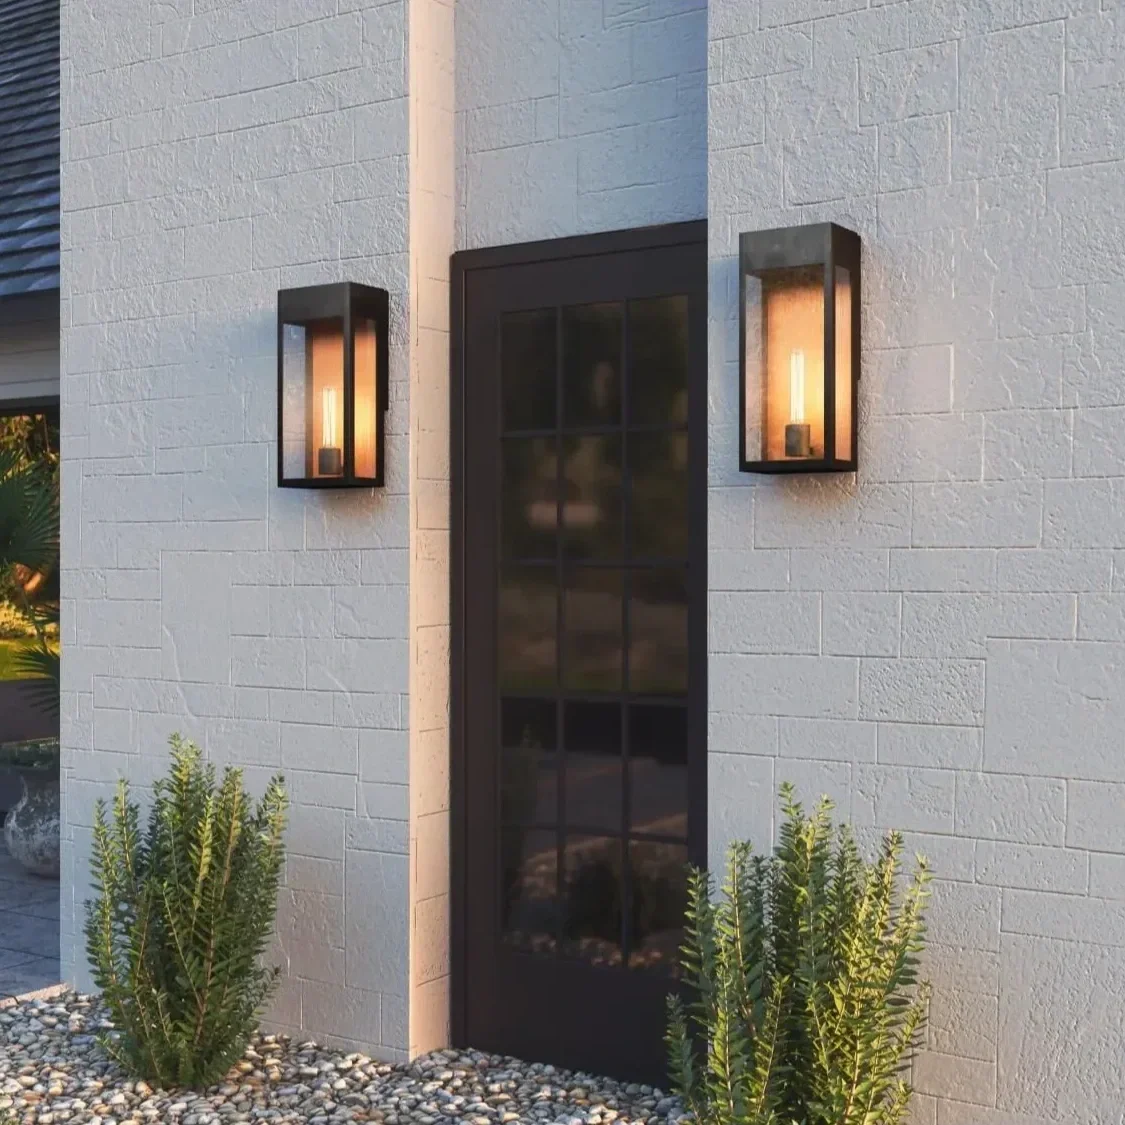
Here’s where it gets interesting: when you design around your actual needs, beauty often follows naturally. A well-organized mudroom might not sound glamorous, but when it prevents your entire house from becoming a dumping ground for bags and shoes, it becomes pretty wonderful.

This doesn’t mean your home has to look boring or purely utilitarian. It means every choice should have a reason beyond looking nice. That gorgeous armchair? It should also be comfortable enough for your Sunday morning coffee ritual.
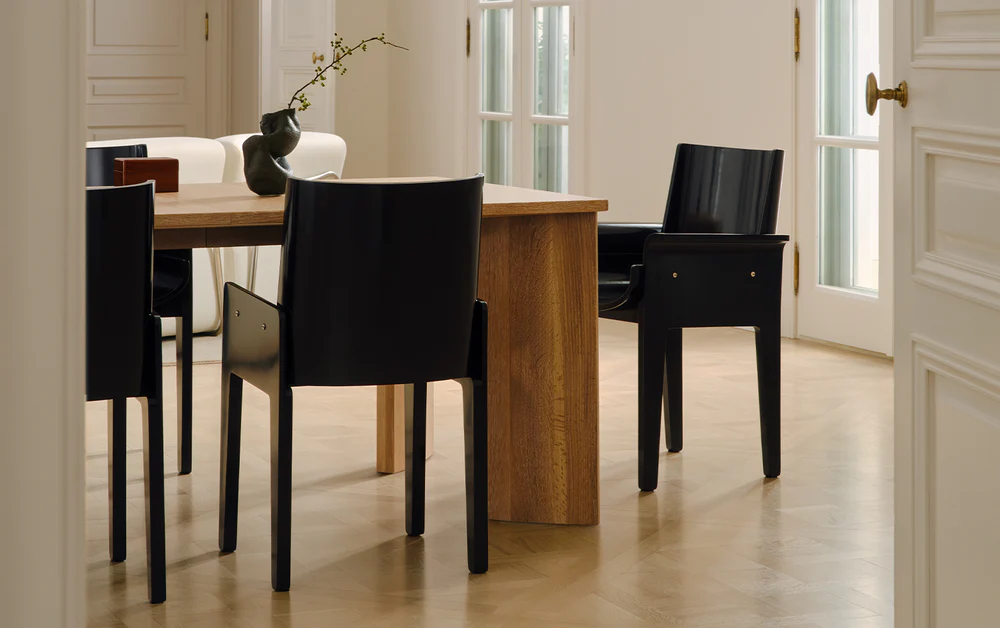
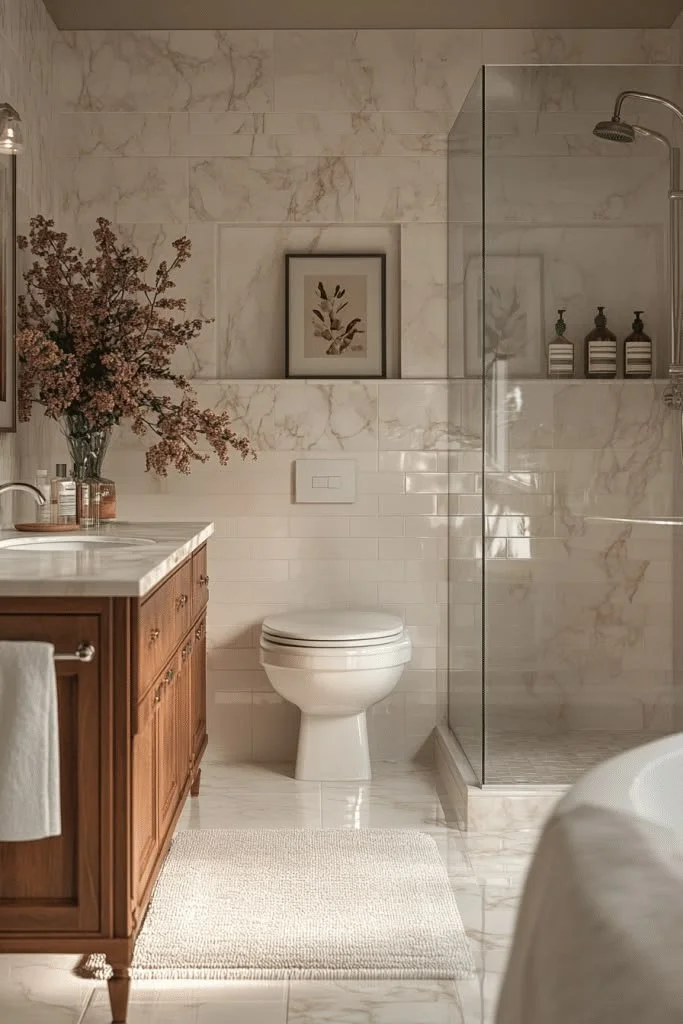
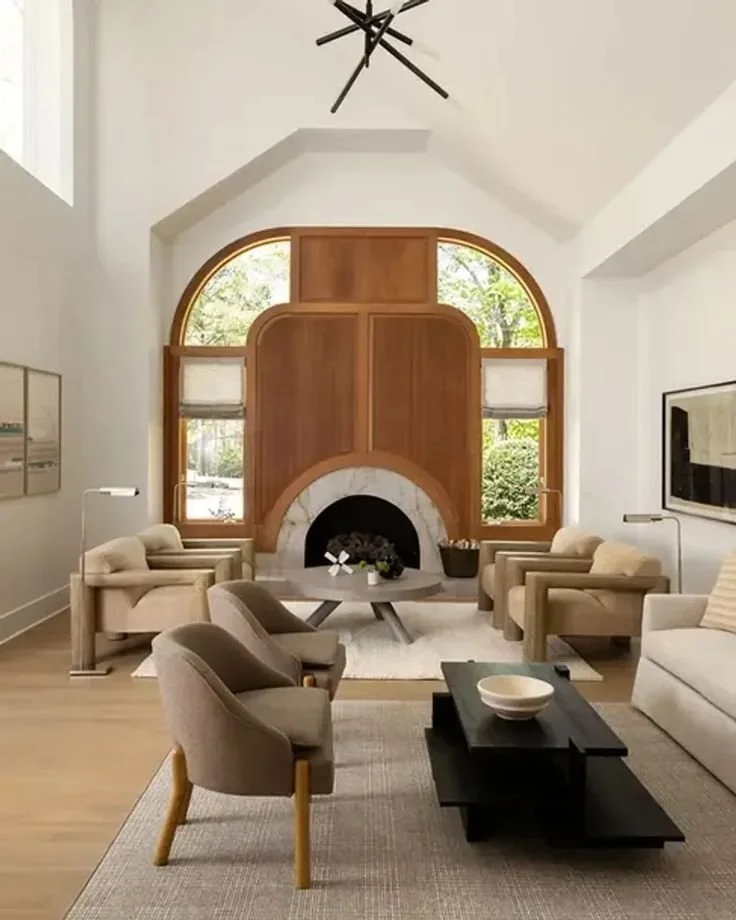
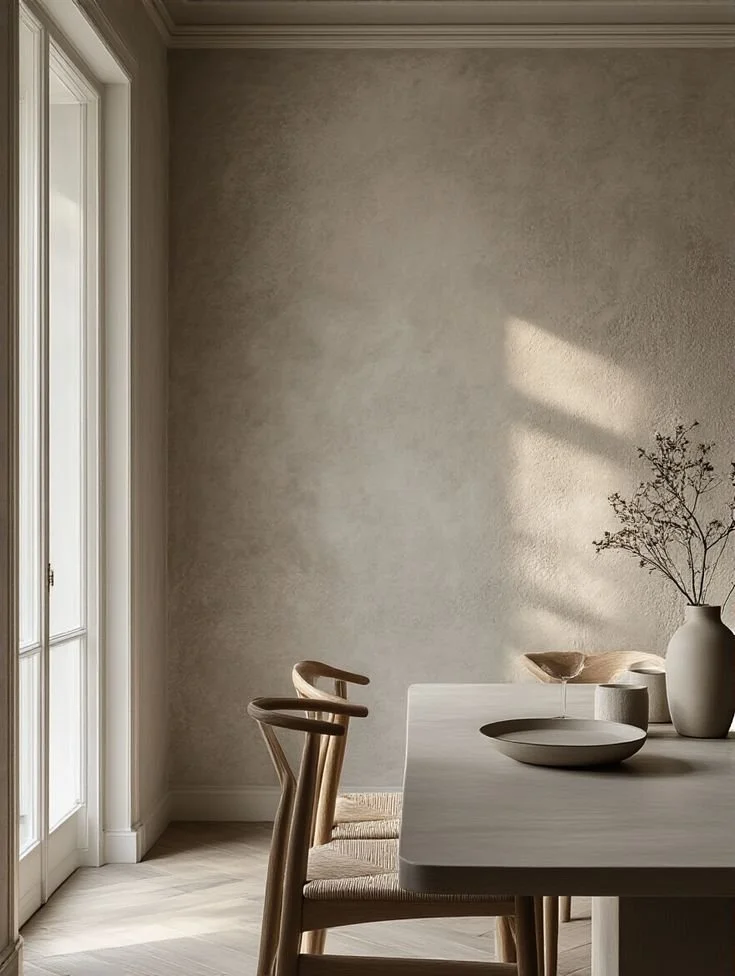
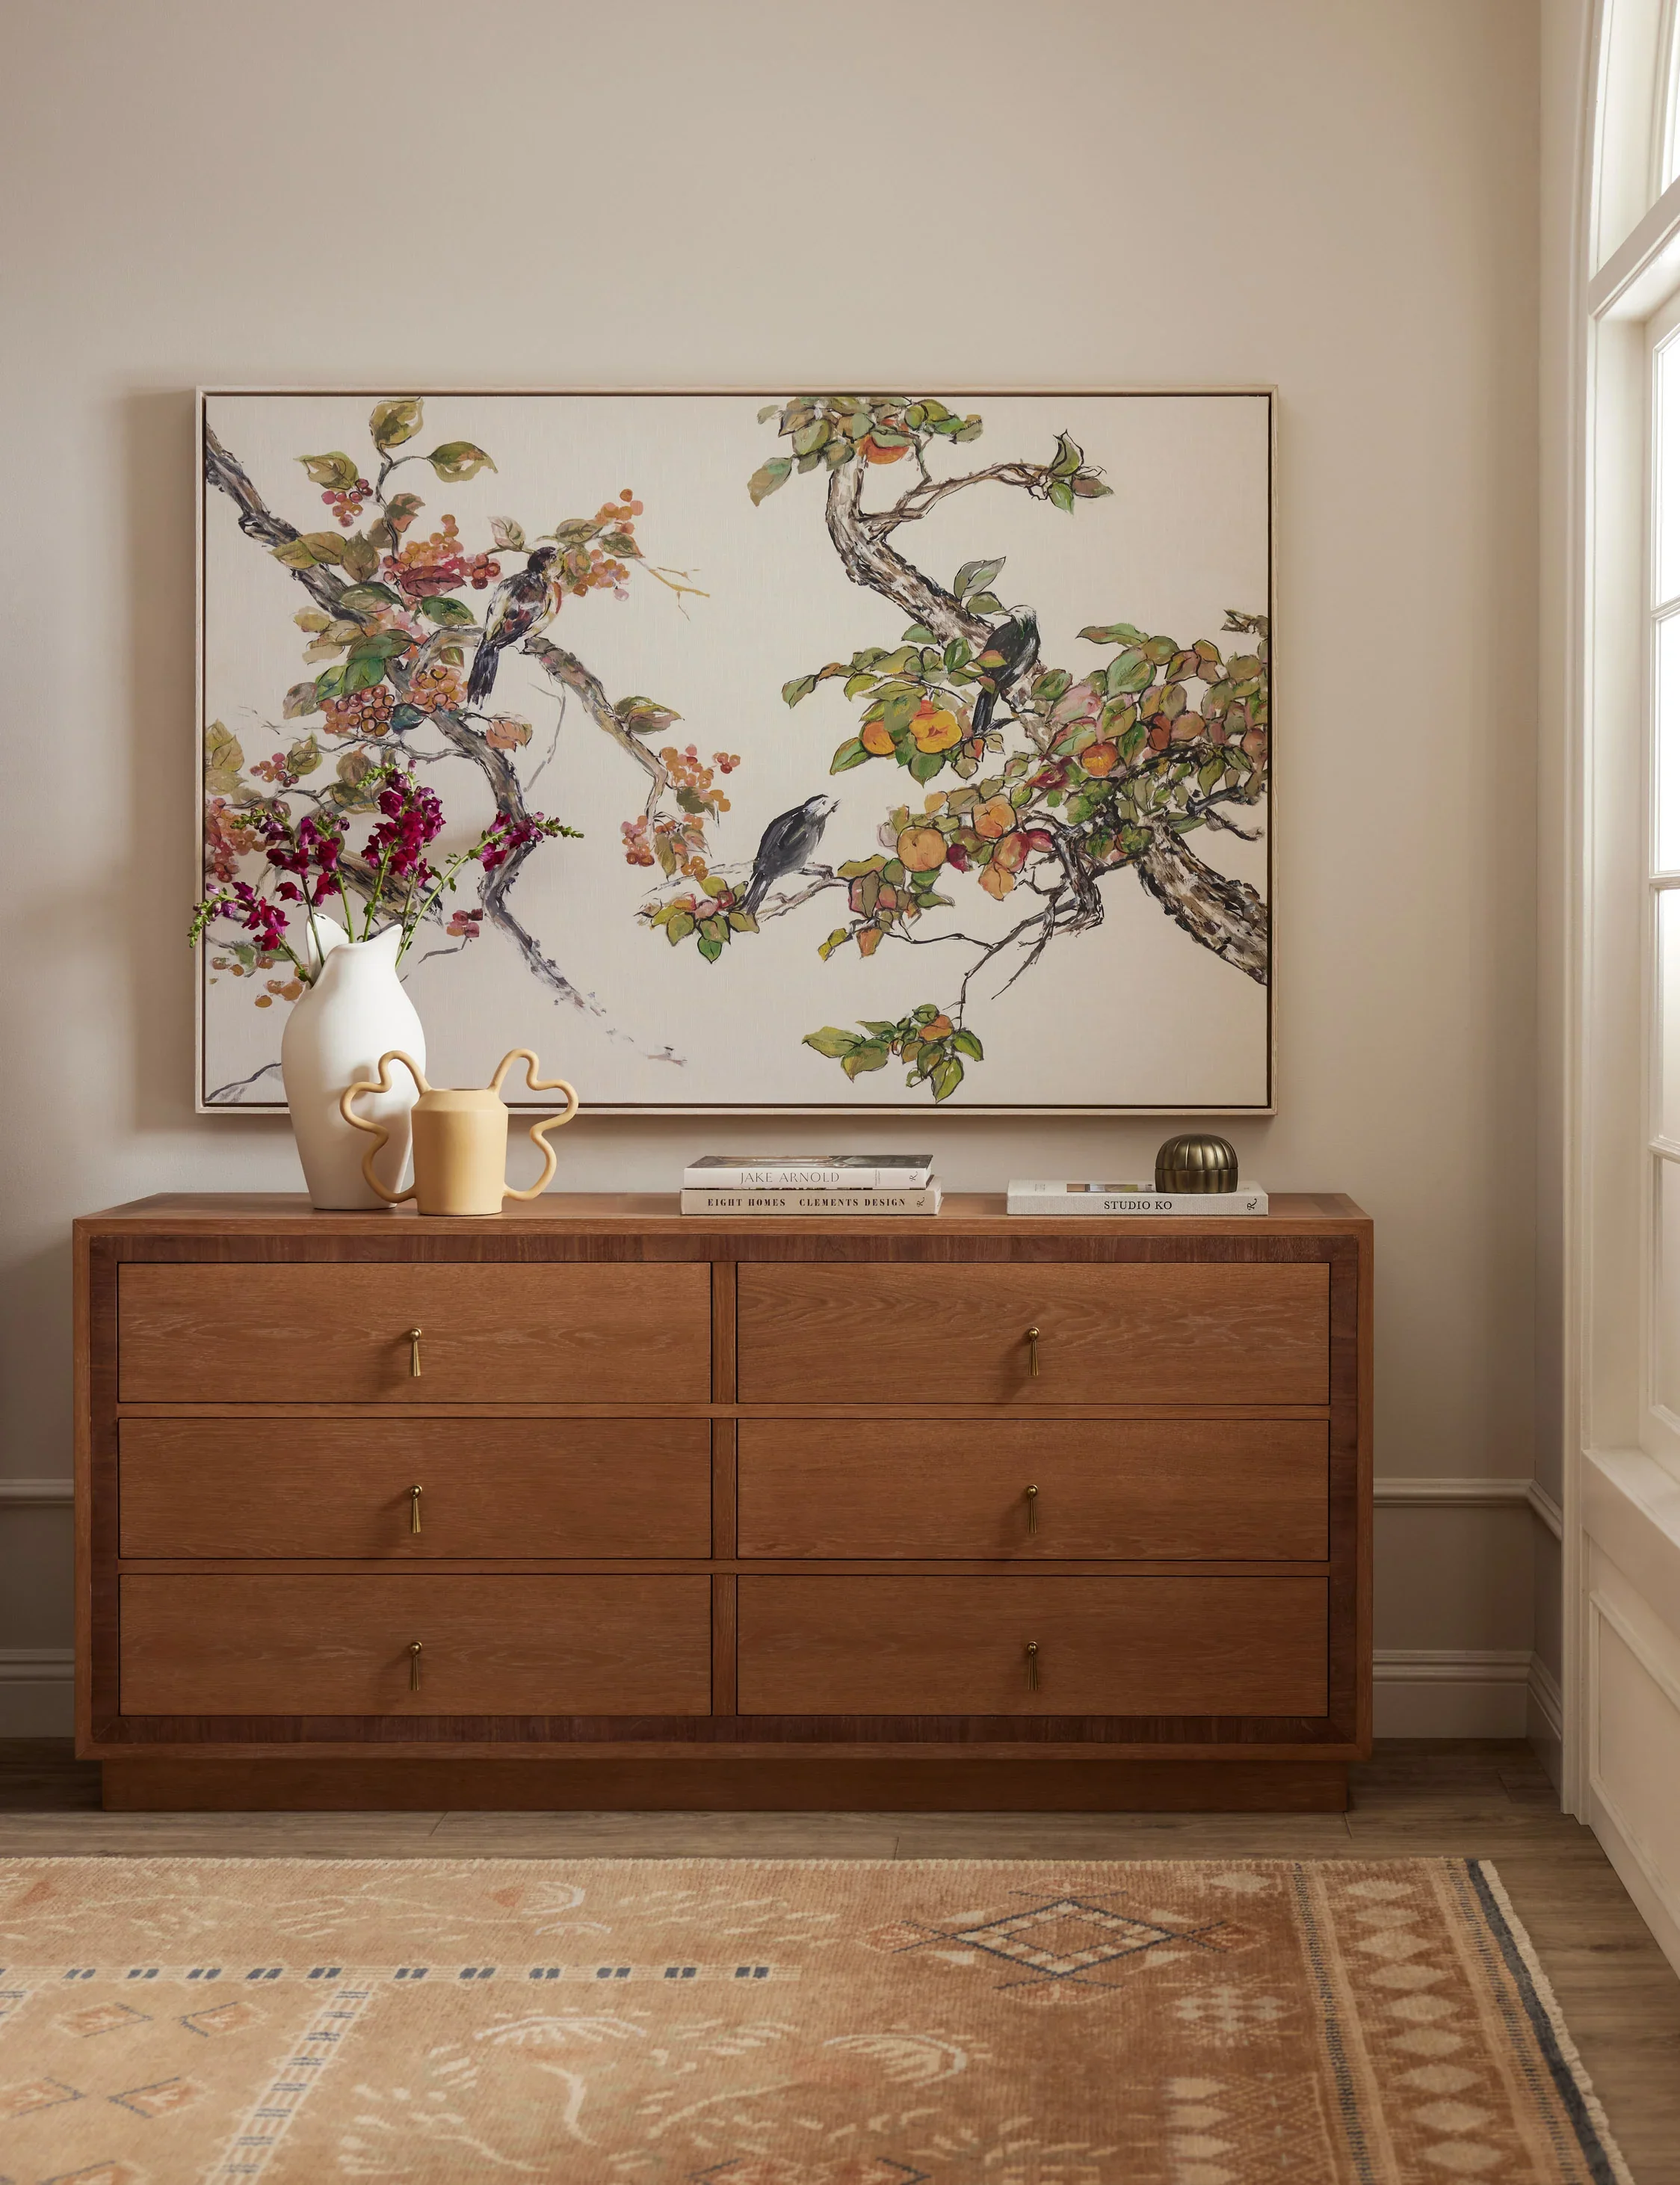
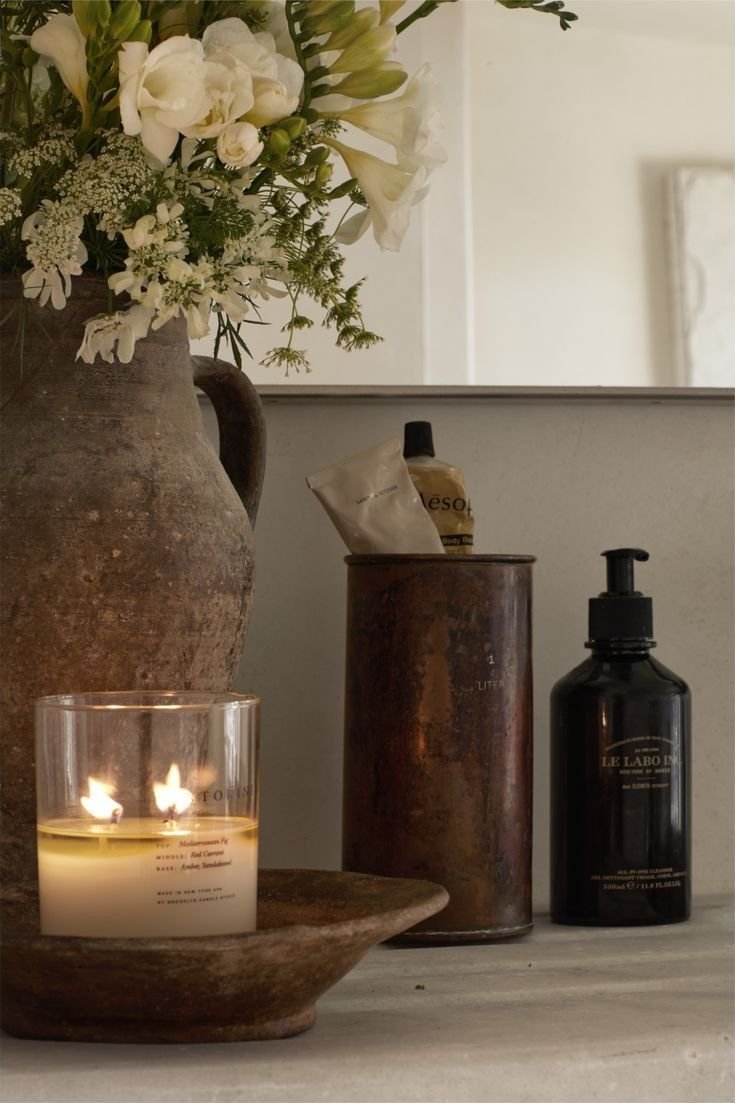
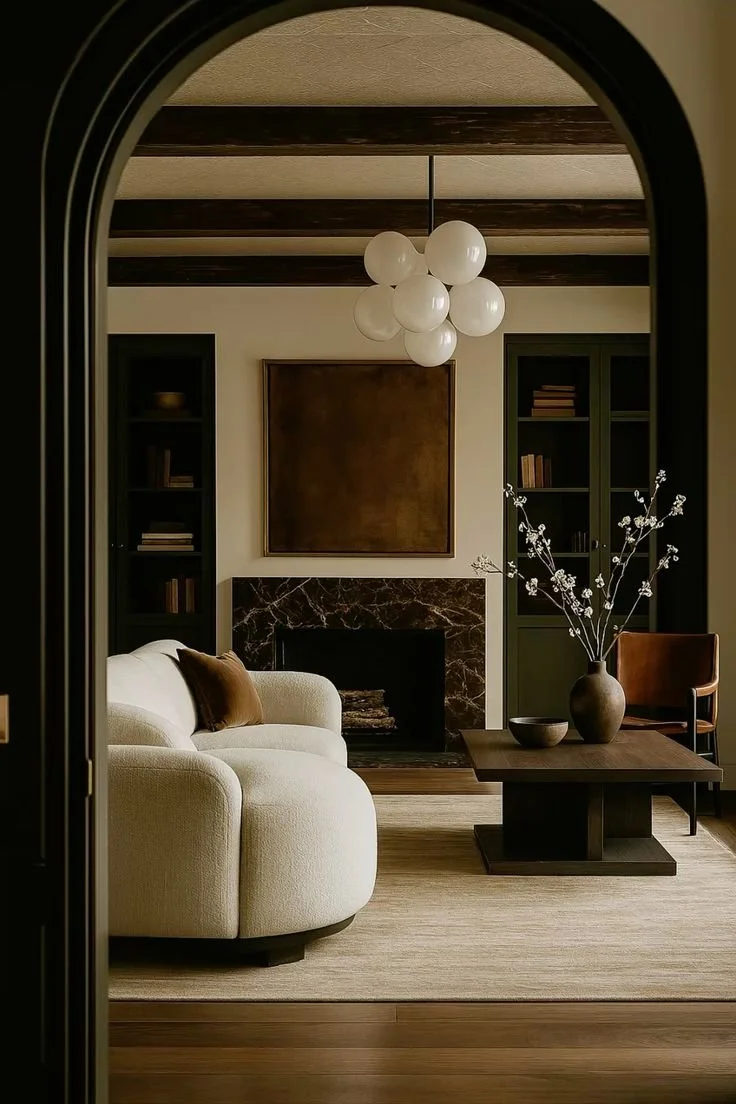
 
 
hellolovelyliving maiden home

Maiden Home

Embrace simplicity with Maiden Home: Discover timeless, minimalist furniture and decor that brings effortless elegance to every space.


No. 4

Making Room for Change

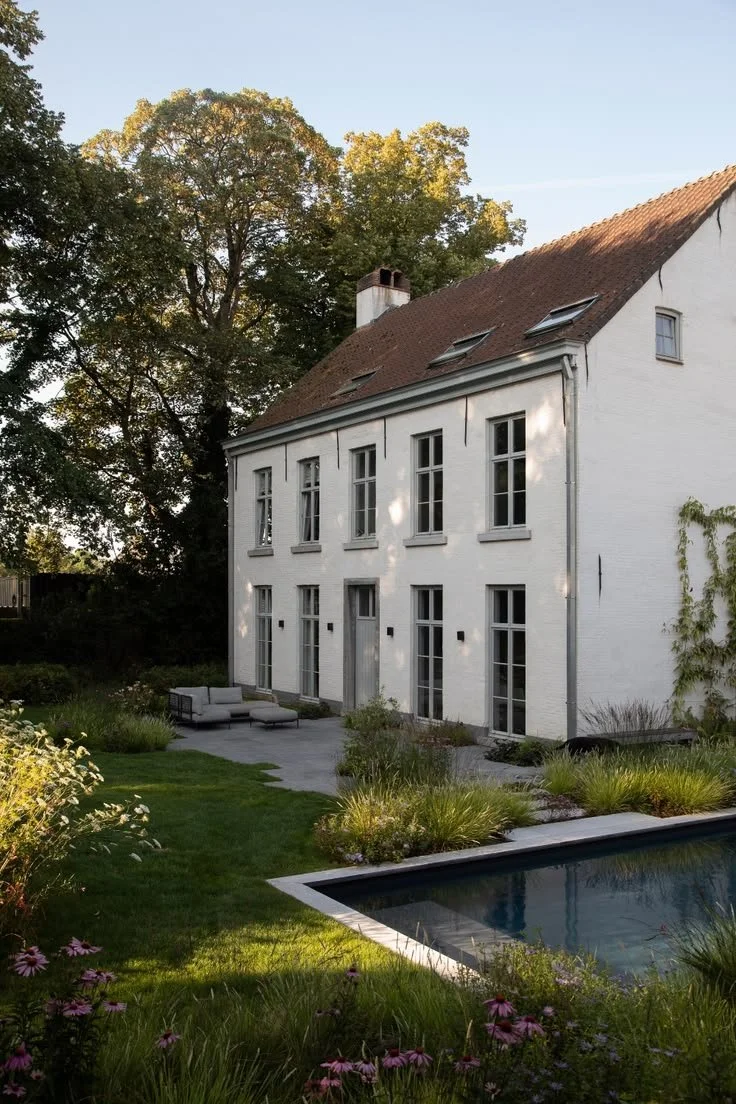
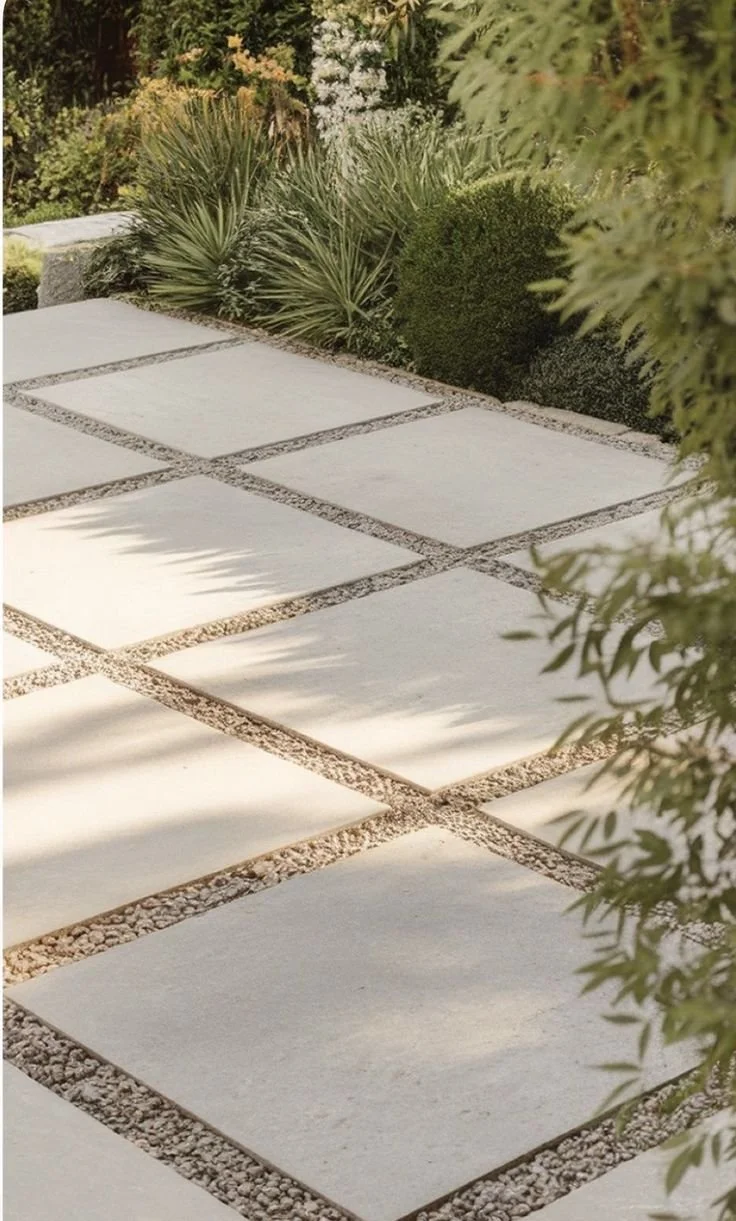
Life shifts constantly, and your home should be flexible enough to shift with it. Maybe you’re single now but hoping to share your place with someone eventually. Or perhaps you’re thinking about starting a family, working from home more often, or picking up new hobbies.

Smart design considers not just who you are today, but who you might become. Modular furniture, flexible lighting, and adaptable storage solutions can grow and change as your needs evolve.

No. 5

Getting Professional Help When You Need It

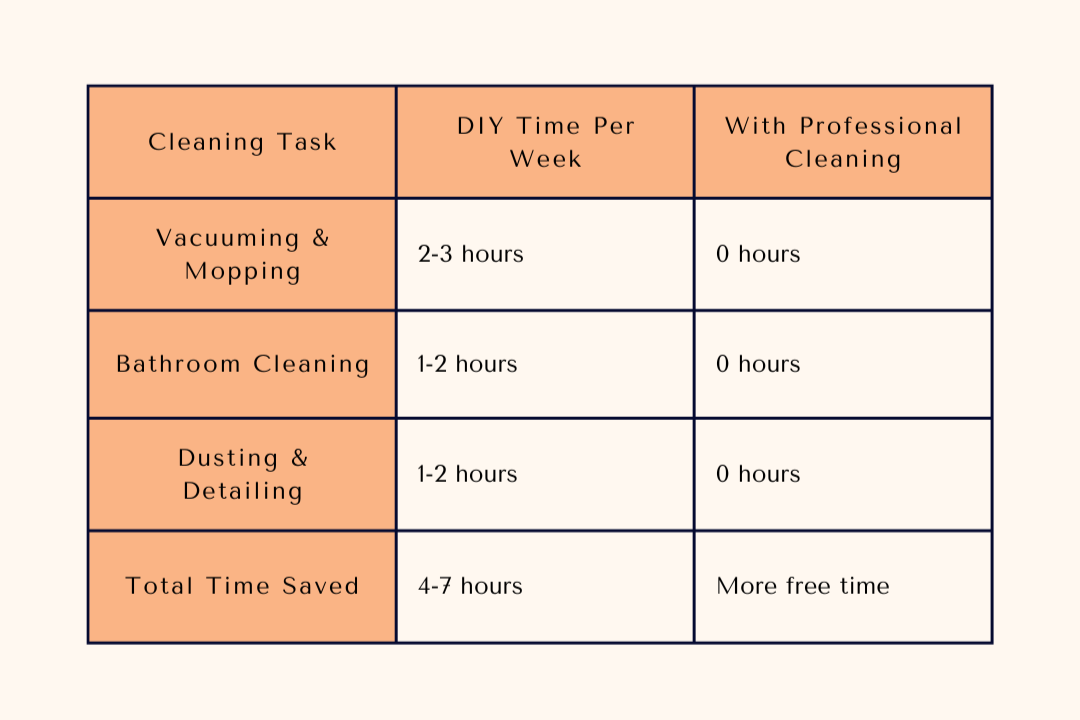
Sometimes you know exactly what you want but can’t figure out how to make it happen within your budget or floor plan. That’s where working with experienced interior designers can make all the difference. Companies like InPlace Living specialize in creating homes that truly reflect their clients’ lifestyles and needs, rather than following cookie-cutter approaches.

The right professional won’t impose their style on your home. Instead, they’ll listen to how you live and help you create an environment that supports and enhances your daily routines.

No. 6

Your Home, Your Rules

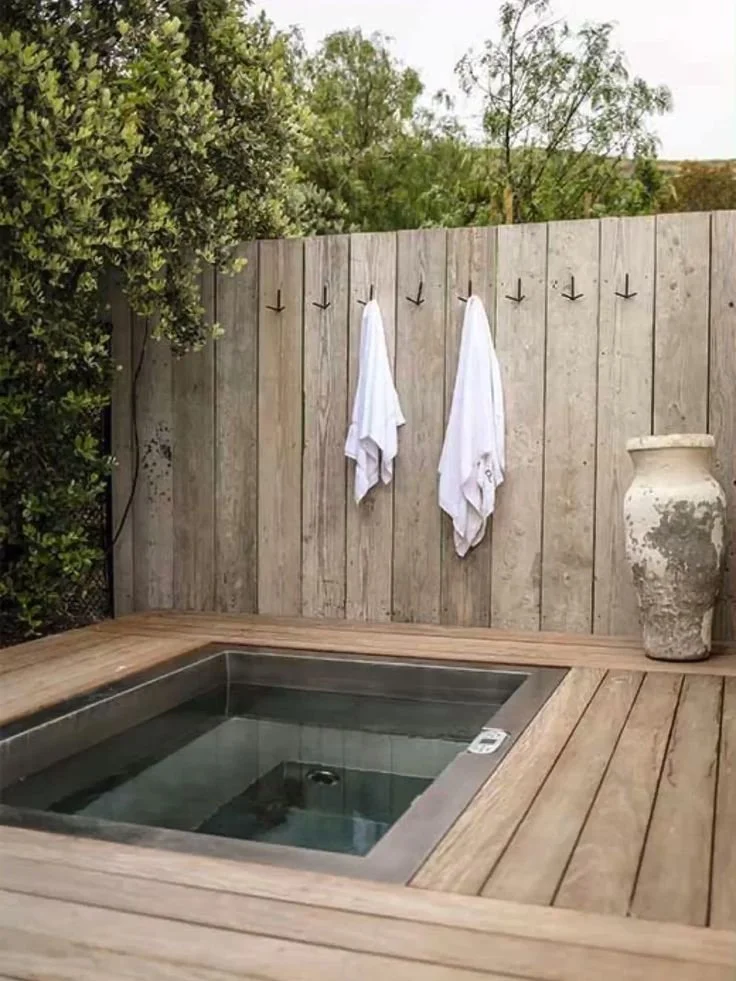
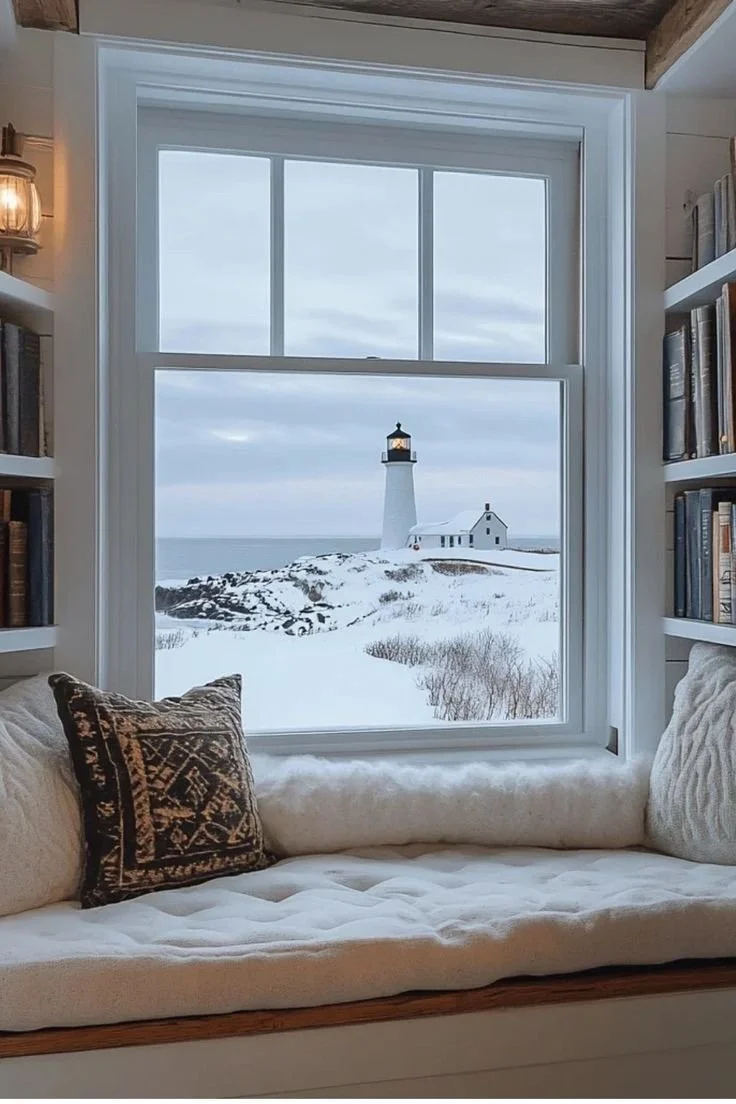
At the end of it all, your home should make your life easier, not harder. It should reflect your personality, support your goals, and provide the kind of comfort that helps you recharge for everything else life throws your way.

Stop worrying about what other people might think about your choices. If you love bold colors, use them. If you prefer minimalist simplicity, embrace it. Your home is yours to shape.

Takeaways

A sanctuary isn’t defined by trends, price tags, or picture-perfect styling—it’s defined by how well your space supports your real life. When you start with your routines, prioritize function alongside beauty, plan for change, and seek professional help when needed, your home becomes more than a place you live. It becomes a place that restores you, reflects you, and quietly helps you thrive—every single day.

Looking for Home resources?

Looking to enhance your living space and create a sanctuary that supports your well-being? Explore our home partners who offer a wide range of resources to elevate your home environment.


homeHLL x Editor


The Art Of the Living Room: Choosing A Television That Enhances Your Home’s Aesthetic

Your living room probably tells a story. Maybe it’s the carefully chosen throw pillows, that vintage coffee table you found at a flea market, or the way the afternoon light hits your favorite reading corner. But then there’s the TV—you know, that big black rectangle that either fits beautifully into your design vision or sticks out like a sore thumb.


Here’s the thing about televisions: they’ve become so much more than entertainment devices. They’re basically furniture now. And just like you wouldn’t randomly plop any old couch in your living room, your TV deserves some thoughtful consideration too.

In this article, we’ll look at how to choose a TV that complements your space—covering size, frame style, mounting options, smart features, and even color temperature—so it feels intentional instead of intrusive.

No. 1

Size Really Does Matter (But Not How You Think)

Everyone’s first instinct is to go bigger. Bigger screen, better movie nights, right? Well, sort of. The truth is, the perfect TV size has more to do with your room’s proportions than your desire to feel like you’re sitting in a movie theater.

Picture this: you walk into someone’s cozy apartment and there’s a massive 75-inch screen dominating an entire wall. It feels overwhelming, doesn’t it? On the flip side, a tiny TV in a spacious room looks almost apologetic—like it’s trying to hide.

A good rule of thumb is to sit about 6–8 feet away from your screen and see how it feels. Your eyes shouldn’t have to work overtime to take everything in. But honestly, trust your gut on this one.

No. 2

The Frame Game Changes Everything

Ever noticed how some TVs just seem to disappear into the room while others demand all the attention? A lot of that comes down to the frame design.

Sleek, minimal bezels work beautifully in modern homes where clean lines rule. These TVs almost float on the wall, letting your content do the talking. But if your style leans more traditional or eclectic, you might actually want a TV with a bit more presence.

Some people get creative with custom frames or surrounds that match their existing decor. It’s like putting your TV in a picture frame—which sounds weird but can look surprisingly sophisticated.

No. 3

Mounting vs. Stand: The Great Debate

Wall mounting definitely gives you that clean, contemporary look. Your TV becomes part of the wall, cables disappear, and you free up valuable surface space. But here’s where it gets a bit tricky: once it’s up there, moving it isn’t exactly a weekend project.

TV stands, on the other hand, offer flexibility. You can adjust the angle, move things around when you rearrange furniture, or switch to a different stand if your style evolves. Plus, they provide extra storage for all those devices we somehow accumulate.

The key is choosing a stand that complements your existing furniture rather than competing with it.


hellolovelyliving castlery

Castlery

Embrace simplicity with Castlery: Discover timeless, minimalist furniture that brings effortless elegance to every space.


No. 4

Smart Features That Actually Make Sense

Modern TVs are basically computers that happen to display really great pictures. The smart features can also help your room feel less cluttered since you might not need as many external devices.

When shopping around, look for options that integrate well with your existing setup. If you’re already invested in a particular smart home ecosystem, finding a TV that plays nicely with it just makes life easier. For instance, checking out LG tvs online Philippines reveals some impressive smart features that can streamline your entire entertainment setup.

No. 5

The Color Temperature Conversation

This might sound technical, but bear with me. TVs display different color temperatures, and that can dramatically affect how they look in your room. Warmer colors feel cozy and inviting, while cooler tones appear crisper and more modern.

The best TVs let you adjust these settings, so you can fine-tune the picture to match your room’s lighting and overall vibe. It’s like having a dimmer switch—but for your TV’s personality.

Takeaways

Your living room should feel like you, and that includes your TV choice. Take your time, consider how it fits with everything else you love about your home, and remember: the best TV isn’t just the one with the most impressive specs—it’s the one that makes you happy every time you walk into the room.

Looking for Home resources?

Looking to enhance your living space and create a sanctuary that supports your well-being? Explore our home partners who offer a wide range of resources to elevate your home environment.


homeHLL x Editor


How To Sell Your Home Fast (And Stay Stress-Free)

Selling your home is one of those things that can feel like a full-time job—and a pretty stressful one at that. Between all of the cleaning, staging, and coordinating showings, it’s easy to get overwhelmed. If you’re on a tight timeline (because of a job move, financial pressure, or just life happening), that stress can double quickly.


What’s the good news? You can sell without panicking, getting stressed, or running around like a headless chicken—and you can do so quickly. In this article, you’ll find practical, low-stress ways to speed up your sale by making smart choices early, staying ready for buyers, and keeping your mindset grounded throughout the process.

No. 1

Price it realistically from the start

If you want to sell your home as quickly as possible—and with as little stress as possible—you need to make sure you price it right from the beginning. Pricing it too high in the hopes of “testing the market” might sound tempting, but it usually adds stress instead of easing it. Overpriced homes often sit longer, which can make buyers suspicious. When a listing lingers, people start wondering what’s wrong with it.

Pricing competitively from day one attracts serious interest and can even spark multiple offers. That momentum is what helps you sell quickly—not wishful thinking.

No. 2

Focus on first impressions

You don’t have to do a full renovation to sell your home fast, but you do need it to feel as welcoming and clean as possible. Clear clutter, deep clean every room, and make small cosmetic improvements where necessary.

Curb appeal matters more than people realise. Trim the lawn, tidy up the entryway, and make sure the outside looks inviting. Buyers often form opinions before they even step through the front door, right?

No. 3

Be flexible and responsive

If you want to make a fast sale, you need to make it as easy as possible for buyers to view your home. That may mean accommodating evening or weekend showings, and keeping your home “ready to go” at short notice.

It might feel a little disruptive, but the more accessible your property is, the more people will see it—and the sooner you’ll get an offer and be able to move on to the next chapter of your life.


hellolovelyliving houzz

Houzz

Make your home project a reality. Find inspiration, products, and the pros to make it happen - all in one place.


No. 4

Consider all of your options

Traditional listings are not the only route. If time is a major factor, you might explore working with cash home buyers. This option can eliminate many of the delays that come with financing approvals, inspections, and drawn-out negotiations.

For some sellers—especially those dealing with urgent circumstances or properties that need repairs—this approach provides clarity and speed. It’s not the right choice for everyone, but knowing it exists can give you more control over your timeline.

No. 5

Keep emotions in check

Selling a home isn’t just about money. It means leaving a place you’ve lived in, loved, and made memories in, and that can be hard. But when the goal is to sell fast, it helps to think of the house as a product rather than a personal space. View feedback objectively. Negotiate calmly. Focus on the outcome you want rather than taking every comment to heart.

takeaways

Selling quickly doesn’t have to mean selling in chaos. When you price realistically from the start, prioritize strong first impressions, stay flexible with showings, consider alternative selling routes, and keep emotions in check, the process becomes far more manageable—and far less stressful. With the right approach, you can move from “overwhelmed” to “in control,” and get to your next step with confidence.

Looking for Home resources?

Looking to enhance your living space and create a sanctuary that supports your well-being? Explore our home partners who offer a wide range of resources to elevate your home environment.


homeHLL x Editor


How To Protect Your Gutters And Fascia During Decorative Lighting Projects

Decorative lighting can make your home look beautiful during the holidays. Rooflines shine, windows glow, and your house feels warm and welcoming. But many homeowners forget one important thing while decorating: they can damage their gutters and fascia without even realizing it. When you attach lights the wrong way, you may bend the gutter edge, crack the fascia board, or create small holes that later turn into leaks.


In the future, these small mistakes can lead to expensive repairs. In this article, you’ll learn how gutters, fascia, and drip edges work together, what commonly causes damage during light installation, which clips and tools are safest, and how to install lights in a way that protects both your roofline and your investment.

It is important to understand how to protect your exterior if you are planning a lighting setup this season. To avoid damaging their gutters and fascia during the decorating process, many homeowners choose professional outdoor Christmas lighting installation services.

No. 1

Understanding Gutters, Fascia, and Drip Edges

You should know what parts of your roofline you are working with before hanging lights. Your gutters collect rainwater and move it safely away from your home. They protect your foundation, siding, and landscaping from water damage. The fascia board is the long wooden board that runs along the edge of your roof. Gutters attach directly to this board.

If the fascia becomes weak or rotten, your gutters may sag or fall. The drip edge is a small metal strip placed under the shingles. It directs water into the gutter instead of behind it. If this part bends or shifts, water can leak behind your gutters and damage wood. All three parts work together. If you damage one, the others can also suffer.

No. 2

How Improper Light Installation Causes Damage

Improper light installation can seriously damage your gutters and roofline if you are not careful.

  • Using nails, staples, or screws can create holes that cause leaks and rust.

  • Staples may pinch wires and increase fire risk.

  • Hanging lights on the gutter edge can bend or loosen the gutter.

  • Heavy decorations can pull gutters away from the fascia board.

  • Wrapping cords tightly around downspouts can block water flow.

Today’s small damage can turn into costly repairs later.

No. 3

Choosing Appropriate Clips and Mounting Tools

Your best option for hanging lights is proper roofline clips that will ensure the lights stay in place without damaging any gutters or fascia.

Here is a brief overview of some common clips:


Smart Weight Distribution

Weight is important even if you have good clips. Do not hang all lights in one section. Spread them evenly across the roofline. Use lightweight LED strands instead of heavy incandescent bulbs. LED lights are lighter and produce less heat.

Avoid putting multiple light strands on a single clip. This adds pressure and can bend the mounting point. Place clips closer together for extra support if you use larger bulbs like C9 lights. Never attach heavy decorations directly to gutters. Place those on the ground or porch instead.


1-800 Lighting

Transform your exterior into a welcoming, well-lit oasis with stylish outdoor lighting fixtures—wall lights, post lamps, landscape, and security options for curb appeal, safety, and ambiance.


No. 4

Practice Safe Installation

Safety is just as important as protecting your home. Use a stable ladder with a ladder stabilizer so it does not press against the gutter. Installing a ladder against a gutter risks denting the gutter.

Hanging lights and clips is best done during the day so that you can see where the clips are going. Make sure to check your gutters. If you notice any issues with brackets or fascia wood that are soft or rotted, deal with them before you hang lights. Removing debris will also help with the clip attachment.

No. 5

Why Contractors Steer Clear of Gutters

Gutter and fascia damage is a risk that gutter installation contractors understand. That's why they are careful to use pain-free and gentle clips. They try to avoid gutter fascia drilling whenever possible.

Experienced gutter light installation also tends to repair the roofline fascia. They are re-adjusting the lighting to be more effective, evenly spaced, and insulated. They do all this to help you have a nice show while still keeping your light fixtures safe and sound.

Takeaways

You can steer clear of many issues with a basic knowledge of fascia boards, gutters, and drip edges. Avoid malpractice and gutter damage: use the right clips and distribute the lights evenly. If you are struggling to go up high or do the light hangers safely, it would be best to bring in a contractor who can do it effortlessly. By keeping your gutters safe during Christmas light installation, you are also protecting your fascia, your home's roofline, and its long-term value.


Looking for Home resources?

Looking to enhance your living space and create a sanctuary that supports your well-being? Explore our home partners who offer a wide range of resources to elevate your home environment.


homeHLL x Editor


Why Your Ceiling Has Brown Spots After Heavy Rain And What To Do Next

Waking up after a stormy night to find an ugly brown ring spreading across your pristine white ceiling is a homeowner’s nightmare. It immediately triggers thoughts of expensive repairs, mold, and chaos. But before you spiral into panic, take a breath. That brown spot is telling you a story, and if you listen closely, you can figure out exactly what’s happening up there.


In this article, you’ll learn what causes brown ceiling stains after heavy rain, how to tell whether the leak is active or old, what to do immediately to limit damage, and when it’s time to call a professional for a permanent fix. This guide will walk you through diagnosing that mysterious stain, determining if the water is still flowing, and deciding your next move before you pick up the phone.

No. 1

What Causes Those Ugly Brown Stains?

The technical term for that discoloration is a “water stain,” but most people just call it an eyesore. The brown or yellow color comes from water passing through insulation, wood, and drywall. As the water travels, it picks up tannins, dirt, and minerals from your home’s materials. When it finally pools on your ceiling and evaporates, it leaves those pigmented deposits behind.

While the immediate culprit is obviously water, the root cause isn't always a giant hole in your roof. It could be something subtle:

  • Compromised Flashing: The metal strips around your chimney or vents might be loose or rusted.

  • Missing Shingles: High winds can strip away shingles, exposing the underlayment.

  • Ice Dams: In colder climates, ice buildup can force melting snow backward under your shingles.

  • Condensation: Sometimes it’s not rain at all, but poor attic ventilation causing moisture to build up and drip.

No. 2

Is It Active or Old News?

Not every stain means water is currently dripping. Sometimes stains reappear due to high humidity, or you might be noticing an old stain you simply missed before. Here is how to tell the difference:

The Touch Test

If the spot is wet, damp, or spongy to the touch, you have an active leak. If it is bone dry but the paint is peeling or flaking, it might be an old issue that wasn't properly primed and painted over.

The Outline Test

Active leaks often have a distinct, darker ring around the edge. If the stain changes size or shape during the next rainstorm, you definitely have water coming in right now.

No. 3

Step-by-Step: What to Do Before Calling for Help

If you confirm you have a leak, don’t ignore it. However, you don't necessarily need an emergency crew at 3 AM. Follow these steps to manage the situation.

1. Contain the Water

If the ceiling is bulging or dripping, the water needs an exit path to prevent the drywall from collapsing. Place a bucket underneath the bulge. Then, take a screwdriver or a small nail and poke a hole right in the center of the wet spot. This relieves the pressure and lets the water drain into your bucket rather than spreading across the ceiling.

2. Inspect the Attic (If Safe)

Grab a flashlight and head up to the attic. Do this while it is still raining, if possible, as it makes spotting the leak easier. Look for water reflecting the light. Remember, water travels. Just because the stain is in the living room doesn't mean the roof leak is directly above it. Water often runs down rafters or trusses before dripping onto the insulation and ceiling.

3. Check for “Shiners”

During your attic inspection, look for nails that missed the framing and are poking through the roof deck. In cold weather, these can frost up. When the attic warms up or the sun hits the roof, the frost melts and drips, mimicking a roof leak.


hellolovelyliving homeaglow

Homeaglow

Book affordable, top-rated cleaning services with Homeaglow—intro deals from $19, verified 4.8-star reviews, easy online scheduling, and appointments available 7 days a week.


No. 4

Recognizing Warning Signs of Structural Damage

A small stain is a nuisance; a sagging ceiling is a danger. Keep an eye out for these red flags that indicate the problem has moved past a simple cosmetic issue:

  • Sagging Drywall: This means the water has saturated the gypsum board to the point where it is losing structural integrity.

  • Mold Growth: If you see dark spots (black, green, or fuzzy), you have a biological issue that needs professional remediation.

  • Rotting Wood: If you are in the attic and see blackened or soft wood trusses, the leak has likely been active for a long time.

No. 5

Temporary Fixes to Buy You Time

If you find the source of the leak, you might be able to stop it temporarily until a professional arrives.

  • Tarping: If you can safely access the roof, securing a heavy-duty tarp over the damaged area is the most effective temporary fix.

  • Roof Patch/Cement: For small, obvious holes or cracks around vents, a tube of wet-patch roof cement can seal the gap. This is strictly a band-aid solution, not a permanent repair.

No. 6

When to Call the Pros

You have contained the drip and inspected the attic, but the reality is that most roof leaks require professional repair to prevent them from coming back. If the leak involves complex flashing, valleys, or extensive shingle damage, DIY fixes usually fail.

When you are ready for a permanent solution and need an inspection you can trust, look for the best roofing company in Lincoln to assess the damage. They can check the integrity of your flashing, replace damaged shingles, and ensure your home stays dry through the next heavy storm.

Takeaways

Ceiling stains after heavy rain are a warning sign that shouldn’t be ignored, but there’s no need to panic if you approach the problem methodically. Start by inspecting the stain to determine if you have an active leak, then take immediate steps to contain water and check for further damage. Keep a close eye out for any signs of mold or structural weakening.

Remember, a temporary fix can prevent additional harm, but for lasting peace of mind, always contact a reputable roofing expert. By responding quickly and wisely, you can protect your home, save on costly repairs, and prevent those brown spots from making another unwelcome appearance.

Taking a proactive approach is the best defense against water damage. Whether you’re dealing with a minor stain or symptoms of a larger problem, knowing what to look for and acting promptly will help you keep your home safe, dry, and comfortable—no matter what the weather brings.

Looking for Home resources?

Looking to enhance your living space and create a sanctuary that supports your well-being? Explore our home partners who offer a wide range of resources to elevate your home environment.


homeHLL x Editor


Budgeting Strategies For Creating Your Dream Home

Building or remodeling a dream home is exciting, but the financial side of the process can be complex. Even seasoned homeowners who understand construction fundamentals find that costs evolve once work begins, and budgeting can quickly get out of control. Materials fluctuate in price, labor availability shifts, and design decisions carry financial consequences that are not always obvious at first.


In this article, you’ll take a practical look at how to stay on budget throughout the process—and how to follow a more structured, disciplined approach to financial control from start to finish.

No. 1

Define the Full Scope Before Setting the Budget

Before assigning numbers to anything, the entire scope of work should be clearly defined and laid out in writing. This includes structural modifications, layout changes, finish selections, mechanical systems, exterior improvements, permits, inspections, and site work, to name a few. The more specific the documentation, the more reliable the estimates will be.

Many budget overruns begin with vague assumptions that later require clarification. It also helps to separate essential work from optional enhancements early in the process. Structural corrections, code compliance upgrades, and infrastructure improvements should be accounted for before aesthetic upgrades are considered. A detailed scope creates a stable foundation for every financial decision that follows.

No. 2

Create a Financial Framework Instead of One Single Limit

Relying on one maximum budget number often leads to confusion when costs begin to shift between categories. A more effective strategy is to divide the budget into structured segments. Hard costs should include labor and materials directly tied to construction. Soft costs should cover design fees, engineering, permitting, inspections, and any temporary housing expenses. In addition, a clearly defined contingency reserve should be set aside for unforeseen conditions.

When funds are organized this way, adjustments can be made with a clear picture in mind. If one category increases, another can be evaluated without losing sight of the overall financial picture.

No. 3

Research Current Market Costs Carefully

Construction pricing is influenced by supply chains, regional demand, and labor availability. Even experienced homeowners benefit from obtaining multiple detailed bids based on the same scope of work. When reviewing estimates, it is important to examine line items rather than focusing only on totals. Allowances for finishes, assumptions about square footage, and projected labor hours can vary significantly between contractors.

Identifying these differences early prevents misunderstandings later. Up-to-date market research provides a realistic baseline and reduces the risk of underestimating true costs.


hellolovelyliving lulu and georgia

Lulu & Georgia

Elevate your space with Lulu and Georgia's stylish storage and organization solutions—where function meets design.


No. 4

Align Design Choices With Structural and Budget Realities

Design ideas often evolve during planning, and even small adjustments can carry meaningful cost implications. Higher ceilings may require additional framing and mechanical revisions. Expanding window openings may alter structural supports. Specialty materials may increase installation time.

During planning discussions, request clear explanations of how each major design decision affects labor and materials. When cost impacts are transparent, design becomes a strategic exercise rather than an emotionally driven one. Aligning design ambitions with structural realities ensures that aesthetic goals remain financially sustainable.

No. 5

Prioritize Long-Term Performance Over Short-Term Savings

Cutting costs without discrimination can create future expenses. Mechanical systems, insulation, roofing materials, and structural components should meet strong performance standards even if they increase initial spending. Durable materials and efficient systems reduce maintenance requirements and operating costs over time.

If financial adjustments are necessary, consider simplifying cosmetic elements before reducing investment in infrastructure. A budget should reflect both immediate affordability and long-term value.

No. 6

Build a Meaningful Contingency Reserve

Unexpected discoveries are common once demolition or excavation begins. Hidden water damage, outdated wiring, structural shifts, or soil conditions can surface without warning. A contingency reserve allows these issues to be addressed without destabilizing the project.

Depending on complexity, reserving ten to twenty percent of hard construction costs is often reasonable. Older homes or major structural renovations may require a larger reserve. This fund should remain separate from upgrade allowances and used only when genuine unforeseen conditions arise.

No. 7

Communicate Clearly With Your Contractor

Financial stability depends heavily on communication. A qualified remodeling contractor should provide detailed cost breakdowns, milestone payment schedules, and a clear process for handling change orders.

Before construction begins, confirm how scope adjustments will be documented and approved. Require written estimates for any modifications and review them carefully before authorizing work. Regular progress meetings provide opportunities to address potential budget concerns early, and open communication strengthens accountability while minimizing misunderstandings that lead to unexpected expenses.

No. 8

Track Expenses in Real Time

A budget is not static once construction begins on your dream home—it requires ongoing monitoring. Maintain a structured record of invoices, payments, allowances, and approved change orders. Reviewing these figures weekly helps identify trends before they become problems.

If one category begins to exceed its allocation, adjustments can be made in other areas while there is still flexibility. Real-time tracking transforms budgeting from a one-time exercise into an active management process that protects financial balance throughout the build.

No. 9

Evaluate Change Orders With Discipline

Changes during construction are common, but each one carries ripple effects. Beyond material costs, adjustments can influence scheduling, subcontractor coordination, and permit requirements.

Before approving a change, consider its functional value and long-term impact. Determine whether savings elsewhere can offset the added cost. Make sure pricing is documented clearly and incorporated into updated budget tracking. Careful evaluation of change orders prevents gradual cost escalation that can otherwise occur through incremental decisions.

No. 10

Plan for Cash Flow and Payment Timing

Even if a project remains within its overall budget, poor cash flow planning can create unnecessary strain. Contractors typically require staged payments tied to progress milestones, and certain materials may require deposits well before installation.

Mapping payment schedules against available funds ensures that financing, savings, or credit arrangements align with construction timing. Organized cash flow management helps maintain steady progress and professional relationships throughout the project.

Takeaways

Staying on budget while creating a dream home requires structure, transparency, and consistent oversight. When budgeting is treated as an active discipline rather than a single estimate, homeowners retain control over both financial outcomes and design integrity. With a clearly defined scope, realistic market research, disciplined change management, and real-time tracking, the result is a completed home that reflects careful planning, thoughtful decision-making, and long-term value.

Looking for Home resources?

Looking to enhance your living space and create a sanctuary that supports your well-being? Explore our home partners who offer a wide range of resources to elevate your home environment.


homeHLL x Editor


Creating An Outdoor Space You'll Use All Year

Those of us who have plenty of outdoor space on our property might want to make good use of it, but often the change of the seasons can get in the way. When there’s a little chill in the air or things start getting darker earlier, it’s tempting to head indoors. However, with a little preparation, you can enjoy your garden all year round.


In this article, you’ll find practical, high-impact ways to give your outdoor area a makeover—so your home’s exterior stays comfortable, functional, and inviting through every season.

Here are a few ways you can make that happen.

No. 1

Build Your Outdoor Living Space

First and foremost, you need a space that genuinely invites outdoor use, such as a well-designed patio. This means choosing materials that are weather-resistant, such as porcelain paving or natural stone, and positioning the patio so it provides room for seating, dining, and movement without feeling cramped.

If your area sees a lot of rain, adding non-slip finishes can be crucial for safety, too.

No. 2

Add Lighting For Comfort, Atmosphere, And Visibility

If you find yourself retreating indoors at night because it’s simply getting too dark, outdoor lighting is the clear solution. Layering your lights helps you cover both function and mood: practical illumination for visibility and safety (such as pathway and step lighting), plus ambient options like wall sconces or lanterns that add a warm, inviting glow.

No. 3

Consider Your Heating Options

When the weather shifts, it’s often the chill in the air that makes spending time outdoors less appealing. The good news is that outdoor heating options—from freestanding patio heaters and wall-mounted units to fire pits—can create real warmth while also providing a gorgeous focal point for friends and family to gather around.

Whether you choose energy-efficient options or the unmatched comfort of an open flame, make sure safety and comfortable seating are priorities in any heated area.


hellolovelyliving terrain

Terrain

Indoor and outdoor living, garden, and entertaining essentials that are well-designed, lasting, and beautiful.


No. 4

Give It A Tidy Evergreen Look

A fresh, green look can instantly elevate an outdoor space, but it can fade after summer—or you might not love the time and effort needed to keep everything maintained. At the same time, you don’t want overgrown greenery to spoil the view.

That’s why you might want to consider DD's synthetic grass installation as an option instead. It can offer lush green lawns that look great all year round, without worrying about ongoing upkeep or losing their lustre over time.

No. 5

Consider The Spot’s Privacy

If you want to feel comfortable—and ensure your guests can truly relax—privacy can play a bigger role in your outdoor space’s usability than you might expect. Whether you choose slatted timber screens, composite panels, or green walls, you can create a more intimate feel. Pergolas and other shelters can also help you stay outside when it’s raining lightly.

TAkeaways

Whether you’re looking to enjoy outdoor dining more often, invite friends to socialise, or simply relax underneath the stars, creating an outdoor space that works all year round can give your home a serious quality-of-life boost. With a solid patio foundation, layered lighting, thoughtful heating, an evergreen look, and improved privacy, your garden can feel just as welcoming in the colder, darker months as it does in summer.

Looking for Home resources?

Looking to enhance your living space and create a sanctuary that supports your well-being? Explore our home partners who offer a wide range of resources to elevate your home environment.


homeHLL x Editor


Improve Your Workplace Aesthetic: Practical Updates That Matter

When it comes to keeping your company at its best—and making sure you’re doing everything you can to improve how the public perceives it—one of the most effective steps you can take is enhancing the look and feel of your workplace. That includes both the interior and exterior, and it’s an area where consistent effort almost always pays off.


In this article, we’ll look at a few practical, high-impact ways to elevate your workspace—from flooring and furniture choices to the small details that shape first impressions—so your business benefits as much as possible.

No. 1

Start With The Flooring

One of the things you might want to consider for your flooring is polished concrete. Polished concrete floors have evolved far beyond their industrial roots. Once reserved for warehouses and factories, they are now celebrated in offices, studios, and creative spaces.

The process involves mechanically grinding and polishing a concrete slab to achieve a smooth, reflective surface. The result is a floor that catches light beautifully, creating a sense of openness and cleanliness while remaining incredibly durable. Unlike carpet or certain tiles, polished concrete doesn’t trap dust or allergens, making it easier to maintain a clean, professional environment.

No. 2

Furniture

Furniture is another key component. Opt for pieces that balance comfort with style, ensuring that employees can move, stretch, and work efficiently. Adjustable desks, ergonomic chairs, and thoughtfully arranged communal areas contribute not only to physical well-being but also to a sense of shared purpose within the space. Even small upgrades—like polished metal hardware, matching storage solutions, or minimalist shelving—can create a cleaner, more organized impression.

No. 3

Small Details

Paying attention to the details visitors notice can also elevate the perception of your workspace. Clear signage, tidy reception areas, and uncluttered surfaces signal professionalism and care. Incorporating natural elements such as plants or small indoor gardens introduces warmth and can help reduce stress, while textured materials—like a rug over a polished concrete floor—add subtle visual contrast without compromising a sleek aesthetic.


hellolovelyliving ergonofis

Ergonofis

Office furniture and accessories designed in Canada. Discover high-end standing desks equipped with groundbreaking Swipe technology.


No. 4

Reflecting Values

Ultimately, improving your workplace isn’t about following trends; it’s about creating an environment that reflects your values and supports the people who use it every day. Whether through durable, gleaming Polished Concrete Cairns, well-chosen furnishings, or the thoughtful integration of light, color, and texture, even small changes can make a noticeable difference.

A workspace that is visually appealing, functional, and clean signals to employees and clients alike that the business is capable, attentive, and forward-thinking—an investment that pays off in both atmosphere and performance.

Takeaways

If you’re able to get even a few of these elements right, you’ll likely find that your workplace looks significantly better—and that everyone who works there or visits can see and feel the difference. The goal is a space that supports productivity and well-being while strengthening your brand through everyday impressions.

Looking for Home resources?

Looking to enhance your living space and create a sanctuary that supports your well-being? Explore our home partners who offer a wide range of resources to elevate your home environment.


homeHLL x Editor


Top 5 Reasons People Consider Renovating The Kitchen

Few home projects carry as much impact as a kitchen update. In fact, remodeling data consistently shows that kitchens rank among the most common renovation jobs, second only to bathrooms. One recent industry report noted that 61% of remodelers completed kitchen projects, highlighting just how popular kitchen renovations remain.


Why is the kitchen such a focus? Because it sits at the center of daily life. It’s where mornings begin, where guests gather, and where routines unfold. When the space no longer supports how you live, change becomes necessary.

In this article, we’ll walk through five of the most common reasons homeowners decide it’s time to renovate—ranging from practical triggers (like new appliances or an extension) to lifestyle changes (like cooking more or updating your interior style).

No. 1

You Invested in New Appliances

Replacing a major appliance often triggers the need for a broader redesign. A new range, refrigerator, or cooktop isn’t simply a plug-and-play upgrade—these pieces anchor the entire layout.

Different models may vary in size, ventilation requirements, or configuration. A larger range might require new cabinetry spacing. An induction cooker may influence countertop materials. A built-in refrigerator demands precise measurements.

Once one element shifts, the rest of the room can start to feel out of balance. Renovating allows the layout, cabinetry, and finishes to work together instead of feeling pieced together over time.

No. 2

After a Kitchen Extension

Kitchen extensions are popular because they open up the home. Families often want more natural light, a larger island, or better flow between indoor and outdoor spaces. Expanding square footage can dramatically improve functionality.

However, once an extension is added, the original kitchen may look dated or disconnected. Flooring and lighting transitions can also feel awkward.

A full redesign helps integrate old and new areas seamlessly. Matching materials, adjusting layouts, and updating cabinetry ensure the space feels cohesive rather than patched together.

No. 3

Clutter Takes Over

A kitchen that constantly feels messy is often a design problem rather than a cleaning issue. Insufficient cabinetry, poor drawer organization, or limited pantry space can create ongoing visual chaos.

Renovation offers the chance to rethink storage from the ground up.

What can it include for better storage flow?

  • Deep drawers for cookware

  • Vertical dividers for baking sheets

  • Hidden pull-outs for spices

  • Integrated trash systems

Smart storage reduces countertop clutter and creates breathing room. Besides, a functional kitchen doesn’t necessarily require having less—it often comes down to keeping what you need in the right place.


hellolovelyliving ikea kitchen remodel

Ikea

Plan your kitchen remodel the smart way with IKEA—get inspired with design ideas, explore planning tools, and unlock member-only perks through IKEA Family.


No. 4

Your Interior Style Has Evolved

Homes evolve as tastes change. You may have updated living areas with warmer tones, natural textures, or modern lighting, while the kitchen still reflects an older aesthetic.

Because the kitchen is often visible from adjacent spaces, mismatched styles become more noticeable over time. Updating cabinetry finishes, countertops, hardware, and lighting can bring the kitchen in line with the rest of the home’s design language.

Consistency creates visual harmony at home.

No. 5

You Want to Cook More

Some kitchens simply don’t inspire use. This can happen for many reasons, such as poor lighting, awkward layouts, or limited prep space. But the result is the same: the kitchen discourages cooking. Over time, that can shift habits toward takeout and convenience foods.

A thoughtful renovation can make the space more intuitive for how you want to use it:

Better task lighting improves visibility. A well-placed island adds prep room. Improved flow between sink, stove, and refrigerator supports efficiency.

When a kitchen feels functional and welcoming, people naturally spend more time there. Renovating can change how you experience daily life inside your own home.

TAkeaways

Kitchen renovations stay popular for a reason: they improve the space you rely on every day. Whether you’ve upgraded appliances, expanded the footprint, outgrown your storage, changed your style, or simply want to cook more, remodeling can help your kitchen match your current life—not the one you had years ago. When the layout, storage, and design finally work together, the kitchen stops being a frustration and becomes a place you genuinely enjoy using.

Looking for Home resources?

Looking to enhance your living space and create a sanctuary that supports your well-being? Explore our home partners who offer a wide range of resources to elevate your home environment.


homeHLL x Editor


Why Professional House Cleaning Matters More in 2026

In 2026, life is busier than ever. Your home isn’t just a place to sleep anymore. It’s also where you work, work out, learn, recharge, and feel protected. It’s no longer only about how your home looks—everything happens there. It’s about time, physical health, and mental well-being.


In this article, we’ll explore why hiring a professional to clean your home has become less of a “nice-to-have” and more of a practical support system—whether you’re searching for reliable maid services in Sacramento, house cleaning in Indianapolis, or high-end house cleaning in Los Angeles.

Homes are working harder in 2026.

Think about all your home does for you right now. You work there. You unwind there. You host friends and family there. When we spend more time indoors, dirt, dust, and clutter build up faster—and a quick weekend clean simply doesn’t cut it anymore.

Most people don’t have the time or energy to do the deep, detailed work that professional cleaners handle. And you can feel the difference—not just in how a home looks, but in how it lives.

No. 1

Time Is the New Luxury

People hire cleaning professionals for many reasons, but time is one of the biggest drivers in 2026.

After long workdays, family responsibilities, and constant digital noise, the last thing most people want to do is scrub bathrooms or mop floors. Hiring a cleaning service gives you your weekends back—and that’s a bigger deal than ever.

How Professional Cleaning Saves Time


You can use that time for family, rest, hobbies, or simply doing nothing—without feeling guilty about it.

No. 2

Your Health Improves When You Live in a Tidy Home

In 2026, people are more health-conscious than ever. Dust, allergens, pet dander, and bacteria can build up quickly—especially in busy households. Professional cleaners don’t just clean what you can see; they also tackle what you can’t.

They help improve indoor air quality and reduce allergens, which is particularly important for children, older adults, and anyone with allergies or asthma.

Families in Sacramento and Los Angeles commonly use maid services and house cleaning businesses for regular, thorough cleaning. This is one of the biggest reasons why.

No. 3

Pros Clean Differently (and Better)

Let’s be honest: most people do a quick clean. Professionals clean with intention, technique, and consistency.

They know:

  • Which products work best on which kinds of surfaces

  • How to remove grime without damaging finishes

  • Where dirt hides (behind baseboards, appliances, and vents)

For example, Indianapolis house cleaning professionals often deliver a level of detail that’s difficult to match with DIY cleaning—no rushed corners and far fewer missed spots.


hellolovelyliving homeaglow

Book affordable, top-rated cleaning services with Homeaglow—intro deals from $19, verified 4.8-star reviews, easy online scheduling, and appointments available 7 days a week.


No. 4

More Peace of Mind, Less Worry

Walking into a clean home feels good. No piles to deal with. No mental checklist running in the background. Just a calm, tidy space.

When someone else handles the cleaning, you don’t have to live with the constant thought of, “I should really take care of that.” In 2026, a clean home is a bigger part of mental wellness than most people realize.

No. 5

Protect Your Home for the Long Term

Professional cleaning doesn’t just make your home look great now—it also helps protect it over time.

Long-Term Benefits of Professional Cleaning

Area of the HomeLong-Term BenefitCarpetsLast longer, fewer replacementsFloorsReduced wear and scratchesBathroomsLess mold and buildupAppliancesBetter performanceFurniturePreserved quality and appearance

Regular upkeep helps prevent dirt and neglect from causing damage—which can save real money in the long run.

No. 6

Cleaning Services That Fit Into Your Life

In 2026, cleaning services are more flexible than ever. You can choose:

  • Weekly or biweekly cleaning

  • Deep-cleaning and maintenance plans

  • Eco-friendly products

  • Pet-safe cleaning methods

Whether you live in a busy city or a family-friendly neighbourhood, services are designed to fit your life—not the other way around.

No. 7

Hiring a Pro to Clean vs. Doing It Yourself

Cleaning yourself can work—but it takes significant time and effort.

Professional cleaning typically delivers a deeper clean, supports better health, and requires far less labour on your end.

What’s the takeaway? Professional cleaners don’t just “clean better”—they reduce stress and make your routine easier.

No. 8

Why It Matters More Than Ever

Hiring someone to clean your house in 2026 isn’t a luxury; for many households, it’s a practical necessity. A clean home supports your time, your health, and your mental clarity. That’s why more people are turning to trustworthy maid services in Sacramento, reputable house cleaning services in Indianapolis, and top-notch house cleaning in Los Angeles.

Takeaways

As life gets busier, the state of your home affects everything else—your schedule, your energy, your mood, and even your health. Professional cleaning isn’t just about having spotless floors; it’s about creating a home that functions smoothly as your all-in-one space. When you outsource the work, you gain back time, reduce stress, and make daily life feel more manageable. That’s exactly why hiring a professional house cleaner matters more than ever in 2026.


Looking for Home resources?

Looking to enhance your living space and create a sanctuary that supports your well-being? Explore our home partners who offer a wide range of resources to elevate your home environment.


homeHLL x Editor


4 Natural Materials That Instantly Soften Modern Homes

Modern interiors often celebrate clean lines, minimal palettes, and sleek surfaces. While visually striking, they can sometimes feel a little cold or impersonal. Natural materials bring balance. They add warmth, texture, and character without sacrificing a contemporary look.


In this article, you’ll find a practical, design-forward list of natural elements that gently soften modern spaces while keeping them refined—so your home still looks crisp and intentional, but feels more welcoming and lived-in.

Here are natural elements that gently soften modern spaces while keeping them refined.

No. 1

Wood Flooring for Grounded Warmth

Few materials change the feel of a room faster than wood underfoot. Its subtle grain patterns break up uniform surfaces and make large spaces feel welcoming rather than echoing.

Options such as wood flooring Ampthill style installations even work in moisture-prone areas when properly treated, bringing continuity between rooms and avoiding harsh transitions.

Wood also ages gracefully, gaining character instead of wear.

No. 2

Linen Textiles for Soft Contrast

Linen diffuses light and softens sharp architectural lines. Curtains, tablecloths, and upholstery made from linen prevent rooms from feeling rigid.

Its slightly imperfect weave adds movement and keeps overly polished interiors from looking staged.

No. 3

Stone Surfaces for Calm Texture

Natural stone introduces depth without visual clutter. Unlike synthetic finishes, its irregular markings create quiet interest.

Stone works especially well in modern homes because it complements minimal design while adding a grounded presence.


hellolovelyliving bedrosians

Bedrosians

Elevate every surface with Bedrosians tile and stone—timeless textures, modern finishes, and statement-making designs for floors, walls, kitchens, and baths.


No. 4

Woven Fibers for Subtle Pattern

Materials such as jute, rattan, and seagrass bring organic rhythm into structured spaces. Baskets, rugs, and lighting shades add detail without overwhelming simplicity.

These textures also absorb sound, helping open-plan rooms feel calmer and more comfortable.

No. 5

Clay and Ceramic Finishes for Handcrafted Character

Hand-finished ceramics add personality through slight variations in shape and glaze. Whether used for vases, tiles, or tableware, they introduce the human touch modern interiors sometimes lack.

Imperfection creates comfort.

No. 6

Wool for Quiet Comfort

Wool rugs and throws provide warmth—visually and physically. Their density softens acoustics and balances harder materials like glass or metal.

Neutral wool tones integrate easily with modern colour palettes.

No. 7

Leather for Depth and Patina

Natural leather gains richness over time. Instead of wearing out, it develops character. A leather chair or accessory adds maturity to minimal interiors and helps prevent spaces from feeling overly delicate.

No. 8

Natural Plaster for Gentle Walls

Lime or clay plaster creates subtle variation in walls, replacing flat painted surfaces with depth. Light moves across it softly, creating warmth without introducing strong colour.

It keeps minimalism intact while removing sterility.

No. 9

Bamboo for Lightness and Sustainability

Bamboo works well in modern homes because of its clean appearance and eco-friendly qualities. Furniture, panels, or accessories provide warmth without heaviness.

Its fine grain maintains a contemporary feel while introducing nature.

No. 10

Indoor Greenery for Living Texture

Plants are the most responsive natural material. They change with seasons, light, and care. Even a single well-placed plant softens hard geometry and makes spaces feel inhabited.

They also subtly improve air quality and mood.

No. 11

Bringing It All Together

Modern homes do not need to abandon clean design to feel welcoming. Natural materials act as balance rather than decoration. By combining smooth architecture with organic textures, spaces become both contemporary and comfortable.

Takeaways

The most inviting modern interiors are rarely made from sleek finishes alone. By layering in wood, linen, stone, woven fibres, ceramics, wool, leather, natural plaster, bamboo, and greenery, you preserve the clarity of modern design while adding warmth, depth, and personality. The result is a home that looks intentional—yet feels genuinely lived in.

Looking for Home resources?

Looking to enhance your living space and create a sanctuary that supports your well-being? Explore our home partners who offer a wide range of resources to elevate your home environment.


homeHLL x Editor


How To Design A Patio That Feels Like An Extension of Your Home

A patio should never feel like a separate add-on. When it’s designed thoughtfully, it becomes a natural continuation of your living space—a place where indoor comfort meets outdoor freedom. It’s where mornings begin with fresh air, where evenings slow down, and where everyday moments feel more connected to nature.


In this article, you’ll learn how to design a patio that blends seamlessly with your lifestyle and your interior space by focusing on flow, comfort, materials, lighting, and the small details that make outdoor living feel truly “at home.”

Here is how to create a patio that merges naturally with the way you live.

No. 1

Start With How You Live

Before choosing materials or layouts, think about how you want to use your patio. Ask yourself:

  • Will this be a place to relax or to entertain?

  • Do you want quiet mornings or social evenings?

  • Will you eat outside often?

  • Do you want space for children or pets?

Your patio should support your daily rhythm, not just look beautiful. When design reflects lifestyle, the space becomes both meaningful and functional.

No. 2

Create Visual Flow From Indoors to Outdoors

The best patios feel connected because they mirror the style and energy of the interior. Use similar colours, textures, or design themes so the transition feels natural.

For example:

  • If your home is modern, use clean lines and simple materials.

  • If your home is warm and rustic, choose stone, wood, and softer finishes.

  • If your interior uses neutral tones, extend that palette outdoors.

When the visual language stays consistent, your patio becomes a true extension of your home.

No. 3

Use Doors and Openings as Design Anchors

Your patio begins where your home opens. Large sliding doors, bi-fold doors, or French doors create a strong visual and physical connection.

Design your patio around these entry points so the space feels inviting the moment the doors open. This connection encourages movement between inside and outside without interruption.


hellolovelyliving 1-800 lighting

1-800 Lighting

Transform your exterior into a welcoming, well-lit oasis with stylish outdoor lighting fixtures—wall lights, post lamps, landscape, and security options for curb appeal, safety, and ambiance.


No. 4

Choose Materials That Feel Natural Underfoot

Comfort starts with what you touch. Stone, pavers, and textured surfaces should feel solid, warm, and welcoming. Materials that reflect nature make the space feel grounded and timeless.

Professional patio construction ensures that your patio is not only visually beautiful but also structurally sound and built to last. A well-built foundation supports long-term comfort and confidence in your space.

No. 5

Design for Comfort First

Just like your living room, your patio should invite people to stay. Choose seating that feels supportive and relaxed. Add cushions, throws, or outdoor rugs to soften the space.

Think about:

  • Comfortable chairs or loungers

  • Shaded areas for warm days

  • Space to stretch out or gather together

Comfort is what transforms a patio from a feature into a destination.

No. 6

Bring Indoor Details Outdoors

Small design details make a big difference. Adding elements that are typically found indoors creates familiarity and warmth.

Consider:

  • Side tables

  • Soft lighting

  • Decorative planters

  • Outdoor artwork

  • Fire features or heaters

These details blur the line between interior and exterior living.

No. 7

Use Plants as Natural Walls

Plants create privacy, softness, and structure. Instead of hard boundaries, use greenery to shape your space.

You can:

  • Frame the patio with shrubs

  • Add tall planters for intimacy

  • Use climbing plants for vertical interest

Plants make your patio feel enclosed without making it feel closed in.

No. 8

Think About Lighting as Mood

Lighting shapes the atmosphere. Soft lighting helps your patio feel welcoming after sunset and encourages you to use the space longer.

Use:

  • Warm string lights

  • Pathway lighting

  • Wall-mounted fixtures

  • Lanterns or solar lights

Gentle lighting keeps the space calm and inviting.

No. 9

Allow for Natural Movement

Just like inside your home, your patio should have flow. Leave enough space to walk comfortably. Create clear zones for seating, dining, and movement. Avoid overcrowding the area with too many features.

Open space allows energy to move naturally and helps the patio feel calm, functional, and easy to enjoy.

No. 10

Make It Personal

Your patio should reflect you. Add elements that carry emotional meaning:

  • Favourite plants

  • Handmade décor

  • Family seating zones

  • Colours that make you feel relaxed

Personal touches turn structure into a sanctuary.

No. 11

Let Nature Be Part of the Design

Wind, light, and seasonal change are part of the experience. Choose materials and layouts that work with nature rather than against it.

Position seating to enjoy sunsets, breezes, or garden views. Let the environment participate in the design.

Takeaways

Designing a patio that feels like an extension of your home is ultimately about connection. It’s about creating a space where indoor comfort flows naturally into outdoor calm. With thoughtful planning, quality construction, and intentional design choices, your patio becomes more than a surface—it becomes a living space filled with warmth, presence, and possibility.

When your patio reflects how you live and how you relax, it becomes a place you return to again and again—not simply because it’s outside, but because it truly feels like home.

Looking for Home resources?

Looking to enhance your living space and create a sanctuary that supports your well-being? Explore our home partners who offer a wide range of resources to elevate your home environment.


homeHLL x Editor


Signs Of Hidden Mold In Walls

Mold is often imagined as a visible black or green patch spreading across walls or ceilings. But some of the most dangerous mold problems occur where you can’t see them — inside your walls. Left undetected, mold can quietly damage your property’s structure and pose a serious risk to your health.


In this article, we'll expose the common causes and subtle signs of hidden mold, explain how it spreads behind drywall, and outline exactly what to do if you suspect a problem. Armed with this knowledge, you’ll be better equipped to catch mold early, take appropriate action, and protect your home and your family.

No. 1

Signs of Hidden Mold in Walls

Mold doesn’t always appear out in the open. In many cases, it thrives silently behind drywall, spreading after unnoticed leaks or prolonged exposure to high humidity. By the time visible signs emerge, the issue may already be deep-rooted. Below are 10 telltale indications of mold lurking behind your walls.

1. Persistent Musty Odor

A musty or earthy smell that won’t go away is often the first red flag. It may resemble the scent of damp cardboard, old books, or wet fabric. Mold releases microbial volatile organic compounds (MVOCs) that produce that telltale unpleasant smell — even when the fungus is completely hidden.

Hotspot indicator: The odor may intensify in areas near bathrooms, basements, or after heavy rainfall.

If fresh air, ventilation, or air fresheners do nothing to resolve the smell, mold could be active behind the walls.

2. Unexplained Indoor Allergy Symptoms

Mold spores can circulate through your home, even if invisible. If you or your family start to experience:

  • Sneezing

  • Nasal congestion

  • Coughing or throat irritation

  • Itchy or watery eyes

And these symptoms improve when you leave the house, there’s a chance mold is to blame.

Children, elderly individuals, and those with asthma or autoimmune issues are particularly susceptible to indoor mold exposure.

3. Peeling Paint or Bubbling Wallpaper

Moisture buildup behind drywall can weaken adhesives, causing:

  • Bubbling wallpaper

  • Flaking or cracking paint

  • Blistered or curling edges

This isn’t just a cosmetic problem — those bubbles are often the result of water pushing through from behind the surface, potentially acting as a breeding ground for mold. If the damage recurs in the same spot, further investigation may be necessary.


hellolovelyliving houzz

Houzz

Looking for professional mold removal service? Discover top-rated experts on Houzz today!


4. Warped or Stained Drywall

Wall stains, especially yellow, brown, or dark patches that grow larger over time, signal water damage — and water damage is mold’s best friend.

Also watch for:

  • Soft, swollen, or bulging drywall

  • Walls that give slightly when pressed

  • Cracking textures that worsen over weeks or months

This points to prolonged hidden moisture and potentially long-term mold growth inside the wall cavity.

5. Discoloration Without a Clear Source

Unexpected spots or streaks — black, green, gray, or even pink — that persist or return after cleaning might be mold escaping from behind the wall.

Pro tip: If bleach or paint temporarily conceals it but spots come back, you're likely masking — not eliminating — a deeper issue.

Visible discoloration almost always means there’s more going on beneath the surface.

6. Frequent Respiratory Issues

Aside from common allergy symptoms, mold exposure can lead to:

  • Asthma flare-ups

  • Chronic nasal congestion

  • Recurrent sinus infections

  • Wheezing or difficulty breathing

For sensitive individuals, hidden mold can quickly impact daily quality of life. If breathing becomes easier when away from home, consider the hidden mold factor.

7. Elevated Humidity in Certain Rooms

Consistently humid rooms can indicate poor ventilation — and trapped moisture behind walls. Identifiers include:

  • Condensation on windows

  • A damp feeling even without visible wetness

  • Mildew smell intensifying over time

Frequently affected spaces include bathrooms, kitchens, basements, and laundry rooms. Using a digital hygrometer to monitor indoor humidity (aim for under 50%) is a smart preventative step.

8. History of Water Damage

Has your home experienced any of the following?

  • Leaky pipes or plumbing issues

  • Roof leaks

  • Flooding or damp basements

  • Improperly dried drywall

Even when the surface appears dry, residual moisture can remain trapped inside insulation or framing, where mold quietly thrives. Proper remediation means using professional-grade dehumidification equipment after any water incident.

9. Deteriorating Caulk or Grout in Wet Areas

Small breaches in waterproof seals can allow moisture to infiltrate wall cavities unnoticed.

Look for:

  • Cracked or shrinking caulk around tubs, sinks, and windows

  • Missing grout between tiles

  • Water pooling or dripping behind fixtures

Even minor leaks behind cabinets or fixtures can trigger mold within days.

10. Unwanted Pest Activity Near Certain Walls

Mold attracts moisture-loving insects, such as:

  • Termites

  • Cockroaches

  • Carpenter ants

  • Silverfish

If you're seeing new pest intrusions near particular spots — especially alongside any of the signs listed above — there may be water damage inside your wall that’s also fueling mold growth.

No. 2

Health Symptoms Linked to Hidden Mold

Prolonged exposure to indoor mold can lead to:

  • Headaches and fatigue

  • Throat irritation and coughing

  • Skin rashes

  • Breathing difficulty

  • Lightheadedness or dizziness

Individuals with asthma, allergies, or weakened immune systems are at higher risk for severe reactions. If health issues worsen at home and improve outside, mold should be considered a likely culprit.

No. 3

How Professionals Detect Hidden Mold in Walls

Experts use non-invasive techniques to locate moisture and mold with precision:

  • Moisture meters assess dampness behind walls

  • Thermal imaging cameras reveal temperature changes caused by water leaks

  • Air sampling tests detect airborne spores

  • Borescope cameras inserted through small holes allow visual inspection inside wall cavities

These methods prevent unnecessary destruction while accurately diagnosing the problem.

No. 4

What to Do If You Suspect Hidden Mold

Important: Do NOT cut into walls yourself.

Opening walls without containment can cause mold spores to spread and contaminate other areas of your home.

Professional Response Steps:

  1. Hire a licensed mold inspector to conduct a thorough evaluation.

  2. Identify and correct the moisture source — roof, plumbing, humidity, or ventilation.

  3. Use a professional mold remediation Bohemia, NY to remove contaminated materials and restore air quality.

  4. Confirm all affected areas are properly insulated and sealed to avoid recurrence.

No. 5

When Hidden Mold Demands Immediate Action

  • A strong, musty odor that spreads throughout the home

  • Widespread surface damage (peeling paint, warping drywall)

  • Visible mold paired with soft or crumbling walls

In these situations, mold growth may be extensive — possibly affecting insulation, wall studs, or flooring. Swift action prevents escalated structural repairs and long-term health risks.

No. 6

Tips for Preventing Hidden Mold in the Future

  • Fix leaks as soon as they’re discovered, even minor ones.

  • Use exhaust fans in kitchens, bathrooms, and laundry areas.

  • Keep indoor humidity levels below 50%.

  • Dry out wet materials within 24–48 hours.

  • Inspect for condensation and water pooling around windows and appliances.

  • Ensure areas behind walls or appliances have adequate ventilation.

Being proactive — and consistent — is the best way to prevent mold from ever developing behind your walls in the first place.

Takeaways: Don’t Let Hidden Mold Take Hold

While hidden mold inside walls can be tricky to detect, it’s far from harmless. Often beginning with moisture that seems minor or insignificant, mold can evolve into a serious issue that affects your property’s structure, indoor air quality, and overall health.

In this article, you've learned how to identify the warning signs, understand the causes, and take safe and effective action. Whether it’s an odd smell, staining on drywall, or recurring health symptoms, it’s essential not to ignore the clues your home gives you.

When in doubt, consult a trained professional. Acting early could save you thousands in repair costs — and protect the well-being of everyone under your roof.

Looking for Home resources?

Looking to enhance your living space and create a sanctuary that supports your well-being? Explore our home partners who offer a wide range of resources to elevate your home environment.


homeHLL x Editor


Mold In the Home: What Homeowners Need To Know

It’s easy to dismiss mold as a minor nuisance — something that exists only in poorly maintained homes or damp basements. But mold is far more insidious than it appears on the surface. It poses threats that strike at the core of what every homeowner holds dear: the structural integrity of their property, its resale value, and most importantly, the health and well-being of the people who live there.


While it may not always be visible, mold can silently undermine your home and health. That’s why understanding mold — how it forms, how to prevent it, how to detect it, and how to treat it — is crucial for responsible homeownership.

In this article, we break down everything you need to know about mold, from early warning signs to prevention methods, treatment options, and the often-overlooked areas where mold can grow unchecked. With this knowledge, you’ll be equipped to protect your home and everyone living in it.

No. 1

Mold Is More Common Than You Think

Discovering mold in your home can be distressing, but if you take comfort in numbers, here’s some perspective: mold is incredibly common. In fact, studies show that nearly 50% of residential properties in the United States harbor mold to some degree.

Properties in humid states — such as Florida, New Jersey, South Carolina, and Arkansas — are particularly vulnerable, but no region is entirely mold-proof. Warmth, moisture, and poor ventilation are the only ingredients mold needs to thrive — all of which can exist in homes anywhere in the country.

Why This Matters:

  • You’re not alone — it’s a common issue faced by millions.

  • The problem is typically not personal fault, but environmental.

  • Since it's widespread, professional help is readily available.

Knowing how prevalent mold truly is can reduce the shame or stress homeowners often associate with its presence — and allow for more rational, proactive action.

No. 2

Preventive Measures Are Always Better Than a Cure

You’ve likely heard the saying: “An ounce of prevention is worth a pound of cure.” That wisdom couldn’t be truer when it comes to mold. While there are effective ways to eliminate mold once it’s established, it’s always cheaper, easier, and healthier to prevent mold before it forms.

Prioritize These Preventative Measures:

  • Maintain good ventilation, especially in high-moisture areas like kitchens, bathrooms, and basements.

  • Use dehumidifiers to keep indoor humidity levels between 30%–50%.

  • Install or upgrade extractor fans in regularly humid areas.

  • Open windows daily, even briefly, to allow fresh airflow.

  • Dry wet areas immediately, especially after spills or leaks.

A consistent approach to managing moisture and airflow dramatically reduces the chances of ever battling mold in the first place.

No. 3

Yes, Even New Homes Are at Risk

It’s a common misconception that mold is a byproduct of age and neglect. But many modern, brand-new homes are fertile ground for mold due to poor ventilation and construction oversights.

Why Mold Develops in New Homes:

  • Building materials may be exposed to rain before the home is weatherproofed, locking in moisture.

  • Early high-humidity activities (showering, cooking, laundry) introduce moisture before the home is fully dried.

  • Modern homes are tightly sealed, limiting natural airflow that would otherwise help regulate humidity.

Even in quality builds, mold can form if these factors go unaddressed. It’s a reminder that mold is less about a home’s age and more about its internal environment.


hellolovelyliving houzz

Houzz

Looking for professional mold removal service? Discover top-rated experts on Houzz today!


No. 4

Early Detection Makes a Big Difference

The key to stopping mold in its tracks? Catch it early. Mold is manageable and often easy to remove when detected in the beginning stages. But the longer it grows, the more it spreads, damages structures, and compromises indoor air quality.

How to Identify Mold Early:

  • Look for musty odors, even if no mold is visible.

  • Watch for discoloration on walls, ceilings, or floors (black, green, or even white patches).

  • Note any worsening allergy-like symptoms in household members.

Confirming Mold Presence:

  • A professional mold inspection can detect hidden mold and potential breeding grounds.

  • Mold testing services identify the exact type of mold, which can inform appropriate treatment.

Investing in expert assessments can prevent extensive repairs and give you peace of mind.

No. 5

Mold Exposure Can Affect Your Health

While small levels of mold may go unnoticed, higher concentrations—or prolonged exposure—can cause physical side effects, especially among vulnerable groups.

Common Health Symptoms Associated with Mold Exposure:

  • Eye irritation and watery eyes

  • Persistent coughing or sneezing

  • Throat irritation

  • Rashes or skin irritation

  • Sinus congestion

  • Frequent headaches

Those with asthma, allergies, or weakened immune systems are at greater risk. If symptoms improve when you leave the home, that’s a clear sign to investigate further.

No. 6

Your HVAC System Could Be Spreading Mold

Even with clean and dry visible spaces, mold may be hiding — and spreading — through your HVAC system. If moisture or microbial growth infiltrates air ducts or filters, mold spores can be dispersed throughout your home, contaminating every room and triggering health issues.

Proactive Steps to Prevent HVAC Mold:

  • Change air filters regularly, at least every 60–90 days.

  • Schedule professional HVAC cleanings, especially in humid environments.

  • Use high-efficiency air filters (HEPA) that trap spores.

  • Inspect air ducts for dust, debris, and moisture accumulation.

Proper HVAC maintenance goes a long way in keeping mold localized—and ideally, non-existent.

No. 7

Energy-Efficient Homes Are More Vulnerable Than You Think

While energy-efficient, airtight homes keep utility bills down and temperature stable, they also pose a unique risk: limited natural ventilation. These homes are insulated against heat loss—but also against fresh air exchange.

Ventilation Strategies for Airtight Homes:

  • Invest in mechanical ventilation systems like HRVs (heat recovery ventilators).

  • Install exhaust fans in bathrooms, kitchens, and laundry rooms.

  • Use dehumidifiers to compensate for naturally higher moisture content.

  • Regularly open windows when possible, especially after activities that introduce moisture.

The trade-off between efficiency and ventilation must be balanced to keep mold from gaining a foothold.

Takeaways: Stay One Step Ahead of Mold for a Happier, Healthier Home

Mold might be out of sight, but it should never be out of mind. As we’ve outlined in this guide, it’s not just an aesthetic nuisance — it’s a threat to your health, your property’s durability, and its market value.

From new builds to old homes, from HVAC ducts to humid bathrooms, mold can take root anywhere if conditions allow. But here’s the good news: with a solid understanding of how mold functions and proactive strategies to manage moisture, you can protect your home and those living inside it.

Remember:

  • Mold is incredibly common — but manageable.

  • Ventilation and humidity control are your best defenses.

  • Early detection saves time, money, and stress.

  • Health symptoms should not be ignored — they could be a warning sign.

  • No home is immune, but every home can be protected.

So keep mold awareness on your mental homeowner checklist. Because a clean, dry, mold-free home isn’t just better for your walls — it’s better for your well-being.

Looking for Home resources?

Looking to enhance your living space and create a sanctuary that supports your well-being? Explore our home partners who offer a wide range of resources to elevate your home environment.


homeHLL x Editor


How To Give Your Home's Exterior A New Lease of Life

You’ve spent time and energy making the inside of your home feel warm, inviting, and stylish — but every time you pull into the driveway, something feels… off. The exterior seems tired, even a little neglected. Maybe you're noticing chipped paint, a sagging gate, or landscaping that looks like it's given up.


Here’s the truth: no matter how beautiful your interiors are, your home's curb appeal sets the stage. It's the first impression friends, family, and neighbors get. If your home’s exterior looks dated or worn down, it can discredit everything else you've worked so hard to create inside.

In this article, we’ll take you through the most common culprits that drag down a home's exterior design — from dirty driveways to faulty gutters — and provide practical, straightforward solutions to revive your home’s appearance quickly and affordably.

Let’s take the guesswork out of it and help your home shine from the outside in.

No. 1

Old, Chipped Paint or Stained Render

This one tops the list for a reason. A fresh coat of paint is hands-down one of the easiest ways to breathe new life into your home’s exterior. Over time, exposure to sun, wind, rain, and pollution leads to peeling, fading, or staining — all of which age your home prematurely.

Whether it's stained render from years of rainfall or paint that’s cracked and flaking, these surface imperfections instantly make your home look unloved.
A solution?

  • Repaint with a classic neutral or

  • Choose a bold color for a modern twist

Yes, painting can sound like a major undertaking or expense, but there are few home upgrades that offer such immediate and noticeable results. You’ll often feel like you’re looking at a brand-new home.

Quick Tips:

  • Wash the walls first to remove mildew or grime

  • Use exterior-grade, weatherproof paints

  • Consider repainting trims and doors for a full refresh

No. 2

Poorly Made Repairs

We get it — you tried fixing the broken gate or patching up the fence yourself. And while we admire the initiative, not all repairs are created equal. Bodge jobs might work temporarily, but visibly poor repairs tend to stick out (and not in a good way).

Think:

  • A sagging gate clumsily tied together

  • Crooked fence posts

  • Makeshift path repairs

While the intent was to save time or money, these quick fixes end up making your home look less cared for.

If the repair is in a high-traffic area or part of your home’s visible front — think gates, fencing, doors — don’t cut corners. Call in a construction professional to not only fix the issue but elevate the space at the same time.

Bonus: Sometimes these repairs offer the opportunity for upgrades. That run-down gate? Replace it with a modern one to instantly uplift your whole curb appeal.

No. 3

Damaged or Leaky Guttering

Here’s a detail that many overlook — until it’s causing serious issues.

Broken gutters or leaky downspouts are not only unsightly, they can lead to foundational damage, damp issues, or even mold growth if left unchecked. Acidic rainwater overflow stains your walls, moss grows at connection points, and soon you’re dealing with more than just an aesthetic problem.

Functionality and form both matter. Properly maintaining or upgrading your gutters does more than improve the look — it protects the value of your home.

Why it matters:

  • Clean, aligned guttering elevates your property line

  • It prevents long-term damp and mold issues

  • Improves resale value and buyer confidence

If your guttering is clogged, cracked, rusted, or simply hanging on for dear life, don’t wait. Get it looked at before it becomes a bigger (and more expensive) job.


hellolovelyliving terrain

Terrain

Indoor and outdoor living, garden, and entertaining essentials that are well-designed, lasting, and beautiful.


No. 4

An Old or Worn-Out Garage Door

This one often sneaks up on homeowners. You’ve freshened up the garden, painted the trim, but your garage door winks at passersby like a relic from the last century.

Rusted metal. Rotting wood. Peeling paint. A creaking or crooked opening mechanism. All of these instantly drag down your otherwise attractive facade.

Replacing your garage door with a modern door is surprisingly impactful — clean lines, modern materials, and improved function are just the beginning.

Upgrade Options:

  • Sleek metal designs

  • Faux wood panels with better durability

  • Motion-sensor lighting built in

  • Smart openers for convenience and security

While you're there, show the rest of your garage some love. A tidy garage exterior often reflects pride in your home — making your curb appeal soar.

No. 5

Lack of Landscaping or Garden Maintenance

Think of your front garden or yard as more than just outdoor space — it's the visual introduction to your home. And sadly, many let it fall to the bottom of the maintenance list.

Overgrown grass. Weeds. Lifeless shrubs. These may seem like minor details, but they dramatically affect how inviting your home looks from the street.

Fortunately, a front garden makeover doesn’t need to be extravagant or expensive.

Easy Landscaping Enhancements:

  • Mow the lawn regularly for a neat, fresh look

  • Add colorful wildflowers or perennials along the borders

  • Place potted plants or small trees (like olives or boxwoods) near the entrance

  • Trim back any excess growth around windows or walls

The result? A cared-for, refined presence that immediately lifts your home's mood and value.

No. 6

A Dirty, Mud-Covered Driveway

You probably don’t even notice how muddy or moss-covered your driveway or paved patio has become over time — until one day you really look. What used to be light grey is now murky brown. There’s a fine layer of grime that makes everything feel... heavy.

But this is one of the easiest wins on this list.

Solution: Jet Washing

A solid hour (or even 30 minutes) with a power washer can completely makeover your driveway — lifting years of moss, dirt, and tire marks. It’s deeply satisfying to watch and creates a brighter, cleaner approach to your front door.

Better yet, it’s one of the most affordable ways to upgrade the look of your home. You’ll probably have neighbors asking if you got a brand-new drive installed.

Takeaways: Restore Your Curb Appeal with Small, Strategic Changes

If your home’s exterior is bringing the whole mood down, know this: you’re not alone, and you’re not stuck with it.

Most homes — especially older homes — accumulate visual wear or quick fixes that detract from their charm. But as you’ve seen in this guide, with a few thoughtful improvements, even the most faded facade can be made fresh again.

Ask yourself:

  • Is the chipped paint aging your beautiful home?

  • Does your garden feel lifeless?

  • Are you ignoring guttering and garage doors when they’re shouting for attention?

Whatever the weak spot is, there’s a solution — and it doesn’t have to cost a fortune or take weeks.

Start with just one change this weekend. Repaint the front door. Trim some branches. Power-wash the drive. As your exterior starts to regain its confidence, you’ll notice a shift not just in your home’s look, but in how you feel coming home to it.

Because your house deserves to feel as good on the outside as it does on the inside — and so do you.

Which issue is letting your home down right now? Make a note, make a plan, and tackle it one step at a time. You’ll be amazed at the difference even a small update can make.

Looking for Home resources?

Looking to enhance your living space and create a sanctuary that supports your well-being? Explore our home partners who offer a wide range of resources to elevate your home environment.


homeHLL x Editor


Common Mistakes People Make When Planning A Home Extension

Extending your home is one of the most exciting renovation projects you can take on. Whether it’s to create more breathing room, accommodate a growing family, or increase market value, a well-planned extension can completely transform how you live in your space.


But amid the anticipation of layout ideas and Pinterest mood boards, one critical step often gets overlooked: proper planning.

In this article, we’ll walk you through the most common mistakes people make when planning a home extension—and how to avoid them. Skipping these essential details can lead to overspending, design regrets, and even legal trouble. But with the right approach, you’ll turn your vision into reality—with fewer headaches and a much smoother experience.

No. 1

Mistake 1: Not Defining the Purpose of Your Extension

One of the most common slip-ups homeowners make is jumping into design mode without first identifying why they’re extending their home in the first place.

Simply saying, “We need more room,” isn’t enough.

Yes, additional square footage sounds like a universal fix—but if the space doesn't serve a clear function, chances are it’ll feel awkward, disconnected, or underused in the long run.

Ask yourself:

  • Are you extending to create a larger kitchen or open-plan family space?

  • Do you need a dedicated home office, extra bedroom, or a spacious playroom for the kids?

  • Is the goal to bring in more natural light or improve the flow between indoor and outdoor areas?

Clarity about function lays the foundation for great design. When you truly understand how the new space will fit into your everyday life, the layout will support your lifestyle—not just your square footage goals.

No. 2

Mistake 2: Skipping Professional Input

Many homeowners get caught up in inspiration and try to map out their extension plans independently, thinking they can consult a professional later. Unfortunately, that approach can lead to design flaws, inefficient layouts, and extra costs when things inevitably have to change.

Here’s what can go wrong without expert consultation:

  • Doorways and windows may be placed in awkward spots

  • Unanticipated structural limitations can derail your ideas

  • Space flow between rooms becomes disrupted

  • Budget estimates are inaccurate or incomplete

Bringing in design professionals—such as the trusted team at CBI Design Professionals—early in the process is essential. Their insight can help you:

  • Understand what’s structurally feasible

  • Maximize your available space creatively

  • Avoid costly alterations once building starts

Think of professional input as prevention rather than repair.

Initial consultations may cost you upfront, but they’ll likely save you from expensive changes once walls are being built. You’ll walk into the process with confidence knowing your dreams are practical—and possible.

No. 3

Mistake 3: Overlooking Planning Permissions and Building Regulations

While it’s true that not all home extensions require formal planning permission, assuming you can skip local building regulations altogether is a recipe for disaster.

Each municipality has its own [zoning laws],[height limits], setback requirements, and building codes that dictate what can and can’t be done. Failing to meet these conditions could result in:

  • Fines and legal penalties

  • Delays in your project

  • In extreme cases, being forced to partially or fully dismantle the extension

Always check:

  • Whether your extension falls under Permitted Development or requires a full planning application

  • Any height, boundary, or visibility restrictions specific to your property

  • Party wall agreements if your home shares structural boundaries with neighbors

When you work with a qualified architect or builder, you gain peace of mind knowing these issues are addressed proactively. They'll help you navigate the red tape, ensuring you secure the right approvals before any major spending or construction takes place.


hellolovelyliving houzz

Houzz

Make your home project a reality. Find inspiration, products, and the pros to make it happen - all in one place.


No. 4

Mistake 4: Designing Based on Budget Instead of Feasibility

Naturally, budget plays a big role in any renovation project. But basing your entire design on how much you think (or hope) something should cost creates risky constraints—especially before understanding feasibility.

If you try to fit ambitious ideas into a limited budget without professional input, you may face:

  • Multiple redesigns down the line when it becomes clear the original plan is too ambitious

  • Having to downgrade finishes, remove features, or reduce square footage

  • Frequent pauses in planning due to financial inconsistencies

A smarter approach:

  1. Start with feasibility, not fantasy. Consult with structural engineers or designers first.

  2. Understand the real factors that impact costs—materials, labor, complexity, and hidden works like plumbing and foundation changes.

  3. Build a realistic baseline budget from those insights.

  4. Leave a contingency buffer (10–20%) for unexpected expenses.

Budgeting based on feasibility creates fewer surprises and allows your project to progress with minimal friction. Instead of designing only what you can afford, you’ll spend money where it matters most, and more efficiently.

Takeaways: Build Smarter with Planning, Not Panic

Embarking on a home extension offers an exciting opportunity to reimagine how your home works for you. But behind every successful, smooth-running renovation is a solid planning process that covers more than paint colors and furniture ideas.

In this article, we explored the four most common home extension planning mistakes—and how to avoid them:

  • Failing to define the purpose of the new space

  • Overlooking professional guidance early in the process

  • Ignoring local regulations and building codes

  • Designing according to budget instead of structural feasibility

Getting these decisions right before construction begins will save you time, money, and countless headaches. You'll enjoy a finished space that not only looks great but truly functions the way your family needs it to.

Invest in the planning now, and your extension will reward you for years to come. With the help of qualified professionals and purposeful design, you can turn your dream home into a living, breathing reality—without the common regrets that so often follow rushed decisions.

Because when it comes to home extensions, the magic is in the details.

Looking for Home resources?

Looking to enhance your living space and create a sanctuary that supports your well-being? Explore our home partners who offer a wide range of resources to elevate your home environment.


homeHLL x Editor


The First Five Years: What Really Happens After A Garden Build

A freshly completed garden carries a distinctive energy—clean lines, defined paths, and neatly planted beds all hint at the potential to come. Young trees stand with quiet promise, and every shrub or perennial is deliberately placed for both aesthetic and ecological harmony. For many, this is seen as the final chapter in garden creation—a beautiful conclusion after months of planning and hard work. But the truth is far more interesting.


In this article, we explore why a newly built garden is not the end, but the stirring beginning of a living, breathing journey. Over the first five years, design transforms into relationship; arrangement becomes rhythm, and space slowly evolves into place. A garden matures not through speed but through seasons, stewardship, and subtle progress.

These early years mark the most defining phase in a garden’s long life—and understanding what happens from year one to year five is key to appreciating the full value of thoughtful landscape design.

No. 1

Year One: Establishment and Adjustment

The first year is all about adjustment below the surface. While the above-ground garden design may appear modest, plant roots are hard at work anchoring into new soil, adapting to unfamiliar microclimates, and beginning the gradual process of settlement.

Gaps between plants may appear too wide or inconsistent—but this is by design. Room to grow ensures long-term health and prevents future overcrowding. A garden crowded too early may flourish in appearance only to suffer from fungal issues, stunted growth, or expensive removals down the line.

Priorities in Year One:

  • Focused root establishment

  • Gentle pruning and shaping for early form

  • Regular, mindful watering and mulching

  • Observation to identify initial adaptation issues

During this phase, the garden’s structure is on full display. Paths, terracing, retaining walls, and hard edges provide a visual framework—a kind of scaffold—onto which green life will slowly layer over time.

No. 2

Year Two: Early Growth and Emerging Character

The second year ushers in a noticeable shift—plants begin to emerge with increasing confidence. Shrubs and perennials start to take up more space, and overall texture becomes richer and more inviting. The skeletal frame begins to gain muscle and skin.

You’ll see changes between seasons more distinctly now: spring shoots burst more quickly into bloom, summer beds feel fuller, and autumn structure becomes clearer and more coherent.

Key developments:

  • Expanded foliage coverage and bloom cycles

  • Minor plant repositioning or replacements

  • Signs of ecological interaction—bees, butterflies, soil life

  • The beginning of informal maintenance routines

Not everything will go exactly as planned. A species that once looked perfect on paper may underperform, while another might surprise you with exceptional vigor. This is where thoughtful editing becomes both art and necessity.

No. 3

Year Three: Balance and Belonging

By the third growing season, something remarkable takes place: the garden starts to feel settled. Planting choices that once appeared scattered begin to knit together. Transitions between paths, seating areas, and beds soften and merge.

Hallmarks of this phase:

  • Stronger branching in trees and shrubs

  • Hedging begins to act as true structure

  • Ground covers suppress weed population naturally

  • Maintenance becomes more relaxed and refined

The experience of being in the garden changes, too. There’s less visual tension. Movement feels easier. Whether you're hosting guests or quietly walking with morning coffee, there's a lasting sense that the space has begun to find itself.


hellolovelyliving terrain

Terrain

Discover the beauty of nature with Terrain’s curated selection of plants. From lush greenery to blooming florals, find the perfect touch for your home or garden!


No. 4

Year Four: Maturity in Motion

The fourth year is where confidence turns into presence. Shrubs offer privacy. Trees form canopies. Flowering plants develop seasonal cadence, peaking and retreating with intentional elegance.

You may notice a more robust ecosystem forming. Birds visit regularly, insects have made a habitat, and the garden has become less an arrangement and more a community.

At this stage:

  • Maintenance is more about timing than frequency

  • Dividing perennials helps guide continued vigor

  • Selective pruning replaces formative training

  • Foot traffic and human interaction feel second nature

Even as it begins to look mature, the garden is still in motion. Every tweak you make—as a designer, steward, or homeowner—affects not just the coming year, but sets the trajectory for the next decade.

No. 5

Year Five: A Garden Comes Into Its Own

Five years in, a thoughtfully constructed garden no longer feels “new.” It feels inevitable—as if it has always been there. Trees are now subtle anchors in the space. Beds are full, layered, generous. There’s an overarching sense of peace.

It is at this point that the garden becomes truly responsive to its location:

  • It provides shade, privacy, and structure without feeling imposed.

  • It feels lived in, yet never overgrown.

  • It reflects seasonal rhythms while supporting daily life in meaningful ways.

The sensation of walking through a five-year-old garden, well-tended and wisely built, is one of quiet completeness. It doesn't shout. It whispers generously.

And yet—this is not the end of growth, only the wisdom phase of it.

No. 6

Why Patience Is Part of the Design

Too often, clients or homeowners perceive the completion of a garden build as the finish line. In reality, it's just the first step in a slow, rewarding process of becoming.

Success in a landscape doesn't depend solely on design or installation. It depends on how time is honored during those crucial first five years. Trying to rush nature—through overplanting, early reshaping, or hurried expectations—inevitably undermines both beauty and functionality.

By contrast, a garden that grows with patience, care, and curiosity becomes something far more enduring. It weaves into its place, grows in intimacy, and allows both people and plants to co-evolve across the seasons.

Takeaways: The Living Journey of Landscape Design

In this article, we've charted the profound transformation that occurs in the five years following a garden’s creation. From subtle beginnings below ground to full maturity above, a well-designed garden does more than fill space—it matures into a living companion that reflects care, discipline, and long-range thinking.

The greatest gardens aren’t installed. They’re allowed to emerge.

To take the long view in garden-making is to embrace a partnership with nature, time, and change. And in doing so, we build not just beautiful outdoor places—but spaces of resonance, rest, and renewal for years to come.

Looking for Home resources?

Looking to enhance your living space and create a sanctuary that supports your well-being? Explore our home partners who offer a wide range of resources to elevate your home environment.


homeHLL x Editor


What To Check After A Storm To Catch Roof Damage Early

Storms are among the leading causes of property damage across the United States. From blowing patio furniture across the yard to uprooting trees, downing power lines, and even inflicting structural harm, their impact can be both immediate and long-lasting. Each year, the U.S. experiences roughly 12 named storms, with at least three escalating into serious hurricanes—reminding homeowners just how vulnerable their properties, particularly their roofs, truly are.


The roof is your home’s first line of defense against the elements. When compromised, it doesn’t take long before water infiltration and structural issues start accumulating. For homeowners, even minor roof damage after a storm can lead to costly and avoidable repairs.

In this article, we'll walk you through the critical areas to inspect following a storm to ensure your roof remains sound and your home protected. These inspections can be performed both post-storm and proactively beforehand. By knowing what to look for—from shingle displacement and granule loss to interior attic checks—you can better determine the health of your roof and take quick action when needed.

No. 1

Shingles and Roofing Surface: The First Line of Defense

Your first check should always start with the shingles, as that’s where the most common storm-related damage occurs. While missing shingles are easy to spot, they’re not the only issues to watch out for—and sometimes not even the most dangerous.

What to Look For:

  • Lifted or curled edges: Wind can loosen shingles without tearing them off completely. Even subtle lifts compromise their protective seal.

  • Misaligned rows: If shingles no longer sit flush, water can seep in unnoticed.

  • Shadowed or raised sections: These visual cues often mean the shingle has bent under pressure and did not return to its original position.

  • Crease lines: Straight or slightly curved lines across shingles indicate they were flexed by high winds and have sustained structural damage.

  • Exposed underlayment: Visible synthetic material beneath shingles is a surefire sign of diminished water protection.

Although you can observe some of these red flags from the ground, a thorough inspection usually requires getting up on the roof—a task best left to professional roofing contractors. Trained experts can detect hidden issues and advise on immediate corrective measures to minimize risk.

No. 2

Granules in Gutters or Around the Base of the Home

Granules play a vital yet often overlooked role in shingle durability. They shield the shingles from harmful UV rays and weather exposure. After a storm, rapid granule loss is a clear indicator that your roof may have suffered significant impact or abrasion damage.

How to Spot It:

  • Check gutters, downspouts, and ground near your home for accumulated dark, gritty material.

  • Compare granule runoff with any visible changes in shingle color or texture.

  • Remember: Minor shedding is normal, but large patches or consistent buildup signal damage.

While this doesn’t cause immediate leaks, granule loss accelerates shingle aging. Left unchecked, it will eventually lead to leaks and premature roof failure, making early intervention essential.

No. 3

Flashing Around Chimneys, Vents, and Roof Edges

Flashing is installed around joints and roof penetrations to prevent water from seeping into the home. It’s designed to flex with temperature fluctuations—but aggressive winds and driving rain can push it far beyond its limits.

Post-Storm Flashing Inspection Checklist:

  • Examine flashing around chimneys, vent pipes, and skylights for bent sections or lifted corners.

  • Ensure flashing material lies flush against roofing surfaces; gaps invite water entry.

  • Inspect sealant lines—cracks, separation, or washed-away areas are signs it's no longer watertight.

  • Check the roof edges: Damaged or loose edge flashing facilitates leaks into shingles and into interior ceiling systems.

Flashing damage, though easy to overlook, often leads to serious internal water damage over time if not addressed promptly.


hellolovelyliving houzz

Houzz

Looking for professional roof repair services? Discover top-rated experts on Houzz today!


No. 4

Fascia, Soffits, and Siding Near the Roofline

The roof isn’t the only area exposed during storms. Components like fascia boards, soffits, and adjacent siding can also take a hit—particularly when wind-driven rain targets small exterior flaws.

Signs of Damage:

  • Loose or detached fascia boards

  • Swollen, cracked, or exposed wood

  • Warped or missing soffit panels

  • Peeling paint or soft spots around the roofline

These areas may seem secondary, but they serve as essential barriers against moisture intrusion. Once water infiltrates, it promotes mold growth and wood rot—resulting in expensive repairs and compromising indoor air quality.

Being proactive in examining and repairing these areas ensures your roof system remains sealed and structurally sound.

No. 5

Attic and Interior Assessments Are Equally Important

It’s easy to focus entirely on the exterior, but the inside of your home provides valuable clues about post-storm roof health. Heading into your attic or upper floors is a must after any substantial weather event.

Key Areas for Indoor Inspections:

  • Insulation: Look for damp areas, discoloration, or compression. Wet insulation is not only ineffective—it accelerates decay in surrounding wood framing.

  • Light, drafts, or unusual noises: These signs signal a breach in the roof or gaps in the structure.

  • Ceiling stains and wall discoloration: Especially near chimneys or external walls

  • Musty odors: Smells often appear before visible damage and shouldn’t be dismissed.

Attic inspections serve as the final line of defense in catching leaks or weaknesses caused by storm damage. Acting on these early warnings limits repair costs and prevents health concerns linked to long-term mold exposure.

Takeaways: Early Detection Protects Your Home and Wallet

Storms are inevitable—but unexpected and costly roof damage doesn’t have to be. By understanding what to look for after a major weather event, you can take calculated steps to protect your home’s most vital structure: its roof.

In this article, we've guided you through a detailed checklist of what to examine post-storm—from the condition of your shingles, underlayment, and flashing, to interior red flags like wet insulation and ceiling stains. These insights empower homeowners to identify vulnerabilities early and work with roofing professionals when needed.

The good news? Preventing widespread damage doesn’t require guesswork—just a bit of diligence and know-how. Regular inspections, particularly after heavy storms, go a long way in safeguarding your property, family, and investment in the years to come.

Looking for Home resources?

Looking to enhance your living space and create a sanctuary that supports your well-being? Explore our home partners who offer a wide range of resources to elevate your home environment.


homeHLL x Editor


Why Slate Roofing Remains A Practical Choice For American Homes

When considering home improvement projects with long-term impact, few decisions can equal the importance of your roof. Acting as a protective shield and aesthetic centerpiece, your roof contributes immensely to your home’s structural integrity, energy efficiency, comfort, and overall value. Among the many materials available today, a choice for slate roofing stands out as a premium solution that marries beauty with longevity.


While many U.S. homeowners first grapple with the decision between a quick fix or a long-term investment, those seeking enduring performance and aesthetic value often find that slate offers a compelling case. Its reputation for enduring decades—often over a century—alongside its timeless aesthetic and environmental advantages has made it a preferred choice for those building or restoring high-caliber homes.

In this article, we explore the many reasons why slate roofing continues to captivate American homeowners. From stunning curb appeal and extreme durability to energy savings and environmental responsibility, read on to discover the full spectrum of benefits that make slate worth every dollar.

No. 1

Natural Beauty That Defies Trends

As a natural stone, slate offers a depth, texture, and richness no synthetic product can replicate. Each tile carries the subtle variations of Mother Nature, delivering an organic aesthetic that seamlessly integrates with surrounding landscapes and architectural styles.

Whether you own a Colonial revival, French country home, farmhouse, or a modern minimalist design, slate’s timeless beauty enhances curb appeal without falling victim to fleeting trends.

Why Natural Slate Stands Out:

  • Authentic look with geological variations

  • Enhances both historic and contemporary architecture

  • Boosts visual harmony with outdoor elements

  • Ages gracefully, developing character over time

If your goal is to elevate your home’s exterior with a material that exudes timeless sophistication, slate is a clear frontrunner.

No. 2

Exceptional Longevity That Spans Generations

Whereas standard roofing materials may require replacement every 10 to 15 years, a properly installed slate roof can last 75 to 100 years—or even longer. This extraordinary lifespan transforms your roofing investment into a long-term asset. Ultimately, climate protection starts with the choices we all make at home, and your roof is a big part of it.

The Case for Slate's Durability:

  • Resistant to cracking, curling, and warping

  • Maintains structural integrity under extreme weather

  • Fewer replacements = less waste and lower lifetime costs

  • Reduces environmental impact of future resource extraction

Slate isn’t just built to last—it’s built to endure for decades with minimal upkeep. That level of reliability makes it ideal for homeowners investing in sustainability and generational value.

No. 3

Minimal Maintenance, Maximum Performance

One of the most attractive features of slate roofing is its low maintenance nature. Unlike wood shakes or asphalt shingles that degrade over time, slate resists rot, mold, and moisture damage.

Maintenance Advantages of Slate:

  • Doesn’t absorb water like porous materials

  • Highly resistant to fungi, algae, and pests

  • Withstands varying temperatures and weather cycles

  • Reduces frequency and cost of repairs over time

In countless climates—whether exposed to rain, snow, heat, or high winds—slate maintains its structure and beauty, giving homeowners lasting peace of mind.


hellolovelyliving houzz

Houzz

Looking for professional slate roofing installation? Discover top-rated experts on Houzz today!


No. 4

Design Versatility That Elevates Architecture

While slate is undeniably natural, it also offers generous design possibilities. Homeowners can choose from a palette of natural shades including gray, green, purple, black, blue-gray, and weathered blends, allowing for both contrast and cohesiveness in exterior design.

Flexible, Yet Timeless:

  • Match or contrast with exterior walls, gutters, or accents

  • Natural hues don’t fade over decades

  • No need for paint, coatings, or chemical finishes

  • Enhances both symmetry and variety in roof layout

Whether you're preserving heritage architecture or building a bespoke modern home, slate can be customized to enhance your vision without compromising its integrity.

No. 5

Superior Sound Dampening for a Calmer Interior

Noise reduction isn’t often a top-of-mind roofing concern, yet it’s an important quality-of-life factor—especially in urban or high-traffic areas. The natural density of slate muffles external noises, allowing for a more restful indoor environment.

Sound-Reducing Benefits Include:

  • Quieter rainfall and hail impact

  • Muted wind turbulence

  • Less auditory intrusion from nearby activity

For families with young children, remote workers, or light sleepers, the acoustic benefits of slate can significantly improve indoor tranquility without the need for expensive insulation systems.

No. 6

Energy Efficiency That Supports Year-Round Comfort

Slate’s density doesn’t only reduce noise; it also contributes to thermal stability. During both hot and cold months, slate helps minimize energy transfer, reducing workload on HVAC systems.

Slate Boosts Energy Performance By:

  • Reflecting heat and regulating thermal gain in summer

  • Retaining indoor warmth in colder temperatures

  • Supporting insulation to reduce heating and cooling costs

Slate roofing, paired with proper attic insulation and ventilation, creates a home envelope that feels comfortable year-round while reducing energy bills and carbon emissions.

No. 7

Naturally Fire-Resistant for Safer Living

In an era of increasing climate volatility and wildfire risk, selecting a non-combustible roofing material becomes a wise safety consideration. Slate is a stone—it does not burn, and it offers exceptional fire resistance that far surpasses traditional asphalt.

Key Safety Features:

  • Rated Class A for fire resistance (highest possible rating)

  • No flammable coating or additives needed

  • Reduces structural fire spread risk

  • Ideal for fire-prone zones or insurance savings

Installing a non-combustible roof may even lead to lower insurance premiums, depending on your state or region.

No. 8

Perfectly Suited for Historic and Character Homes

Slate roofs have been trusted for centuries, making them a natural fit for historic restorations and character properties. They preserve period authenticity without sacrificing modern performance.

Slate Supports:

  • Preservation of architectural heritage

  • Seamless integration with period-specific colors and profiles

  • Durable construction suited for restored or listed buildings

Whether you’re a preservationist or restoring a family estate, slate upholds architectural integrity while upgrading durability to modern standards.

No. 9

Strong ROI and Boost in Property Value

Slate has a higher initial cost than many roofing options, but it also delivers incomparable long-term return on investment. Its durability, performance, and beauty make it a high-value feature for homeowners—and buyers.

Financial Upsides:

  • Adds distinctive curb appeal for premium listings

  • Reduces lifetime costs due to rare replacements

  • Appeals to eco-conscious buyers and luxury markets

  • Signals craftsmanship and thoughtful property care

For resale or appraisal purposes, a well-maintained slate roof enhances both perceived and actual property value, giving it strong staying power in competitive real estate markets. While Americans are famously hands-on and enthusiastic about DIY projects, roofing is one area where professional expertise truly matters.

Takeaways: Slate Roofing Is a Legacy Investment with Lasting Rewards

When it comes to selecting a roofing material that balances performance, aesthetics, sustainability, and long-term savings, few options rival slate. Its timeless appearance, natural durability, environmental responsibility, and return on investment all contribute to its reputation as the gold standard of roofing materials.

In this article, we’ve explored why more American homeowners are turning to slate—from its sound-dampening peace to its historical authenticity and energy efficiency. Whether you're building your dream home or upgrading a beloved one, slate should be seen not as a cost—but as a legacy investment, one that pays off for generations.

That said, while the benefits are clear, slate roofing requires expert installation. Unlike synthetic shingles, slate is heavy, precise, and demands skilled craftsmanship. Always hire experienced roofing professionals who understand the technical needs and structural reinforcements required for slate installation.

Invest wisely. Choose slate. And give your home a roof that enhances its life, value, and legacy—for decades to come.

Looking for Home resources?

Looking to enhance your living space and create a sanctuary that supports your well-being? Explore our home partners who offer a wide range of resources to elevate your home environment.


homeHLL x Editor


Storage Solutions: How To Find A Unit That Fits Your Needs

When your home becomes too cluttered, the garage has no more room, and extra belongings begin to pile up, it’s time to find a solution that offers both relief and organization. Whether you're downsizing, planning a move, storing seasonal gear, or simply need more space, a storage unit can be a practical and flexible way to safeguard your possessions.


But with so many options available—ranging from basic self-storage to climate-controlled spaces and specialty vehicle storage—finding the right unit requires careful consideration. Before choosing, it’s helpful to visit storage places near me to check unit sizes, accessibility, lighting, and overall cleanliness in person. Not all storage is created equal, and the wrong choice could lead to unnecessary costs, security vulnerabilities, or even damage to valuable items.

In this article, we’ll walk you through everything you need to know about choosing a storage unit that best fits your personal situation. From understanding the types of storage available to evaluating security, size, environmental needs, and cost comparisons, this guide is packed with actionable tips to help you make an informed, stress-free decision.

No. 1

Understanding Different Types of Storage Units and Their Purposes

Storage units come in a variety of forms, each designed to meet specific storage needs. Selecting the right type ensures your belongings remain intact and accessible, no matter how long they’re stored.

Common Types of Storage Units:

  • Standard Self-Storage – Best for general household items, boxes, clothes, and furniture. These are the most readily available and affordable.

  • Climate-Controlled Units – Maintains consistent temperature and humidity. Ideal for sensitive items like electronics, musical instruments, artwork, antiques, and photographs.

  • Vehicle Storage – Designed for cars, motorcycles, RVs, and boats. These come in indoor, covered outdoor, or open lot solutions.

  • Portable Storage Units – Delivered to your home, loaded on-site, and stored or relocated. Great for moving and renovation needs.

Before making your decision, visit storage facilities near you to inspect the unit types in person. Check for cleanliness, lighting, access hours, parking, and user-friendly loading areas. Seeing the space firsthand will give you confidence in your choice.

No. 2

Evaluating Size and Space Requirements for Your Storage Needs

Choosing the right size storage unit is just as important as selecting the type. A unit that’s too small may leave you scrambling for space, while one that’s too large may be unnecessarily expensive.

Quick Tips for Assessing Storage Space:

  • Inventory all items you intend to store before you start comparing units

  • Use size guides provided by facilities (e.g., 5x5 for boxes, 10x15 for furniture, 10x30 for whole-home storage)

  • Allow room to walk inside or add shelves if you’ll need regular access

  • Account for future storage plans, if more items might be added later

  • Stack boxes vertically to save space, but ensure heavy items stay on the bottom

  • Contact staff for custom recommendations based on your inventory list

Facilities often provide virtual sizing tools or consultation services. When in doubt, err slightly on the larger size to maintain ease of access.

No. 3

Security Features to Consider When Selecting a Storage Unit

Security should never be an afterthought. You’re entrusting a facility with your possessions, so robust protection should be a top priority.

Key Security Features to Look For:

  • 24/7 video surveillance with clearly visible cameras

  • Gated access with individual security codes or badges

  • Well-lit premises, especially near unit doors and parking areas

  • On-site staff or security patrols

  • Individual alarms for each unit or door-entry notifications

  • Strong, tamper-resistant locking mechanisms

It’s also wise to visit the facility during off-hours to see how secure the environment feels. Ask about robbery protocols and whether there's insurance for specific incidents. Some providers even offer coverage bundles so that your items are protected against theft, fire, flooding, or other regional risks.


hellolovelyliving the container store

The Container Store

Your ultimate destination for innovative storage and organization solutions for home or office—offering everything from stylish bins and shelves to custom closet systems.


No. 4

Climate Control in Storage Units: Is It Necessary for Your Items?

If you're storing anything valuable, sensitive, or irreplaceable, climate-controlled units are often worth the investment.

These units protect against damage from temperature shifts, humidity, and moisture, which can wreak havoc on electronics, wood, paper, and fabric.

Items That Benefit from Climate Control:

  • Wooden furniture (to avoid warping or cracking)

  • Artwork and photograph collections (to prevent discoloration)

  • Electronics such as TVs, computers, and A/V equipment

  • Clothing, especially designer apparel and vintage wear

  • Musical instruments

  • Documents, books, and vinyl records

Also consider your geographic location. If you live in a region with high humidity, freezing winters, or scorching summers, climate control helps protect your belongings from mold, mildew, or thermal stress. It may cost more upfront, but it pays off in long-term preservation.

No. 5

Comparing Costs and Contracts: Finding the Best Deal on Storage Units

Storage unit rates can vary wildly—even between facilities in the same city. Understanding market prices and reading the fine print ensures you get fair value and aren’t caught off guard with added fees.

How to Get the Best Deal:

  • Compare multiple nearby facilities for size, price, and features

  • Take note of promotional offers for first-time renters or long-term contracts

  • Ask about discounts for pre-paying or signing up online

  • Carefully read rental agreements to uncover add-on fees:

    • Administrative charges

    • Late payment penalties

    • Fees for extended access or special services

Also consider contract flexibility. Month-to-month rentals are typically the most versatile, particularly if you're unsure how long you'll need the unit. Review cancellation terms and notice periods, and be clear on cleanout procedures to avoid retention fees.

Takeaways: A Smart Storage Strategy Simplifies Life

Finding the perfect storage unit is more than just a logistical chore—it’s a chance to create space, reduce stress, and preserve the things that matter most. But it requires smart planning, careful comparison, and a clear understanding of your storage goals.

In this article, we’ve walked through the five key areas for making the right decision:

  • Understanding the different types of units available

  • Evaluating your size and storage requirements

  • Prioritizing security and access control

  • Deciding whether climate control is necessary for your items

  • Comparing costs, contracts, and flexibility before you commit

By approaching the storage selection process methodically, you’ll ensure your items are stored safely, affordably, and conveniently—giving you clarity and peace of mind.

Whether you’re storing for a month or a year, with the right steps, your belongings will remain in perfect condition, patiently awaiting the day they’re needed again.

Looking for Home resources?

Looking to enhance your living space and create a sanctuary that supports your well-being? Explore our home partners who offer a wide range of resources to elevate your home environment.


homeHLL x Editor