Posts in home
What To Do When Your Home No Longer Fits Your Lifestyle

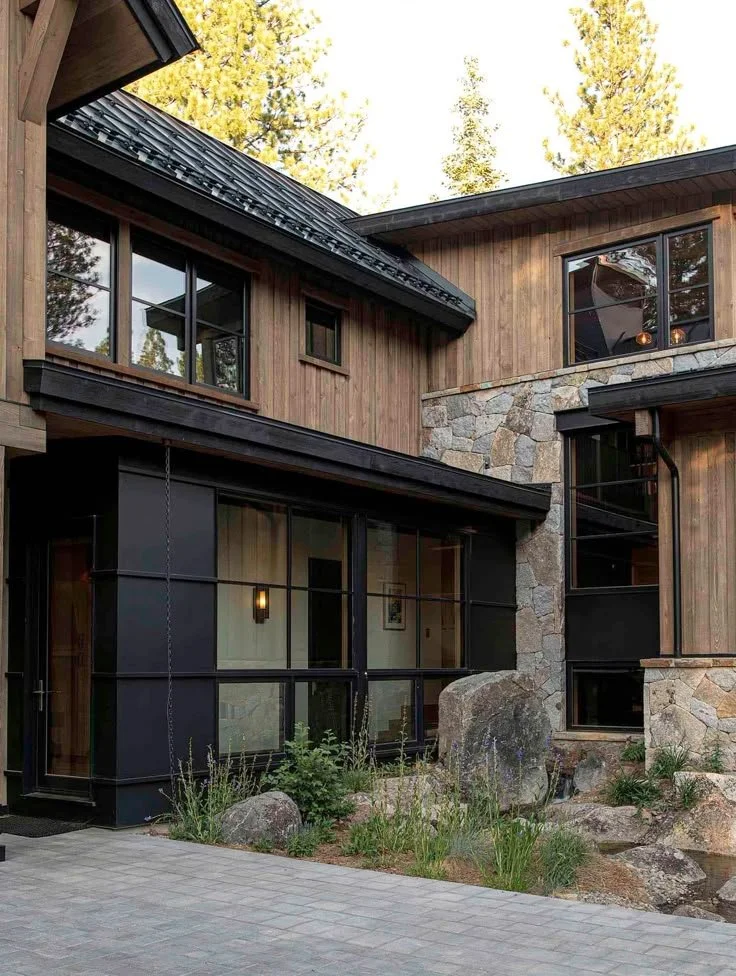
A home can stop fitting your life gradually, then all at once. The stairs that once felt trivial start to feel like an obstacle, the yard becomes a second job, and rooms you used to love turn into spaces you rarely enter. Commutes change, repairs multiply, and the home that once provided comfort can start to feel heavy, expensive, or impractical.


In this article, we will explore how to recognize when your home no longer supports your current lifestyle, how to weigh emotional attachment against practical realities, and how to evaluate realistic options ranging from renovations to selling. The goal is not to push you toward a single choice, but to help you make a clear, confident decision based on day-to-day needs, financial impact, and future plans.

No. 1

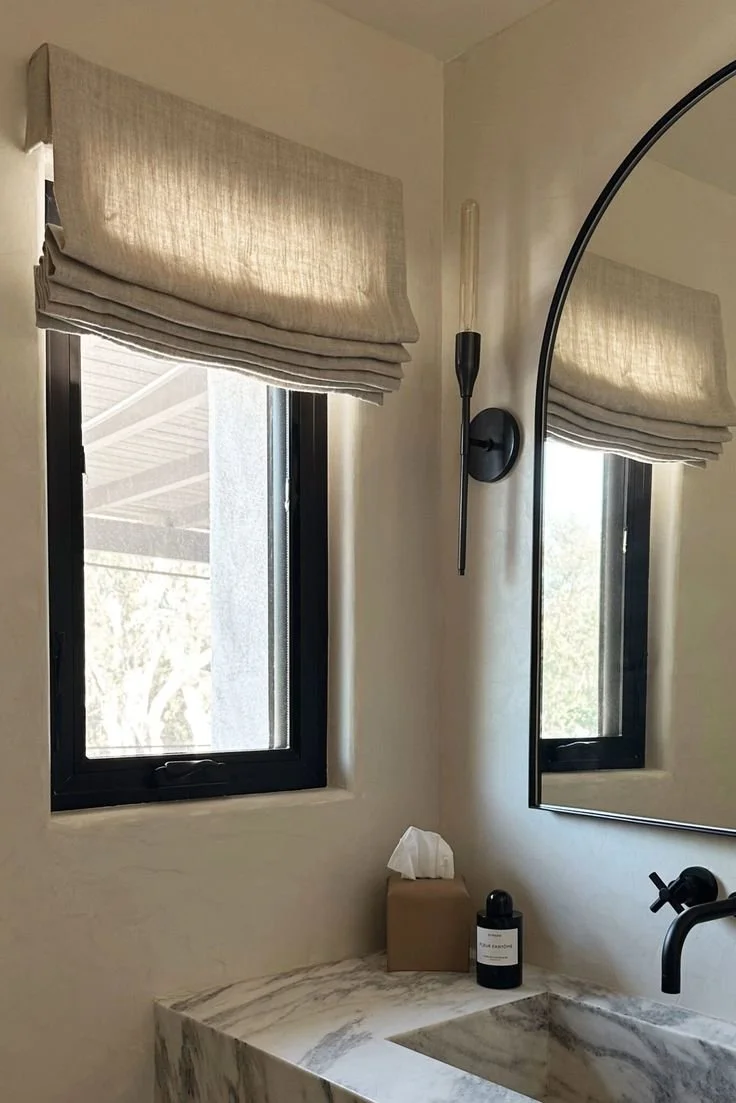
Recognize the Signs That the Home No Longer Works

Many homeowners adapt quietly for years. They stop using certain rooms, delay repairs, pay for extra help, or accept daily inconveniences as “normal.” The problem is that small workarounds tend to accumulate until your home feels like something you manage rather than enjoy.

A useful way to start is to identify friction points that occur repeatedly, especially those that affect your time, safety, or finances.

Common signs your home is no longer a good fit

  • Maintenance and upkeep are increasing

    • More frequent repairs, higher contractor bills, or recurring issues that never fully resolve

    • Exterior work that feels endless, such as lawn care, pruning, or seasonal cleanup

  • The layout creates daily strain

    • Stairs you avoid, narrow hallways, or bathrooms that are difficult to use

    • Poor flow between the kitchen, living areas, and bedrooms

  • Space no longer matches how you live

    • Empty rooms that require heating, cooling, cleaning, and furnishing

    • Storage that has become overflow for items you no longer need

  • Costs feel out of proportion

    • Utility bills that rise with no improvement in comfort

    • Insurance or property taxes increasing faster than your budget

  • Location no longer supports your routine

    • A commute that drains energy

    • Longer drives to healthcare, family, or the places you go weekly

If your home consistently creates friction, it is not a personal failure or a sign you “should have planned better.” It often means your life has changed, and the home has not changed with it.

No. 2

Compare Emotional Value With Practical Reality

Homes carry memories, and memories add weight to decisions. A house can symbolize independence, family history, a milestone, or years of effort. That emotional value is real, and it deserves respect.

At the same time, a home is also an ongoing system of responsibilities: financial, physical, and mental. A clear decision usually comes from seeing both sides on paper, not only in your head.

A simple exercise to clarify the trade-off

  • List what the home gives you now

    • Comfort, familiarity, neighborhood connections

    • Space for hobbies, gatherings, pets, or privacy

    • A sense of stability and identity

  • List what the home requires from you

    • Mortgage, taxes, insurance, utilities, HOA fees

    • Repairs, cleaning, landscaping, pest control

    • Time costs, including commuting and errands

    • Physical effort, such as stairs, heavy maintenance, or frequent lifting

  • Circle what has changed in the last 2–3 years

    • Health and mobility needs

    • Household size or caregiving responsibilities

    • Work location, school needs, or travel patterns

This comparison often reveals a key truth: you may love your home, but you may also be spending an increasing amount of your life serving it.


No. 3

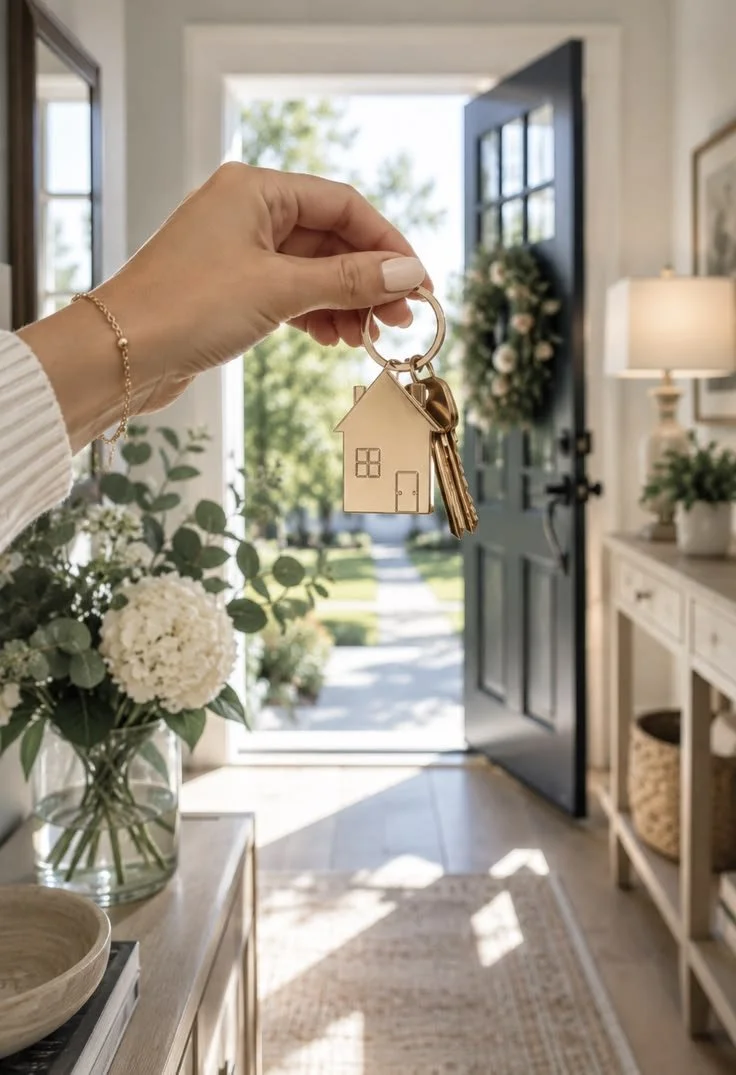
Understand Your Selling Options

If your home no longer fits, selling can be one path forward, but it is not a single-track process. The right selling strategy depends on the property’s condition, your timeline, your tolerance for disruption, and how much work you want to do before listing.

Some homeowners prefer a traditional listing, especially if the home is updated, easy to show, and likely to perform well in the local market. Others prioritize simplicity, speed, or minimizing repairs, and they consider selling as-is.

Common selling paths to evaluate

  • Traditional listing with an agent

    • Typically involves photos, staging, showings, and negotiation

    • May require repairs or updates to meet buyer expectations

    • Often fits homeowners who have time and want maximum market exposure

  • Selling as-is on the open market

    • May still involve showings but usually reduces prep expectations

    • Can attract buyers looking for renovation opportunities

    • Works best when pricing aligns with the home’s condition

  • Direct-sale options for a simpler process

    • Often designed to reduce preparation, repairs, staging, and repeated showings

    • Can be appealing when time is limited or the home needs significant work

    • For example, someone researching we buy houses Irvine services may be looking for a way to sell without extensive preparation, repairs, staging, or repeated showings

The right option depends on your priorities. If your top priority is maximizing price, you may accept a longer timeline and more prep. If your top priority is reducing stress, you may value certainty, speed, and fewer moving parts.

No. 4

Evaluate the Cost of Staying

Staying can feel like the least disruptive choice, but it still carries a cost. Sometimes that cost is obvious, like rising utility bills. Other times it is hidden, like the mental load of anticipating the next breakdown.

To evaluate staying fairly, you need a full-cost view rather than a monthly-payment view.

Expenses to include in a realistic “stay” budget

  • Fixed housing costs

    • Mortgage payment

    • Property taxes and insurance

    • HOA or special assessments (if applicable)

  • Operating costs

    • Electricity, gas, water, trash, and internet

    • Cleaning, lawn care, pool service, pest control

  • Near-term replacements and repairs

    • Roof, HVAC, water heater, appliances

    • Plumbing work, electrical updates, and drainage issues

    • Exterior painting, fencing, and driveway maintenance

  • Long-term financial risks

    • Deferred maintenance compounding over time

    • The possibility that multiple systems fail close together

A single major repair can change the equation instantly. If staying requires large spending every year just to maintain baseline comfort and safety, moving may be more practical than continually patching problems.


No. 5

Decide Whether Repairs Are Worth It

Not all repairs are equal. Some are safety-related and unavoidable, while others are optional improvements that may not deliver the return you expect. Before you commit to renovations or list your home, it helps to separate “must-fix” issues from “nice-to-have” upgrades.

Repairs to review first (high priority)

  • Roof leaks and gutter drainage issues

  • Electrical problems, outdated panels, or recurring breaker trips

  • Plumbing leaks, low water pressure, or slow drains throughout the home

  • HVAC failure, poor airflow, or uneven heating and cooling

  • Foundation cracks, shifting, or doors and windows that no longer close properly

  • Water damage and mold concerns

  • Broken stairs, railings, or trip hazards

  • Pest damage, including termites or rodents

How to decide if a renovation makes sense

  • Get professional estimates before assuming it is “manageable”

  • Identify whether the repair solves a root problem or only symptoms

  • Consider the disruption cost

    • Living through renovations can be stressful and time-consuming

  • Be realistic about return on investment

    • Some updates improve marketability but do not return their full cost

If you are repairing solely to sell, focus on safety, function, and preventing buyer objections. Cosmetic perfection is rarely necessary, and it can become a money sink.

No. 6

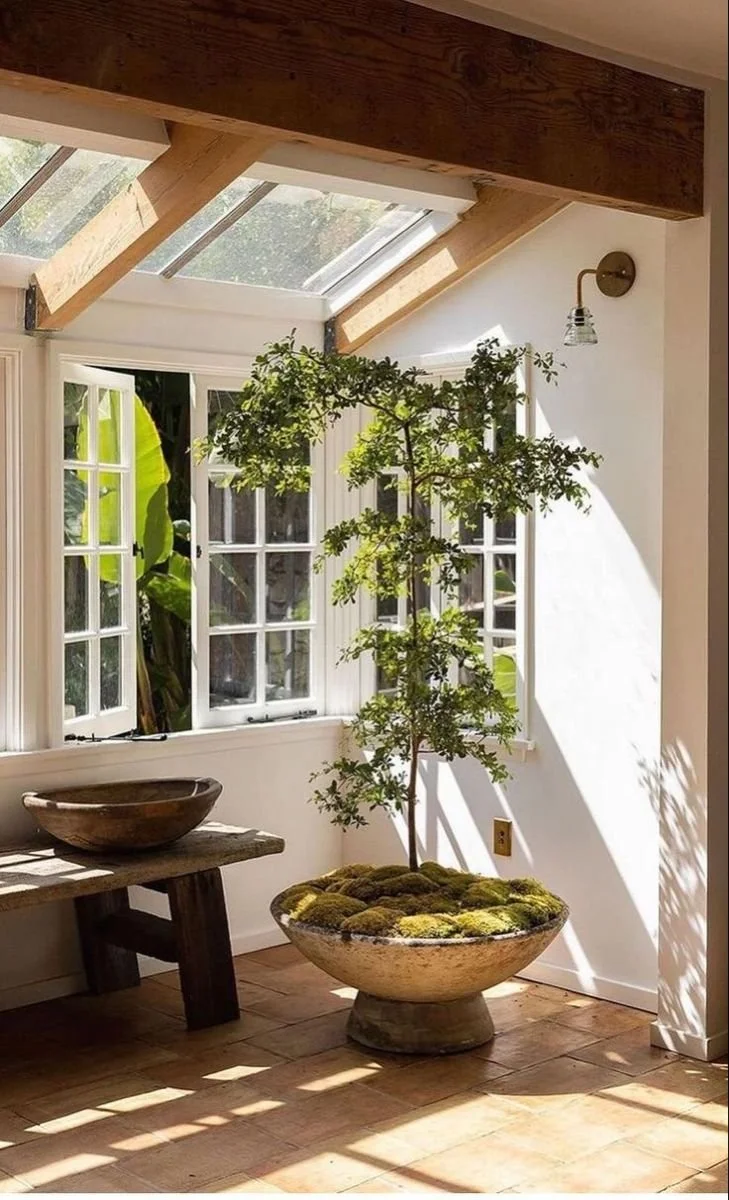
Think About How You Actually Use Space

Square footage only matters when it serves your life. A home that was perfect for one stage can become inefficient or burdensome in the next.

A practical approach is to evaluate each room based on reality rather than intention.

A room-by-room reality check

  • Daily-use spaces

    • Which rooms do you use every day, and do they feel comfortable and accessible?

    • Are these rooms easy to heat/cool and maintain?

  • Occasional-use spaces

    • Are guest rooms, formal dining rooms, or extra living rooms truly valuable now?

    • Could any of these spaces be reconfigured for current needs?

  • Storage-only spaces

    • Are you paying to maintain space primarily for items you rarely use?

    • Would decluttering reduce the need for extra rooms?

Common “life stage” fit issues

  • Remote or hybrid work requires a functional office

  • Empty nesting makes multiple unused bedrooms feel unnecessary

  • Mobility concerns increase the value of single-level living

  • Caregiving responsibilities may require proximity and ease of access

This assessment helps you decide whether you need a different home, or simply a different layout and less space.

No. 7

Consider Location and Lifestyle, Not Just the House

A home can be perfectly fine, but in the wrong place for your current life. When routines change, location becomes a major quality-of-life factor.

Time is often the most overlooked cost in housing decisions, because it is not itemized like a bill, yet it affects every week of your life.

Location factors that tend to matter more over time

  • Proximity to what you use weekly

    • Work, family, healthcare, school, community activities

    • Shopping, fitness, and day-to-day errands

  • Commute strain

    • Long drives that increase stress and reduce free time

    • Traffic patterns that have worsened over the years

  • Access and safety

    • Neighborhood walkability and ease of getting around

    • Lighting, street conditions, and convenience for visitors or services

A better-fitting home may not be larger or newer. It may simply be closer to the places that support your current routine.

No. 8

Explore Alternatives Before Making a Decision

Moving is not the only solution. Sometimes the best outcome comes from adapting the home you already have. The key is to compare options side-by-side so you do not default to the most familiar path.

Options to consider before deciding

  • Staying and making targeted repairs

  • Renovating for current needs

    • Improving lighting, adding storage, or updating a bathroom for accessibility

  • Downsizing to reduce costs and upkeep

  • Moving closer to work, family, or healthcare

  • Selling as-is to avoid major repairs

  • Renting the property (if financially and logistically viable)

  • Selling and buying a lower-maintenance home

Questions that help you choose among options

  • Which option reduces daily friction the most?

  • Which option best fits your financial comfort zone over the next 3–5 years?

  • How much disruption can you realistically tolerate right now?

  • What decision supports the next chapter of your life, not the previous one?

Each option has trade-offs. The best choice is the one that improves daily life without creating avoidable financial strain.

No. 9

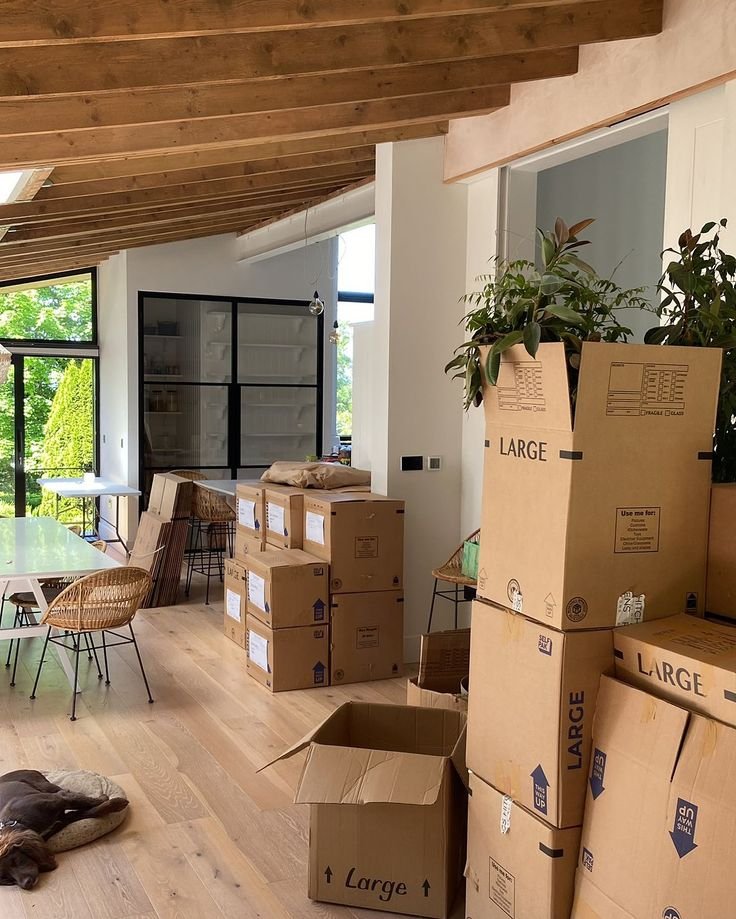
Prepare Emotionally for Change

Leaving a home can feel like closing a chapter, even when the decision is clearly right. It can bring grief, uncertainty, and the sense that you are letting go of more than a building. Planning for the emotional side of the transition can make the practical side easier.

Ways to make the transition healthier and more intentional

  • Give yourself time to sort belongings

    • Start earlier than you think you need

    • Separate items into keep, donate, gift, and discard

  • Preserve memories without preserving everything

    • Take photos of meaningful spaces and details

    • Save a few items that represent the home rather than trying to keep it all

  • Share the story

    • Talk with family about what the home meant and what you are taking forward

    • Frame the move as a decision that supports your future needs

Moving on does not erase the value of the home. It acknowledges that life has changed, and you are allowed to change with it.

Takeaways

When a home no longer fits your life, the best first step is an honest evaluation of friction points, costs, safety, and the way you actually use the space. In this article, we explored how small compromises can accumulate until the home starts to feel like a burden instead of support.

Practical decision-making requires balancing emotional attachment with financial and lifestyle realities, including location and future needs. We also discussed how selling paths vary, from traditional listings to as-is and direct-sale options, depending on timeline and desired simplicity.

The right choice is the one that makes daily life easier without creating unnecessary strain, whether that means renovating, downsizing, or moving. A home should support the way you live today, not the way you lived years ago.


Looking for Home resources?

Looking to enhance your living space and create a sanctuary that supports your well-being? Explore our home partners who offer a wide range of resources to elevate your home environment.


homeHLL x Editor


When Selling Your House Fast Makes More Sense Than Waiting

Selling a home is rarely just a transaction; it is usually the final step in a bigger life change. You might be facing rising monthly outgoings, an unexpected relocation, or a property that has become more burden than asset. Whatever the reason, the goal is typically the same: reduce uncertainty, set a clear timeline, and complete the sale without unnecessary delays.


In this article, we will explore why homeowners choose a faster route to selling, how this approach differs from a traditional listing, and what practical considerations help you decide whether it is the right move for your situation.

No. 1

You Don’t Want to Carry Ongoing Costs

One of the clearest reasons to sell quickly is to stop the financial drain that comes with keeping a property. Every month your home remains unsold can mean ongoing commitments that are difficult to maintain, particularly if your income has changed or you are carrying more than one property.

A traditional sale can take time not only because of marketing and viewings, but also because buyers’ financing, surveys, chains, and negotiations often introduce delays. If your priority is speed and certainty, moving away from the open market may reduce the period you are responsible for costs.

Common costs that continue while a home sits unsold

  • Mortgage payments and interest

  • Property taxes or local authority charges

  • Insurance premiums

  • Utilities, even at a minimal level

  • Maintenance and safety checks

  • Emergency repairs that cannot be postponed

  • HOA or service charges (where applicable)

Why faster-buy options can relieve pressure

  • Shorter timeline to completion

    • The process is designed to reduce waiting and minimise back-and-forth

  • Fewer “holding months”

    • The faster you close, the fewer extra payments you need to cover

  • Less uncertainty

    • A clear route to sale can be more valuable than testing the market for a higher offer that may never materialise

If you are already thinking, “I need to sell my house fast” it is usually because the cost of waiting has become more expensive than the potential upside of a longer sale process.

No. 2

The Market Has Peaked or Is Starting to Cool

Property markets do not stand still. Demand shifts with interest rates, local employment changes, seasonality, and broader economic confidence. A home that attracted multiple offers six months ago might struggle to generate viewings today, even if nothing about the property has changed.

If your local market is weakening, waiting for values to return can be risky. You may be competing with more listings, dealing with buyers who negotiate harder, or seeing properties stay on the market longer. In those conditions, speed becomes its own form of protection, because it reduces exposure to further softening.

Signs your market may be cooling

  • Listings in your area are staying active longer than usual

  • Price reductions are becoming more common

  • Buyer demand feels inconsistent, with fewer serious viewings

  • Comparable homes are selling below asking price

  • Mortgage rates or financing conditions are tightening

How fast-sale routes can help in a declining market

  • Less reliance on perfect timing

    • You can secure a sale without waiting for conditions to improve

  • Fewer repeated negotiations

    • In a slow market, buyers often renegotiate after surveys or inspections; speed-focused sales can reduce this cycle

  • More control over your timeline

    • Instead of “listing and hoping,” you are working toward a defined outcome

This is not about panic-selling. It is about recognising that a fast, fair offer today may be preferable to a theoretical higher price later that depends on variables you cannot control.


No. 3

Major Life Changes Make Waiting Unworkable

Many fast sales are driven by a change in personal circumstances rather than the property itself. Divorce, bereavement, job relocation, or a shift in employment can all create a need for speed and simplicity. When your life changes quickly, the last thing you want is a drawn-out selling process with uncertain timing.

A traditional sale can be emotionally and logistically demanding: preparing a home for viewings, keeping it presentable, managing ongoing communications, and living with the uncertainty of whether a buyer will proceed. A faster sale can reduce that strain by giving you a clearer closing date and fewer steps to manage.

Common life events that trigger the need for a fast sale

  • Divorce or separation

  • Death in the family and estate administration

  • Relocation for work or caring responsibilities

  • Downsizing due to retirement or health concerns

  • Financial changes such as redundancy or reduced income

  • Managing a property from a distance

What a fast sale can provide during upheaval

  • A firm timeline

    • Being able to plan a move, school changes, or a new job start date with more confidence

  • Reduced disruption

    • Fewer repeated viewings and less time spent keeping a home “market-ready”

  • Administrative simplicity

    • A streamlined process can be easier when you are already managing a complex personal transition

When life is already demanding, a simpler property sale can be a practical way to remove one significant source of stress.

No. 4

The Property Needs Work and You Do Not Want to Renovate

Homes that require significant repair or updating can be harder to sell through traditional methods. Many buyers want a “move-in ready” property, and lenders can be cautious if the home has issues that affect habitability or insurability. Even when buyers are interested, they may negotiate aggressively once surveys and inspections highlight problems.

If you are not in a position to carry out repairs, or you do not want to invest time and money into renovations, a buyer who purchases properties in all conditions may be a better match. You will likely receive a lower offer than you might achieve after improvements, but the trade-off is speed and convenience.

Examples of work that can slow down a traditional sale

  • Structural concerns or signs of movement

  • Outdated electrical systems or plumbing issues

  • Damp, mould, or persistent moisture problems

  • Roof repairs, drainage issues, or exterior deterioration

  • Kitchens and bathrooms in need of replacement

  • Cosmetic wear throughout that would require redecoration

  • Properties with long periods of vacancy

Why selling “as-is” can be advantageous

  • No need for upfront renovation costs

    • You avoid paying for contractors, materials, and unexpected overages

  • No prolonged disruption

    • Renovations often take longer than expected and can delay listing

  • Fewer conditional offers

    • Traditional buyers may make their offer dependent on repairs, credits, or renegotiation after inspection

A key point is that “needs work” does not always mean “unsellable.” It means your likely buyer pool is smaller and your timeline may be longer, which is exactly why faster routes can appeal.


No. 5

You Want a More Predictable Process Than the Traditional Route

Even in a strong market, traditional sales are not always straightforward. Chains can collapse, financing can fall through, and buyers can change their minds. Each stage introduces risk, and each delay increases the cost and stress of selling.

A faster sale route is often designed around reducing common friction points. While the details vary by company and location, the promise is generally the same: a simpler process that moves from initial contact to completion without the extended uncertainty of open-market selling.

Common issues that slow traditional home sales

  • Multiple rounds of negotiation

  • Buyer financing problems late in the process

  • Survey or inspection findings that trigger renegotiation

  • Appraisal shortfalls affecting mortgage approval

  • Delays caused by legal steps, paperwork, or third parties

  • Chains of dependent sales where one failure affects everyone

What to clarify before choosing a fast-sale company

  • How the offer is calculated

    • Ask what factors drive valuation and whether fees are deducted from the offer

  • The expected timeline

    • Confirm realistic completion windows and whether you can choose a closing date

  • Property condition expectations

    • Make sure “as-is” truly means you do not need to repaint, repair, or stage the home

  • How certainty is handled

    • Understand what could change the offer and at which stage

Speed is valuable, but transparency matters just as much. A genuinely straightforward sale should be clear about timelines, responsibilities, and how the price is determined.

No. 6

Balancing Speed, Price, and Convenience

The decision to sell quickly typically comes down to priorities. If the maximum sale price is the only goal, traditional listing routes may still be the best fit, assuming you have time and the property is in strong marketable condition. If time, certainty, and reduced hassle matter more, the faster options can be compelling.

A simple way to decide what matters most

  • Choose a fast sale if you prioritize

    • Certainty of timeline

    • Reduced ongoing costs

    • Selling “as-is” without repairs

    • Less disruption from viewings and showings

    • A clearer path during life changes

  • Consider a traditional sale if you prioritize

    • Achieving the highest possible price

    • Marketing exposure and competitive bidding

    • You have time to wait for the right buyer

    • You can invest in presentation, repairs, or upgrades

This is not a one-size-fits-all choice. The best option is the one that aligns with your financial reality, your time constraints, and your capacity to manage the process.

Takeaways

In this article, we explored why homeowners often choose faster alternatives to a traditional property listing when time, finances, or personal circumstances make waiting impractical. For many sellers, speed is not about rushing; it is about reducing uncertainty and protecting their ability to move forward.

Carrying monthly costs, selling in a cooling market, navigating major life changes, and dealing with a property that needs work are all common reasons to prioritize a quicker resolution. A fast sale can offer predictability and convenience, but it is important to understand how offers are calculated and what might affect the final price.

The right decision depends on what you value most: maximum price, a firm timeline, or an “as-is” sale with fewer steps. By weighing speed, cost, and disruption realistically, you can choose a route that fits your situation and helps you close with confidence.


Looking for Home resources?

Looking to enhance your living space and create a sanctuary that supports your well-being? Explore our home partners who offer a wide range of resources to elevate your home environment.


homeHLL x Editor


Poor Plastering Ruins Paint Finishes: What To Know

A great paint finish is rarely the result of paint alone. You can invest in premium emulsion, use the right roller, and apply multiple coats with care, yet still end up with patchiness, visible lines, or areas that seem to change sheen as the light hits them. When that happens, it is tempting to blame technique or product choice.


In this article, we will explore why poor plastering is one of the most common hidden causes of disappointing paintwork, how specific plaster defects show through once decorated, and what practical steps prevent failure before you waste time and money on repainting.

No. 1

Fresh Plaster Painted Too Soon

Painting new plaster before it has fully dried is one of the most frequent reasons a finish fails quickly. Fresh plaster may look dry from a distance, particularly if the surface feels firm, but moisture can still be present deeper within the skim. When paint goes on too early, it forms a film that interferes with the plaster’s ability to release that moisture evenly.

Gypsum finish plaster, used widely in UK homes, typically needs at least four weeks to cure under normal conditions. In colder months, in rooms with poor airflow, or where plaster has been applied thickly, drying can take significantly longer. A useful visual cue is color: the plaster shifts from a darker pink-orange tone to a consistent pale pink as it dries. If any darker areas remain, the wall is not ready.

What can happen if you paint before plaster is fully dry

  • Loss of adhesion and early failure

    • Moisture pushes against the paint film, which can cause bubbling, flaking, or peeling

    • Paint can fail to bond properly because the surface is still actively releasing water vapour

  • Visible staining and uneven appearance

    • Dark patches can show through as different areas dry at different speeds

    • The finished wall may look mottled even when the paint color is correct

  • Increased risk of mould in vulnerable areas

    • Trapped moisture behind a paint film can support mould growth, especially in corners and behind furniture

How to avoid premature painting

  • Allow adequate cure time

    • Plan for four weeks as a baseline and extend it if ventilation is poor or the weather is cold

  • Improve drying conditions safely

    • Use gentle, consistent ventilation rather than intense heat focused on one area

    • Keep airflow moving through the room to help moisture leave the building

  • Confirm readiness before painting

    • Look for an even, pale color across the entire wall

    • Pay special attention to thicker patches, repaired areas, and corners

No. 2

Skipping the Mist Coat

Even when plaster is fully dry, bare plaster is highly porous. If you apply standard emulsion straight onto it, the wall absorbs the water in the paint too quickly and often unevenly. That leads to patchy results that can remain visible despite additional coats, because the first coat never formed a stable, uniform base.

A mist coat is a diluted first coat of emulsion designed to soak into the plaster, reduce suction, and create a consistent surface for subsequent coats. A common mix is roughly 70 percent paint to 30 percent water, though the exact ratio can vary depending on the paint manufacturer and the porosity of the plaster.

What goes wrong without a mist coat

  • Uneven drying and patchiness

    • The plaster pulls moisture from the paint at different rates across the surface

    • The finish can look blotchy, dull in some areas, and slightly reflective in others

  • Poor key for subsequent coats

    • Later coats sit on an unstable layer that did not bond properly

    • Peeling becomes more likely over time, particularly in high-traffic rooms

  • Inconsistent final color

    • Paint can settle at different depths in porous plaster, changing how the color reads once dry

How to apply a mist coat effectively

  • Use the right paint type

    • A basic white emulsion is often used, provided it is suitable for dilution

  • Apply evenly and avoid overworking

    • Roll consistently and maintain a wet edge to prevent lap marks

  • Let it dry fully before topcoats

    • Rushing straight to full-strength paint can recreate the same suction problems


No. 3

Uneven or Poorly Finished Plaster

Paint highlights flaws. A wall that looks acceptable in bare plaster can look dramatically worse once painted, particularly when natural light or a single ceiling light hits it at a low angle. This is known as raking light, and it is unforgiving: any ridge, hollow, or trowel mark casts a shadow that becomes obvious as soon as the wall has a uniform color.

Common plaster defects that show through paint

  • Trowel lines and drag marks

    • Caused by insufficient flattening or inconsistent pressure during finishing

    • Often becomes more noticeable with eggshell, satin, or any finish with a higher sheen

  • Cat scratching and rough texture

    • Happens when plaster is worked too dry during final trowelling

    • Produces a scratched surface that paint cannot disguise

  • Hollows and high spots

    • Create a wavy wall that reflects light unevenly

    • Even matte paint cannot hide significant undulation

  • Poorly feathered patch repairs

    • Leave visible edges or a halo effect once painted

    • Particularly common around chases, socket repairs, and filled-in cracks

What to do before painting if the plaster is not smooth

  • Inspect under raking light

    • Stand at the end of the room and look along the wall rather than directly at it

  • Correct defects before decoration

    • Sand down high spots

    • Fill minor hollows and imperfections, then sand flush

    • Re-skim if the surface is consistently uneven or heavily marked

Paint is not a filler. If the plaster surface is not flat and well-finished, paint will simply make the problem easier to see.

No. 4

Incompatible Materials and Failed Adhesion

Not all plaster systems behave the same way, and compatibility issues often appear later as cracking, peeling paint, or sections that sound hollow when tapped. These problems can be mistaken for paint failure, but the root cause is usually the plaster layer beneath.

One common scenario is applying gypsum finish plaster over a sand and cement backing coat without the correct bonding method. The materials expand and contract differently, and the bond can fail over time. When that happens, the skim coat can become blown, meaning it is no longer fully adhered to the substrate. Painted blown plaster often cracks along the edges of the detached area and can peel in an outline shape.

Another issue is plastering over previously painted surfaces without proper preparation. Plaster needs a surface it can grip. Existing paint is designed to be sealed and non-porous, which makes adhesion unreliable unless the surface is properly keyed and primed.

Preparation steps before plastering over painted surfaces

  • Remove anything loose

    • Scrape away flaking paint entirely rather than plastering over it

  • Create a mechanical key

    • Sand or score the surface so the plaster has texture to grip

  • Use a suitable bonding agent

    • Apply PVA or a purpose-made bonding primer as appropriate

  • Time the bonding layer correctly

    • Allow it to become tacky before plastering, not wet and not fully dry

Signs the problem is plaster adhesion, not paint

  • A hollow, drum-like sound when tapping the wall

  • Cracking that follows an outline rather than random hairline movement

  • Peeling paint that brings fine plaster with it


No. 5

Mismatched Suction Across the Wall

Suction describes how quickly a surface absorbs moisture from wet paint. On a properly prepared wall, suction is reasonably consistent, allowing paint to dry evenly and form a uniform film. On problem walls, suction varies from area to area, and the results are often frustrating.

Mismatched suction is common where old plaster meets new patch repairs, where one area has been skimmed and another has not, or where parts of a wall were previously painted and other parts are bare. When you apply paint over all of it at once, each zone dries differently.

A classic symptom is flashing: the wall looks fine when wet, then dries with visible patches of different sheen and depth. It can resemble damp marks even when the wall is completely dry.

What causes suction variation

  • Patch repairs next to the original plaster

  • Areas skimmed at different times or thicknesses

  • Mixed substrates on one wall, such as plaster, filler, and previously painted sections

How to prevent flashing and uneven sheen

  • Seal or prime the entire wall

    • Use a primer designed to equalise porosity across mixed surfaces

  • Standardise the base before topcoats

    • Treat the whole wall consistently rather than spot-priming only the patches

  • Avoid “more coats” as the only solution

    • Additional coats often increase the sheen difference and make flashing more noticeable

No. 6

Hairline Cracks That Appear After Painting

Some shrinkage as plaster dries is normal. The issue arises when the wall is painted before that early movement has completed. When shrinkage occurs under a paint film, fine cracks can appear through the finish weeks later. The paint has not necessarily failed as a product, but the timing and preparation were wrong, and the visual effect is poor.

In older properties, existing hairline cracks often telegraph through paint if they are not filled and properly sanded. Each new paint layer can make the line more noticeable under light because it creates a slightly raised bridge over the crack.

How to handle hairline cracking properly

  • Let the plaster complete its initial drying movement

    • Do not rush from plastering to painting without allowing time for shrinkage

  • Fill and sand before mist coating

    • Use a fine surface filler for hairline cracks

    • Sand flush and remove dust so the base is clean and consistent

  • Inspect before committing to finish coats

    • Check under raking light to catch fine cracking you might miss head-on

No. 7

What Good Plastering Looks Like Before You Paint

If you want paint to look even, smooth, and consistent, the plaster needs to meet a basic standard. That standard is not perfection in a theoretical sense, but it should be consistent enough that light does not reveal obvious defects.

A paint-ready plastered wall should be

  • Fully dry and uniform in color

    • A consistent pale tone with no darker patches indicating retained moisture

  • Flat and even under raking light

    • No obvious ridges, hollows, trowel marks, or patch edges

  • Properly adhered

    • No hollow or loose sections when tapped

  • Free from surface defects

    • No cracks, chips, roughness, or poorly blended repairs

  • Correctly sealed prior to topcoats

    • A mist coat or appropriate primer to control suction and improve bond

The relationship between plaster quality and paint quality is direct. When plastering is rushed or corners are cut, paint becomes the messenger that exposes every weakness.

Takeaways

Poor plastering ruins paint finishes because paint amplifies what is underneath, especially in raking light and on walls with uneven porosity. If the plaster is not dry, flat, and stable, even premium paint will look patchy or fail early. A skilled plasterer produces a surface that decorates beautifully and holds its finish for years.

Most paint problems linked to plaster come down to timing and preparation, including allowing a full cure, applying a mist coat, and correcting defects before decorating begins. Addressing suction differences and hairline cracks before topcoats is far easier than trying to hide them afterward.

A paint-ready wall should be uniform in color, smooth under angled light, and properly sealed to create a consistent base. If you get the plaster right first, the paint becomes straightforward and the finish lasts years rather than months.


Looking for Home resources?

Looking to enhance your living space and create a sanctuary that supports your well-being? Explore our home partners who offer a wide range of resources to elevate your home environment.


homeHLL x Editor


How Professional Landscaping Can Transform Your Outdoor Living Space

Most homeowners spend a lot of time and money perfecting the inside of their home — but the backyard? It often gets overlooked until there's a reason to use it. The truth is, a well-designed outdoor space doesn't just look great; it changes how you actually live.


You spend more time outside, you entertain more, and your property becomes something you're genuinely proud of. Professional landscaping is what makes that shift happen, and the results tend to go much further than most people expect.

In this article, we will explore how professional landscaping can transform an ordinary yard into a functional outdoor living space, which upgrades tend to deliver the greatest everyday value, and why working with the right local team makes a lasting difference. From lifestyle-first planning to low-maintenance materials and high-impact features, strategic landscaping can create a space that feels tailored, comfortable, and built to hold up over time.

No. 1

It Starts With a Design That Works for Your Lifestyle

The biggest difference between a DIY yard project and professional landscaping is the planning. A good landscaper doesn't just make things look nice — they think about how you actually use the space. Do you have kids who need a lawn area? Do you host dinner parties? Do you want a quiet corner for a morning coffee? Those answers shape everything from where paths go to how the planting is arranged.

Professional landscape designers also account for practical factors that homeowners often miss: drainage, sun exposure, soil conditions, and long-term plant maintenance. Getting these details right from the start saves a lot of money and headaches down the road.

No. 2

Outdoor Kitchens and BBQ Areas Are Game Changers

One of the most popular — and most rewarding — outdoor upgrades right now is a dedicated cooking and entertaining space. If you've been thinking about adding something like this, exploring some solid outdoor BBQ area ideas for your backyard is a great place to start. A well-built outdoor kitchen brings the full cooking experience outside — counter space, built-in storage, proper lighting, and weather-resistant materials that hold up through every season.

What makes these spaces so valuable isn't just the wow factor. It's how much they change your daily routine. Grilling moves from a quick solo task to an actual experience you share with people. And when the cooking space is designed right — with enough room to move, prep, and serve — it becomes the natural center of any backyard gathering.


No. 3

Low-Maintenance Landscaping Is a Real Option Now

A lot of homeowners hesitate to invest in their yards because they don't want to spend every weekend maintaining them. That's completely understandable, but it's also a problem that professional landscaping actually solves. Modern landscaping options, especially in drier climates, are built with low maintenance in mind.

Artificial turf, for example, has become a genuinely popular choice for homeowners who want green space without irrigation bills and constant mowing. High-quality turf today looks realistic, drains well, and holds up in heat. Other low-maintenance options include:-

•        Drought-tolerant native plants that need minimal watering once established

•        Decorative rock and stone landscaping that adds texture and color without upkeep

•        Paver patios that are durable, weed-resistant, and easy to clean

These choices aren't just practical — they look great too. And when they're installed by professionals who know the local climate and soil, they last much longer than DIY alternatives.

No. 4

Fire Features Add Warmth and Year-Round Usability

One of the smartest things you can do to extend how often you use your outdoor space is to add a fire feature. A fire pit or outdoor fireplace creates a focal point in the yard and — more importantly — gives you a reason to be outside on cooler evenings when you'd otherwise head in.

According to the National Association of Home Builders, outdoor fireplaces and fire pits consistently rank among the most desired outdoor features by homebuyers — meaning they also add measurable resale value to your property.

Whether you go with a simple stone fire ring or a full built-in gas fireplace, the key is proper installation. Fire features need to be positioned correctly for safety, built with heat-appropriate materials, and integrated into the overall landscape design so they feel like a natural part of the space rather than an afterthought.


No. 5

Water Features Bring a Surprising Amount of Value

If you've ever sat near a fountain or a small garden pond, you know how much the sound of moving water changes the feel of a space. It's calming in a way that's hard to replicate with anything else. Water features, whether that's a simple bubbling fountain, a pondless waterfall, or a larger decorative feature, add a sensory layer to your yard that makes it feel like a genuine retreat.

They also tend to become a natural conversation piece when you have guests. From a practical standpoint, a professionally installed water feature is sealed, properly plumbed, and designed to handle weather extremes, unlike many DIY kits that leak or break down quickly.

No. 6

Working With a Local Landscaping Company Makes a Difference

Landscaping isn't one-size-fits-all. What works in a humid Southern climate looks completely different from what thrives in the high desert of Arizona. Local professionals understand the specific conditions you're working with, the soil type, the seasonal temperature swings, and how much sun different parts of your yard get throughout the year.

R.E. and Sons Landscaping, for instance, specializes in outdoor transformations for homeowners in the Prescott area, a region where water conservation matters and materials need to hold up to significant weather variation. Their work spans everything from artificial turf and custom outdoor kitchens to fire pits, water features, and full landscape design. That kind of local expertise translates directly into results that last.

When choosing a landscaping company, look for a licensed and insured contractor with a real portfolio of completed work, clear communication about their process, and references from homeowners in your area. The right team will make the whole experience straightforward and deliver results you'll actually enjoy for years.

Takeaways

Your outdoor space has more potential than you might realize. With the right professional help, a plain backyard can become somewhere you genuinely want to spend time — cooking outside, gathering with family, or just unwinding after a long day. Professional landscaping brings together smart design, quality materials, and local expertise to make that transformation real.

Whether you're starting from scratch or looking to upgrade what you already have, the investment in professional landscaping pays off in daily enjoyment and long-term property value. Start by thinking about how you want to use your space — the right landscaping team will take it from there.


Looking for Home resources?

Looking to enhance your living space and create a sanctuary that supports your well-being? Explore our home partners who offer a wide range of resources to elevate your home environment.


homeHLL x Editor


Creating An Outstanding Evening Oasis: The Allure Of Premium Outdoor Lanterns

As the days get longer and the weather turns warm, outdoor spaces naturally become extensions of the home. Patios, decks, and gardens shift from “nice-to-have” areas into everyday settings for family dinners, weekend gatherings, and quiet moments at the end of a busy day. Yet even the most thoughtfully designed backyard can feel flat—or worse, uncomfortable—if the lighting is too harsh, too dim, or simply placed in the wrong spots.


In this article, we will explore how premium Outdoor Lanterns can help you create a layered, inviting evening oasis, why craftsmanship matters in exterior environments, and how to choose lantern designs that look elevated while performing reliably through the seasons. The right lanterns do more than illuminate a walkway; they shape mood, highlight landscaping, and turn ordinary nights outside into experiences you look forward to.

No. 1

Layer Your Lighting to Create a Warm Outdoor Atmosphere

If there is one design principle that consistently improves outdoor spaces, it is layering. Relying on a single bright source, such as a floodlight, can flatten your patio and erase the cozy feeling you are trying to create. On the other hand, depending only on a fire pit often leaves seating areas unevenly lit, which can make conversations and dining feel awkward.

Outdoor Lanterns are ideal for layering because they are portable, adjustable, and visually decorative even when they are not turned on. They allow you to add targeted pools of light exactly where people gather, while keeping the overall ambience soft and welcoming.

Key lighting layers to aim for

  • Ambient lighting

    • Provides general illumination for the space

    • Keeps the patio comfortable without feeling clinical

  • Task lighting

    • Supports functional areas such as dining tables or outdoor kitchens

    • Helps guests move around safely

  • Accent lighting

    • Adds drama by highlighting plants, trees, architectural features, or textures

    • Creates depth and a more “designed” look

Easy ways to layer lantern light

  • Place lanterns in pairs near seating areas to balance light distribution

  • Use different lantern heights to create dimension

  • Mix tabletop lanterns with floor lanterns to prevent glare

  • Position a lantern near steps or transitions to subtly guide movement

No. 2

Use Versatility to Match Real Life, Not a Showroom

One of the biggest advantages of lanterns is that they adapt to how you actually live. Unlike hardwired fixtures, lanterns can move with the occasion. A quiet evening on the patio might call for a small, intimate glow, while a dinner party often needs brighter table-level lighting and clearer pathway visibility.

With well-designed Outdoor Lanterns, you can create a space that feels styled but never rigid. That flexibility is what turns a patio into a true second living room: it supports both spontaneous moments and planned entertaining.

Practical placement ideas that feel high-end

  • Dining table centerpiece

    • A sleek, modern lantern can replace a standard candle arrangement

    • It creates a focal point without blocking conversation

  • Ground-level lighting along deck edges

    • Structured, architectural lanterns make steps and borders feel intentional

    • They add safety without looking utilitarian

  • Soft glow in garden zones

    • Lanterns placed near plants can create a resort-like atmosphere

    • The light reflects off leaves and textures for a layered effect

  • Hanging accents in trees or pergolas

    • Suspended lanterns can cast subtle patterns and shadows

    • This is especially effective for intimate gatherings

When lantern versatility matters most

  • You host different types of events (family dinners, cocktail evenings, birthdays)

  • You want seasonal styling without changing your entire setup

  • You prefer flexible lighting that adjusts as your patio furniture moves


No. 3

Prioritize Craftsmanship Because the Outdoors Is Unforgiving

Outdoor décor is exposed in ways indoor décor never is. Lanterns may sit on open tabletops, rest on grass, hang under direct sun, or endure sprinkler spray and wind-driven rain. That constant exposure tests materials quickly, especially when finishes are thin or construction is lightweight.

Many people learn this the hard way: inexpensive lanterns can look appealing at first, then fade, rust, crack, or warp after a few storms and hot weeks. When you are building an elevated home environment, treating lighting as disposable usually becomes more expensive over time—not only in replacement costs, but also in the frustration of constantly re-buying and re-styling.

Common issues with low-quality outdoor lanterns

  • Rusting and corrosion at seams, screws, and handles

  • Fading finishes from UV exposure

  • Cracked plastic panels or brittle parts after heat cycles

  • Fogging or moisture intrusion that dulls the light output

  • Unstable bases that tip easily in the wind

What “premium craftsmanship” should include

  • Weather-resistant construction designed for exterior use

  • Durable finishes intended to resist corrosion

  • Solid structural integrity that does not wobble or flex

  • Materials that maintain colour and texture through sun exposure

  • Design details that still look refined up close

No. 4

Choose Lanterns Built for the Elements, Not Just the Look

To truly elevate an outdoor space, lighting should be approached as a long-term design investment. The goal is not only to create a beautiful evening atmosphere today, but also to have lanterns that still look exceptional after months of exposure.

That search for durable and elegant fixtures is what led the author’s approach toward Dazuma, a premium retailer positioned around refusing to compromise on durability or design. Their exterior collections are described as engineered for outdoor performance, including heavy-duty weather-resistant construction and advanced anti-rust finishes intended to preserve appearance season after season.

Why performance features matter in outdoor lighting

  • Better resistance to rain, humidity, and coastal air

  • Less maintenance and fewer surprise replacements

  • More consistent appearance across seasons

  • Stronger structural quality for hanging or ground placement

A simple checklist before you buy

  • Confirm the lantern is rated or intended for outdoor use

  • Look for corrosion-resistant finishes and stable construction

  • Consider how it will be stored during extreme weather

  • Choose designs that still look good in the daytime


No. 5

Extend the “Premium Standard” Indoors for a Cohesive Home

One reason premium outdoor lighting feels so impactful is that it brings indoor-level design thinking outside. When lanterns look intentional, substantial, and well-finished, the patio stops feeling like a separate zone and starts feeling like part of the home.

The article also highlights that Dazuma applies a similar standard of craftsmanship to interior lighting, using high-end materials that are both durable and visually distinctive. Details such as solid brass and natural alabaster are mentioned as examples of materials that create timeless style and softer light diffusion, turning fixtures into functional art pieces rather than purely practical items.

Design benefits of using authentic materials

  • Solid brass

    • Adds warmth and depth to a space

    • Ages in a way that often looks better over time

  • Natural alabaster

    • Diffuses light softly, reducing harsh glare

    • Adds an elevated, sculptural feel even when the lights are off

How to make indoor and outdoor lighting feel connected

  • Repeat finishes (for example, warm metals) across key areas

  • Keep the colour temperature consistent for a seamless mood

  • Use similar design lines (modern, coastal, traditional) throughout the home

  • Avoid mixing too many competing styles in a single sightline

No. 6

Invest in Everyday Joy With Lighting That Supports Memories

Outdoor lighting is not only about aesthetics; it shapes the way you use the space. When lighting is balanced and flattering, people stay outside longer. Conversations feel calmer, meals feel more special, and the backyard becomes a place you naturally return to instead of a space you only use occasionally.

Premium Outdoor Lanterns support that lifestyle shift because they combine atmosphere with function. They can help you create a backyard environment that feels comfortable after dark, while also delivering the subtle design polish that makes the space feel complete.

Moments that benefit from the right lantern lighting

  • Weeknight dinners that feel like a small reset

  • Quiet wine or tea on the patio after the house is asleep

  • Outdoor celebrations where lighting keeps energy warm and welcoming

  • Late-night conversations that extend naturally without harsh glare

  • Safe, softly lit movement between the house, steps, and garden

Takeaways

Premium Outdoor Lanterns can transform a patio from a dark or overly bright space into a layered, inviting evening oasis. The most effective approach is to combine ambient, task, and accent lighting so the entire area feels balanced and intentional.

Versatility is a major advantage of lanterns because they move with your lifestyle and adapt to different occasions. Thoughtful placement—on tables, along pathways, and near seating—helps create a resort-like mood while supporting safety and comfort.

Craftsmanship matters because outdoor conditions quickly expose weak materials and thin finishes. Investing in lanterns designed for the elements, and choosing cohesive materials and styles that connect indoor and outdoor spaces, creates a lasting backdrop for everyday joy and family memories.


Looking for Home resources?

Looking to enhance your living space and create a sanctuary that supports your well-being? Explore our home partners who offer a wide range of resources to elevate your home environment.


homeHLL x Editor


Simple Habits That Can Help Prevent Plumbing Problems At Home

Most homeowners rarely think about their plumbing until something stops working. Because pipes, drains, vents, shutoff valves, and supply lines are largely hidden behind walls and under floors, small warning signs can be easy to miss. The result is that many “sudden” plumbing emergencies are not sudden at all; they are slow-developing problems that could have been reduced or prevented with consistent habits and basic maintenance.


In this article, we will explore simple, practical habits that help prevent plumbing problems at home, including what to keep out of drains, how to spot early leak signals, and which seasonal checks protect your system year-round. None of these steps require advanced tools, but together they can lower repair costs, reduce water waste, and help you avoid stressful surprises.

No. 1

Be Careful About What Goes Down Kitchen Drains

Kitchen plumbing is especially vulnerable because it handles grease, food scraps, and detergent residue on a daily basis. Many clogs begin as thin layers of buildup that harden over time, narrowing the pipe until drainage becomes slow or stops entirely.

Grease and oil are the most common long-term offenders. Even if you run hot water, grease cools and solidifies as it travels through the drain system, trapping other debris along the way.

What to keep out of the kitchen sink

  • Cooking grease, oil, butter, and pan drippings

  • Coffee grounds and loose tea leaves

  • Eggshells and fibrous vegetable scraps

  • Rice, pasta, oats, flour, and other starchy foods that expand

  • “Thick” sauces and fats that cling to pipe walls

Habits that protect kitchen plumbing

  • Wipe greasy pans with a paper towel before rinsing

  • Pour cooled grease into a disposable container and throw it away

  • Use a mesh strainer to catch food particles before they enter the drain

  • Run cold water briefly when using the garbage disposal to help solidify fats so they can be chopped and carried away

  • Avoid relying on drain chemicals, which can damage pipes and mask bigger issues

If you already have slow drainage, treat it as an early warning sign. Addressing it early is usually easier than waiting for a complete blockage.

No. 2

Protect Bathroom Drains From Hair, Soap, and “Flushables”

Bathroom drains deal with a different kind of buildup: hair, soap residue, toothpaste, and personal care products. This debris can form sticky clogs that are difficult to clear once they thicken.

Toilets have their own category of risk. Flushing the wrong items can cause blockages in your home’s pipes and, in some cases, contribute to sewer line issues.

What not to flush, even if it seems convenient

  • Wipes labeled “flushable”

  • Paper towels and facial tissues

  • Cotton balls, cotton swabs, and dental floss

  • Feminine hygiene products

  • Excessive amounts of hair from brushes or razors

Simple bathroom habits that reduce clogs

  • Install a hair catcher in showers and tubs and empty it regularly

  • Use less soap when possible and rinse thoroughly to reduce residue

  • Dispose of wipes and hygiene products in the trash every time

  • Periodically clean sink stoppers where hair and film accumulate

A good rule is: toilets are for human waste and toilet paper only. Anything else increases your odds of a blockage.


No. 3

Watch Water Pressure to Reduce Wear and Leaks

High water pressure can feel great in a shower, but it puts added stress on pipes, fixtures, supply lines, and shutoff valves. Over time, that extra stress can contribute to pinhole leaks, premature fixture failure, and appliance hose problems.

Many homeowners do not realize their pressure is high because the system still seems to “work.” Pressure-related damage often shows up later as leaks in unexpected places.

Signs your water pressure may be too high

  • Banging pipes (water hammer) when turning taps off

  • Frequent dripping from faucets or showerheads

  • Appliance supply line issues or repeated valve replacements

  • Sudden bursts of water when a tap is opened

Habits that help keep pressure in a safe range

  • Use a pressure gauge periodically if you have one available

  • Consider a pressure regulator if pressure is consistently high

  • Do not ignore banging or vibrating pipes; those are stress signals

  • Replace worn washers and cartridges promptly to reduce dripping

Managing pressure is a long-term protective habit, especially in homes with older plumbing materials.

No. 4

Maintain Your Water Heater for Efficiency and Longevity

Water heaters work hard every day, and mineral sediment naturally collects inside the tank as water is heated. Over time, sediment reduces efficiency, increases energy usage, and can shorten the lifespan of the unit. It can also contribute to noisy operation and inconsistent hot water delivery.

Periodic maintenance is one of the easiest ways to keep performance steady and avoid early replacement.

Common signs of sediment buildup or water heater wear

  • Rumbling or popping sounds while heating

  • Hot water runs out faster than usual

  • Water takes longer to heat

  • Rusty or cloudy water in hot taps

Helpful water heater habits

  • Schedule periodic flushing when appropriate for your system and water quality

  • Keep the area around the heater clear to spot leaks early

  • Monitor for moisture near the base, which can indicate slow leakage

  • Check the temperature setting to avoid unnecessary strain and scald risk

If you are unsure what maintenance is safe for your specific unit, a professional evaluation can prevent mistakes and identify wear before failure.


No. 5

Prepare Seasonally to Prevent Frozen and Burst Pipes

Cold weather can be especially hard on plumbing, particularly for pipes in crawlspaces, garages, exterior walls, and unheated areas. When water freezes, it expands, and that expansion can crack pipes or fittings. The resulting damage often appears when the ice melts and water begins flowing again, sometimes creating significant water damage quickly.

Seasonal preparation is a preventative habit that pays for itself if it prevents even one freeze-related failure.

Cold-weather habits that reduce freeze risk

  • Insulate exposed pipes in unheated areas

  • Disconnect outdoor hoses before freezing temperatures arrive

  • Shut off and drain exterior spigots if your setup allows

  • Seal drafts near plumbing runs, especially in basements and crawlspaces

  • Keep interior cabinet doors open on very cold nights to allow warm air to circulate

A small amount of prevention here can reduce the risk of a burst pipe, which is one of the most expensive and disruptive plumbing emergencies.

No. 6

Treat Small Leaks as Early Warnings, Not Minor Annoyances

A dripping faucet or a slow leak under a sink is easy to ignore, especially when it seems minor. However, leaks rarely stay stable. They often worsen gradually, and even small amounts of water can rot cabinetry, damage flooring, stain drywall, and encourage mould growth over time.

Beyond property damage, leaks waste water continuously, which may increase utility bills without you noticing immediately.

Places leaks commonly hide

  • Under sinks behind stored items

  • Around toilet bases

  • Behind washing machines and dishwashers

  • At refrigerator ice maker lines

  • Inside vanity cabinets and around shutoff valves

Leak-prevention habits that catch problems early

  • Look under sinks monthly for moisture, stains, or warped wood

  • Listen for toilets that run intermittently without being flushed

  • Check caulk lines and grout for persistent damp areas

  • Do not store items directly against pipes where small drips can go unnoticed

The earlier you catch a leak, the cheaper it is to fix. That is one of the most reliable principles in home maintenance.

No. 7

Pay Attention to “Behavior Changes” in Your Plumbing

Plumbing systems often signal trouble before they fail completely. The challenge is that homeowners sometimes treat these signals as normal quirks instead of early symptoms.

Gurgling, bubbling, and odors can indicate issues such as partial clogs, venting problems, or sewer line concerns. In some cases, tree root intrusion or pipe deterioration develops slowly and creates symptoms long before a full backup occurs.

Symptoms to take seriously

  • Gurgling sounds from drains after flushing or running water

  • Sewer smells indoors or near drains

  • Slow drainage in multiple fixtures

  • Toilet bubbles when a sink or shower runs

  • Recurring clogs that return quickly after being cleared

What to do when you notice symptoms

  • Note which fixtures are affected and when it happens

  • Avoid chemical drain cleaners that can worsen pipe damage

  • Stop using the fixture if backups begin to occur

  • Schedule an inspection if symptoms involve multiple drains or sewer odors

These signs are useful data. When you act early, you often avoid emergency-level damage.

No. 8

Prevent Laundry Room Failures With Hose and Valve Checks

Washing machine supply hoses can weaken over time, and when they fail, they can release a large volume of water quickly. Because laundry areas are often out of sight, leaks may go unnoticed until damage is significant.

Replacing older rubber hoses with braided stainless steel options can reduce the chance of sudden rupture, and periodic checks help identify corrosion or moisture early.

Laundry room habits that reduce risk

  • Inspect hoses for bulges, cracking, or brittleness

  • Check fittings for corrosion or dampness

  • Replace old hoses proactively, especially in older homes

  • Ensure the machine is level to reduce vibration and strain

  • Know where the shutoff valves are and confirm they work

A few minutes of inspection can prevent one of the most costly household water events.

No. 9

Inspect Appliance Supply Lines and Hidden Connections

Modern homes often have multiple appliances that depend on water supply and drainage: dishwashers, refrigerators with ice makers, water filtration systems, and tankless water heaters. Small leaks in these areas can persist for months because they occur behind cabinetry or in tight spaces.

Routine checks reduce the likelihood of long-term water exposure that can damage subfloors, cabinets, and walls.

Appliances and components to check periodically

  • Dishwasher drain hose and supply line connections

  • Refrigerator water line and fittings

  • Under-sink filtration housings and cartridges

  • Water softeners and drain discharge tubing

  • Any visible shutoff valves for signs of corrosion or seepage

A simple inspection routine

  • Look for moisture or mineral buildup at joints

  • Check for musty smells near cabinets and appliances

  • Confirm that hoses are not kinked or rubbing against sharp edges

  • Make sure shutoff valves turn smoothly and do not leak when moved

Even a slow drip can cause major damage when it stays hidden long enough.

No. 10

Know Your Home’s Plumbing Age and Get Routine Inspections

Understanding the approximate age of your home’s plumbing can help you plan ahead. Older homes may have materials more prone to corrosion or deterioration, and even newer homes can have issues such as poorly installed fittings or aging valves.

Routine inspections remain one of the best prevention strategies available. Even when no obvious problems exist, professionals may spot hidden leaks, deteriorating shutoff valves, pressure problems, or early sewer line issues before they become expensive emergencies.

For homeowners researching maintenance recommendations and regional plumbing considerations, information from a trusted plumber Wake Forest residents frequently consult may provide additional guidance regarding common local plumbing issues.

What a proactive plumbing plan can include

  • A yearly or biennial whole-home plumbing check

  • Water pressure testing and regulator evaluation

  • Water heater performance assessment

  • Drain and sewer line evaluation if symptoms appear

  • A review of shutoff valve locations and condition

Plumbing systems are built to last, but they last longer when you treat them like a system that needs basic attention rather than an invisible utility.

Takeaways

Small daily habits have a big impact on plumbing health, especially when you prevent grease, food scraps, hair, and non-flushable items from entering drains. Consistent use of strainers, proper disposal, and basic bathroom precautions can reduce clogs significantly.

Preventative maintenance also includes monitoring water pressure, flushing or servicing water heaters when appropriate, and preparing exposed pipes for cold weather. Addressing minor leaks and early warning signs promptly helps you avoid costly water damage and disruptive emergencies.

Finally, routine inspections, appliance line checks, and awareness of your home’s plumbing age support long-term reliability. A proactive approach, including guidance from a trusted plumber Wake Forest residents frequently consult, can help you plan repairs and upgrades before problems escalate.


Looking for Home resources?

Looking to enhance your living space and create a sanctuary that supports your well-being? Explore our home partners who offer a wide range of resources to elevate your home environment.


homeHLL x Editor


How Can Better Planning Reduce Relocation Stress

Moving home is often described as one of life’s most stressful experiences. Between packing, paperwork, travel arrangements, and adjusting to a new environment, it is easy to feel overwhelmed before moving day even arrives.


In this article, we will explore how better planning reduces relocation stress by replacing uncertainty with clear steps, realistic timing, and practical systems that keep you in control from start to finish.

The goal is not to create a perfect move with zero surprises. Instead, the goal is to make decisions early, reduce last-minute pressure, and build a relocation plan that supports a smoother transition for your household, your budget, and your peace of mind.

No. 1

Create a Realistic Moving Timeline

One of the biggest drivers of relocation stress is leaving key tasks until the final week. A rushed move can quickly become chaotic, especially when important details are overlooked or you discover too late that a preferred service is fully booked. A timeline gives your move structure and turns an intimidating project into smaller, manageable steps.

A strong relocation timeline should start earlier than most people think. For a local move, 4–6 weeks is often workable. For long-distance or multi-vehicle moves, 8–12 weeks provides much more breathing room.

What to include in your moving schedule

  • Sorting and decluttering belongings

  • Booking movers or transport services

  • Organising utility transfers

  • Updating addresses

  • Packing non-essential items early

  • Confirming travel arrangements

  • Preparing important documents

A simple timeline structure that works

  • 8–12 weeks out: choose dates, compare quotes, begin decluttering

  • 6–8 weeks out: book services, order supplies, notify schools or landlords

  • 4–6 weeks out: start packing non-essentials, confirm time off work

  • 2–3 weeks out: transfer utilities, finalise travel plans, label rooms

  • 1 week out: pack essentials, confirm bookings, clean and recycle

A timeline can also reduce stress by improving coordination within families. When responsibilities are visible, tasks can be assigned logically rather than falling on one person at the last minute.

No. 2

Reduce Clutter Before the Move

Relocation is dramatically easier when you are not transporting items you do not want or use. Planning ahead gives you time to sort properly, rather than panic-packing drawers and closets into boxes you will later regret.

Many people underestimate how much they own until they start packing. Decluttering early reduces the number of boxes, lowers transport costs, and makes unpacking faster and less emotionally draining. It also helps your new home feel comfortable sooner because you are not surrounded by unnecessary items.

Benefits of decluttering early

  • Fewer items to pack, carry, insure, and organise

  • Lower moving costs, especially by volume or weight

  • Faster unpacking and easier room setup

  • Less decision fatigue on moving week

  • A calmer arrival experience in the new space

Category sorting that prevents confusion later

  • Daily essentials

  • Seasonal items

  • Sentimental possessions

  • Furniture and appliances

  • Items no longer needed

If you find it hard to make decisions, try a “two-touch rule”: pick an item up once, decide immediately whether it is keep, donate, sell, recycle, or dispose. Momentum is one of the most effective antidotes to moving stress.


No. 3

Plan Transportation Well in Advance

Transportation is the backbone of any relocation. When transport is poorly organised, everything else becomes harder: schedules slip, costs rise, and stress spikes. Early planning allows you to compare providers, secure availability, and confirm the practical details that prevent moving-day surprises.

This is especially important for long-distance relocations or moves involving multiple vehicles. Some families choose specialist services to help safely transport cars to Colorado Springs when relocating long distances. Arranging vehicle transport in advance removes the pressure of coordinating multiple drivers or taking on long road journeys during an already demanding time.

Transportation details to confirm early

  • Collection and delivery windows (and what happens if dates shift)

  • Insurance coverage and what it does or does not include

  • Vehicle condition documentation (photos, inspections, checklists)

  • Access limitations at either property (stairs, narrow roads, parking)

  • Contingency plans for delays (weather, traffic, scheduling changes)

Planning transport early also reduces decision fatigue. When the most complex logistics are locked in, everything else feels more manageable.

No. 4

Avoid Last-Minute Packing Panic

Packing is usually more time-consuming than expected. Waiting until the final few days increases stress, raises the chance of breakage, and often leads to disorganised unpacking. A planning-led approach lets you pack gradually and strategically, while keeping daily life functioning.

Start with items you rarely use. This reduces visual clutter and gives you early wins, which is important psychologically when a move feels endless.

A practical packing order

  • Storage areas first (attic, garage, closets)

  • Seasonal and decorative items

  • Books, extra linens, backup kitchenware

  • Non-essential electronics and cables

  • Daily essentials last

Box labelling that saves hours later

Helpful labels may include:

  • Room destination

  • Fragile items

  • Priority essentials

  • Heavy boxes

  • Electronics and cables

An essentials box (or suitcase) is one of the most effective stress-reduction tools you can prepare. Include toiletries, chargers, medication, snacks, paper towels, a change of clothes, basic tools, and important documents, so your first night does not feel like a scavenger hunt.


No. 5

Manage Financial Stress With a Clear Budget

Moving can become expensive quickly, and financial uncertainty adds a heavy layer of anxiety to an already busy period. A moving budget allows you to plan for known costs, prepare for common extras, and avoid unpleasant surprises.

Creating a budget early also helps you make calmer decisions. Rushed choices often cost more, either because availability is limited or because you are forced into last-minute options.

Common moving expenses to plan for

  • Removal services

  • Packing materials

  • Storage fees

  • Fuel and travel costs

  • Utility deposits

  • Temporary accommodation

  • Cleaning services

Budget tips that reduce pressure

  • Get multiple quotes early and compare what is included

  • Set aside a contingency buffer for unexpected costs

  • Track spending weekly so you stay ahead of overruns

  • Avoid “double paying” (overlapping rent, utilities, or storage) when possible

Even a simple spreadsheet can reduce stress because it turns vague worry into concrete numbers and decisions.

No. 6

Keep Important Documents Organised and Accessible

Relocation often involves a surprising amount of paperwork. Losing documents during a move can cause delays, extra fees, and unnecessary stress, especially when you need something quickly for a service provider, school, or property handover.

Create a dedicated folder that stays with you, not in the moving truck. Many households also keep a scanned digital backup for peace of mind.

Documents to keep in a single dedicated place

  • Identification

  • Lease or mortgage agreements

  • Insurance information

  • School records

  • Medical documents

  • Moving contracts

  • Utility account details

A small organisational step here prevents some of the most frustrating moving-week problems, particularly when you are tired and time-sensitive.

No. 7

Support Children and Pets Through the Transition

Relocation is not only logistical. Children and pets often experience a move as a disruption to safety and routine, even if the new home is objectively better. Planning ahead allows you to reduce anxiety, preserve stability, and create predictability during a period of change.

For children, communication matters, but so does consistency. Maintaining familiar routines around meals, bedtime, and downtime helps protect emotional regulation.

Ways to help children adjust

  • Explain the move in simple, age-appropriate language

  • Involve them in small choices (room setup, a “first night” kit)

  • Keep bedtime routines consistent even during packing

  • Prepare a comfort box with favourite items kept accessible

For pets, stress often shows up as restlessness, appetite changes, or clinginess. Planning reduces the chance of last-minute scrambling, which pets sense immediately.

Pet preparations that prevent avoidable problems

  • Updating identification tags

  • Preparing travel arrangements

  • Packing familiar toys and bedding

  • Researching nearby veterinary clinics

No. 8

Build Buffer Time for the Unexpected

Even well-organised moves encounter setbacks. Weather issues, delayed paperwork, traffic problems, and scheduling conflicts can all affect relocation plans. Planning reduces stress partly by acknowledging this reality and building in slack.

When there is no buffer, every disruption becomes a crisis. When extra time exists, the same disruption becomes a manageable adjustment.

Where buffers matter most

  • Packing completion (finish early if possible)

  • Cleaning and property handover

  • Travel days and vehicle collection/delivery windows

  • Utility activation dates and internet installation

A flexible timeline keeps you calm under pressure, which improves decision-making when something changes.

No. 9

Create a Smoother Transition Into Your New Home

Stress does not stop when the boxes arrive. The first week in a new home can feel disorienting, especially if essentials are buried in random boxes or utilities are not set up properly. Planning ahead makes the “landing” easier.

Prioritise functional comfort first. You do not need to unpack everything immediately, but you do need the home to work.

First-day priorities that reduce overwhelm

  • Set up beds and basic linens

  • Confirm water, power, heating/cooling, and internet

  • Unpack the kitchen basics (a few dishes, mugs, key utensils)

  • Establish a “drop zone” for keys, chargers, and documents

Pre-move research that reduces uncertainty

  • Grocery stores and pharmacies nearby

  • Schools, childcare, or commuting routes

  • Healthcare providers and urgent care options

  • Waste collection schedules and local rules

When the basics are handled early, the new space becomes livable faster, which reduces the emotional load of the transition.

Takeaways

Planning reduces relocation stress by replacing uncertainty with a clear timeline, defined responsibilities, and buffer time. When key decisions are made early, moving week feels more controlled and far less reactive.

Decluttering, budgeting, and document organisation are high-impact steps that prevent avoidable chaos. Packing gradually and labelling strategically also improves the first few days in your new home.

Transportation planning, including specialist options to transport cars to Colorado Springs, can remove one of the biggest logistical burdens of long-distance moves. The smoother the logistics, the easier it is for everyone, including children and pets, to settle in confidently.


Looking for Home resources?

Looking to enhance your living space and create a sanctuary that supports your well-being? Explore our home partners who offer a wide range of resources to elevate your home environment.


homeHLL x Editor


The Essential Home Upgrades That Keep Your Home Strong For Years

A strong home is not only about curb appeal or a fresh coat of paint. It is about how reliably your house handles heat, cold, rain, snow, and everyday wear without turning your weekends into repair marathons or draining your budget with surprise emergencies. The smartest homeowners do not wait for failure; they reinforce the right systems early, so the property remains durable, efficient, and comfortable year after year.


In this article, we will explore the essential home upgrades that help protect your home for the long haul, with a practical focus on climates like Cincinnati, OH. Cincinnati’s low cost of living and job opportunities make it an appealing place to settle, but the weather can be punishing: sticky summer humidity, freeze-thaw winter cycles, snow loads, and ice. That seasonal whiplash expands and contracts materials, traps moisture where it should not be, and turns small weaknesses into expensive structural problems if you let them linger.

No. 1

Schedule Roof Inspections and Necessary Upgrades

Your roof is your home’s first line of defense, and in Cincinnati it takes a consistent beating. Summer sun bakes shingles, storms test flashing and seals, and winter snow and ice add weight while freeze-thaw cycles exploit the smallest gaps. If you wait until you see water stains on the ceiling, the damage often has already spread into decking, insulation, framing, and even electrical components.

Regular inspections help you catch early issues before they become full replacements. A qualified professional can identify the subtle problems homeowners often miss, especially those caused by wind lift, ice dams, and hidden moisture.

What a professional roof inspection should cover

  • Shingle condition, including curling, cracking, and missing tabs

  • Flashing integrity around chimneys, vents, skylights, and valleys

  • Soft spots that may signal rot or trapped moisture under the surface

  • Signs of poor ventilation that accelerate shingle aging and attic moisture

  • Gutter and roof-edge issues that contribute to ice dam formation

Warning signs you should watch for at home

  • Dark stains on ceilings or upper walls

  • Granules collecting in gutters or at downspout exits

  • Sagging rooflines or visible dips from the street

  • Shingles lifting at the edges after wind events

  • Persistent attic mustiness, which may indicate ventilation or leak issues

Working with a top Cincinnati roofing company helps because they understand how local weather affects roofing materials and what holds up best long-term. The right contractor can also advise you on targeted upgrades, such as improved underlayment, stronger flashing, ridge vent improvements, or ice-and-water protection at vulnerable roof edges.

No. 2

Upgrade Your Drainage System

Water is one of the most destructive forces around a house because it rarely causes damage in a dramatic way at first. It starts with pooling near the foundation, oversaturated soil, or clogged gutters, and eventually becomes cracks, basement moisture, mold growth, and warped interior finishes. A strong drainage system protects the structure by directing water away quickly and consistently.

Start by evaluating how your home handles heavy rain. If water spills over gutter edges or pools near corners, your drainage needs attention.

High-impact drainage upgrades

  • Replace undersized or frequently clogged gutters with larger, more durable systems

  • Add gutter guards if debris buildup is constant

  • Install downspout extensions to move runoff farther from the foundation

  • Ensure downspouts discharge away from walkways to reduce winter icing

  • Consider a French drain or sump pump upgrade if basement moisture is persistent

Yard grading and landscaping fixes that protect foundations

  • Regrade soil so it slopes away from the home on all sides

  • Avoid piling mulch too high against siding, which can trap moisture

  • Use splash blocks at downspout exits to prevent soil erosion

  • Keep planting beds from creating “water bowls” against foundation walls

Good drainage is not glamorous, but it is one of the most cost-effective ways to prevent the kind of slow damage that is expensive to reverse.


No. 3

Reinforce Windows and Exterior Doors

Drafty windows and weak doors can make a home feel uncomfortable in every season. In winter, cold air slips in and warm air leaks out, forcing the furnace to run longer. In summer, humidity and heat infiltrate, pushing your air conditioning to work harder and longer. Over time, that constant strain raises utility bills and accelerates wear on HVAC equipment.

Replacing aging windows and exterior doors improves sealing, insulation, and daily comfort. It also reduces the subtle “indoor instability” that makes people constantly adjust thermostats.

Benefits of modern windows and doors

  • Better temperature control through improved sealing and insulated frames

  • Reduced condensation that can damage trim, drywall, and paint

  • Quieter interiors due to improved sound dampening

  • Improved security with stronger frames, locks, and door cores

  • Increased resale appeal because buyers recognize efficiency upgrades

What to prioritize when upgrading

  • Double-pane or higher-performance glass suited to your climate

  • Professional installation to prevent gaps that negate the upgrade

  • Weatherstripping around doors to stop wind intrusion

  • A well-fitted, insulated front door to reduce drafts and moisture entry

When windows and doors are tight and properly installed, the house stops “fighting the outdoors,” which makes every other system run more efficiently.

No. 4

Upgrade Your Home’s Insulation

Insulation is one of the most important upgrades for long-term comfort and durability, especially in climates with both hot summers and freezing winters. Without adequate insulation, conditioned air escapes quickly, and your HVAC system compensates by running longer cycles. That increases energy bills and shortens equipment lifespan.

The attic is usually the highest priority because heat rises and escapes upward. Crawl spaces and rim joists are also common leakage points that create cold floors and inconsistent temperatures.

Areas where insulation upgrades matter most

  • Attic floors and rooflines, depending on your ventilation strategy

  • Exterior walls, particularly in older homes with minimal fill

  • Crawl spaces and basements where cold air infiltrates easily

  • Rim joists, a frequent source of drafts and heat loss

Comfort changes you can expect after improving insulation

  • More consistent temperatures across floors and rooms

  • Fewer hot upstairs bedrooms in summer

  • Less “cold floor” discomfort in winter mornings

  • Reduced HVAC cycling and quieter operation

  • Better humidity control when paired with proper ventilation

Insulation works best when combined with air sealing. Closing gaps around penetrations, attic hatches, and utility lines prevents the kind of airflow that makes insulation far less effective than it should be.


No. 5

Modernize the Plumbing System

Plumbing problems often stay hidden until they become expensive. A small leak behind a wall can quietly soak framing, degrade drywall, and create a mold-friendly environment long before you notice a visible stain. In winter-prone areas, older pipes are also more vulnerable to freezing and bursting, which can cause major water damage in hours.

Updating aging plumbing reduces risk and improves daily performance. It can also improve water quality and pressure, depending on the condition of existing pipes.

Signs your plumbing system may be overdue for upgrades

  • Low water pressure that is getting worse over time

  • Rusty or discolored water from taps

  • Recurring leaks, especially at joints or under sinks

  • Slow drains that persist after basic maintenance

  • Strange banging or knocking sounds when turning water on or off

Plumbing upgrades that strengthen long-term reliability

  • Replace outdated supply lines before they fail

  • Upgrade shutoff valves for faster control during emergencies

  • Install leak detection devices to catch problems early

  • Evaluate water heater efficiency and capacity for your household

  • Add pipe insulation to reduce freezing risk in unconditioned areas

Modern plumbing systems run cleaner, reduce water waste, and lower the chances of sudden cold-weather failures that can create significant property damage.

No. 6

Invest in HVAC System Improvements

A struggling HVAC system makes a home uncomfortable and unpredictable. One room feels freezing while another stays stuffy, humidity feels out of control, and the energy bill climbs without a clear explanation. Older systems lose efficiency as parts wear down, and they often cannot manage humidity well, which matters during Cincinnati’s long, humid summers.

Upgrading your HVAC system can improve comfort, energy efficiency, and indoor air quality. Even if a full replacement is not immediately necessary, targeted upgrades can deliver meaningful improvements.

HVAC improvements that provide immediate value

  • Replace aging units with higher-efficiency models sized correctly for the home

  • Seal and balance ductwork to improve airflow consistency

  • Add a smart thermostat to reduce energy waste during unoccupied hours

  • Upgrade filtration to reduce dust and improve air quality

  • Service coils and components to restore performance and reduce strain

Symptoms your HVAC system is costing you more than it should

  • Uneven temperatures that persist despite thermostat adjustments

  • Excessive cycling, loud operation, or weak airflow

  • Indoor humidity that feels sticky in summer or dry in winter

  • Frequent repairs that add up season after season

  • Energy costs rising without changes in usage

A modern, properly maintained HVAC system does more than heat and cool. It creates a stable indoor environment that protects flooring, furniture, and even structural components from repeated moisture swings.

No. 7

Upgrade Electrical Components for Safety

Many older electrical systems were not designed for today’s device-heavy households. When circuits are overloaded or wiring is deteriorating, you may see flickering lights, warm outlets, and breakers that trip frequently. These are not minor inconveniences; they can be early warning signs of safety risks inside walls.

Electrical upgrades improve safety, support modern appliances, and reduce the chance of equipment damage during storms and power fluctuations.

Electrical issues you should not ignore

  • Breakers tripping repeatedly under normal use

  • Flickering lights when appliances turn on

  • Buzzing sounds near outlets or switches

  • Discolored outlets or a warm “hot plastic” smell

  • Limited outlets leading to heavy extension cord use

Electrical upgrades that improve safety and capacity

  • Upgrade the electrical panel to meet modern demand

  • Replace worn wiring where needed after a professional evaluation

  • Add GFCI protection in kitchens, bathrooms, garages, and outdoor areas

  • Install surge protection to safeguard sensitive electronics

  • Add dedicated circuits for high-demand appliances

Once electrical capacity and wiring are updated, the home functions more reliably, and you reduce the risk of preventable hazards that can escalate quickly.

Takeaways

A durable home is built through proactive upgrades that prevent stress and small issues from becoming expensive emergencies. In Cincinnati’s challenging climate, strengthening the roof, insulation, and drainage system is especially important to reduce moisture damage and seasonal wear.

Comfort and efficiency improve significantly when windows, doors, HVAC, and insulation work together as a sealed, well-regulated system. These upgrades reduce energy waste, stabilize indoor temperatures, and lessen the strain on mechanical equipment.

Long-term reliability also depends on modern plumbing and safe electrical capacity. When you invest in these essentials early, your home becomes easier to maintain, less costly to operate, and more comfortable in every season.


Looking for Home resources?

Looking to enhance your living space and create a sanctuary that supports your well-being? Explore our home partners who offer a wide range of resources to elevate your home environment.


homeHLL x Editor


How Professional Landscaping Transforms Outdoor Spaces

A beautifully designed yard does more than look good from the street. It shapes how you arrive home, how you relax after work, how you entertain, and how your property performs in heavy rain, summer heat, and changing seasons. While interior upgrades often get the spotlight, the exterior is what sets expectations the moment someone pulls into the driveway.


In this article, we will explore how professional landscaping can completely transform your outdoor space by improving curb appeal, usability, drainage, comfort, and long-term property value. You will also see how experienced planning helps you avoid common design mistakes, choose the right plants and materials, and build an outdoor environment that stays attractive and practical year after year.

No. 1

Landscaping Is More Than “Yard Work”

Many homeowners associate landscaping with mowing, trimming, and occasional planting. Professional landscaping is fundamentally different because it starts with design, purpose, and a long-term plan. It blends horticulture, construction, and site engineering to create an outdoor setting that feels intentional and cohesive.

Rather than adding random features, a professional approach considers how the yard will be used and maintained, how the home is positioned on the lot, and how water, sunlight, and soil conditions affect every decision.

What professional landscaping typically includes

  • Site evaluation and concept design

  • Plant selection based on sunlight, soil, and local climate

  • Hardscape planning, such as patios, walkways, and retaining walls

  • Grading and drainage solutions to protect the home and lawn

  • Lighting design for safety and nighttime curb appeal

  • Irrigation planning for efficiency and plant health

  • Ongoing maintenance strategies that match your lifestyle

No. 2

Curb Appeal: The Fastest Visual Upgrade with Real Payoff

Curb appeal is not just about impressing neighbors. It affects how you feel about your home and how others perceive it, including guests and future buyers. A professionally landscaped property tends to look more polished because it uses clear lines, balanced plant placement, and healthy, well-supported growth.

Even small enhancements, when planned properly, can make the exterior feel updated and more valuable without changing the home itself.

Curb appeal upgrades that make an immediate difference

  • Fresh edging that defines lawn and garden borders

  • Layered planting (low plants in front, taller plants behind) for depth

  • A clean, consistent mulch or rock treatment for contrast and weed control

  • Foundation plantings that soften the home’s edges without blocking windows

  • Seasonal color in controlled areas for impact without clutter

  • Updated path materials and entry lighting for a welcoming approach

A professional plan also prevents a common problem: planting too much, too close, or in the wrong areas. Overcrowding eventually makes a yard look messy, increases maintenance, and can lead to plant failure.


No. 3

Outdoor Functionality: Turning a Yard into Living Space

The most meaningful landscaping transformations improve how you use the property, not just how it looks. Today’s homeowners increasingly want outdoor areas that function like extensions of the home, with space for dining, lounging, play, gardening, or quiet retreat.

Professional landscapers help define “zones” so the yard feels organized and easy to navigate. The result is a backyard that supports real habits: morning coffee outside, family dinners on the patio, or a fire pit gathering on cool evenings.

Popular functional features to consider

  • Patios and paver terraces designed for furniture placement

  • Walkways that guide movement and reduce muddy traffic paths

  • Retaining walls that create flat, usable areas on sloped yards

  • Seating walls and built-in benches for low-maintenance comfort

  • Pergolas or shade structures for relief from summer sun

  • Fire pits or fireplaces as a year-round focal point

  • Outdoor kitchens for entertaining and convenience

How professionals plan for usability

  • They size features to your real needs, not generic templates

  • They consider foot traffic patterns, gate locations, and door access

  • They account for sun exposure so seating is comfortable at peak hours

  • They select surfaces that drain well and resist slipping

No. 4

Drainage and Grading: The Transformation You Do Not Want to Skip

Drainage is one of the most overlooked reasons to invest in professional landscaping, and it is also one of the most valuable. Poor drainage can lead to standing water, erosion, muddy lawns, dying plants, and, in the worst cases, water-related foundation concerns.

A good landscaper looks at the property as a system. Water should move away from the home, not toward it, and it should have a controlled path during storms rather than carving one through your yard.

Warning signs your yard needs drainage help

  • Pooled water that remains hours after rainfall

  • Soggy areas where grass never thrives

  • Soil erosion, exposed roots, or washed-out mulch

  • Water stains on basement walls or damp crawl spaces

  • Downspouts dumping water too close to the foundation

Common professional drainage solutions

  • Regrading to correct slope and water flow direction

  • French drains to capture and redirect subsurface water

  • Dry creek beds that manage runoff while adding visual appeal

  • Downspout extensions and drainage catch basins

  • Retaining walls with proper backfill and drainage management

This work often makes the difference between a yard that looks good for one season and a yard that stays healthy and stable for years.


No. 5

Trees, Shrubs, and Planting Design That Improves Comfort

Plants are not just decorative. With proper placement, landscaping can increase privacy, reduce noise, create shade, and even lower outdoor temperatures around the home. Strategic planting can also frame views, hide less attractive features (like utility boxes), and guide the eye toward your home’s best architectural details.

Benefits of thoughtful plant placement

  • Privacy screening from neighbors or street views

  • Shade near patios and windows to reduce heat buildup

  • Wind buffering in open lots

  • Habitat value and improved ecological balance

  • Natural borders that reduce the need for fencing in some areas

Smart planting considerations professionals handle

  • Mature size of trees and shrubs to prevent future overcrowding

  • Root behavior near foundations, sidewalks, and irrigation lines

  • Plant compatibility with sun exposure and soil conditions

  • Spacing for airflow to reduce disease and improve longevity

Evergreens add year-round structure, while flowering shrubs and ornamental grasses bring seasonal texture. The best designs mix evergreen stability with seasonal interest so the yard never feels bare.

No. 6

Four-Season Interest: A Landscape That Looks Good All Year

One reason some yards feel “flat” is that they peak for a short period and then fade. Professional landscaping often focuses on creating a sequence of visual interest across the year, using plants with staggered bloom times, foliage changes, and winter structure.

Elements of a four-season planting plan

  • Spring bulbs and early-blooming perennials for the first color

  • Summer flowering shrubs and long-bloom perennials for consistency

  • Fall foliage trees and late-season grasses for warmth and movement

  • Winter evergreens, bark texture, and seed heads for structure

This approach helps the yard feel alive and intentional even when the weather shifts. It also prevents the common issue of relying on one type of plant for all impact, which can leave the landscape looking empty once that plant’s season ends.

No. 7

Maintenance Planning: Designing for Your Lifestyle

A transformation should not become a burden. Maintenance is a key factor in any landscaping project, and professionals can design around how much time and energy you realistically want to spend outdoors.

Some homeowners enjoy gardening and want layered plant beds that evolve. Others prefer low-maintenance simplicity with clean lines, durable materials, and fewer high-care plants.

Options that reduce long-term upkeep

  • Native and climate-adapted plants that require less water and fertilizer

  • Mulch or rock groundcover to reduce weeds and protect soil

  • Perennials and shrubs instead of annual-heavy beds

  • Drip irrigation for targeted watering and less waste

  • Hardscape choices that resist shifting and cracking

Good maintenance planning also includes practical access. Landscapers think about how you will reach planting beds, trim shrubs, and clean out leaves without stepping through mud or damaging plantings.

No. 8

Outdoor Lighting: Safety, Security, and Nighttime Beauty

Outdoor lighting is often underestimated, but it can dramatically elevate a landscape once the sun goes down. It improves safety on steps and walkways, adds security around entry points, and highlights key features like trees, stonework, and garden beds.

A professional lighting plan avoids harsh glare and “runway” looks. Instead, it uses layered lighting to create a warm, inviting atmosphere.

Lighting types that enhance outdoor spaces

  • Path lighting for walkways and transitions

  • Step and riser lighting for safe movement

  • Uplighting to showcase trees and architectural features

  • Downlighting for a soft, moonlit feel under branches or pergolas

  • Accent lighting for focal points like water features or sculptures

The end result is a yard that feels usable and welcoming well into the evening, especially in summer when outdoor time often happens after work.

No. 9

Emotional and Lifestyle Benefits You Actually Feel

A well-designed outdoor environment changes daily life in subtle but meaningful ways. It can become a place to decompress, spend time with family, or host friends without feeling exposed or unfinished. Homeowners often report using their outdoor space far more once it is designed for comfort and flow.

Ways landscaping supports well-being

  • Creates quiet, shaded areas that encourage downtime

  • Adds natural beauty that reduces stress and improves mood

  • Supports healthy habits like walking, gardening, and outdoor meals

  • Makes gatherings easier by improving seating areas and lighting

These benefits are difficult to quantify, but they are often the reason homeowners say the investment was “worth it” beyond resale value.

No. 10

Why Working with Professionals Protects Your Investment

Landscaping combines design decisions with technical realities: soil, sun, drainage, grading, material durability, and plant maturity. Professionals help prevent expensive mistakes such as improper grading, poor plant selection, undersized patios, or hardscape installations that shift and crack.

They also bring local knowledge, which matters for climate and seasonal challenges. Choosing a trusted family owned landscaping company in Indianapolis can provide personalized service and local expertise tailored to the unique needs of Indiana homeowners.

What to expect when planning a landscaping project

  • A consultation focused on goals, budget, and how you want to use the space

  • A plan that prioritizes improvements in phases if needed

  • Guidance on materials and plants that match maintenance preferences

  • A clearer timeline for installation and seasonal planting windows

Takeaways

Professional landscaping transforms outdoor spaces by combining design, functionality, and long-term planning rather than focusing on quick cosmetic changes. The best results improve curb appeal while also making the yard easier and more enjoyable to use.

A complete landscape plan often includes hardscapes, planting design, drainage solutions, and lighting that work together as one system. When grading, water management, and plant maturity are considered from the start, the landscape stays attractive and durable across seasons.

Working with experienced professionals reduces costly mistakes and helps align the final result with your lifestyle, budget, and maintenance preferences. With the right plan, your yard can become a true extension of your home that delivers value and enjoyment for years.


Looking for Home resources?

Looking to enhance your living space and create a sanctuary that supports your well-being? Explore our home partners who offer a wide range of resources to elevate your home environment.


homeHLL x Editor


Why Patio Screens Look Filmy In Late Spring

Late spring is one of the most rewarding times to use outdoor living areas. Warmer days return, patios become daily destinations, and screened porches start functioning like an extra room. Yet many homeowners run into the same annoyance every year: patio screens, outdoor windows, porch enclosures, and glass doors begin to look dull, hazy, or filmy even after they were cleaned earlier in the season.


In this article, we will explore why that cloudy film shows up so quickly in late spring, what it is actually made of, and how to reduce it with a smarter, whole-area cleaning approach. The key is understanding that the haze is rarely caused by one single factor; it is usually the result of multiple airborne and surface-level contaminants combining into a thin, stubborn layer that keeps coming back.

No. 1

The Real Culprit: A Seasonal Mix of Airborne Debris

Most people assume “it must be pollen,” and pollen is certainly part of the story. But the filmy layer on screens and exterior glass is usually a blend of particles that land, bind, and smear rather than rinse cleanly. Late spring conditions make this worse because you often have a combination of dry wind, increasing humidity, morning dew, frequent lawn care, and more outdoor foot traffic.

That combination creates two problems:

  • More debris is airborne and moving around your property

  • More moisture is available to glue fine particles to screens and glass

A screened porch or patio enclosure acts like a passive filter. Air moves through, but particles get trapped on mesh fibers, window tracks, frames, and the edges of glass where residue builds up first.

Common contributors to late-spring haze

  • Tree and grass pollen

  • Lawn clippings and plant fragments

  • Soil dust from landscaping and garden beds

  • Fine grit from patios, walkways, and driveways

  • Residue from concrete, pavers, and stone surfaces

No. 2

Airborne Pollen Is Only Part of the Problem

Pollen is the most obvious late-spring culprit because it is both visible and persistent. Trees, grasses, flowers, and weeds release tiny particles that travel easily on breezy days. These particles cling to mesh screens, glass panes, vinyl porch panels, outdoor furniture, rails, and siding.

What makes pollen especially frustrating is how it behaves once it mixes with moisture. Morning dew, light rain, and humidity can turn dry pollen dust into a tacky residue that bonds to surfaces. At that point, a quick hose rinse often fails because the film does not lift cleanly; instead, it streaks, smears, or lodges deeper into screen fibers.

Why pollen becomes harder to clean over time

  • Moisture turns powdery particles into a sticky coating

  • The coating attracts and holds additional dust and debris

  • Repeated partial rinsing can create uneven streaking on glass

  • Screens trap pollen in the mesh, making it look gray or dingy

If you clean your screens early in the season and they still look hazy later, it is often because new layers have bonded on top of old residue in tiny increments. The buildup may be thin, but it is constant.


No. 3

Lawn Clippings and Landscaping Debris Add to the Cloudy Look

Late spring is prime lawn-care season. Regular mowing, trimming, edging, and blowing can send fine organic debris into the air. Even when clippings look too heavy to travel far, the smallest particles can drift and settle on nearby screens, window ledges, porch frames, and glass doors.

This is especially noticeable when outdoor living areas sit near open lawn, garden beds, or active landscaping. If a leaf blower is used near the home, it can amplify the problem by pushing fine debris toward the structure and into corners where it is difficult to remove.

High-risk setups that collect debris faster

  • Screened porches adjacent to lawns or mulched beds

  • Sunrooms and pool enclosures near frequent mowing zones

  • Outdoor kitchens near edging and trimming areas

  • Patios located downwind of open grass or garden soil

  • Homes where blowers are used along siding and thresholds

When organic debris mixes with pollen and dust, it forms a dull coating that makes screens look aged and glass look perpetually streaked, even shortly after cleaning.

No. 4

Dust and Concrete Residue Travel Farther Than You Think

Another overlooked source of grime is nearby hardscapes. Patios, walkways, retaining walls, driveways, pool decks, and concrete steps hold fine dirt and residue year-round. In late spring, dry weather and wind can lift fine particles from these surfaces and carry them onto nearby windows and screens.

Concrete, pavers, brick, and stone can also develop buildup from:

  • Soil and foot-traffic grime

  • Mildew or algae in shaded areas

  • Mineral deposits from irrigation and runoff

  • Weathering residue that becomes powdery when dry

When wind moves across these surfaces, it can spread loose particles into your outdoor living area, where they settle on screens, glass, and frames. This is why cleaning only the screens or only the windows often produces short-lived results. If the patio slab or walkway next to them is still dirty, the next breezy afternoon can redistribute that residue right back onto the freshly cleaned surfaces.

Signs your hardscapes are contributing to the haze

  • A dusty film returns within a few days of cleaning glass

  • Corners of the porch or window tracks collect grit quickly

  • Patio furniture feels gritty rather than simply “dusty”

  • The haze is heavier on the side facing the driveway or walkway


No. 5

Windy Spring Weather Spreads Grime Across the Entire Property

Spring breezes are pleasant, but they are also highly effective at moving debris. Pollen, soil dust, mulch fragments, grass clippings, and hardscape residue can shift from one area of the yard to another repeatedly.

Orientation matters. A screened porch facing an open lawn or driveway often accumulates more buildup than a sheltered window on a protected side of the home. Likewise, areas exposed to prevailing winds tend to show faster film development because they receive a steady supply of fine particles.

The result is an outdoor space that feels dull sooner than expected:

  • Screens look gray instead of crisp and clean

  • Outdoor windows appear hazy even when the interior is spotless

  • Sliding glass doors lose clarity and shine

  • Railings and trim collect dust that makes paint look tired

  • Furniture and décor feel like they never stay clean

No. 6

Why Routine Exterior Cleaning Works Better Than Spot Cleaning

Spot cleaning a single surface can feel productive, but it rarely solves the late-spring film problem for long. A complete exterior approach tends to produce longer-lasting results because it reduces the overall supply of loose grime that wind can redeposit.

Instead of treating screens and glass as separate projects, it helps to treat the patio area as a connected system. The condition of your concrete, pavers, siding, rails, and landscaping directly affects how quickly your screens and outdoor windows get dirty again.

Surfaces that often need attention along with screens and glass

  • Patio floors, pool decks, and porch slabs

  • Walkways, driveways, and steps

  • Siding, trim, and exterior frames

  • Railings, columns, and porch ceilings

  • Screen tracks and door thresholds

This is where homeowners may start considering seasonal maintenance options, including professional exterior power washing in Towson, especially when patios, driveways, siding, porch areas, and outdoor windows are all affected by the same springtime buildup.

Power washing and soft washing can remove layers of pollen, dust, mildew, algae, and surface grime more efficiently than repeated hand-wiping. The right method depends on the material: concrete and pavers may tolerate stronger cleaning, while screens, painted trim, siding, and delicate outdoor window areas typically require a gentler approach to avoid damage.

No. 7

How to Keep Patio Screens and Outdoor Windows Cleaner Longer

Once you understand what causes the film, prevention becomes more realistic. The goal is not to eliminate pollen or dust entirely, but to reduce how much buildup is available to stick and spread.

Smart habits that reduce late-spring haze

  • Rinse screens and exterior glass lightly every week or two during peak pollen

  • Clean hardscapes early in the season so wind has less loose residue to move

  • Direct mower discharge away from the home, porch, and glass doors

  • Use leaf blowers strategically, aiming debris away from structures and screens

  • Wipe down frames, tracks, and rails where grime concentrates first

Quick maintenance checklist for screened porches

  • Rinse screens from the outside to push debris outward rather than into the enclosure

  • Vacuum or wipe screen tracks before washing to avoid turning grit into sludge

  • Clean door thresholds and corners where pollen paste tends to form

  • Rinse patio floors after mowing to remove fresh clippings and dust

Cleaning sequence for better results

  • Remove loose debris first (dry brush, gentle vacuum, or low-pressure rinse)

  • Wash hardscapes next (patio, walkway, steps) to reduce airborne redeposit

  • Clean screens and frames

  • Finish with exterior glass and door surfaces for the clearest final look

The order matters because cleaning the glass first often leads to immediate re-contamination when you later disturb dust on nearby concrete or screens.

No. 8

A Cleaner Outdoor Space Starts Around the Screens

That filmy look on patio screens and outdoor windows is not random, and it is not necessarily a sign you cleaned “wrong.” In late spring, airborne pollen, lawn debris, dust, and residue from nearby concrete can combine into a stubborn layer that spreads across outdoor living spaces.

The most effective solution is usually comprehensive rather than isolated. When you address both the screens and the surrounding hardscape, you reduce the supply of particles that keep landing, sticking, and smearing across the surfaces you want to enjoy most.

Takeaways

Late-spring haze on patio screens and outdoor windows is typically caused by a combination of pollen, lawn debris, and fine dust from nearby hardscapes. Moisture from dew and humidity helps these particles bond into a film that streaks instead of rinsing cleanly.

Spot cleaning often produces short-lived results because wind redistributes grime from patios, walkways, and driveways back onto screens and glass. A whole-area exterior cleaning approach reduces the overall debris available to settle and stick.

To keep outdoor surfaces cleaner longer, focus on routine light rinsing, better control of lawn-care debris, and cleaning surrounding concrete and pavers before buildup becomes heavy. Treat the patio zone as a connected system so your results last beyond the next breezy day.


Looking for Home resources?

Looking to enhance your living space and create a sanctuary that supports your well-being? Explore our home partners who offer a wide range of resources to elevate your home environment.


homeHLL x Editor


From Wild To Workable: Practical Ways To Reclaim Your Land

Land has a way of getting away from you. One season, it is just a few saplings near the fence line, a patch of brush behind the shed, or weeds reclaiming an old access road. Then suddenly, you are looking at a property that feels less like an asset and more like a problem with roots.


In this article, we will explore how to reclaim overgrown land with a strategy that improves safety, access, and long-term usability, without turning your first round of clearing into an endless maintenance cycle. Whether you own rural acreage, a hunting parcel, a farm edge, or a “someday” property you plan to build on, the goal is the same: bring the land back under control in a way that supports what you want it to become next.

No. 1

Start by Understanding What Your Land Is Really Hiding

Overgrowth can hide far more than tall grass and thorny brush. It can conceal hazards that create real risk for people, vehicles, livestock, and equipment. It can also mask problems that will influence how you clear and what the land can support afterward.

Common issues concealed by thick growth include old fencing, partial wire runs, buried debris, uneven ground, stump remnants, drainage failures, animal burrows, and invasive plants. In wetter regions or low spots, overgrowth may be hiding areas where water pools after heavy rain, which can complicate access, erode soil, or undermine future building plans.

Before you clear anything, take time to read the property like a manager, not a weekend warrior. Walk it slowly, ideally in good daylight, and treat the first walkthrough as information gathering rather than action.

Land assessment checklist

  • Identify where you need access most (driveway, trails, fence lines, gates, creek crossings)

  • Flag hazards such as downed trees, sinkholes, erosion channels, loose wire, or junk piles

  • Note plant types that signal invasive growth or aggressive regrowth potential

  • Observe water patterns after rainfall: puddling, runoff lines, muddy ruts, and soft ground

  • Photograph and mark areas that will require a different approach (steep slopes, wetlands, dense thickets)

This step prevents a common mistake: clearing everything just because it is there. Not every wild patch needs to disappear, and not every tree is a problem. Selective clearing is often the most sustainable approach because it preserves shade where needed, protects slopes from erosion, and keeps the property visually and ecologically balanced.

No. 2

Why Quick Fixes Often Create Bigger Maintenance Problems

It is tempting to jump in with a chainsaw or hire a basic brush cutter or basic mowing service that simply knocks everything down. That kind of “fast progress” can look satisfying for a weekend, but it often creates a second problem: what you leave behind.

When overgrowth is cut without a plan, the property may end up with stump fields, brush piles, torn soil, and rutted access lanes. Those conditions are not just messy, they are expensive in time and money because they invite follow-up work and increase the risk of injury.

Cut stumps can become trip hazards and can also damage tires and equipment. Brush piles attract pests and can become fire fuel during dry seasons. Disturbed soil is vulnerable to erosion, especially on slopes or near drainage paths. Heavy equipment can compact soil and leave deep ruts that hold water and quickly become impassable.

Invasive species add another layer of complexity. If you cut invasives at the wrong time or without proper follow-up, you can actually encourage regrowth by triggering sprouting or spreading seeds. The result is a property that looks “cleared” for a short period, then comes back worse.

A durable clearing plan considers what happens after the first cut. The goal is not a photo-op result. The goal is land that stays manageable through the next seasons, with less labor required to keep it that way.


No. 3

How Forestry Mulching Supports Healthier, More Manageable Ground

Forestry mulching is often a smart option when the objective is to remove brush and unwanted small trees without creating piles, burn zones, or bare, exposed soil. Instead of hauling debris away or leaving it in heaps, forestry mulching processes vegetation into a mulch layer on site.

That mulch is not just visual cleanup. It can play a functional role by helping the soil retain moisture, limiting erosion, and reducing how quickly some weeds return. It also provides a more finished, “managed” look than a rough cut-and-pile approach.

Forestry mulching is commonly used to:

  • Open up blocked trails and hunting lanes without turning them into muddy corridors

  • Improve access roads and edges where vehicles need predictable clearance

  • Clear around fence lines so boundaries are visible and maintainable

  • Reduce ladder fuels and improve fire safety in dry seasons

  • Prepare land for future use while preserving soil stability

This approach is often appealing for owners who want to reclaim space without making the land look scraped raw. When done properly, it gives you control while keeping the property’s surface protected and easier to maintain.

That said, even forestry mulching benefits from planning. It matters what you mulch, when you mulch it, and what your next step is. The most successful projects treat mulching as part of land management, not as a one-time event that magically stops nature from returning.

No. 4

Think Beyond Clearing: Decide What the Land Will Become

Clearing without a next step is one of the fastest ways to lose the gains you just paid for. Nature does not leave open ground alone. If you remove growth and do nothing else, regrowth begins immediately, often with the most aggressive species first.

Defining the land’s future use changes how you clear today. A trail system needs different widths, grading, and drainage planning than a potential homesite. A pasture edge needs different decisions than a wildlife corridor. A firebreak should be planned differently from a scenic view opening.

Clarify your goal before the equipment arrives. That goal becomes the blueprint for where you clear heavily, where you thin selectively, and where you intentionally leave natural cover.

Examples of “next step” land uses that shape clearing decisions

  • Access and mobility: stable routes for vehicles, ATVs, or equipment, with attention to drainage

  • Safety and fire prevention: defensible space, reduced brush density, and improved visibility

  • Recreation and hunting: shooting lanes, walking paths, and manageable undergrowth

  • Agricultural expansion: fence-ready edges, reduced brambles, and room for rotational use

  • Future building: site access, preliminary clearing, and attention to soil and water behavior

When you think this way, the clearing becomes purposeful. You are not just removing plants. You are shaping function: how you will move through the land, how you will maintain it, and what it will produce for you over time.


No. 5

Keep the Land Working for You After the First Clearing

Reclaimed land still needs attention, but the goal is to reduce that attention to a reasonable rhythm. A well-cleared property should not require constant rescue missions. It should need periodic check-ins and light maintenance that prevent small problems from becoming big ones again.

The most reliable approach is seasonal monitoring. Walk the key areas you cleared, especially edges where brush tends to creep back. Watch for invasive regrowth early, when it is easiest to control. Pay attention to drainage and soil stability after storms. If you have trails or access roads, look for rut formation and correct water flow before damage becomes structural.

Maintenance also becomes easier when you keep boundaries visible. Fence lines, gates, and corners are where overgrowth returns quietly, and once those areas disappear, everything else becomes harder: access, property inspection, repairs, and even basic navigation.

If you want the land to stay usable, protect what you cleared by reinforcing its purpose. Trails should be walked or driven. Access routes should be kept open. Managed edges should be inspected. A property stays “reclaimed” when you treat it like an active asset, not a passive holding.

Takeaways

Reclaiming overgrown land starts with understanding what the vegetation is hiding, from debris and drainage issues to invasive plants and safety hazards. A careful assessment lets you clear selectively and avoid turning an improvement project into a long-term headache.

Quick fixes often create hidden costs, including stump hazards, brush piles, erosion, and rapid regrowth. A lasting result comes from choosing methods that support soil stability and planning for what happens after the first cut.

Forestry mulching can be a practical, land-friendly approach when you want usable space without bare ground and cleanup piles. The most successful clearing projects define the land’s next purpose first and then maintain it through simple seasonal checks.


Looking for resources?

At Hello Lovely Living, we aim to empower you to earn and save money and time while benefiting from our expansive network of home, life, wellness, travel, work-from-home, career, and business resources and opportunities. Discover a wealth of tools to support your journey.


5 Ways Home Inspections Help Prevent Unexpected Repair Expenses

Nobody likes a surprise bill — especially when it runs into the thousands. Yet for many homeowners, that's exactly what happens when a hidden problem quietly grows behind a wall or under a floor for months or years before revealing itself in the most inconvenient way possible. A leaking pipe that warps the subfloor. A deteriorating chimney that damages the roofline. An aging electrical panel that finally gives out during a heat wave.


The good news is that most of these surprises aren't truly unforeseeable. They're just unseen — until a trained eye looks at the right places.

In this article, we will explore five practical ways home inspections help prevent unexpected repair expenses, protect your budget, and replace reactive “emergency mode” decisions with informed planning. Whether you are buying, selling, or simply trying to maintain your property more intelligently, a well-timed inspection can uncover risks early, clarify priorities, and help you allocate money where it will matter most.

No. 1

Early Detection Stops Small Issues from Becoming Big Ones

Home systems don't fail overnight. Most major repairs start as minor issues that gradually worsen over time — a slow drain that signals a partial blockage, a small gap in flashing that lets moisture creep under the shingles, a hairline crack in the foundation that widens with each freeze-thaw cycle. Left alone, each of these can escalate into a repair that costs ten times more than the original fix would have.

A professional inspection identifies these early warning signs before they compound. The inspector isn't just documenting what's broken — they're flagging what's heading in the wrong direction. That context changes how a homeowner responds: instead of waiting for a failure, they can schedule a repair on their own terms, at a reasonable cost, without the pressure of an emergency situation driving up the price.

No. 2

It Creates a Maintenance Roadmap

One of the most underrated outcomes of a thorough home inspection isn't what it catches — it's the documentation it creates. A detailed report gives homeowners a room-by-room, system-by-system snapshot of the property's current condition. That snapshot becomes a reference point for everything that follows.

When you search for a trusted home inspection near me, you're not just looking for someone to check off a list — you're looking for a professional who can explain the findings in practical terms and help you understand what needs attention now versus what can wait.

Modern property inspections increasingly rely on technology that goes beyond what can be spotted during a standard walkthrough. Firms like LunsPro Inspection Group incorporate tools such as infrared imaging and drone technology into residential and commercial inspections to help uncover issues that may not be immediately visible to the naked eye.


No. 3

Inspections Uncover Costly Hidden Systems Issues

Structural elements and major home systems — the roof, foundation, HVAC, electrical, and plumbing — are where the most expensive repair bills come from. They're also the parts of a home that most people never think about until something stops working. An inspector evaluates each of these systematically, looking for signs of wear, aging, improper installation, or deferred maintenance that could translate into a significant expense down the line.

According to Bankrate's 2025 Hidden Costs of Homeownership Study, home maintenance averages $8,808 annually for a typical U.S. homeowner, and overall hidden homeownership costs reach about $21,400 per year. A professional inspection that surfaces a failing HVAC system or a roof approaching its end of life gives homeowners the chance to budget for those costs proactively — rather than absorbing them as a sudden, unplanned hit to their finances.

No. 4

It Reduces Reliance on Emergency Repairs

Emergency repairs are almost always more expensive than planned ones. When something breaks unexpectedly — a burst pipe in winter, a failed HVAC unit in the middle of summer, a sudden electrical fault — homeowners pay a premium for urgency. They're booking whoever is available, often at after-hours rates, and accepting whatever timeline and pricing the market will bear in that moment.

Regular inspections interrupt that cycle. Here's what proactive inspection typically looks like in practice:

  • Roof condition is assessed before leaks develop, allowing time to schedule re-roofing during a contractor's slower season

  • Plumbing vulnerabilities are caught early, before a small leak becomes water damage requiring subfloor or drywall replacement

  • HVAC components near the end of their lifespan are identified, giving homeowners a window to plan a replacement rather than facing a sudden loss of heating or cooling

  • Electrical panels with outdated or dangerous wiring are flagged, reducing fire risk and the cost of emergency remediation

Each of these scenarios follows the same pattern: early information leads to better timing, and better timing leads to lower cost.


No. 5

It Helps New Homeowners Avoid Inherited Problems

Buying a home means taking on whatever the previous owners left behind — including deferred maintenance they decided not to address. Some of that deferred work is cosmetic. Some of it is structural. And without an inspection, there's no reliable way to tell the difference before you're the one holding the repair bill.

Pre-purchase inspections are the most well-known application, but inspections are also valuable for homeowners who have lived in a property for years without ever having a formal review done. Systems age. Conditions change. What was in good shape five years ago may not be in good shape today.

Scheduling a periodic inspection — even outside of any transaction — gives homeowners an updated picture of where their property stands and what to prioritize in the coming years. That kind of visibility is exactly what turns reactive, expensive repairs into manageable, planned maintenance.

Takeaways

Unexpected home repair costs are one of the most common financial stressors for homeowners. Inspections don't eliminate repair expenses — homes age, systems wear out, and maintenance is always part of the picture. But they do change the relationship between homeowner and home from reactive to informed. And that shift, consistently applied, tends to save a significant amount of money over time.


Looking for Home resources?

Looking to enhance your living space and create a sanctuary that supports your well-being? Explore our home partners who offer a wide range of resources to elevate your home environment.


homeHLL x Editor


The Everyday Signs Your Home May Be Shifting Below The Surface

There is a strange moment that happens in many homes before anyone realizes something bigger is unfolding. It usually starts with something so minor that it feels easy to dismiss: a hairline crack above a doorway, a floorboard that creaks in a new place, or a kitchen window that suddenly sticks on humid afternoons.


Most homeowners ignore these changes at first, and that is understandable. Life is busy, budgets are real, and small annoyances rarely feel urgent when you are juggling work, family logistics, and an endless list of household tasks.

In this article, we will explore the everyday signs that can suggest subtle foundation movement, why those signs are often missed, and what you can do to respond early and intelligently. If you have started noticing unusual changes around your house, companies like Acculevel often explain that small household annoyances sometimes point toward foundation movement happening quietly underneath the structure, even when nothing looks dramatic.

No. 1

Doors Suddenly Develop Personalities

One sticky door is not automatically a red flag. Wood expands and contracts with humidity, hinges loosen over time, and older homes develop quirks.

But when several doors begin sticking, scraping, or swinging open on their own, it can indicate that the frames are no longer square. That misalignment can occur when parts of the home settle at different rates, subtly changing the geometry of door openings.

What door issues may look like

Watch for patterns rather than isolated incidents:

  • Multiple doors rubbing at the top corner near the latch side

  • A door that will not latch unless you lift it slightly

  • A door that drifts open or closed on its own, even with no airflow

  • Sudden gaps between the door and frame that were not there before

  • Strike plates that no longer line up with the latch

How to rule out simple causes first

Before assuming structural movement, do a quick, practical check:

  • Tighten hinge screws and inspect for stripped holes

  • Confirm the door is not swelling from moisture or paint buildup

  • Check whether one specific room is more humid than the rest

  • Look for a consistent pattern across multiple doors and floors

If the issue is spreading to more than one doorway or keeps returning after basic fixes, it is worth paying closer attention to what else is changing in the home.

No. 2

Cracks Around Windows Start Showing Up

Small drywall cracks happen in almost every home eventually. Materials shift slightly with temperature changes, and minor settling can leave a hairline mark that never becomes a real problem.

However, certain crack shapes and locations deserve a closer look. Cracks are not just cosmetic; they can be clues about where stress is concentrating within the structure.

Crack patterns that deserve attention

Not every crack is “bad,” but these are worth monitoring:

  • Diagonal cracks radiating from the corners of windows or doors

  • Jagged cracks that reappear after patching

  • Cracks that grow longer over time or widen seasonally

  • Stair-step cracks along brick or block walls (often seen outside)

  • Gaps that form between the trim and the wall

What to track so you are not guessing

A simple tracking habit can clarify whether the change is active or stable:

  • Take dated photos from the same angle every month

  • Mark the crack endpoints lightly with a pencil to see if it lengthens

  • Note whether changes correlate with heavy rain, drought, or freeze-thaw cycles

  • Track whether doors and windows nearby are also changing

Homes often “tell stories through patterns,” and recurring cracks in the same area can be a sign that the underlying stress has not been addressed.


No. 3

Floors That Feel Slightly “Wrong”

Floor changes are one of the easiest symptoms to normalize because they happen slowly. People adapt. Furniture stays in place. Daily routines continue, and the shift becomes part of the background.

Still, noticeable sloping or soft spots can indicate that support conditions under the floor are changing, whether from settlement, moisture, or structural stress.

Subtle signs of uneven floors

You may notice small clues before anything looks obvious:

  • An office chair that rolls in one direction repeatedly

  • A ball or small object that consistently drifts across the floor

  • A “bouncy” or springy area when you walk across a room

  • New squeaks concentrated in one zone

  • Tiles are cracking, or grout is separating in a localized area

Where floor symptoms often show up

Certain areas tend to reveal problems sooner:

  • Near exterior walls where drainage issues concentrate

  • Around fireplaces, which are heavy and sensitive to settlement

  • Near staircases where framing transitions occur

  • In older additions, where construction methods may differ

A home does not need to be perfectly level to be healthy, especially if it is older. The key is change: if the floor feels different from how it used to, that information matters.

No. 4

Moisture Usually Sits at the Center of It

Water is one of the most common drivers of foundation movement. Too much moisture can cause some soils to expand, while prolonged dryness can cause shrinkage. That constant expansion and contraction changes how the ground supports the home.

The challenge is that the cause may look harmless at first: clogged gutters, a downspout that dumps water too close to the foundation, or a low spot in the yard that holds runoff after storms.

Common moisture sources that affect foundations

Look for these issues around the perimeter of the home:

  • Downspouts discharging next to the foundation

  • Gutters overflowing during heavy rain

  • Soil grading that slopes toward the house instead of away from it

  • Mulch piled too high against the foundation wall

  • Leaky outdoor spigots or irrigation lines

  • Standing water near patios, walkways, or basement walls

Practical drainage improvements to consider

Some fixes are simple and preventative:

  • Clean gutters regularly and confirm they drain freely

  • Extend downspouts away from the home

  • Re-grade soil to direct water away from the foundation

  • Repair broken drains and check irrigation spray patterns

  • Use splash blocks where needed to prevent erosion

Lasting stability often depends less on the concrete itself and more on keeping the surrounding soil conditions consistent.


No. 5

Windows Suddenly Become Difficult

Windows are another classic clue because they depend on alignment. When the structure shifts, windows can rack slightly, putting pressure on the frame and affecting how smoothly they open, close, and lock.

People often assume the hardware is failing, which is fair. But when multiple windows begin acting up at the same time, it is wise to look for structural causes.

Common window symptoms to watch for

  • Windows sticking halfway open or refusing to close fully

  • Locks no longer lining up correctly

  • Drafts where none existed before

  • Small gaps near corners of the frame

  • Cracks spreading outward from window corners

A quick way to spot a pattern

Try this simple scan:

  • Check windows on the same side of the house first

  • Compare one floor to another if you have multiple levels

  • Note whether symptoms are worse after rain or seasonal changes

  • Look at nearby drywall and trim for matching cracks or gaps

When window problems cluster in one area, it may indicate that portion of the home is experiencing different movement than the rest.

No. 6

Basements Usually Spill the Truth First

Basements and crawl spaces tend to reveal foundation stress early because they are closest to the soil and most exposed to moisture pressure. Musty smells, damp corners, water stains, and certain crack types can show up downstairs before you see anything dramatic upstairs.

Moisture pressure builds as saturated soil presses against basement walls, and over time, that pressure finds weak points.

According to FEMA, maintaining proper drainage around the home remains one of the most effective ways to reduce structural damage risks tied to moisture and shifting soil conditions. That advice can feel dull until you notice that your basement smells earthy after storms, or you find recurring dampness that does not match a plumbing leak.

Basement and crawl space signs that matter

Pay attention to these conditions, especially when they repeat:

  • Persistent musty odor or “wet cardboard” smell after rain

  • Water stains, efflorescence (white mineral deposits), or peeling paint

  • Dampness is concentrated at the cove joint where the floor meets the wall

  • Horizontal wall cracks or bowing walls

  • Rusting metal, warped wood, or mold growth in localized areas

What to do if you find basement moisture

Take a measured approach:

  • Confirm whether the moisture is from outside (rain patterns) or inside (plumbing)

  • Document where dampness appears and how soon after storms it shows up

  • Improve exterior drainage first when possible

  • Avoid sealing problems without addressing water entry, since trapped moisture can create new issues

Basements rarely hide problems well, which makes them useful early-warning zones.

No. 7

Tiny Cosmetic Changes Add Up

Foundation movement rarely announces itself with one dramatic symptom overnight. More often, it shows up as a collection of smaller changes that feel unrelated until you step back and connect them.

A baseboard gap here, a cabinet seam there, a recurring tile crack in the same corner. Individually, these can be shrugged off. Together, they can suggest that movement is ongoing.

Small interior signs that can cluster together

  • Baseboards separating slightly from the wall

  • Crown molding gaps that appear or widen

  • Cabinets pulling away from walls or developing uneven doors

  • Tile cracks that appear without impact damage

  • Nail pops in drywall that keep returning

Companies like Acculevel often encourage homeowners to pay attention when several subtle changes appear simultaneously because structural movement tends to reveal itself gradually rather than dramatically. The value is in noticing the combination, not obsessing over a single imperfection.

No. 8

Why People Put Off Looking Into It

Foundation concerns sound stressful, expensive, and disruptive. It is natural to hope the issue is cosmetic, seasonal, or “just the house settling.”

The problem is that movement usually continues unless the underlying cause is addressed, especially when moisture and soil conditions are the drivers. Seasonal cycles can repeatedly stress the same areas of the foundation, and the longer those patterns continue, the more likely it is that small symptoms become larger ones.

Common reasons homeowners delay action

  • The signs feel minor and easy to rationalize

  • Repairs sound expensive, so avoidance feels safer short-term

  • People worry they will be pressured into big projects

  • It is difficult to know who to trust without clear information

  • The home still “functions,” so urgency feels low

A more practical mindset

Instead of jumping to worst-case conclusions, aim for early clarity:

  • Track symptoms for 30 to 60 days

  • Note whether changes accelerate after storms or drought

  • Address drainage and gutter issues immediately

  • Consult a qualified professional when multiple signs appear together

Early investigation is often less disruptive than late-stage repairs, and it can prevent you from spending money on repeated cosmetic fixes that never hold.

Takeaways

Small changes like sticking doors, window misalignment, and recurring cracks are often easy to ignore, but patterns across multiple areas can suggest movement beneath the home. The most useful approach is to look for changes that repeat, spread, or return after repairs.

Moisture management is frequently at the center of foundation shifting because soil expands and contracts as water conditions change. Consistent drainage, properly functioning gutters, and downspouts that carry water away from the house can reduce long-term stress on the structure.

If several subtle symptoms appear at the same time, it is worth documenting them and seeking clarity before the issues grow. Paying attention early helps you make calmer, more cost-effective decisions later.


Looking for Home resources?

Looking to enhance your living space and create a sanctuary that supports your well-being? Explore our home partners who offer a wide range of resources to elevate your home environment.


homeHLL x Editor


Why Your Pool Keeps Losing Water And How Leak Detection Helps

Pools lose water. That's just a fact of having one — evaporation is real, especially in hot climates, and splashing accounts for more than most people think. But there's a point where the water loss stops being normal and starts being a sign of something that needs attention.


In this article, we will explore how to tell the difference between normal water loss and a true leak, where pools most commonly fail, why do-it-yourself checks often miss the real problem, and what professional leak detection actually involves. If you have been topping off your pool far more often than usual, a structured approach can help you stop guessing and start narrowing down the cause.

If you've been topping off your pool more than usual and wondering whether it's just the weather or something more, here's how to think through it.

No. 1

How Much Water Loss Is Normal

A pool typically loses around a quarter inch of water per day to evaporation — more in dry, hot, or windy conditions. Over a week, that adds up to roughly an inch and a half to two inches. If you're losing significantly more than that, a leak is likely the cause.

A quick test: fill a bucket with pool water, set it on a pool step, and mark the water level in both the bucket and the pool. Check them 24 hours later. If the pool has dropped more than the bucket, water is leaving through somewhere other than the surface.

No. 2

Where Pools Actually Leak

People assume a pool leak is always in the shell — a crack in the plaster or a gap in the tiles. That does happen. But the plumbing is actually a more common source, and it's considerably harder to find without proper equipment.

The main areas where leaks typically develop include:-

Plumbing lines: the pipes that circulate water underground are subject to ground movement, root intrusion, and joint failure over time. A slow leak in an underground line can go unnoticed for months.

Fittings and returns: the fittings where water enters and exits the pool, including return jets and main drains, can develop leaks at their connection points.

Skimmer: the skimmer connects the pool to the circulation system. Cracks in the skimmer body or at the junction with the pool shell are a common source of leaks.

Equipment pad: pump seals, valve o-rings, and filter connections can all fail and lose water at the equipment level.

Shell and finish: cracks in plaster, gunite, or fiberglass, particularly around fittings or in the floor, can allow water to seep out.


No. 3

Why DIY Detection Usually Falls Short

You can sometimes spot an obvious shell crack or a visibly dripping fitting. But most leaks aren't visible. Underground plumbing leaks, small shell cracks below the waterline, and fitting failures all require pressurizing the plumbing system and using listening equipment or dye testing to isolate the source.

Without proper equipment, the process is mostly guesswork — and guessing wrong means opening up concrete or excavating plumbing that turns out to be fine, which is expensive and disruptive.

No. 4

What Professional Leak Detection Involves

A professional pool leak detection visit typically starts with a full inspection of the equipment pad, fittings, and any visible pool surfaces. From there, the plumbing is pressure-tested — each line is isolated and pressurized to see whether it holds. Lines that drop pressure have leaks, and the location is then narrowed down using listening devices that pick up the sound of water escaping underground.

According to the Pool & Hot Tub Alliance, undetected pool leaks are one of the leading causes of structural damage in residential pools over time, because water saturating the surrounding soil can undermine the shell and affect the surrounding landscape.

Catching a leak early is almost always cheaper than dealing with the consequences of one that's been running for months.


No. 5

Getting It Fixed the Right Way

Detection and repair are often offered together by the same company, which makes practical sense. Once the leak is found, you want it fixed by someone who already understands the plumbing layout and the scope of the problem.

For pool owners dealing with persistent water loss, pool leak detection by Gold Star Leak & Repair focuses on locating the exact source of the problem before any repair work begins. Their diagnostic process typically involves evaluating plumbing lines, fittings, and structural components to identify where water loss is occurring, helping make repairs more accurate and less disruptive.

No. 6

What to Do While You Wait for a Technician

If you're confident there's a leak and a detection appointment is scheduled, a few things help in the meantime:

• Keep the pool filled to its normal operating level so the equipment continues to function safely.

• Running the system on a normal schedule — shutting the pump off can sometimes mask symptoms and make detection harder.

• Note whether the loss rate changes when the pump is off versus on — that information is useful for the technician and can help point toward pressure-side vs. suction-side plumbing.

Takeaways

A pool that keeps losing water is telling you something. In many cases, the issue is manageable, and addressing it early helps reduce the risk of costly damage later. If topping off has become part of your weekly routine, a professional leak detection visit is the most direct way to find out what's actually happening and get it sorted before a small problem turns into a big one. 


Looking for Home resources?

Looking to enhance your living space and create a sanctuary that supports your well-being? Explore our home partners who offer a wide range of resources to elevate your home environment.


homeHLL x Editor


The Best Time Of Year To Start Planning Outdoor Holiday Decor

The holiday season is meant to feel joyful, not frantic. Yet many homeowners end up scrambling in late November to untangle light strands, replace broken clips, and make rushed buying decisions after the best products and appointment slots are already gone. That last-minute approach often leads to higher costs, fewer design options, and a display that looks pieced together rather than intentional.


In this article, we will explore the best time of year to start planning custom holiday lighting and decor, with a practical, month-by-month mindset that reduces stress and improves results. You will also learn how early planning supports safer installation, smarter budgeting, better product availability, and a more cohesive design that complements your home’s architecture and landscaping.

No. 1

Why Early Planning Leads to Better Outdoor Holiday Decor

Planning early is not about doing holiday work year-round; it is about giving yourself enough time to make good decisions and avoid the seasonal bottleneck. The best-looking outdoor displays are rarely rushed. They are usually planned with attention to layout, color temperature, focal points, and the practical details that keep decorations secure through wind, rain, and cold.

What improves when you plan months ahead

  • Design quality improves because you have time to map out a cohesive look

  • Budgeting is easier because purchases can be spread out gradually

  • Safety increases because rooflines, outlets, and attachment points can be addressed in warm weather

  • Scheduling is simpler because professional installers book up quickly in peak season

  • Product selection is stronger because you can shop before inventory is picked over

Common problems that early planning helps you avoid

  • Discovering burned-out strands only after you have already started hanging lights

  • Realizing you lack outdoor-rated extension cords or GFCI protection at the last minute

  • Settling for mismatched colors because the preferred bulbs are sold out

  • Needing urgent roof or gutter repairs when weather conditions are already risky

No. 2

Why Spring Is the Ideal Starting Point

Spring is often overlooked as a holiday decor planning season, but it is one of the most strategic times to begin. Winter weather has just passed, the exterior of the home is easier to inspect, and outdoor work is safer and more comfortable to complete.

Spring planning also has a psychological advantage: it allows you to make calm, practical decisions long before holiday deadlines, shipping cutoffs, and installation queues begin.

Spring checklist: what to inspect right away

  • Roof condition, including shingles, flashing, and any visible soft spots

  • Gutters and drainage to confirm they can support clips and do not overflow

  • Fascia boards, soffits, and trim where lights are commonly attached

  • Exterior outlets and wiring for safe, reliable power access

  • Trees and shrubs near rooflines, windows, and walkways

Spring checklist: what to review in storage

  • Light strands for dead sections, flickering bulbs, or damaged plugs

  • Timers, smart plugs, and photocells for proper function

  • Extension cords to confirm they are outdoor-rated and long enough

  • Stakes, clips, hooks, and fasteners so you do not rely on improvised solutions

  • Inflatable or motorized decorations for fan function and fabric wear

Taking inventory in spring prevents the common cycle of discovering problems in November when there is little time to replace or repair anything.


No. 3

How Summer Planning Makes Budgeting and Design Easier

Summer is an excellent time to shift from inspection to design and budgeting. Since the holidays are still months away, you can compare options without pressure and decide where a small upgrade will make the biggest visual difference.

Summer planning also helps you avoid making expensive choices in a single weekend, which is when many households are already spending more on travel, gifts, and events.

Budget-friendly ways to build your display over time

  • Replace lights in stages, starting with roofline and entryway strands

  • Upgrade to LED options to reduce energy use and bulb replacements

  • Add one “feature element” per year, such as a lit garland or pathway markers

  • Watch for early-season pricing rather than peak-season markups

  • Test and replace storage bins to prevent moisture damage to decor

Design planning tasks that fit well in summer

  • Sketch a simple front-elevation plan of your home and yard

  • Choose a consistent lighting style and color temperature

  • Identify 2–3 focal points instead of decorating every surface

  • Coordinate decor scale so items look balanced from the street

  • Decide which areas need subtle lighting versus high-impact accents

A polished display usually follows one clear theme, even if the theme is simple. Summer is when you can select that theme and build around it intentionally.

No. 4

Roofline and Electrical Prep Improve Safety

Outdoor holiday decorating often involves ladders, roof edges, and electrical connections, which makes safety a top priority. Handling prep work in spring or summer reduces the risk of working in cold, wet, or windy conditions when slips and falls are more likely.

Even if you plan to hire professionals, knowing your roofline is in good shape and your outlets are accessible improves the installation process and reduces surprises.

Roofline areas to check before decorating season

  • Loose shingles or flashing that can catch clips or create leaks

  • Weak or rotting fascia boards that may not hold attachments

  • Rusted or unstable gutters that could bend under pressure

  • Siding damage that could worsen with additional fasteners

  • Branches that scrape roof edges and interfere with lighting lines

Electrical and power planning essentials

  • Confirm outdoor outlets are GFCI-protected

  • Identify where timers or smart controls will be placed

  • Plan cord routes to minimize tripping hazards near walkways

  • Use outdoor-rated cords and weatherproof connection covers

  • Avoid overloading circuits by estimating total wattage in advance

Good safety planning is not just about preventing accidents. It also protects your decor investment by reducing the chance of lights failing due to water intrusion or poor connections.


No. 5

Tree Trimming and Landscaping Create a Cleaner Display

Landscaping is the structure that your holiday decor sits on. Overgrown branches can block roofline lights, hide pathway accents, or create cluttered sightlines that make even expensive decor look messy. By trimming and shaping landscaping in late spring or summer, you create clean lines that make lighting look deliberate.

Landscaping elements that improve decor impact

  • Trees with clear trunk lines for wrapping lights evenly

  • Shrubs trimmed to a consistent height for balanced illumination

  • Garden bed edges that help define where decorations should go

  • Walkways cleared and bordered so pathway lights look intentional

  • Entryway plants shaped to frame wreaths and garlands

Practical benefits of trimming early

  • Less risk of branches rubbing through wires during windy weather

  • Fewer leaves and debris caught in light strands or clips

  • Easier access for ladder placement and installation routes

  • Better visibility from the street, which improves curb appeal

The strongest displays usually rely on fewer, clearer focal areas rather than decorations placed everywhere. Clean landscaping makes those focal points stand out.

No. 6

Storage Preparation Protects Decorations and Saves Time

Holiday decor often fails early, not because it is low quality, but because it was stored poorly. Heat, moisture, and crushed cords can shorten the life of lights and ornaments. Spring and summer are ideal seasons to reorganize and upgrade storage so setup becomes faster and less frustrating.

A simple system for faster setup later

  • Label bins by location, such as roofline, porch, trees, and pathway

  • Separate fragile items so they are not stacked under heavy lights or hardware

  • Coil light strands neatly and store them with the correct clips

  • Keep a small “replacement kit” with extra bulbs, fuses, and fasteners

  • Store everything in a dry space to reduce corrosion and mildew

What to test before you put items back into storage

  • Plug in every strand to check for dead sections and flicker

  • Inspect cords for cracking, exposed wire, or loose plugs

  • Confirm timers and smart outlets still connect and switch reliably

  • Check inflatables for fan noise, fabric thinning, and seam wear

When storage is organized by location and function, decorating becomes a sequence of simple steps instead of a multi-hour sorting project.

No. 7

Early Planning Reduces Stress and Improves the Final Result

The holiday calendar fills up quickly with family events, travel, shopping, and end-of-year work deadlines. Outdoor decorating becomes much more enjoyable when it is not competing with everything else.

Early planning gives you breathing room. Instead of rushing decisions, you can make small progress over time and enjoy the process of building a display that truly fits your home.

What homeowners typically gain by starting early

  • More control over costs and fewer impulse purchases

  • Better access to installers, consultations, and preferred schedules

  • Time to fix small exterior problems before they affect installation

  • A cohesive look that feels polished rather than improvised

  • More time in December to enjoy the season instead of managing it

A realistic planning timeline to follow

  • Spring: inspect roofline, outlets, and existing decor inventory

  • Summer: finalize design theme, budget, and any key purchases

  • Early fall: test everything again, replace essentials, confirm installation dates

  • Late fall: install with confidence, using prepared attachment points and clean storage

This timeline prevents last-minute surprises and makes outdoor decorating feel like a planned upgrade, not a yearly emergency.

Takeaways

Starting outdoor holiday decor planning in spring and summer gives you time to inspect your home, test your inventory, and address safety concerns before cold weather complicates installation. It also helps you design a cleaner, more cohesive display instead of relying on rushed decisions.

Summer is ideal for building a realistic budget, shopping strategically, and choosing a theme that complements your home and landscaping. By spreading tasks across months, you reduce peak-season stress and avoid paying premium prices due to limited availability.

When you treat outdoor holiday decor as a planned project, you protect your home, your time, and your investment in seasonal displays. The result is a safer installation process and a better-looking presentation you can enjoy all season long.


Looking for Home resources?

Looking to enhance your living space and create a sanctuary that supports your well-being? Explore our home partners who offer a wide range of resources to elevate your home environment.


homeHLL x Editor


How Salt Air Changes The Way Coastal Windows Age Over Time

Living near the coast offers breathtaking views, calming ocean breezes, and a lifestyle many homeowners genuinely enjoy. However, beachfront and near-shore environments also create conditions that can quietly accelerate exterior wear on a home, especially on surfaces that face constant wind and moisture. Windows are among the most exposed building components, and their performance can decline faster in coastal climates than many homeowners expect.


In this article, we will explore how salt air changes the way coastal windows age over time, why the damage often appears as haze or stubborn spotting, and what homeowners can do to protect glass, seals, and frames. With the right upkeep and a few preventative choices, coastal windows can retain their clarity, efficiency, and curb appeal far longer.

No. 1

Why Salt Air Is So Damaging to Coastal Windows

Ocean air contains microscopic salt particles that travel inland with wind and humidity. These particles settle on glass, lodge in corners around frames, and mix with moisture to form a thin, stubborn film. Unlike ordinary dust, salt is hygroscopic, meaning it attracts and holds water from the air. That constant dampness creates ideal conditions for corrosion, seal fatigue, and surface etching.

Coastal environments can also intensify aging through other factors that work alongside salt:

Environmental conditions that amplify salt damage

  • High humidity that keeps residue damp longer

  • Frequent wind that continuously deposits new particles

  • Strong UV exposure that breaks down certain finishes and sealants

  • Temperature swings that stress window seals and frame joints

  • Airborne sand or grit that can micro-scratch surfaces during cleaning

Over time, these combined stressors can shorten the functional lifespan of windows and increase the likelihood of repairs.

No. 2

Salt Residue Reduces Glass Clarity Over Time

One of the earliest and most noticeable effects of coastal exposure is reduced window clarity. Many homeowners near the ocean find that their windows look cloudy shortly after cleaning, or develop a hazy film that feels impossible to eliminate with basic methods.

This happens because salt residue bonds to glass, then traps moisture and other minerals on the surface. When sunlight hits the film, it can create glare, dullness, and a persistent “foggy” look that reduces the value of one of the biggest benefits of coastal living: the view.

Common signs of salt buildup on glass

  • A cloudy or dull appearance, especially in direct sunlight

  • White spotting after rain or morning condensation

  • Streaks that reappear quickly after cleaning

  • Rough-feeling patches that suggest mineral deposits

  • Reduced brightness and natural light entering the home

How salt can permanently affect glass

If salt deposits remain in place for long periods, they may contribute to etching. Etching is not just surface dirt; it is a physical change in the glass caused by prolonged mineral and moisture interaction. Once etching occurs, the window may never return to its original clarity, even with professional cleaning, and replacement could become the only true fix.


No. 3

Coastal Weather Can Accelerate Window Seal Failure

Modern windows rely on seals to block air and moisture, improve insulation, and maintain energy efficiency. In coastal environments, seals are under more stress due to constant humidity, salt exposure, and repeated pressure changes from storms and high winds.

As seals weaken, windows can start to show performance issues that go beyond cosmetic haze.

Symptoms of deteriorating window seals

  • Condensation or fogging between panes in double-pane windows

  • Drafts or airflow near the frame

  • Higher indoor humidity near windows

  • Noticeable temperature differences close to glass surfaces

  • Rising heating and cooling costs

Why seal deterioration matters

A compromised seal allows moisture intrusion, which can lead to persistent fogging and may also encourage mold or mildew around frames and sills. It also reduces the window’s insulating value, forcing HVAC systems to work harder and potentially increasing energy bills over time.

No. 4

Window Frames React Differently to Salt and Humidity

The frame material plays a major role in how windows age near the ocean. Even when the glass appears manageable, the frames may be degrading in ways that are less obvious until the damage becomes costly.

How common window frame materials age in coastal air

  • Metal frames

    • More vulnerable to corrosion and oxidation

    • Protective coatings can break down, leading to discoloration and rust

    • Hardware, fasteners, and tracks may seize or degrade

  • Wood frames

    • Absorb moisture in humid air unless properly sealed

    • Can swell, warp, or soften over time

    • Increased risk of rot if paint or sealants fail

  • Vinyl frames

    • Generally more resistant, but still collect salt film

    • Can fade or become brittle with strong UV exposure

    • Tracks can accumulate gritty residue that affects operation

Frame-related issues homeowners often notice

  • Windows becoming harder to open or close

  • Flaking paint, bubbling finishes, or surface pitting

  • Visible rust spots on metal components

  • Soft or swollen wood near corners and sills

  • Gaps that allow air infiltration

Because frames are structural, deterioration here can eventually affect water intrusion resistance and overall window stability.


No. 5

Why Rainstorms Do Not Truly Clean Coastal Windows

It is easy to assume rain “washes” windows, but coastal rain is rarely clean. Moisture in coastal air often contains dissolved salt and picks up pollutants, sand, and minerals as it moves. When rain hits the glass, it can spread these materials across the surface, and as the water evaporates, it leaves behind spotting and streaking.

Coastal winds can also blow new debris onto wet windows immediately after storms, increasing residue adhesion.

What rain leaves behind on coastal glass

  • Salt crystals that dry into visible streaks

  • Mineral deposits that cause spotting

  • Grit that can scratch glass during wiping

  • A thin film that dulls shine and clarity

As a result, homeowners may see windows looking worse after storms, not better, especially when sunlight reveals dried deposits.

No. 6

The Importance of Routine Window Cleaning in Coastal Areas

While no homeowner can eliminate

entirely, consistent cleaning and inspections dramatically reduce its long-term impact. Routine cleaning helps remove corrosive residue before it can etch glass, weaken finishes, or damage seals and hardware.

For many coastal homeowners, the key is frequency and technique. Standard household methods may remove surface dirt, but salt residue often requires more thorough rinsing, careful product choice, and methods that avoid grinding grit into the glass.

Benefits of consistent coastal window cleaning

  • Preserves glass clarity and maximizes ocean views

  • Reduces the chance of permanent etching

  • Helps identify early seal or frame issues before they become major repairs

  • Improves natural light and interior brightness

  • Enhances curb appeal and overall exterior appearance

Homeowners searching for the Best window cleaner near Topsail Beach, NC often prioritize services experienced with coastal properties and salt residue removal. Coastal window cleaning is less about making glass look good for a day and more about protecting the window system over the long term.

What to look for in a coastal window cleaning routine

  • More frequent cleaning during windy or storm-heavy seasons

  • Gentle, non-abrasive tools that reduce scratching risk

  • Thorough rinsing to remove salt rather than spread it

  • Attention to corners, tracks, and frame edges where residue concentrates

  • Periodic inspection of seals, hardware, and drainage channels

No. 7

Long-Term Prevention Strategies for Coastal Window Protection

Cleaning helps, but preventative measures can further slow window aging and reduce maintenance demands. The best approach is a combination of material choices, protective upgrades, and consistent monitoring.

Practical ways to extend window lifespan near the ocean

  • Choose corrosion-resistant hardware and components when replacing windows

  • Consider protective coatings designed to reduce mineral adhesion

  • Maintain paint, sealants, and exterior finishes on frames and trim

  • Inspect caulking and weatherstripping regularly and re-seal as needed

  • Keep tracks clean so windows operate smoothly and drain properly

  • Address small issues early to avoid moisture intrusion and hidden damage

When replacement may be the smarter option

If windows show repeated seal failure, permanent haze from etching, or structural frame deterioration, repair may become less cost-effective than replacement. In those cases, selecting products designed for coastal climates can reduce repeat problems and improve both energy efficiency and durability.

Takeaways

Coastal windows age differently because salt particles, humidity, wind, and UV exposure combine to speed up wear on glass, seals, and frames. What starts as mild haze or spotting can develop into permanent clarity loss and performance issues if left untreated.

Routine cleaning and early inspections are among the most effective ways to prevent long-term damage. Salt residue is persistent, and coastal rain often adds to the buildup rather than removing it, which is why maintenance must be proactive.

Homeowners can further protect their investment by choosing coastal-appropriate materials, maintaining frame finishes, and addressing seal problems early. With a consistent strategy, it is possible to preserve window clarity, comfort, and curb appeal for years in an oceanfront environment.


Looking for Home resources?

Looking to enhance your living space and create a sanctuary that supports your well-being? Explore our home partners who offer a wide range of resources to elevate your home environment.


homeHLL x Editor


Why Curb-Appeal Neighborhoods Go Big On Holiday Lights

When the holiday season arrives, some neighborhoods evolve into full-scale festive destinations, complete with sparkling rooflines, glowing pathways, coordinated displays, and front yards that look like they belong in a movie scene. These are the streets people detour to see, slowly driving through with hot drinks in hand just to take it all in. Notably, the neighborhoods that decorate most impressively in December are often the same communities known for strong curb appeal throughout the year.


In this article, we will explore why neighborhoods with high curb appeal tend to go bigger during the holidays, and how year-round home maintenance, landscaping, lighting, and community pride naturally translate into more elaborate seasonal décor. From tidy lawns and updated exteriors to professional-grade lighting designs, holiday decorating is rarely random in these areas. Instead, it is an extension of habits, standards, and shared expectations that are already built into the neighborhood’s identity.

No. 1

The Connection Between Curb Appeal and Holiday Decorating

Curb appeal is the overall attractiveness of a home as viewed from the street. While it is often discussed in real estate, it also reflects something deeper: homeowner pride, attention to detail, and a commitment to maintaining a welcoming exterior environment. In neighborhoods where curb appeal is consistently strong, holiday decorating becomes a natural seasonal “upgrade” rather than an occasional, last-minute effort.

Homeowners who regularly invest time and money into their home’s exterior typically approach holiday décor the same way. They think in terms of design, cohesion, and impact. Instead of a few disconnected decorations, they aim for a display that complements the home’s architecture and landscaping while still feeling festive.

What curb appeal typically includes

A high-curb-appeal home usually shows care in areas such as:

  • Landscaping and lawn health

  • Exterior cleanliness and upkeep

  • Paint condition, siding quality, and trim details

  • Roofing condition and gutter maintenance

  • Outdoor lighting and visibility

  • Driveway, walkway, and porch presentation

  • Overall organization, including minimal clutter and well-placed décor

How that translates into holiday décor

In neighborhoods where these standards are common, holiday decorating tends to feature:

  • Coordinated holiday lighting themes across multiple homes

  • Professionally designed outdoor decoration layouts

  • Well-lit walkways and entry points for safety and atmosphere

  • Decorated trees, shrubs, and landscaping focal points

  • Roofline and architectural lighting that enhances the home’s structure

The result is a street that feels intentional, cohesive, and inviting, which is exactly what draws visitors and reinforces a neighborhood's reputation.

No. 2

Well-Maintained Landscaping Makes Displays Look Polished

One of the most underrated reasons holiday decorations look better in curb-appeal-focused neighborhoods is simple: the landscaping is already doing half the work. When lawns are healthy, hedges are trimmed, beds are edged, and walkways are clean, the décor immediately looks more refined—even before the first light turns on.

Holiday lighting relies heavily on clean lines and strong visual anchors. Mature trees, shaped shrubs, and orderly planting beds provide a natural structure for lights, wreaths, and accents. In other words, good landscaping gives holiday décor something to “attach to” visually, not just physically.

Landscaping features that elevate holiday decorations

Well-maintained outdoor spaces create a stronger foundation for:

  • Tree wrapping that looks symmetrical rather than chaotic

  • Bush lighting that appears dense and intentional

  • Pathway lighting that feels balanced and navigable

  • Yard displays that do not look crowded or cluttered

  • Natural framing for entryway décor, such as garlands and wreaths

Why neglected yards reduce even expensive décor

Even high-quality decorations can lose their impact when the surrounding environment looks unkempt.

Common issues that make displays feel less cohesive include:

  • Overgrown shrubs that swallow lights and ornaments

  • Patchy lawns that make yards look unfinished

  • Cluttered porches or crowded entryways

  • Poorly defined borders or messy planting beds

Because curb-appeal neighborhoods typically avoid these problems year-round, their holiday decorations look more “designed” by default.


No. 3

Updated Home Exteriors Encourage Bigger, Better Decorating

Homes with updated exteriors naturally invite more ambitious holiday decorating because the backdrop is clean, current, and visually appealing. A freshly painted facade, modern siding, upgraded windows, or a renovated front porch creates a strong canvas for lighting. Instead of trying to distract from worn features, homeowners are highlighting what already looks good.

Architectural details become a major advantage during the holidays. A home with columns, roof peaks, stone accents, or distinctive trim offers built-in focal points for lighting design. In neighborhoods where exterior improvements are common, holiday décor can become a friendly way to showcase those enhancements.

Exterior upgrades that make holiday décor stand out

Holiday lighting and decorations tend to look more striking against:

  • Fresh paint and crisp trim

  • Modern siding with consistent texture

  • Upgraded windows that allow for neat outlining and a warm interior glow

  • Stylish front doors that pair well with wreaths and garlands

  • Renovated porches and railings that support layered lighting

The role of subtle “neighborhood competition”

In communities where home exteriors look well-kept across the board, holiday décor can become a tradition of friendly one-upmanship.

It is not necessarily about spending the most, but rather about:

  • Creating the most cohesive theme

  • Designing the cleanest roofline lighting

  • Building the most inviting entryway

  • Adding thoughtful details that feel upscale rather than noisy

Over time, these expectations raise the bar and make holiday decorating an annual highlight.

No. 4

Outdoor Lighting Is the Core of Holiday Curb Appeal

Outdoor lighting is one of the strongest drivers of curb appeal in any season, but it becomes the centerpiece of exterior presentation during the holidays. Well-lit homes appear warmer, more welcoming, and more visually defined at night. That same principle applies to Christmas lights, only amplified.

In curb-appeal-focused neighborhoods, lighting is rarely treated as an afterthought. Homeowners often aim for layered lighting that highlights the home, the landscape, and the path of travel from street to entryway.

Popular lighting elements that create a high-end look

Well-planned holiday lighting designs often include:

  • Roofline lighting for clean architectural definition

  • Tree wrapping to add height and visual drama

  • Illuminated wreaths and garlands to create a strong focal point

  • Pathway lights to guide movement and enhance safety

  • Window outlining for symmetry and depth

  • Landscape accent lighting to tie the yard into the overall design

Why professional installation has become the preferred option

Larger displays require more than enthusiasm; they require technical planning and safety awareness. Many homeowners want a polished result without taking on the risk and time involved with ladders, electrical connections, and design trial-and-error.

Because of that, professional Christmas light installation companies are increasingly common in neighborhoods where high curb appeal is the norm. Homeowners looking for professional help often turn to Allentown holiday decorating and lighting services to create custom displays that complement their landscaping and exterior design. Professional support can help homeowners achieve consistency, a safe setup, and a finished appearance that matches the neighborhood standard.


No. 5

Neighborhood Pride Turns Decorating Into a Tradition

Strong curb appeal is rarely accidental; it usually reflects a shared culture of maintenance and pride. In these communities, residents value a welcoming streetscape because it supports property values, strengthens community identity, and simply feels better to live in.

Holiday decorating becomes a visible expression of that pride. Once a few houses put up lights, others often follow, not from pressure, but from a desire to contribute to the seasonal atmosphere. Over time, the neighborhood becomes known for its holiday displays, which reinforces the tradition and encourages future participation.

Social dynamics that influence holiday decorating

In many neighborhoods, holiday décor grows due to community rhythms such as:

  • Homeowner association expectations or seasonal guidelines

  • Block gatherings and neighborhood events

  • Informal “best house” conversations and friendly contests

  • Shared norms around maintenance and exterior presentation

When neighborhoods become destinations

Some communities gain a local reputation for holiday lights, attracting visitors from surrounding areas.

That visibility can motivate homeowners to:

  • Maintain a consistent quality of décor year after year

  • Upgrade lighting styles to stay cohesive with neighbors

  • Keep landscaping and exterior presentation sharp for the season

Ultimately, the displays are not just about decoration; they are about belonging, identity, and pride in place.

No. 6

Professional Holiday Lighting Is Growing for Practical Reasons

The increasing popularity of professional lighting is not only about aesthetics. It is also about time, safety, and convenience. Many homeowners enjoy the look of elaborate displays but would rather outsource the labor-intensive parts of the process.

The benefits homeowners often expect from professional installers

Professional services typically appeal because they can offer:

  • Custom lighting designs that fit the home’s architecture

  • Safe installation practices and proper ladder use

  • Commercial-grade products that look brighter and last longer

  • Efficient setup and scheduled removal

  • A consistent, polished appearance that avoids “patchy” lighting

Why curb-appeal neighborhoods adopt professional services faster

When year-round exterior presentation is already a priority, hiring professionals is seen as an extension of routine home care. In these areas, the goal is not just “holiday spirit,” but a finished look that matches the neighborhood’s established standard.

No. 7

How Homeowners Can Create a Bigger Impact Without Overdoing It

A large display does not have to mean a cluttered display. In fact, the most impressive holiday homes often follow design principles that keep everything clean and coherent.

Ways to create a high-end look with a simple plan

If you want to elevate your display while keeping it tasteful, focus on:

  • Choosing one primary lighting color temperature and sticking to it

  • Highlighting architectural lines first, then adding landscape accents

  • Prioritizing symmetry at the entryway for an immediate “wow” effect

  • Using fewer focal pieces, placed intentionally, rather than many scattered items

  • Ensuring cords and extension lines are hidden as much as possible

Quick checklist for a cohesive exterior display

Before you start, it helps to confirm:

  • Your roofline and gutters are clear and safe for installation

  • Your landscaping is trimmed so that lights do not look swallowed by greenery

  • Your pathways are visible and well-lit for guests and delivery services

  • Your theme complements your home rather than competing with it

This approach keeps holiday decorating aligned with curb appeal instead of distracting from it.

Takeaways

Neighborhoods with strong curb appeal often create the most memorable holiday displays because homeowners already value their homes' exterior presentation year-round. Seasonal decorating becomes a natural extension of landscaping, maintenance, and thoughtful design choices.

Well-kept yards, updated exteriors, and layered lighting make decorations look more polished and intentional. As holiday décor becomes more elaborate, professional installation continues to grow in popularity due to safety, convenience, and the desire for a cohesive result.

Ultimately, the neighborhoods that shine brightest in December are usually the ones that look welcoming in every season. When curb appeal is part of the community culture, holiday decorating is not an exception—it is the annual showcase.


Looking for Home resources?

Looking to enhance your living space and create a sanctuary that supports your well-being? Explore our home partners who offer a wide range of resources to elevate your home environment.


homeHLL x Editor


Trendy Pool Deck Installation Styles For A Modern Backyard Look

Honestly, if you’ve been spending more weekends out back lately — you’re in good company. Outdoor living has shot up the priority list for homeowners all across the Bay Area, and the pool deck is usually the first thing people want to get right. It sets the whole tone of the space.


The good news is there’s a lot to work with right now. From large-format porcelain to natural travertine and low-maintenance composite, today’s styles strike a balance between looks and real-world practicality that just wasn’t there a decade ago. In this article, we share a rundown of what pool deck installation styles are trending — and what might work best for your backyard.

No. 1

Large-Format Porcelain Pavers: Clean Lines, Zero Fuss

If you’ve scrolled through any home design feed recently, you’ve definitely seen these. Large-format porcelain pavers — think 24×24 or even 24×48 inch slabs in soft stone tones — have become the go-to for that clean, almost architectural outdoor look.

For Bay Area homeowners specifically, porcelain checks a lot of boxes. It’s frost-resistant, non-porous so pool water won’t stain it, and with a textured finish it handles wet feet better than you’d expect. Day-to-day maintenance is basically a rinse.

The real design trick with porcelain is keeping the grout lines thin. That continuous, uninterrupted surface is what gives the backyard that high-end feel without the high-end material cost.

No. 2

Stamped Concrete: More Versatile Than People Give It Credit For

Stamped concrete has genuinely leveled up. Modern techniques can replicate flagstone, wood planks, slate, cobblestone — and do it convincingly, at a fraction of what the real thing would run you.

What makes it appealing beyond the price point is how much you can customize. Pattern, color stain, finish texture — a good contractor can dial it in to match your home’s existing exterior without it looking like an afterthought.

One thing worth mentioning: always seal it. Bay Area summers get warm, and a quality sealant keeps the surface cooler underfoot while protecting the color from UV damage over time.


No. 3

Natural Stone: Timeless, and It Actually Gets Better with Age

There’s a reason people have been putting travertine and bluestone around outdoor spaces for centuries. Every slab is a little different, the surface develops character over time, and no manufactured material has quite figured out how to replicate that.

Travertine in particular is great for pool surrounds because it stays noticeably cooler in direct sun compared to concrete or dark pavers — which matters a lot when you’re walking barefoot. Bluestone leans more contemporary and pairs really well with modern pool designs.

Just make sure whoever installs it knows stone specifically. The cutting, leveling, and sealing are a different skill set than poured concrete, and the difference shows in the finished result.

No. 4

Composite Decking: The Modern Wood Alternative

Wood decking always photographs beautifully. Living with it is a different story — swelling, splintering, fading, and the annual re-sealing ritual that most homeowners quietly resent. Composite exists to fix all of that.

Modern composite boards genuinely nail the warmth and grain of real hardwood, while being completely resistant to moisture, mold, and UV fading. It’s no surprise that pool deck installation Bay Area requests have increasingly included composite as a top pick — Bay Area homeowners who’ve made the switch tend to wonder why they waited. Upkeep is basically a rinse and an occasional sweep.

Design-wise, composite really shines on raised decks, multi-level layouts, and anywhere you want that indoor-outdoor flow to feel seamless.


No. 5

Concrete Overlays: The Smart Upgrade for Existing Decks

Not every project needs a full tear-out. If your existing concrete base is structurally solid, an overlay can completely change the look of the space — faster, and for a lot less money than starting from scratch.

Overlays can be textured, stained, scored, or micro-troweled to a smooth finish, depending on what you’re going for. It’s a popular move for Bay Area homeowners looking to freshen up before listing a property, or just get the backyard ready before summer kicks in.

Worth noting: according to the American Society of Landscape Architects, outdoor living upgrades consistently rank among homeowners’ top investment priorities — and pool and patio improvements specifically tend to deliver strong returns. (Source: ASLA Residential Landscape Architecture Trends Survey)

No. 6

A Few Things Worth Thinking Through Before You Decide

Whatever style is catching your eye, these practical factors are worth running through before you commit:

•  Slip resistance: Wet feet and pool decks go hand in hand. Look for textured finishes or anti-slip coatings on any surface you’re considering.

•  Heat absorption: Dark surfaces get hot. If your deck sees a lot of afternoon sun, lighter tones or materials like travertine make a real difference underfoot.

•  Drainage: Proper slope and drainage planning is one of those things that’s easy to overlook and expensive to fix later.

•  Budget: Material costs vary a lot. A good contractor will help you find the best value for your goals rather than just pitching the most expensive option.

The team at Advantage Pools Bay Area works through all of this with homeowners during the planning phase — which honestly makes the whole process a lot less stressful when you’re juggling style preferences, practical needs, and a real budget.

No. 7

Your Backyard, Your Call

At the end of the day, the best deck is the one that fits how you actually use your outdoor space. Low maintenance person? Composite or porcelain. Want warmth and character? Natural stone is hard to beat. Working with a tighter budget? Stamped concrete or an overlay can genuinely impress.

Whichever direction you’re leaning, it pays to work with someone who actually knows the Bay Area — the climate, the soil conditions, and local permitting. Advantage Pools Bay Area has helped hundreds of homeowners across the region get decks they genuinely love spending time on. Your next backyard upgrade might be a lot closer than you think.


Looking for Home resources?

Looking to enhance your living space and create a sanctuary that supports your well-being? Explore our home partners who offer a wide range of resources to elevate your home environment.


homeHLL x Editor


Best Subscription-Free Diffusers For Hassle-Free Home Scent

The home scenting market has evolved rapidly in recent years. What used to be a straightforward, one-time purchase now often comes bundled with memberships, refill plans, locked mobile apps, and proprietary cartridge systems that require ongoing payments. While subscription models work for some households, many buyers are actively seeking alternatives that deliver reliable fragrance performance without recurring fees or restrictions.


No. 1

Why Buyers Are Moving Away From Subscription Diffusers

Home scenting is no longer an occasional luxury purchase. Families, remote workers, and apartment owners are using diffusers more consistently throughout the week, sometimes for hours each day. As usage increases, ongoing subscription charges and refill limitations become far more noticeable.

Common reasons people avoid subscriptions

  • They prefer to control when and how often they buy oils

  • They dislike being limited to proprietary cartridges or brand-specific refills

  • They want the diffuser’s full feature set without monthly payments

  • They are looking for predictable long-term ownership costs

  • They do not want an app that stops working properly if a plan expires

For most households, a diffuser should feel like an appliance: buy it once, maintain it easily, and keep using it for years without new strings attached.

No. 2

Best Diffuser Brands Without Subscription Requirements

The brands below are frequently mentioned by buyers looking for ownership-friendly scenting systems. They generally allow ongoing use without mandatory memberships, and several avoid closed cartridge ecosystems altogether.

1) Lephrone

Lephrone is known for emphasizing ownership-first scenting systems. The brand avoids cartridge-only ecosystems and does not require paid subscriptions for core app functionality, which is a major differentiator in a market increasingly designed around recurring revenue.

Lephrone devices use waterless cold air diffusion technology, dispersing fragrance oils without water dilution or heat. This tends to produce a more stable scent output and reduces several of the maintenance issues associated with ultrasonic diffusers, such as water tank cleaning and mineral residue.

What Lephrone does well

  • Refillable approach that supports direct oil replacement rather than disposable cartridges

  • Waterless diffusion for consistent scent concentration

  • App-based scheduling and intensity adjustment without monthly fees

  • WiFi connectivity for reliable remote access beyond short-range Bluetooth

  • Quieter operation suited to bedrooms, offices, and shared living spaces

Who Lephrone is best for

  • People who run a diffuser daily and want predictable performance

  • Households that want smart controls but do not want “premium app” payments

  • Users who value flexibility in fragrance selection and refill timing

  • Anyone prioritizing a low-maintenance, waterless setup

Another practical benefit is day-to-day simplicity. Once configured, the diffuser can run on a schedule without constant manual input, which matters if you want scenting to feel ambient rather than like another task to manage.

2) AromaTech

AromaTech offers waterless diffuser systems that do not require subscription plans. The brand has a strong reputation in commercial scenting and hospitality settings, and that professional background shows in its emphasis on output strength and coverage.

Many users choose AromaTech when they want noticeable scent performance, especially in larger open-concept areas. While the devices can feel more technical than some residential-first brands, they are typically straightforward once set up.

Reasons people choose AromaTech

  • Strong scent throw suited to larger rooms or multi-room areas

  • Waterless diffusion options

  • Oils can usually be purchased as needed rather than through mandatory refills

3) Air Aroma

Air Aroma blends scent diffusion with a design-forward approach and is often seen in hospitality and luxury residential environments. Buyers who care about how a diffuser visually integrates into a modern interior often consider this brand.

Importantly for non-subscription shoppers, Air Aroma is not built around heavily restricted cartridge programs in the way some consumer subscription brands are. That gives users more independence after purchase.

Air Aroma stands out for

  • Aesthetic integration in high-end interiors

  • Stable scent performance aimed at premium spaces

  • Less reliance on closed refill restrictions than many subscription-first systems

4) ScentAir

ScentAir is primarily known for commercial scenting, particularly in retail and office environments, with solutions that can support continuous operation and HVAC integration.

Some of ScentAir’s enterprise offerings may involve managed programs, but standalone options can still function without consumer subscription requirements. This is a more infrastructure-oriented route, and it tends to fit buyers who think in terms of coverage, consistency, and longer run times.

ScentAir is often chosen for

  • Larger spaces and continuous scenting needs

  • Commercial-style performance expectations

  • Users who prefer scalable systems rather than small countertop units

5) Vitruvi

Vitruvi is widely recognized for minimalist design and approachable home use. These are generally not commercial-grade waterless machines, but they remain popular for buyers who want an uncomplicated, non-subscription option with a strong aesthetic.

Vitruvi tends to appeal to essential oil users who value simplicity over advanced automation.

Vitruvi is best for

  • Smaller rooms and everyday residential use

  • Minimalist interiors and countertop-friendly designs

  • Users who want straightforward operation without technical setup


No. 3

Why Subscription-Based Diffusers Became So Common

Subscription models in the diffuser industry grew quickly for several business and product-design reasons. Understanding these helps clarify what you may be trading away when you choose a subscription-based ecosystem.

Key drivers behind diffuser subscriptions

  • Recurring revenue: brands earn continuously from refills, cartridges, or app features

  • Controlled consumables: proprietary refills keep buyers locked into one supplier

  • Predictable reorder cycles: companies can forecast demand and inventory more easily

  • “Convenience” positioning: auto-ship refills are marketed as a hands-off benefit

For some consumers, automated refills are genuinely convenient. For many others, they introduce unnecessary cost and reduce control, especially when they prefer choosing different scents seasonally or shopping based on availability and price.

No. 4

What Makes a Non-Subscription Diffuser Better

Subscription-free models tend to feel more like true ownership. Instead of paying to keep features active, you purchase the device and decide how and when to restock fragrance.

Lower long-term cost

Avoiding monthly fees can significantly reduce the total cost of ownership over time. Even small recurring charges can eventually surpass the original hardware cost, especially for households that use diffusers year-round.

More freedom with oils

Non-subscription systems often support broader oil choices or at least let you purchase refills on your own schedule. This is especially valuable for people who:

  • Rotate fragrances by season

  • Prefer experimenting with different scent styles

  • Want control over how strong or subtle the aroma is

  • Do not want to depend on a single brand’s inventory

No locked features

Some smart diffusers restrict scheduling, automation, or remote control behind a paid plan. Subscription-free brands typically provide full functionality after setup, which aligns better with how people expect home appliances to work.

Better long-term ownership experience

A diffuser should remain usable for years. Subscription-free systems usually feel more stable because performance and features are not tied to maintaining an ongoing payment relationship.


No. 5

Why Waterless Diffusers Often Fit Subscription-Free Ownership

Waterless diffusion systems are frequently a better match for non-subscription buyers because the technology naturally supports refillable oil use and consistent performance.

Fewer replaceable components

Traditional cartridge systems create dependence on branded replacements. Waterless diffusers often use refillable oil containers or direct bottle replacement, which reduces restrictions and simplifies sourcing.

Lower maintenance requirements

Without a water tank, there is:

  • Less routine cleaning

  • Less risk of mineral buildup

  • Less chance of musty odours developing from stagnant water

  • Less daily attention required to keep the device running well

More consistent scent output

Because fragrance oils are not diluted, diffusion can feel more predictable. This matters for people who scent their homes regularly and want steady output rather than noticeable fluctuations.

No. 6

What to Look for in a Subscription-Free Diffuser

A non-subscription label is only part of the decision. Performance, reliability, and usability will determine whether the diffuser actually improves your day-to-day environment.

App access without fees

If smart controls matter to you, confirm whether scheduling, remote access, and intensity adjustments are included without monthly payments. Some products appear “smart” but require paid tiers to unlock the most useful functions.

Open oil compatibility

Look for systems that allow direct oil replacement rather than proprietary single-use cartridges. Open refill models typically provide better flexibility and more predictable long-term ownership.

WiFi connectivity

WiFi-based systems tend to offer more reliable remote access than Bluetooth-only devices, especially in:

  • Larger homes

  • Multi-level layouts

  • Situations where you want to adjust scent settings while away

Quiet operation

Noise becomes a bigger factor than many shoppers expect, particularly when a diffuser runs overnight or during work hours. If you plan to place the unit near a bedroom or desk, prioritize designs known for quieter performance.

Long-term reliability and serviceability

Diffusers are often used frequently, which makes durability important. Consider:

  • Build quality and fit of components

  • Availability of replacement parts (especially for mechanical components)

  • Warranty terms and clarity

  • Brand reputation for customer support

No. 7

Common Problems With Subscription-Based Systems

Subscription-based scenting can be appealing upfront, but several issues tend to surface over time.

Rising long-term costs

Monthly fees may seem modest initially, but over multiple years, they can add up quickly. If the diffuser becomes a daily habit, you may end up paying far more than expected.

Limited fragrance selection

Closed ecosystems can prevent you from testing new scent profiles or buying based on value. Many people eventually want variety, especially as preferences shift with seasons or household needs.

Feature restrictions

Some products reduce functionality when subscriptions lapse, even though the hardware is already paid for. This can feel frustrating and out of step with normal expectations for home devices.

Supply dependence

If cartridges or refills are delayed, out of stock, or discontinued, you may not be able to use the device consistently. For households that rely on scenting as part of daily comfort, that dependency can be a real drawback.

Takeaways

Subscription-free diffusers are gaining popularity because they offer straightforward ownership, predictable costs, and fewer restrictions on how you scent your home. For many households, avoiding recurring fees makes home fragrance feel simpler and more sustainable over the long term.

Brands such as Lephrone, AromaTech, Air Aroma, ScentAir, and Vitruvi provide viable non-subscription options, with different strengths depending on coverage needs, design preferences, and desired smart features. Waterless diffusion systems often pair especially well with this ownership model due to consistent output and reduced maintenance.

The best choice comes down to how you live: how often you run the diffuser, where it will sit, and whether you want smart controls without paywalls. If you prioritize flexibility and long-term usability, a subscription-free diffuser is often the most practical investment.


Looking for Home resources?

Looking to enhance your living space and create a sanctuary that supports your well-being? Explore our home partners who offer a wide range of resources to elevate your home environment.


homeHLL x Editor


What Makes Casement Windows A Popular Choice For Canadian Homes?

Casement windows have become a defining feature in many Canadian communities, particularly in newer builds and well-planned renovations. Walk through almost any newer Calgary neighborhood, and you will spot them on main floors, in bedrooms, and in kitchens above the sink. Their widespread use is not a passing trend; it is a response to performance, comfort, and practicality in a climate where temperature swings, wind, and long winters demand more from a window.


In this article, we will explore why casement windows are such a popular choice for Canadian homes, how they work, what makes them energy efficient, and where they tend to perform best. If you are planning a window replacement project, understanding the advantages and trade-offs will help you make a confident decision that suits your home, lifestyle, and long-term budget.

No. 1

How Casement Windows Work

Casement windows are hinged on one side and swing outward. They are typically operated by a hand crank at the base of the frame, allowing the sash to open smoothly and hold its position at different angles.

Unlike hung windows that slide vertically or horizontal sliders that move side-to-side, a casement window opens the entire sash. This is a key reason homeowners notice an immediate difference in airflow.

What this opening style means in real life

  • Full ventilation through the entire window opening, not just a partial gap

  • Better control over airflow direction, since the sash can be angled outward

  • Easier “fine-tuning” of ventilation during shoulder seasons when you want fresh air without a full blast of cold air

The “scoop effect” and why it matters in Calgary

The outward-opening design can create a natural scoop effect. When wind travels along the exterior wall, the open sash catches the breeze and directs it indoors. On a warm Calgary summer evening, this often feels like a meaningful upgrade compared to a window style that only opens a narrow channel.

Best rooms for casement-style airflow

  • Kitchens, especially above the sink, where you want quick ventilation

  • Bedrooms, where fresh air circulation improves comfort at night

  • Living rooms paired with fixed glass for a bright, open feel

  • Home offices where temperature control and air freshness affect focus

No. 2

Energy Efficiency Advantages in Cold Canadian Winters

Casement windows are widely chosen in Canada because they seal exceptionally well. When closed, the locking mechanism pulls the sash tightly against the frame, compressing the weatherstripping at multiple points. This compression-style seal is inherently more airtight than designs that rely on sliding contact within a track.

In climates like Calgary, where winter conditions can be prolonged and windy, small drafts turn into big comfort issues. A tighter seal can reduce cold spots near windows and help maintain stable indoor temperatures.

Why casement windows can outperform sliders and hung windows

  • A compression seal reduces air leakage more effectively

  • Multi-point locking supports consistent contact around the perimeter

  • Fewer “moving track” pathways for air and moisture intrusion

  • Better performance in wind, because pressure pushes the sash tighter into the seal

Features to look for if energy efficiency is your priority

Energy performance depends on manufacturing quality and glass specifications, not the window style alone. When comparing options, ask about:

  • Low-E coatings suited to your climate goals

  • Double or triple glazing based on exposure and budget

  • Warm-edge spacers to reduce condensation risk

  • Quality weatherstripping and corner sealing

A well-manufactured casement unit with an appropriate glass package can noticeably improve comfort in winter and reduce the workload on your heating system.


No. 3

Ventilation Control and Indoor Comfort

Canadian homeowners often deal with big seasonal transitions: dry winter air, short but warm summers, and unpredictable shoulder-season days. Casement windows offer ventilation control that helps maintain comfort without overcorrecting the temperature in your home.

Practical ventilation benefits that affect daily living

  • Quick clearing of cooking odours and humidity in kitchens

  • Improved cross-breeze potential when paired with windows on another wall

  • Ability to open partially during light rain, depending on wind direction and overhangs

  • Better air exchange in rooms that feel stuffy due to poor circulation

Tips for maximizing airflow with casement windows

  • Place casements on the windward side to pull air in using the scoop effect

  • Pair them with other operable windows across the room to create cross-ventilation

  • Consider multiple smaller units rather than one large unit if you want flexible control

  • Use insect screens designed for outward-opening operation to keep ventilation comfortable

No. 4

Accessibility and Ease of Use for Everyday Spaces

One reason casement windows are so common in Canadian residential construction is their user-friendly operation. The crank mechanism removes the need to lift or slide a heavy sash, which can be helpful for people of different ages and abilities.

This design is also practical in hard-to-reach locations, where pushing up a sash or sliding a panel would be awkward.

Locations where crank operation is especially useful

  • Above kitchen counters and sinks

  • Behind furniture placements where reaching a sash is difficult

  • Stairwells and landings with limited access

  • Bathrooms where quick ventilation is useful, but space is tight

Considerations for long-term usability

Like any mechanical component, cranks and hinges should be durable and serviceable. When evaluating products, it is worth confirming:

  • Hardware quality and corrosion resistance

  • Smoothness of crank operation under load

  • Availability of replacement parts over time

  • Warranty coverage for hardware components


No. 5

Design Flexibility for Traditional and Modern Homes

Casement windows suit a wide range of architectural styles. They can look clean and contemporary with slim frames, or more traditional depending on grille patterns, frame profiles, and colour choices.

They also combine well with fixed glazing, allowing you to create larger compositions that balance view, daylight, and ventilation.

Popular configurations in Canadian homes

  • Casements flanking a fixed picture window for a large living room opening

  • Paired casements in bedrooms for balanced symmetry and airflow

  • Casements with a transom above to add height and daylight

  • Multiple casements in a row for modern, expansive wall designs

Design details that influence appearance

  • Frame colour and finish, inside and out

  • Sightlines, meaning how much frame you see versus glass

  • Grid or grille options for a classic look

  • Hardware finish to match interior style

If your goal is maximum daylight, modern casement frames often provide generous glass area relative to frame, improving both view and natural light.

No. 6

Performance in Wind, Weather, and Seasonal Change

Canadian weather is not only cold; it is also dynamic. Wind events, freeze-thaw cycles, and sudden swings in temperature can test a window’s ability to remain sealed and stable.

Casement windows tend to perform well in these conditions because the sash closes into the frame and locks firmly. In windy conditions, external pressure can actually help reinforce the seal, rather than working against it as it sometimes does with sliding designs.

Weather-related benefits homeowners notice

  • Reduced rattling and movement during high winds

  • Less noticeable draft compared to older sliding windows

  • Stronger perceived “closure” and security feel when locked

  • Consistent performance through seasonal shifts when properly installed

Installation quality remains critical. Even an excellent window can underperform if it is not properly flashed, insulated, and integrated with the wall system.

No. 7

What to Consider Before Choosing Casement Windows

Casement windows offer many advantages, but good planning means understanding the practical constraints as well.

Situations where casements may be less ideal

  • Exterior obstructions, such as walkways, where an outward swing could be inconvenient

  • Tight clearances near decks, patios, or exterior fixtures

  • Homes where interior window treatments conflict with crank hardware placement

  • Locations exposed to strong prevailing winds, where opening could be uncomfortable

Questions to ask during a window consultation

  • What glass package is recommended for my exposure and budget?

  • Is triple pane necessary everywhere or only on certain elevations?

  • How do the seals and locking systems compare across manufacturers?

  • What is the expected maintenance for hinges and cranks?

  • How will the new unit integrate with existing trim and exterior finishing?

If you are considering casement windows Calgary installers offer in a range of configurations, it is worth booking a consultation to see samples in person. The hardware, frame quality, and glass specification can vary considerably between manufacturers — and those differences matter over a 25-year lifespan.

Takeaways

Casement windows are popular in Canadian homes because they combine strong ventilation, a tight compression seal, and user-friendly operation. Their outward-opening design can improve airflow and indoor comfort, especially during warm weather and shoulder seasons.

From an energy-efficiency standpoint, the way casements lock and compress weatherstripping can help reduce drafts and improve winter comfort. The best results come from pairing a quality frame and hardware system with an appropriate glass package and professional installation.

Casement windows also offer excellent design flexibility, working well in both modern and traditional homes and in combination with fixed glass. Before committing, consider clearance, wind exposure, and product quality so your investment performs well for decades.


Looking for Home resources?

Looking to enhance your living space and create a sanctuary that supports your well-being? Explore our home partners who offer a wide range of resources to elevate your home environment.


homeHLL x Editor