Posts in home
Why Patio Screens Look Filmy In Late Spring

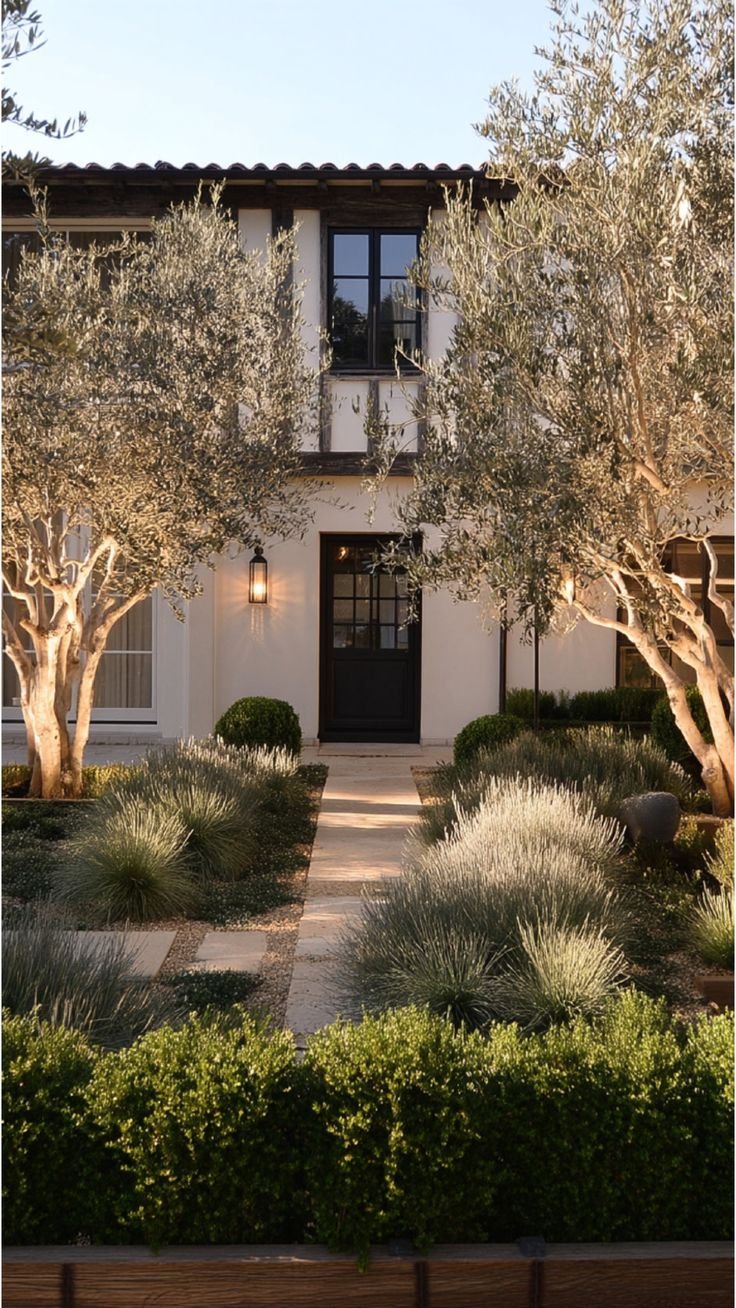
Late spring is one of the most rewarding times to use outdoor living areas. Warmer days return, patios become daily destinations, and screened porches start functioning like an extra room. Yet many homeowners run into the same annoyance every year: patio screens, outdoor windows, porch enclosures, and glass doors begin to look dull, hazy, or filmy even after they were cleaned earlier in the season.


In this article, we will explore why that cloudy film shows up so quickly in late spring, what it is actually made of, and how to reduce it with a smarter, whole-area cleaning approach. The key is understanding that the haze is rarely caused by one single factor; it is usually the result of multiple airborne and surface-level contaminants combining into a thin, stubborn layer that keeps coming back.

No. 1

The Real Culprit: A Seasonal Mix of Airborne Debris

Most people assume “it must be pollen,” and pollen is certainly part of the story. But the filmy layer on screens and exterior glass is usually a blend of particles that land, bind, and smear rather than rinse cleanly. Late spring conditions make this worse because you often have a combination of dry wind, increasing humidity, morning dew, frequent lawn care, and more outdoor foot traffic.

That combination creates two problems:

  • More debris is airborne and moving around your property

  • More moisture is available to glue fine particles to screens and glass

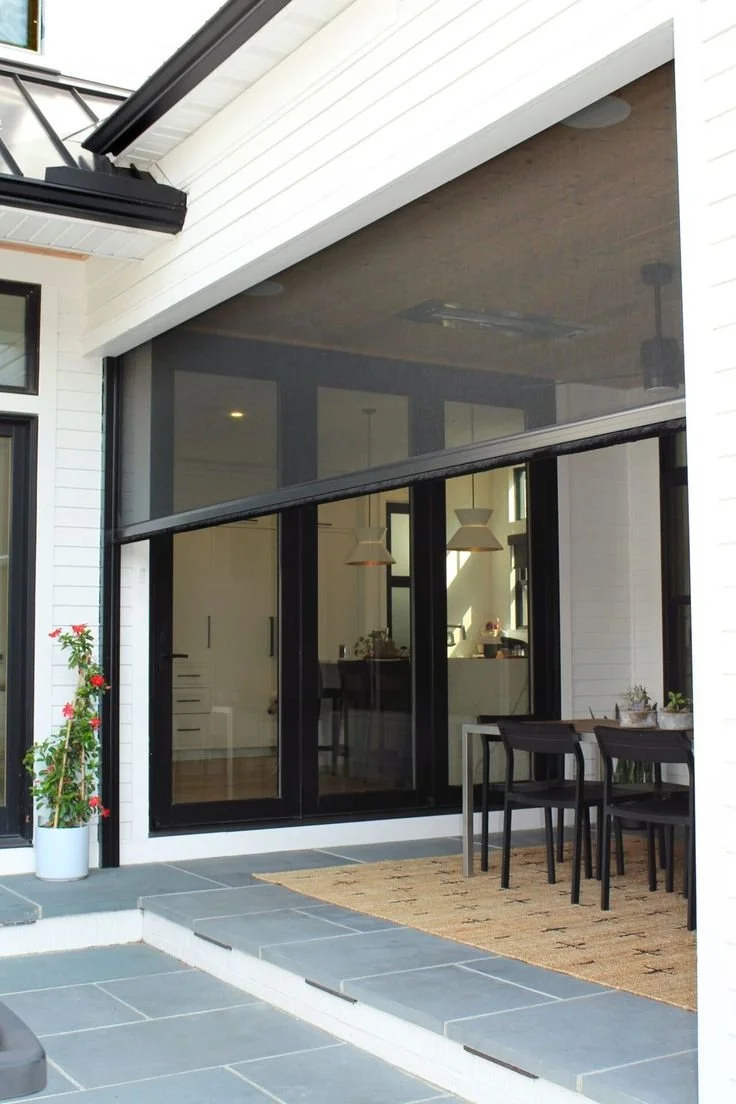
A screened porch or patio enclosure acts like a passive filter. Air moves through, but particles get trapped on mesh fibers, window tracks, frames, and the edges of glass where residue builds up first.

Common contributors to late-spring haze

  • Tree and grass pollen

  • Lawn clippings and plant fragments

  • Soil dust from landscaping and garden beds

  • Fine grit from patios, walkways, and driveways

  • Residue from concrete, pavers, and stone surfaces

No. 2

Airborne Pollen Is Only Part of the Problem

Pollen is the most obvious late-spring culprit because it is both visible and persistent. Trees, grasses, flowers, and weeds release tiny particles that travel easily on breezy days. These particles cling to mesh screens, glass panes, vinyl porch panels, outdoor furniture, rails, and siding.

What makes pollen especially frustrating is how it behaves once it mixes with moisture. Morning dew, light rain, and humidity can turn dry pollen dust into a tacky residue that bonds to surfaces. At that point, a quick hose rinse often fails because the film does not lift cleanly; instead, it streaks, smears, or lodges deeper into screen fibers.

Why pollen becomes harder to clean over time

  • Moisture turns powdery particles into a sticky coating

  • The coating attracts and holds additional dust and debris

  • Repeated partial rinsing can create uneven streaking on glass

  • Screens trap pollen in the mesh, making it look gray or dingy

If you clean your screens early in the season and they still look hazy later, it is often because new layers have bonded on top of old residue in tiny increments. The buildup may be thin, but it is constant.


No. 3

Lawn Clippings and Landscaping Debris Add to the Cloudy Look

Late spring is prime lawn-care season. Regular mowing, trimming, edging, and blowing can send fine organic debris into the air. Even when clippings look too heavy to travel far, the smallest particles can drift and settle on nearby screens, window ledges, porch frames, and glass doors.

This is especially noticeable when outdoor living areas sit near open lawn, garden beds, or active landscaping. If a leaf blower is used near the home, it can amplify the problem by pushing fine debris toward the structure and into corners where it is difficult to remove.

High-risk setups that collect debris faster

  • Screened porches adjacent to lawns or mulched beds

  • Sunrooms and pool enclosures near frequent mowing zones

  • Outdoor kitchens near edging and trimming areas

  • Patios located downwind of open grass or garden soil

  • Homes where blowers are used along siding and thresholds

When organic debris mixes with pollen and dust, it forms a dull coating that makes screens look aged and glass look perpetually streaked, even shortly after cleaning.

No. 4

Dust and Concrete Residue Travel Farther Than You Think

Another overlooked source of grime is nearby hardscapes. Patios, walkways, retaining walls, driveways, pool decks, and concrete steps hold fine dirt and residue year-round. In late spring, dry weather and wind can lift fine particles from these surfaces and carry them onto nearby windows and screens.

Concrete, pavers, brick, and stone can also develop buildup from:

  • Soil and foot-traffic grime

  • Mildew or algae in shaded areas

  • Mineral deposits from irrigation and runoff

  • Weathering residue that becomes powdery when dry

When wind moves across these surfaces, it can spread loose particles into your outdoor living area, where they settle on screens, glass, and frames. This is why cleaning only the screens or only the windows often produces short-lived results. If the patio slab or walkway next to them is still dirty, the next breezy afternoon can redistribute that residue right back onto the freshly cleaned surfaces.

Signs your hardscapes are contributing to the haze

  • A dusty film returns within a few days of cleaning glass

  • Corners of the porch or window tracks collect grit quickly

  • Patio furniture feels gritty rather than simply “dusty”

  • The haze is heavier on the side facing the driveway or walkway


No. 5

Windy Spring Weather Spreads Grime Across the Entire Property

Spring breezes are pleasant, but they are also highly effective at moving debris. Pollen, soil dust, mulch fragments, grass clippings, and hardscape residue can shift from one area of the yard to another repeatedly.

Orientation matters. A screened porch facing an open lawn or driveway often accumulates more buildup than a sheltered window on a protected side of the home. Likewise, areas exposed to prevailing winds tend to show faster film development because they receive a steady supply of fine particles.

The result is an outdoor space that feels dull sooner than expected:

  • Screens look gray instead of crisp and clean

  • Outdoor windows appear hazy even when the interior is spotless

  • Sliding glass doors lose clarity and shine

  • Railings and trim collect dust that makes paint look tired

  • Furniture and décor feel like they never stay clean

No. 6

Why Routine Exterior Cleaning Works Better Than Spot Cleaning

Spot cleaning a single surface can feel productive, but it rarely solves the late-spring film problem for long. A complete exterior approach tends to produce longer-lasting results because it reduces the overall supply of loose grime that wind can redeposit.

Instead of treating screens and glass as separate projects, it helps to treat the patio area as a connected system. The condition of your concrete, pavers, siding, rails, and landscaping directly affects how quickly your screens and outdoor windows get dirty again.

Surfaces that often need attention along with screens and glass

  • Patio floors, pool decks, and porch slabs

  • Walkways, driveways, and steps

  • Siding, trim, and exterior frames

  • Railings, columns, and porch ceilings

  • Screen tracks and door thresholds

This is where homeowners may start considering seasonal maintenance options, including professional exterior power washing in Towson, especially when patios, driveways, siding, porch areas, and outdoor windows are all affected by the same springtime buildup.

Power washing and soft washing can remove layers of pollen, dust, mildew, algae, and surface grime more efficiently than repeated hand-wiping. The right method depends on the material: concrete and pavers may tolerate stronger cleaning, while screens, painted trim, siding, and delicate outdoor window areas typically require a gentler approach to avoid damage.

No. 7

How to Keep Patio Screens and Outdoor Windows Cleaner Longer

Once you understand what causes the film, prevention becomes more realistic. The goal is not to eliminate pollen or dust entirely, but to reduce how much buildup is available to stick and spread.

Smart habits that reduce late-spring haze

  • Rinse screens and exterior glass lightly every week or two during peak pollen

  • Clean hardscapes early in the season so wind has less loose residue to move

  • Direct mower discharge away from the home, porch, and glass doors

  • Use leaf blowers strategically, aiming debris away from structures and screens

  • Wipe down frames, tracks, and rails where grime concentrates first

Quick maintenance checklist for screened porches

  • Rinse screens from the outside to push debris outward rather than into the enclosure

  • Vacuum or wipe screen tracks before washing to avoid turning grit into sludge

  • Clean door thresholds and corners where pollen paste tends to form

  • Rinse patio floors after mowing to remove fresh clippings and dust

Cleaning sequence for better results

  • Remove loose debris first (dry brush, gentle vacuum, or low-pressure rinse)

  • Wash hardscapes next (patio, walkway, steps) to reduce airborne redeposit

  • Clean screens and frames

  • Finish with exterior glass and door surfaces for the clearest final look

The order matters because cleaning the glass first often leads to immediate re-contamination when you later disturb dust on nearby concrete or screens.

No. 8

A Cleaner Outdoor Space Starts Around the Screens

That filmy look on patio screens and outdoor windows is not random, and it is not necessarily a sign you cleaned “wrong.” In late spring, airborne pollen, lawn debris, dust, and residue from nearby concrete can combine into a stubborn layer that spreads across outdoor living spaces.

The most effective solution is usually comprehensive rather than isolated. When you address both the screens and the surrounding hardscape, you reduce the supply of particles that keep landing, sticking, and smearing across the surfaces you want to enjoy most.

Takeaways

Late-spring haze on patio screens and outdoor windows is typically caused by a combination of pollen, lawn debris, and fine dust from nearby hardscapes. Moisture from dew and humidity helps these particles bond into a film that streaks instead of rinsing cleanly.

Spot cleaning often produces short-lived results because wind redistributes grime from patios, walkways, and driveways back onto screens and glass. A whole-area exterior cleaning approach reduces the overall debris available to settle and stick.

To keep outdoor surfaces cleaner longer, focus on routine light rinsing, better control of lawn-care debris, and cleaning surrounding concrete and pavers before buildup becomes heavy. Treat the patio zone as a connected system so your results last beyond the next breezy day.


Looking for Home resources?

Looking to enhance your living space and create a sanctuary that supports your well-being? Explore our home partners who offer a wide range of resources to elevate your home environment.


homeHLL x Editor


From Wild To Workable: Practical Ways To Reclaim Your Land

Land has a way of getting away from you. One season, it is just a few saplings near the fence line, a patch of brush behind the shed, or weeds reclaiming an old access road. Then suddenly, you are looking at a property that feels less like an asset and more like a problem with roots.


In this article, we will explore how to reclaim overgrown land with a strategy that improves safety, access, and long-term usability, without turning your first round of clearing into an endless maintenance cycle. Whether you own rural acreage, a hunting parcel, a farm edge, or a “someday” property you plan to build on, the goal is the same: bring the land back under control in a way that supports what you want it to become next.

No. 1

Start by Understanding What Your Land Is Really Hiding

Overgrowth can hide far more than tall grass and thorny brush. It can conceal hazards that create real risk for people, vehicles, livestock, and equipment. It can also mask problems that will influence how you clear and what the land can support afterward.

Common issues concealed by thick growth include old fencing, partial wire runs, buried debris, uneven ground, stump remnants, drainage failures, animal burrows, and invasive plants. In wetter regions or low spots, overgrowth may be hiding areas where water pools after heavy rain, which can complicate access, erode soil, or undermine future building plans.

Before you clear anything, take time to read the property like a manager, not a weekend warrior. Walk it slowly, ideally in good daylight, and treat the first walkthrough as information gathering rather than action.

Land assessment checklist

  • Identify where you need access most (driveway, trails, fence lines, gates, creek crossings)

  • Flag hazards such as downed trees, sinkholes, erosion channels, loose wire, or junk piles

  • Note plant types that signal invasive growth or aggressive regrowth potential

  • Observe water patterns after rainfall: puddling, runoff lines, muddy ruts, and soft ground

  • Photograph and mark areas that will require a different approach (steep slopes, wetlands, dense thickets)

This step prevents a common mistake: clearing everything just because it is there. Not every wild patch needs to disappear, and not every tree is a problem. Selective clearing is often the most sustainable approach because it preserves shade where needed, protects slopes from erosion, and keeps the property visually and ecologically balanced.

No. 2

Why Quick Fixes Often Create Bigger Maintenance Problems

It is tempting to jump in with a chainsaw or hire a basic brush cutter or basic mowing service that simply knocks everything down. That kind of “fast progress” can look satisfying for a weekend, but it often creates a second problem: what you leave behind.

When overgrowth is cut without a plan, the property may end up with stump fields, brush piles, torn soil, and rutted access lanes. Those conditions are not just messy, they are expensive in time and money because they invite follow-up work and increase the risk of injury.

Cut stumps can become trip hazards and can also damage tires and equipment. Brush piles attract pests and can become fire fuel during dry seasons. Disturbed soil is vulnerable to erosion, especially on slopes or near drainage paths. Heavy equipment can compact soil and leave deep ruts that hold water and quickly become impassable.

Invasive species add another layer of complexity. If you cut invasives at the wrong time or without proper follow-up, you can actually encourage regrowth by triggering sprouting or spreading seeds. The result is a property that looks “cleared” for a short period, then comes back worse.

A durable clearing plan considers what happens after the first cut. The goal is not a photo-op result. The goal is land that stays manageable through the next seasons, with less labor required to keep it that way.


No. 3

How Forestry Mulching Supports Healthier, More Manageable Ground

Forestry mulching is often a smart option when the objective is to remove brush and unwanted small trees without creating piles, burn zones, or bare, exposed soil. Instead of hauling debris away or leaving it in heaps, forestry mulching processes vegetation into a mulch layer on site.

That mulch is not just visual cleanup. It can play a functional role by helping the soil retain moisture, limiting erosion, and reducing how quickly some weeds return. It also provides a more finished, “managed” look than a rough cut-and-pile approach.

Forestry mulching is commonly used to:

  • Open up blocked trails and hunting lanes without turning them into muddy corridors

  • Improve access roads and edges where vehicles need predictable clearance

  • Clear around fence lines so boundaries are visible and maintainable

  • Reduce ladder fuels and improve fire safety in dry seasons

  • Prepare land for future use while preserving soil stability

This approach is often appealing for owners who want to reclaim space without making the land look scraped raw. When done properly, it gives you control while keeping the property’s surface protected and easier to maintain.

That said, even forestry mulching benefits from planning. It matters what you mulch, when you mulch it, and what your next step is. The most successful projects treat mulching as part of land management, not as a one-time event that magically stops nature from returning.

No. 4

Think Beyond Clearing: Decide What the Land Will Become

Clearing without a next step is one of the fastest ways to lose the gains you just paid for. Nature does not leave open ground alone. If you remove growth and do nothing else, regrowth begins immediately, often with the most aggressive species first.

Defining the land’s future use changes how you clear today. A trail system needs different widths, grading, and drainage planning than a potential homesite. A pasture edge needs different decisions than a wildlife corridor. A firebreak should be planned differently from a scenic view opening.

Clarify your goal before the equipment arrives. That goal becomes the blueprint for where you clear heavily, where you thin selectively, and where you intentionally leave natural cover.

Examples of “next step” land uses that shape clearing decisions

  • Access and mobility: stable routes for vehicles, ATVs, or equipment, with attention to drainage

  • Safety and fire prevention: defensible space, reduced brush density, and improved visibility

  • Recreation and hunting: shooting lanes, walking paths, and manageable undergrowth

  • Agricultural expansion: fence-ready edges, reduced brambles, and room for rotational use

  • Future building: site access, preliminary clearing, and attention to soil and water behavior

When you think this way, the clearing becomes purposeful. You are not just removing plants. You are shaping function: how you will move through the land, how you will maintain it, and what it will produce for you over time.


No. 5

Keep the Land Working for You After the First Clearing

Reclaimed land still needs attention, but the goal is to reduce that attention to a reasonable rhythm. A well-cleared property should not require constant rescue missions. It should need periodic check-ins and light maintenance that prevent small problems from becoming big ones again.

The most reliable approach is seasonal monitoring. Walk the key areas you cleared, especially edges where brush tends to creep back. Watch for invasive regrowth early, when it is easiest to control. Pay attention to drainage and soil stability after storms. If you have trails or access roads, look for rut formation and correct water flow before damage becomes structural.

Maintenance also becomes easier when you keep boundaries visible. Fence lines, gates, and corners are where overgrowth returns quietly, and once those areas disappear, everything else becomes harder: access, property inspection, repairs, and even basic navigation.

If you want the land to stay usable, protect what you cleared by reinforcing its purpose. Trails should be walked or driven. Access routes should be kept open. Managed edges should be inspected. A property stays “reclaimed” when you treat it like an active asset, not a passive holding.

Takeaways

Reclaiming overgrown land starts with understanding what the vegetation is hiding, from debris and drainage issues to invasive plants and safety hazards. A careful assessment lets you clear selectively and avoid turning an improvement project into a long-term headache.

Quick fixes often create hidden costs, including stump hazards, brush piles, erosion, and rapid regrowth. A lasting result comes from choosing methods that support soil stability and planning for what happens after the first cut.

Forestry mulching can be a practical, land-friendly approach when you want usable space without bare ground and cleanup piles. The most successful clearing projects define the land’s next purpose first and then maintain it through simple seasonal checks.


Looking for resources?

At Hello Lovely Living, we aim to empower you to earn and save money and time while benefiting from our expansive network of home, life, wellness, travel, work-from-home, career, and business resources and opportunities. Discover a wealth of tools to support your journey.


5 Ways Home Inspections Help Prevent Unexpected Repair Expenses

Nobody likes a surprise bill — especially when it runs into the thousands. Yet for many homeowners, that's exactly what happens when a hidden problem quietly grows behind a wall or under a floor for months or years before revealing itself in the most inconvenient way possible. A leaking pipe that warps the subfloor. A deteriorating chimney that damages the roofline. An aging electrical panel that finally gives out during a heat wave.


The good news is that most of these surprises aren't truly unforeseeable. They're just unseen — until a trained eye looks at the right places.

In this article, we will explore five practical ways home inspections help prevent unexpected repair expenses, protect your budget, and replace reactive “emergency mode” decisions with informed planning. Whether you are buying, selling, or simply trying to maintain your property more intelligently, a well-timed inspection can uncover risks early, clarify priorities, and help you allocate money where it will matter most.

No. 1

Early Detection Stops Small Issues from Becoming Big Ones

Home systems don't fail overnight. Most major repairs start as minor issues that gradually worsen over time — a slow drain that signals a partial blockage, a small gap in flashing that lets moisture creep under the shingles, a hairline crack in the foundation that widens with each freeze-thaw cycle. Left alone, each of these can escalate into a repair that costs ten times more than the original fix would have.

A professional inspection identifies these early warning signs before they compound. The inspector isn't just documenting what's broken — they're flagging what's heading in the wrong direction. That context changes how a homeowner responds: instead of waiting for a failure, they can schedule a repair on their own terms, at a reasonable cost, without the pressure of an emergency situation driving up the price.

No. 2

It Creates a Maintenance Roadmap

One of the most underrated outcomes of a thorough home inspection isn't what it catches — it's the documentation it creates. A detailed report gives homeowners a room-by-room, system-by-system snapshot of the property's current condition. That snapshot becomes a reference point for everything that follows.

When you search for a trusted home inspection near me, you're not just looking for someone to check off a list — you're looking for a professional who can explain the findings in practical terms and help you understand what needs attention now versus what can wait.

Modern property inspections increasingly rely on technology that goes beyond what can be spotted during a standard walkthrough. Firms like LunsPro Inspection Group incorporate tools such as infrared imaging and drone technology into residential and commercial inspections to help uncover issues that may not be immediately visible to the naked eye.


No. 3

Inspections Uncover Costly Hidden Systems Issues

Structural elements and major home systems — the roof, foundation, HVAC, electrical, and plumbing — are where the most expensive repair bills come from. They're also the parts of a home that most people never think about until something stops working. An inspector evaluates each of these systematically, looking for signs of wear, aging, improper installation, or deferred maintenance that could translate into a significant expense down the line.

According to Bankrate's 2025 Hidden Costs of Homeownership Study, home maintenance averages $8,808 annually for a typical U.S. homeowner, and overall hidden homeownership costs reach about $21,400 per year. A professional inspection that surfaces a failing HVAC system or a roof approaching its end of life gives homeowners the chance to budget for those costs proactively — rather than absorbing them as a sudden, unplanned hit to their finances.

No. 4

It Reduces Reliance on Emergency Repairs

Emergency repairs are almost always more expensive than planned ones. When something breaks unexpectedly — a burst pipe in winter, a failed HVAC unit in the middle of summer, a sudden electrical fault — homeowners pay a premium for urgency. They're booking whoever is available, often at after-hours rates, and accepting whatever timeline and pricing the market will bear in that moment.

Regular inspections interrupt that cycle. Here's what proactive inspection typically looks like in practice:

  • Roof condition is assessed before leaks develop, allowing time to schedule re-roofing during a contractor's slower season

  • Plumbing vulnerabilities are caught early, before a small leak becomes water damage requiring subfloor or drywall replacement

  • HVAC components near the end of their lifespan are identified, giving homeowners a window to plan a replacement rather than facing a sudden loss of heating or cooling

  • Electrical panels with outdated or dangerous wiring are flagged, reducing fire risk and the cost of emergency remediation

Each of these scenarios follows the same pattern: early information leads to better timing, and better timing leads to lower cost.


No. 5

It Helps New Homeowners Avoid Inherited Problems

Buying a home means taking on whatever the previous owners left behind — including deferred maintenance they decided not to address. Some of that deferred work is cosmetic. Some of it is structural. And without an inspection, there's no reliable way to tell the difference before you're the one holding the repair bill.

Pre-purchase inspections are the most well-known application, but inspections are also valuable for homeowners who have lived in a property for years without ever having a formal review done. Systems age. Conditions change. What was in good shape five years ago may not be in good shape today.

Scheduling a periodic inspection — even outside of any transaction — gives homeowners an updated picture of where their property stands and what to prioritize in the coming years. That kind of visibility is exactly what turns reactive, expensive repairs into manageable, planned maintenance.

Takeaways

Unexpected home repair costs are one of the most common financial stressors for homeowners. Inspections don't eliminate repair expenses — homes age, systems wear out, and maintenance is always part of the picture. But they do change the relationship between homeowner and home from reactive to informed. And that shift, consistently applied, tends to save a significant amount of money over time.


Looking for Home resources?

Looking to enhance your living space and create a sanctuary that supports your well-being? Explore our home partners who offer a wide range of resources to elevate your home environment.


homeHLL x Editor


The Everyday Signs Your Home May Be Shifting Below The Surface

There is a strange moment that happens in many homes before anyone realizes something bigger is unfolding. It usually starts with something so minor that it feels easy to dismiss: a hairline crack above a doorway, a floorboard that creaks in a new place, or a kitchen window that suddenly sticks on humid afternoons.


Most homeowners ignore these changes at first, and that is understandable. Life is busy, budgets are real, and small annoyances rarely feel urgent when you are juggling work, family logistics, and an endless list of household tasks.

In this article, we will explore the everyday signs that can suggest subtle foundation movement, why those signs are often missed, and what you can do to respond early and intelligently. If you have started noticing unusual changes around your house, companies like Acculevel often explain that small household annoyances sometimes point toward foundation movement happening quietly underneath the structure, even when nothing looks dramatic.

No. 1

Doors Suddenly Develop Personalities

One sticky door is not automatically a red flag. Wood expands and contracts with humidity, hinges loosen over time, and older homes develop quirks.

But when several doors begin sticking, scraping, or swinging open on their own, it can indicate that the frames are no longer square. That misalignment can occur when parts of the home settle at different rates, subtly changing the geometry of door openings.

What door issues may look like

Watch for patterns rather than isolated incidents:

  • Multiple doors rubbing at the top corner near the latch side

  • A door that will not latch unless you lift it slightly

  • A door that drifts open or closed on its own, even with no airflow

  • Sudden gaps between the door and frame that were not there before

  • Strike plates that no longer line up with the latch

How to rule out simple causes first

Before assuming structural movement, do a quick, practical check:

  • Tighten hinge screws and inspect for stripped holes

  • Confirm the door is not swelling from moisture or paint buildup

  • Check whether one specific room is more humid than the rest

  • Look for a consistent pattern across multiple doors and floors

If the issue is spreading to more than one doorway or keeps returning after basic fixes, it is worth paying closer attention to what else is changing in the home.

No. 2

Cracks Around Windows Start Showing Up

Small drywall cracks happen in almost every home eventually. Materials shift slightly with temperature changes, and minor settling can leave a hairline mark that never becomes a real problem.

However, certain crack shapes and locations deserve a closer look. Cracks are not just cosmetic; they can be clues about where stress is concentrating within the structure.

Crack patterns that deserve attention

Not every crack is “bad,” but these are worth monitoring:

  • Diagonal cracks radiating from the corners of windows or doors

  • Jagged cracks that reappear after patching

  • Cracks that grow longer over time or widen seasonally

  • Stair-step cracks along brick or block walls (often seen outside)

  • Gaps that form between the trim and the wall

What to track so you are not guessing

A simple tracking habit can clarify whether the change is active or stable:

  • Take dated photos from the same angle every month

  • Mark the crack endpoints lightly with a pencil to see if it lengthens

  • Note whether changes correlate with heavy rain, drought, or freeze-thaw cycles

  • Track whether doors and windows nearby are also changing

Homes often “tell stories through patterns,” and recurring cracks in the same area can be a sign that the underlying stress has not been addressed.


No. 3

Floors That Feel Slightly “Wrong”

Floor changes are one of the easiest symptoms to normalize because they happen slowly. People adapt. Furniture stays in place. Daily routines continue, and the shift becomes part of the background.

Still, noticeable sloping or soft spots can indicate that support conditions under the floor are changing, whether from settlement, moisture, or structural stress.

Subtle signs of uneven floors

You may notice small clues before anything looks obvious:

  • An office chair that rolls in one direction repeatedly

  • A ball or small object that consistently drifts across the floor

  • A “bouncy” or springy area when you walk across a room

  • New squeaks concentrated in one zone

  • Tiles are cracking, or grout is separating in a localized area

Where floor symptoms often show up

Certain areas tend to reveal problems sooner:

  • Near exterior walls where drainage issues concentrate

  • Around fireplaces, which are heavy and sensitive to settlement

  • Near staircases where framing transitions occur

  • In older additions, where construction methods may differ

A home does not need to be perfectly level to be healthy, especially if it is older. The key is change: if the floor feels different from how it used to, that information matters.

No. 4

Moisture Usually Sits at the Center of It

Water is one of the most common drivers of foundation movement. Too much moisture can cause some soils to expand, while prolonged dryness can cause shrinkage. That constant expansion and contraction changes how the ground supports the home.

The challenge is that the cause may look harmless at first: clogged gutters, a downspout that dumps water too close to the foundation, or a low spot in the yard that holds runoff after storms.

Common moisture sources that affect foundations

Look for these issues around the perimeter of the home:

  • Downspouts discharging next to the foundation

  • Gutters overflowing during heavy rain

  • Soil grading that slopes toward the house instead of away from it

  • Mulch piled too high against the foundation wall

  • Leaky outdoor spigots or irrigation lines

  • Standing water near patios, walkways, or basement walls

Practical drainage improvements to consider

Some fixes are simple and preventative:

  • Clean gutters regularly and confirm they drain freely

  • Extend downspouts away from the home

  • Re-grade soil to direct water away from the foundation

  • Repair broken drains and check irrigation spray patterns

  • Use splash blocks where needed to prevent erosion

Lasting stability often depends less on the concrete itself and more on keeping the surrounding soil conditions consistent.


No. 5

Windows Suddenly Become Difficult

Windows are another classic clue because they depend on alignment. When the structure shifts, windows can rack slightly, putting pressure on the frame and affecting how smoothly they open, close, and lock.

People often assume the hardware is failing, which is fair. But when multiple windows begin acting up at the same time, it is wise to look for structural causes.

Common window symptoms to watch for

  • Windows sticking halfway open or refusing to close fully

  • Locks no longer lining up correctly

  • Drafts where none existed before

  • Small gaps near corners of the frame

  • Cracks spreading outward from window corners

A quick way to spot a pattern

Try this simple scan:

  • Check windows on the same side of the house first

  • Compare one floor to another if you have multiple levels

  • Note whether symptoms are worse after rain or seasonal changes

  • Look at nearby drywall and trim for matching cracks or gaps

When window problems cluster in one area, it may indicate that portion of the home is experiencing different movement than the rest.

No. 6

Basements Usually Spill the Truth First

Basements and crawl spaces tend to reveal foundation stress early because they are closest to the soil and most exposed to moisture pressure. Musty smells, damp corners, water stains, and certain crack types can show up downstairs before you see anything dramatic upstairs.

Moisture pressure builds as saturated soil presses against basement walls, and over time, that pressure finds weak points.

According to FEMA, maintaining proper drainage around the home remains one of the most effective ways to reduce structural damage risks tied to moisture and shifting soil conditions. That advice can feel dull until you notice that your basement smells earthy after storms, or you find recurring dampness that does not match a plumbing leak.

Basement and crawl space signs that matter

Pay attention to these conditions, especially when they repeat:

  • Persistent musty odor or “wet cardboard” smell after rain

  • Water stains, efflorescence (white mineral deposits), or peeling paint

  • Dampness is concentrated at the cove joint where the floor meets the wall

  • Horizontal wall cracks or bowing walls

  • Rusting metal, warped wood, or mold growth in localized areas

What to do if you find basement moisture

Take a measured approach:

  • Confirm whether the moisture is from outside (rain patterns) or inside (plumbing)

  • Document where dampness appears and how soon after storms it shows up

  • Improve exterior drainage first when possible

  • Avoid sealing problems without addressing water entry, since trapped moisture can create new issues

Basements rarely hide problems well, which makes them useful early-warning zones.

No. 7

Tiny Cosmetic Changes Add Up

Foundation movement rarely announces itself with one dramatic symptom overnight. More often, it shows up as a collection of smaller changes that feel unrelated until you step back and connect them.

A baseboard gap here, a cabinet seam there, a recurring tile crack in the same corner. Individually, these can be shrugged off. Together, they can suggest that movement is ongoing.

Small interior signs that can cluster together

  • Baseboards separating slightly from the wall

  • Crown molding gaps that appear or widen

  • Cabinets pulling away from walls or developing uneven doors

  • Tile cracks that appear without impact damage

  • Nail pops in drywall that keep returning

Companies like Acculevel often encourage homeowners to pay attention when several subtle changes appear simultaneously because structural movement tends to reveal itself gradually rather than dramatically. The value is in noticing the combination, not obsessing over a single imperfection.

No. 8

Why People Put Off Looking Into It

Foundation concerns sound stressful, expensive, and disruptive. It is natural to hope the issue is cosmetic, seasonal, or “just the house settling.”

The problem is that movement usually continues unless the underlying cause is addressed, especially when moisture and soil conditions are the drivers. Seasonal cycles can repeatedly stress the same areas of the foundation, and the longer those patterns continue, the more likely it is that small symptoms become larger ones.

Common reasons homeowners delay action

  • The signs feel minor and easy to rationalize

  • Repairs sound expensive, so avoidance feels safer short-term

  • People worry they will be pressured into big projects

  • It is difficult to know who to trust without clear information

  • The home still “functions,” so urgency feels low

A more practical mindset

Instead of jumping to worst-case conclusions, aim for early clarity:

  • Track symptoms for 30 to 60 days

  • Note whether changes accelerate after storms or drought

  • Address drainage and gutter issues immediately

  • Consult a qualified professional when multiple signs appear together

Early investigation is often less disruptive than late-stage repairs, and it can prevent you from spending money on repeated cosmetic fixes that never hold.

Takeaways

Small changes like sticking doors, window misalignment, and recurring cracks are often easy to ignore, but patterns across multiple areas can suggest movement beneath the home. The most useful approach is to look for changes that repeat, spread, or return after repairs.

Moisture management is frequently at the center of foundation shifting because soil expands and contracts as water conditions change. Consistent drainage, properly functioning gutters, and downspouts that carry water away from the house can reduce long-term stress on the structure.

If several subtle symptoms appear at the same time, it is worth documenting them and seeking clarity before the issues grow. Paying attention early helps you make calmer, more cost-effective decisions later.


Looking for Home resources?

Looking to enhance your living space and create a sanctuary that supports your well-being? Explore our home partners who offer a wide range of resources to elevate your home environment.


homeHLL x Editor


Why Your Pool Keeps Losing Water And How Leak Detection Helps

Pools lose water. That's just a fact of having one — evaporation is real, especially in hot climates, and splashing accounts for more than most people think. But there's a point where the water loss stops being normal and starts being a sign of something that needs attention.


In this article, we will explore how to tell the difference between normal water loss and a true leak, where pools most commonly fail, why do-it-yourself checks often miss the real problem, and what professional leak detection actually involves. If you have been topping off your pool far more often than usual, a structured approach can help you stop guessing and start narrowing down the cause.

If you've been topping off your pool more than usual and wondering whether it's just the weather or something more, here's how to think through it.

No. 1

How Much Water Loss Is Normal

A pool typically loses around a quarter inch of water per day to evaporation — more in dry, hot, or windy conditions. Over a week, that adds up to roughly an inch and a half to two inches. If you're losing significantly more than that, a leak is likely the cause.

A quick test: fill a bucket with pool water, set it on a pool step, and mark the water level in both the bucket and the pool. Check them 24 hours later. If the pool has dropped more than the bucket, water is leaving through somewhere other than the surface.

No. 2

Where Pools Actually Leak

People assume a pool leak is always in the shell — a crack in the plaster or a gap in the tiles. That does happen. But the plumbing is actually a more common source, and it's considerably harder to find without proper equipment.

The main areas where leaks typically develop include:-

Plumbing lines: the pipes that circulate water underground are subject to ground movement, root intrusion, and joint failure over time. A slow leak in an underground line can go unnoticed for months.

Fittings and returns: the fittings where water enters and exits the pool, including return jets and main drains, can develop leaks at their connection points.

Skimmer: the skimmer connects the pool to the circulation system. Cracks in the skimmer body or at the junction with the pool shell are a common source of leaks.

Equipment pad: pump seals, valve o-rings, and filter connections can all fail and lose water at the equipment level.

Shell and finish: cracks in plaster, gunite, or fiberglass, particularly around fittings or in the floor, can allow water to seep out.


No. 3

Why DIY Detection Usually Falls Short

You can sometimes spot an obvious shell crack or a visibly dripping fitting. But most leaks aren't visible. Underground plumbing leaks, small shell cracks below the waterline, and fitting failures all require pressurizing the plumbing system and using listening equipment or dye testing to isolate the source.

Without proper equipment, the process is mostly guesswork — and guessing wrong means opening up concrete or excavating plumbing that turns out to be fine, which is expensive and disruptive.

No. 4

What Professional Leak Detection Involves

A professional pool leak detection visit typically starts with a full inspection of the equipment pad, fittings, and any visible pool surfaces. From there, the plumbing is pressure-tested — each line is isolated and pressurized to see whether it holds. Lines that drop pressure have leaks, and the location is then narrowed down using listening devices that pick up the sound of water escaping underground.

According to the Pool & Hot Tub Alliance, undetected pool leaks are one of the leading causes of structural damage in residential pools over time, because water saturating the surrounding soil can undermine the shell and affect the surrounding landscape.

Catching a leak early is almost always cheaper than dealing with the consequences of one that's been running for months.


No. 5

Getting It Fixed the Right Way

Detection and repair are often offered together by the same company, which makes practical sense. Once the leak is found, you want it fixed by someone who already understands the plumbing layout and the scope of the problem.

For pool owners dealing with persistent water loss, pool leak detection by Gold Star Leak & Repair focuses on locating the exact source of the problem before any repair work begins. Their diagnostic process typically involves evaluating plumbing lines, fittings, and structural components to identify where water loss is occurring, helping make repairs more accurate and less disruptive.

No. 6

What to Do While You Wait for a Technician

If you're confident there's a leak and a detection appointment is scheduled, a few things help in the meantime:

• Keep the pool filled to its normal operating level so the equipment continues to function safely.

• Running the system on a normal schedule — shutting the pump off can sometimes mask symptoms and make detection harder.

• Note whether the loss rate changes when the pump is off versus on — that information is useful for the technician and can help point toward pressure-side vs. suction-side plumbing.

Takeaways

A pool that keeps losing water is telling you something. In many cases, the issue is manageable, and addressing it early helps reduce the risk of costly damage later. If topping off has become part of your weekly routine, a professional leak detection visit is the most direct way to find out what's actually happening and get it sorted before a small problem turns into a big one. 


Looking for Home resources?

Looking to enhance your living space and create a sanctuary that supports your well-being? Explore our home partners who offer a wide range of resources to elevate your home environment.


homeHLL x Editor


The Best Time Of Year To Start Planning Outdoor Holiday Decor

The holiday season is meant to feel joyful, not frantic. Yet many homeowners end up scrambling in late November to untangle light strands, replace broken clips, and make rushed buying decisions after the best products and appointment slots are already gone. That last-minute approach often leads to higher costs, fewer design options, and a display that looks pieced together rather than intentional.


In this article, we will explore the best time of year to start planning custom holiday lighting and decor, with a practical, month-by-month mindset that reduces stress and improves results. You will also learn how early planning supports safer installation, smarter budgeting, better product availability, and a more cohesive design that complements your home’s architecture and landscaping.

No. 1

Why Early Planning Leads to Better Outdoor Holiday Decor

Planning early is not about doing holiday work year-round; it is about giving yourself enough time to make good decisions and avoid the seasonal bottleneck. The best-looking outdoor displays are rarely rushed. They are usually planned with attention to layout, color temperature, focal points, and the practical details that keep decorations secure through wind, rain, and cold.

What improves when you plan months ahead

  • Design quality improves because you have time to map out a cohesive look

  • Budgeting is easier because purchases can be spread out gradually

  • Safety increases because rooflines, outlets, and attachment points can be addressed in warm weather

  • Scheduling is simpler because professional installers book up quickly in peak season

  • Product selection is stronger because you can shop before inventory is picked over

Common problems that early planning helps you avoid

  • Discovering burned-out strands only after you have already started hanging lights

  • Realizing you lack outdoor-rated extension cords or GFCI protection at the last minute

  • Settling for mismatched colors because the preferred bulbs are sold out

  • Needing urgent roof or gutter repairs when weather conditions are already risky

No. 2

Why Spring Is the Ideal Starting Point

Spring is often overlooked as a holiday decor planning season, but it is one of the most strategic times to begin. Winter weather has just passed, the exterior of the home is easier to inspect, and outdoor work is safer and more comfortable to complete.

Spring planning also has a psychological advantage: it allows you to make calm, practical decisions long before holiday deadlines, shipping cutoffs, and installation queues begin.

Spring checklist: what to inspect right away

  • Roof condition, including shingles, flashing, and any visible soft spots

  • Gutters and drainage to confirm they can support clips and do not overflow

  • Fascia boards, soffits, and trim where lights are commonly attached

  • Exterior outlets and wiring for safe, reliable power access

  • Trees and shrubs near rooflines, windows, and walkways

Spring checklist: what to review in storage

  • Light strands for dead sections, flickering bulbs, or damaged plugs

  • Timers, smart plugs, and photocells for proper function

  • Extension cords to confirm they are outdoor-rated and long enough

  • Stakes, clips, hooks, and fasteners so you do not rely on improvised solutions

  • Inflatable or motorized decorations for fan function and fabric wear

Taking inventory in spring prevents the common cycle of discovering problems in November when there is little time to replace or repair anything.


No. 3

How Summer Planning Makes Budgeting and Design Easier

Summer is an excellent time to shift from inspection to design and budgeting. Since the holidays are still months away, you can compare options without pressure and decide where a small upgrade will make the biggest visual difference.

Summer planning also helps you avoid making expensive choices in a single weekend, which is when many households are already spending more on travel, gifts, and events.

Budget-friendly ways to build your display over time

  • Replace lights in stages, starting with roofline and entryway strands

  • Upgrade to LED options to reduce energy use and bulb replacements

  • Add one “feature element” per year, such as a lit garland or pathway markers

  • Watch for early-season pricing rather than peak-season markups

  • Test and replace storage bins to prevent moisture damage to decor

Design planning tasks that fit well in summer

  • Sketch a simple front-elevation plan of your home and yard

  • Choose a consistent lighting style and color temperature

  • Identify 2–3 focal points instead of decorating every surface

  • Coordinate decor scale so items look balanced from the street

  • Decide which areas need subtle lighting versus high-impact accents

A polished display usually follows one clear theme, even if the theme is simple. Summer is when you can select that theme and build around it intentionally.

No. 4

Roofline and Electrical Prep Improve Safety

Outdoor holiday decorating often involves ladders, roof edges, and electrical connections, which makes safety a top priority. Handling prep work in spring or summer reduces the risk of working in cold, wet, or windy conditions when slips and falls are more likely.

Even if you plan to hire professionals, knowing your roofline is in good shape and your outlets are accessible improves the installation process and reduces surprises.

Roofline areas to check before decorating season

  • Loose shingles or flashing that can catch clips or create leaks

  • Weak or rotting fascia boards that may not hold attachments

  • Rusted or unstable gutters that could bend under pressure

  • Siding damage that could worsen with additional fasteners

  • Branches that scrape roof edges and interfere with lighting lines

Electrical and power planning essentials

  • Confirm outdoor outlets are GFCI-protected

  • Identify where timers or smart controls will be placed

  • Plan cord routes to minimize tripping hazards near walkways

  • Use outdoor-rated cords and weatherproof connection covers

  • Avoid overloading circuits by estimating total wattage in advance

Good safety planning is not just about preventing accidents. It also protects your decor investment by reducing the chance of lights failing due to water intrusion or poor connections.


No. 5

Tree Trimming and Landscaping Create a Cleaner Display

Landscaping is the structure that your holiday decor sits on. Overgrown branches can block roofline lights, hide pathway accents, or create cluttered sightlines that make even expensive decor look messy. By trimming and shaping landscaping in late spring or summer, you create clean lines that make lighting look deliberate.

Landscaping elements that improve decor impact

  • Trees with clear trunk lines for wrapping lights evenly

  • Shrubs trimmed to a consistent height for balanced illumination

  • Garden bed edges that help define where decorations should go

  • Walkways cleared and bordered so pathway lights look intentional

  • Entryway plants shaped to frame wreaths and garlands

Practical benefits of trimming early

  • Less risk of branches rubbing through wires during windy weather

  • Fewer leaves and debris caught in light strands or clips

  • Easier access for ladder placement and installation routes

  • Better visibility from the street, which improves curb appeal

The strongest displays usually rely on fewer, clearer focal areas rather than decorations placed everywhere. Clean landscaping makes those focal points stand out.

No. 6

Storage Preparation Protects Decorations and Saves Time

Holiday decor often fails early, not because it is low quality, but because it was stored poorly. Heat, moisture, and crushed cords can shorten the life of lights and ornaments. Spring and summer are ideal seasons to reorganize and upgrade storage so setup becomes faster and less frustrating.

A simple system for faster setup later

  • Label bins by location, such as roofline, porch, trees, and pathway

  • Separate fragile items so they are not stacked under heavy lights or hardware

  • Coil light strands neatly and store them with the correct clips

  • Keep a small “replacement kit” with extra bulbs, fuses, and fasteners

  • Store everything in a dry space to reduce corrosion and mildew

What to test before you put items back into storage

  • Plug in every strand to check for dead sections and flicker

  • Inspect cords for cracking, exposed wire, or loose plugs

  • Confirm timers and smart outlets still connect and switch reliably

  • Check inflatables for fan noise, fabric thinning, and seam wear

When storage is organized by location and function, decorating becomes a sequence of simple steps instead of a multi-hour sorting project.

No. 7

Early Planning Reduces Stress and Improves the Final Result

The holiday calendar fills up quickly with family events, travel, shopping, and end-of-year work deadlines. Outdoor decorating becomes much more enjoyable when it is not competing with everything else.

Early planning gives you breathing room. Instead of rushing decisions, you can make small progress over time and enjoy the process of building a display that truly fits your home.

What homeowners typically gain by starting early

  • More control over costs and fewer impulse purchases

  • Better access to installers, consultations, and preferred schedules

  • Time to fix small exterior problems before they affect installation

  • A cohesive look that feels polished rather than improvised

  • More time in December to enjoy the season instead of managing it

A realistic planning timeline to follow

  • Spring: inspect roofline, outlets, and existing decor inventory

  • Summer: finalize design theme, budget, and any key purchases

  • Early fall: test everything again, replace essentials, confirm installation dates

  • Late fall: install with confidence, using prepared attachment points and clean storage

This timeline prevents last-minute surprises and makes outdoor decorating feel like a planned upgrade, not a yearly emergency.

Takeaways

Starting outdoor holiday decor planning in spring and summer gives you time to inspect your home, test your inventory, and address safety concerns before cold weather complicates installation. It also helps you design a cleaner, more cohesive display instead of relying on rushed decisions.

Summer is ideal for building a realistic budget, shopping strategically, and choosing a theme that complements your home and landscaping. By spreading tasks across months, you reduce peak-season stress and avoid paying premium prices due to limited availability.

When you treat outdoor holiday decor as a planned project, you protect your home, your time, and your investment in seasonal displays. The result is a safer installation process and a better-looking presentation you can enjoy all season long.


Looking for Home resources?

Looking to enhance your living space and create a sanctuary that supports your well-being? Explore our home partners who offer a wide range of resources to elevate your home environment.


homeHLL x Editor


How Salt Air Changes The Way Coastal Windows Age Over Time

Living near the coast offers breathtaking views, calming ocean breezes, and a lifestyle many homeowners genuinely enjoy. However, beachfront and near-shore environments also create conditions that can quietly accelerate exterior wear on a home, especially on surfaces that face constant wind and moisture. Windows are among the most exposed building components, and their performance can decline faster in coastal climates than many homeowners expect.


In this article, we will explore how salt air changes the way coastal windows age over time, why the damage often appears as haze or stubborn spotting, and what homeowners can do to protect glass, seals, and frames. With the right upkeep and a few preventative choices, coastal windows can retain their clarity, efficiency, and curb appeal far longer.

No. 1

Why Salt Air Is So Damaging to Coastal Windows

Ocean air contains microscopic salt particles that travel inland with wind and humidity. These particles settle on glass, lodge in corners around frames, and mix with moisture to form a thin, stubborn film. Unlike ordinary dust, salt is hygroscopic, meaning it attracts and holds water from the air. That constant dampness creates ideal conditions for corrosion, seal fatigue, and surface etching.

Coastal environments can also intensify aging through other factors that work alongside salt:

Environmental conditions that amplify salt damage

  • High humidity that keeps residue damp longer

  • Frequent wind that continuously deposits new particles

  • Strong UV exposure that breaks down certain finishes and sealants

  • Temperature swings that stress window seals and frame joints

  • Airborne sand or grit that can micro-scratch surfaces during cleaning

Over time, these combined stressors can shorten the functional lifespan of windows and increase the likelihood of repairs.

No. 2

Salt Residue Reduces Glass Clarity Over Time

One of the earliest and most noticeable effects of coastal exposure is reduced window clarity. Many homeowners near the ocean find that their windows look cloudy shortly after cleaning, or develop a hazy film that feels impossible to eliminate with basic methods.

This happens because salt residue bonds to glass, then traps moisture and other minerals on the surface. When sunlight hits the film, it can create glare, dullness, and a persistent “foggy” look that reduces the value of one of the biggest benefits of coastal living: the view.

Common signs of salt buildup on glass

  • A cloudy or dull appearance, especially in direct sunlight

  • White spotting after rain or morning condensation

  • Streaks that reappear quickly after cleaning

  • Rough-feeling patches that suggest mineral deposits

  • Reduced brightness and natural light entering the home

How salt can permanently affect glass

If salt deposits remain in place for long periods, they may contribute to etching. Etching is not just surface dirt; it is a physical change in the glass caused by prolonged mineral and moisture interaction. Once etching occurs, the window may never return to its original clarity, even with professional cleaning, and replacement could become the only true fix.


No. 3

Coastal Weather Can Accelerate Window Seal Failure

Modern windows rely on seals to block air and moisture, improve insulation, and maintain energy efficiency. In coastal environments, seals are under more stress due to constant humidity, salt exposure, and repeated pressure changes from storms and high winds.

As seals weaken, windows can start to show performance issues that go beyond cosmetic haze.

Symptoms of deteriorating window seals

  • Condensation or fogging between panes in double-pane windows

  • Drafts or airflow near the frame

  • Higher indoor humidity near windows

  • Noticeable temperature differences close to glass surfaces

  • Rising heating and cooling costs

Why seal deterioration matters

A compromised seal allows moisture intrusion, which can lead to persistent fogging and may also encourage mold or mildew around frames and sills. It also reduces the window’s insulating value, forcing HVAC systems to work harder and potentially increasing energy bills over time.

No. 4

Window Frames React Differently to Salt and Humidity

The frame material plays a major role in how windows age near the ocean. Even when the glass appears manageable, the frames may be degrading in ways that are less obvious until the damage becomes costly.

How common window frame materials age in coastal air

  • Metal frames

    • More vulnerable to corrosion and oxidation

    • Protective coatings can break down, leading to discoloration and rust

    • Hardware, fasteners, and tracks may seize or degrade

  • Wood frames

    • Absorb moisture in humid air unless properly sealed

    • Can swell, warp, or soften over time

    • Increased risk of rot if paint or sealants fail

  • Vinyl frames

    • Generally more resistant, but still collect salt film

    • Can fade or become brittle with strong UV exposure

    • Tracks can accumulate gritty residue that affects operation

Frame-related issues homeowners often notice

  • Windows becoming harder to open or close

  • Flaking paint, bubbling finishes, or surface pitting

  • Visible rust spots on metal components

  • Soft or swollen wood near corners and sills

  • Gaps that allow air infiltration

Because frames are structural, deterioration here can eventually affect water intrusion resistance and overall window stability.


No. 5

Why Rainstorms Do Not Truly Clean Coastal Windows

It is easy to assume rain “washes” windows, but coastal rain is rarely clean. Moisture in coastal air often contains dissolved salt and picks up pollutants, sand, and minerals as it moves. When rain hits the glass, it can spread these materials across the surface, and as the water evaporates, it leaves behind spotting and streaking.

Coastal winds can also blow new debris onto wet windows immediately after storms, increasing residue adhesion.

What rain leaves behind on coastal glass

  • Salt crystals that dry into visible streaks

  • Mineral deposits that cause spotting

  • Grit that can scratch glass during wiping

  • A thin film that dulls shine and clarity

As a result, homeowners may see windows looking worse after storms, not better, especially when sunlight reveals dried deposits.

No. 6

The Importance of Routine Window Cleaning in Coastal Areas

While no homeowner can eliminate

entirely, consistent cleaning and inspections dramatically reduce its long-term impact. Routine cleaning helps remove corrosive residue before it can etch glass, weaken finishes, or damage seals and hardware.

For many coastal homeowners, the key is frequency and technique. Standard household methods may remove surface dirt, but salt residue often requires more thorough rinsing, careful product choice, and methods that avoid grinding grit into the glass.

Benefits of consistent coastal window cleaning

  • Preserves glass clarity and maximizes ocean views

  • Reduces the chance of permanent etching

  • Helps identify early seal or frame issues before they become major repairs

  • Improves natural light and interior brightness

  • Enhances curb appeal and overall exterior appearance

Homeowners searching for the Best window cleaner near Topsail Beach, NC often prioritize services experienced with coastal properties and salt residue removal. Coastal window cleaning is less about making glass look good for a day and more about protecting the window system over the long term.

What to look for in a coastal window cleaning routine

  • More frequent cleaning during windy or storm-heavy seasons

  • Gentle, non-abrasive tools that reduce scratching risk

  • Thorough rinsing to remove salt rather than spread it

  • Attention to corners, tracks, and frame edges where residue concentrates

  • Periodic inspection of seals, hardware, and drainage channels

No. 7

Long-Term Prevention Strategies for Coastal Window Protection

Cleaning helps, but preventative measures can further slow window aging and reduce maintenance demands. The best approach is a combination of material choices, protective upgrades, and consistent monitoring.

Practical ways to extend window lifespan near the ocean

  • Choose corrosion-resistant hardware and components when replacing windows

  • Consider protective coatings designed to reduce mineral adhesion

  • Maintain paint, sealants, and exterior finishes on frames and trim

  • Inspect caulking and weatherstripping regularly and re-seal as needed

  • Keep tracks clean so windows operate smoothly and drain properly

  • Address small issues early to avoid moisture intrusion and hidden damage

When replacement may be the smarter option

If windows show repeated seal failure, permanent haze from etching, or structural frame deterioration, repair may become less cost-effective than replacement. In those cases, selecting products designed for coastal climates can reduce repeat problems and improve both energy efficiency and durability.

Takeaways

Coastal windows age differently because salt particles, humidity, wind, and UV exposure combine to speed up wear on glass, seals, and frames. What starts as mild haze or spotting can develop into permanent clarity loss and performance issues if left untreated.

Routine cleaning and early inspections are among the most effective ways to prevent long-term damage. Salt residue is persistent, and coastal rain often adds to the buildup rather than removing it, which is why maintenance must be proactive.

Homeowners can further protect their investment by choosing coastal-appropriate materials, maintaining frame finishes, and addressing seal problems early. With a consistent strategy, it is possible to preserve window clarity, comfort, and curb appeal for years in an oceanfront environment.


Looking for Home resources?

Looking to enhance your living space and create a sanctuary that supports your well-being? Explore our home partners who offer a wide range of resources to elevate your home environment.


homeHLL x Editor


Why Curb-Appeal Neighborhoods Go Big On Holiday Lights

When the holiday season arrives, some neighborhoods evolve into full-scale festive destinations, complete with sparkling rooflines, glowing pathways, coordinated displays, and front yards that look like they belong in a movie scene. These are the streets people detour to see, slowly driving through with hot drinks in hand just to take it all in. Notably, the neighborhoods that decorate most impressively in December are often the same communities known for strong curb appeal throughout the year.


In this article, we will explore why neighborhoods with high curb appeal tend to go bigger during the holidays, and how year-round home maintenance, landscaping, lighting, and community pride naturally translate into more elaborate seasonal décor. From tidy lawns and updated exteriors to professional-grade lighting designs, holiday decorating is rarely random in these areas. Instead, it is an extension of habits, standards, and shared expectations that are already built into the neighborhood’s identity.

No. 1

The Connection Between Curb Appeal and Holiday Decorating

Curb appeal is the overall attractiveness of a home as viewed from the street. While it is often discussed in real estate, it also reflects something deeper: homeowner pride, attention to detail, and a commitment to maintaining a welcoming exterior environment. In neighborhoods where curb appeal is consistently strong, holiday decorating becomes a natural seasonal “upgrade” rather than an occasional, last-minute effort.

Homeowners who regularly invest time and money into their home’s exterior typically approach holiday décor the same way. They think in terms of design, cohesion, and impact. Instead of a few disconnected decorations, they aim for a display that complements the home’s architecture and landscaping while still feeling festive.

What curb appeal typically includes

A high-curb-appeal home usually shows care in areas such as:

  • Landscaping and lawn health

  • Exterior cleanliness and upkeep

  • Paint condition, siding quality, and trim details

  • Roofing condition and gutter maintenance

  • Outdoor lighting and visibility

  • Driveway, walkway, and porch presentation

  • Overall organization, including minimal clutter and well-placed décor

How that translates into holiday décor

In neighborhoods where these standards are common, holiday decorating tends to feature:

  • Coordinated holiday lighting themes across multiple homes

  • Professionally designed outdoor decoration layouts

  • Well-lit walkways and entry points for safety and atmosphere

  • Decorated trees, shrubs, and landscaping focal points

  • Roofline and architectural lighting that enhances the home’s structure

The result is a street that feels intentional, cohesive, and inviting, which is exactly what draws visitors and reinforces a neighborhood's reputation.

No. 2

Well-Maintained Landscaping Makes Displays Look Polished

One of the most underrated reasons holiday decorations look better in curb-appeal-focused neighborhoods is simple: the landscaping is already doing half the work. When lawns are healthy, hedges are trimmed, beds are edged, and walkways are clean, the décor immediately looks more refined—even before the first light turns on.

Holiday lighting relies heavily on clean lines and strong visual anchors. Mature trees, shaped shrubs, and orderly planting beds provide a natural structure for lights, wreaths, and accents. In other words, good landscaping gives holiday décor something to “attach to” visually, not just physically.

Landscaping features that elevate holiday decorations

Well-maintained outdoor spaces create a stronger foundation for:

  • Tree wrapping that looks symmetrical rather than chaotic

  • Bush lighting that appears dense and intentional

  • Pathway lighting that feels balanced and navigable

  • Yard displays that do not look crowded or cluttered

  • Natural framing for entryway décor, such as garlands and wreaths

Why neglected yards reduce even expensive décor

Even high-quality decorations can lose their impact when the surrounding environment looks unkempt.

Common issues that make displays feel less cohesive include:

  • Overgrown shrubs that swallow lights and ornaments

  • Patchy lawns that make yards look unfinished

  • Cluttered porches or crowded entryways

  • Poorly defined borders or messy planting beds

Because curb-appeal neighborhoods typically avoid these problems year-round, their holiday decorations look more “designed” by default.


No. 3

Updated Home Exteriors Encourage Bigger, Better Decorating

Homes with updated exteriors naturally invite more ambitious holiday decorating because the backdrop is clean, current, and visually appealing. A freshly painted facade, modern siding, upgraded windows, or a renovated front porch creates a strong canvas for lighting. Instead of trying to distract from worn features, homeowners are highlighting what already looks good.

Architectural details become a major advantage during the holidays. A home with columns, roof peaks, stone accents, or distinctive trim offers built-in focal points for lighting design. In neighborhoods where exterior improvements are common, holiday décor can become a friendly way to showcase those enhancements.

Exterior upgrades that make holiday décor stand out

Holiday lighting and decorations tend to look more striking against:

  • Fresh paint and crisp trim

  • Modern siding with consistent texture

  • Upgraded windows that allow for neat outlining and a warm interior glow

  • Stylish front doors that pair well with wreaths and garlands

  • Renovated porches and railings that support layered lighting

The role of subtle “neighborhood competition”

In communities where home exteriors look well-kept across the board, holiday décor can become a tradition of friendly one-upmanship.

It is not necessarily about spending the most, but rather about:

  • Creating the most cohesive theme

  • Designing the cleanest roofline lighting

  • Building the most inviting entryway

  • Adding thoughtful details that feel upscale rather than noisy

Over time, these expectations raise the bar and make holiday decorating an annual highlight.

No. 4

Outdoor Lighting Is the Core of Holiday Curb Appeal

Outdoor lighting is one of the strongest drivers of curb appeal in any season, but it becomes the centerpiece of exterior presentation during the holidays. Well-lit homes appear warmer, more welcoming, and more visually defined at night. That same principle applies to Christmas lights, only amplified.

In curb-appeal-focused neighborhoods, lighting is rarely treated as an afterthought. Homeowners often aim for layered lighting that highlights the home, the landscape, and the path of travel from street to entryway.

Popular lighting elements that create a high-end look

Well-planned holiday lighting designs often include:

  • Roofline lighting for clean architectural definition

  • Tree wrapping to add height and visual drama

  • Illuminated wreaths and garlands to create a strong focal point

  • Pathway lights to guide movement and enhance safety

  • Window outlining for symmetry and depth

  • Landscape accent lighting to tie the yard into the overall design

Why professional installation has become the preferred option

Larger displays require more than enthusiasm; they require technical planning and safety awareness. Many homeowners want a polished result without taking on the risk and time involved with ladders, electrical connections, and design trial-and-error.

Because of that, professional Christmas light installation companies are increasingly common in neighborhoods where high curb appeal is the norm. Homeowners looking for professional help often turn to Allentown holiday decorating and lighting services to create custom displays that complement their landscaping and exterior design. Professional support can help homeowners achieve consistency, a safe setup, and a finished appearance that matches the neighborhood standard.


No. 5

Neighborhood Pride Turns Decorating Into a Tradition

Strong curb appeal is rarely accidental; it usually reflects a shared culture of maintenance and pride. In these communities, residents value a welcoming streetscape because it supports property values, strengthens community identity, and simply feels better to live in.

Holiday decorating becomes a visible expression of that pride. Once a few houses put up lights, others often follow, not from pressure, but from a desire to contribute to the seasonal atmosphere. Over time, the neighborhood becomes known for its holiday displays, which reinforces the tradition and encourages future participation.

Social dynamics that influence holiday decorating

In many neighborhoods, holiday décor grows due to community rhythms such as:

  • Homeowner association expectations or seasonal guidelines

  • Block gatherings and neighborhood events

  • Informal “best house” conversations and friendly contests

  • Shared norms around maintenance and exterior presentation

When neighborhoods become destinations

Some communities gain a local reputation for holiday lights, attracting visitors from surrounding areas.

That visibility can motivate homeowners to:

  • Maintain a consistent quality of décor year after year

  • Upgrade lighting styles to stay cohesive with neighbors

  • Keep landscaping and exterior presentation sharp for the season

Ultimately, the displays are not just about decoration; they are about belonging, identity, and pride in place.

No. 6

Professional Holiday Lighting Is Growing for Practical Reasons

The increasing popularity of professional lighting is not only about aesthetics. It is also about time, safety, and convenience. Many homeowners enjoy the look of elaborate displays but would rather outsource the labor-intensive parts of the process.

The benefits homeowners often expect from professional installers

Professional services typically appeal because they can offer:

  • Custom lighting designs that fit the home’s architecture

  • Safe installation practices and proper ladder use

  • Commercial-grade products that look brighter and last longer

  • Efficient setup and scheduled removal

  • A consistent, polished appearance that avoids “patchy” lighting

Why curb-appeal neighborhoods adopt professional services faster

When year-round exterior presentation is already a priority, hiring professionals is seen as an extension of routine home care. In these areas, the goal is not just “holiday spirit,” but a finished look that matches the neighborhood’s established standard.

No. 7

How Homeowners Can Create a Bigger Impact Without Overdoing It

A large display does not have to mean a cluttered display. In fact, the most impressive holiday homes often follow design principles that keep everything clean and coherent.

Ways to create a high-end look with a simple plan

If you want to elevate your display while keeping it tasteful, focus on:

  • Choosing one primary lighting color temperature and sticking to it

  • Highlighting architectural lines first, then adding landscape accents

  • Prioritizing symmetry at the entryway for an immediate “wow” effect

  • Using fewer focal pieces, placed intentionally, rather than many scattered items

  • Ensuring cords and extension lines are hidden as much as possible

Quick checklist for a cohesive exterior display

Before you start, it helps to confirm:

  • Your roofline and gutters are clear and safe for installation

  • Your landscaping is trimmed so that lights do not look swallowed by greenery

  • Your pathways are visible and well-lit for guests and delivery services

  • Your theme complements your home rather than competing with it

This approach keeps holiday decorating aligned with curb appeal instead of distracting from it.

Takeaways

Neighborhoods with strong curb appeal often create the most memorable holiday displays because homeowners already value their homes' exterior presentation year-round. Seasonal decorating becomes a natural extension of landscaping, maintenance, and thoughtful design choices.

Well-kept yards, updated exteriors, and layered lighting make decorations look more polished and intentional. As holiday décor becomes more elaborate, professional installation continues to grow in popularity due to safety, convenience, and the desire for a cohesive result.

Ultimately, the neighborhoods that shine brightest in December are usually the ones that look welcoming in every season. When curb appeal is part of the community culture, holiday decorating is not an exception—it is the annual showcase.


Looking for Home resources?

Looking to enhance your living space and create a sanctuary that supports your well-being? Explore our home partners who offer a wide range of resources to elevate your home environment.


homeHLL x Editor


Trendy Pool Deck Installation Styles For A Modern Backyard Look

Honestly, if you’ve been spending more weekends out back lately — you’re in good company. Outdoor living has shot up the priority list for homeowners all across the Bay Area, and the pool deck is usually the first thing people want to get right. It sets the whole tone of the space.


The good news is there’s a lot to work with right now. From large-format porcelain to natural travertine and low-maintenance composite, today’s styles strike a balance between looks and real-world practicality that just wasn’t there a decade ago. In this article, we share a rundown of what pool deck installation styles are trending — and what might work best for your backyard.

No. 1

Large-Format Porcelain Pavers: Clean Lines, Zero Fuss

If you’ve scrolled through any home design feed recently, you’ve definitely seen these. Large-format porcelain pavers — think 24×24 or even 24×48 inch slabs in soft stone tones — have become the go-to for that clean, almost architectural outdoor look.

For Bay Area homeowners specifically, porcelain checks a lot of boxes. It’s frost-resistant, non-porous so pool water won’t stain it, and with a textured finish it handles wet feet better than you’d expect. Day-to-day maintenance is basically a rinse.

The real design trick with porcelain is keeping the grout lines thin. That continuous, uninterrupted surface is what gives the backyard that high-end feel without the high-end material cost.

No. 2

Stamped Concrete: More Versatile Than People Give It Credit For

Stamped concrete has genuinely leveled up. Modern techniques can replicate flagstone, wood planks, slate, cobblestone — and do it convincingly, at a fraction of what the real thing would run you.

What makes it appealing beyond the price point is how much you can customize. Pattern, color stain, finish texture — a good contractor can dial it in to match your home’s existing exterior without it looking like an afterthought.

One thing worth mentioning: always seal it. Bay Area summers get warm, and a quality sealant keeps the surface cooler underfoot while protecting the color from UV damage over time.


No. 3

Natural Stone: Timeless, and It Actually Gets Better with Age

There’s a reason people have been putting travertine and bluestone around outdoor spaces for centuries. Every slab is a little different, the surface develops character over time, and no manufactured material has quite figured out how to replicate that.

Travertine in particular is great for pool surrounds because it stays noticeably cooler in direct sun compared to concrete or dark pavers — which matters a lot when you’re walking barefoot. Bluestone leans more contemporary and pairs really well with modern pool designs.

Just make sure whoever installs it knows stone specifically. The cutting, leveling, and sealing are a different skill set than poured concrete, and the difference shows in the finished result.

No. 4

Composite Decking: The Modern Wood Alternative

Wood decking always photographs beautifully. Living with it is a different story — swelling, splintering, fading, and the annual re-sealing ritual that most homeowners quietly resent. Composite exists to fix all of that.

Modern composite boards genuinely nail the warmth and grain of real hardwood, while being completely resistant to moisture, mold, and UV fading. It’s no surprise that pool deck installation Bay Area requests have increasingly included composite as a top pick — Bay Area homeowners who’ve made the switch tend to wonder why they waited. Upkeep is basically a rinse and an occasional sweep.

Design-wise, composite really shines on raised decks, multi-level layouts, and anywhere you want that indoor-outdoor flow to feel seamless.


No. 5

Concrete Overlays: The Smart Upgrade for Existing Decks

Not every project needs a full tear-out. If your existing concrete base is structurally solid, an overlay can completely change the look of the space — faster, and for a lot less money than starting from scratch.

Overlays can be textured, stained, scored, or micro-troweled to a smooth finish, depending on what you’re going for. It’s a popular move for Bay Area homeowners looking to freshen up before listing a property, or just get the backyard ready before summer kicks in.

Worth noting: according to the American Society of Landscape Architects, outdoor living upgrades consistently rank among homeowners’ top investment priorities — and pool and patio improvements specifically tend to deliver strong returns. (Source: ASLA Residential Landscape Architecture Trends Survey)

No. 6

A Few Things Worth Thinking Through Before You Decide

Whatever style is catching your eye, these practical factors are worth running through before you commit:

•  Slip resistance: Wet feet and pool decks go hand in hand. Look for textured finishes or anti-slip coatings on any surface you’re considering.

•  Heat absorption: Dark surfaces get hot. If your deck sees a lot of afternoon sun, lighter tones or materials like travertine make a real difference underfoot.

•  Drainage: Proper slope and drainage planning is one of those things that’s easy to overlook and expensive to fix later.

•  Budget: Material costs vary a lot. A good contractor will help you find the best value for your goals rather than just pitching the most expensive option.

The team at Advantage Pools Bay Area works through all of this with homeowners during the planning phase — which honestly makes the whole process a lot less stressful when you’re juggling style preferences, practical needs, and a real budget.

No. 7

Your Backyard, Your Call

At the end of the day, the best deck is the one that fits how you actually use your outdoor space. Low maintenance person? Composite or porcelain. Want warmth and character? Natural stone is hard to beat. Working with a tighter budget? Stamped concrete or an overlay can genuinely impress.

Whichever direction you’re leaning, it pays to work with someone who actually knows the Bay Area — the climate, the soil conditions, and local permitting. Advantage Pools Bay Area has helped hundreds of homeowners across the region get decks they genuinely love spending time on. Your next backyard upgrade might be a lot closer than you think.


Looking for Home resources?

Looking to enhance your living space and create a sanctuary that supports your well-being? Explore our home partners who offer a wide range of resources to elevate your home environment.


homeHLL x Editor


Best Subscription-Free Diffusers For Hassle-Free Home Scent

The home scenting market has evolved rapidly in recent years. What used to be a straightforward, one-time purchase now often comes bundled with memberships, refill plans, locked mobile apps, and proprietary cartridge systems that require ongoing payments. While subscription models work for some households, many buyers are actively seeking alternatives that deliver reliable fragrance performance without recurring fees or restrictions.


No. 1

Why Buyers Are Moving Away From Subscription Diffusers

Home scenting is no longer an occasional luxury purchase. Families, remote workers, and apartment owners are using diffusers more consistently throughout the week, sometimes for hours each day. As usage increases, ongoing subscription charges and refill limitations become far more noticeable.

Common reasons people avoid subscriptions

  • They prefer to control when and how often they buy oils

  • They dislike being limited to proprietary cartridges or brand-specific refills

  • They want the diffuser’s full feature set without monthly payments

  • They are looking for predictable long-term ownership costs

  • They do not want an app that stops working properly if a plan expires

For most households, a diffuser should feel like an appliance: buy it once, maintain it easily, and keep using it for years without new strings attached.

No. 2

Best Diffuser Brands Without Subscription Requirements

The brands below are frequently mentioned by buyers looking for ownership-friendly scenting systems. They generally allow ongoing use without mandatory memberships, and several avoid closed cartridge ecosystems altogether.

1) Lephrone

Lephrone is known for emphasizing ownership-first scenting systems. The brand avoids cartridge-only ecosystems and does not require paid subscriptions for core app functionality, which is a major differentiator in a market increasingly designed around recurring revenue.

Lephrone devices use waterless cold air diffusion technology, dispersing fragrance oils without water dilution or heat. This tends to produce a more stable scent output and reduces several of the maintenance issues associated with ultrasonic diffusers, such as water tank cleaning and mineral residue.

What Lephrone does well

  • Refillable approach that supports direct oil replacement rather than disposable cartridges

  • Waterless diffusion for consistent scent concentration

  • App-based scheduling and intensity adjustment without monthly fees

  • WiFi connectivity for reliable remote access beyond short-range Bluetooth

  • Quieter operation suited to bedrooms, offices, and shared living spaces

Who Lephrone is best for

  • People who run a diffuser daily and want predictable performance

  • Households that want smart controls but do not want “premium app” payments

  • Users who value flexibility in fragrance selection and refill timing

  • Anyone prioritizing a low-maintenance, waterless setup

Another practical benefit is day-to-day simplicity. Once configured, the diffuser can run on a schedule without constant manual input, which matters if you want scenting to feel ambient rather than like another task to manage.

2) AromaTech

AromaTech offers waterless diffuser systems that do not require subscription plans. The brand has a strong reputation in commercial scenting and hospitality settings, and that professional background shows in its emphasis on output strength and coverage.

Many users choose AromaTech when they want noticeable scent performance, especially in larger open-concept areas. While the devices can feel more technical than some residential-first brands, they are typically straightforward once set up.

Reasons people choose AromaTech

  • Strong scent throw suited to larger rooms or multi-room areas

  • Waterless diffusion options

  • Oils can usually be purchased as needed rather than through mandatory refills

3) Air Aroma

Air Aroma blends scent diffusion with a design-forward approach and is often seen in hospitality and luxury residential environments. Buyers who care about how a diffuser visually integrates into a modern interior often consider this brand.

Importantly for non-subscription shoppers, Air Aroma is not built around heavily restricted cartridge programs in the way some consumer subscription brands are. That gives users more independence after purchase.

Air Aroma stands out for

  • Aesthetic integration in high-end interiors

  • Stable scent performance aimed at premium spaces

  • Less reliance on closed refill restrictions than many subscription-first systems

4) ScentAir

ScentAir is primarily known for commercial scenting, particularly in retail and office environments, with solutions that can support continuous operation and HVAC integration.

Some of ScentAir’s enterprise offerings may involve managed programs, but standalone options can still function without consumer subscription requirements. This is a more infrastructure-oriented route, and it tends to fit buyers who think in terms of coverage, consistency, and longer run times.

ScentAir is often chosen for

  • Larger spaces and continuous scenting needs

  • Commercial-style performance expectations

  • Users who prefer scalable systems rather than small countertop units

5) Vitruvi

Vitruvi is widely recognized for minimalist design and approachable home use. These are generally not commercial-grade waterless machines, but they remain popular for buyers who want an uncomplicated, non-subscription option with a strong aesthetic.

Vitruvi tends to appeal to essential oil users who value simplicity over advanced automation.

Vitruvi is best for

  • Smaller rooms and everyday residential use

  • Minimalist interiors and countertop-friendly designs

  • Users who want straightforward operation without technical setup


No. 3

Why Subscription-Based Diffusers Became So Common

Subscription models in the diffuser industry grew quickly for several business and product-design reasons. Understanding these helps clarify what you may be trading away when you choose a subscription-based ecosystem.

Key drivers behind diffuser subscriptions

  • Recurring revenue: brands earn continuously from refills, cartridges, or app features

  • Controlled consumables: proprietary refills keep buyers locked into one supplier

  • Predictable reorder cycles: companies can forecast demand and inventory more easily

  • “Convenience” positioning: auto-ship refills are marketed as a hands-off benefit

For some consumers, automated refills are genuinely convenient. For many others, they introduce unnecessary cost and reduce control, especially when they prefer choosing different scents seasonally or shopping based on availability and price.

No. 4

What Makes a Non-Subscription Diffuser Better

Subscription-free models tend to feel more like true ownership. Instead of paying to keep features active, you purchase the device and decide how and when to restock fragrance.

Lower long-term cost

Avoiding monthly fees can significantly reduce the total cost of ownership over time. Even small recurring charges can eventually surpass the original hardware cost, especially for households that use diffusers year-round.

More freedom with oils

Non-subscription systems often support broader oil choices or at least let you purchase refills on your own schedule. This is especially valuable for people who:

  • Rotate fragrances by season

  • Prefer experimenting with different scent styles

  • Want control over how strong or subtle the aroma is

  • Do not want to depend on a single brand’s inventory

No locked features

Some smart diffusers restrict scheduling, automation, or remote control behind a paid plan. Subscription-free brands typically provide full functionality after setup, which aligns better with how people expect home appliances to work.

Better long-term ownership experience

A diffuser should remain usable for years. Subscription-free systems usually feel more stable because performance and features are not tied to maintaining an ongoing payment relationship.


No. 5

Why Waterless Diffusers Often Fit Subscription-Free Ownership

Waterless diffusion systems are frequently a better match for non-subscription buyers because the technology naturally supports refillable oil use and consistent performance.

Fewer replaceable components

Traditional cartridge systems create dependence on branded replacements. Waterless diffusers often use refillable oil containers or direct bottle replacement, which reduces restrictions and simplifies sourcing.

Lower maintenance requirements

Without a water tank, there is:

  • Less routine cleaning

  • Less risk of mineral buildup

  • Less chance of musty odours developing from stagnant water

  • Less daily attention required to keep the device running well

More consistent scent output

Because fragrance oils are not diluted, diffusion can feel more predictable. This matters for people who scent their homes regularly and want steady output rather than noticeable fluctuations.

No. 6

What to Look for in a Subscription-Free Diffuser

A non-subscription label is only part of the decision. Performance, reliability, and usability will determine whether the diffuser actually improves your day-to-day environment.

App access without fees

If smart controls matter to you, confirm whether scheduling, remote access, and intensity adjustments are included without monthly payments. Some products appear “smart” but require paid tiers to unlock the most useful functions.

Open oil compatibility

Look for systems that allow direct oil replacement rather than proprietary single-use cartridges. Open refill models typically provide better flexibility and more predictable long-term ownership.

WiFi connectivity

WiFi-based systems tend to offer more reliable remote access than Bluetooth-only devices, especially in:

  • Larger homes

  • Multi-level layouts

  • Situations where you want to adjust scent settings while away

Quiet operation

Noise becomes a bigger factor than many shoppers expect, particularly when a diffuser runs overnight or during work hours. If you plan to place the unit near a bedroom or desk, prioritize designs known for quieter performance.

Long-term reliability and serviceability

Diffusers are often used frequently, which makes durability important. Consider:

  • Build quality and fit of components

  • Availability of replacement parts (especially for mechanical components)

  • Warranty terms and clarity

  • Brand reputation for customer support

No. 7

Common Problems With Subscription-Based Systems

Subscription-based scenting can be appealing upfront, but several issues tend to surface over time.

Rising long-term costs

Monthly fees may seem modest initially, but over multiple years, they can add up quickly. If the diffuser becomes a daily habit, you may end up paying far more than expected.

Limited fragrance selection

Closed ecosystems can prevent you from testing new scent profiles or buying based on value. Many people eventually want variety, especially as preferences shift with seasons or household needs.

Feature restrictions

Some products reduce functionality when subscriptions lapse, even though the hardware is already paid for. This can feel frustrating and out of step with normal expectations for home devices.

Supply dependence

If cartridges or refills are delayed, out of stock, or discontinued, you may not be able to use the device consistently. For households that rely on scenting as part of daily comfort, that dependency can be a real drawback.

Takeaways

Subscription-free diffusers are gaining popularity because they offer straightforward ownership, predictable costs, and fewer restrictions on how you scent your home. For many households, avoiding recurring fees makes home fragrance feel simpler and more sustainable over the long term.

Brands such as Lephrone, AromaTech, Air Aroma, ScentAir, and Vitruvi provide viable non-subscription options, with different strengths depending on coverage needs, design preferences, and desired smart features. Waterless diffusion systems often pair especially well with this ownership model due to consistent output and reduced maintenance.

The best choice comes down to how you live: how often you run the diffuser, where it will sit, and whether you want smart controls without paywalls. If you prioritize flexibility and long-term usability, a subscription-free diffuser is often the most practical investment.


Looking for Home resources?

Looking to enhance your living space and create a sanctuary that supports your well-being? Explore our home partners who offer a wide range of resources to elevate your home environment.


homeHLL x Editor


What Makes Casement Windows A Popular Choice For Canadian Homes?

Casement windows have become a defining feature in many Canadian communities, particularly in newer builds and well-planned renovations. Walk through almost any newer Calgary neighborhood, and you will spot them on main floors, in bedrooms, and in kitchens above the sink. Their widespread use is not a passing trend; it is a response to performance, comfort, and practicality in a climate where temperature swings, wind, and long winters demand more from a window.


In this article, we will explore why casement windows are such a popular choice for Canadian homes, how they work, what makes them energy efficient, and where they tend to perform best. If you are planning a window replacement project, understanding the advantages and trade-offs will help you make a confident decision that suits your home, lifestyle, and long-term budget.

No. 1

How Casement Windows Work

Casement windows are hinged on one side and swing outward. They are typically operated by a hand crank at the base of the frame, allowing the sash to open smoothly and hold its position at different angles.

Unlike hung windows that slide vertically or horizontal sliders that move side-to-side, a casement window opens the entire sash. This is a key reason homeowners notice an immediate difference in airflow.

What this opening style means in real life

  • Full ventilation through the entire window opening, not just a partial gap

  • Better control over airflow direction, since the sash can be angled outward

  • Easier “fine-tuning” of ventilation during shoulder seasons when you want fresh air without a full blast of cold air

The “scoop effect” and why it matters in Calgary

The outward-opening design can create a natural scoop effect. When wind travels along the exterior wall, the open sash catches the breeze and directs it indoors. On a warm Calgary summer evening, this often feels like a meaningful upgrade compared to a window style that only opens a narrow channel.

Best rooms for casement-style airflow

  • Kitchens, especially above the sink, where you want quick ventilation

  • Bedrooms, where fresh air circulation improves comfort at night

  • Living rooms paired with fixed glass for a bright, open feel

  • Home offices where temperature control and air freshness affect focus

No. 2

Energy Efficiency Advantages in Cold Canadian Winters

Casement windows are widely chosen in Canada because they seal exceptionally well. When closed, the locking mechanism pulls the sash tightly against the frame, compressing the weatherstripping at multiple points. This compression-style seal is inherently more airtight than designs that rely on sliding contact within a track.

In climates like Calgary, where winter conditions can be prolonged and windy, small drafts turn into big comfort issues. A tighter seal can reduce cold spots near windows and help maintain stable indoor temperatures.

Why casement windows can outperform sliders and hung windows

  • A compression seal reduces air leakage more effectively

  • Multi-point locking supports consistent contact around the perimeter

  • Fewer “moving track” pathways for air and moisture intrusion

  • Better performance in wind, because pressure pushes the sash tighter into the seal

Features to look for if energy efficiency is your priority

Energy performance depends on manufacturing quality and glass specifications, not the window style alone. When comparing options, ask about:

  • Low-E coatings suited to your climate goals

  • Double or triple glazing based on exposure and budget

  • Warm-edge spacers to reduce condensation risk

  • Quality weatherstripping and corner sealing

A well-manufactured casement unit with an appropriate glass package can noticeably improve comfort in winter and reduce the workload on your heating system.


No. 3

Ventilation Control and Indoor Comfort

Canadian homeowners often deal with big seasonal transitions: dry winter air, short but warm summers, and unpredictable shoulder-season days. Casement windows offer ventilation control that helps maintain comfort without overcorrecting the temperature in your home.

Practical ventilation benefits that affect daily living

  • Quick clearing of cooking odours and humidity in kitchens

  • Improved cross-breeze potential when paired with windows on another wall

  • Ability to open partially during light rain, depending on wind direction and overhangs

  • Better air exchange in rooms that feel stuffy due to poor circulation

Tips for maximizing airflow with casement windows

  • Place casements on the windward side to pull air in using the scoop effect

  • Pair them with other operable windows across the room to create cross-ventilation

  • Consider multiple smaller units rather than one large unit if you want flexible control

  • Use insect screens designed for outward-opening operation to keep ventilation comfortable

No. 4

Accessibility and Ease of Use for Everyday Spaces

One reason casement windows are so common in Canadian residential construction is their user-friendly operation. The crank mechanism removes the need to lift or slide a heavy sash, which can be helpful for people of different ages and abilities.

This design is also practical in hard-to-reach locations, where pushing up a sash or sliding a panel would be awkward.

Locations where crank operation is especially useful

  • Above kitchen counters and sinks

  • Behind furniture placements where reaching a sash is difficult

  • Stairwells and landings with limited access

  • Bathrooms where quick ventilation is useful, but space is tight

Considerations for long-term usability

Like any mechanical component, cranks and hinges should be durable and serviceable. When evaluating products, it is worth confirming:

  • Hardware quality and corrosion resistance

  • Smoothness of crank operation under load

  • Availability of replacement parts over time

  • Warranty coverage for hardware components


No. 5

Design Flexibility for Traditional and Modern Homes

Casement windows suit a wide range of architectural styles. They can look clean and contemporary with slim frames, or more traditional depending on grille patterns, frame profiles, and colour choices.

They also combine well with fixed glazing, allowing you to create larger compositions that balance view, daylight, and ventilation.

Popular configurations in Canadian homes

  • Casements flanking a fixed picture window for a large living room opening

  • Paired casements in bedrooms for balanced symmetry and airflow

  • Casements with a transom above to add height and daylight

  • Multiple casements in a row for modern, expansive wall designs

Design details that influence appearance

  • Frame colour and finish, inside and out

  • Sightlines, meaning how much frame you see versus glass

  • Grid or grille options for a classic look

  • Hardware finish to match interior style

If your goal is maximum daylight, modern casement frames often provide generous glass area relative to frame, improving both view and natural light.

No. 6

Performance in Wind, Weather, and Seasonal Change

Canadian weather is not only cold; it is also dynamic. Wind events, freeze-thaw cycles, and sudden swings in temperature can test a window’s ability to remain sealed and stable.

Casement windows tend to perform well in these conditions because the sash closes into the frame and locks firmly. In windy conditions, external pressure can actually help reinforce the seal, rather than working against it as it sometimes does with sliding designs.

Weather-related benefits homeowners notice

  • Reduced rattling and movement during high winds

  • Less noticeable draft compared to older sliding windows

  • Stronger perceived “closure” and security feel when locked

  • Consistent performance through seasonal shifts when properly installed

Installation quality remains critical. Even an excellent window can underperform if it is not properly flashed, insulated, and integrated with the wall system.

No. 7

What to Consider Before Choosing Casement Windows

Casement windows offer many advantages, but good planning means understanding the practical constraints as well.

Situations where casements may be less ideal

  • Exterior obstructions, such as walkways, where an outward swing could be inconvenient

  • Tight clearances near decks, patios, or exterior fixtures

  • Homes where interior window treatments conflict with crank hardware placement

  • Locations exposed to strong prevailing winds, where opening could be uncomfortable

Questions to ask during a window consultation

  • What glass package is recommended for my exposure and budget?

  • Is triple pane necessary everywhere or only on certain elevations?

  • How do the seals and locking systems compare across manufacturers?

  • What is the expected maintenance for hinges and cranks?

  • How will the new unit integrate with existing trim and exterior finishing?

If you are considering casement windows Calgary installers offer in a range of configurations, it is worth booking a consultation to see samples in person. The hardware, frame quality, and glass specification can vary considerably between manufacturers — and those differences matter over a 25-year lifespan.

Takeaways

Casement windows are popular in Canadian homes because they combine strong ventilation, a tight compression seal, and user-friendly operation. Their outward-opening design can improve airflow and indoor comfort, especially during warm weather and shoulder seasons.

From an energy-efficiency standpoint, the way casements lock and compress weatherstripping can help reduce drafts and improve winter comfort. The best results come from pairing a quality frame and hardware system with an appropriate glass package and professional installation.

Casement windows also offer excellent design flexibility, working well in both modern and traditional homes and in combination with fixed glass. Before committing, consider clearance, wind exposure, and product quality so your investment performs well for decades.


Looking for Home resources?

Looking to enhance your living space and create a sanctuary that supports your well-being? Explore our home partners who offer a wide range of resources to elevate your home environment.


homeHLL x Editor


Shower Niche Ideas: Designs, Sizes, And Placement Tips

A beautiful shower is not defined by tile alone. The most functional showers feel effortless to use because every detail, from storage to sightlines, has been planned with intention. That is where a shower niche can make a major difference: it keeps daily essentials tidy, reduces clutter on the floor or corners, and adds a built-in architectural detail that elevates the entire space.


In this article, we will explore shower niche ideas that balance design and practicality, including popular styles, recommended sizes, placement tips, waterproofing essentials, and creative ways to integrate niches into a modern bathroom layout. Whether you are renovating a compact ensuite or designing a spacious walk-in shower, the right niche plan can improve your day-to-day routine while enhancing the overall look of your bathroom.

No. 1

Understanding the Purpose of a Shower Niche

A shower niche is a recessed shelf built into the shower wall. Instead of relying on hanging caddies or corner racks, a niche creates storage that feels integrated, streamlined, and easy to access. When executed correctly, it also minimizes visual noise, helping the shower look clean and intentional.

Why homeowners choose shower niches

  • Keeps shampoo, conditioner, and body wash within comfortable reach

  • Reduces trip hazards and clutter from products left on the shower floor

  • Eliminates the need for bulky storage accessories

  • Creates a design feature that can blend in or stand out

  • Helps maintain a more organized, spa-like shower experience

What a niche does better than a corner shelf

  • It does not protrude into the shower space, which matters in smaller showers

  • It can be placed exactly where you need it, based on height and layout

  • It can be sized for your actual products, including tall pump bottles

  • It can be finished to match or contrast the tile for a more cohesive design

A niche is both functional and architectural. If you think of it as part of the wall design rather than a last-minute add-on, it will look more polished and perform better long-term.

No. 2

Popular Shower Niche Designs and Styles

Choosing a niche design starts with your bathroom style and how much visual contrast you want. Some niches are intended to disappear into the wall, while others are meant to serve as a focal point. Both approaches can work well when the materials and proportions are carefully considered.

Recessed niches for a minimalist look

Recessed niches sit flush within the wall cavity and are the most common option. They are ideal if you want a clean, modern finish that prioritizes practicality.

Best for:

  • Contemporary bathrooms

  • Smaller showers where space is limited

  • Homeowners who want storage without a decorative statement

Framed niches for definition and contrast

Framed niches use trim, edging, or a border detail to outline the niche shape. This creates a crisp, intentional look that pairs well with modern hardware and structured tile layouts.

Common framing options include:

  • Metal edging in finishes like chrome, brushed nickel, or matte black

  • Contrasting stone trim for a more classic feel

  • A border of smaller-format tiles to “picture-frame” the niche

Tiled feature niches as a design focal point

A tiled feature niche uses a different tile inside the niche than the main shower wall. This can be subtle or bold, depending on your palette and pattern choices.

Feature-tile ideas:

  • Mosaic tiles for texture and detail

  • Vertical kit-kat or finger tiles for a modern look

  • A patterned tile that echoes the flooring or vanity backsplash

  • A darker tone inside the niche for depth and visual interest

Single niche vs. stacked niches

A single, wide niche is often the most versatile, but stacked niches can offer better organization, especially for shared showers.

Consider stacked niches if:

  • You want separation between tall bottles and small items

  • Multiple people share the shower and want a designated space

  • You want a more symmetrical layout on a large wall


No. 3

Choosing the Right Shower Niche Size

Niche sizing is where many showers either become effortless or irritating. If the niche is too small, it will not hold what you use daily. If it is too large or poorly placed, it may disrupt tile alignment or require extra structural work.

Common niche dimensions to consider

While many standard niches measure around 30 to 60 centimeters wide and 30 centimeters high, the best dimensions depend on your wall framing, product sizes, and whether the shower is used by one person or several.

Useful size guidelines:

  • Small niche: ideal for a compact shower and minimal products

  • Medium niche: a good fit for most households, holding several bottles comfortably

  • Wide niche: works well on large walls and can double as a design feature

Depth matters as much as width

Depth affects both usability and cleaning. Too shallow and bottles may tip forward; too deep and it becomes awkward to reach and harder to maintain.

A depth of about 10 to 15 centimeters typically works well for:

  • Standard shampoo and conditioner bottles

  • Pump bottles

  • Soap and razors (especially if you include a small lower shelf)

Plan around your products, not guesswork

Before finalizing niche size, do a quick product audit.

Measure or consider:

  • Your tallest bottles (especially if you buy salon-size products)

  • Whether you prefer pump dispensers

  • If you want space for a loofah, shave gel, or face wash

  • Whether you want to store bottles upright or laid down

No. 4

Shower Niche Placement Tips for Comfort and Visual Balance

Placement determines how the niche feels in daily use and how it reads visually on the wall. A niche that looks great but forces you to bend awkwardly will quickly become a frustration. Likewise, a niche that is practical but poorly aligned with tile lines can look like an afterthought.

The most practical height for a niche

Many niches are placed around shoulder height, so items are accessible without bending. That said, the best position depends on who uses the shower and how the space is laid out.

Placement considerations:

  • Shoulder height is convenient for daily bottles

  • Slightly lower placement can work well for children’s products

  • If your shower includes a bench, placing the niche above the bench can be highly functional

Avoid common placement mistakes

  • Placing the niche where the showerhead spray hits directly, which can increase soap buildup

  • Positioning it too low, forcing constant bending

  • Cutting into plumbing walls without proper planning

  • Ignoring the tile layout, leading to awkward cuts and uneven grout lines

Tips for multiple niches and shared showers

If multiple users share the space, dual niches at varying heights can make the shower feel more organized and intentional.

Examples:

  • Upper niche for tall bottles, lower niche for soap and razors

  • Two niches at equal height on separate walls for a “his and hers” setup

  • A long horizontal niche, divided into zones for different users


No. 5

Waterproofing and Drainage: The Details That Protect Your Bathroom

A shower niche is only as good as its waterproofing. Because a niche interrupts the wall plane, it adds corners and seams where water can infiltrate if the installation is not precise. Proper waterproofing protects the structure behind the tile and prevents leaks, mold, and costly repairs.

Waterproofing essentials for a long-lasting niche

  • Use a waterproof membrane system throughout the shower area, including the niche

  • Ensure all joints and corners are sealed properly

  • Use quality grout and sealants suitable for wet areas

  • Confirm that the niche edges are integrated with the surrounding waterproofing layer

Build in drainage to prevent pooling

The niche base should slope slightly so water drains out rather than sitting in the back corners. Standing water leads to mildew, discoloration, and soap scum buildup.

Maintenance-friendly features include:

  • A slightly sloped sill

  • Smooth tile surfaces inside the niche for easier cleaning

  • Fewer grout lines, if possible, which reduces cleaning effort over time

No. 6

Integrating a Niche With Tiles, Fixtures, and Shower Screens

The most polished niches look like they belong in the original design. That comes from aligning the niche with the tile layout, coordinating finishes, and considering what the niche will look like through the shower enclosure.

Transparent enclosures like those offered through shower screens in Australia highlight the niche design while keeping the space open and bright. Because the niche becomes more visually prominent with clear glass, details like symmetry, grout color, and tile alignment matter even more.

Coordinate your niche with the rest of the shower

  • Match hardware finishes for a cohesive look

  • Align niche edges to tile grout lines when possible

  • Consider whether you want the niche centered on a feature wall

  • Use consistent grout spacing and clean transitions at corners

Consider the view through the shower screen

If your shower has a clear screen, the niche may be one of the first things you notice when entering the bathroom. This is where a feature tile, a framed edge, or a carefully proportioned niche can elevate the entire design.

No. 7

Creative Uses for Shower Niches Beyond Storage

A niche does not have to be purely utilitarian. It can also be a design element that adds ambiance and personality to a shower, especially in a modern renovation where small details carry the visual impact.

Lighting ideas for a more elevated look

  • LED strip lighting at the top of the niche for a soft glow

  • Waterproof recessed micro lighting for a high-end finish

  • Warm lighting to enhance stone and earthy tile tones

Styling ideas that still feel practical

  • A small plant that tolerates humidity (if lighting allows)

  • Minimalist bottles decanted into matching dispensers

  • A stone or ceramic tray to keep smaller items tidy

The key is restraint. A niche looks best when it is not overcrowded, which is another reason sizing and organization matter.

No. 8

Exploring More Options for Layout and Inspiration

A shower niche should support the way you actually use the shower. That means the best niche is not necessarily the trendiest one; it is the one that fits your routine, your space, and your design style.

For more inspiration on integrating functional storage, explore shower niche ideas that suit various bathroom styles and sizes.

Questions to ask before finalizing your niche design

  • Who will use this shower daily, and what products do they use?

  • Do you want the niche to blend in or act as a feature?

  • Where will the niche be easiest to reach without interrupting the shower flow?

  • How will the niche align with your tile layout and grout lines?

  • Are you prepared to prioritize waterproofing and proper slope details?

Takeaways

A shower niche improves both function and appearance by creating built-in storage that reduces clutter and supports a clean, intentional shower design. The best niches feel seamless because they are planned around real product needs, tile layout, and the way the shower is used.

Design choices such as recessed, framed, or feature-tiled niches can complement anything from minimalist bathrooms to statement spaces. Size, depth, and placement are the details that determine whether a niche feels effortless every day or becomes a long-term annoyance.

Waterproofing and drainage are non-negotiable for durability, and integration with surrounding tiles, fixtures, and glass enclosures determines the final visual impact. With thoughtful planning, a shower niche can become one of the most practical and design-forward features in your bathroom.


Looking for Home resources?

Looking to enhance your living space and create a sanctuary that supports your well-being? Explore our home partners who offer a wide range of resources to elevate your home environment.


homeHLL x Editor


How To Make Moving Into A New Home Less Overwhelming

Moving into a new home should feel like a fresh start, yet it can feel more stressful than getting divorced, surprising even the most organized people. Between packing, paperwork, changing routines, and the emotional weight of leaving a familiar space, it is easy to feel like the process is happening to you rather than something you are managing.


In this article, we will explore practical, realistic ways to make moving into a new home less overwhelming, from early planning and decluttering to using temporary storage and protecting your daily routines. With a few structured steps and the right timeline, you can reduce chaos, avoid last-minute decisions, and settle in with more calm and control.

No. 1

Understand Why Moving Feels So Stressful

Before you can make a move easier, it helps to name what is actually making it hard. Moving is not just a physical task; it is a full-life transition that affects your time, energy, and sense of stability. Even when the new home is an upgrade, change demands effort, and effort adds up quickly when you are also trying to keep your normal responsibilities running.

Common stress triggers to plan for

  • Decision fatigue from sorting, purging, and organizing thousands of small items

  • Disruption to routines such as sleep, meals, workouts, school schedules, and work

  • Emotional strain tied to leaving a neighborhood, memories, or a sense of comfort

  • Logistical pressure involving timelines, utilities, keys, cleaning, and transport

  • Financial concerns such as deposits, unexpected repairs, and moving-day costs

The good news is that most of these stress points are predictable. Once you treat moving like a project with phases instead of a single event, it becomes far more manageable.

No. 2

Start Preparing Early for a Smoother Timeline

One of the main reasons moving feels exhausting is that people underestimate how long packing and decision-making really take. A closet might look simple until you start trying to decide what still fits, what is worn out, and what is worth moving. Paperwork seems small until it turns into stacks of documents that require sorting, shredding, or filing.

Starting early gives you time to make calm decisions and prevents the “everything at once” spiral that leads to broken items, lost essentials, and unnecessary expenses.

A practical planning schedule

If you can, aim for a phased approach:

  • 6–8 weeks out: Create a moving binder or digital folder, start decluttering, and gather supplies

  • 4–6 weeks out: Begin packing non-essentials, schedule movers or a truck, notify key services

  • 2–4 weeks out: Pack most rooms, confirm timelines, plan pet and child logistics

  • 1 week out: Pack daily essentials last, finalize paperwork, clean, confirm utilities

  • Moving day: Focus on safety, clear labeling, and a controlled first-night setup

Supplies that reduce stress more than you expect

  • Sturdy boxes in multiple sizes

  • Packing paper or towels for fragile items

  • Zip-top bags for screws, remotes, and small hardware

  • Labels and thick markers for clear box identification

  • A dedicated “open first” bin for the first 24 hours


No. 3

Declutter Before You Pack (Not After)

Many people treat decluttering your entire home as optional, but it is often the difference between a move that feels clean and intentional versus one that feels heavy and chaotic. Moving is one of the rare moments when you naturally review what you own. That makes it the best time to reduce what you are carrying into your next chapter.

A key mindset shift is this: do not pack decisions you can make now. Every item you move costs time, money, and energy—during packing, lifting, transporting, unpacking, and storing.

Declutter by category to speed up decisions

Room-by-room decluttering can work, but category-based decluttering is often faster because it forces clearer comparisons. For example, when all your sweaters are in one pile, it is much easier to keep the ones you actually wear.

Helpful categories to tackle in order:

  • Clothing and shoes

  • Books and papers

  • Kitchen tools and small appliances

  • Bathroom products and duplicates

  • Decorations, cords, and miscellaneous drawers

  • Sentimental items last

Use a clear sorting system

Create simple piles or boxes:

  • Keep

  • Donate

  • Recycle

  • Sell

  • Trash

Quick decision rules that keep you moving

  • If you forgot you owned it, you probably do not need it

  • If it is easily replaceable and rarely used, consider letting it go

  • If it requires repair you have postponed for a year, it may not be worth moving

  • If it does not fit your new space, it becomes instant clutter

Decluttering is emotionally draining because it forces reflection. However, it also creates momentum, because each bag donated or box recycled reduces what you must manage later.

No. 4

Pack Smarter With a System You Can Unpack

Packing is not just about getting items into boxes. It is about designing an unpacking experience that helps you function quickly in your new home. Most moving stress peaks after the move, when people cannot find what they need and feel buried in boxes with no plan.

Packing principles that save hours later

  • Pack by category within each room, not just by what fits

  • Label every box on multiple sides so it is visible when stacked

  • Write both the destination room and the box contents

  • Keep a running inventory for high-value items

  • Use consistent labeling terms such as “Primary Bedroom” rather than switching between “Master,” “Bedroom 1,” and “Main”

Labeling that actually works

Include:

  • Room name

  • Specific zone (for example, “Kitchen: Coffee Station”)

  • Priority level (Open first, Open soon, Store)

This allows you to unpack in layers rather than chaos.

What not to do when packing

  • Do not mix items from multiple rooms in one box unless it is labeled clearly

  • Do not pack important documents in random boxes

  • Do not wait until the last day to pack the items you use daily


No. 5

Use Flexible Storage to Reduce Pressure

It is nearly impossible to time a move perfectly. Sometimes closing dates shift, renovations run late, or your new place is technically ready but not realistically livable yet. Even when the move goes smoothly, unpacking everything immediately can feel impossible.

That is why homeowners look for solutions like moving and storage services that help create a flexible transition. Temporary storage can create breathing room. It allows you to move without forcing every box into your new space at once, and it helps you keep your home functional while you settle in.

When storage helps most

  • You are downsizing and need time to decide what fits

  • You are renovating and need to keep rooms clear

  • Your move-in and move-out dates do not align

  • You want to unpack gradually to reduce stress

  • You need to stage your old home while preparing to move

How to use storage strategically

  • Store non-essential seasonal items first

  • Keep daily-living essentials accessible in your new home

  • Avoid storing items you might urgently need in the first two weeks

  • Use clear bins for items you may need to retrieve quickly

No. 6

Protect Your Daily Routines During the Transition

Moving can take over your schedule, but your body and mind still need basics: sleep, food, hydration, and some form of downtime. When these fundamentals disappear, everything feels worse, and small setbacks feel huge.

Instead of aiming for your ideal routine, aim for a “moving routine” that keeps you stable.

A simple moving-week routine checklist

  • Sleep: protect a consistent bedtime as much as possible

  • Food: plan two reliable, easy meals you can repeat

  • Hydration: keep a water bottle visible and filled

  • Movement: a short walk reduces stress and improves sleep

  • Breaks: schedule 15-minute resets to avoid burnout

Meal ideas that work during moving week

  • Rotisserie chicken or ready-to-eat protein options

  • Pre-cut vegetables and hummus

  • Yogurt, granola, fruit, and nut butter

  • Sandwich supplies and salad kits

  • Frozen meals for the first few nights in the new home

The goal is not perfection. It is energy management so you can make better decisions and stay calm under pressure.

No. 7

Make the First 24 Hours in Your New Home Easier

Your first night sets the tone. If you cannot find toiletries, chargers, pajamas, or basic kitchen items, you will start the new chapter feeling disorganized. A first-night kit prevents that and gives you immediate comfort.

First-night essentials to pack separately

  • Toiletries, medications, and contact lenses or glasses

  • Phone chargers and a power strip

  • A change of clothes and pajamas

  • Basic cleaning supplies and paper towels

  • Shower curtain liner, hand soap, and toilet paper

  • Simple dishware: one cup, one bowl, one plate per person

  • Snacks and breakfast basics for the next morning

A smart unpacking order

  • Bedrooms first, so everyone can rest

  • Bathroom essentials so the home is functional

  • Kitchen basics so you can eat without stress

  • Work and school setups so the week can continue normally

  • Decorative items last

This order reduces overwhelm because it prioritizes function before aesthetics.

No. 8

Reduce Paperwork Stress With a Simple Checklist

Paperwork can quietly become one of the most frustrating parts of moving, especially if it is scattered across email, printed documents, and multiple accounts. A basic checklist prevents missed deadlines and last-minute scrambling.

Administrative tasks to handle early

  • Change of address with USPS and key subscriptions

  • Utility transfers or new service setup

  • Internet installation scheduling

  • Insurance updates for home and auto

  • School, medical, and employer address changes

  • Updating billing addresses for banks and credit cards

Organize documents in one place

Use a folder (physical or digital) for:

  • Lease or purchase documents

  • Receipts and contracts

  • Moving company details

  • Inventory photos for valuables

  • Warranty information for appliances and home upgrades

When your paperwork is centralized, you reduce mental clutter and avoid duplicate work.

Takeaways

Moving feels overwhelming because it combines logistics, disruption, and emotion all at once, even when the change is positive. The most effective way to reduce stress is to treat moving like a phased project rather than a single deadline.

Starting early, decluttering before you pack, and using clear labeling systems can dramatically reduce decision fatigue and post-move chaos. Flexible storage and a first-night essentials kit add breathing room when timelines are imperfect.

A successful move is not about doing everything flawlessly; it is about protecting your energy and keeping daily life stable while you transition. With a realistic routine, a packing system you can unpack, and a focused checklist, you can settle into your new home with far more ease.


Looking for Home resources?

Looking to enhance your living space and create a sanctuary that supports your well-being? Explore our home partners who offer a wide range of resources to elevate your home environment.


homeHLL x Editor


6 Home Renovation Ideas That Make A Big Difference

Are you planning to make some changes to your home but are not sure where to start? When it comes to home renovations, there are countless routes you can take, from improving your kitchen and upgrading to a new bathroom to refreshing your garden and focusing on the exterior.


In this article, we will explore practical, high-impact home renovation ideas that can improve everyday comfort, boost functionality, and potentially increase the value of your property. Whether your budget allows for a full refurbishment or just a few strategic upgrades, the key is choosing improvements that suit how you live and what you need from your space.

No. 1

Improve your kitchen

If you are looking for one area of your home where changes can be instantly noticeable, the kitchen is a strong starting point. As one of the most frequently used spaces in most homes, kitchen upgrades often deliver a clear day-to-day benefit, both in terms of practicality and overall enjoyment.

A kitchen improvement does not always have to mean a complete refit. Depending on budget and condition, you can choose between cosmetic upgrades, functional swaps, or a full redesign.

High-impact kitchen updates to consider

  • Replace worktops to modernise the look and improve durability

  • Upgrade appliances for better performance and energy efficiency

  • Add or improve storage solutions (pull-out larders, corner units, deep drawers)

  • Refresh cupboard fronts rather than replacing the whole kitchen

  • Change handles, taps, and splashbacks for a more contemporary finish

Layout ideas if you enjoy hosting

If hosting friends or family is important to you, prioritise changes that support flow and sociability:

  • Install a kitchen island if you have the space, as it can create a natural gathering point

  • Consider a larger oven or a double oven for entertaining

  • Add bar seating to make the kitchen feel more communal

  • Improve ventilation to keep the room comfortable when cooking

For visual inspiration, Pinterest is a great place to browse layouts and style ideas before you commit to any major decisions.

No. 2

Upgrade your bathroom

A bathroom upgrade can transform how your home feels, because it is a space most people rely on multiple times every day. Even if your bathroom is not “bad,” older fixtures, tired tiles, or poor lighting can make it feel less comfortable than it should.

You can take a phased approach if your budget is limited, focusing first on what will make the room feel cleaner, brighter, and more modern.

Bathroom renovation options by budget

  • Smaller changes

    • Replace taps and shower fittings

    • Re-grout tiles and reseal around the bath or shower

    • Swap out a mirror for a larger or illuminated option

    • Update accessories (towel rails, shelves, hooks) for a cohesive look

  • Mid-range upgrades

    • Install new tiles or wall panels for a fresh finish

    • Replace the vanity unit to improve storage and style

    • Upgrade the shower (for example, a rainfall head or improved pressure system)

  • Full refit

    • Reconfigure the layout for better use of space

    • Install a new bath or walk-in shower

    • Bring in a professional designer or installer to create a polished, long-lasting result

Practical considerations that make a big difference

  • Choose materials that are easy to clean and resistant to moisture

  • Ensure ventilation is strong enough to reduce condensation and mould

  • Prioritise storage if your bathroom currently feels cluttered


No. 3

Add a porch

If you have the space, adding a porch can be a surprisingly effective home improvement. It creates a useful “buffer zone” between outdoors and indoors, making daily life more organised and potentially improving energy efficiency by reducing heat loss through your front door.

A porch also contributes to first impressions, which matters if you ever plan to sell.

Benefits of adding a porch

  • Extra storage for shoes, coats, umbrellas, and bags

  • A dedicated spot for everyday outdoor items, such as a bike

  • Better insulation and reduced drafts near the entrance

  • A more welcoming entryway that feels intentional rather than cramped

Planning tips before you commit

  • Visit a local home shop to compare porch styles and materials

  • Ask about installation timelines, as some companies can fit quickly while others may have long lead times

  • Consider how you will use the space day-to-day (storage benches, hooks, closed cabinets)

No. 4

Refresh your garden

Gardens are often one of the most neglected parts of a home, yet improving outdoor space can change how you use your property entirely. Even relatively simple upgrades can make the garden feel like an extension of your living space, especially in warmer months.

Whether you want a low-maintenance outdoor area or a garden designed for entertaining, it helps to think in terms of zones and purpose.

Garden upgrade ideas that improve function and comfort

  • Add seating areas to encourage you to spend more time outside

  • Improve landscaping with clearer borders, paths, and defined beds

  • Introduce new plants for colour, privacy, or pollinator support

  • Refresh a patio area with cleaning, re-pointing, or a new surface

  • Add outdoor lighting to make the space usable in the evenings

Outdoor zoning ideas (especially if space allows)

  • Dining area for meals and hosting

  • Lounge space for reading or relaxing

  • A small garden office or sheltered corner for focused work

  • Play area if you have children

If you are looking for an affordable and popular option, many homeowners choose to install decking to create an easy-to-use, level space.


No. 5

Build into your loft

If your loft is currently used only for storage, a loft conversion can be one of the most impactful renovations you can make. Converting unused space into a functional room can improve your home’s layout without changing the footprint.

A loft conversion can also increase property value, which may matter even if selling is years away.

Common ways to use a converted loft

  • Extra bedroom for a growing family

  • Home office for hybrid or remote work

  • A quiet reading room or creative studio

  • An additional living room or relaxation space

Key points to check early on

  • Head height and available floor space

  • Staircase placement and access

  • Insulation requirements and ventilation

  • Whether planning permission is needed in your area

  • Wiring, heating, and natural light options (such as skylights or dormers)

No. 6

Update your lighting throughout the home

Lighting is often overlooked, but it can completely change how a home looks and feels. Poor lighting can make rooms feel smaller, colder, and less welcoming, while a thoughtful lighting plan can make even modest spaces feel more expensive and comfortable.

A lighting refresh is also a flexible improvement: you can update one room at a time without major disruption.

Easy lighting upgrades that elevate a space

  • Replace outdated ceiling fixtures with modern designs

  • Add layered lighting

    • Lamps for warmth and ambience

    • Spotlights for task areas

    • Under-cabinet lighting in the kitchen for practicality

  • Switch to LED lighting for long-term savings and better efficiency

  • Explore smart lighting options if you want dimming, timers, and mood settings

Good lighting improves functionality, but it also supports the atmosphere of your home. If you like hosting guests, lighting can be the difference between a space that feels flat and a space that feels warm, comfortable, and inviting.

Takeaways

Home renovations do not need to feel overwhelming, especially when you focus on changes that clearly improve everyday living. The most effective upgrades often start with the rooms you use the most, such as the kitchen and bathroom, as well as overlooked areas like lighting.

If you have the space, additions such as a porch or a loft conversion can improve storage, comfort, and the overall usability of your home. Outdoor improvements, including garden seating, lighting, and practical landscaping, can also make your home feel significantly larger.

Start by deciding what matters most to you, whether that is hosting, energy efficiency, added space, or a more modern look. Once your priorities are clear, your budget will be easier to allocate, and your renovation decisions will feel far more straightforward.


Looking for Home resources?

Looking to enhance your living space and create a sanctuary that supports your well-being? Explore our home partners who offer a wide range of resources to elevate your home environment.


homeHLL x Editor


Settle Into A New Home: First-Week Comfort Tips

The kettle is around here somewhere, but not exactly where you want it. One shoe is by the front door, the other is wedged under a box labeled linen, and you have opened the same cupboard three times looking for mugs that have apparently vanished. Your house is yours, yet it can feel like you are borrowing it, learning its corners while your routines float just out of reach.


In this article, we will explore how to feel grounded during the first week in a new home by prioritizing the rooms you rely on most, unpacking for comfort rather than perfection, and using simple sensory cues and routines that help your brain register safety and familiarity.

The goal is not to “finish” the house immediately, but to create enough stability that daily life can run with less friction while the rest unfolds naturally.

No. 1

First Week: Focus on the Rooms That Carry Your Daily Life

One of the hardest parts of unpacking is the urge to unpack everything at once. When boxes are stacked in nearly every room, spreading yourself too thin can make the entire home feel chaotic, even if the chaos is temporary and manageable.

A better approach is to create reliable spaces in the rooms that support your everyday needs first. Think of these as your “daily life anchors”: the few places that help you wake up, get ready, eat, and unwind without constant searching.

Prioritize high-impact rooms first

Start with spaces that reduce decision fatigue and time-wasting:

  • Bedroom: sleep quality and a sense of calm start here

  • Bathroom: predictable access to toiletries and towels reduces stress

  • Kitchen: even basic meal and drink routines restore normalcy

  • One cozy area: a chair, a corner of the sofa, or a small nook where you can pause

Set up simple, reliable stations (not perfect rooms)

Aim for function over aesthetics. These quick wins give you immediate relief:

  • Make the bed as soon as possible, even if the rest of the room is unfinished

  • Place towels where you can reach them without opening multiple drawers

  • Group coffee, tea, breakfast basics, and mugs in one easy-to-reach cupboard

  • Create a landing zone for keys, mail, school papers, handbags, and chargers

  • Choose one bin or basket for “things I cannot place yet” to keep surfaces clear

These practical details do more than organize. They signal safety to your nervous system and reduce the low-grade stress that comes from constant micro-searching.

No. 2

Unpack for Comfort Over Perfection During the First Week

The first week is rarely the right moment to solve every design dilemma. You do not yet know where the natural light falls during the day, which rooms feel cooler at night, or which areas naturally become social gathering points. Give yourself permission to live in the space before trying to style it.

Instead of striving for perfection, unpack for comfort. Comfort creates a sense of belonging faster than a flawlessly arranged shelf.

Make comfort decisions that are easy to reverse

Choose small changes that warm the space without locking you into a final layout:

  • Lay down a familiar rug to reduce echo and visual emptiness

  • Position a lamp to soften harsh overhead lighting

  • Place your most-used throw blanket and a favourite cushion where you relax

  • Arrange a small stack of favorite books, even if the bookcase is not ready

  • Put familiar artwork on a surface temporarily before committing to wall placement

Use familiar items to reduce emotional friction

Familiarity carries emotional weight. When the environment is new, familiar objects act like “shortcuts” to calm.

Consider unpacking these early:

  • The mug you always use

  • Your regular bedding and pillow

  • A candle or room spray you associate with home

  • A framed photo or small keepsake

  • A soft robe, slippers, or a comforting blanket

One small area with your usual chair, warm light, and a known scent can make the entire house feel less foreign.


No. 3

Create One Peaceful Area Before Tackling the Rest

When you move, every room feels urgent. Boxes need breaking down, cupboards need wiping, cables need untangling, and furniture looks wrong in its new place. Because everything seems to require immediate attention, it helps to intentionally finish one area early.

This is not about denial. It is about creating a visual and emotional refuge inside the mess.

Choose a small zone you can complete in one to two hours

Good options include:

  • Bedside table and the space around it

  • Reading chair and side table

  • Breakfast nook

  • Entrance hall landing area

  • One kitchen counter section that stays clear

Keep the peaceful area simple and functional

To make it feel restful, try this approach:

  • Clean the area thoroughly first

  • Add only essentials

  • Include one calming element, such as a lamp or plant

  • Maintain it daily, even if the rest of the house is still in progress

This finished corner becomes proof of progress. It also gives your attention somewhere gentle to land when the garage or spare room still looks like day one.

If you hired top rated movers, then you probably had an easier day of moving. However, emotionally settling into a new home is yours alone. It requires effort, patience, and a bit of humility.

No. 4

Use Smell, Sound, and Soft Lighting to Build Atmosphere

A home begins to feel like home through the senses. Long before every room is decorated, you can shift the atmosphere using items you likely already own.

Refresh the air and establish a “home” scent

Start with ventilation and a consistent, comforting smell:

  • Open windows in the morning to release cardboard, dust, and paint odours

  • Light candles you genuinely enjoy (not ones you tolerate)

  • Simmer citrus peels or cinnamon on the stovetop for a clean, warm scent

  • Spritz a linen spray on bedding and curtains after making the bed

The key is consistency. Repeating the same gentle scent can create an association that tells your brain, this place is safe and familiar now.

Add sound to reduce the “empty house” feeling

Silence can make a new space feel expansive and unfamiliar. Soft background sound creates a sense of lived-in warmth.

Try:

  • Playing music while you unpack

  • Using a familiar playlist during meal prep

  • Putting on light talk radio or a comforting podcast during sorting sessions

  • Adding white noise at night if the new environment sounds different

Switch to softer lighting at night

Strong overhead lighting can make rooms feel clinical, especially when walls are bare.

Use lighting that supports rest:

  • Table lamps in living areas

  • Warm-toned bulbs rather than cool-white bulbs

  • String lights in a reading corner or bedroom

  • A low lamp in the hallway to reduce nighttime harshness

Soft lighting is one of the fastest ways to make a space feel calmer without buying anything major.


No. 5

Maintain a Simple First-Week Routine

Routines often vanish during the first week after a move. Meals become random, laundry piles up, chargers go missing, and everyone stays up too late because there is always one more box.

Structure does not need to be strict. It simply needs to be recognisable.

Reinstate a few “non-negotiable” daily rhythms

These habits can stabilise the household quickly:

  • Make coffee or tea in the same location each morning

  • Eat one meal at the table, even if boxes are nearby

  • Put shoes and coats in one consistent place

  • Decide where everyone charges devices overnight

  • Keep bedtime roughly consistent, especially for children

Try a short nightly reset to prevent overwhelm

A 10-minute reset reduces morning stress:

  • Load or wash dishes

  • Set out school bags, work items, and keys

  • Start one small laundry load or at least gather it into a basket

  • Clear one countertop so you begin the next day with a clean surface

Routine helps both adults and children settle faster because it creates predictable patterns in an unfamiliar setting.

No. 6

Let the House Show You What It Needs

Every house has a rhythm, and you cannot fully understand it from a floor plan or a moving-day instinct. You might realise the kitchen needs a small planning station, the entryway needs a bench, or the living room works better with furniture pulled closer together.

Those answers come from lived experience, not panic buying.

Notice friction points and solve them one at a time

When something feels annoying repeatedly, it is data. Common early “friction signals” include:

  • You keep dropping bags because there is nowhere to set them down

  • Everyone piles shoes in the same inconvenient spot

  • Mail collects because there is no obvious sorting location

  • You cannot find scissors, tape, or a charger when you need them

  • You avoid a room because the lighting feels harsh or the layout feels awkward

Make small improvements before committing to big purchases

Try temporary solutions first:

  • Use a tray or basket as a placeholder for keys and mail

  • Add removable hooks for coats until you choose permanent ones

  • Rearrange furniture for flow before buying additional pieces

  • Test lamp locations before investing in overhead changes

If the house is still partially unpacked by week two, that can be completely normal. Home is not measured by how many boxes are gone; it is measured by small moments of ease, such as making your first peaceful meal, placing a glass beside your bed, or exhaling when you walk through the door.

Takeaways

Settling into a new home takes time, and it is normal to feel emotional and disoriented during the first week. Focus first on the rooms that support daily life so your routines can restart quickly.

Unpack for comfort rather than perfection by prioritising familiar items, sensory cues, and one finished, peaceful area. These small steps reduce stress and help your brain register the space as safe and lived-in.

Maintain simple routines and let the house reveal what it needs through daily use before making big design decisions. Progress is real even when boxes remain, because home arrives in pieces through consistent, practical action.


Looking for Home resources?

Looking to enhance your living space and create a sanctuary that supports your well-being? Explore our home partners who offer a wide range of resources to elevate your home environment.


homeHLL x Editor


Stop Bugs From Invading Your Home: Prevention Tips That Work

Nobody wants creepy crawlies taking over their home. Even if you are not particularly squeamish, leaving an insect problem unchecked can lead to food contamination, unpleasant odours, damaged belongings, and in some cases, structural issues.


In this article, we will explore practical, proven ways to stop bugs from invading your home by removing what attracts them, blocking their entry points, and using simple deterrents and control strategies that work in real households.

No. 1

Do Not Advertise Your Home to Bugs

Most household bugs are not “random visitors.” They show up because your home provides something they need, typically food, water, shelter, or an easy route indoors. The fastest way to reduce bug activity is to identify what is attracting them and remove those temptations.

Remove food sources that attract insects

Even small traces of food can draw pests inside, especially in kitchens, dining areas, and pet feeding zones. Prioritize these habits:

  • Store pantry items such as cereal, flour, rice, and sugar in sealed containers

  • Put fruit in the fridge if you are dealing with fruit flies

  • Avoid leaving dirty dishes overnight, including cups with sweet drinks

  • Wipe down counters and stovetops after cooking, especially around grease splatter

  • Sweep or vacuum crumbs under tables, high chairs, and sofas

  • Clean up pet food spills promptly and avoid leaving wet food out for hours

Bugs that commonly target exposed food include ants, flies, weevils, roaches, and pantry moths. If you notice insects in dry goods, dispose of the item immediately and inspect nearby packages, because infestations can spread quickly.

Reduce moisture and damp hiding spots

Many bugs thrive in damp conditions, and moisture is one of the biggest reasons insects persist even in otherwise tidy homes. Pay close attention to these moisture triggers:

  • Leaky pipes under sinks and behind toilets

  • Damp bath mats or towels left on the floor

  • Condensation near windows or in basements

  • Standing water in plant trays

  • Slow drains that create humid, organic buildup

Insects commonly drawn to moisture include silverfish, cockroaches, mosquitoes, and termites. Fixing leaks and improving ventilation can have a bigger impact than spraying chemicals, particularly for recurring issues.

Manage light and darkness to make your home less inviting

Different insects prefer different environments. Some are attracted to light, while others seek dark, undisturbed areas.

To reduce light-attracted insects:

  • Avoid leaving lights on at night when windows are open

  • Consider using warmer outdoor bulbs that attract fewer insects

  • Keep curtains or blinds partially closed if indoor lights draw bugs to windows

To reduce insects that prefer darkness and clutter:

  • Improve lighting in basements, storage rooms, and garages

  • Reduce piles of cardboard, paper, or fabric that create sheltered nesting zones

  • Store items in plastic bins rather than open boxes

No. 2

Block Up Entrances Bugs Use to Get Inside

Even if your home is clean, bugs will still enter if they can. Many insects need only a tiny gap to slip inside, especially as temperatures change and they search for warmth or water.

Secure windows without sacrificing airflow

Windows are one of the most common entry points for flying and crawling insects. Practical fixes include:

  • Install fly screens so you can ventilate without inviting pests

  • Repair torn screens and make sure frames sit flush with the window

  • Seal gaps around window frames with caulk

  • Check the basement and bathroom windows carefully, as they are often overlooked

If you enjoy sleeping with windows open, screens are one of the best long-term solutions because they prevent bugs without relying on fragrances or sprays.

Tighten door protection and reduce gaps

Doors are high-traffic entry points, and insects can slip in quickly when doors are left open. Improve your door barriers by:

  • Installing patio screen doors for frequently used exterior doors

  • Adding door sweeps to block gaps under doors

  • Replacing worn weatherstripping along door edges

  • Sealing gaps around the door frame with appropriate sealant

Door sweeps can be especially helpful against cockroaches and spiders, which often enter through small gaps near thresholds.

Seal cracks in walls, floors, and foundations

A hairline crack can still allow insects inside, especially ants. Walk around your home and inspect:

  • Gaps where pipes enter the wall under sinks

  • Cracks in exterior brickwork or siding

  • Spaces around vents, cable lines, or utility boxes

  • Baseboards and corners where flooring meets walls

Use caulk for small cracks and expanding foam for larger gaps, but be careful around electrical fixtures. When in doubt, consult a professional to ensure you are sealing safely.


No. 3

Use Scents and Natural Deterrents Strategically

Certain scents may discourage specific bugs, particularly when used in problem zones like entryways, kitchens, and window sills. While scent-based methods are not a complete solution for heavy infestations, they can work well as part of a layered prevention plan.

Scents that may help repel common household bugs

Consider these options:

  • Mint: often used to discourage ants and spiders

  • Citronella: widely used to deter mosquitoes, especially outdoors

  • Lavender: can discourage flies and moths, and is useful near wardrobes and linen cupboards

Best ways to use scent deterrents at home

To make scent-based strategies more effective:

  • Use oil diffusers near entry points, but keep them out of reach of children and pets

  • Place scented sachets in wardrobes, drawers, and storage areas

  • Use candles in outdoor seating areas to reduce flying insects

  • Refresh scents regularly, as many natural deterrents fade quickly

If you have pets, confirm that any essential oils used are pet-safe. Some oils can be harmful to cats and dogs, particularly in poorly ventilated spaces.

No. 4

Set Up Traps to Catch and Monitor Bugs

Traps can be effective for reducing bug numbers and identifying where bugs are coming from. They are also useful as an early-warning system, letting you spot a growing problem before it becomes a full infestation.

Sticky traps for crawling insects

Sticky traps are simple and widely used. They work best when placed:

  • Along baseboards where bugs travel

  • Behind appliances like fridges and stoves

  • Under sinks and inside cupboards

  • Near bins, pet bowls, or pantry areas

Sticky traps can help capture cockroaches, silverfish, spiders, and other crawling insects. Replace them regularly, because dusty traps lose effectiveness.

Electric traps for flying insects

Electric traps typically use light to attract bugs, then stun them when they approach. They can be helpful for:

  • Flying insects such as flies and moths

  • Indoor areas where window access increases flying bug traffic

  • Garages, enclosed patios, and utility rooms

For best results:

  • Place traps away from food preparation areas

  • Do not position them near open windows, which can draw more insects inside

  • Clean the trap as recommended so it continues to work efficiently

If you are seeing a large number of insects daily, traps should be paired with deeper prevention steps like sealing entry points and removing attractants; otherwise, you will be treating symptoms rather than the cause.


No. 5

Keep on Top of Cleaning and Reduce Clutter

Bugs are far more likely to settle in homes that provide quiet, undisturbed hiding places and easy access to food. Cleaning does not need to be obsessive, but consistency matters.

Cleaning habits that prevent infestations

Focus on routines that remove the things bugs rely on:

  • Wipe kitchen surfaces daily, including around the cooker and toaster

  • Sweep or vacuum high-crumb zones several times per week

  • Empty bins regularly and wash the bin interior when odours build up

  • Rinse recycling thoroughly, especially cans and bottles

  • Clean behind appliances periodically, where crumbs and grease collect

  • Avoid leaving pet bowls out overnight if pests are a concern

Many household cleaners also leave scents that insects dislike, which can offer mild additional deterrence.

Decluttering to eliminate hiding and nesting spots

Clutter is not just a visual issue. It creates stable, protected zones where insects can hide, breed, and remain undisturbed. Reduce risk by:

  • Clearing piles of paper, cardboard, and clothing from floors

  • Storing seasonal items in sealed plastic containers

  • Keeping storage rooms and basements organised and well-lit

  • Avoiding stacks of boxes directly against walls, which creates travel routes

This is especially important for cockroaches and silverfish, which prefer dark, sheltered environments.

No. 6

Know When You Need a Stronger Response

Sometimes prevention and basic home strategies are not enough, especially if insects are already well established. If you are repeatedly seeing bugs despite sealing entry points and maintaining cleanliness, it may indicate:

  • A hidden moisture problem behind walls or under flooring

  • An active nest or colony in wall cavities, roof spaces, or under decks

  • A neighbouring infestation in connected housing

  • Gaps you have not yet identified around plumbing, vents, or foundations

Signs it is time to escalate

Consider professional help if you notice:

  • Cockroaches during the day, which can suggest a large population

  • Ongoing ant trails that return after cleaning

  • Termite activity, wood dust, or hollow-sounding timber

  • Repeated bites or allergic reactions without a clear source

  • Frequent sightings in multiple rooms over several weeks

Professionals can identify the species, locate the source, and apply targeted treatments that are more effective than general sprays.

Takeaways

Keeping bugs out starts with removing the things that attract them, especially exposed food and moisture. Small routine changes, such as sealing food containers and fixing leaks, can significantly reduce insect activity.

Blocking entry points is one of the most reliable long-term strategies, particularly around windows, doors, and cracks in walls. When you pair physical barriers with scent deterrents and well-placed traps, you create multiple layers of protection.

Consistent cleaning and decluttering remove hiding places and prevent minor bug sightings from becoming persistent infestations. If insects continue appearing despite these steps, it may be time to investigate hidden moisture issues or seek professional support.


Looking for Home resources?

Looking to enhance your living space and create a sanctuary that supports your well-being? Explore our home partners who offer a wide range of resources to elevate your home environment.


homeHLL x Editor


Common Spa System Issues And How To Fix Them Quickly

Owning a spa is one of the best ways to build year-round relaxation into your routine, but even well-maintained systems can run into occasional hiccups. The good news is that many problems have clear warning signs and can be resolved quickly if you know what to check first.


In this article, we will explore the most common spa system issues, how to troubleshoot them safely, and when it is smarter to call a professional to prevent costly damage.

No. 1

Water Heating Problems

Heating complaints are among the most frequent spa service calls, and they usually come down to one of three factors: power, flow, or the heater components themselves. When water does not heat at all, heats too slowly, or fluctuates unpredictably, start with the simplest checks before assuming a major part has failed.

Fast checks to perform first

Before you replace anything, confirm these basics:

  • The water level is high enough to maintain proper circulation

  • Filters are clean and not restricting flow

  • Valves are open and not partially closed after maintenance

  • The spa is receiving power, and the breakers have not tripped

  • The temperature setting is correct and not in an economy or sleep mode

Low water flow is a hidden cause of heating issues because most spa heaters will not activate unless a pressure switch or flow sensor confirms circulation.

Common causes and practical fixes

If the basics look good, move to these targeted steps:

  • Reset the spa at the breaker to clear minor control glitches

  • Inspect the filter and remove it temporarily to test whether the flow improves

  • Confirm pump operation, since a weak pump can prevent the heater from engaging

  • Check for scale buildup on heater components if you have hard water

Consistent heating irregularities may indicate corrosion or wear in the heating element, a failing thermostat, or a sensor problem. If the unit repeatedly throws heater or flow-related error codes, a professional inspection is often the safest and fastest route.

No. 2

Pump and Circulation Issues

When jets lose pressure or water movement seems weak, the pump and circulation system should be your first focus. Circulation is the backbone of heating, filtration, and sanitizing, so addressing flow problems early prevents a chain reaction of secondary issues.

Symptoms that point to circulation trouble

Watch for these common signs:

  • Jets feel weaker than usual

  • Water looks cloudy despite normal chemical levels

  • Heater fails to engage or displays a flow-related error

  • Unusual pump noise, rattling, or vibration

  • Air bubbles are blasting through the jets more than normal

How to clear an airlock quickly

Airlocks often happen after draining and refilling.

A straightforward method can restore flow:

  • Turn off the power to the spa at the breaker

  • Loosen the pump union slightly to release trapped air

  • Wait until you see water begin to seep or flow steadily

  • Retighten the union and restore power

If you are uncomfortable accessing the pump housing, do not force it. A small mistake can cause a leak, a cracked fitting, or an electrical risk.

Routine steps that prevent pump issues

To keep circulation strong:

  • Rinse filters frequently and deep clean them on a schedule

  • Check intake areas for debris or obstruction

  • Run the spa regularly, even if you are not using it daily

  • Keep water chemistry balanced to reduce scale and buildup in lines

Persistent noise may suggest bearing wear, cavitation, or a failing motor. Those problems rarely improve on their own, and delaying repairs can lead to more expensive replacements.


No. 3

Leaking Components

Leaks are stressful because they can waste water, dilute chemical balance, and cause damage over time. The key is to identify the source quickly and determine whether it is a simple fitting issue or an internal plumbing problem that requires a technician.

Where leaks commonly start

Many leaks begin in accessible areas such as:

  • Pump unions and connection points

  • Heater fittings

  • Valves and drain plugs

  • Jet bodies and gaskets

  • O-rings, seals, and clamp connections

Keep in mind that water can travel along pipes and surfaces before it drips somewhere visible, so the drip location is not always the true source.

Quick leak troubleshooting checklist

Try these steps in order:

  • Inspect the equipment bay with a flashlight while the spa is running

  • Look for wet insulation, mineral deposits, or small spray patterns

  • Tighten fittings gently, avoiding over-tightening plastic components

  • Replace worn gaskets or O-rings if you can access them safely

  • Mark the waterline and monitor how quickly the level drops

If the leak appears beneath the shell or inside foam insulation, professional repair is usually necessary. Regular inspections and balanced water chemistry help prevent deterioration of rubber and plastic parts that cause many small leaks.

No. 4

Water Quality Concerns

Cloudy water, foam, or unpleasant odors are not just cosmetic issues. They indicate that sanitizer levels, filtration, or bather load are out of balance. Water quality problems also shorten the life of pumps, heaters, and jets because poor chemistry promotes scale, corrosion, and buildup.

Common causes of cloudy or smelly water

These are frequent triggers:

  • Low sanitizer levels

  • High pH or unstable alkalinity

  • Dirty filters restricting circulation

  • Heavy bather load without compensating treatment

  • Oils, lotions, detergents, or cosmetics in the water

Steps to restore clarity quickly

If water quality drops suddenly:

  • Test pH, alkalinity, and sanitizer first

  • Adjust alkalinity before fine-tuning pH

  • Apply a shock treatment based on your sanitizer type

  • Run the pump and filtration cycle longer for 24 hours

  • Clean or replace filters to improve circulation

Shock treatments can restore water quality quickly, but long-term clarity depends on consistent weekly testing and filter care.

Weekly maintenance that keeps the water stable

A simple weekly routine usually prevents most problems:

  • Test and adjust pH, alkalinity, and sanitizer

  • Check for early foam or cloudiness and correct promptly

  • Rinse filters and remove visible debris

  • Wipe the waterline to reduce buildup


No. 5

Electrical and Control Panel Errors

Modern spas rely on control boards, sensors, and control panels to run heating cycles, filtration schedules, and safety shutoffs. When you see error codes, flickering displays, or unresponsive buttons, treat it seriously and prioritize safety.

Safety first: what to do before inspecting anything

Before you touch components:

  • Turn off the power at the breaker

  • Confirm the spa is fully de-energized

  • Keep the equipment bay dry and well-lit

  • Avoid handling wiring unless you are qualified

Moisture infiltration and power surges are common causes of electronic failures, especially in harsh weather conditions.

Common fixes that resolve many panel errors

Some issues are straightforward:

  • Reset the breaker to clear minor faults

  • Check for loose sensor connections if they are accessible and clearly labeled

  • Inspect for corrosion on connectors and terminals

  • Verify sensors are properly seated, as misalignment can trigger false readings

If error codes persist, consult the system manual for the specific code. Replacing boards or sensors can be expensive, so accurate diagnosis matters.

No. 6

Preventive Maintenance Practices

Most spa problems are easier to prevent than to fix. A short maintenance routine protects your equipment, stabilizes water quality, and helps you spot small issues before they become shutdowns.

Monthly and seasonal maintenance tasks

Build these into your schedule:

  • Flush lines periodically to reduce biofilm and buildup

  • Inspect hoses, jets, fittings, and unions for early signs of wear

  • Clean the cover and condition it to reduce cracking

  • Check the water level and top up before it drops below the safe circulation level

  • Run pumps and jets briefly, even during off-seasons, to keep seals lubricated

Core preventative checklist

Keep these habits consistent:

  • Clean or replace filters regularly

  • Balance water chemistry weekly

  • Inspect seals and gaskets for leaks

  • Maintain a clean, well-fitting cover to reduce debris and heat loss

Small, consistent actions often prevent the expensive issues: heater failure, pump strain, and persistent water clarity problems.

No. 7

Choosing Quality Equipment and Support

When you need replacement parts or an upgrade, compatibility and reliability matter more than price. A trusted supplier helps ensure that pumps, heating elements, and control systems meet proper standards and match your spa model.

For example, a well-built hot tub in Calgary benefits from durable components designed to handle local temperature swings and seasonal use. Many owners also rely on established retailers like Backyard Canada for guidance on selecting parts, maintaining efficiency, and choosing systems that suit regional conditions.

What to prioritize when buying parts or booking service

Look for support that offers:

  • Correct part matching for your spa model and year

  • Clear warranty coverage and service policies

  • Guidance on local water conditions and seasonal operation

  • Professional installation options for electrical or plumbing components

Choosing the right support reduces downtime and helps your spa stay dependable for the long term.

Takeaways

Spa issues are usually manageable when you troubleshoot in the right order, starting with water level, filtration, and circulation before assuming a part has failed. Heating problems, weak jets, and cloudy water often share the same root causes, so a methodical approach saves time and money.

Leaks and electrical errors should be treated with extra caution because they can lead to equipment damage or safety risks if ignored. When problems persist beyond basic fixes, professional diagnosis is often the most cost-effective path.

Preventive maintenance is what keeps a spa reliable: clean filters, stable water chemistry, regular inspections, and seasonal operation habits. Investing in quality components and dependable support, including options like a hot tub in Calgary and guidance from Backyard Canada, helps protect your setup for years.


Looking for Home resources?

Looking to enhance your living space and create a sanctuary that supports your well-being? Explore our home partners who offer a wide range of resources to elevate your home environment.


homeHLL x Editor


How Families Use Outdoor Spaces During Holidays

When the holiday season arrives, homes naturally become the center of activity, but it is not only the interiors that come alive. Outdoor spaces such as patios, driveways, porches, and yards play a surprisingly important role in how families celebrate, host, and create lasting memories. From overflow seating during busy gatherings to cozy photo backdrops and neighborhood traditions, these areas often function as true extensions of the home.


In this article, we will explore how families actually use their outdoor spaces during the holidays, why these spaces matter more than many people realize, and how you can make your own outdoor areas more functional, comfortable, and festive without overcomplicating your plans.

No. 1

Outdoor Spaces as Holiday Gathering Hubs

One of the most common ways families use outdoor areas is for casual holiday gatherings. Patios and decks, in particular, are ideal for relaxed get-togethers where guests can circulate, enjoy fresh air, and take breaks from the intensity of indoor hosting. Even in colder climates, outdoor spaces can still work well with the right setup, especially for shorter visits, post-meal conversations, or dessert and drinks.

Outdoor gathering areas also reduce pressure on your indoor layout. Instead of squeezing everyone into one living room or kitchen, you can create a natural flow between inside and outside that feels more comfortable and social.

Why patios work so well for holiday hosting

Patios often become the “second living room” during the holidays because they offer:

  • More room for guests to spread out

  • Better airflow and a less crowded indoor experience

  • A natural place for casual conversations and mingling

  • An easy transition zone for people arriving and leaving

  • A dedicated spot for warm drinks, snacks, or dessert stations

Setup ideas for a comfortable outdoor gathering

If you want your patio or deck to feel welcoming without major renovations, focus on a few practical essentials:

  • Seating variety, including chairs, benches, and even outdoor-safe floor cushions

  • Simple warmth options such as outdoor heaters or a fire pit (where permitted)

  • Wind protection, such as screens, curtains, or strategic furniture placement

  • A dedicated surface for food and beverages

  • A clearly lit pathway to prevent trips and slips after dark

No. 2

Driveways: The Unexpected Social Space

Driveways are often overlooked as “just practical,” yet during the holidays, they frequently turn into active social zones. They function as a natural meeting point where guests are greeted, conversations begin, and quick hellos turn into longer chats. In many households, the driveway becomes the place where people linger while waiting for others to arrive or while saying goodbye.

For families with children, driveways also become convenient play areas because adults can supervise while still socializing nearby. And in neighborhoods with strong community traditions, driveways can become part of a larger shared holiday experience.

Ways families use driveways during the holidays

Driveways commonly become a multi-use area for:

  • Greeting guests and creating a warm first impression

  • Staging coats, gifts, and food drop-offs before heading inside

  • Kid-friendly games and activities while adults talk

  • Neighborhood catch-ups while admiring decorations

  • Quick photo moments near the front of the home

Easy ways to make your driveway feel more festive and functional

Small upgrades can make a driveway feel intentional rather than incidental:

  • Keep the area well-lit for safety and a welcoming feel

  • Add simple décor near the garage or walkway

  • Maintain a clear path free of clutter, cords, or slippery leaves

  • Consider music at a low volume to create an atmosphere near arrivals


No. 3

Yards as the Heart of Holiday Traditions

Front and backyards often take on a more magical role during the holiday season. These are the spaces where many families express creativity through decorations, lighting displays, and seasonal setups. Beyond visual appeal, yards are frequently used for traditions that bring people together year after year.

For some households, the yard becomes the main “experience zone,” where kids run around while adults catch up, where extended family gathers for group photos, or where quieter moments happen under festive lights.

Common yard-based holiday traditions

Families often use yards for traditions such as:

  • Decorating bushes, trees, and fences together

  • Setting up an outdoor cocoa bar for visitors and neighbors

  • Hosting a small celebration around a fire pit

  • Creating a walking path through lights for kids to explore

  • Putting up seasonal lawn displays that become a yearly ritual

Ideas for creating a yard tradition that sticks

The best traditions are simple, repeatable, and enjoyable rather than complicated.

Consider traditions that are easy to reset each year, such as:

  • A yearly “lights on” night with hot drinks and music

  • A short family walk around the yard to admire the decorations

  • A holiday craft activity outdoors on mild afternoons

  • A photo in the same spot each year to track family growth

No. 4

Capturing Holiday Memories Outdoors

Outdoor spaces have become increasingly popular for holiday photography. Natural daylight often provides more flattering lighting than indoor bulbs, and decorated porches or yards create ready-made backdrops for family portraits and holiday cards. Even candid moments, such as kids playing outside or guests laughing on the patio, can become the photos you cherish most.

Outdoor photography also helps families capture a broader story of the season. It shows the setting, the decorations, and the atmosphere, not just a crowded room.

Outdoor photo moments families love most

Some of the most common outdoor holiday photo opportunities include:

  • Family portraits in front of a decorated porch or yard

  • Candid photos of kids playing in the driveway

  • Group shots during arrivals or goodbyes

  • Photos with pets exploring the decorations

  • Evening shots with lights in the background for a warm, festive glow

Quick tips for better holiday photos outdoors

You do not need professional equipment to improve your results.

A few practical adjustments can help:

  • Take daytime photos in open shade to avoid harsh shadows

  • Use porch lights or soft outdoor lighting for evening shots

  • Keep the background simple so the people remain the focus

  • Choose one “signature spot” that stays consistent year to year


No. 5

Creating Flexible and Functional Outdoor Zones

One of the biggest advantages of outdoor areas is flexibility. Indoor spaces can quickly feel crowded during holiday gatherings, but patios, yards, and driveways add valuable room for guests to spread out. They also allow multiple activities to happen at once, which helps families avoid the common holiday problem of everyone piling into a single noisy space.

When outdoor zones are planned thoughtfully, they improve comfort for all types of guests, including children, older relatives, and anyone who needs a quiet moment.

Practical zones to create for holiday gatherings

You do not need a large yard to make this work.

Even small outdoor spaces can be divided by function:

  • Conversation zone with seating grouped close enough to talk

  • Warm drink station for cocoa, coffee, or tea

  • Kid activity zone with simple games or crafts

  • Quiet corner for guests who need a break from noise

  • Photo spot with a consistent, festive backdrop

Features that make outdoor zones easier to use

If you want your outdoor space to feel genuinely helpful during the holidays, focus on usability:

  • Safe walking paths with reliable lighting

  • Seating that is stable and comfortable

  • Blankets or throws that guests can grab without asking

  • A small bin or basket for essentials like napkins, hand warmers, or flashlights

No. 6

The Rise of Outdoor Holiday Dining

Outdoor dining is another growing trend during the holidays. Instead of gathering around a traditional indoor table, families are setting up outdoor dining areas with string lights, blankets, and portable heaters. Even when the main meal is served indoors, dessert or drinks may shift outside to create a fresh, less formal atmosphere.

Outdoor dining also solves a practical problem: space. When guest lists grow, outdoor tables offer additional seating without forcing a cramped indoor arrangement.

Outdoor dining formats that work well

Depending on weather and space, families often choose:

  • Dessert and coffee outdoors after the main meal

  • A buffet table on the patio to reduce kitchen crowding

  • Small plate stations to encourage mingling

  • A casual outdoor brunch gathering during the holiday week

Essentials for comfortable outdoor dining

To keep outdoor dining enjoyable rather than stressful, prioritize comfort and safety:

  • Warmth options, such as heaters or fire pits (where appropriate)

  • Wind management, especially for lightweight plates and napkins

  • Lighting that is bright enough for eating but still cozy

  • Easy cleanup tools, such as lined bins and a simple dish station


No. 7

Enhancing Atmosphere with Lighting

Lighting plays a crucial role in making outdoor spaces usable and inviting during the holidays. The right lighting can transform a simple patio or yard into a warm, welcoming environment suitable for evening gatherings, arrivals, and traditions. Good lighting also improves safety by making steps, pathways, and edges visible.

Many homeowners choose to upgrade their outdoor lighting for both functionality and aesthetics. For example, some may decide to install Christmas lights in Westfield or explore similar services in their local area to achieve a polished and festive look without the stress of doing it themselves.

Types of holiday lighting families use outdoors

Families typically use lighting to create different effects and improve usability:

  • Warm ambient lighting for patios and seating areas

  • Pathway lighting to guide guests safely

  • Decorative displays that highlight trees, railings, or rooflines

  • Photo-friendly lighting to create a soft glow in the background

Planning lighting for both beauty and function

A balanced approach helps you avoid the common problems of overly harsh lighting or dim, unusable spaces.

Consider:

  • Layering light sources instead of relying on one bright fixture

  • Prioritizing pathways first, then decorative elements

  • Ensuring cords and plugs are secured and protected from the weather

  • Choosing a consistent color temperature for a cohesive look

Takeaways

Outdoor spaces play a bigger role in holiday celebrations than many families expect, functioning as gathering hubs, overflow areas, and memory-making settings. Patios, driveways, and yards offer flexibility that helps hosting feel less crowded and more comfortable.

When outdoor areas are planned with simple zones, warmth, and lighting, they become practical extensions of the home rather than “extra space.” Even small updates like clearer pathways, cozy seating, and a dedicated drink station can improve the experience for guests.

Holiday lighting can transform how an outdoor space looks and how it functions, especially for evening gatherings and family traditions. Whether you decorate yourself or choose to have Christmas lights installed in Westfield, a thoughtful setup can make your outdoor space one of the most enjoyed parts of the season.


Looking for Home resources?

Looking to enhance your living space and create a sanctuary that supports your well-being? Explore our home partners who offer a wide range of resources to elevate your home environment.


homeHLL x Editor


What To Expect During A Professional Carpet Cleaning Service - Step-by-Step

Carpets in homes across Bloomington experience constant wear from daily use. Dirt, allergens, and stains settle deep into fibers, often going unnoticed until they begin to affect appearance and air quality. Regular vacuuming helps maintain the surface, but it does not address what lies beneath.


Professional carpet cleaning offers a deeper, more effective solution. It uses specialized equipment and methods designed to remove embedded debris while protecting the carpet’s structure. Knowing what happens during the process helps set clear expectations and ensures better results.

In this article, we provide a helpful step-by-step guide explaining how a professional carpet cleaning service works, so you can feel confident before scheduling your next cleaning.

No. 1

Initial Inspection and Carpet Assessment

The process begins with a detailed inspection of your carpet. A technician evaluates the type of material, level of soiling, and any visible stains. This step helps determine the most suitable cleaning approach for your specific carpet.

Different carpets require different methods. Synthetic fibers react differently compared to natural ones, and using the wrong treatment can cause damage. The inspection ensures that the cleaning process is both safe and effective.

During this stage, professionals often plan a tailored approach based on the carpet’s condition and cleaning needs. This is similar to local service practices at Magna-Dry Bloomington, where low-moisture techniques are used to avoid over-wetting and achieve better results.  This also helps maintain carpet texture and reduces the risk of long drying times. 

No. 2

Pre-Vacuuming for Surface Dirt Removal

Before applying any cleaning solution, the carpet is thoroughly vacuumed. This step removes loose dirt, dust, and debris that sit on the surface. It also prepares the carpet fibers for deeper treatment, allowing cleaning solutions to work more effectively.

Pre-vacuuming is important because it prevents dirt from turning into mud during cleaning. It also allows the deeper cleaning stages to focus on embedded contaminants rather than surface particles.

Many modern services rely on high-efficiency products to ensure thorough removal. Proper preparation is considered essential to achieving a deeper, more consistent clean. 


No. 3

Pre-Treatment of Stains and High-Traffic Areas

After vacuuming, a specialized solution is applied to stains and heavily used areas. This solution works to break down oils, dirt, and residues trapped within the fibers. It also helps loosen stubborn buildup, making the overall cleaning process more effective and thorough.

High-traffic zones like hallways and living rooms usually need extra attention. Stains from spills, pets, or daily activity are treated individually to improve removal effectiveness.

Reduced-moisture and eco-friendly solutions are commonly used at this stage. These treatments help loosen dirt without saturating the carpet, with a focus on faster drying and minimal residue while maintaining effective cleaning results.

No. 4

Deep Cleaning Process

The main cleaning phase involves removing dirt from deep within the carpet fibers. Depending on the method used, this may involve hot-water extraction. This step ensures that deeply embedded contaminants, allergens, and residues are effectively lifted, leaving the carpet cleaner, fresher, and more hygienic. 

Hot-water extraction uses heated water and strong suction to remove dirt and bacteria. Low-moisture cleaning, on the other hand, uses minimal water and specialized compounds for quicker drying.

Each method has its advantages. The choice depends on the carpet type, level of dirt, and desired drying time. Professional technicians select the most suitable option based on the earlier assessment.


No. 5

Agitation, Rinsing, and Extraction

In cases where dirt is deeply embedded, agitation is used to loosen it. This involves gentle brushing or machine-assisted scrubbing to allow cleaning solutions to penetrate deeper.

Once the dirt is loosened, the carpet is rinsed and extracted. High-powered equipment removes both the cleaning solution and the dissolved dirt from the fibers. This step also helps restore the carpet’s original texture and prevents residue buildup that can attract dirt again.

Proper extraction is essential. It ensures that no residue is left behind, which could otherwise attract more dirt over time and reduce the effectiveness of the cleaning.

No. 6

Drying and Final Inspection

After cleaning, the drying process begins. Depending on the method used, drying times can vary from a few hours to nearly a full day. Air movers or proper ventilation may be used to speed up the process.

Quick drying is important to prevent mold growth and to allow normal use of the space as soon as possible. Low-moisture methods are often preferred for this reason. It also helps preserve the carpet’s structure and reduces the chances of odors developing after cleaning. 

Finally, a walkthrough is conducted to ensure the results meet expectations. The technician checks for any missed spots and provides guidance on maintaining the carpet after cleaning.

Takeaways

Professional carpet cleaning follows a structured process designed to deliver deep and lasting results. Each step, from inspection to final drying, plays an important role in improving cleanliness and extending the carpet's lifespan. Knowing what to expect helps you prepare better and ensures a smoother experience. With the right approach, your carpet can stay fresh, hygienic, and visually appealing for a long time.


Looking for Home resources?

Looking to enhance your living space and create a sanctuary that supports your well-being? Explore our home partners who offer a wide range of resources to elevate your home environment.


homeHLL x Editor


How To Host A Beautiful Celebration At Home

Hosting at home is at its best when you focus on control and flow. You are managing space, timing, and guest experience at the same time, and most problems come from overcomplicating the setup or trying to do everything at once. A clean plan, limited moving parts, and clear priorities make the event feel effortless without adding pressure.


In this article, we will explore how to host a beautiful celebration at home by designing a smart layout, building a practical table setup, serving food that matches your timing, using decor strategically, and planning for cleanup in a way that keeps you present with your guests.

No. 1

Start With Layout and Guest Flow

Before thinking about decor or food, look at how people will move through your space. A home celebration succeeds when guests can enter, settle in, eat, and interact without congestion or confusion.

Define clear zones to prevent crowding

When everything happens in one area, movement slows down, and the room feels smaller than it is. Separate key zones so guests intuitively understand where to go without being directed.

Use a simple zone plan such as:

  • Entry area for greetings and initial gathering

  • A central table or station for food and drinks

  • Seating areas for conversation, ideally in small clusters

  • Clear walking paths between zones, especially around doorways and corners

Quick ways to improve flow in small spaces

Even compact homes can host comfortably if the layout is intentional. Focus on creating space where it matters most, even if the room looks slightly more minimal than usual.

Consider these adjustments:

  • Move side tables, decorative stools, or extra chairs to a bedroom temporarily

  • Push larger furniture slightly toward the walls to create walking space

  • Keep high-traffic paths at least shoulder-width where possible

  • Place drinks away from the main food station to reduce bottlenecks

  • Choose one primary “gathering” room instead of spreading guests everywhere

When the layout works, everything else becomes easier to manage because you are not constantly reacting to crowding or traffic jams.

No. 2

Keep the Table Setup Practical and Clean

The table is the visual center of most home celebrations. It should look intentional at the start and remain functional once guests begin eating, setting down glasses, and passing plates.

Build structure with simple, reliable layers

A table looks “hosted” when it has a consistent foundation. Instead of filling the surface with decor, prioritize a few elements that create order.

A practical table formula:

  • One base layer that defines the surface (tablecloth or runner)

  • Place settings that match the formality of the event

  • One centerpiece that stays low and does not block sightlines

  • Small accents that support the theme, not compete with it

Items like customized table runners help define the table visually while protecting surfaces and keeping the setup organized. They also add polish without requiring extra decor that will need to be moved later.

Keep guest comfort in mind

Overcrowded tables look impressive in photos, but become frustrating during the event. Guests need elbow room, space for shared dishes, and somewhere to put phones or handbags if seating is tight.

To keep the setup guest-friendly:

  • Keep centerpieces low enough for conversation across the table

  • Avoid decor that sheds (loose petals, glitter, fragile items)

  • Use stable candles or enclosed lighting to reduce risk

  • Ensure each place setting has enough space for a plate and a drink

A clean table is not a sparse table; it is one where every item earns its spot.


No. 3

Plan Food Around Timing, Not Variety

Food is where most hosts overextend. Too many menu items create more prep, more dishes, and more opportunities for delays. A smaller menu that is timed well will feel more generous than a large menu that arrives late or requires constant attention.

Choose food that holds well and serves easily

The best home-hosted menus are designed to be low-maintenance during the event. Aim for dishes that can sit for a while without losing texture or safety.

Build your menu around:

  • Dishes that can be served at room temperature

  • Items that can be reheated quickly without careful plating

  • Foods that can be portioned easily to avoid crowding at the table

  • A mix of familiar staples and one or two standout options

Create a service plan so you are not trapped in the kitchen

A smooth event usually has fewer “hard moments” where everything must be done at once. Plan food based on the flow of the gathering.

Useful timing strategies:

  • Serve a simple snack early so guests are comfortable while arriving

  • Delay the main spread until most guests have settled in

  • Refresh one or two items later rather than serving everything at once

  • Keep dessert simple, or pre-portion it to reduce last-minute work

If you want the event to feel relaxed, your menu should be designed so you can spend most of your time with guests, not checking timers.

No. 4

Use Simple Decor That Scales the Space

Decor should support the atmosphere, not take over the room. The goal is to make your home look intentional and celebratory while staying easy to set up, live with, and clean up.

Pick a theme you can execute consistently

A cohesive look usually comes from restraint, not abundance. Choose one theme or palette and let repetition do the work, rather than adding unrelated elements.

A simple decor framework:

  • One primary color and one supporting neutral

  • One repeating texture (linen, glass, greenery, wood)

  • One focal point (table, entry, or a small photo moment)

Lighting also plays a major role. Soft, warm lighting makes spaces feel more welcoming and helps create a “special occasion” atmosphere without adding extra decor.

Use visual markers for larger or outdoor gatherings

If guests need help finding the right home, entrance, or celebration area, clear signage improves the experience immediately. It also reduces the number of questions you need to answer while you are hosting.

For outdoor or larger gatherings, visible markers help define the celebration. Using yard sign letters can highlight the event and guide guests without needing extra explanation.

Prioritize decor that is easy to remove

Complex installations often create two problems: they take too long to set up, and they make cleanup feel like a second event. Choose decor that can be placed quickly and removed just as easily.

Examples of low-effort, high-impact decor:

  • Grouped candles on a tray

  • A simple arrangement of greenery or seasonal stems

  • Coordinated napkins or a single repeated accent color

  • One focal display near the entryway


No. 5

Manage Timing to Avoid Bottlenecks

A well-timed event feels effortless because guests are never waiting too long for the next thing, and you are not trying to do five tasks at once. Poor timing tends to create crowding, delayed food, and a host who feels rushed.

Stagger the “big moments”

Rather than launching everything at once, let the gathering breathe. Give guests time to arrive, settle, and start conversations before introducing food, speeches, or activities.

A simple pacing structure:

  • Arrival window with drinks available

  • Light snack or starter once most people are there

  • Main food service after guests are settled

  • Dessert or a closing moment later to signal the final phase

Focus on what affects guests directly

If multiple tasks need attention, prioritize the details that influence comfort and flow first.

Top priorities during the event:

  • Food availability and serving access

  • Seating and conversational comfort

  • Temperature, lighting, and music level

  • Clean, stocked bathrooms

If those are handled, small imperfections in decor or timing will not matter.

No. 6

Prepare for Cleanup Before the Event Starts

Cleanup is part of hosting. Planning for it early makes the end of the night significantly easier, and it keeps your home feeling manageable throughout the gathering.

Set up “systems” guests can use without asking

When disposal and dish areas are obvious, guests naturally help maintain the space. You also avoid clutter building up on random counters and side tables.

A basic cleanup setup includes:

  • Clearly placed trash and recycling bins

  • A designated area for used dishes (a tray, bus tub, or one side of the sink)

  • Extra cloths or wipes for quick surface resets

  • A spare garbage bag ready for a fast mid-event swap

Reset as you go, in short bursts

You do not need to clean constantly, but small resets prevent a larger mess later.

Quick resets that take under two minutes:

  • Clear and wipe the drink area

  • Replace napkins or paper towels

  • Remove empty bottles or packaging

  • Load the dishwasher once during the event, if possible

No. 7

Stay Flexible During the Event

Even with a solid plan, things will shift. Guests may rearrange furniture, timing may change, or food may run out faster than expected. The best hosts respond without letting small surprises change the mood.

What flexibility looks like in practice

Staying flexible does not mean abandoning structure; it means adjusting calmly.

Examples:

  • If one area becomes crowded, move a snack bowl or drink station to a second location

  • If guests linger at the table, delay cleanup and lean into conversation

  • If seating is tight, bring in extra chairs from another room without apologizing for the mismatch

  • If a dish runs low, replace it with something simple rather than rushing to remake it

A comfortable atmosphere comes from how the host behaves as much as how the home looks.

No. 8

Focus on Experience Over Perfection

A successful home celebration is not about flawless presentation. It is about how the space feels and how easily guests can connect with one another. Guests remember warmth, ease, and thoughtful details far longer than they remember whether every plate matched.

Host decisions that improve guest experience fast

If you want to make the event feel “complete” without doing more work, prioritize the details that guests feel immediately:

  • Comfortable temperature and ventilation

  • Enough seating options, even if they are informal

  • A clear place for coats and bags

  • Music set to a level that supports conversation

  • Simple food access with obvious serving utensils and plates

When the layout is clear, the food is manageable, and the setup is simple, the event runs smoothly. Keeping things controlled and straightforward allows you to host without stress and still create a setting that feels polished.

Takeaways

A beautiful home celebration starts with flow: define zones for arrival, food, drinks, and conversation so guests can move comfortably. When movement is easy, the event feels calmer, and your space feels larger.

Keep the table and decor intentional but practical by using simple layers, low centerpieces, and a consistent theme. Plan food for timing and ease of service so you can stay present rather than managing constant kitchen tasks.

Reduce stress by pacing the event, setting up cleanup systems in advance, and staying flexible as the night evolves. Guests will remember comfort, connection, and atmosphere more than perfect details.


Looking for Home resources?

Looking to enhance your living space and create a sanctuary that supports your well-being? Explore our home partners who offer a wide range of resources to elevate your home environment.


homeHLL x Editor