Posts in home
Homeowners: What To Ask Before Hiring A Plumber In Norcross, GA

Finding a trustworthy plumber in Norcross, Georgia involves more than choosing the first name you see online. A recent survey found that 75% of homeowners reported higher satisfaction when they carefully vetted service providers, and plumbing is one area where the stakes are high: the wrong hire can lead to recurring leaks, water damage, failed inspections, or unexpectedly high bills.



In this article, we will explore the most important questions to ask before hiring a plumberin Norcross GA, so you can compare quotes accurately, verify credentials with confidence, and select a professional who can complete the work safely and correctly the first time.

No. 1

Questions to Ask for Plumber Quotes in Norcross, GA

Before you commit to any plumbing company, you need a quote that is clear, specific, and easy to compare with other bids. Vague estimates are one of the biggest reasons homeowners experience surprise costs mid-project, especially when the scope changes or hidden issues are discovered behind walls, under slabs, or inside drain lines.

Ask for an itemized estimate

An itemized quote helps you understand exactly what you are paying for and makes it easier to compare multiple providers.

Ask the plumber to break the estimate down into categories such as:

  • Labor hours and hourly rate (or flat-rate labor)

  • Materials and parts (including brand and model when relevant)

  • Permit fees (if applicable)

  • Disposal fees (for old fixtures, water heaters, or damaged materials)

  • Travel or service-call charges

  • After-hours or emergency surcharges

Also, ask whether the quote is a binding price or an estimate that may change. If it can change, request clarity on what triggers a price adjustment.

Confirm what the quote includes and excludes

Many misunderstandings come from assumptions. Get explicit answers about what is included in the scope of work, such as:

  • Patchwork and cleanup (drywall, tile removal, or concrete access)

  • Hauling away old fixtures or packaging

  • Replacing shutoff valves, supply lines, or connectors

  • Testing the system after installation or repair

If the job involves troubleshooting, ask what diagnostic steps are included and whether camera inspections, leak detection tools, or pressure testing will add cost.

Compare at least three quotes, but compare the right way

It’s advisable to request at least three independent quotes from different plumbers in the area. This helps you understand typical pricing for your specific repair and prevents you from overpaying due to urgency or incomplete information.

When you compare quotes, look beyond the total price and evaluate:

  • How detailed and transparent the estimate is

  • The quality of parts proposed (budget vs. premium)

  • Timeline and scheduling availability

  • Communication clarity and professionalism

Aim to compare not only on price but also on the quality of service, because the lowest bid can become the most expensive if the repair fails or creates additional damage.

No. 2

Ensuring Plumber Licensing and Insurance in Norcross, GA

Verifying licensing and insurance is not a formality; it is a core risk-management step for homeowners. In Norcross, plumbers should hold the appropriate Georgia state licensing to demonstrate training, competence, and compliance with applicable standards. Ensure these documents are up to date before contracting.

Ask for proof of licensing and confirm it

Ask the plumber to provide their license number and the exact license type. If they hesitate or claim it is unnecessary, treat that as a red flag.

When you check licensing, you are protecting yourself from:

  • Work that fails inspection or violates local code

  • Unqualified repairs that lead to leaks or pipe damage

  • Difficulty holding the contractor accountable if a dispute occurs

Also, ask whether they pull permits when required. A reputable plumber will explain when permits are necessary and how the process works.

Verify liability and workers’ compensation insurance

Insurance protects both you and the workers on your property.

Confirm they carry:

  • General liability insurance, which helps cover property damage caused by the contractor

  • Workers’ compensation insurance, which helps cover injuries to workers while on-site

Ask for a certificate of insurance (COI) and confirm it is current. This is especially important for larger repairs like water heater replacements, repiping, sewer line work, or any job requiring access behind walls or under floors.

Clarify who is actually doing the work

In some cases, the person providing the quote is not the person performing the repair.

Ask:

  • Will the work be completed by employees or subcontractors?

  • If subcontractors are used, are they also licensed and insured?

  • Who supervises the job and signs off on completion?

This helps prevent situations where credentials checked during the quote stage do not match the crew arriving at your home.


No. 3

Evaluating Experience and References of Norcross Plumbers

Experience matters in plumbing because diagnosis often determines the outcome. A seasoned plumber is more likely to identify the root cause of a recurring issue, not just treat the symptoms. Industry-specific skills can make a significant difference in the quality of service you receive.

Ask what similar work they do most often

Start by matching their strengths to your needs.

Ask how frequently they handle jobs like yours, such as:

  • Drain clogs and recurring backups

  • Water heater repair or replacement

  • Sewer line repair, replacement, or trenchless options

  • Leak detection and pipe repair

  • Fixture upgrades during bathroom or kitchen remodels

  • Pressure issues, regulator replacement, or whole-home plumbing evaluations

A plumber who regularly completes similar projects is more likely to work efficiently and prevent avoidable mistakes.

Request references and review past work

Request a list of references and, when possible, examples of past projects.

When you speak with previous customers, ask about:

  • Whether the plumber arrived on time and communicated changes

  • How closely the final invoice matched the original estimate

  • The cleanliness of the job site and respect for the home

  • Whether the repair held up over time

  • How the company handled any follow-up issues

A plumber confident in their work will be willing to provide references and explain what outcomes you should expect.

Ask about tools and diagnostic approach

Modern plumbing often relies on specialized tools that improve accuracy and reduce unnecessary demolition. Consider asking whether they use:

  • Video camera inspections for drain lines

  • Electronic leak detection

  • Pressure testing equipment

  • Hydro-jetting for heavy buildup (when appropriate)

Even if you do not need these tools for a basic repair, their availability signals investment in quality and professionalism.

No. 4

Understanding Plumbing Costs and Guarantees in Norcross GA

Understanding costs upfront is vital to avoiding financial surprises. Plumbing work can range from a straightforward replacement to a complex repair that reveals additional issues once work begins, so you want clear terms in writing.

Ask how pricing is structured

Different companies price work differently. Ask whether the plumber uses:

  • Flat-rate pricing per job

  • Time-and-materials billing

  • Tiered pricing for common repairs

Then confirm key details:

  • Is the service call fee credited toward the repair?

  • Do you charge by the hour, and is there a minimum?

  • What happens if the job takes longer than expected?

  • Do you charge more for weekends or evenings?

Knowing these terms helps you budget accurately and reduces stress if the project runs long.

Clarify deposits, payment timing, and acceptable methods

Before scheduling, ask:

  • Is a deposit required, and if so, how much?

  • When is the final payment due?

  • What payment methods are accepted?

  • Are financing or payment plans available for major work?

For larger projects, a written schedule of payments tied to milestones can protect both sides and prevent confusion.

Confirm warranties and what they actually cover

Discuss what guarantees or warranties accompany the work. Many reputable plumbers provide warranties to demonstrate confidence in their workmanship and the parts they install.

Ask these questions to avoid gaps in coverage:

  • Is the warranty on labor, parts, or both?

  • How long does coverage last?

  • Are there exclusions (for example, homeowner-supplied parts)?

  • Does the warranty change if another contractor touches the work later?

  • What is the process if something fails: call-back window, response time, and any fees?

Read the warranty details carefully and request it in writing. A strong warranty is not just reassurance; it is a practical indicator of how a company stands behind its service.


No. 5

Practical Questions That Reveal Professionalism Quickly

Beyond pricing and credentials, a few targeted questions can quickly show whether a plumber is organized, customer-focused, and prepared to do the job cleanly.

Ask about scheduling, communication, and arrival windows

To avoid missed days and unclear timelines, ask:

  • What is your typical arrival window?

  • Will I receive a call or text when the technician is en route?

  • How do you handle delays?

  • How soon can you start, and how long will the work take?

Clear communication is often a better predictor of a smooth experience than any sales pitch.

Ask how they protect your home during the job

Plumbing can be messy, especially for drain work, cutting access points, or replacing fixtures. Ask what protection steps they take, such as:

  • Wearing shoe covers or using floor protection

  • Using drop cloths and dust control when cutting drywall

  • Turning off the water safely and testing for leaks before leaving

  • Cleaning the work area and hauling away debris

A professional plumber should be able to describe their process confidently.

Ask what you can do to prevent the issue from returning

The best service providers educate as they work. Ask for prevention guidance related to your specific problem, such as:

  • What caused this failure?

  • Is there anything in the home’s plumbing setup contributing to it?

  • Are there maintenance steps I should take seasonally?

  • Should any nearby components be replaced proactively?

This turns a one-time repair into a longer-term improvement to your home’s reliability.

Takeaways

Hiring the right plumber in Norcross, GA starts with asking for a detailed, itemized quote and confirming exactly what is included in the scope of work. Comparing multiple bids helps you evaluate value, not just the lowest price.

Licensing, insurance, and relevant experience are essential for protecting your home and ensuring code-compliant work. References, clear communication, and a professional diagnostic process can reveal whether a plumber is likely to deliver durable results.

Finally, clarify pricing structure, payment terms, and warranty coverage before work begins so there are no surprises later. When you choose transparency and proven capability, you greatly increase the odds of a smooth repair and long-term peace of mind.


Looking for Home resources?

Looking to enhance your living space and create a sanctuary that supports your well-being? Explore our home partners who offer a wide range of resources to elevate your home environment.



homeHLL x Editor


Smart Steps To Buying A Home Without Regret

Buying a home is exciting, but it can also feel pressured, especially when you see prices rising or properties moving quickly. Many buyers make the mistake of settling for “good enough” simply because it fits the budget and is available now, only to discover later that the layout, location, or ongoing costs do not suit their real life. That can lead to stress, expensive changes, and the uncomfortable feeling that your home is working against you rather than for you.


In this article, we will explore the most practical steps you can take to buy a home with confidence, from building a deposit and securing a mortgage to defining your must-haves, researching the area, and involving the right professionals. The goal is not just to purchase a property, but to choose a home you will still feel good about after the moving boxes are gone.

No. 1

Save for a Deposit

A deposit is more than a tick-box requirement; it is one of the biggest levers you have for shaping your mortgage options and long-term affordability. While many lenders may accept smaller deposits in certain circumstances, the general rule is that the larger your deposit, the stronger your position as a buyer.

A healthy deposit can help you access better interest rates, reduce monthly payments, and limit how much you pay over the life of the mortgage. If you would like to live somewhere that is known for being expensive, you’re going to need more money. It can also make you more attractive to sellers, particularly in competitive markets where buyers with stronger financing are preferred.

Why a larger deposit helps in real terms

A bigger deposit typically improves your finances in several ways:

  • Lower monthly payments because you borrow less

  • Better mortgage rates due to reduced lender risk

  • Greater chance of approval if affordability is tight

  • More flexibility to handle unexpected costs after purchase

Practical ways to build your deposit faster

Saving is challenging when you already have rent and living expenses, so it helps to use a system rather than relying on willpower.

Consider strategies such as:

  • Automating savings on payday so it never sits in your spending account

  • Separating the deposit fund into a dedicated savings account

  • Reducing large, recurring costs rather than only cutting small purchases

  • Reviewing subscriptions, insurance, and utility tariffs for quick wins

  • Setting a realistic timeline that keeps you motivated without burnout

Don’t forget upfront buying costs

A deposit is not the only cash you need. Buyers often underestimate the “buying day one” costs, which can include:

  • Legal fees and conveyancing

  • Surveys and inspections

  • Moving costs

  • Immediate repairs or replacements

  • Mortgage arrangement or valuation fees, if applicable

Planning for these early reduces the risk of draining your emergency fund the moment you close on your property.

No. 2

Secure a Mortgage

Unless you are buying outright, securing a mortgage is the backbone of your purchase. The most important part is not just getting approved; it is getting approved for a mortgage you can comfortably sustain, even if your circumstances shift.

Many buyers benefit from working with a mortgage broker. Brokers can compare a wider range of products, explain the trade-offs between deals, and help you prepare your application so you do not lose time during the buying process. In some cases, they may also have access to rates that are not available directly to the public.

What lenders typically look for

While each lender has its own criteria, most will assess:

  • Your income and employment stability

  • Your existing debts and monthly obligations

  • Your credit history and overall credit profile

  • Your deposit size and the property value

  • Your spending patterns through bank statements

Steps that can improve approval chances

Before you apply, it helps to tighten anything that could weaken your file.

Useful actions include:

  • Checking your credit report and correcting errors

  • Reducing outstanding debt where possible

  • Avoiding new credit applications close to mortgage time

  • Keeping bank statements tidy and consistent for a few months

  • Gathering documents early, such as payslips and proof of deposit

Choose affordability over maximum borrowing

Just because a lender offers a high maximum does not mean it is wise to accept it. A mortgage should fit into your life without forcing you to sacrifice essentials or rely on constant overtime.

A helpful way to pressure-test affordability is to estimate your payment at a higher interest rate than today. If that figure would cause financial strain, consider borrowing less or increasing your deposit target.


No. 3

Think About What You Want

A successful home purchase starts with clarity. Without clear criteria, it is easy to be swayed by surface-level features, staging, or a “nice feeling,” then realize later that you compromised on things that matter every single day.

You need to define what you want from the property itself and how you want to live inside it. That includes space, layout, storage, and your non-negotiables.

Create a must-have vs nice-to-have list

Start by separating essentials from extras. This prevents you from rejecting good homes for minor reasons or accepting poor-fit homes because of one attractive feature.

Must-haves could include:

  • Minimum number of bedrooms or bathrooms

  • Commute limits and transport access

  • Safe parking or a garage if needed

  • Outdoor space for children or pets

  • A layout that supports working from home

Nice-to-haves could include:

  • A second reception room

  • A larger garden than you technically need

  • A utility room, pantry, or walk-in wardrobe

  • A renovated kitchen rather than a functional one

  • A specific style or period of home

Think about the type of home that fits your lifestyle

Beyond features, consider which property type suits your preferences and future plans. Options often include detached, semi-detached, terraced, flats, and newer builds.

You may also come across the concept of an infill home. The article currently suggests searching “what is an infill home?” and while the phrase appears as plain text here, the concept is worth understanding. In short, it generally refers to a newly built home constructed on an existing lot within an established area, often where an older property once stood. This can appeal to buyers who want modern finishes without moving far from amenities.

Plan for how your needs could change

Even if you are buying for today, your home should still fit you tomorrow.

It helps to consider:

  • Family growth or caring responsibilities

  • Work-from-home needs becoming more permanent

  • Storage needs over time

  • Accessibility if mobility becomes a concern later

  • Potential for renovation or extension if space becomes tight

No. 4

Research the New Area

A home can be perfect on paper and still feel wrong if the surrounding area does not support your daily life. Location influences your routine, safety, commute stress, lifestyle options, and long-term resale prospects.

Researching the new area is not just a formality. It is how you avoid discovering major deal-breakers after you move in.

Key factors to investigate before you commit

To build a clearer picture, look into:

  • Local amenities such as supermarkets, healthcare, and gyms

  • Transport links and typical commute times at peak hours

  • School options, if relevant, including catchment boundaries

  • Crime rates and general safety perceptions

  • Noise factors like main roads, nightlife, or flight paths

  • Green space, parks, and family-friendly activities

Do in-person checks, not only online research

Online research is helpful, but it cannot replace seeing a place in real life.

If possible:

  • Visit at different times of day and on weekends

  • Park nearby and walk around to gauge noise and foot traffic

  • Try the commute route during typical work hours

  • Check mobile signal strength and broadband availability

  • Notice the general upkeep of neighbouring properties

Look forward: how the area might change

Ask questions about planned developments, infrastructure projects, or zoning changes. A new transport link might raise value, but construction work or major changes in traffic patterns could affect day-to-day comfort.


No. 5

Speak to Professionals

Buying a home involves legal, financial, and structural details that most people do not deal with often. Relying entirely on your own judgement can be risky, even if you are a confident researcher.

Speak to professionals to help you avoid costly mistakes, negotiate more effectively, and move through the process with fewer surprises.

Who to involve and what they do

Professionals you may want on your side include:

  • Real estate agent to help you understand pricing, market conditions, and comparable sales

  • Mortgage broker to source suitable deals and guide your application

  • Solicitor or conveyancer to handle contracts, searches, and the legal transfer

  • Surveyor to inspect the property and highlight structural concerns

  • Specialist tradespeople, if you need estimates for repairs or renovations

Why surveys and inspections are worth it

Many buyers see surveys as an optional cost. In reality, they can protect you from buying a property with expensive hidden issues.

A survey can identify problems such as:

  • Damp, mold, or ventilation issues

  • Roofing and structural movement concerns

  • Electrical and plumbing risks

  • Poor insulation or outdated heating systems

  • Signs of previous DIY work that need correction

Even when issues are manageable, having them documented can strengthen your negotiation position or help you plan upgrades responsibly.

Budget for professional support early

Professional fees add up, but they are part of buying well. It helps to treat them as essential costs rather than “extras,” especially because they can prevent far larger expenses later.

No. 6

Stay Grounded During Viewings and Offers

It is easy to fall in love during a viewing, especially when a home is staged beautifully or fits your aesthetic. Emotional reactions are normal, but they should not override the practical checks that protect your long-term satisfaction.

Use a viewing checklist to stay objective

A structured checklist keeps you focused on what matters:

  • Natural light and ventilation in main rooms

  • Storage space that matches your lifestyle

  • Condition of windows, doors, floors, and ceilings

  • Signs of damp, cracks, or unusual smells

  • Heating system age and general energy efficiency

  • Noise levels inside the property

Think about the total cost, not just the price

A property can be “affordable” and still stretch you if it needs major work or has high running costs.

When assessing value, consider:

  • Estimated repair and renovation costs

  • Energy bills and insulation quality

  • Council tax band and local fees

  • Maintenance expectations for the property type

Avoid rushing because of pressure

A competitive market can create urgency, but rushing increases the chance of overlooking important details. If you are being pushed to decide quickly, slow down and confirm the facts that matter, especially around legal issues, structural conditions, and financing.

Takeaways

Buying a home successfully starts with preparation, not pressure. A well-planned deposit, realistic budgeting, and a mortgage that fits your life give you the stability to buy confidently rather than impulsively.

Clarity about what you need in a property, paired with careful area research, helps ensure the home supports your daily routine and long-term plans. Using checklists, comparing options, and thinking in terms of total cost protects you from expensive surprises later.

Professional support from brokers, solicitors, and surveyors can reduce stress and prevent avoidable mistakes. With the right process, you are far more likely to buy a home you enjoy living in, not one you grow to regret.


Looking for Home resources?

Looking to enhance your living space and create a sanctuary that supports your well-being? Explore our home partners who offer a wide range of resources to elevate your home environment.


homeHLL x Editor


Spring Backyard Reset: Getting Your Paver Patio Ready For Use Again

After a long winter of freeze-thaw cycles, moisture, and debris, even a well-built paver patio can look tired and feel slightly uneven underfoot. The good news is that a spring reset is usually straightforward, and a few targeted tasks can dramatically improve both appearance and performance before the season’s get-togethers begin.


In this article, we will explore a practical, step-by-step process to get your paver patio ready for spring use again, including cleaning, inspection, re-leveling, joint sand restoration, and sealing options that help protect your investment for the long term.

No. 1

Clear Away Winter Debris

Start by removing anything sitting on the surface. Organic debris holds moisture against pavers and joints, which encourages staining, algae growth, and weed sprouting once temperatures rise.

What to remove first

Focus on anything that traps water or breaks down into fine soil:

  • Leaves, twigs, and seed pods collected along edges

  • Pine needles that lodge into joints and corners

  • Mud and windblown grit that dulls paver colour

  • Branch fragments near downspouts and splash zones

Tools that make cleanup faster

A few basic tools can keep this step efficient:

  • Stiff push broom for sweeping joints and texture

  • Leaf blower for corners and hard-to-reach areas

  • Plastic scraper for stuck-on mud (avoid metal edges that can scratch)

  • Weeding tool for early growth between pavers

If weeds have already started, pull them now while the roots are shallow. Early removal reduces the chance of deeper rooting that can disturb joint sand and create wider gaps.

No. 2

Inspect for Winter Damage and Movement

Once the surface is clear, walk the entire patio slowly. Winter often causes subtle shifts that are easy to miss until furniture wobbles or puddles form.

What to check during your walkthrough

Look and feel for signs of movement:

  • Uneven or sunken pavers that create trip points

  • Raised edges that indicate frost heave or base disruption

  • Cracked, chipped, or spalled pavers

  • Loose border restraints or shifting edge courses

  • Areas where water tends to pool after rain

How to map problem areas quickly

To avoid losing track of what needs attention:

  • Mark sunken spots with painter’s tape or sidewalk chalk

  • Take a few photos for reference before you lift anything

  • Note whether low spots are isolated or part of a larger drainage pattern

This inspection phase prevents wasted effort later, because it helps you prioritize structural fixes before cosmetic upgrades.


No. 3

Re-Level Sunken or Uneven Pavers

If you notice settling or shifting, fix it before you refill joint sand or seal the surface. Re-leveling creates a stable, flat base that supports furniture, reduces water pooling, and prevents edge stress that can crack pavers over time.

Step-by-step approach for small areas

For a limited sunken section, the process is typically:

  • Remove the affected pavers using a flat tool such as a screwdriver or pry bar

  • Set pavers aside in the same order so patterns stay consistent

  • Inspect and correct the bedding layer (often sand) and base layer (often compacted aggregate)

  • Add or redistribute material to restore height and slope

  • Compact the base gently and level the bedding layer

  • Reinstall pavers and tap them flush with a rubber mallet

Tips for a stronger, longer-lasting repair

Small details make a big difference in how long the fix lasts:

  • Match the slope of surrounding pavers so runoff continues to move away

  • Avoid leaving loose bedding sand beneath pavers; compact and level it

  • Check edge restraints, because loose borders often contribute to spreading and settling

  • Address drainage issues if the same area sinks repeatedly

If you have widespread settling across large sections, it can indicate base failure or drainage problems. In that case, a more involved repair may be necessary to avoid repeating the same fixes every spring.

No. 4

Refill Joint Sand to Stabilize the Patio

Joint sand is not just filler; it plays a key structural role. It locks pavers together, reduces shifting, and helps prevent weeds and ants from disturbing the system.

Over winter, joint sand can wash out due to snowmelt, heavy rain, and freeze-thaw action. Replacing it is one of the most important steps in a patio reset.

When joint sand needs replenishing

You likely need fresh sand if you notice:

  • Visible gaps between pavers

  • Loose pavers that rock slightly when stepped on

  • Increased weed growth in joints

  • Ant activity or soil pushing up between stones

How to apply polymeric sand correctly

Polymeric sand is popular because it hardens after activation, providing added stability.

A reliable application process includes:

  • Sweep sand into joints using a stiff broom

  • Work in multiple passes to ensure joints fill completely

  • Remove excess sand from the paver surface so it does not haze

  • Lightly mist with water to activate binding agents

  • Allow proper curing time based on product instructions and weather

Avoid overwatering, which can wash out binders or create patchy curing. Also, make sure the patio is dry before application so the sand settles properly into the joint depth.


No. 5

Deep Clean the Surface Without Damaging It

Cleaning improves appearance, reduces slipping hazards, and prepares the patio for sealing if you choose to apply a protective coat. Spring is an ideal time because you are removing months of grime before it becomes embedded.

Start with the gentlest method

Use the least aggressive approach that achieves results:

  • Rinse with a garden hose to remove loose dirt

  • Scrub with a mild detergent and water using a stiff brush

  • Treat stubborn areas with a specialized cleaner appropriate for pavers

Common spring stains include grease spots near grills, mildew in shaded areas, and rust stains from metal furniture. Use targeted cleaners for specific stains rather than increasing pressure or harshness across the whole surface.

Pressure washing, used carefully

A pressure washer can be effective, but poor technique can cause problems. To reduce risk:

  • Use a fan spray rather than a narrow, high-pressure stream

  • Keep the nozzle at a safe distance from the surface

  • Avoid blasting directly into joints, which can remove joint sand

  • Test a small, inconspicuous section first

If you plan to use polymeric sand, pressure washing should typically happen before sanding, not after, to avoid stripping out newly placed joint material.

No. 6

Consider Sealing for Long-Term Protection

Once the patio is clean and completely dry, sealing can add a protective layer that helps resist staining, fading, moisture intrusion, and organic growth. It can also enhance colour and create a more “finished” look, depending on the sealant type.

Benefits of sealing a paver patio

A quality seal can help:

  • Reduce oil and food staining from outdoor cooking

  • Slow colour fading from UV exposure

  • Limit water absorption that contributes to freeze-thaw wear

  • Make routine cleaning faster and easier

  • Reduce moss and weed growth by protecting joints and surfaces

When professional sealing makes sense

If you want a durable result and are unsure about product choice or application conditions, professional support can be worthwhile. Working with the best paver sealing company in Dayton can help ensure the surface is properly prepped, the correct sealant is used, and the application is even and long-lasting.

Sealing is not a substitute for repairs, though. Re-leveling and joint sand restoration should be completed first, so you are sealing a stable system.

No. 7

Refresh Your Outdoor Setup for Comfort and Function

With the surface restored, it is time to make the patio feel inviting. A few practical updates can make the space more usable, especially if you entertain or plan to spend mornings and evenings outside.

Simple ways to reset your patio “room”

Consider improvements such as:

  • Cleaning furniture frames and washing or replacing cushion covers

  • Adding an outdoor rug designed for drainage and mildew resistance

  • Using planters to soften edges and create privacy

  • Installing string lights or solar path lighting for evening use

  • Creating zones for dining, lounging, and grilling

Safety and usability checks

Before the season gets busy, confirm:

  • Furniture sits level without wobbling

  • Walkways are clear and not slippery

  • Steps and edges are well-lit for nighttime use

  • Grill placement allows safe airflow and protects nearby surfaces

No. 8

Set a Low-Effort Maintenance Routine

A patio stays looking good longer when maintenance is light but consistent. The goal is to prevent buildup and protect joint stability, not to create a weekly chore.

Weekly and monthly habits that work

A simple routine might include:

  • Weekly sweep to remove leaves and grit before they break down

  • Occasional rinse to prevent dirt from embedding into the texture

  • Seasonal weed checks with early removal

  • Joint inspection every few months and touch-up sanding as needed

Mistakes that increase maintenance later

Avoid habits that often create extra work:

  • Letting leaves sit for weeks in shaded corners

  • Using harsh chemicals that discolor pavers

  • Pressure washing too frequently or too aggressively

  • Ignoring small low spots until they spread and cause pooling

Takeaways

A spring reset for your paver patio starts with clearing debris and inspecting for winter-related shifting, cracks, and drainage issues. Re-leveling uneven areas before adding joint sand helps restore stability and prevents recurring movement during the season.

Deep cleaning improves curb appeal and reduces slippery organic buildup, but it should be done carefully to protect the paver surface and joint structure. Refilling joints with polymeric sand strengthens the patio system and reduces weeds, ants, and washout.

Sealing can add valuable long-term protection against stains, fading, and moisture intrusion when applied to a clean, dry, and structurally sound patio. With a simple maintenance routine, your patio can stay warm-weather ready with far less effort for the rest of spring and summer.


Looking for Home resources?

Looking to enhance your living space and create a sanctuary that supports your well-being? Explore our home partners who offer a wide range of resources to elevate your home environment.



homeHLL x Editor


How Spring Rain Exposes Hidden Exterior Problems Fast

April rain does more than freshen up your lawn and kickstart the growing season. It also puts your home’s exterior through a real-world performance test, revealing how well your roof, gutters, siding, hardscapes, and landscaping manage prolonged moisture. When rainfall continues for hours or days, it exposes weaknesses that dry weather can hide, from subtle drainage problems to early signs of rot, staining, and foundation risk.


In this article, we will explore how spring rain reveals hidden issues across your home’s exterior, what warning signs to look for during and after storms, and which preventative fixes can protect your property before minor problems turn into costly repairs.

No. 1

Watch Water Flow in Real Time

One of the most valuable things you can do during spring rain is observe what is actually happening around your home. Rain provides immediate feedback on water movement, showing where it drains correctly and where it collects, slows down, or runs where it should not.

Instead of relying only on assumptions, use a rainy day as an informal inspection.

What to check during rainfall

Take a slow walk around your property and pay attention to:

  • Where roof runoff lands and how quickly it disperses

  • Whether gutters overflow or spill water behind the fascia

  • How water behaves near door thresholds and garage edges

  • Whether water runs toward the foundation instead of away from it

  • Which parts of the yard remain saturated long after rainfall

Red flags that suggest hidden problems

Some patterns point to underlying issues even if nothing looks “broken” yet:

  • Puddles that return in the same spots after each rain

  • Soil that looks washed out near slopes or garden edges

  • Splash marks on siding close to the ground

  • Persistent dampness around the base of exterior walls

Spring rain is particularly helpful because steady precipitation reveals repeatable patterns, not just one-off effects from a short storm.

No. 2

Roof Runoff, Streaking, and Surface Buildup

Your roof is the first major surface that handles rainfall, and spring storms can quickly show whether water is shedding properly. Dark streaks on shingles or down siding often become more noticeable in April because rainwater pulls debris, algae residue, and fine dirt downward.

While streaking can be cosmetic, it can also indicate that water is picking up more material than it should, which may be linked to buildup and slow drainage.

What roof streaks can mean

Common causes of spring roof staining include:

  • Organic growth, such as algae collecting moisture and debris

  • Leaves and grit trapped in valleys or around roof features

  • Granule loss that changes how water flows over shingles

  • Overflow from gutters carrying dirty runoff down the walls

Where to look from the ground

You do not need to climb a ladder to spot early clues. Stand back and look for:

  • Dark lines beneath roof edges or roof valleys

  • Uneven runoff patterns, especially near dormers and chimneys

  • Concentrated staining near a downspout exit point

  • Areas where water appears to cascade instead of stream

When cleaning becomes part of prevention

Routine exterior maintenance helps water move cleanly off the roof rather than dragging buildup along the way. Services like roof cleaning services in Coeur d'Alene can help remove accumulated debris and organic material that interfere with runoff, improving drainage performance and reducing visible staining as the rainy season continues.


No. 3

Gutters and Downspouts: Your Drainage Control System

Gutters and downspouts do not just “collect water.” They control where water goes. During spring rain, it becomes obvious whether this system is working correctly, because failures show themselves immediately through overflow, dripping joints, and splashing around the foundation.

Even minor gutter problems can create bigger downstream effects, including fascia damage, siding saturation, and basement moisture.

Signs your gutters are not performing properly

During or right after rainfall, watch for:

  • Water spilling over gutter edges

  • Drips or leaks at seams and corner joints

  • Gutters that sag or pull away from the roofline

  • Downspouts that discharge too close to the house

  • Gutter outlets that overflow because of internal blockages

Common causes of gutter issues in spring

Gutter trouble in April is often linked to:

  • Winter debris accumulation (twigs, leaves, roof grit)

  • Ice-related shifting that loosens fasteners

  • Misaligned pitch that prevents proper flow

  • Clogs at the downspout elbow or underground drain exit

Quick improvements that make a measurable difference

If you identify a problem, practical fixes may include:

  • Clearing debris and flushing the system with a hose

  • Resealing a leaking joint

  • Securing loose hangers to correct pitch

  • Extending downspouts farther from the foundation

No. 4

Siding and Moisture Exposure

Siding is designed to shed water, but it can only do that reliably when it is intact, sealed, and properly flashed. Spring rain helps you see how water interacts with the surface, especially on walls that receive less sun and take longer to dry.

If you notice water clinging to certain areas, leaving stains, or soaking into material, it may signal that the siding system is no longer managing moisture the way it should.

What to look for on exterior walls

During wet weather, check for:

  • Dark patches that appear quickly and dry slowly

  • Discoloration near seams, corners, or around penetrations

  • Water trails beneath windows, vents, or light fixtures

  • Visible gaps where sealant has cracked or pulled away

Common issues spring rain can reveal

Siding problems often involve:

  • Cracks or gaps that allow water behind the surface

  • Failing caulk around trim and openings

  • Warped panels that no longer sit flush

  • Mold or mildew in persistently damp areas

Why small siding issues matter

Moisture that gets behind siding can lead to hidden damage, such as:

  • Wood rot in sheathing or framing

  • Insulation saturation and reduced energy efficiency

  • Interior staining around windows or exterior-facing walls

  • Increased pest activity in damp cavities


No. 5

Walkways, Driveways, and Patios

Hard surfaces can look fine in dry conditions while still draining poorly. Spring rain highlights low spots and subtle grading problems because water shows exactly where it wants to settle.

Puddling is not just a visual concern. Over time, it weakens surfaces and increases the likelihood of cracking, shifting, and slippery algae growth.

What pooled water can lead to

Standing water on concrete, stone, or pavers can contribute to:

  • Surface erosion and gradual material breakdown

  • Freeze-thaw damage later when temperatures drop again

  • Joint sand loss in paver systems

  • Slip hazards in shaded or high-traffic areas

Where to focus your inspection

After a steady rain, look for:

  • Puddles that remain after an hour of dry weather

  • Water collecting near steps, thresholds, or garage slabs

  • Runoff flowing toward the house instead of away

  • Areas where the surface looks darker due to persistent dampness

Possible solutions depending on severity

The right fix depends on what you find:

  • Minor: cleaning, re-sanding pavers, sealing small cracks

  • Moderate: leveling sections, replacing settled pavers, patching low spots

  • Larger: resurfacing, adding a channel drain, or correcting overall grading

No. 6

Landscaping and Drainage Patterns in the Yard

Your yard is not just decorative; it is part of the drainage system. Spring rain is the best time to evaluate whether the landscape directs water away from the home or accidentally pushes it toward vulnerable areas.

Even well-maintained landscaping can underperform if soil is compacted, slopes are too flat, or downspouts dump water in the wrong place.

What to look for in the soil and lawn

During wet weeks, watch for:

  • Water pooling near the foundation line

  • Soil erosion around garden beds or along fences

  • Mulch displacement and exposed roots

  • Bare strips where runoff repeatedly channels through

  • Spongy ground that stays saturated for days

Drainage mistakes that commonly show up in spring

Problems often trace back to:

  • Downspouts ending too close to the house

  • Landscape beds built up higher than the siding clearance

  • Compacted soil preventing absorption

  • Incorrect grading that slopes back toward the structure

Practical ways to improve yard drainage

Depending on your situation, helpful improvements may include:

  • Extending downspouts or adding splash blocks

  • Regrading small sections to create a gentle slope away from the home

  • Aerating compacted soil to improve absorption

  • Installing a French drain or dry well in persistent problem areas

  • Using gravel borders or edging to reduce erosion and splashback

No. 7

Use Spring Rain as a Built-In Exterior Inspection

Spring rain is valuable because it is consistent. A single heavy storm can be misleading, but multiple rainy days show you how your home performs under ongoing moisture exposure. That makes it the ideal time to shift from reactive maintenance to preventative care.

A simple rain-day inspection routine

To turn rainy weather into a useful tool, consider:

  • Observing runoff once during rainfall and once after it stops

  • Taking photos of puddling, overflow, or staining for comparison later

  • Checking problem areas again after the next storm to confirm patterns

  • Scheduling repairs based on what repeats, not what happens once

Address small fixes before they escalate

Early action usually costs less and prevents compounding damage. Examples of high-impact, low-effort fixes include:

  • Clearing a clogged gutter and confirming the downspout discharge distance

  • Resealing a small siding gap before it becomes a moisture entry point

  • Correcting a splash zone with a downspout extension

  • Cleaning organic growth before it becomes embedded and staining

Takeaways

Spring rain acts as a practical stress test for your home’s exterior, revealing how well your roof, gutters, siding, hard surfaces, and landscaping handle sustained moisture. Watching water flow in real time helps you identify patterns that dry weather cannot show.

The most common issues spring storms expose include gutter overflow, roof runoff staining, siding moisture cling, walkway puddling, and poor yard drainage near the foundation. Addressing these problems early can prevent rot, cracking, staining, and long-term structural concerns.

Treat rainy weeks as a built-in inspection window and document what you see so you can prioritize fixes confidently. With targeted maintenance and smart drainage improvements, your home will stay drier, cleaner, and better protected through every season.


Looking for Home resources?

Looking to enhance your living space and create a sanctuary that supports your well-being? Explore our home partners who offer a wide range of resources to elevate your home environment.



homeHLL x Editor


How Winter Weather Damages Your Home’s Exterior

Winter may look calm from the window, but it can be one of the most disruptive seasons for your home’s exterior. Snow, ice, wind, and repeated temperature swings create conditions that slowly break down siding, concrete, wood, and other outdoor surfaces. Because much of this damage develops gradually, homeowners often do not notice a problem until the weather warms and flaws become more visible.


In this article, we will explore how winter weather quietly impacts exterior surfaces around your home, why the damage often shows up in early spring, and what you can do to clean, inspect, and protect your property before small issues become expensive repairs.

No. 1

The Impact of Freeze-Thaw Cycles on Siding

Freeze-thaw cycles are among the most common causes of winter-related exterior wear. When moisture finds its way into tiny gaps or porous areas, it freezes, expands, and puts pressure on the material. When temperatures rise again, the moisture thaws and the material contracts. Repeated over weeks or months, this movement acts like stress testing for your siding.

Over time, the expansion-and-contraction pattern can cause cosmetic deterioration and structural vulnerability, particularly around seams, joints, and fasteners.

How freeze-thaw damage typically starts

It often begins in places that are easy to overlook, such as:

  • Hairline cracks around corners and trim

  • Slightly separated joints where panels meet

  • Areas near downspouts or gutters where water runs frequently

  • Lower sections of siding where snow piles up and melts slowly

Common signs by early spring

By April or during the first stretch of mild weather, siding issues become easier to spot. Look for:

  • Peeling paint or bubbling finishes on wood siding

  • Warping, buckling, or loosened panels on vinyl siding

  • Small chips and cracking on stucco or brick surfaces

  • Soft spots or swelling on wood near the ground line

Material-specific vulnerabilities

Different siding materials respond differently to winter stress:

  • Wood siding is vulnerable to moisture absorption, swelling, cracking, and rot if unsealed or aging

  • Vinyl siding can shift or buckle if it has loosened over time and gets stressed by temperature changes

  • Brick and stucco can develop hairline cracks that grow as moisture enters and freezes again

No. 2

Concrete Surfaces and the Damage of Winter Salt

Concrete is durable, but it is also porous, which makes it vulnerable during winter. Driveways, walkways, patios, and steps often take the brunt of harsh weather plus deicing products. Salt and chemical deicers help prevent slips, but they can also weaken concrete by penetrating the surface and contributing to scaling, spalling, and cracking.

When salt-laden moisture enters the concrete and then freezes, it expands and breaks apart the surface layer. The result can be a rough, flaky texture that becomes visible in spring.

Where concrete damage shows up first

Concrete tends to deteriorate faster in high-exposure areas, including:

  • Front steps and entry paths that are salted frequently

  • Driveway edges where snow is piled and melts repeatedly

  • Areas with poor drainage or standing water

  • Older concrete with existing surface wear or microcracks

Springtime indicators that salt has taken a toll

When temperatures warm, you may notice:

  • Flaking or peeling at the surface (scaling)

  • Pitted areas that feel rough underfoot

  • Thin cracks that spread outward from corners

  • Chipped edges on steps, curbs, or expansion joints

Smarter deicing habits that reduce risk

If winter conditions require ice control, a few small adjustments can reduce long-term concrete damage:

  • Use the smallest effective amount of deicer, rather than over-applying

  • Shovel early so you rely less on chemical melting

  • Consider sand or traction grit for grip instead of heavy chemical use

  • Rinse concrete on mild days if salt residue builds up (when safe to do so)


No. 3

Damage to Wood Decks and Fencing

Wood decks, fences, railings, and pergolas add warmth and value, but they are sensitive to winter moisture. Snow sits on horizontal surfaces, melts slowly, and keeps boards damp for long periods. That extended moisture exposure can soften fibers, lift grain, and compromise protective finishes.

Once water penetrates the wood and freezes, the expansion can create checking (small surface cracks), splitting, and warping. These issues may start small, but they often worsen when spring rain and sun arrive.

Typical winter stress points for wood structures

Wood problems commonly begin in areas such as:

  • Board ends and cut edges where sealant has worn away

  • High-traffic deck zones where the finish has thinned

  • Posts near soil contact where water sits longer

  • Railings and horizontal surfaces where snow accumulates

What to look for when the snow clears

As you inspect in spring, watch for:

  • Raised grain or splintering on deck boards

  • Dark staining or patches that suggest moisture retention

  • Loose nails, popped screws, or wobbly railings

  • Boards that feel spongy or soft, particularly near edges

Maintenance tasks that prevent repeat damage

Early-season upkeep can extend the life of wood features:

  • Clean the surface to remove grime and organic buildup

  • Replace damaged boards before they affect surrounding sections

  • Re-seal or stain after the wood fully dries (timing matters)

  • Improve drainage around posts and fence lines to reduce standing water

No. 4

The Accumulation of Dirt, Mold, Mildew, and Algae

Winter creates an ideal environment for organic growth because surfaces often remain damp, shaded, and slow to dry. Areas that receive limited sunlight, such as north-facing walls, fence lines, and spots beneath trees, are particularly susceptible.

Mold, mildew, and algae do not just affect appearance. Left alone, they can stain surfaces permanently and break down certain materials, especially wood and older paint or sealant layers.

Where organic growth most often appears

Check these moisture-prone zones first:

  • Shaded siding sections, especially behind shrubs or trees

  • Decks and patios with limited airflow

  • Concrete areas near downspouts and splash zones

  • Fence panels that stay damp due to dense landscaping

How to identify the most common types of staining

Organic stains can look different depending on what is growing:

  • Green staining often indicates algae

  • Black spotting may suggest mildew or mold

  • Brownish discoloration can be a mix of dirt, tannins, and organic debris

Why spring is the right time to address it

As temperatures rise, organic growth can spread faster.

Cleaning early helps you:

  • Restore curb appeal quickly

  • Reduce slip hazards on decks and walkways

  • Prevent deeper staining and surface breakdown

  • See the underlying damage that grime was hiding


No. 5

Pressure Washing Services: A Simple Seasonal Reset

When April arrives, many homeowners finally see what winter left behind: grime on siding, salt residue on concrete, and green or black stains on shaded surfaces. Pressure washing is one of the fastest ways to refresh exterior materials after winter, especially when dirt and organic buildup have accumulated gradually.

Pressure washing services can remove dirt, grime, algae, and mold from your home’s exterior. It is an ideal solution to freshen up siding, decks, patios, and driveways after the harsh winter months.

What pressure washing is best for

A proper exterior wash can help:

  • Brighten siding and restore a cleaner finish

  • Remove slippery algae from decks, stairs, and walkways

  • Lift winter grime from patios and driveways

  • Wash away salt residue that clings to surfaces

Situations where caution is needed

Pressure washing is effective, but it should be done carefully. Excessive pressure or poor technique can:

  • Etch or pit concrete

  • Strip paint or damage wood fibers

  • Force water behind siding or into vents

  • Damage seals around windows and doors

A simple spring exterior checklist

After cleaning, use the improved visibility to inspect and plan repairs. A practical checklist includes:

  • Check siding joints, trim, and caulk lines for separation

  • Look for cracking, spalling, or scaling on concrete surfaces

  • Inspect wood for soft spots, splintering, or loose fasteners

  • Confirm gutters and downspouts direct water away from foundations

  • Note any areas where moisture consistently collects and address drainage

Takeaways

Winter weather impacts your home’s exterior through repeated freeze-thaw cycles, moisture exposure, and the use of deicing products. Much of the damage starts small and becomes noticeable only when spring reveals warping, cracking, staining, or surface breakdown.

Siding, concrete, and wood are particularly vulnerable because they expand and contract, absorb moisture, and hold residue through the cold season. Early-spring inspections help you catch problems before they become structural repairs or full replacements.

Cleaning strategies, including pressure washing, can remove winter buildup and make it easier to spot issues that require attention. With timely maintenance and smarter seasonal habits, you can protect curb appeal and extend the life of your exterior surfaces year after year.


Looking for Home resources?

Looking to enhance your living space and create a sanctuary that supports your well-being? Explore our home partners who offer a wide range of resources to elevate your home environment.


homeHLL x Editor


How To Choose The Right Garage Door Repair Service For Your Home

A garage door is one of the most frequently used entry points in a home, yet it is often overlooked until something goes wrong. Issues such as broken springs, malfunctioning openers, or misaligned tracks can quickly disrupt daily routines and compromise safety. Choosing the right repair service becomes essential to ensure these problems are handled efficiently and correctly.


Not all repair providers offer the same level of expertise or reliability. Some may focus on quick fixes, while others provide long-term solutions backed by proper tools and experience. Taking the time to evaluate your options helps prevent recurring issues and unnecessary expenses. A careful approach to selecting a repair service ensures your garage door remains safe, functional, and dependable. 

In this article, we take a closer look at what to consider before making a decision so your garage door remains safe, functional, and dependable.

No. 1

Experience and Technical Expertise

Experience is one of the most important factors when choosing a garage door repair service. A technician who has handled a variety of systems is better equipped to diagnose issues accurately and recommend appropriate solutions. Garage doors involve multiple components, including springs, cables, rollers, and openers, each of which requires specific technical knowledge.

An experienced provider understands how these components work together and can identify underlying issues that may not be immediately visible. This reduces the chances of temporary fixes and ensures that repairs are done correctly the first time, saving both time and cost in the long run.

No. 2

Licensing, Insurance, and Safety Standards

Garage door repairs involve high-tension parts and heavy materials, which can be hazardous if handled improperly. This makes it essential to choose a provider that is properly licensed and insured. These credentials demonstrate that the company follows industry standards and operates responsibly.

Insurance coverage also protects homeowners in case of accidental damage or injury during the repair process. In addition, companies that follow proper safety protocols are more likely to use the right tools and techniques, reducing risks and ensuring a safer repair experience.


No. 3

Service Availability and Response Time

Garage door issues can arise unexpectedly and may require immediate attention. A provider that offers prompt response times and flexible scheduling can make a significant difference, especially in urgent situations such as a broken spring or a non-functioning opener.

Working with a Garage Door Spring and Opener Repair Company that provides emergency support and efficient on-site inspections helps ensure that problems are resolved quickly. One such company is AMS Garage Doors & Openers, which focuses on timely repairs, offering services that cover spring replacements, opener repairs, and full system inspections. Their approach typically involves accurately identifying the issue and using the appropriate parts to restore smooth operation without unnecessary delays.

No. 4

Transparent Pricing and Detailed Estimates

Clear pricing helps avoid confusion and unexpected expenses. A reliable repair service will provide a detailed estimate before starting any work, outlining the cost of parts, labor, and any additional services.

Transparent pricing also reflects professionalism and builds trust. Comparing multiple quotes can help you understand the market rate, but the lowest price should not always be the deciding factor. Quality of service and reliability should be considered alongside cost to ensure long-term value.


No. 5

Reputation and Customer Feedback

Customer reviews offer valuable insight into a company’s performance and reliability. Consistent positive feedback often indicates quality service, while recurring complaints may highlight potential issues. Looking at both ratings and detailed experiences helps form a clearer picture.

A strong reputation is usually built over time through consistent service and customer satisfaction. Checking reviews, testimonials, and even recommendations from neighbors or friends can help you make a more informed decision when selecting a provider.

No. 6

Range of Services and Long-Term Support

A well-rounded repair service should offer more than just basic fixes. This includes maintenance, part replacements, and even full installations when required. Having access to a wide range of services ensures that all garage door needs can be addressed by a single provider.

Long-term support is equally important. Regular maintenance services help prevent future issues and extend the system's lifespan. Choosing a provider that offers ongoing support ensures consistency and reliability over time.

No. 7

Quality of Parts and Workmanship

The durability of a repair depends heavily on the quality of the parts used. High-quality components ensure better performance and reduce the likelihood of recurring issues. A professional service provider uses parts that are compatible with your specific garage door system.

Workmanship is just as important as materials. Proper installation, alignment, and testing ensure that the system functions smoothly after the repair. Attention to detail during the repair process contributes to long-term reliability and overall performance.

Takeaways

Choosing the right garage door repair service requires careful consideration of experience, reliability, and service quality. Each factor plays a role in ensuring your garage door functions safely and efficiently.

Taking the time to evaluate these elements helps prevent recurring issues and ensures long-term performance, so that you will not need to replace your garage door any time soon. A well-chosen service provider can make a noticeable difference in both convenience and peace of mind.


Looking for Home resources?

Looking to enhance your living space and create a sanctuary that supports your well-being? Explore our home partners who offer a wide range of resources to elevate your home environment.


homeHLL x Editor


Custom Home Building In Chapel Hill Shaped By Experience and Intentional Design

Custom home building in Chapel Hill, North Carolina is increasingly defined by more than exterior style and interior finishes. Homeowners still care deeply about beauty and architectural character, but many are now prioritizing something more enduring: how the home will function over time—through changing family needs, evolving lifestyles, and the practical realities of maintenance, energy use, and long-term comfort. As demand grows for tailored living environments, builders with meaningful local experience are becoming more influential in shaping Chapel Hill’s residential landscape.


In this article, we’ll explore why Chapel Hill is a uniquely complex place to build, what “intentional design” looks like in modern custom construction, and how the design-build model can improve alignment between vision, feasibility, and cost. We’ll also examine how Zinn Design Build—closely associated with longtime builder Carol Ann Zinn and her 47+ years of experience in the Chapel Hill area—reflects a broader shift toward integrated, planning-led building practices designed to produce cohesive, predictable results.

No. 1

Chapel Hill Custom Homes: Moving Beyond Aesthetics to Long-Term Performance

For years, custom homes were often framed as a lifestyle upgrade—more space, higher-end finishes, and a design that “stands out.” That desire still exists, but Chapel Hill homeowners are increasingly looking for homes that stand up to real life.

This means asking different questions at the start of a project, such as:

  • How will this layout support day-to-day routines—not just entertaining?

  • Will the home still work if our family structure changes?

  • Can we incorporate flexible space without wasting square footage?

  • What materials and systems will hold up well in this climate?

  • How can we reduce maintenance burdens over time?

In many ways, Chapel Hill’s custom home market is maturing. Rather than chasing only visual impact, homeowners want design decisions that remain satisfying long after the “new home glow” fades. That shift naturally elevates builders who focus on planning discipline, buildability, and realistic expectations—because these are the factors most likely to determine whether a custom home feels effortless or frustrating five years later.

No. 2

Why Chapel Hill Is a Unique Environment for Custom Construction

Chapel Hill presents a distinctive mix of opportunities and constraints. Its appeal—mature neighborhoods, tree canopy, and varied terrain—also creates challenges that require more than a standardized building approach.

Local builders often must account for:

  • Established neighborhoods and community context
    Many projects involve fitting a new home into an existing architectural rhythm. Scale, massing, setbacks, and streetscape presence can matter as much as interior finishes.

  • Varied topography and site-specific engineering
    Sloped lots, drainage considerations, and changing elevations influence foundation decisions, driveway design, and even how the home “sits” visually on the property.

  • Lot constraints and the realities of infill building
    Building in established areas can involve tighter construction access, existing utilities, and more careful staging and scheduling.

  • Tree preservation and environmental sensitivity
    Chapel Hill homeowners often want to preserve mature trees and natural features, which can affect footprints, grading, and long-term landscape planning.

  • Modern performance expectations
    Homeowners increasingly expect stronger energy performance, better indoor comfort, and resilient materials—especially as weather patterns and energy costs become more variable.

These variables don’t operate in isolation. A decision to preserve specific trees, for example, might influence the driveway approach, which affects the home’s orientation, which impacts daylighting, which can change window selections and mechanical sizing. This is why local familiarity isn’t just a “nice-to-have.” In Chapel Hill, it can directly affect build outcomes and predictability.


No. 3

Zinn Design Build and the Value of Deep Local Experience

Among the firms working within this evolving market is Zinn Design Build, a company closely associated with one of the most trusted Chapel Hill home builders, Carol Ann Zinn, whose 47+ years of experience in Chapel Hill continue to shape how custom homes are planned and executed.

In residential construction, longevity is rarely accidental. Over nearly five decades, Carol Ann Zinn has worked through:

  • changing architectural styles and client preferences

  • evolving building codes and inspection standards

  • material innovations and construction best practices

  • shifts in household needs (from formal layouts to flexible living)

  • market cycles that affect budgets, labor, and timelines

That breadth of experience tends to show up in two crucial ways:

  1. Sharper early-stage judgment about what will work on a specific site

  2. Stronger process discipline—because experience often teaches where problems typically begin

In a space where many builders operate across wide territories, a long-standing Chapel Hill presence can also imply a deeper familiarity with the community’s design norms, build constraints, and quality expectations. For homeowners, that can translate into fewer surprises and more coherent decision-making.

No. 4

The Design-Build Model: Aligning Vision, Cost, and Feasibility Early

One of the most consequential decisions a homeowner makes is not a finish selection—it’s the project delivery method. Zinn Design Build operates within a unified design-build model, treating design and construction as integrated disciplines rather than separate phases managed by different parties.

This matters because custom homes carry a unique risk profile: decisions made during design have significant downstream implications for cost, schedule, structural complexity, and even long-term maintenance. If design and construction are disconnected, homeowners may discover late that a plan is over budget, difficult to build, or misaligned with the site.

A design-build approach aims to reduce those breakdowns by encouraging early alignment across key variables:

  • Vision: What the homeowner wants the home to feel and function like

  • Feasibility: What the lot, codes, and construction realities can support

  • Cost: What the budget can realistically deliver, given the scope and choices

When those elements are aligned early, several common pain points often diminish:

  • scope misalignment (“We thought this was included.”)

  • budget uncertainty (“Why did the price change so much?”)

  • mid-project redesigns (often costly and emotionally draining)

  • scheduling disruptions (caused by late decisions or rework)

Importantly, this is not about eliminating complexity—custom homes are complex by nature. It’s about managing complexity with a structure that supports continuity from concept to completion.


No. 5

Homeowner Priorities Are Shifting Toward Livability and Adaptability

Chapel Hill homeowners are increasingly requesting homes designed around the realities of modern life—work-from-home routines, multi-generational needs, and a desire for spaces that evolve with the family instead of forcing the family to adapt to the house.

While architectural beauty remains essential, there is a rising emphasis on:

  • Livability: layouts that support everyday movement, storage, and comfort

  • Durability: materials and details designed to hold up over time

  • Adaptability: flexibility for new needs without major renovations

  • Efficient use of space: thoughtful planning rather than excess square footage

  • Aging-in-place considerations: design that remains functional across life stages

These priorities often show up in practical choices, such as:

  • flexible rooms that function as an office now and a guest room later

  • main-level living options that reduce long-term mobility barriers

  • mudrooms, drop zones, and storage designed around how people truly live

  • kitchen and living layouts that balance openness with acoustic and visual comfort

  • materials chosen for performance, maintenance, and longevity—not only trend value

Zinn Design Build’s projects are described as reflecting this mindset—where layout decisions and detailing prioritize long-term function alongside architectural cohesion. In an area like Chapel Hill, that cohesion matters: a home should feel both personal and appropriately rooted in its context.

No. 6

Why Detailed Drawings and Upfront Precision Reduce Risk

Another notable aspect of the firm’s process is its emphasis on detailed architectural and engineered drawings early in the project lifecycle. This may sound technical, but for homeowners it often translates into something highly practical: fewer unpleasant surprises.

In construction, ambiguity is expensive. When plans leave too much undefined, builders and trades must make assumptions, and assumptions can turn into:

  • change orders that inflate cost

  • delays caused by rework or approvals

  • design compromises made under time pressure

  • inconsistent execution across different parts of the build

By leaning into detailed documentation early, a project gains a clearer roadmap. Homeowners can also make better-informed decisions because they can more accurately visualize how design choices will translate into real outcomes—how spaces will feel, how systems will integrate, and what the finished home will actually include.

Benefits of strong upfront drawings often include:

  • clearer scope definition (what’s included, what’s not)

  • improved coordination between architectural intent and structural requirements

  • more accurate budgeting and procurement planning

  • fewer midstream “figure it out later” moments

  • better communication among everyone involved in the execution

For homeowners, the deeper value is confidence: a well-defined plan supports a more predictable build process and a more coherent result.

No. 7

The Future of Custom Home Building in Chapel Hill

As Chapel Hill continues to attract residents seeking a balance of culture, education, and quality of life, the demand for well-executed custom homes is expected to remain strong. But “well-executed” increasingly means more than a beautiful reveal at the end. It means a process that respects the homeowner’s intent, the site’s constraints, and the reality that a home must perform for decades.

In that environment, builders who combine local knowledge with an integrated, planning-led approach are positioned to deliver more predictable outcomes. Zinn Design Build’s ongoing work in Chapel Hill reflects this broader shift toward experience-driven building practices. With Carol Ann Zinn’s 47+ years of local expertise informing the firm’s approach, the company represents a model where longevity, process discipline, and client alignment converge—supporting homes built not just for today’s preferences, but for how people intend to live well into the future.

Takeaways

Custom home building in Chapel Hill is evolving from a primarily aesthetic endeavor into a deliberate, performance-minded process centered on long-term livability.

In this article, we covered why Chapel Hill’s established neighborhoods, varied topography, and environmental considerations require builders to think beyond standardized plans. We also examined how deep local experience—such as Carol Ann Zinn’s 47+ years in the community—can strengthen early planning and reduce avoidable surprises.

Finally, we outlined why the design-build model and detailed upfront drawings can improve alignment between vision, feasibility, and cost—helping homeowners create custom homes that are cohesive, adaptable, and designed for the realities of life over time.


Looking for Home resources?

Looking to enhance your living space and create a sanctuary that supports your well-being? Explore our home partners who offer a wide range of resources to elevate your home environment.



homeHLL x Editor


Why Your Backyard Feels Less Relaxing Than It Used To

Your backyard is supposed to be the easiest place to exhale. It’s where morning coffee tastes better, where evenings slow down, and where the noise of the day fades into birdsong, breezes, and familiar routines. Yet many homeowners reach a point where their outdoor space still functions—but it no longer feels like a retreat. It looks fine at a glance, but it doesn’t invite you to linger. You sit down, glance around, and something feels subtly “off.”


In this article, we’ll unpack the most common (and often overlooked) reasons a backyard loses its calming effect over time—ranging from visual clutter and discoloration to worn surfaces, broken transitions, and poor lighting. More importantly, you’ll learn practical, high-impact ways to restore a sense of peace without necessarily committing to a full renovation.

No. 1

The Hidden Impact of Visual Clutter

Visual clutter isn’t only about having “too much stuff.” It’s about too many competing signals in the same field of view. Even outdoors—where nature is typically soothing—your brain still tries to process patterns, group objects, and make sense of what belongs together.

Look around your yard and ask yourself:

  • Do you have mismatched chairs collected over the years?

  • Are tools, hoses, toys, or planters scattered across multiple zones?

  • Do décor items compete rather than complement (different styles, colors, materials)?

  • Are there “temporary” items that have become permanent (unused pots, spare pavers, broken umbrellas)?

Individually, these details feel minor. Collectively, they create visual noise, and your mind stays slightly alert trying to organize it. That low-level mental effort reduces the sense of restoration a backyard should provide.

How to reduce visual clutter (without making your yard sterile)

A calmer yard doesn’t require minimalism—it requires cohesion and intention.

  • Choose a simple color palette: Repeat 2–3 core colors across cushions, planters, and accents.

  • Group like items together: Create a defined storage area for garden tools, kids’ toys, or pool accessories.

  • Hide what you don’t use daily: Storage benches, deck boxes, and slimline sheds reduce scatter fast.

  • Replace “random décor” with a few statement pieces: Fewer items, chosen deliberately, read as designed rather than accumulated.

When your brain sees fewer “loose ends,” your body feels more at ease.

No. 2

Discoloration: The Slow Fade You Stop Noticing

One of the most powerful mood-drainers in an outdoor space is gradual discoloration—because it happens slowly enough that you adapt to it. Sun, rain, dirt, mildew, and seasonal debris don’t just make surfaces dirty; they alter the perceived age and energy of your backyard.

Over time, discoloration can make a space feel:

  • Dull instead of bright

  • Neglected instead of cared for

  • Heavy instead of airy

  • Uneven instead of clean-lined

Even if you keep things tidy, uneven color and staining can subconsciously signal “work to be done,” which is the opposite of relaxation.

Common signs your backyard is suffering from fading and buildup

  • Uneven patches on patios and outdoor steps

  • Dark streaks on walkways (often runoff or organic staining)

  • Greenish film from algae or moss in shaded areas

  • Wood decking that looks washed-out or gray

  • Pavers that have lost contrast between the stone and grout/sand lines

The fastest way to restore visual freshness

Refreshing surfaces—sometimes as simply as deep cleaning—often makes the biggest “before and after” difference. When grime is removed, materials regain contrast, and your yard immediately feels newer and more welcoming.


No. 3

Surface Wear and Tear Disrupts Comfort (Even When It’s Subtle)

Relaxation isn’t only visual. Your backyard is a physical environment: you walk through it, sit on it, step barefoot, and move between zones. When surfaces degrade, your body responds—even if you aren’t consciously thinking about it.

Small defects create small tension:

  • A slightly uneven paver makes you watch your step

  • A splintered deck board makes you avoid walking barefoot

  • A cracked edge makes a space feel less finished

  • A wobbly stepping stone creates a constant micro-alertness

Instead of feeling loose and comfortable, you stay just a bit guarded. Over time, that changes how often you use the space and how restorative it feels.

What to watch for

  • Uneven walkways or shifted pavers

  • Cracks and chips in concrete or stone

  • Loose edging, crumbling borders, or settling around transitions

  • Rough wood, lifting nails, or splinter-prone boards

Fixing these issues improves safety, but it also restores something less tangible: the feeling of flow.

No. 4

The Importance of Transitions Between Materials

A truly relaxing backyard feels cohesive. You shouldn’t “notice” the boundaries between patio, lawn, path, and garden beds—your mind should glide through the space.

When transitions are neglected, though, the yard starts to feel fragmented. Examples include:

  • A clean stone patio leading into a stained or streaked concrete path

  • Fresh grass bordered by crumbling edging

  • A deck surface that clashes visually with the surrounding stonework

  • Two adjacent materials that have aged at different rates (one bright, one faded)

Your brain prefers continuity. Abrupt changes in texture, color, and condition create a subtle sense of disorder—even when everything is technically functional.

How to improve transitions without rebuilding everything

  • Use complementary tones and textures: If one surface is cool gray, avoid introducing a warm red-brown beside it without a connector.

  • Maintain consistent cleanliness: A single dirty strip can make the entire yard feel off-balance.

  • Repair borders and edges: Crisp edges signal intention and care.

  • Add “connector” elements: Gravel strips, low planting bands, or repeated planters help tie zones together.

In design terms, transitions are where calm is won or lost.


No. 5

Why Clean Surfaces Matter More Than You Think

Cleanliness is one of the strongest predictors of whether a space feels relaxing. Not “perfect,” not “sterile”—but clean enough that your mind reads the environment as maintained and safe.

When patios and walkways show stains, mildew, or grime, they broadcast a message: this space is slipping. Even if your furniture is beautiful and your plants are thriving, dirty hardscapes can drag everything down.

The good news is that this is one of the most efficient improvements you can make. In many cases, a deep clean can reset the entire mood of the yard in a single day. For example, professional help like power washing companies in Wheaton for patios can remove years of buildup, brighten surfaces, and restore visual clarity—without changing the layout or replacing materials.

Benefits of deep-cleaning patios, pavers, and paths

  • Restores original color and contrast

  • Improves curb appeal instantly

  • Reduces slip hazards from algae/moss

  • Makes the whole yard feel “finished” again

  • Encourages you to use the space more often

If your backyard feels less relaxing than it used to, cleaning is often the highest-return first step.

No. 6

How Lighting and Shadows Can Increase Visual Stress

Lighting doesn’t just make a yard usable at night—it defines the mood. And when surfaces are worn, stained, or cluttered, lighting can unintentionally exaggerate problems.

Here’s how:

  • Dirty areas absorb light unevenly, creating dull patches

  • Stained concrete can look harsher under bright white bulbs

  • Clutter creates jagged shadows that add to the sense of chaos

  • Inconsistent lighting between zones makes transitions feel abrupt

By contrast, when surfaces are clean and design elements are cohesive, light reflects more evenly, and your yard feels open and calm.

Quick lighting upgrades that change the atmosphere

  • Start with maintenance: Clean surfaces so they reflect light naturally.

  • Simplify the scene: Remove or consolidate clutter that casts messy shadows.

  • Use warm, soft lighting: Think warm-white path lights, sconces, and string lights rather than harsh flood tones.

  • Highlight movement paths: Gentle illumination on walkways and edges makes the yard feel intentional and safe.

  • Layer lighting: Combine path lights, ambient glow, and a few focal highlights (a tree, a feature wall, a planter).

Lighting is emotional architecture—done well, it makes your yard feel like a destination.

No. 7

Small Fixes That Make a Big Difference (Without a Full Renovation)

A calmer backyard is usually the result of a few targeted improvements, not a total rebuild.

If you’re feeling overwhelmed, use a simple sequence that builds momentum:

Step-by-step reset checklist

  • Declutter: Remove what doesn’t belong; store what you need; donate what you don’t.

  • Clean hardscapes: Patio, paths, edging, retaining walls—restore brightness and contrast.

  • Repair safety issues: Level stones, fix cracked areas, sand rough wood, tighten loose borders.

  • Unify the visual language: Repeat materials, colors, and shapes so the yard feels designed.

  • Add comfort deliberately: Upgrade cushions, add one outdoor rug, and introduce shade where needed.

  • Finish with light: Warm illumination makes everything feel calmer after sunset.

You’re not chasing perfection—you’re restoring ease.

No. 8

Restoring the Calm: Rebuilding a Backyard That Actually Feels Like a Retreat

If your backyard feels less relaxing than it used to, it’s rarely because you “stopped liking it.”

More often, time has quietly introduced friction:

  • Visual clutter overwhelms the senses

  • Discoloration signals neglect

  • Wear and tear creates physical unease

  • Poor transitions fragment the experience

  • Dirty surfaces dull the entire atmosphere

  • Harsh lighting exaggerates every inconsistency

The solution isn’t complicated, but it does require intentionality. When you simplify, restore, and unify, your yard becomes what it was meant to be: a space that gives something back to you.

Takeaways

A relaxing backyard depends less on size or expensive features and more on how the environment reads and feels day to day. In this article, we explored how visual clutter creates mental noise, how discoloration and buildup quietly age outdoor surfaces, how wear and uneven footing introduce physical tension, and why clean transitions and thoughtful lighting are essential to a cohesive, calming outdoor experience.

Start with decluttering and surface restoration (often the fastest transformation), then repair key problem areas and unify the design with consistent materials, colors, and warm lighting. With a handful of targeted changes, your backyard can feel peaceful, inviting, and restorative again.


Looking for Home resources?

Looking to enhance your living space and create a sanctuary that supports your well-being? Explore our home partners who offer a wide range of resources to elevate your home environment.



homeHLL x Editor


How Choosing Artisan Tiles Transforms Your Space

Home design enthusiasts are increasingly opting for artisan tiles to revamp their interiors—and the shift is more than a passing trend. As homeowners move away from uniform, mass-produced finishes, they’re embracing materials that feel intentional, expressive, and built to last. Artisan tiles, celebrated for their distinctive patterns and superior craftsmanship, offer a rare blend of practicality and personality: they can withstand daily wear while turning ordinary surfaces into design statements.


What makes them especially compelling is how naturally they support the broader movement toward bespoke homes. People no longer want spaces that look like a showroom template; they want rooms that reflect lived experience, personal taste, and a sense of story. Whether it’s a hand-painted backsplash that becomes the heart of a kitchen, a textured bathroom wall that feels spa-like, or a mosaic entryway that sets the tone the moment you walk in, artisan tiles give you a way to build identity into the architecture of your home.

In this article, we’ll explore how artisan tiles enhance the beauty, durability, and functionality of living spaces. You’ll learn how to choose patterns that suit your layout and lighting, why quality and installation methods matter, and how customized options can elevate your home from stylish to truly one-of-a-kind. Along the way, we’ll also cover practical considerations—maintenance, placement strategy, and design coherence—so your choices look as good in five years as they do on day one.

No. 1

How Artisan Tiles Enhance Aesthetic Appeal

Artisan tiles significantly elevate a room’s aesthetic by introducing depth, texture, and artistry—elements that are difficult to replicate with standard, factory-printed tile. Where conventional tiles often rely on repeated patterns and predictable finishes, artisan pieces are made to feel curated.

They may feature hand-painted scenes, intricate geometric motifs, or mosaic compositions assembled with careful variation. Even when the design repeats, subtle differences in glaze, pigment density, or surface texture create a lively, human quality.

A common reason homeowners choose artisan tiles is their ability to act as a focal point. Instead of decorating a room after the finishes are installed, artisan tiles allow you to build the room around a “hero surface.” Examples include:

  • A kitchen backsplash that anchors cabinetry and countertops

  • A fireplace surround that becomes an architectural centerpiece

  • A powder room accent wall that feels like a boutique hotel

  • A stair riser detail that turns a functional element into art

Traditional ceramic tiles can certainly be attractive, but artisan tiles expand the design vocabulary. Styles range from old-world Mediterranean to crisp contemporary, with everything from painterly florals to minimal, tactile relief patterns. Many homeowners also appreciate that these tiles look better up close—where real homes are experienced—because the craftsmanship rewards attention.

The rise in demand for bespoke finishes reflects this desire for originality. If a trend shows a 30% increase in homeowners selecting unique tiles over mass-produced options, it signals a broader preference for interiors that communicate individuality rather than conformity.

Design tip: Before choosing a tile, evaluate the visual weight you want it to carry. A high-contrast, intricate tile naturally draws attention; a subtle, tonal artisan tile adds sophistication without dominating the room. Both can be “statement” choices—just in different ways.

No. 2

Choosing Unique Patterns and Designs for Your Space

One of the most exciting advantages of artisan tiles is variety. Patterns can be bold or restrained, dense or airy, historic or modern. This range creates near-endless creative combinations—but it also means selection requires strategy. A beautiful tile that doesn’t match the room’s scale, lighting, or function can feel chaotic rather than elevated.

Pattern impacts perception of space

Beyond aesthetics, patterns influence how large or small a room feels. The same square footage can read very differently depending on motif size, contrast, and orientation:

  • Large-scale patterns can make compact rooms feel more expansive by reducing visual “busyness.”

  • Small-scale, high-contrast patterns add energy and detail, but may feel crowded in tight spaces if overused.

  • Linear or directional motifs can elongate a wall, widen a narrow area, or draw attention upward.

  • Repeating geometric patterns can add modern structure, while florals and hand-painted themes add softness and narrative.

If research suggests that vibrant, colorful patterns can improve mood and productivity, it makes sense that homeowners often place energizing tiles in kitchens, home offices, or creative studios—rooms where people want a lift. Conversely, calmer palettes and gentle tonal variation are frequently chosen for bathrooms and bedrooms, where the goal is restoration.

Practical steps for choosing patterns

To avoid expensive missteps, work through a clear decision process:

  • Identify the room’s role: Is it a high-traffic kitchen? A quiet primary bath? A decorative entryway?

  • Define the “tile job”: Focal point, supporting background, or transitional element?

  • Consider lighting: Natural light amplifies color shifts and glaze effects; dim rooms may need lighter tile.

  • Coordinate with fixed finishes: Cabinets, countertops, flooring, and paint are your anchor elements.

  • Test samples at home: View them morning vs. night; glossy glazes can change drastically with lighting.

Consulting style guides can be useful, but the best guidance often comes from seeing real installations and assessing how the tile behaves at full scale. A pattern that looks perfect on a small swatch can feel very different across a 10-foot wall.

Rule of coherence: If your tile is visually complex, keep surrounding finishes simpler. If your tile is quiet and tonal, you can add interest through layered textures (wood grain, stone, brushed metals).


No. 3

The Durability and Quality of Artisan Tiles

Artisan tiles are not only decorative—they are often built to endure. Many are produced using high-grade materials such as terracotta and ceramic, and finished with glazes that add both beauty and protection. When properly installed and maintained, artisan tile surfaces can perform exceptionally well over time, even in demanding rooms like kitchens, bathrooms, and mudrooms.

Why artisan tiles can outlast standard options

Durability depends on materials, firing process, glaze quality, and installation. Artisan makers often pay closer attention to the full lifecycle of the tile, not just its appearance.

Key factors that support longevity include:

  • Robust base materials suited for the tile’s intended location

  • Carefully developed glazes that resist staining and moisture

  • Thickness and structural integrity appropriate for foot traffic or wall use

  • Compatibility with sealing (when needed) for porous tiles like terracotta

If studies suggest artisan tiles can extend flooring life by up to 50% when properly maintained, that highlights the value of investing in quality plus correct care. Still, it’s important to be realistic: not every artisan tile is made for every application. Some are best for walls, others for floors, and some require sealing or gentler cleaners.

Safety and performance in wet or high-traffic areas

Many artisan tiles can be selected with performance in mind—especially for bathrooms, showers, and kitchens. Depending on finish, certain surfaces may provide better slip resistance, while others (very glossy glazes) are better suited for walls and backsplashes.

For high-traffic floors, ask about:

  • Recommended use (wall vs. floor rating)

  • Slip resistance (especially in wet zones)

  • Expected wear characteristics over time

  • Whether the tile needs sealing and how often

Maintenance that protects the investment

Routine care keeps artisan tiles vibrant and prevents long-term damage.

Consider these baseline practices:

  • Clean with pH-neutral products suitable for tile and grout

  • Avoid harsh abrasives that can dull glazes or scratch surfaces

  • Seal porous tiles when recommended (and re-seal on schedule)

  • Address grout maintenance early—grout often ages faster than tile

Consult cleaning guides specific to your tile type for best practices, especially if you’ve chosen handmade terracotta or tiles with crackle glazes that may require specialized handling.

No. 4

Elevating Your Space with Customized Artisan Tiles

While off-the-shelf artisan tiles already offer a distinctive look, customized artisan tiles take the concept further: they allow your home to carry a signature detail that cannot be replicated elsewhere. Custom patterns can be as subtle as a personalized colorway or as bold as an entirely bespoke pattern designed around your story, architecture, or cultural references.

What customization can look like

Customization doesn’t always mean designing from scratch.

Common bespoke approaches include:

  • Adjusting color palette to match cabinetry, paint, or textiles

  • Selecting a specific glaze finish (matte, satin, gloss, crackle)

  • Modifying the scale of a motif for the room’s proportions

  • Creating a border, medallion, or mural feature for a focal wall

  • Incorporating meaningful symbols, dates, or place-inspired elements

Customers often collaborate with artists to create designs that reflect personal narratives—travel inspirations, family heritage, or a theme that ties the home together. This approach is particularly popular in high-end renovations, where the goal is not merely “new finishes,” but a home that feels authored.

How to plan a custom tile project successfully

Commissioning custom tiles requires alignment between your vision and practical constraints like budget, timelines, installation complexity, and long-term maintenance.

A strong process usually looks like this:

  • Start with concept and constraints: Where will the tile go, and what must it withstand?

  • Collect references: Photos, colors, textures, and style cues you want echoed.

  • Work with a specialist: Approach artisans experienced in bespoke tile creation.

  • Request mockups or samples: Approve color and glaze under your home lighting.

  • Coordinate with your installer early: Handmade tiles may have variations that affect layout and grout spacing.

Because custom work can involve longer lead times, it’s wise to factor tile production into the broader renovation schedule—especially if other trades (cabinetry, counters, plumbing fixtures) depend on the tile being installed at a certain stage.

Integration tip: Use custom tiles in a targeted way for maximum impact. A single custom backsplash or feature wall can transform a space without requiring every surface to be bespoke.


No. 5

Practical Placement Ideas: Where Artisan Tiles Deliver the Biggest Impact

If you’re investing in artisan tiles, placement strategy matters. The goal is to put the artistry where it can be appreciated, while ensuring performance fits the room’s demands.

High-impact locations include:

  • Kitchen backsplash: Ideal for hand-painted tiles and detailed patterns.

  • Bathroom vanity wall: A controlled splash zone with strong visual payoff.

  • Shower niche or accent band: Adds luxury without overwhelming the space.

  • Fireplace surround: Turns a functional feature into a signature design moment.

  • Entryway floor or stair risers: Creates a memorable first impression.

To keep the design cohesive, balance artisan tile moments with calmer surfaces. Think of artisan tiles as punctuation: used intentionally, they make the whole “sentence” of the room more expressive.

Takeaways

In this article, we explored why artisan tiles have become a go-to choice for homeowners seeking interiors that feel personal, elevated, and enduring. Artisan tiles enhance aesthetic appeal through intricate patterns, hand-crafted variation, and the ability to create focal points that define a room. Their wide range of designs—geometric, floral, mosaic, contemporary, and traditional—allows you to shape how a space feels and even how large it appears.

Beyond beauty, artisan tiles often deliver impressive durability when the material, finish, and installation method match the room’s demands. Finally, customized artisan tiles offer a rare opportunity to embed story and identity into your home through bespoke colorways, motifs, and artist collaborations.

If you want the best results, choose patterns with intention, test samples in real lighting, confirm performance requirements (especially in wet or high-traffic areas), and plan maintenance from the start. Done well, artisan tiles don’t merely decorate a home—they help define it.


Looking for Home resources?

Looking to enhance your living space and create a sanctuary that supports your well-being? Explore our home partners who offer a wide range of resources to elevate your home environment.



homeHLL x Editor


How Hiring A Local Plumber Transforms Emergency Situations

When a plumbing emergency strikes—burst pipes, overflowing toilets, sudden water-heater failures—homeowners face an immediate, high-stakes dilemma: who can stop the damage quickly and fix the problem correctly the first time? According to recent statistics, 76% of homeowners experience a plumbing-related issue annually, underscoring how common (and disruptive) these incidents are.


In this article, we explain how hiring a local plumber can dramatically change the outcome of an emergency. Beyond simply “showing up,” local professionals often reduce damage through faster response, improve safety with proper protocols, and lower total costs by preventing small failures from turning into major repairs. You’ll also learn practical steps for preparing ahead so you’re not scrambling when every minute counts.

No. 1

Quick Response Times in Plumbing Emergencies: How Local Plumbers Make a Difference

In a plumbing crisis, time is not a convenience—it’s a cost multiplier. A burst supply line can release gallons of water per minute, soaking drywall, flooring, insulation, and electrical systems in a matter of minutes. Similarly, an overflowing toilet or backed-up drain can quickly become a sanitation issue that affects multiple rooms.

Because they operate nearby, local plumbers can typically reach your home faster than providers coming from across a metro area or from outside town. That proximity often translates into:

  • Shorter dispatch windows and fewer scheduling delays

  • Less time spent traveling (especially during peak traffic or storms)

  • Faster on-site assessment and quicker start to repairs

The result is simple: the sooner water flow is stopped and pressure is stabilized, the less damage you absorb.

The phrase plumber near me isn’t just a search query; in an emergency, it’s a practical filtering strategy. A nearby professional is more likely to arrive while the problem is still containable rather than after it has spread to subfloors, wall cavities, and adjacent rooms.

What “fast response” looks like in real life

In many cases, a local plumber can arrive within an hour, depending on demand and time of day. Even when immediate arrival isn’t possible, local companies are often more familiar with neighborhood layouts and can provide clearer remote guidance while they’re en route—such as how to shut off the main water valve, isolate a fixture, or avoid electrical hazards.

How homeowners can reduce response time even more

Preparation is a force multiplier.

Keep these items ready:

  • A saved contact for a trusted local plumber (not just a web tab)

  • Knowledge of where your main shutoff valve is located

  • A basic emergency kit (bucket, towels, flashlight, adjustable wrench)

  • Photos or notes about your plumbing layout if you have an older home

When minutes matter, these small steps can reduce panic and speed up the path to resolution.

No. 2

Assessing and Managing Water Damage: The Role of Local Plumbers in Prevention

Stopping the leak is only the first phase. The second phase—often overlooked in the stress of an emergency—is evaluating what failed, why it failed, and what risks remain.

Local plumbers tend to be especially valuable here because they often have deep familiarity with:

  • Common pipe materials in the area (galvanized, copper, PEX, PVC)

  • Local water pressure patterns and known hard-water issues

  • Weather-related freeze risks and seasonal vulnerabilities

  • Typical construction styles in nearby homes (slab vs. crawlspace vs. basement)

That context helps them move quickly from “symptom control” to “root-cause repair.”

Rapid diagnosis prevents secondary damage

Water rarely stays where you can see it. Hidden leaks can travel along joists, behind cabinets, under tiles, or into insulation. Local plumbers frequently bring tools and methods that help detect and contain damage early, such as:

  • Moisture detection techniques

  • Pressure testing to confirm a sealed repair

  • Targeted inspection of high-risk joints, valves, and supply lines

Early detection matters because lingering moisture can lead to:

  • Mold growth and odor issues

  • Warped flooring and compromised subfloors

  • Deteriorating drywall and insulation failure

  • Corrosion around fittings that triggers future leaks

Preventative maintenance reduces emergencies

While emergencies can’t always be avoided, many are preventable. Regular inspections—especially before winter freezes or heavy rain seasons—often catch small problems early.

Homeowners can ask a local plumber to check:

  • Water heater connections and relief valve function

  • Supply-line wear at sinks, toilets, and washing machines

  • Shutoff valves that have seized or started to drip

  • Outdoor spigots and irrigation lines that are vulnerable to freezing

Statistics and facts point to an important truth: preventive care measurably reduces failures. Even without perfect numbers for every home, the principle remains consistent—small, scheduled fixes cost less than urgent, after-hours repairs plus restoration work.


No. 3

Enhancing Safety During Plumbing Disasters with Professional Expertise

Plumbing emergencies can create safety hazards that go well beyond water on the floor. A professional’s value isn’t only in technical ability—it’s also in knowing what not to do during a chaotic moment.

Key safety risks in common emergencies

Local plumbers bring training and practical safety protocols, especially in situations involving:

  • Gas leaks (from water heater lines or nearby appliances): requires immediate caution, ventilation, and strict ignition avoidance

  • Sewage backups: poses contamination and exposure risks requiring protective handling and proper cleanup guidance

  • Water near electricity: can create shock hazards if outlets, appliances, or breaker panels are affected

  • Structural saturation: prolonged leaks can weaken drywall, ceilings, and cabinetry, increasing collapse risk

A trained plumber can secure the site, isolate the system, and restore safe operation—while also advising you on next steps (e.g., whether you need water remediation, electrical inspection, or mold prevention measures).

Follow-up matters as much as the repair

One of the biggest advantages of hiring a local professional is continuity. When the same company can return easily for a follow-up inspection, you reduce the chance that a temporary fix becomes a recurring problem. A good local plumber will often:

  • Recheck the repaired area for seepage or pressure loss

  • Confirm fixtures drain correctly and vents function as expected

  • Identify nearby components likely to fail next (proactive risk reduction)

For homeowners, choosing a plumber who treats emergency work as the beginning of a solution—not the end of a service call—can prevent repeat disasters.

No. 4

Cost-Effectiveness of Hiring Local Plumbers for Emergency Repairs

Emergency plumbing is rarely “cheap,” but it can be less expensive when handled quickly and correctly. Hiring locally often improves cost outcomes in two main ways: reduced logistics costs and reduced damage escalation.

Lower travel-related expenses and clearer pricing

Because they are nearby, local plumbers typically have:

  • Lower or no long-distance travel charges

  • More predictable arrival windows (less time billed for transit)

  • Better awareness of local pricing norms and common job scopes

In contrast, plumbers traveling farther may need to price in longer drive time, fuel costs, and uncertainty.

Faster action prevents exponential damage costs

The true financial risk in plumbing emergencies is not always the repair itself—it’s what happens while you wait.

Delays can increase:

  • Flooring replacement costs

  • Drywall removal and repainting

  • Cabinetry repair or replacement

  • Mold mitigation expenses

  • Lost time and temporary relocation disruptions (in extreme cases)

A rapid fix can also reduce wasted water and prevent damage to valuable belongings.

Maintenance agreements can improve long-term savings

For optimal savings, some homeowners choose a service plan or maintenance agreement with a trusted local plumber. These arrangements can include scheduled inspections and discounted emergency calls. The reference to Consumer Reports in the original draft aligns with a widely accepted consumer principle: preventative maintenance reduces total repair costs over time.

If you go this route, ask what’s included:

  • Annual water-heater inspection and flush recommendations

  • Priority scheduling for emergencies

  • Discounts on parts or labor

  • Documentation of repairs (helpful for insurance and resale)


No. 5

How to Choose the Right Local Plumber Before an Emergency Happens

“Local” is valuable, but reliability and professionalism still matter. Since emergencies are stressful, the best time to vet a plumber is before you urgently need one.

Use this checklist:

  • Licensing and insurance: Confirm they are properly credentialed for your area.

  • Emergency availability: Ask about after-hours response and typical dispatch times.

  • Transparent estimates: Look for clear pricing policies and approval before major work begins.

  • Reputation: Check reviews that specifically mention emergency calls and follow-up support.

  • Communication: A good plumber explains the problem, the fix, and prevention steps without jargon overload.

Also, store their number somewhere accessible (phone contacts, a note on the fridge, or your home maintenance folder). Searching plumber near me is helpful, but in a true emergency, having a pre-vetted option is faster—and often safer.

Takeaways

In this article, we explored how hiring a local plumber can fundamentally improve the outcome of a plumbing emergency. Local professionals tend to arrive faster, which limits water damage and reduces disruption. They also provide practical diagnostic skills that help prevent secondary issues like hidden leaks, mold, and repeat failures.

Just as importantly, they enhance household safety in high-risk situations involving sewage, gas, or water near electrical systems. Finally, local service is often more cost-effective—not only due to reduced travel overhead, but because faster intervention prevents damage from escalating.

The most effective strategy is proactive: identify a trusted local plumber now, understand your shutoff points, and consider preventative inspections. When an emergency hits, preparedness plus proximity can make the difference between a manageable repair and a costly home disaster.


Looking for Home resources?

Looking to enhance your living space and create a sanctuary that supports your well-being? Explore our home partners who offer a wide range of resources to elevate your home environment.



homeHLL x Editor


What To Know Before Installing Outdoor Shade Systems

Outdoor shade systems can turn an exposed patio, deck, or garden into a comfortable extension of your home—one that offers protection from intense sun, helps manage heat, and can even provide shelter from light rain. The right setup makes outdoor living more usable across seasons, whether you’re hosting family dinners, creating a quiet reading corner, or improving comfort around a pool.


In this article, you’ll learn what to evaluate before installing an outdoor shade solution, how to match the system to your space and lifestyle, what materials hold up best over time, and how to plan for safe installation and long-term value. A shade system is not just a design choice; it’s a performance choice that affects durability, maintenance demands, comfort, and energy efficiency.

No. 1

Assessing Your Space and Needs (The Step That Prevents Costly Mistakes)

Every outdoor area has its own microclimate and design constraints, and your shade system should respond to those realities—not fight them. Before comparing products, start by evaluating the space as it truly functions day to day.

Measure with purpose, not guesses

Accurate measurements do more than ensure a shade structure “fits.”

They help you determine:

  • How much coverage is required at peak sun hours

  • Where supports can be anchored securely

  • Whether the shade will interfere with doors, walkways, grills, or furniture layouts

  • The correct projection and height for comfortable clearance

Also note the sun’s path. Morning sun can be gentle, while afternoon sun can be harsh and low-angled—especially on west-facing patios. Spend a few days observing where shadows fall and how the space feels at different times.

Consider wind and weather patterns

Wind is one of the most underestimated factors in shade planning. A system that looks perfect on a calm day may become unstable if it’s not designed for the gusts common in your area.

Pay attention to:

  • Wind tunnels created by fences and neighboring buildings

  • Seasonal gust patterns (storm seasons, coastal winds, open plains)

  • Exposure on upper decks or rooftops

If your space experiences strong winds, retractable or removable options may be safer and more practical.

Match shade to how you’ll actually use the space

A shaded dining area often needs broad, consistent overhead coverage. A lounging area might benefit from adjustable shade that changes with the sun.

Consider:

  • Dining vs. lounging vs. poolside use

  • Time of day you use the space most

  • Whether you need shade over a doorway or windows

  • Privacy needs from neighbors or nearby streets

  • Lighting and ventilation expectations

When you define the purpose first, the ideal design becomes much easier to select—and far more satisfying to live with.

No. 2

Types of Outdoor Shade Systems (Choosing Between Fixed, Flexible, and Adjustable)

There is no one “best” shade system. The best choice depends on how permanent you want the structure to be, how much weather exposure it must handle, and whether you want adjustable control over sun and airflow.

Fixed structures

Fixed systems include pergolas, gazebos, and other permanent installations. They are strong, visually architectural, and can be integrated with:

  • Lighting

  • Ceiling fans or heaters

  • Climbing plants and trellises

  • Slatted roofs or polycarbonate panels

They’re often ideal if you want a long-term backyard “room” and don’t need to retract shade frequently. However, permanent structures typically require more planning, may involve permits, and can cost more upfront.

Canopy sails

Shade sails are modern, lightweight fabric panels that stretch between anchored points. They’re popular because they can cover irregular spaces and create a contemporary look.

Key benefits include:

  • Flexible placement around existing landscaping or hardscapes

  • Strong UV reduction when high-quality fabric is used

  • Visual openness compared to solid roofs

That said, sails require correct tensioning and reliable anchor points. If installed poorly, they can sag or flap, which reduces performance and longevity.

Retractable designs

Retractable systems are excellent when you want control. A retractable awning is a common example, allowing you to extend shade when needed and retract it during high winds or when you want sunlight.

Retractable options are especially useful for:

  • Patios that need shade only during peak heat

  • Homes where winter sun exposure is desirable

  • Areas with unpredictable weather changes

  • Protecting fabrics and mechanisms by retracting during storms

They offer strong day-to-day practicality, but they also require attention to installation quality, motor/manual mechanism durability, and maintenance routines.


No. 3

Material and Fabric Considerations (Where Durability Is Won or Lost)

The performance of an outdoor shade system depends heavily on material selection. Two systems can look similar on day one yet age very differently based on fabric quality, frame construction, and protective coatings.

Fabric performance: UV, fading, and moisture resistance

Quality outdoor fabrics are designed to handle:

  • UV exposure without breaking down

  • Colorfastness to reduce fading

  • Mold and mildew resistance

  • Water resistance (or controlled permeability, depending on design)

Common fabric options include acrylic, polyester, and PVC-coated textiles. Each has strengths, but what matters most is the specific product grade and treatment.

When comparing fabrics, look for:

  • UV protection rating (higher protection matters for health and comfort)

  • Breathability (helps reduce trapped heat under the canopy)

  • Coating durability (poor coatings crack and peel over time)

  • Warranty terms that clearly cover fading and structural integrity

Frame strength and corrosion resistance

Frames typically use aluminum or treated steel. Aluminum is popular for its corrosion resistance and lower weight, while treated steel can offer higher strength but must be well-protected against rust.

Also consider the quality of:

  • Fasteners (stainless steel is often preferable outdoors)

  • Brackets and anchor plates

  • Powder coating or protective finishes

In outdoor installations, small hardware choices can have outsized impacts on lifespan and safety.

No. 4

Installation and Safety Factors (Stability Comes Before Style)

A shade system is only as reliable as its installation. Even premium materials can fail if mounted incorrectly or attached to surfaces that cannot bear the load.

Mounting and load-bearing basics

Mounting brackets and supports must be secured into stable, appropriate surfaces—ideally structural framing, reinforced posts, or professionally assessed masonry.

For larger systems, it’s wise to evaluate:

  • Wall condition and structural supports

  • Beam integrity

  • Ledger attachment points (for decks)

  • Soil stability (for posts installed in ground footings)

For complex or heavy installations, a professional assessment can prevent structural stress, cracking, or long-term sagging.

Wind management is non-negotiable

Wind places dynamic stress on shade structures.

Practical precautions include:

  • Choosing retractable systems that can be closed in extreme conditions

  • Using proper tensioning methods for sails

  • Ensuring anchor points are rated for expected loads

  • Avoiding “DIY shortcuts” with undersized hardware

If you live in a high-wind region, prioritize systems designed for wind resilience and build a habit of retracting or removing fabric during storms.


No. 5

Maintenance and Longevity (How to Keep Your Shade System Performing)

A shade system is an outdoor asset—exposed to sun, dust, pollen, moisture, and temperature swings. Routine maintenance protects both appearance and function.

Cleaning and care

Most shade fabrics do best with gentle cleaning:

  • Mild soap and water

  • Soft brushes or cloths

  • Thorough rinsing to prevent residue buildup

Avoid harsh chemicals or abrasive tools that can degrade protective coatings.

Retractable mechanism upkeep

If your system has moving components, regular care is essential:

  • Lubricate moving parts as recommended by the manufacturer

  • Check for uneven extension or unusual noises

  • Inspect fasteners for loosening due to vibration or temperature changes

Seasonal habits that extend lifespan

To reduce wear:

  • Retract awnings during high winds and heavy rain

  • Store removable panels during the off-season

  • Use protective covers when appropriate

  • Inspect anchor points and fittings periodically

Small maintenance routines prevent the slow decline that often leads to expensive repairs—or premature replacement.

No. 6

Energy and Comfort Benefits (More Than Just Shade)

A well-placed shade system improves comfort outside, but it can also affect indoor temperature and energy use. By reducing direct sun exposure on windows, doors, and exterior walls, shade systems can limit heat gain—helping rooms stay cooler during hot months.

Potential benefits include:

  • Reduced glare inside the home

  • Cooler interior temperatures near sun-facing windows

  • Lower reliance on air conditioning during peak hours

  • A more comfortable patio environment, even in mid-summer

Shade also supports healthier outdoor living by reducing UV exposure, which matters for skin protection during long periods outside.

No. 7

Planning for Long-Term Value (Design That Pays You Back)

A thoughtful shade system can enhance daily life and contribute to property appeal. But long-term value depends on planning—not impulse buying.

Before you commit, compare:

  • Materials and fabric ratings

  • Wind suitability for your location

  • Warranty coverage (fabric, frame, mechanisms)

  • Maintenance requirements over time

  • How the structure complements your architecture

It’s also worth considering whether you might expand your outdoor living area later. Choosing a flexible system now—especially if you anticipate changes in landscaping, furniture layout, or usage—can prevent you from outgrowing the setup too quickly.

Takeaways

In this article, we explored what to consider before installing outdoor shade systems, from assessing sunlight and wind patterns to selecting the right type of structure and investing in durable materials. The best results come from matching the system to how you actually live—dining, entertaining, relaxing, or creating a cool poolside retreat—while keeping installation safety and long-term maintenance in mind.

If you plan carefully, choose quality components, and maintain the system consistently, outdoor shade can deliver lasting comfort, improved energy efficiency, and a more functional outdoor space you’ll want to use every day.


Looking for Home resources?

Looking to enhance your living space and create a sanctuary that supports your well-being? Explore our home partners who offer a wide range of resources to elevate your home environment.



homeHLL x Editor


Why Mold Keeps Coming Back And How To Stop The Cycle For Good

Having a mold problem in your home isn’t something anyone wants to deal with—yet it’s a surprisingly common issue for both renters and homeowners. Mold is more than an eyesore on a wall or a musty smell in the corner of a room. It’s a signal that moisture is present where it shouldn’t be, and that moisture is creating conditions that can damage your property, ruin belongings, lower indoor comfort, and potentially affect health.


The frustrating part is when you scrub, spray, and wipe—only to find mold returning days or weeks later. That usually means the visible mold was only the symptom, not the cause.

In this article, we’ll walk through the most common reasons mold keeps coming back even after cleaning, what you may be overlooking, and the practical steps that help break the regrowth cycle. The goal is simple: stop repeatedly cleaning the same spots and start solving the underlying moisture and air-quality problems that allow mold to thrive.

No. 1

You’re Not Eliminating the Moisture Source (You’re Only Treating the Symptom)

The most common reason mold returns is also the easiest to misunderstand: you cleaned what you could see, but you didn’t address what’s feeding it.

Mold grows where moisture collects. If water is still entering or condensing in the same area, mold will return—even if the surface looks spotless right after cleaning. Many people assume that if the wall looks dry, it is dry.

But moisture can hide:

  • Behind drywall

  • Under flooring

  • Inside cabinets

  • Around window frames

  • Behind appliances (especially refrigerators, washing machines, and dishwashers)

  • In poorly sealed bathrooms or showers

Where moisture typically comes from

Mold can be fueled by both obvious and subtle sources, including:

  • A small plumbing leak under a sink

  • A slow drip behind a toilet

  • A cracked grout line or failing caulk in a shower

  • Rainwater entering around a window or roof flashing

  • Condensation on cold surfaces (pipes, exterior walls, windows)

  • Damp crawlspaces or basements wicking moisture upward

What to do instead of “just cleaning”

To stop mold from returning, treat cleaning as the final step—not the first.

A better order of operations is:

  • Find the dampness

  • Stop the moisture

  • Dry the materials thoroughly

  • Then clean or remove contaminated materials

If you can’t identify the source, consider using a simple moisture meter (often inexpensive) or bringing in a professional to locate hidden leaks or saturation behind walls. Repeated regrowth is often your home’s way of saying, “There’s water here somewhere.”

No. 2

Your Home’s Humidity Is Too High (Even Without a Leak)

A lot of homeowners look for a leak and find nothing—so they assume mold “just happens.” In many cases, the real issue isn’t a single water intrusion event; it’s consistently high indoor humidity.

Mold doesn’t always need dripping water to thrive. In many situations, ambient humidity above ~60% is enough to support mold growth—especially on materials that hold moisture, like drywall, fabric, wood, and cardboard.

Why humidity rises faster than you think

Everyday activities add moisture to the air, including:

  • Showering and bathing

  • Cooking (especially boiling water)

  • Running the dishwasher

  • Drying clothes indoors

  • Mopping floors

  • Even breathing in a closed room overnight

In warm months, humidity can also enter from outside, especially if doors/windows are opened frequently or if your HVAC system isn’t effectively removing moisture.

How to measure and fix it

You don’t need to guess. You can buy a hygrometer for a relatively low cost and then identify where your home's humidity is high.

Once you know where humidity is high, solutions include:

  • Run a dehumidifier (especially in basements, laundry rooms, and bathrooms)

  • Use air conditioning to remove humidity during hot months

  • Improve airflow so damp air doesn’t stagnate

  • Aim for 30–50% indoor humidity for most homes (comfortable and mold-resistant)

If mold repeatedly appears in multiple rooms or closets, high humidity is often the real culprit—not your cleaning method.


No. 3

Mold Spores Are Still in the Air (So the Problem Keeps Re-Seeding)

Here’s the part many people miss: mold isn’t only a surface issue. Mold spreads via spores, and spores can remain suspended in the air and resettle onto surfaces.

When you clean visible mold, you may accidentally disturb colonies and release more spores. If the room still has excess moisture, those spores have everything they need to establish new growth—sometimes right in the same spot.

Why airborne spores matter

Even after wiping down a wall, spores can land on:

  • Window sills where condensation forms

  • Bathroom ceilings after a hot shower

  • Closet corners with poor airflow

  • Behind furniture pushed against exterior walls

This is why surface cleaning alone can feel like an endless loop.

A practical tool: filtration

Removing airborne spores is where targeted filtration helps. Using products like air purifiers for mold can be extremely useful in managing ongoing issues—especially in rooms where you’ve already found mold. Models with HEPA filtration can capture spores before they land and spread, helping reduce recontamination while you work on moisture control.

Important note: filtration supports prevention; it doesn’t replace fixing humidity or leaks. But it can meaningfully reduce how quickly mold returns and how widely spores circulate.

No. 4

Ventilation Is Poor (Moisture Has Nowhere to Go)

Even if humidity isn’t high throughout the whole home, individual rooms can become “microclimates” where moisture builds up daily. Bathrooms, laundry rooms, kitchens, and basements are common examples.

When ventilation is poor, damp air lingers. If the air doesn’t move, surfaces stay wet longer—and mold gets the time it needs to grow.

Common ventilation problems

Poor ventilation often looks like:

  • Bathroom exhaust fans that are too weak—or not used long enough

  • Fans that vent into the attic instead of outside

  • Blocked HVAC vents or returns

  • Furniture pushed flush against cold exterior walls

  • Closets packed tightly with no air movement

  • Windows that stay closed in damp weather with no mechanical ventilation

Fixes that usually work

Improving ventilation doesn’t have to be complicated. Often, the best results come from a few consistent habits and small upgrades:

  • Run the bathroom fan during showers and for 20–30 minutes after

  • Open a window briefly (weather permitting) to purge humid air

  • Check fan ducting to ensure it vents outside

  • Keep interior doors open periodically to balance airflow

  • Avoid blocking vents and returns

  • Leave a small gap between furniture and exterior walls

  • Use your HVAC fan setting strategically to circulate air

Think of ventilation as moisture removal. If moisture can’t leave the room, it will settle—on mirrors, ceilings, grout lines, and painted drywall—creating a recurring mold pattern.


No. 5

You May Be Using the Wrong Cleaning Approach (Or Cleaning the Wrong Material)

Not all mold problems can be solved with a wipe-down. Sometimes mold is rooted in porous materials that can’t be fully sanitized once colonized.

Porous materials can hold mold “roots”

Materials that often require removal (not just cleaning) when mold is persistent include:

  • Drywall (especially if it feels soft or crumbly)

  • Ceiling tiles

  • Carpeting and padding

  • Cardboard storage boxes

  • Untreated wood that has remained damp

If mold keeps returning in the same area despite cleaning, the growth may be beneath the surface. In that case, you may need to replace the affected material after fixing the moisture source.

Avoid spreading spores while cleaning

Also, consider your cleaning method. Scrubbing aggressively without containment can spread spores around the room. If the affected area is larger, or if you’re dealing with recurring growth, it may be safer to:

  • Wear proper PPE (gloves, eye protection, and an appropriate mask/respirator)

  • Ventilate the area while cleaning

  • Use controlled wiping rather than dry brushing

  • Dispose of contaminated rags/sponges carefully

If the mold covers a large area or keeps returning quickly, a professional assessment may be warranted.

No. 6

The Mold Is Coming From an Adjacent Space (Basement, Attic, Crawlspace, or Wall Cavity)

Sometimes the mold you see isn’t originating where it appears.

For example:

  • A closet wall grows mold because the attic above is poorly vented

  • A bedroom corner grows mold because the exterior wall is cold and condensing

  • Bathroom mold returns because moisture is trapped behind tile or inside a wall cavity

  • Basement mold keeps seeding the upstairs air

If you fix the visible patch but ignore the connected space, the problem repeats.

Clues that mold is coming from elsewhere

Watch for patterns like:

  • Mold concentrated on an exterior wall or corner

  • A persistent musty smell even after cleaning

  • Mold returning seasonally (hot/humid months or rainy periods)

  • Multiple small outbreaks in different rooms

In these cases, the “real” fix may involve insulation improvements, sealing air leaks, crawlspace encapsulation, attic ventilation correction, or targeted dehumidification.

Takeaways

In this article, we looked at why mold keeps coming back after you clean it—and the answer is usually simple: cleaning removes what you can see, but mold regrows when moisture, humidity, spores, and poor airflow remain.

To stop the cycle, focus on the root causes:

  • Eliminate the moisture source (leaks, condensation, water intrusion)

  • Control indoor humidity (ideally keeping it in a mold-resistant range)

  • Reduce airborne spores with tools like air purifiers for mold featuring HEPA filtration

  • Improve ventilation so damp air doesn’t linger in bathrooms, basements, and closed rooms

  • Recognize when materials must be replaced, not just wiped down

  • Check adjacent spaces (attics, crawlspaces, wall cavities) if regrowth persists

If you address moisture first and cleaning second, mold stops being a recurring battle—and becomes a solvable home maintenance issue.


Looking for Home resources?

Looking to enhance your living space and create a sanctuary that supports your well-being? Explore our home partners who offer a wide range of resources to elevate your home environment.



homeHLL x Editor


Smart Toilets Vs. One Piece Toilets: Which Is Better For Hygiene And Comfort?

When was the last time you thought seriously about your toilet? For most people, the answer is “not often”—unless you’re in the middle of a bathroom remodel or dealing with an urgent plumbing issue. Still, the toilet is one of the most frequently used fixtures in any home, and it has a surprisingly large impact on daily comfort, cleanliness, and even long-term hygiene habits.


With bathroom technology evolving quickly, more homeowners are debating whether to invest in a smart toilet or stick with classic one piece toilets. The decision isn’t only about luxury or aesthetics; it’s also about practical hygiene, ease of cleaning, and how your bathroom functions for kids, guests, and older family members.

In this article, we’ll compare smart toilets and one-piece toilets in a realistic, non-salesy way. We’ll cover how each option affects hygiene, what features matter most, where hidden costs show up, and how to choose the best fit for your home and lifestyle.

No. 1

What Makes Smart Toilets and One-Piece Toilets Different?

Before we talk hygiene, it helps to define what each toilet type actually is. The differences aren’t just cosmetic—they change how the toilet is cleaned, how it’s used, and what kinds of upgrades are possible.

A quick overview of one-piece toilets

One-piece toilets are exactly what they sound like: the bowl and tank are molded together into a single, seamless unit. They differ from two-piece toilets (where the tank bolts onto the bowl), and that one design change brings a few meaningful benefits:

  • Fewer seams and crevices, which means fewer places for grime to hide

  • Easier wiping and disinfecting, especially around the tank area

  • A clean, modern look that works well in updated bathrooms

  • Often more durable over time because there are fewer connection points and gaskets

For many households, one-piece toilets hit the “sweet spot”: they feel like an upgrade, they’re easier to maintain than older designs, and they don’t introduce new tech that requires power or specialized servicing.

What exactly is a smart toilet?

A smart toilet goes beyond shape and style—it changes the experience of using the bathroom. Think of it as a toilet combined with bidet functionality and a set of automated features designed to improve comfort and cleanliness.

Depending on the model, smart toilets may include:

  • Automatic flushing (sometimes with adjustable settings)

  • Heated seats

  • Built-in bidet spray systems (front and rear wash options)

  • Warm air drying

  • Touchless lids (auto open/close using sensors)

  • Deodorizing systems

  • Self-cleaning bowls and self-cleaning nozzles

Some high-end options even add night lights, foot-sensing lid controls, or health-oriented sensors. While that might sound futuristic, smart toilets are already mainstream in some regions—Japan is the most commonly cited example—because the hygiene benefits are real and immediate.

No. 2

Why Bathroom Hygiene Matters More Than Most People Realize

Bathrooms feel “clean” when they look tidy. But hygiene is not only about appearance—it’s about reducing germ transfer, minimizing contaminated touchpoints, and making routine cleaning easier and more consistent.

The hidden truth about bathroom germs

Even a well-maintained bathroom can spread bacteria through everyday use. A few uncomfortable-but-useful realities:

  • Flushing can aerosolize microscopic droplets (often called the “toilet plume” effect)

  • Flush levers, buttons, and lids become high-touch germ surfaces

  • Shared bathrooms amplify these issues because germs transfer from one user to the next

  • Toilet seat covers, rugs, and fabric accessories can trap moisture and microbes

So, when people compare smart toilets and one-piece toilets on hygiene, they’re really comparing two things:

  1. How many surfaces you have to touch

  2. How thoroughly you can clean yourself and the toilet itself


No. 3

How Smart Toilets Improve Hygiene (Where They Truly Stand Out)

Smart toilets tend to win the hygiene argument because they reduce touchpoints and improve personal cleanliness, not just “how nice the bathroom looks.”

Touchless operation is a genuine game-changer

One of the biggest hygiene upgrades is hands-free operation. Many smart toilets offer sensor-based:

  • Lid opening and closing

  • Automatic flushing

  • Sometimes touchless controls via remote or side panel design

That means fewer people touching the same flush lever or button multiple times per day. In a home with kids, frequent guests, or anyone prone to skipping handwashing steps, reducing touchpoints can noticeably improve bathroom cleanliness.

One-piece toilets are easier to clean than older two-piece models, but most still rely on manual flushing. Even if you disinfect the handle regularly, it remains a shared “germ handoff” point.

Built-in bidet and warm air drying (cleaner than paper alone)

If you’ve never used a bidet, it can be hard to understand the difference until you try it. A smart toilet with bidet features provides targeted water cleansing, often with adjustable:

  • Water temperature

  • Spray pressure

  • Nozzle position

  • Washing modes (rear, front, oscillating, pulsing)

Many models also add warm air drying, reducing (or sometimes eliminating) the need for toilet paper. From a hygiene standpoint, this matters because:

  • Water cleans more thoroughly than dry wiping alone

  • Less paper use can mean less irritation for sensitive skin

  • Reduced residue can lower odor and discomfort

By comparison, one-piece toilets rely on toilet paper as the primary method of personal cleaning. The toilet itself may be sleek and easy to wipe down, but the personal hygiene experience is still fundamentally the same as a standard toilet.

Self-cleaning mechanisms and nozzle sterilization

Many smart toilets include features designed to reduce cleaning frequency and prevent bacteria buildup, such as:

  • Nozzle rinsing before and after use

  • Antibacterial materials or coatings

  • UV sterilization (on some models)

  • Electrolyzed water cleaning systems (model dependent)

This can reduce how often you need to scrub, and it can also help maintain a more consistently hygienic bowl and bidet system between deep cleans.

One-piece toilets typically don’t self-clean, but they remain easier to manually clean than two-piece toilets because of their smooth, integrated construction.

No. 4

Hygiene Comparison: Smart Toilets vs One Piece Toilets (Side-by-Side)

Here’s a practical breakdown of how the two typically compare on hygiene-related features:


If hygiene is your top priority, smart toilets usually deliver more measurable improvement because they change both contact surfaces and personal cleaning methods.


No. 5

Real-Life Scenarios Where Hygiene Features Matter Most

Hygiene upgrades matter differently depending on who uses your bathroom and how often.

Families with kids

Kids are wonderful—and also famous for rushing. A smart toilet can reduce the “mess factor” by automating steps that children may forget or avoid, such as flushing or closing the lid. You also reduce how often little hands touch the same high-germ surfaces.

A one-piece toilet can still be a strong choice for family bathrooms because it’s easier to wipe clean quickly, especially around seams. But it can’t prevent touchpoint sharing the way touchless features can.

Elderly users or people with limited mobility

For seniors or anyone with arthritis, injuries, or mobility limitations, hygiene and dignity often overlap. Smart toilet features can reduce strain by eliminating twisting and reaching for flush handles, while bidet washing reduces uncomfortable movement.

A one-piece toilet may still work well if simplicity is the priority, but it won’t provide the same level of assistance.

Homes that host frequently

If you regularly have guests, a smart toilet’s automatic features and deodorizing systems can help keep the bathroom feeling fresher with less intervention. That said, guests may need a short “how to” if controls are unfamiliar—something to consider if you host a lot of people.

No. 6

Downsides and Trade-Offs (Being Honest About the Costs)

No toilet is perfect for every household. The “best” option depends on priorities: budget, reliability, comfort, and willingness to maintain technology.

Smart toilet challenges

Common drawbacks include:

  • Higher upfront cost than one-piece toilets

  • Requires electricity (and sometimes a nearby outlet upgrade)

  • More components can mean more specialized servicing

  • Some users need time to adjust to bidet functions and settings

  • Repairs, when needed, can be more expensive than standard parts

Smart toilets can be incredibly reliable, but they’re still technology—and technology introduces more variables than traditional plumbing hardware.

Why many people still choose one-piece toilets

One-piece toilets remain popular for practical reasons:

  • Lower cost and strong value

  • Simple operation (nothing to learn)

  • Fewer parts compared to smart systems

  • Sleek, modern aesthetic without needing electricity

  • Easier cleaning than two-piece toilets due to the integrated design

If your goal is a clean-looking, easy-to-maintain toilet with minimal complexity, a one-piece design can be a satisfying upgrade without stepping into the smart category.

No. 7

Which Option Is Better for Hygiene? A Realistic Verdict

If hygiene is the top priority, smart toilets generally offer the highest hygiene ceiling because they:

  • Reduce shared touchpoints (touchless lid + flush)

  • Improve personal cleanliness (bidet + optional air drying)

  • Offer self-cleaning features that help maintain a more sanitary bowl and nozzle system

That said, one-piece toilets are still a hygienic, practical choice, especially compared with older two-piece designs. Their smooth shape makes routine disinfecting easier, which is a major factor in real-world cleanliness.

The most honest conclusion is this:

  • Choose a smart toilet for maximum hygiene, comfort, and convenience.

  • Choose one-piece toilets for strong hygiene with simplicity, reliability, and a more manageable budget.

No. 8

How to Choose Between Smart Toilets and One-Piece Toilets

Use these questions as a quick decision framework:

  • Do you want maximum hygiene and fewer touchpoints? → Smart toilet

  • Is your budget limited, but you still want a modern upgrade? → One-piece toilets

  • Do you have kids, seniors, or frequent guests? → Smart toilet (often worth it)

  • Are you doing a simple remodel without electrical changes? → One-piece toilets

  • Do you value comfort features like heated seats and drying? → Smart toilet

If you’re on the fence, a middle-ground approach can work too: install a high-quality one-piece toilet now, and consider a bidet seat add-on later (if compatible) to improve hygiene without a full smart toilet investment.

Takeaways

In this article, we compared smart toilets and one-piece toilets through the lens of hygiene and everyday usability—not just aesthetics. Smart toilets clearly lead in hygiene features thanks to touchless operation, built-in bidet washing, air drying, and self-cleaning functions that reduce germ spread and improve personal cleanliness. They’re especially valuable for families, older users, and households that want maximum comfort with less manual effort.

At the same time, one-piece toilets remain a highly practical and hygienic choice. Their seamless design reduces crevices, simplifies cleaning, and offers a modern look with fewer parts and lower cost—ideal for homeowners who want reliability and simplicity.

The best choice depends on your priorities: if you want the cleanest, most hands-free experience, smart toilets are hard to beat. If you want a durable, easy-to-clean upgrade without introducing technology, one-piece toilets are still an excellent option.


Looking for Home resources?

Looking to enhance your living space and create a sanctuary that supports your well-being? Explore our home partners who offer a wide range of resources to elevate your home environment.



homeHLL x Editor


The Hidden Costs Of Backyard Upgrades No One Talks About

Backyard upgrades are one of the most satisfying ways to improve how your home looks, feels, and functions. A new patio can turn unused space into an outdoor living room. A deck can create the perfect spot for entertaining. A garden can add beauty and calm. And a pool can completely change how you spend your summers.


Yet while most homeowners plan carefully for the “obvious” expenses—materials, design choices, and contractor labor—many projects still end up costing more than expected. The reason is usually not poor planning or bad luck. It’s that there are several predictable costs that rarely get discussed upfront, and they tend to surface only after you’ve already committed.

In this article, we’ll break down the most commonly overlooked expenses that can quietly inflate your backyard renovation budget. You’ll learn what to watch for, why these costs show up, and how to plan for them so your project stays financially manageable from start to finish.

No. 1

Permit and Inspection Fees (Costs That Start Before Construction)

One of the first hidden costs can appear before any digging, drilling, or building begins: permits and inspections. Many outdoor projects—especially those involving structures, electrical work, plumbing, or pools—require approvals from local authorities.

Permits exist to ensure your project aligns with:

  • Zoning rules (setbacks, property lines, easements)

  • Safety standards (structural requirements, barrier rules for pools)

  • Environmental or drainage regulations (stormwater runoff, grading changes)

Why it affects your budget more than you think

Permit fees vary widely based on location and project type, and inspections may be required at multiple milestones. In other words, you may pay more than once, and you may have to schedule work around inspection availability.

Skipping permits can feel like a shortcut, but it often becomes expensive later through:

  • Fines and stop-work orders

  • Forced removal or rebuilds to meet code

  • Appraisal or home sale complications (unpermitted work can raise red flags)

If your contractor isn’t proactively discussing permitting, it’s worth asking early so you can budget for it rather than being surprised mid-project.

No. 2

Electrical and Utility Upgrades (The “Invisible” Infrastructure)

Modern backyard features often demand more from your home than you expect. Outdoor lighting, audio systems, kitchens, hot tubs, pool pumps, heaters, and automation equipment all require power—and not every home has an electrical system that can handle extra load.

Common cost drivers include:

  • Upgrading an electrical panel

  • Adding new circuits for outdoor equipment

  • Trenching and running conduit to outdoor areas

  • Installing GFCI protection and weather-rated outlets

  • Adding dedicated disconnects where required by code

Don’t forget plumbing and gas

Depending on the upgrade, you may also need:

  • Plumbing extensions for an outdoor sink, shower, or irrigation changes

  • Gas line installation for grills, fire pits, or pool heaters

  • Utility locating services to confirm what’s underground before digging

These are “hidden” because they often don’t appear until a contractor assesses your current setup—or until excavation begins and the reality of distances, access, and code compliance becomes clear.


No. 3

Soil Preparation and Groundwork (What’s Below the Surface Matters)

A backyard can look flat and simple until construction starts. Then the ground tells the truth. Soil composition, drainage patterns, and the slope of your yard can significantly impact cost—especially for projects that require stable footings and long-term structural integrity.

Potential groundwork expenses include:

  • Excavation and removal of soil

  • Grading to create a level base

  • Compaction for patios, pavers, and slabs

  • Soil replacement if the existing soil is unstable

  • Drainage solutions such as French drains or dry wells

Common surprises that add cost

Many homeowners are caught off guard by issues like:

  • Rock-heavy soil that slows excavation

  • Tree roots that require removal or rerouting plans

  • Poor drainage that must be fixed to prevent pooling water

  • Soft or shifting soil that can compromise foundations

Skipping or minimizing groundwork can be tempting when trying to save money, but it’s one of the most expensive corners to cut. Poor preparation can lead to cracking patios, shifting pavers, leaning retaining walls, or water damage—repairs that often cost more than doing it right the first time.

No. 4

Fencing and Safety Requirements (Especially for Pools)

Some upgrades are subject to safety regulations that are not optional. Pools are the clearest example, but other features may also require barriers depending on your local code and layout.

Typical pool-related requirements can include:

  • Fencing of a specific height

  • Self-closing or self-latching gates

  • Door or window alarms (in certain jurisdictions)

  • Safety covers or additional barriers

Even if you already have a fence, it may not meet code due to spacing, gate hardware, height, or access points. That can mean replacing sections or installing new compliant barriers—an expense that homeowners frequently don’t anticipate during the “dreaming” phase.


No. 5

Landscaping Restoration (The Cleanup Phase Isn’t Free)

Backyard construction is messy by nature. Materials are delivered, equipment rolls in, and paths are taken through parts of the yard you never intended to disturb. Even with careful contractors, heavy work can leave your outdoor space looking rougher than expected once the main build is done.

Restoration costs can include:

  • Re-sodding or reseeding damaged lawn areas

  • Replacing crushed plants, shrubs, or garden beds

  • Repairing sprinkler or irrigation lines

  • Adding mulch, edging, or new plantings to blend old and new areas

  • Rebuilding compacted soil so plants can grow again

This stage often gets overlooked because homeowners focus on the main feature—a patio, deck, or pool—and assume the yard will “naturally” look finished once it’s complete. In reality, construction can leave behind a patchwork effect unless you budget to restore or redesign the surrounding landscape for a cohesive final look.

No. 6

Ongoing Maintenance Costs (The Budget After the Build)

A backyard upgrade is not just a one-time purchase. Most improvements introduce ongoing maintenance requirements that can add up over the years. Planning for these costs upfront helps you avoid buyer’s remorse later.

Here are common examples:

  • Decks may need sealing, staining, and periodic repairs

  • Gardens require watering, seasonal care, soil amendments, and pest management

  • Patios and pavers may need leveling, joint sand replacement, and cleaning

  • Pools require routine cleaning, chemicals, filter maintenance, and equipment upkeep

Maintenance isn’t necessarily a downside—many homeowners enjoy it. But financially, it should be treated like part of ownership. A project that fits your renovation budget might still strain your finances if the long-term upkeep isn’t realistic for your schedule or wallet.

No. 7

Unexpected Issues During Construction (Why a Contingency Fund Matters)

Even the best-planned projects can run into surprises once you break ground. Underground conditions, old installations, and hidden damage don’t always show up in initial planning conversations.

Common unexpected issues include:

  • Underground utility conflicts requiring rerouting

  • Drainage problems that become obvious only after excavation

  • Structural concerns with existing patios, retaining walls, or decks

  • Permit-driven changes required after inspection feedback

  • Material substitutions due to supply issues or backorders

These surprises can increase both the budget and the timeline—sometimes quickly. The most practical defense is a contingency fund. Many contractors recommend setting aside 10% to 20% of your total budget for unforeseen conditions, especially for large or complex projects.

No. 8

A Note on Pool Installations (Where Hidden Costs Are Especially Common)

Pool projects are particularly known for uncovering hidden costs during installation. Excavation often reveals conditions that require adjustments—unstable soil, unanticipated drainage needs, or outdated electrical systems that must be upgraded to safely support pumps, heaters, lighting, and automation.

That’s why working with experienced professionals matters. For example, top rated pool companies in Annapolis typically anticipate many common challenges and can advise homeowners early on what to expect. Even with strong planning, it’s important to treat adjustments as a normal part of the pool-building process—not as an exception or a sign that something has gone wrong.

If you’re considering a pool, it’s wise to discuss these topics before construction:

  • Soil and groundwater considerations

  • Drainage and runoff management

  • Electrical load requirements and panel capacity

  • Access limitations for excavation equipment

  • Safety barrier and inspection requirements

The clearer these discussions are at the beginning, the more accurate your budget will be—and the less stressful the build tends to feel.

Takeaways

Backyard upgrades can add comfort, enjoyment, and long-term value to your home—but the true cost extends beyond materials and labor. In this article, we covered the hidden budget items that often catch homeowners off guard: permits and inspections, electrical and utility upgrades, soil preparation, fencing and safety requirements, landscaping restoration, ongoing maintenance, and unexpected construction surprises.

If you want a renovation that feels exciting rather than financially draining, plan with reality in mind. Get clarity on permitting early, confirm utility capacity before you commit to high-powered features, and budget for groundwork and restoration so the final result looks intentional—not “finished, but messy.” Most importantly, include a contingency fund so that surprises don’t derail your project.

With thoughtful preparation and the right professionals—especially for complex installs like pools—your backyard upgrade can be both beautiful and financially manageable, from the first sketch to the final walkthrough.


Looking for Home resources?

Looking to enhance your living space and create a sanctuary that supports your well-being? Explore our home partners who offer a wide range of resources to elevate your home environment.



homeHLL x Editor


Why Hiring a Professional Painter Is Worth It - And How To Choose The Right Team

A home feels truly welcoming when it reflects your personality—your preferred colors, your style, and the small details that make a space feel unmistakably yours. Paint is one of the fastest, most cost-effective ways to transform a room, but it’s also one of the easiest upgrades to underestimate. What looks simple on a short online video often becomes time-consuming in real life: moving furniture, repairing walls, taping edges, cutting in straight lines, and applying coats evenly without streaks, drips, or missed spots.


In this article, you’ll learn why hiring a professional painter can be one of the smartest decisions for your home improvement project, how it saves time and reduces disruption, what “high-quality finish” actually means, and how to choose a decorating company you can trust—from experience and insurance to licensing and bonding.

No. 1

A Home That Feels Like You Starts With the Right Color and Finish

Before discussing timelines and workmanship, it helps to acknowledge why painting matters so much. Color affects mood, energy, and how large (or small) a room feels. A well-chosen palette can make a house feel calmer, brighter, warmer, or more modern—without changing the layout or buying new furniture.

A professional painter doesn’t just “apply paint.” 

The best ones help you think through choices that affect the final look, such as:

  • Color scheme: warm vs. cool tones, bold vs. neutral palettes

  • Undertones and lighting: how natural and artificial light shifts color during the day

  • Sheen selection: flat/matte, eggshell, satin, semi-gloss, gloss (each impacts durability and how imperfections show)

  • Consistency across rooms: making hallways, adjoining rooms, and trim feel cohesive

If your goal is comfort and happiness in your space, paint is foundational—and the decisions behind it deserve care.

No. 2

Save Time (and Protect Your Free Time)

Your spare time is valuable. Most homeowners have long lists of things they’d rather do than spend evenings and weekends prepping walls, washing trim, patching dents, sanding rough areas, laying drop cloths, and cleaning brushes.

When you hire professionals, you’re not only paying for labor—you’re buying back time. That matters because DIY painting is rarely “just painting.” 

It often becomes:

  • A multi-weekend project that stretches longer than planned

  • A constant cycle of moving furniture around

  • A house that feels perpetually “in progress”

  • Stress over whether you’re doing it right (and how hard it will be to fix mistakes)

Professional painters arrive with a plan, a workflow, and the right tools. Instead of sacrificing your downtime, you can keep your schedule intact while the work gets done efficiently.


No. 3

Get Your Home Decorated Faster (Without Living in Half-Finished Rooms)

One of the most frustrating parts of painting on your own is how quickly the project expands.

What starts as “we’ll paint the living room this weekend” can become:

  • Day 1: move furniture + tape edges + patch imperfections

  • Day 2: sand + prime + first coat

  • Weeknight: second coat (after work, already tired)

  • Following weekend: touch-ups + trim + cleanup

And that’s just one room—assuming everything goes smoothly.

Professional painters typically complete projects faster because:

  • They work full days rather than squeezing time around other commitments

  • They use efficient prep and masking systems

  • They apply paint evenly, minimizing rework and touch-ups

  • They coordinate drying times and room-to-room sequencing smartly

Speed isn’t just about convenience—it reduces disruption. 

A faster project means fewer days of:

  • Furniture pushed into the center of rooms

  • Tape lines, drop cloths, and paint odors

  • Interrupted routines (especially challenging for families and remote workers)

A professional team can often refresh multiple rooms—or even an entire house—in a fraction of the time it would take most homeowners to do it themselves.

No. 4

Enjoy a High Standard of Finish (What “Professional Results” Really Mean)

Many people assume a high-quality finish is mainly about neatness. It is, but it’s also about consistency and durability. 

A professional finish typically includes details that DIY jobs often miss, such as:

  • Smooth walls with properly repaired dents, nail holes, and small cracks

  • Clean, straight cut-in lines at ceilings, corners, and trim

  • Even coverage with no patchiness, flashing, or roller marks

  • Proper primer use to prevent stains from bleeding through or color inconsistency

  • Crisp trimwork without brush lines, drips, or paint on hardware

  • A finish that holds up to real life—cleaning, scuffs, humidity, and everyday wear

Painting may look simple until you’re staring at a wall that dried unevenly or noticing lap marks every time the sunlight hits it. Professionals know how to avoid these issues through technique, product selection, and surface preparation.


No. 5

Reduce Costly Mistakes (and the Hidden Expense of DIY)

DIY projects can be economical—when they go as planned. But painting is one of those tasks where small errors can become expensive or time-consuming to fix. 

Common DIY pitfalls include:

  • Buying the wrong sheen (too glossy for walls, too flat for high-traffic areas)

  • Skipping primer when it’s needed (leading to stains, poor adhesion, or extra coats)

  • Inadequate surface prep (paint peeling, bubbling, or showing every imperfection)

  • Paint bleeding under tape due to poor technique

  • Choosing low-quality rollers/brushes that leave fuzz or streaks

  • Underestimating how much paint is required (multiple store runs, mismatched batches)

A professional painter reduces these risks because they’ve already learned—through experience—what works and what fails. They also tend to have supplier relationships and product knowledge that help ensure the coating system performs properly.

No. 6

How to Choose the Best Decorating Company

Hiring professionals has clear advantages, but your results depend heavily on who you hire. You will find that some painters vary widely in reliability, craftsmanship, cleanliness, and communication. The goal is to find a team that delivers excellent quality on schedule—without leaving messes, missed details, or surprise costs behind.

Below are the key factors to evaluate before you commit.

Experience

Always look for painters with a strong track record. Experience often translates into:

  • Better prep work (where quality truly begins)

  • Faster completion times without cutting corners

  • More consistent finishes on different surfaces (drywall, wood, plaster, trim)

  • Better problem-solving when unexpected issues appear (water stains, cracking, uneven textures)

Ask practical questions:

  • How long have you been painting professionally?

  • Do you specialize in interiors, exteriors, or both?

  • Have you completed projects similar to mine (older homes, high ceilings, detailed trim)?

Insurance

Before allowing any tradesperson to work on your property, confirm they are fully insured. This protects both you and the workers if something goes wrong—property damage, accidental injury, or unexpected incidents.

Ask to see proof of insurance and make sure it’s current. A reputable company will provide documentation without hesitation.

Licensed and bonded

For added peace of mind, look for painters who are licensed (where required) and bonded. While requirements vary by location, being licensed and bonded generally signals professionalism and accountability.

  • Licensed often means they meet local standards and operate legitimately.

  • Bonded can provide financial protection if contractual obligations aren’t met.

If you’re unsure what applies in your area, ask the company to explain their status clearly.

References and reviews

Don’t rely only on a polished website. 

Ask for:

  • Recent references you can contact

  • Photos of completed projects

  • Reviews that mention punctuality, cleanliness, and communication (not just “looks great”)

When you speak with references, consider asking:

  • Did the painters show up on time consistently?

  • Was the final cost close to the quote?

  • Did they protect floors and furniture properly?

  • How did they handle touch-ups or concerns?

A clear, detailed written quote

A professional quote should spell out what you’re paying for. 

It should include details like:

  • Areas to be painted (walls, ceilings, trim, doors)

  • Prep work included (patching, sanding, caulking)

  • Paint brand/line and sheen

  • Number of coats (and what determines if more are needed)

  • Timeline and daily working hours

  • Cleanup plan and disposal details

Clarity prevents misunderstandings and helps ensure the “high standard of finish” you expect is actually what’s being delivered.

Communication and professionalism

Finally, trust how the process feels. 

A strong painting company typically:

  • Answers questions directly

  • Offers realistic timelines

  • Explains prep and protection steps

  • Sets expectations about drying times and odor/ventilation

  • Treats your home with care

Professionalism shows up early—often before a single drop of paint is opened.

Takeaways

In this article, we explored why hiring a professional painter is often the best route to a home that looks polished, feels comfortable, and reflects your personal style. While DIY painting may seem straightforward, the reality is that prep work, product selection, technique, and timing all play major roles in how long your paint job lasts—and how good it looks in everyday lighting.

Professional painters help you save time, finish faster, and avoid the disruption of living in half-decorated rooms for weeks. They also deliver a higher standard of finish through careful preparation, precise edges, consistent coverage, and durable results.

To get the best outcome, choose a decorating company with proven experience, proper insurance, and (where applicable) licensing and bonding. Ask for references, insist on a detailed written quote, and look for clear communication from the first interaction. With the right professionals, your home can be beautifully transformed—efficiently, cleanly, and to a standard you’ll be proud to live with.


Looking for Home resources?

Looking to enhance your living space and create a sanctuary that supports your well-being? Explore our home partners who offer a wide range of resources to elevate your home environment.
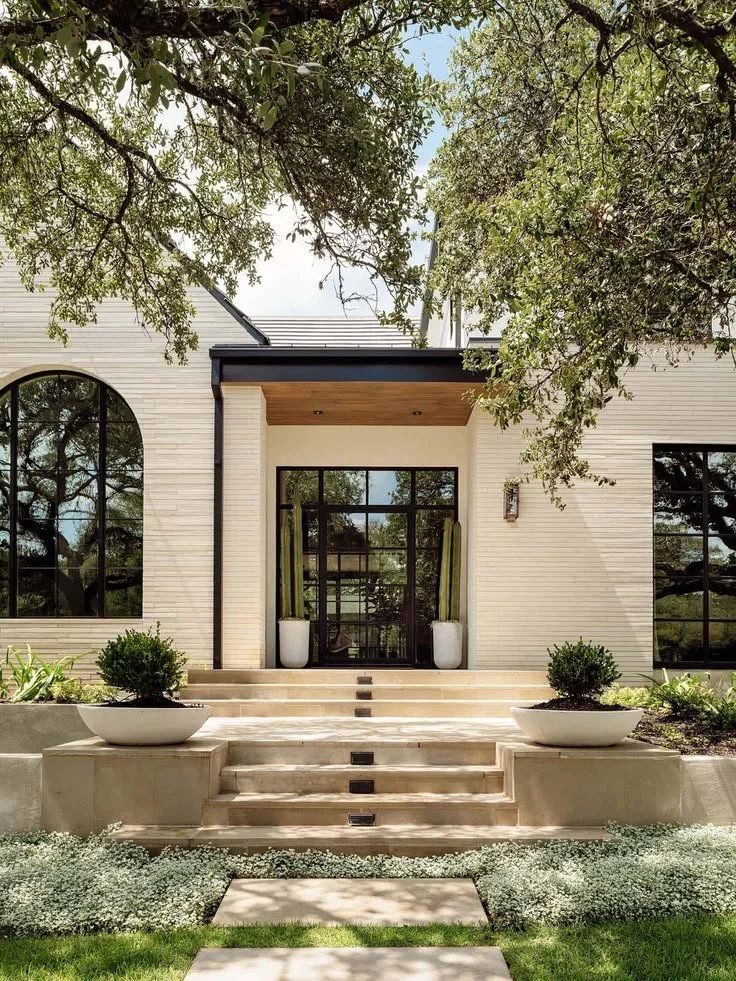


homeHLL x Editor


The Hidden Reason Your Car Repairs Don't Last As Long As They Should

It’s one of the most aggravating situations any driver can face: you pay for a repair, you pick up the vehicle believing the problem is solved, and then—weeks or months later—the same symptom returns. At that point, it’s tempting to blame “bad parts,” assume the shop did something wrong, or chalk it up to rotten luck. Sometimes those explanations are true, but more often the reason is deeper and more predictable.


Long-lasting repairs depend on more than swapping a failed component.

They hinge on three fundamentals:

  1. Part quality (does the replacement meet the demands of real-world driving?)

  2. Correct installation (was it fitted, torqued, sealed, calibrated, and verified properly?)

  3. Accurate diagnosis (was the true cause found, or only the most obvious symptom?)

Drivers who invest in reliable components—such as sourcing quality jeep parts for vehicle-specific needs—are already making a smart move. Still, even great parts can fail early if they’re installed incorrectly, paired with worn supporting components, or used to “treat” the wrong problem.

In this article, you’ll learn the most common reasons repairs fail prematurely, how quality and installation work together, how diagnostic tools like an obd scanner reduce expensive guesswork, and what you can do—before and after any repair—to make sure you aren’t paying twice for the same issue.

No. 1

Part Quality and Installation: The Two Pillars of a Repair That Lasts

Part quality isn’t just “OEM vs. aftermarket”

Not all replacement parts are equal—even when they look identical in the box. A part’s longevity is influenced by its materials, tolerances, manufacturing consistency, and quality control. Low-cost components often “fit,” but they may not withstand heat cycles, vibration, road salt, and everyday wear the way a well-made part will.

High-quality parts are typically built to meet or exceed manufacturer standards. That matters because modern vehicles operate within tight mechanical and electrical tolerances. A slightly out-of-spec sensor, gasket, or suspension component can cause repeated warning lights, poor drivability, noise, leaks, or premature wear.

If you drive a jeep, for example, choosing vehicle-appropriate jeep parts is especially important because many jeeps see heavier loads, more vibration, and more off-road stress than the average commuter car. The wrong part may survive a short time—but it can degrade quickly under tougher conditions.

Installation quality is just as important as what you buy

Even the best part can fail if it’s installed carelessly.

Common installation-related issues include:

  • Incorrect torque specs (over-tightening or under-tightening fasteners)

  • Poor sealing surfaces or improper gasket placement

  • Contamination (dirt/debris in a sealed system, like cooling or braking)

  • Misalignment (belt tracking, suspension angles, axle seating, etc.)

  • Skipped steps (not bleeding brakes properly, not vacuum-filling coolant, not calibrating electronic components)

A professional-grade repair is more than “replace and send.” It’s a process: inspect, replace, verify, and test.

A repair should treat the whole system, not one failed piece

Many components fail because something else pushes them past their limits. If you only replace the final “victim” part, you risk repeating the failure.

Examples:

  • Installing a new brake caliper while ignoring seized slide pins or warped rotors

  • Replacing a battery repeatedly without testing the alternator, grounds, or parasitic draw

  • Installing a new wheel bearing without addressing an axle nut torque issue or worn hub mating surfaces

  • Swapping an ignition coil without checking plugs, injector issues, or oil contamination in the plug well

When a repair considers the full system—adjacent wear, root causes, and operating conditions—it’s far more likely to last.

No. 2

Accurate Diagnosis: The Difference Between Fixing a Symptom and Solving the Problem

If there’s one reason drivers get trapped in repeat repairs, it’s misdiagnosis. Vehicles often show the same symptoms for multiple different reasons. A rough idle, for instance, can be caused by ignition issues, vacuum leaks, fuel delivery problems, sensor faults, carbon buildup, or even mechanical engine wear.

That’s why replacing parts based on suspicion is expensive. You may get temporary improvement simply because the new part masks the symptom, but the underlying fault remains.

Why “parts cannon” repairs fail

A “parts cannon” approach means replacing the most common culprit and hoping it works.

Sometimes it does, but when it doesn’t, you’ve paid for:

  • An unnecessary part

  • Unnecessary labor

  • More downtime

  • Continued damage (because the real issue keeps persisting)

How an OBD scanner improves repair outcomes

A quality diagnostic workflow usually starts with data. Tools like an obd scanner help identify fault codes, monitor live sensor readings, and confirm whether a repair actually resolved the condition.

Crucially, fault codes are not the same as a diagnosis. They are clues. A good technician uses codes plus testing—smoke tests for vacuum leaks, fuel pressure tests, battery/charging tests, compression checks, wiring integrity tests, and more—to confirm root cause.

If you want repairs to last, insist on this mindset: confirm the failure, repair it correctly, then verify the result.


No. 3

Why Some Repairs Fail Too Soon (Even When the Part Is “Good”)

Even with quality components and competent installation, repairs can still fail prematurely when underlying contributors are ignored. Below are the most common real-world reasons.

1) Incomplete repairs and ignored contributing wear

A vehicle is a network of systems. When one component fails, it may be linked to wear elsewhere.

For example:

  • Replacing shocks/struts without addressing worn bushings can continue to cause noise and poor handling.

  • Installing a new radiator cap won’t solve overheating caused by a weak water pump or trapped air.

  • Replacing a single tire on an AWD vehicle can create drivetrain stress if the tread depths mismatch.

A durable fix often involves replacing or servicing related components—not because shops want to upsell you, but because the system must operate as designed.

2) Driving conditions that accelerate wear

Your environment matters. Short trips, stop-and-go traffic, rough roads, towing, extreme heat, and winter salt all shorten component life. A repair that would last five years in mild highway use may last two years in harsh urban driving.

This doesn’t mean repairs are “bad”—it means expectations and maintenance intervals must match reality.

If you drive in severe conditions, you may need:

  • More frequent fluid changes

  • More frequent brake inspections

  • More frequent suspension checks

  • Better-grade parts suited for heavy-duty use

3) Skipping routine maintenance after the repair

Maintenance is what protects repairs. New parts still rely on clean fluids, correct lubrication, and proper operating conditions. Neglecting basics—oil changes, coolant service, transmission servicing where applicable, air filter replacement, tire rotations—can cause repeat failures by increasing heat and friction across the vehicle.

Think of it this way: the repair is the “reset,” but maintenance is what keeps the reset from being undone.

4) Electrical or charging problems that destroy components

Electrical problems are notorious for causing repeat failures because they can look like unrelated issues.

For example, if you keep searching for a car battery near me and replacing the battery again and again, the battery may not be the true problem.

Common root causes include:

  • A weak alternator that undercharges

  • Overcharging due to a faulty voltage regulator

  • Corroded battery terminals or poor ground connections

  • Parasitic draw (something draining power when the car is off)

In these scenarios, the battery is just the component that fails first. Without a charging-system test, you can easily get trapped in an expensive cycle.


5) Incorrect or mismatched parts

Sometimes a part is “close enough” to fit, but not correct for the exact engine, trim, year, or drivetrain configuration.

Small spec differences can matter:

  • Wrong thermostat temperature rating

  • Incorrect sensor type or calibration

  • Slightly different brake pad compound

  • Incorrect serpentine belt length

  • Wrong spark plug heat range

Using the wrong part can create new symptoms or shorten lifespan, even if the installation was perfect. This is another reason sourcing correct jeep parts (or any vehicle-specific components) matters—fitment is not the whole story; correct specification is.

6) Delaying the repair until it causes secondary damage

Timing matters. Driving “just a little longer” with a known problem often creates collateral damage that makes the eventual repair less effective.

Examples:

  • Ignoring a misfire can damage catalytic converters.

  • Driving with a coolant leak can warp engine components from overheating.

  • Continuing with worn suspension parts can wear tires unevenly and stress steering components.

Early intervention is one of the simplest ways to ensure repairs last—because you’re fixing the original fault before it spreads.

7) Lack of verification testing after the job

A repair isn’t finished when the part is installed; it’s finished when the system is proven to work under real conditions.

Verification may include:

  • Clearing codes and confirming they do not return

  • Test-driving under the conditions that originally triggered the issue

  • Checking live data (fuel trims, sensor readings, charging voltage)

  • Rechecking for leaks after heat cycling

  • Confirming torque on critical fasteners after initial settling (where appropriate)

Skipping final checks is how small mistakes survive—only to become big problems later.

No. 4

How to Protect Yourself as a Driver: Practical Habits That Prevent Repeat Repairs

You don’t need to be a mechanic to improve your odds dramatically. A few smart habits can help you avoid paying twice.

  • Ask what caused the failure: A good shop can explain the root cause, not just the replaced part.

  • Request evidence of diagnosis: This might include scan results, voltage readings, or inspection photos.

  • Use quality components: For critical systems (brakes, steering, cooling, charging).

  • Don’t ignore maintenance: Repairs last longer when the vehicle is cared for consistently.

  • Test early if symptoms return: The sooner you address a returning issue, the less secondary damage you create.

If you’re troubleshooting at home, an obd scanner can be a cost-effective way to gather information before you approve major work—particularly for check-engine light issues. And for platform-specific vehicles, choosing the right jeep parts can reduce compatibility issues that lead to early failure.

Takeaways

Repairs that don’t last are rarely caused by one single mistake. Most premature failures come from a combination of part quality, installation quality, and—most importantly—whether the repair addressed the true root cause rather than just the symptom.

In this article, we covered why choosing reliable components (including vehicle-specific options like jeep parts) matters, why correct installation and system-level thinking prevent repeat failures, and how accurate troubleshooting with tools like an obd scanner reduces costly guesswork. We also highlighted common failure triggers—harsh driving conditions, neglected maintenance, electrical faults that lead to repeated battery replacement (the “car battery near me” cycle), incorrect part specifications, delayed repairs, and skipped post-repair testing.

A successful repair isn’t just a replacement—it’s a verified solution. When you combine quality parts, careful workmanship, proper diagnosis, and sensible maintenance, you dramatically increase the odds that the fix will hold up for the long haul.


Looking for Home resources?

Looking to enhance your living space and create a sanctuary that supports your well-being? Explore our home partners who offer a wide range of resources to elevate your home environment.



homeHLL x Editor


Why Spring Is the Best Time to Inspect Your Roof for Hidden Damage

Spring is often associated with fresh starts—cleaning, decluttering, and tackling home maintenance projects that were postponed during colder months. It’s also the ideal season to check one of your home’s most important protective systems: the roof. After months of freezing temperatures, snow loads, ice buildup, and strong winds, roofing materials can shift, crack, loosen, or fail in ways that aren’t obvious from the ground.


In this article, you’ll learn why post-winter roof inspections are so important, what kinds of hidden damage winter commonly causes, where to look for early warning signs, and how spring repairs can prevent expensive problems later in the year. We’ll also cover a practical (and often overlooked) benefit: how spring roof maintenance can make holiday light installation safer and less stressful when winter returns.

No. 1

Post-Winter Roof Inspections Are Essential

Winter weather can be surprisingly destructive for roofs—even ones that appear fine at first glance. The freeze-thaw cycle is particularly hard on building materials. Water can seep into tiny gaps around shingles, flashing, or roof penetrations, then expand as it freezes. Over time, that expansion can widen cracks, loosen fasteners, and separate joints.

Meanwhile, heavy snow accumulation can stress structural components, and high winds can lift, curl, or dislodge shingles. Some of the most common winter-related roof issues include:

  • Ice dams forming at the roof edge and forcing water back under shingles

  • Shingles loosening due to wind uplift or brittle cold-weather cracking

  • Flashing separating around chimneys, skylights, and vents

  • Small leaks that begin subtly and worsen as spring rain arrives

  • Gutter and downspout strain that causes water to back up near rooflines

The trouble is that many of these issues don’t show immediate symptoms indoors. A roof can sustain damage in January and only reveal it in March or April—when snow melts, spring rain increases, and warmer temperatures encourage moisture to spread.

Scheduling a roof inspection in early spring is a preventative move. It helps you locate weak points before they become urgent failures, extending the service life of your roof and reducing the odds of emergency repairs.

No. 2

Catching Loose Shingles Early (Before Water Finds a Path)

One of the most common problems after winter is loose, lifted, or missing shingles. Wind gusts and ice can break adhesive seals, allowing shingles to shift. Even if only one area is affected, the risk can multiply quickly.

A single displaced shingle may not look dramatic, but it can trigger a chain reaction:

  • Exposed underlayment becomes more vulnerable to moisture and UV damage

  • Wind can catch the edge of surrounding shingles, lifting more over time

  • Water can infiltrate beneath the shingle line, leading to rot or mold

  • Interior ceilings and insulation can absorb moisture before stains appear

Spring is the best time to address this because the weather is generally moderate and repairs are easier to schedule. Replacing or securing shingles early is often far less costly than repairing the damage caused by months of slow leaks.

What to look for during a spring check

From the ground (or using binoculars), watch for:

  • Shingles that look curled, uneven, or “wavy”

  • Missing tabs or exposed areas that appear darker than the rest

  • Granules collecting in downspouts (a sign shingles are deteriorating)

If you can safely access the attic, also look for:

  • Damp insulation

  • Darkened wood or a musty smell

  • Staining around roof decking or rafters


No. 3

Checking Flashing for Potential Leaks

Flashing is the thin metal material installed around roof joints and penetrations—such as chimneys, skylights, vents, and valleys—to guide water away from vulnerable seams. It’s a small component with a major job, and it often becomes the first point of failure after winter.

Cold temperatures can cause flashing to:

  • Crack or corrode

  • Separate from adjacent materials

  • Lose sealant adhesion

  • Warp slightly, creating gaps where water can enter

Once flashing is compromised, leaks can develop quickly—especially during spring storms. What makes flashing leaks tricky is that water may travel along rafters or roof decking before it shows up as a visible ceiling stain. That delay can make the damage more extensive by the time it’s detected.

A spring roof inspection should include close attention to flashing conditions and seals. If a roofer identifies gaps or cracks, addressing them early can prevent:

  • Interior water damage

  • Mold growth in attics or wall cavities

  • Damaged insulation and rising heating/cooling costs

  • Structural wood deterioration

No. 4

Why Early Repairs Make Holiday Light Installation Safer

Many homeowners only think about roof safety when it’s time to install Christmas lights. But by that point, the weather is colder, days are shorter, and roof surfaces can be slippery—making the job riskier. Taking care of roof issues in spring reduces the odds that you’ll be dealing with broken shingles, unstable edges, or hidden weak spots months later.

A well-maintained roof makes holiday decorating safer and simpler because:

  • Shingles are less likely to crack under foot traffic

  • Gutters and edges are more secure for ladder placement

  • You’re less likely to trigger leaks by disturbing damaged sections

  • You can plan decorating instead of scrambling to repair last-minute problems

If you prefer professional help during the holidays, hiring the best holiday light installation company in Grovetown, GA can also reduce risk—especially if your roof has steep pitches, multiple rooflines, or delicate areas around gutters and fascia. Professional installers are typically equipped to work efficiently without damaging roofing materials or drainage systems.

Spring repairs aren’t just about preventing leaks—they’re about reducing future seasonal stress and improving home safety year-round.


No. 5

Preventing Future Roof Problems (Not Just Fixing Winter Damage)

A spring inspection isn’t only about repairing what winter broke. It’s also your best chance to stop minor roof weaknesses from turning into costly repairs later in the year.

Small issues often lead to major outcomes because roofs manage water. When water control fails—even slightly—damage can spread into:

  • Roof decking and structural wood

  • Insulation (reducing energy efficiency)

  • Drywall and interior paint

  • Electrical systems in ceilings or walls

  • Indoor air quality, due to mold and dampness

A thorough spring inspection can also include the attic, where early signs often show up first.

A professional may look for:

  • Moisture marks around roof penetrations

  • Condensation issues or poor ventilation

  • Daylight visible through roof boards (a sign of gaps or holes)

  • Signs of pests that may have entered through compromised areas

This preventative approach can save significant money over time. Many major roof repairs don’t start as “big problems”—they start as small, neglected ones.

No. 6

Benefits of Spring Roof Inspections (A Quick Summary)

Spring inspections are one of the highest-value maintenance tasks you can do as a homeowner. They combine good weather conditions, post-winter timing, and a practical window to fix issues before heavy rain and summer heat accelerate deterioration.

Key benefits include:

  • Early detection of hidden damage: Loose shingles, cracked seals, damaged flashing, or soft spots are easier to address when caught early.

  • Prevention of costly repairs: Minor fixes in spring can prevent interior water damage, mold remediation, and structural repairs later.

  • Improved roof lifespan: Routine maintenance and timely repairs help your roofing system reach (or exceed) its intended lifespan.

  • Safer seasonal projects: A stable roof supports safer gutter cleaning and easier holiday light installation later in the year.

  • Better peace of mind: Knowing your roof is secure before storm season reduces the stress of surprise leaks.

Takeaways

Spring is the best time to inspect your roof for hidden damage because winter conditions—ice, snow, wind, and freeze-thaw cycles—can weaken shingles, flashing, and seals without obvious signs.

In this article, we covered why post-winter roof inspections matter, how loose shingles and damaged flashing can lead to leaks, and why early repairs reduce long-term costs and disruption. We also explained an often-overlooked advantage: spring maintenance can make holiday light installation safer and easier, especially if you plan to work with the best holiday light installation company in Grovetown, GA.

If you do one thing this season, schedule a professional roof inspection (or at minimum, perform a careful visual check and attic review). Catching small issues in spring can prevent major water damage later—and keep your home protected through storms, heat, and the next winter cycle.


Looking for Home resources?

Looking to enhance your living space and create a sanctuary that supports your well-being? Explore our home partners who offer a wide range of resources to elevate your home environment.
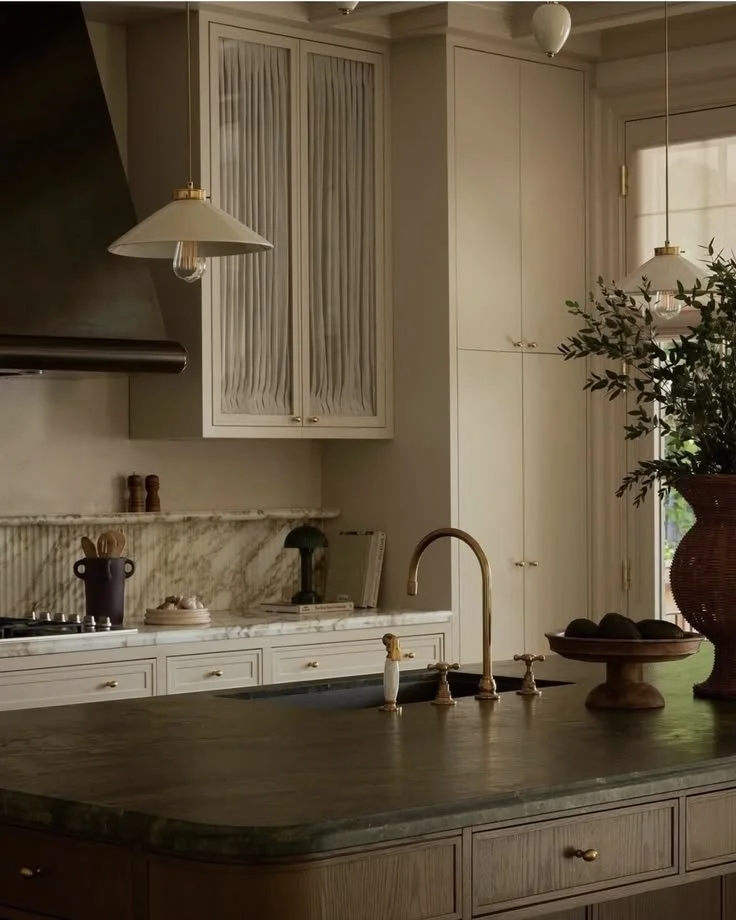


homeHLL x Editor


Why Reliable Plumbing Matters More Than You Think

Most parts of your home work quietly in the background. You turn on the tap, run the shower, flush the toilet—without thinking much about what makes all of it possible. Plumbing is one of those essential systems that tends to go unnoticed until something goes wrong. And when an issue does arise, it becomes immediately clear how much your comfort, hygiene, and daily routine depend on reliable water flow and proper drainage.


In this article, we’ll look at the role plumbing plays in everyday life, why small issues can quickly turn into expensive disruptions, how professional support protects your home, and what preventative maintenance habits make the biggest difference over time. The goal is simple: help you keep your plumbing system dependable, so your home remains easy to live in—day after day.

No. 1

The Role of Plumbing in Daily Life (More Than You Think)

From the moment you wake up, plumbing supports your routine. It provides clean water for basic hygiene, enables cooking and cleaning, removes waste safely, and helps keep your living environment sanitary. It’s not an overstatement to say that plumbing is one of the foundations of modern comfort.

Think about how many times you rely on it in a normal day:

  • Washing hands, brushing teeth, and showering

  • Making coffee, boiling water, and rinsing produce

  • Running the dishwasher, doing laundry, and cleaning surfaces

  • Flushing toilets and keeping bathrooms functional

  • Watering gardens or filling pet bowls

When everything works as it should, your home feels stable and manageable. But if water pressure drops, drains slow down, or a toilet begins to run continuously, even simple tasks become inconvenient—or impossible.

Because plumbing is mostly hidden behind walls, under floors, and beneath fixtures, it’s easy to forget it needs care. That “out of sight, out of mind” dynamic is exactly why plumbing maintenance matters. Your system can be deteriorating slowly long before it becomes a visible problem.

No. 2

Why Small Plumbing Problems Escalate So Quickly

A minor leak, a slow drain, or a toilet that occasionally struggles to flush might not seem urgent. Many homeowners postpone repairs because the issue feels manageable—or because they assume it can wait until it gets worse.

The problem is: plumbing rarely fails in a neat, predictable way. Small issues tend to worsen quietly, and they often cause damage that is far more costly than the original repair.

Common “small” issues that can become major disruptions

  • Tiny leaks under sinks or behind appliances can lead to mould, warped cabinetry, and damaged flooring.

  • Slow drains can indicate a growing blockage, which may eventually back up into sinks, showers, or toilets.

  • Dripping taps waste water continuously and can signal worn seals or corrosion.

  • Running toilets can drive up water bills and may indicate failing internal components.

  • Low water pressure can be a symptom of mineral buildup, a hidden leak, or issues with the supply line.

What makes plumbing problems particularly risky is the relationship between water and building materials. Water damage spreads. Moisture compromises timber, plaster, paint, and insulation. And once dampness becomes persistent, it can introduce odors, allergens, and long-term structural issues.

Addressing problems early is not just about convenience—it’s a form of protection.

Early intervention can prevent:

  • Larger repairs that require demolition or replacement

  • Extended disruption to bathrooms, kitchens, or laundry areas

  • Secondary damage (mould growth, swelling, rot, stains)

  • Unexpected emergency call-outs at inconvenient times


No. 3

The Value of Professional Support (When DIY Isn’t Enough)

There are maintenance tasks you can handle on your own—like keeping an eye on visible pipework, noting water pressure changes, or using drain strainers to reduce buildup. But plumbing systems are complex, and many issues are hidden or misdiagnosed when treated as surface-level problems.

An experienced plumber doesn’t just fix what’s visible—they identify the source, assess the broader system, and help prevent repeat failures.

Professional plumbers can provide:

  • Accurate diagnosis, including for issues behind walls or under floors

  • Correct repairs that meet safety and compliance standards

  • Tools and expertise for blockages, leaks, and pressure issues

  • Advice on upgrades that improve reliability and efficiency over time

Working with a service such as Evolution Plumbing can help ensure issues are handled correctly and efficiently. Professional guidance may not only solve the current problem, but also reduce the likelihood of future concerns—especially when the underlying cause is identified early.

Just as importantly, reliable plumbing support provides peace of mind. When you’re dealing with a system that is essential to your household’s function, knowing who to call—and knowing the job will be done properly—matters.

No. 4

Preventative Maintenance: The Best Way to Avoid Major Plumbing Issues

One of the smartest ways to avoid expensive repairs is to treat plumbing like other essential home systems: it needs routine attention. Preventative maintenance doesn’t have to be complicated. It’s often a collection of small checks and habits that help you catch problems early—before they become emergencies.

Simple preventative checks that make a difference

  • Monitor water pressure: sudden changes can signal a leak, blockage, or supply issue.

  • Pay attention to drainage speed: slow drains are often early warning signs.

  • Watch for stains or damp patches: discoloration on walls, ceilings, or cabinetry can indicate hidden leaks.

  • Listen for unusual sounds: banging pipes, gurgling drains, or persistent toilet refills deserve attention.

  • Check under sinks and around appliances: a quick glance can catch moisture before it spreads.

Everyday habits that protect your plumbing system

  • Avoid pouring fats and oils down the sink (they solidify and build blockages).

  • Use drain strainers to catch hair and food particles.

  • Don’t treat toilets like bins—flush only toilet paper.

  • Run water through infrequently used drains to reduce odours and trap drying.

  • Address minor issues promptly instead of “waiting to see if it stops.”

Preventative maintenance is not just about reducing repair costs—it’s also about preserving your home’s comfort. When plumbing is reliable, your home feels effortless to run. When it isn’t, daily routines become stressful and unpredictable.


No. 5

Comfort, Hygiene, and Home Value: What a Healthy Plumbing System Really Provides

Plumbing affects far more than convenience. It supports hygiene, protects your property, and contributes to the long-term value of your home. Even if you’re not planning to sell, your plumbing system is still a core asset—because damage caused by leaks or poor drainage can be expensive and invasive to repair.

A well-maintained plumbing system helps deliver:

  • Consistent comfort: hot showers, reliable water pressure, working fixtures

  • Health protection: clean water, proper waste removal, reduced mould risk

  • Lower costs over time: fewer emergencies, less secondary damage, better efficiency

  • Property protection: reduced risk of rot, swelling, and structural moisture damage

  • Confidence: fewer surprises, less household disruption

When plumbing works properly, it fades into the background—as it should. Your home becomes a space you can move through without worrying about unexpected interruptions.

Takeaways

Plumbing is one of the most important systems in your home, even though it’s easy to overlook because it operates behind the scenes.

In this article, we explored how plumbing supports everyday routines, why small issues like leaks and slow drains can escalate quickly, and how professional support—such as Evolution Plumbing—can ensure problems are handled correctly and help prevent repeat concerns. We also covered practical preventative maintenance habits that reduce the risk of major disruptions.

If you take only one step, make it this: pay attention to small changes in water pressure, drainage speed, or unusual dampness, and address issues early. A little attention now can protect your comfort, your budget, and your home for years to come.


Looking for Home resources?

Looking to enhance your living space and create a sanctuary that supports your well-being? Explore our home partners who offer a wide range of resources to elevate your home environment.



homeHLL x Editor


Essential Design Upgrades For A Brighter And More Peaceful Home

A home can look “finished” and still feel draining. That’s because genuine comfort isn’t created by furniture alone—it’s created by how a space supports your nervous system, your routines, and your sensory needs throughout the day. If you want your home to function as a wellness sanctuary, the goal is not only minimalism or visual harmony. The goal is a living environment that consistently feels calm, quiet, breathable, and emotionally restorative.


In this article, you’ll learn the most impactful design upgrades—both structural and decorative—that make a home brighter and more peaceful in a lasting way. We’ll start with foundational comfort (temperature and sound), move into the psychological benefits of daylight, and then finish with smaller sensory-friendly enhancements that make everyday living feel lighter and more intentional.

No. 1

Build a Sanctuary by Upgrading Acoustic and Thermal Comfort

Visual aesthetics can only do so much if your home is freezing in winter, stifling in summer, or constantly interrupted by street noise. A peaceful home is not merely a styled home; it is a protected home—one that reduces exposure to outside stressors so you can downshift, recover, and focus.

Two of the most common “invisible stressors” are:

  • Thermal discomfort: drafts, fluctuating temperatures, rooms that never feel stable

  • Acoustic irritation: traffic noise, neighbour activity, barking dogs, general urban sound bleed

When these persist, the body stays subtly alert. That low-level vigilance is the opposite of what most people want from their home environment. Addressing it often requires structural upgrades, not just décor changes.

For homeowners who want to significantly improve both temperature regulation and acoustic insulation, investing in premium fixtures can be transformative. Exploring upgrades like double glazed windows in Mornington is a strong example of how a practical structural improvement can convert a noisy, drafty room into a quieter retreat. Double glazing works by trapping an insulating layer (often gas) between two panes of glass, which helps stabilize indoor temperatures and reduce heat transfer.

Just as importantly, that dual-pane construction reduces the intensity of outside noise. In a wellness-oriented home, that matters: quiet is not a luxury detail—it’s a foundational ingredient for rest, reading, focused work, and better sleep.

Additional upgrades that support acoustic and thermal calm include:

  • Sealing gaps around windows and doors to reduce drafts and noise leakage

  • Upgrading door sweeps and weatherstripping, especially on exterior doors

  • Adding thicker curtains or acoustic drapery in bedrooms and living areas

  • Using rugs (or larger area rugs) to reduce echo and soften footfall noise

  • Insulating key problem areas such as the roof cavity and external-facing walls

These changes don’t only improve comfort; they reduce ongoing friction. When your home maintains temperature and dampens sound naturally, you stop “managing” your environment and start living in it.

No. 2

Maximize the Psychological Benefits of Daylight (Not Just the Aesthetic Ones)

Natural light is one of the most powerful, underused wellness tools in modern home design. Bright spaces feel larger and more inviting, but daylight’s real value goes beyond appearance. Consistent exposure to natural light helps regulate circadian rhythms, supports mood stability, and improves sleep quality—three pillars of feeling mentally and physically well.

When a home lacks daylight, people often compensate with harsh overhead lighting, screens, and constant stimulation—especially in winter months or in homes with smaller windows. Over time, that can contribute to fatigue, irritability, and a general sense of low energy.

Research highlighted by UCLA Health reinforces why daylight matters. A large study involving 500,000 individuals found that each additional hour spent outside in natural light was linked with a corresponding reduction in the risk of long-term depression, alongside self-reported improvements in happiness and sleep quality.

The takeaway for home design is simple: if you can bring more daylight into your indoor environment, you’re not just improving a room—you’re supporting your biology.

Design upgrades that help you capture more daylight indoors:

  • Larger, energy-efficient windows (where renovation is possible)

  • Glass doors or wider openings to share light between rooms

  • Lighter wall colours that reflect sunlight rather than absorbing it

  • Strategically placed mirrors that bounce light deeper into the space

  • Sheer curtains that maintain privacy without blocking brightness

Daylight also improves how other materials read—wood looks warmer, textiles look richer, and a minimalist palette feels softer rather than stark. That’s why increasing natural light often makes an entire home feel more “expensive” without changing any furniture.


No. 3

Use a Minimalist Framework: Space, Color, Lighting, Texture, and Form

A calm home isn’t created through emptiness; it’s created through coherence. When design feels unified, the mind works less to interpret the environment—and that reduces mental load.

A helpful framework is the foundational five elements of interior design:

  • Space: flow, clear walkways, functional zones

  • Color: a controlled palette that supports calm

  • Lighting: balanced layers, warm temperatures, dimmable options

  • Texture: softness and tactile comfort to counter sterile minimalism

  • Form: consistent shapes and silhouettes that reduce visual “noise”

If any one of these is chaotic, the home can feel unsettled even if it’s clean. The goal is to align them so each room feels intentional, not accidental.

Practical ways to apply this framework quickly:

  • Remove one piece of oversized furniture that interrupts flow

  • Reduce competing colours by choosing two neutrals plus one accent family

  • Replace one harsh overhead fixture with layered, warm lighting

  • Add texture (wool, linen, timber) to soften hard surfaces

  • Repeat shapes—e.g., rounded lamps with rounded mirrors—to create visual rhythm

Minimalism works best when it serves comfort, not when it becomes rigid. A wellness home can be simple and still feel warm.

No. 4

Make Small Sensory-Friendly Upgrades That Calm the Body

Once your home is structurally prepared to welcome daylight and buffer noise, the “small” interior details begin to matter more. These are the upgrades that shift a room from visually appealing to genuinely soothing.

A sensory-friendly home is designed to reduce overstimulation. It considers glare, harsh contrast, scratchy materials, chemical scents, echo, and clutter density. This is where peace becomes tactile.

Natural materials (tactile calm)

Introduce materials that feel grounding and breathable:

  • Untreated or lightly finished timber

  • Linen bedding and curtains

  • Wool rugs or throws

  • Cotton upholstery and simple weaves

These textures don’t only look good—they create a subtle sense of warmth and safety.

Ambient lighting (nervous system support)

Light tells the brain when to be alert and when to wind down. If your home relies on cool, bright bulbs in the evening, you may unintentionally keep your body in “daytime mode.”

Consider:

  • Dimmers in living rooms and bedrooms

  • Warm-toned LED bulbs for lamps and evening lighting

  • Bedside lighting that is soft, not glaring

  • Indirect light (wall sconces, shaded lamps) to reduce harsh shadows

Indoor greenery (visual softness + air quality)

Plants add organic shape and soften minimal interiors. They also bring life into corners that feel visually dead.

Good low-maintenance choices often include:

  • Snake plant

  • Pothos

  • ZZ plant

  • Peace lily (if safe for your household)

Even one larger plant can change the mood of a room by adding a gentle focal point.

Mindful color palettes (reduce visual fatigue)

Colour is mood architecture. If you want peace, choose tones that read as stable and grounded rather than sharp or overly saturated.

Examples of calming tones:

  • Sage green

  • Warm terracotta

  • Muted beige

  • Soft clay

  • Gentle off-white (not stark bright white)

These colors tend to reflect light beautifully and reduce the “buzz” that high-contrast rooms can create.


No. 5

Design with Long-Term Intention (So Peace Lasts Beyond the Makeover)

A brighter, calmer home isn’t a one-time project—it’s a design philosophy. It’s the decision to align your environment with how you want to live, not just how you want your home to look in photos.

Long-term intention means you choose upgrades that remove recurring friction:

  • Materials that hold up well and age gracefully

  • Insulation and window upgrades that lower ongoing discomfort

  • Lighting that supports evening wind-down rather than fighting it

  • Layout choices that support routines (morning calm, meal prep ease, bedtime quiet)

It also means resisting trend-chasing. Wellness design is not about what’s popular this year. It’s about what continues to feel good five years from now.

When your environment functions as a true sanctuary, your days begin and end differently. You recover more fully. You sleep more deeply. You feel less “on.” That’s not abstract—it’s a practical outcome of a home designed to support human needs.

Takeaways

A peaceful home is created through more than furniture and styling; it’s built through structural comfort, supportive light, and sensory-friendly details.

In this article, we covered the upgrades that make the biggest difference: improving acoustic and thermal stability, increasing natural daylight to support mood and sleep, using a minimalist design framework (space, color, lighting, texture, and form), and layering smaller wellness-focused enhancements like natural materials, ambient lighting, indoor greenery, and calming color palettes.

If you want the highest-impact starting point, prioritise the upgrades that reduce daily friction—particularly noise, drafts, and poor light quality. These changes don’t just improve how your home looks; they improve how it feels to live in, day after day.


Looking for Home resources?

Looking to enhance your living space and create a sanctuary that supports your well-being? Explore our home partners who offer a wide range of resources to elevate your home environment.



homeHLL x Editor


Home Upgrades That Elevate Your Home To A New Level

You don’t always need a full renovation to transform your home. In reality, some of the most meaningful improvements come from small, strategic upgrades—the kind that make your home feel more polished, more comfortable, and more functional without turning your life into a construction zone.


In this article, you’ll find a curated set of minor home upgrades that deliver outsized results. These ideas are designed to help you refresh the look of your space, improve everyday usability, and—when chosen wisely—support long-term property value. Whether you tackle one change this weekend or plan a series of gradual improvements, the goal is the same: create a home that feels intentionally upgraded rather than “kind of fine.”

No. 1

Upgrade Your Doors for Instant Impact

Doors are one of the most underrated elements in a home, largely because you see them every day and stop noticing their influence. But doors set the tone—visually and practically. A worn, dated, or poorly fitted door can quietly pull a space down, while a modern door installation can make the entire home feel more elevated.

Upgrading doors can improve:

  • First impressions (especially with the front entrance)

  • Security, with stronger cores, better locks, and improved frames

  • Energy efficiency, by reducing drafts and improving seals

  • Noise reduction, particularly with solid-core interior doors

  • Resale value, because doors signal “well-maintained” to buyers

Even when homeowners choose high-quality materials, the result depends heavily on fit and finish. A door that rubs, sticks, leaks air, or sits unevenly will never feel premium. That’s why many people opt for a professional approach; it saves time and avoids the common alignment and framing issues that can happen with DIY work.

If your home has older, hollow interior doors, mismatched styles, or an entry door that feels thin and insecure, this single upgrade can create a noticeable “new home” effect without requiring a remodel.

No. 2

Refresh Your Walls with Paint (The Highest ROI Visual Upgrade)

A fresh coat of paint is one of the fastest ways to modernize a home. It’s also one of the easiest upgrades to plan in phases—one room at a time—without disrupting the entire house.

Paint improves a space because it changes how light behaves. Walls that are scuffed, yellowing, or unevenly patched tend to make rooms feel dull, even if your furniture is beautiful. New paint can make rooms feel brighter, cleaner, and more cohesive.

Smart approaches that elevate the result:

  • Choose soft neutrals for a timeless, wide-appeal look

  • Use a consistent palette across connected spaces for flow

  • Add a feature wall if you want personality without overpowering the room

  • Don’t skip prep: fill holes, sand rough patches, and clean walls first

Paint is also one of the easiest ways to “correct” mismatched design eras. If your home has a blend of old and new elements, consistent wall colour creates visual harmony and makes everything feel more deliberate.


No. 3

Update Lighting for a More Modern, Finished Feel

Lighting is often the difference between a home that looks good in daylight and a home that feels warm, stylish, and inviting at night. Outdated fixtures can make a space feel dated, even if everything else has been updated. Conversely, modern lighting can instantly elevate the perceived quality of a room.

A strong lighting upgrade focuses on both fixtures and layering.

Consider these lighting improvements:

  • Replace dated ceiling fixtures with clean, contemporary designs

  • Add layered light, combining ambient, task, and accent lighting

  • Use warm, consistent bulb temperatures (mixing cool and warm bulbs makes spaces feel “off”)

  • Install dimmers in living rooms, bedrooms, and dining areas for flexibility

Layered lighting examples

  • Kitchen: ceiling lights + under-cabinet lighting + pendant over island

  • Living room: overhead + floor lamp + table lamps to reduce harsh shadows

  • Bedroom: bedside lamps + overhead dimmer for a calmer atmosphere

This is a relatively minor upgrade, but it changes how you experience your home every evening—arguably when you most want it to feel restorative.

No. 4

Improve Energy Efficiency Without Major Construction

Energy upgrades don’t need to be dramatic to be effective. Small improvements that reduce drafts, stabilize indoor temperature, and cut waste can lead to noticeable comfort gains—and steady savings over time.

Even modest efficiency improvements can elevate a home because they reduce “invisible annoyances”: rooms that feel cold, hot spots, window drafts, and HVAC systems that run too often.

High-impact, low-disruption energy upgrades:

  • Seal gaps around doors and windows with weatherstripping

  • Re-caulk around trims and frames where air leaks occur

  • Add attic insulation if it’s thin or uneven

  • Upgrade older windows when feasible, or use thermal treatments (curtains, blinds) as interim steps

Many homeowners start with the simplest change—draft sealing—and are surprised by how much more comfortable the home feels. Comfort is a form of luxury, and small efficiency upgrades often deliver it.


No. 5

Enhance Curb Appeal with Simple, High-Visibility Changes

Curb appeal isn’t only for selling. It affects how you feel every time you come home. A welcoming exterior creates a subtle sense of pride and calm—while a neglected exterior creates mental clutter before you even step inside.

Easy curb appeal upgrades that make a real difference:

  • Repaint or refresh the front door

  • Replace old house numbers with modern, readable ones

  • Add planters near the entry for colour and balance

  • Upgrade exterior lighting to improve warmth and safety

  • Tidy garden edges and refresh mulch for a clean, intentional look

You don’t need a new driveway or a major landscaping redesign. Often, the best result comes from tightening what’s already there: clean lines, healthy greenery, and one or two focal points.

No. 6

Replace Fixtures and Hardware (Small Details, Big “New Home” Energy)

Hardware is one of those details that affects the “feel” of a home more than people expect. When door handles are scratched, cabinet pulls are mismatched, or taps are dated, the home can feel older—even if everything is clean.

Upgrading fixtures and hardware is typically affordable, fast, and highly visible.

Areas to target:

  • Cabinet handles and drawer pulls (kitchen and bathrooms)

  • Door handles and hinges (especially if finishes don’t match)

  • Bathroom taps, showerheads, and towel bars

  • Light switches and outlet covers (new ones look surprisingly crisp)

Tip: Choose a consistent finish direction (e.g., matte black, brushed nickel, aged brass) and repeat it intentionally. That repetition creates the “designed” feeling people associate with higher-end homes.

No. 7

Declutter and Reorganize to Make Space Feel Bigger (and Easier to Live In)

Decluttering may not sound like an upgrade, but it functions like one. It improves flow, increases usable space, and makes your home feel calmer and more premium—without buying anything new.

Clutter adds visual noise. It also creates friction: you spend more time looking for things, cleaning around things, and managing piles that never resolve. Decluttering removes that drag.

Practical ways to make decluttering stick:

  • Reduce “flat-surface storage” (counters, dining tables, entry benches)

  • Create zones: keys, mail, bags, and shoes each get a dedicated home

  • Use storage that closes (baskets, cabinets) for visual simplicity

  • Schedule a seasonal reset: one closet, one drawer, one cabinet at a time

If you want the biggest impact, focus on the areas you see and use daily: the entryway, kitchen counters, bathroom surfaces, and bedroom floor space.

No. 8

Add Small Comfort Upgrades That Make the Home Feel More Premium

Once the basics are handled—paint, lighting, doors, and organization—comfort upgrades can push the home into that “new level” feeling. These are not renovations; they are finishing touches that improve daily experience.

Minor upgrades that enhance comfort and polish:

  • Upgrade towels and bedding (texture makes a surprising difference)

  • Add quality curtains that frame windows cleanly and improve light control

  • Use a large area rug to anchor a room and reduce echo

  • Install soft-close hinges or drawer slides for a smoother feel

  • Improve sound comfort with fabric elements (rugs, curtains, upholstered pieces)

A home feels elevated when it’s not only visually appealing, but also easy to live in. These upgrades improve the lived experience—the part that matters most.

Takeaways

Minor upgrades can transform your home without the cost and disruption of a full renovation. In this article, we covered practical, high-impact improvements that make a noticeable difference: upgrading doors for immediate visual and functional payoff, refreshing walls with paint, modernizing lighting, improving energy efficiency, enhancing curb appeal, updating fixtures and hardware, decluttering for a calmer and more spacious feel, and adding small comfort-focused touches that elevate everyday living.

If you want the best results, prioritize upgrades that improve both how your home looks and how it functions. A few smart changes—done intentionally—can make your space feel cleaner, newer, and more “yours,” often faster than you expect.


Looking for Home resources?

Looking to enhance your living space and create a sanctuary that supports your well-being? Explore our home partners who offer a wide range of resources to elevate your home environment.



homeHLL x Editor